manuals.online logo
Brands
  1. Home
  2. •
  3. Brands
  4. •
  5. Siemens
  6. •
  7. Power Supply
  8. •
  9. Siemens 5WG1125-4CB33 User manual

Siemens 5WG1125-4CB33 User manual

s
P.T.O. – page 1 of 2 A6V12688327 A5W00101286 RS-AC
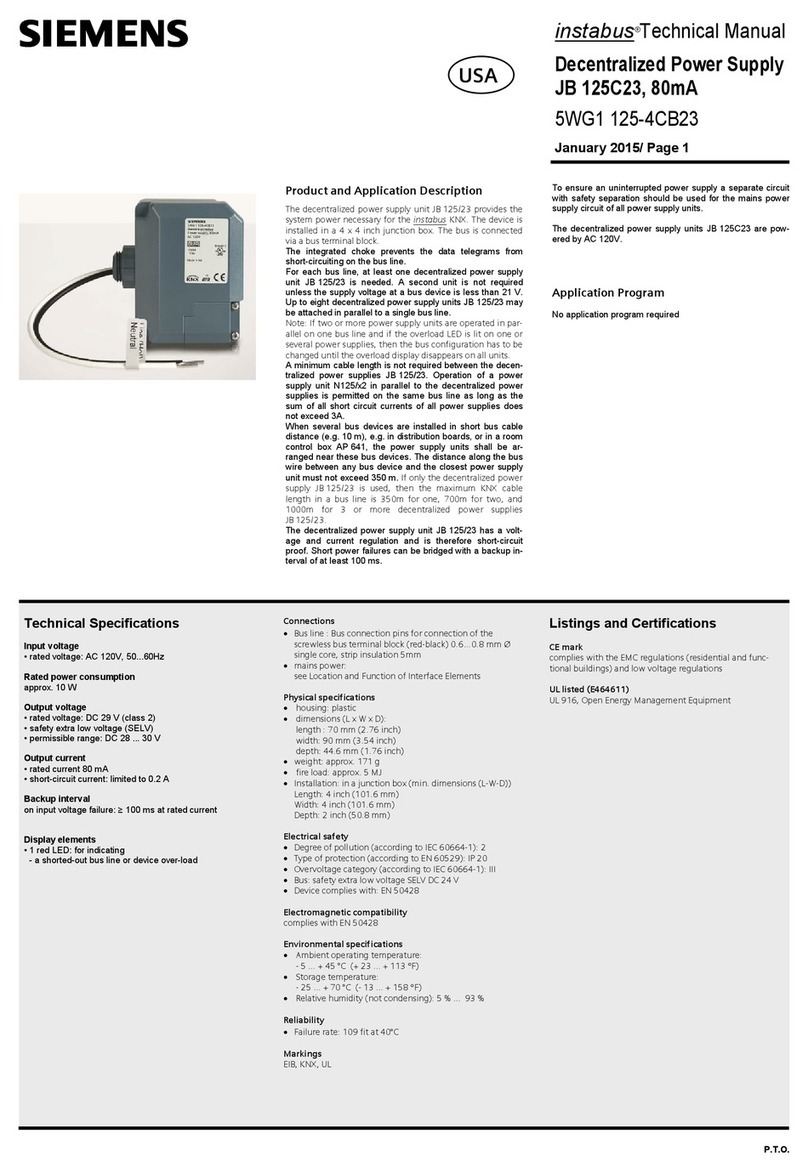
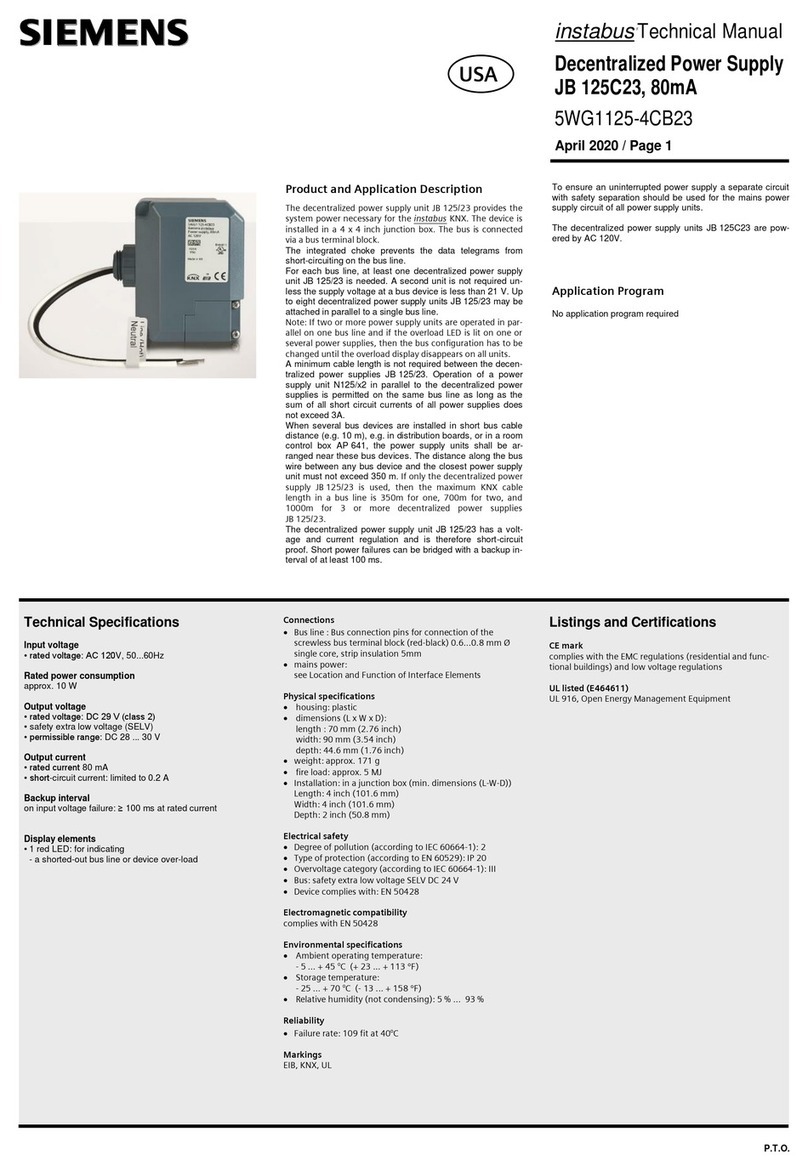
Technical Manual
Decentralized Power Supply
JB 125C33, 160 mA, AC 110 – 277V
5WG1125-4CB33
January 2022
Product and Application Description
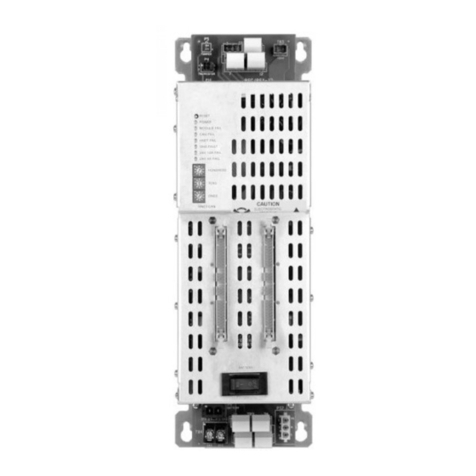
The JB 125C33 junction box mount decentralized
power supply provides KNX Bus power for Gamma
and TRA installations. The device mounts to, or in,
USA 4-11/16” square deep junction box. Power sup-
ply has integral choke to support KNX data tele-
grams. Bus short circuit protection includes visible
operation status indicators.
KNX S-Mode installations requires at least one power
supply per line segment, main line, and backbone. A
second power supply can be added to handle bus
loads exceeding 160 mA. Maximum of two (2)
JB 125C33 can be wired in parallel for 320 mA bus
load. For larger KNX installations, DIN mount power
supplies are available from Siemens Gamma.
Note: If two (2) power supplies are operated in par-
allel on one bus line and if the overload LED is lit on
one power supply, then the bus configuration must
be changed until the overload display disappears on
all units.
KNX TP (twisted pair) installation is “Free-Topology,”
“T” taps are allowed. The distance between any bus
device and the closest power supply unit must not
exceed 350 m (380 yds).
The power supply has voltage and current regula-
tion, therefore is short-circuit proof. Short power dis-
ruptions can be bridged with a reserve interval of at
least 100 ms.
To ensure uninterrupted network operation, sepa-
rate (120 - 277Vac) power circuit should be used.
Total Room Automation (TRA) with DXR Controller
can use 1 or 2 JB 125C33 power supplies to support
the room devices. The DXR internal power supply
must be deactivated when external power supplies
are added to the (KNX) PL-LINK bus, see DXR Tech-
nical Product Information for details.
Technical Specifications
Input voltage
• operation voltage: AC 110 - 277 V, 50...60Hz
Rated power consumption approx. 3 W
Output voltage
• rated voltage: DC 24 V (class 2)
• safety extra low voltage (SELV)
• permissible range: DC 21 ... 30 V
Output current
• rated current 160 mA
• short-circuit current: limited to 0.39 A
Backup interval
on input voltage failure: ≥100 ms at rated current
Display elements
•
1 RED LED: shorted-out bus line or device over-load
•
1 GREEN LED: KNX power ON, normal operation
Connections
KNX Bus: screwless “Push-Connect” standard KNX
terminal block (red/black). Connect can fit 4 pairs of
terminations
BUS Wire: 18-22 AWG (0.6…0.8 mm) solid core,
twisted, shielded wire - strip insulation 5 mm.
Siemens wire: KNX-TSP20LC-CMP
Electrical safety
Degree of pollution (according to IEC 60664-1): 2
Type of protection (according to EN 60529): IP 20
Overvoltage category (according to IEC 60664-1): III
Bus: safety extra low voltage SELV DC 24 V
Device complies with: IEC 61558-2-16, EN 50491-3
Physical specifications
housing: plastic
dimensions (L x W x D):
length: 3.0 inch (76 mm)
width: 3.62 inch (92 mm)
depth: 1.76 inch (45 mm)
weight: approx. 8 oz (210 g)
fire load: approx. 4 MJ
Installation: in a junction box
(min. dimensions (L-W-D))
Length: 4 11/16 inch (119 mm)
Width: 4 11/16 inch (119 mm)
Depth: 2 1/8 inch (54 mm)
Electromagnetic compatibility
complies with
IEC 61000-6-1, IEC 61000-6-2, IEC 61000-6-3,
EN 50491-5-2, EN 50491-5-3
Environmental specifications
Ambient operating temperature:
- 5 … + 45 °C (+ 23 ... + 113 F)
Storage temperature:
- 25 … + 70 °C (- 13 ... + 158 F)
Relative humidity (not condensing): 5 % … 95 %
Reliability
Failure rate: 159 FIT at 40 °C (104 °F)
Markings KNX, UL, ULC, PLENUM RATED
Listings and Certifications
UL listed (E464611)
UL 916 Open Energy Management Equipment
UL 2043 Plenum Rated - Suitable for installation
in Air Handling or Plenum spaces
Electromagnetic compatibility
USA:
This device complies with part 15 of the FCC Rules.
Operation is subject to the following two conditions:
(1) This device may not cause harmful interference,
and
(2) this device must accept any interference received,
including interference that may cause undesired op-
eration.
This equipment has been tested and found to comply
with the limits for a Class B digital device, pursuant to
part 15 of the FCC Rules. These limits are designed to
provide reasonable protection against harmful inter-
ference in a residential installation. This equipment
generates, uses, and can radiate radio frequency en-
ergy and, if not installed and used in accordance with
the instructions, may cause harmful interference to
radio communications. However, there is no guaran-
tee that interference will not occur in a particular in-
stallation. If this equipment does cause harmful inter-
ference to radio or television reception, which can be
determined by turning the equipment off and on, the
user is encouraged to try to correct the interference
by one or more of the following measures:
- Reorient or relocate the receiving antenna.
- Increase the separation between the equipment and
receiver.
- Connect the equipment into an outlet on a circuit
different from that to which the receiver is con-
nected.
- Consult the dealer or an experienced radio/TV
technician for help.
This device complies with Part 15 of the FCC rules.
Changes or modifications not expressly approved by
Siemens Schweiz AG could void the user’s authority
to operate the equipment.
United States representative:
https://new.siemens.com/us/en/products/building-
technologies/home.html
Canada:
CAN ICES-3(B)/NMB-3(B)
page 2 of 2 A6V12688327 A5W00101286 RS-AC
Technical Manual
Decentralized Power Supply
JB 125C33, 160 mA, AC 110 – 277V
5WG1125-4CB33
Location and Function of
Interface Elements
A1
A2
A3
A4
A5
A6
A1 Type label
A2 Protective lid over bus connection
A3 Bus connection terminal block for single core
conductors with Ø 0.6...0.8 mm
A4 Green LED for indicating KNX power
present (ON)
Red LED for indicating shorted-out bus line or
device over-load (OVERLOAD)
A5 1/2 inch screw nut
A6 Wire (black) line (hot) (AWG #14)
Wire (white) neutral (AWG #14)
Wire (green) ground (AWG#14)
Dimension Diagram
Dimensions in mm (inch)
92 (3.62)
76 (3.0)
45 (1.76)
B4
B2
B1
B3
B4
B1
B2
B3
B1 Junction Box
B2 Device
B3 Bus connection pins of the module for connec-
tion of the bus terminal block for single core
conductors with Ø 0.6…0.8 mm
B4 1/2 inch screw nut
Mounting
Option 1 (mounting inside a J-Box):
- Insert the thread of the JB module (B2) into the 1/2
inch knockout between two adjacent J-Boxes (B1)
- Fasten the JB module (B2) with the 1/2 inch thread
nut (B4)
- Remove the protective lid (B3) and connect the
bus wire to the bus terminal block (A4)
- Connect the wires from the device to the field
wires using wire nuts (not provided in package)
Option 2 (mounting outside of a J-Box):
- Insert the thread of the JB module (B2) into the 1/2
inch knockout of the J-Box (B1)
- Fasten the JB module (B2) with the 1/2 inch thread
nut (B4) to the J-Box (B1)
- Connect the bus wire to the bus terminal block un-
der the protective cover (B3)
- Connect the wires from the device to the field
wires using wire nuts (not provided in package)
- Install the protective lid (B3) and fasten with
screws (provided in package)
Dismounting
- Disconnect power to the module
- Remove the wire nuts and bus connection
- Unfasten the 1/2 inch thread nut (B4) connecting
the JB module (B2) to the J-Box (B1)
- Remove the JB module (B2) from the J-Box (B1)
Wiring
Slipping off/on bus connection blocks
The bus connection block consists of two compo-
nents (C2.1 and C2.2) with four terminal contacts
each. Take care not to damage the two test sockets
(C2.3) by accidentally connecting them to the bus ca-
ble or with the screwdriver (e.g. when attempting to
unplug the bus connection block).
C2
C2.2 C2.1
C2.3
D2
D2.4
5 mm
D2
D2.4
25...35 mm
D1
Slipping off bus connection blocks
- Carefully put the screwdriver to the wire insertion
slit of the bus connection block’s grey component
(C2.2) and
- pull the bus connection block (C2) from the mod-
ule.
Note
Don’t try to remove the bus connection block from
the bottom side. There is a risk of shorting-out the
device!
Slipping on bus connection blocks
- Slip the bus connection block (C2) onto the guide
slot of the module and
- press the bus connection block (C2) down to the
stop.
Connecting and Disconnecting bus cables
Connecting bus cables
- The bus connection block (D1) can be used with
single core conductors Ø 0.6…0.8 mm.
- Remove approx. 5 mm of insulation from the con-
ductor (D2) and plug it into the bus connection
block (D1)
(red = +, grey = -)
Disconnecting bus cables
- Unplug the bus connection block (D1) and remove
the bus cable conductor (D2) while simultaneously
wiggling it.
Connecting mains:
Connect wires
Connect wire leads using wire nuts.
Hazardous voltage.
Can cause death, or serious injury or property damage.
The device must not be opened.
A faulty device should be returned to the local Siemens sales office
or distributor.
WARNING
WARNING
The device must be mounted and commissioned by a factory trained person.
The prevailing safety rules must be observed!
Mount in dry locations only!

Other Siemens Power Supply manuals

Siemens SITOP UPS1600 Technical Document

Siemens

Siemens SITOP UPS1600 Technical Document

Siemens SITOP PSE200U 3A User manual

Siemens

Siemens SITOP PSE200U 3A User manual

Siemens 4AV2302-2EB00-0A User manual

Siemens

Siemens 4AV2302-2EB00-0A User manual

Siemens PSR-1 User manual

Siemens

Siemens PSR-1 User manual

Siemens 5WG1 125-4CB23 User manual

Siemens

Siemens 5WG1 125-4CB23 User manual

Siemens SITOP PSU400M User manual

Siemens

Siemens SITOP PSU400M User manual

Siemens SITOP C98130-A1251-A1-02-19 User manual

Siemens

Siemens SITOP C98130-A1251-A1-02-19 User manual

Siemens SITOP PSU6200 User manual

Siemens

Siemens SITOP PSU6200 User manual

Siemens FP2011-U1 User manual

Siemens

Siemens FP2011-U1 User manual

Siemens SIMATIC PS307 User manual

Siemens

Siemens SIMATIC PS307 User manual

Siemens 7XV5810-0BA00 User manual

Siemens

Siemens 7XV5810-0BA00 User manual

Siemens SIMATIC NET PS598-1 Administrator guide

Siemens

Siemens SIMATIC NET PS598-1 Administrator guide

Siemens SPCP332 User manual

Siemens

Siemens SPCP332 User manual

Siemens 6ES7138-7EC00-0AA0 User manual

Siemens

Siemens 6ES7138-7EC00-0AA0 User manual

Siemens JB 125C23 User manual

Siemens

Siemens JB 125C23 User manual

Siemens SITOP Power 20 6EP1 536-2AA00 User manual

Siemens

Siemens SITOP Power 20 6EP1 536-2AA00 User manual

Siemens SITOP PSU8200 User manual

Siemens

Siemens SITOP PSU8200 User manual

Siemens SITOP PSU8600 Parts list manual

Siemens

Siemens SITOP PSU8600 Parts list manual

Siemens SIMATIC NET PS598-1 Administrator guide

Siemens

Siemens SIMATIC NET PS598-1 Administrator guide

Siemens SIPLUS PSU User manual

Siemens

Siemens SIPLUS PSU User manual

Siemens 4AV2106-2EB00-0A User manual

Siemens

Siemens 4AV2106-2EB00-0A User manual

Siemens SITOP PSU6200 3ph Technical Document

Siemens

Siemens SITOP PSU6200 3ph Technical Document

Siemens SPCP332 Reference manual

Siemens

Siemens SPCP332 Reference manual

Siemens SITOP power 20 User manual

Siemens

Siemens SITOP power 20 User manual

Popular Power Supply manuals by other brands

Meanwell VFD Series installation manual

Meanwell

Meanwell VFD Series installation manual

Tripp Lite MPS912 Owner's manual addendum

Tripp Lite

Tripp Lite MPS912 Owner's manual addendum

Corsair TX950W user manual

Corsair

Corsair TX950W user manual

qtran Q-VAULT-5 STANDARD INSTALLATION

qtran

qtran Q-VAULT-5 STANDARD INSTALLATION

Delta PMR-V320WD Series instruction manual

Delta

Delta PMR-V320WD Series instruction manual

AimTTi MX180T instruction manual

AimTTi

AimTTi MX180T instruction manual

BOSSCO RPW-7 instructions

BOSSCO

BOSSCO RPW-7 instructions

TYCON Solar UPSPro UPS-PL-120 SM quick start guide

TYCON Solar

TYCON Solar UPSPro UPS-PL-120 SM quick start guide

EcoPower APT015W installation instructions

EcoPower

EcoPower APT015W installation instructions

DekoLight MINI D50004NT Product notes

DekoLight

DekoLight MINI D50004NT Product notes

GOAL ZERO Yeti 1000 Core user manual

GOAL ZERO

GOAL ZERO Yeti 1000 Core user manual

Meanwell LCM-25 installation manual

Meanwell

Meanwell LCM-25 installation manual

KEPCO BOP 400W Operator's manual

KEPCO

KEPCO BOP 400W Operator's manual

Contro l4 C4-DIN-BPS48 installation guide

Contro l4

Contro l4 C4-DIN-BPS48 installation guide

B+K precision 1672 instruction manual

B+K precision

B+K precision 1672 instruction manual

KeepOut FX Series user guide

KeepOut

KeepOut FX Series user guide

Vertiv NetSure 722NBBB Installation and user instructions

Vertiv

Vertiv NetSure 722NBBB Installation and user instructions

CleanDigital PSU12 user manual

CleanDigital

CleanDigital PSU12 user manual

manuals.online logo
manuals.online logoBrands
  • About & Mission
  • Contact us
  • Privacy Policy
  • Terms and Conditions

Copyright 2025 Manuals.Online. All Rights Reserved.