manuals.online logo
Brands
  1. Home
  2. •
  3. Brands
  4. •
  5. SILENT KNIGHT
  6. •
  7. Security System
  8. •
  9. SILENT KNIGHT RA-100 User manual

SILENT KNIGHT RA-100 User manual

P/N 151283
SILENT
KNIGHT
®
RA-100 Remote Annunciator
Installation
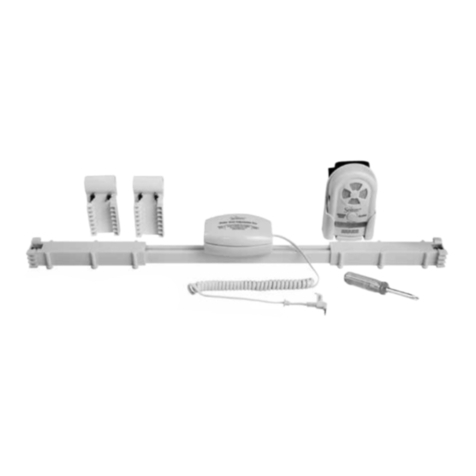
The optional Model RA-100 Remote Annunciator, shown in
Figure 1, performs the same functions as the on-board
annunciator. Operation is identical. The RA-100 can be surface
or flush monted.
Up to 8 RA-100s can be added to the IFP-100 system.
Figure 1: Model RA-100 Remote Annunciator
RA-100 installation involves the following steps:
1. Make sure power is off at the panel.
2. Mount the RA-100 in the desired location (see Section
“Mounting the RA-100” ).
3. Connect the RA-100 to the panel (see Figure 2).
4. Use the dipswitches on the back of the RA-100 to assign an
ID# to the RA-100 (see Section 4.10.1 of Manual P/N
151280).
5. The new RA-100 module must be added to the system
through programming. JumpStart will add the module
automatically (refer to Manual P/N 151280). You can also
add it manually. Select a name, if desired (see Section 7 of
manual 151280).
Wiring Connections
Wire the RA-100 to the FACP as Shown in Figure 2.
Figure 2: SBUS Connections
Specifications
Mounting the RA-100
This section of the manual describes mounting the remote
annunciator. The annunciator can be flush- or surface-mounted.
Flush Mounting
This section of the manual describes flush mounting.
Follow these steps to flush mount the RA-100
1. The back box dimensions are 9-3/8" w x 8-3/8" h. The
minimum depth 2". The back box can be mounted prior to
the complete installation of the RA-100 using any of the
mounting holes shown in Figure 3.
Figure 3: Back Box Mounting Holes
Supervised
Power Limite
d
Parameter Value
Operating Voltage: 24 VDC
Current Standby: 20 mA
Alarm: 65 mA
Operating Temperature: 0° to 49° C (32° to 120° F)
Dimensions:
Flush
Mount: Overall: 12-1/4” W x 11.5” H x 7/8” D
31.1 cm W x 29.2 cm H x 2.2 cm D
See “Flush Mounting” for back box
dimensions.
Surface
Mount: Including trim ring:
12-1/4” W x 11.5” H x 3” D
31.1 cm W x 29.2 cm H x 7.6 cm D
Mounting Holes
Mounting Holes
Model SK-5280 Installation Instructions
2P/N 151283
7550 Meridian Circle
Maple Grove, MN 55369-4927
763-493-6455
800-328-0103
Fax: 763-493-6475
http://www.silentknight.com
© 2001 Silent Knight
P/N 151283, 10/01
2. Remove knockout holes as needed for wires. See Figure 4
for backbox knockout locations
Figure 4: Back Box Knockout Locations
3. Wire the Annunciator board to the main control panel. See
Figure 2.
4. Attach the annunciator and door assembly to back box as
shown in Figure 5 using the supplied screws.
Figure 5: Attaching Annunciator/Door Assembly to
Backbox
Surface Mounting
The Model RA-100TG/TR trim ring kit is available for use when
surface mounting.
1. Remove the desired knock out. See Figure 4.
2. To properly mount the back box, insert a single screw into
the key shaped mounting hole. Do not tighten all the way.
See Figure 6.
Place a level on top of the back box, with the back
box level insert the rest of the mounting screws.
Figure 6: Back Box Surface Mount Holes
3. Run wires to the control panel.
4. Place the trim ring over the back box as shown in Figure 7.
Figure 7: Installing Trim Ring
5. Attach the Door assembly to the back box using screws
provided.
6. After the annunciator wiring to the panel has been
completed, replace the electronic assembly in the back box.
Place the bezel over the back box and tighten the set screws
on the bezel.
Wire Knockouts
Wire Knockouts
Wire Knockouts
Key Shaped
Mounting Hole
Back Box
Mounting Holes

Other SILENT KNIGHT Security System manuals

SILENT KNIGHT Page Deluxe 3220 User manual

SILENT KNIGHT

SILENT KNIGHT Page Deluxe 3220 User manual

SILENT KNIGHT 300 User manual

SILENT KNIGHT

SILENT KNIGHT 300 User manual

SILENT KNIGHT 4821 User manual

SILENT KNIGHT

SILENT KNIGHT 4821 User manual

SILENT KNIGHT INTELLIKNIGHT 5820XL Technical specifications

SILENT KNIGHT

SILENT KNIGHT INTELLIKNIGHT 5820XL Technical specifications

SILENT KNIGHT 2735 User manual

SILENT KNIGHT

SILENT KNIGHT 2735 User manual

SILENT KNIGHT 4724 User manual

SILENT KNIGHT

SILENT KNIGHT 4724 User manual

SILENT KNIGHT 4720 User manual

SILENT KNIGHT

SILENT KNIGHT 4720 User manual

Popular Security System manuals by other brands

Eaton Scantronic i-on10 Configuration guide

Eaton

Eaton Scantronic i-on10 Configuration guide

Pyronix RINS1902-2 user manual

Pyronix

Pyronix RINS1902-2 user manual

Honeywell SD500-PSDA installation instructions

Honeywell

Honeywell SD500-PSDA installation instructions

Bticino 393014G manual

Bticino

Bticino 393014G manual

AKO AKO-558241 quick guide

AKO

AKO AKO-558241 quick guide

Iget HOMEGUARD HGNVK-49004 quick start guide

Iget

Iget HOMEGUARD HGNVK-49004 quick start guide

PROEL PROEVAC EVO EV PROM5Z User and installation manual

PROEL

PROEL PROEVAC EVO EV PROM5Z User and installation manual

SkyLink WA-434RTL quick guide

SkyLink

SkyLink WA-434RTL quick guide

Simplex TrueAlert ES Installation instructions manual

Simplex

Simplex TrueAlert ES Installation instructions manual

Nortel DMS-100 Series Reference manual

Nortel

Nortel DMS-100 Series Reference manual

ZKTeco SpeedFace Series quick start guide

ZKTeco

ZKTeco SpeedFace Series quick start guide

Fermax COMFORT KIT V4.0 user manual

Fermax

Fermax COMFORT KIT V4.0 user manual

Pyronix EURO 46 V10 user manual

Pyronix

Pyronix EURO 46 V10 user manual

Roost Security360 user manual

Roost

Roost Security360 user manual

King Pigeon K9 manual

King Pigeon

King Pigeon K9 manual

Bosch Plena BGM Source Installation and operating manual

Bosch

Bosch Plena BGM Source Installation and operating manual

ATSS ACTIVE LD user manual

ATSS

ATSS ACTIVE LD user manual

Honeywell Lyric SIXSIREN installation instructions

Honeywell

Honeywell Lyric SIXSIREN installation instructions

manuals.online logo
manuals.online logoBrands
  • About & Mission
  • Contact us
  • Privacy Policy
  • Terms and Conditions

Copyright 2025 Manuals.Online. All Rights Reserved.