6
Before Use
WARNING: Ensure the tool is disconnected from the power supply before attaching or
changing any accessories, or making any adjustments.
Bench mounting
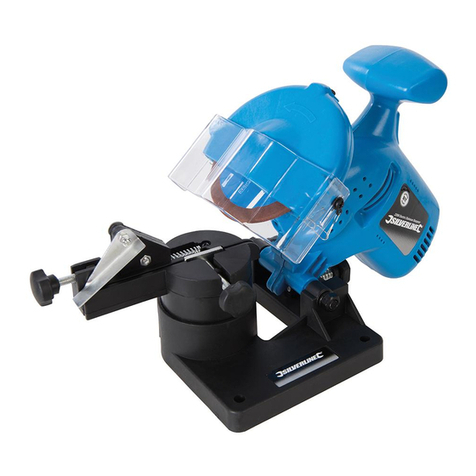
• Foraddedsafetythemultipurposesharpenercanbesecuredtoarigidworksurfacesuchasa
workbench.Thisisrecommendedifthesharpeneristobeusedinapermanentposition
• UsethefourBenchMountingHoles(3)inthebaseoftheMotorUnitasatemplatetomarkand
drillfourholesintheintendedmountingsurface.SecuretheMotorUnitinpositionusingbolts,
washersandnuts(notsupplied)
• Foraportablearrangement,xaboardtothebaseoftheMotorUnitwhichcanbeeasily
clampedandremovedfromvariousmountingsurfaces
On-board storage of sharpening modules
• TheModuleFixingSlots(6)locatedonthesidefacesoftheMotorUnitprovideon-boardstorage
forsharpeningmoduleswhennotinuse
• SimplyslidethemodulesintotheModuleFixingSlotsonthesidesoftheMotorUnit
Sharpening module
•Thesharpeningmodulesprovideaguideforsafe,precisionsharpeningofcuttingtools
•Donotusethemultipurposesharpenerwithoutasharpeningmoduleinplace
•Therearethreesharpeningmodules:
- DrillBitSharpeningModule
- Chisel&PlaneSharpeningModule
- Knife&ScissorSharpeningModule
Fitting a sharpening module:
1. SlidetheappropriatesharpeningmoduleintotheModuleFixingSlot(6)ontheGrindingWheel
(5)faceoftheMotorUnit
2. PushthemoduledownuntilitisfullyengagedintheModuleReleaseLever(7)inthebaseofthe
MotorUnit.Youwillheara‘click’asitlocksintoplace
Removing a sharpening module:
• DepresstheModuleReleaseLeverandpullthemoduleupandoutoftheModuleFixing
Slot
Operation
WARNING:ALWAYSweareyeprotection,adequaterespiratoryandhearingprotection,aswellas
suitablegloves,whenworkingwiththistool.
Switching ON and OFF
•SwitchthesharpeneronbydepressingthesideoftheON/OFFSwitch(4)marked‘I’
•SwitchthesharpeneroffbydepressingthesideoftheON/OFFSwitchmarked‘O’
Duty cycle
WARNING:Thisproducthasadutycycleof30%.
• Aftereverythreeminutesofuse,thesharpenermustbeallowedtocooldownforsevenminutes,
beforecontinuingwithanothermaximumthreeminutes’continuoususe
• Thisproductisequippedwithathermalcut-outdevicetoprotectthemotor
• Ifthetoolcutsout,thedutycyclehasbeenexceeded.SwitchOFFthetoolandallowthemotorto
cooldownfully.Youwillthenbeabletoproceed,usingthetoolinaccordancewiththe30%duty
cycle
Sharpening HSS drill bits
• Themultipurposesharpenerwillsharpenhigh-speedsteeldrillbitsof3–13mmdiameter
• Whensharpeningdrillbitsof3-3.5mmdiameter,ensuretheTopClamp(12)isinstalledonthe
DrillBitClampwiththeprotrudingfacedirectedinwards(ImageA)
• Whensharpeningdrillbitsof3.5-13mmdiameter,ensuretheTopClampisinstalledontheDrill
BitClampwiththeprotrudingfacedirectedoutwards(ImageB)
Preparation:
1. SlidetheDrillBitSharpeningModuleintopositionovertheGrindingWheel(5)ontheMotor
Unit
2. RemovetheDrillBitClamp(11)fromthemoduleandloosenthejawsufcientlytoinsertthe
drillbit
3. TightentheDrillBitClampjusttothepointwherethedrillbitisretainedbutitspositioncanstill
beadjusted
4. PlacetheDrillBitClampintheAlignmentShoe(11),beingsuretheDrillBitClampengagesthe
railsontheAlignmentShoe(ImageC)
5. Pushthedrillbitforwardandrotatethebitsothatitlaysinthe‘V’Guidewiththetipincontact
withthemetalendstopandthecuttingedgesareincontactwiththemetalsidesofthe‘V’
6. TightentheDrillBitClamptosecurethedrillbitinthisposition
7. RemovetheDrillBitClamp,withthedrillbitsecuredinposition,andplaceitintheGrinding
Shoe(8)ensuringtheDrillBitClampengagestherailsontheGrindingShoe
8. CheckthecuttingedgesofthedrillbitareincontactwiththeGrindingWheel.Ifnot,repeatthe
alignmentprocedure
9. Thedrillbitisnowreadyforsharpeningwiththecuttingedgespositionedatthecorrectangle
Sharpening:
1. SwitchthetoolONandmovethetopsectionoftheDrillBitSharpeningModulefromsidetoside
tosharpenbothcuttingedges(ImageD)
Note:Theamountofsharpeningrequiredwilldependupontheconditionofthecuttingedges
2. SwitchthetoolOFF,removetheDrillBitClampfromtheGrindingShoe,andthenre-insertitthe
otherwayroundinordertosharpentheothersideofthecuttingedges
3. RepeatthesharpeningprocedureforanequalamountoftimethenswitchthetoolOFF
4. LifttheDrillBitClampoutoftheGrindingShoeandcheckthattheleadingedgesofbothutes
areequallysharp.Theyshouldmeetexactlyinthemiddle
5. Repeatthesharpeningproceduretocorrectanymisalignmentasnecessary
6. SwitchthetoolOFFandallowtheGrindingWheeltostopcompletelybeforeremovingtheDrill
BitSharpeningModule
Sharpening chisels and plane irons
• Themultipurposesharpenerwillsharpenchiselsandplaneironsof6–51mmwidth(1/4”–2”)
Preparation:
1. SlidetheChisel&PlaneSharpeningModuleintopositionovertheGrindingWheel(5)onthe
Motor Unit
2. PlacethebladeontheToolBed(15)sothesideofthechiselorplaneironisadjacenttothelip
onthefaredgeoftheToolBed.Themagnetswillhelptosecurethebladeinposition
Note:Forthinchiselblades,ttheSpacer(16)ontothelip,andensurethechiselisadjacentto
thespacer.
3. ChecktheangleoftheToolBedmatchestheexistingbevelledangleontheblade.Thisis
importanttomaintainbladesattheiroptimumshavingangle
4. ToadjusttheangleoftheToolBed,loosentheAngleAdjustmentKnob(13),tilttheToolBedto
thecorrectangle,thentightentheAngleAdjustmentKnobtosecuretheToolBedatthecorrect
angle
5. ChecktheedgeofthebladeisincontactwiththeGrindingWheelandthattheGuard(14)is
tted.DONOTusetheChisel&PlaneSharpeningModulewithouttheGuardinplace
Sharpening:
1. SwitchthemachineON,andwhilstholdingthetoolinpositionontheToolBed,movethe
ToolBedbackandforthacrosstheGrindingWheel,usingsteadypressureandacontinuous,
consistentmotion(ImageE)
2. Donotallowthebladetoremainstationary–thiswillcauseunevensharpening
3. Removethebladeandcheckthebevellededgeandtiparesharpandevenacrosstheirentire
width
4. Ifnecessary,continuethesharpeningproceduretocorrectanymisalignment
5. SwitchthemachineOFFandallowtheGrindingWheeltostopcompletelybeforeremovingthe
Chisel&PlaneSharpeningModule
6. Aftergrinding,itisrecommendedthatyouhonethebladeonanoilstone
Sharpening knives and scissors
• Themultipurposesharpenerwillsharpenallstraight-edgedknivesandscissors
• Tosharpenknivesandscissors,slidetheKnife&ScissorsSharpeningModuleintopositionover
theGrindingWheel(5)ontheMotorUnit
Sharpening knives:
1. Switch the tool on
2. FullyinserttheknifebladeintooneoftheKnifeSharpeningSlots(2),sothecuttingedgeis
facingtheGrindingWheel(ImageF)
3. BringthebladeintocontactwiththeGrindingWheelanddrawitslowlytowardsyou,usinglight
pressuretokeepthebladeincontactwiththeGrindingWheelthroughoutthelengthofthe
blade
4. Turntheknifeoverandinsertthebladeintheoppositeknifesharpeningslot.Repeatstep3to
sharpentheothersideoftheblade
5. Repeatthesharpeningprocessoneachsideofthebladeinturnuntilaclean,sharpedgeis
attained
6. Switchthesharpeneroffandallowthegrindingwheeltostopcompletelybeforeremovingthe
Knife&ScissorsSharpeningModule
657946_Manual.indd 6 13/06/2017 14:25
