manuals.online logo
Brands
  1. Home
  2. •
  3. Brands
  4. •
  5. Simoco
  6. •
  7. Portable Radio
  8. •
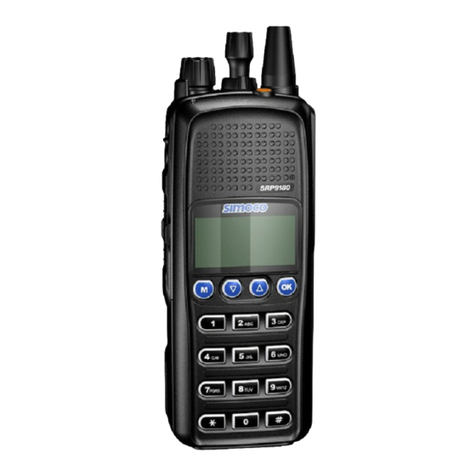
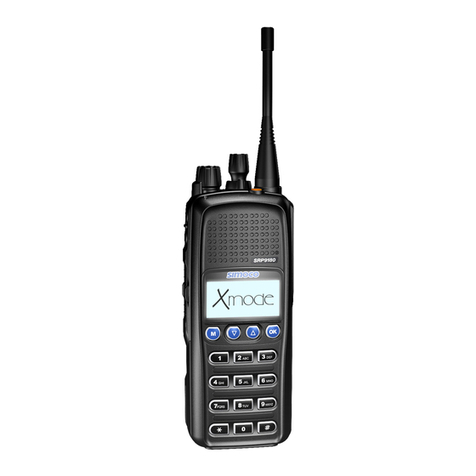
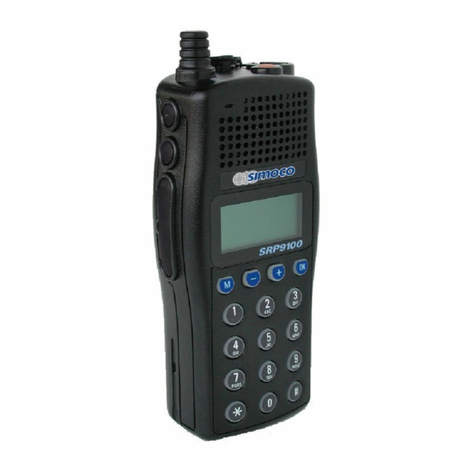
  9. Simoco SRP9120 Instruction Manual

Simoco SRP9120 Instruction Manual

MRMap Development Team 21/07/2008
MRMap - www.mrmap.org.uk
MRMap-GPS-Tracking-Communications-Safety-Mountain Rescue-Mapping-Downloads-Free Software
Programming the Simoco SRP Portable For GPS
Generic guidelines for the programming of Simoco
SRP9120 and SRP9130 portable radios for use with
the MRMap GPS Tracking Application.
MRMap Development Team 21/07/2008
On the opening page of the Simoco programming software application, ensure that
the Frequency range is correct for the channels you will be programming and that
the Accessory option has been set to RSM-GPS, the GPS speaker microphone.
Failure to do this will mean the programming page for the microphone is not later
displayed.
The Radio Type will be either SRP9120 (No Keypad) or SRP9130 (Full numeric
keypad)
Programming for use with a GPS microphone.
The programming software is available free of charge from the TMC website at
www.tmcradio.com (Note: The version on the Simoco website is not usually current)
Connection between the radio and the computer running the software is via the
programming lead supplied by Simoco.
Initially, connect the radio and switch on, select Read Radio from the menu
options and this will upload the current configuration file from the radio. This can be
modified as required and reloaded into the radio.
MRMap Development Team 21/07/2008
On this next page the only things of note are what you would like to be displayed
on screen when the radio is switched on, here it’s the name of the radio’s user
shown under Power-On Text.
The Backlight Timer can be adjusted to whatever you wish and is, as the name
suggests, the time during which the screen back light will be on whenever a
function button is pressed or a message has been received by the radio.
Auto-Lock Keys is used to prevent accidental pressing of any of the function keys
and is released either by pressing the ‘OK’ button on the radio for a few seconds or
by pressing the ‘C’ button on the GPS speaker microphone. Again for a few seconds.
The lock will automatically reset itself after a few seconds.
Always allow Side Keys refers to the two function buttons above the PTT bar.
These can be programmed for a variety of functions and are independent of the
KeyPad Lock if this option is checked. Some teams use them for channel changing
rather tan the front mounted + and—keys as they are recessed and difficult to
press accidentally.
MRMap Development Team 21/07/2008
The Minimum Speech option sets the lowest volume level for a received signal
and if set above 0, ensures that incoming signals are never completely inaudible.
Key Beeps Enabled and Invalid Key Alerts do what you would expect and are a
matter of personal preference as to whether they are used or not.
The Battery Low Alert is a local warning tone sounded when the battery level
drops below a factory set point.
The Default Mute setting depends on the level of local RF noise and is usually set
at 3. A setting of 0 will permanently open the receiver mute gate. Beyond a setting
of 10 the radios become noticeably deaf.
The Minimum Mute can be changed from the default value of 0 if a Mute Adjust
menu option is available as this prevents the user from ever completely disabling
the muting system.
MRMap Development Team 21/07/2008
All the function buttons from F1 to F7 can be individually programmed for a variety
of functions as can those on the speaker microphone. If programmed they may or
may not be subject to the condition of the KeyPad Lock depending on the function
selected and other parameters.
Selecting any option box and pressing F1 will bring up the context help file.
Here the + and - keys are programmed for sequential channel changing and the
‘M’ button (F1) is programmed to enter the menu list. These are fairly obvious uses
but other keys can be programmed to do the same job if required. If not needed,
the buttons are left programmed as ‘Undefined’.
Note: ‘Reset’ is not the same as ‘OK’ as far as the radio is concerned.
Buttons on the speaker microphone can be programmed to duplicate any of these
functions or to allow other functions to be accessed.
MRMap Development Team 21/07/2008
A similar set of functions to that shown on the previous page can be programmed
into the speaker microphone buttons but equally, they can be left unprogrammed if
preferred.
Both the orange buttons, F7 on the radio itself and F10 on the speaker microphone
can be programmed with the FFSK alarm function (see later). In this case only, they
are independent of the KeyPad Lock.
Although there is nothing to prevent further experimentation, the settings shown
under ‘GPS Settings’ have been shown to work well. The two values set to 0
cause the GPS engine to be powered up all the time. This is the most costly in
terms of battery consumption and will require a further 80mA to power the GPS
engine. To date this has not caused any battery life problems.
The Man-Down function monitors the vertical angle of the speaker microphone but
is not used due to the likelihood of the microphone deliberately being placed in the
condition where it would trigger the alarm such as when attached to a ruck sack
which is subsequently placed on the ground.
MRMap Development Team 21/07/2008
As with the programming of the function buttons, the menu options are selected
from those available in drop-down lists. Individual menus are operationally selected
by pressing the ‘M’ button (if suitably programmed) followed by ‘OK’ to confirm the
choice of menu required.
In the case of the Mute Adjust menu, pressing the + and - keys will adjust the
current mute level but this is active only as long as the radio is switched on.
In the case of the others shown here, Send Message allows a text message to be
sent via the keypad, to another radio.
Stored Messages lists the messages received by your own radio and pressing the
programmed ‘Reset’ key will delete these messages one by one.
User CTCSS allows the active CTCSS tone to be changed. Again, this function is
only effective whilst ever the radio is switched on. It will revert to the default
settings after being switched off and on again.
Note, a valid CTCSS tone must be programmed into either receive or transmit in
order for this function to operate. It’s not necessary for BOTH receive and transmit
to have such a tone programmed however. User CTCSS will allow the tone to be
changed only where there is a tone programmed in the first place.
MRMap Development Team 21/07/2008
If Level 3 programming is available in your version of the programming software
then this page will be displayed. Nothing needs to be changed from the default
settings apart from Compressor Gain which has been shown to give better
transmitted audio whilst not degrading the transmitted FFSK data.
To open the level 3 audio page, you need a password. You can get this from
myself via the MRMap website contact address.
MRMap Development Team 21/07/2008
Channel information is entered one channel at a time and is self explanatory. The
SRP9120 can handle 200 channels and the SRP9130, 1000
After adding the required information for the number of channels you intend to use,
the Channel Table will look something like the screen shot below. Scan banks can
be added if required by selecting the Add Scan/Vote Group option and adding the
numbers of the channels to be included in the scan bank.
MRMap Development Team 21/07/2008
In versions of the software above 5.36 the ability to select which channels can send
FFSK data has been added. The channels will default to sending FFSK and should
you not wish to do this on a specific channel or channels then you must check the
No FFSK ANI option for that channel under the Selcall options page.
MRMap Development Team 21/07/2008
The Power-On options allow the user to select which channel the radio will be on at
switch-on. If you select ‘Defined Channel’ then an additional option box will appear
in which you put the number of the channel you want the radio to be on when it is
first switched on. If you select ‘Last Channel’ then it will be whichever channel had
been selected when the radio was switched off.
Goto A requires that a button has been programmed with this function and
pressing it will send the radio to whichever channel is programmed into the Goto A
option box, here it will be channel 3. Pressing a button programmed as Goto B
does the same, here sending the radio to channel 10.
Checking Channel Reversion will result in the radio returning to the originally
selected channel if either of the Goto buttons are pressed again. If the radio is
currently on channel 20 then pressing Goto A will send it to channel 3. Pressing
Goto A again will return it to channel 20. This can be a little confusing in use if the
radio display is not visible to you at the time. It’s easy to lose track of which
channel you’re now on. It’s use isn’t really recommended.
Channel Redefinition will allow the user to change the Goto A-D channels by
setting the radio manually to the desired channel and then pressing the Goto button
for a couple of seconds. The radio will beep several times and pressing Goto A for
example will now send the radio to the new channel.
The remaining options are either not used or are fairly obvious in their function. The
Do Not Display Channel Number is checked because the channel numbers
assigned in the list have no bearing on the UKSAR numbers used being 1, 2, 3, 4
etc.
MRMap Development Team 21/07/2008
The only parameter of note on this page is the Scan Restart Time. Here it’s set to
one second which causes the radio to restart scanning one second after the signal
it’s receiving has been lost.
The Tx Channel Whilst Scanning option allows you to select what the radio
does if you press the PTT during a scan. Usually this is set to transmit on the Last
channel received but is occasionally set to First in Group which means the first
channel in the list of channels. Normally this would be your own team working
channel.
MRMap Development Team 21/07/2008
Under Microphone Operations, Tx Limit Timer determines how long a single
continuous transmission can last before the radio returns itself to receive. If the
PTT has been accidentally pressed for longer than this period of time then the radio
will automatically return to receive and even though the PTT remains pressed, it will
not transmit again until the PTT has been released and pressed again. This allows
base to advise anyone sitting on their microphone PTT that they should desist.
Tx Limit Beeps warns the user by beeping ten seconds before the time out period
expires. Briefly releasing and re-keying the PTT will reset this timer and allow you
to continue if necessary.
MRMap Development Team 21/07/2008
This page sets up the necessary callsign information for the radio to work with the
MRMap GPS tracking application. You need to read the MRMap Setup Manual for
more information on this but the numbers here refer to a radio who’s default
callsign with MRMap is ‘Kinloss 50’
Under ‘Options’ setting the FFSK ANI option will cause the radio to send an FFSK
automatic numeric identifier when the PTT is released. This will be the number
18610 in our case.
Setting GPS Reporting means that a GPS position report is added to the ANI if a
GPS microphone is fitted and it has GPS lock. If not then only the ANI (callsign) is
sent.
Setting Mute Speaker During FFSK will significantly reduce the FFSK data noise
audible in the speaker as it’s received.
Immediate Message Display is used with text messaging to ensure that the
message is displayed on screen as soon as it’s received and not stored for later
reading without first having been displayed.
The FFSK Data Rate and FFSK Lead-In Delay values are those that have been
found to work well with MRMap.
Checking the Use LID For FFSK ANI option will cause the FFSK data to be sent a
short time after the PTT has been released. This time is determined by the FFSK
Lead-In Delay value, here shown as 300ms
MRMap Development Team 21/07/2008
If either of the two orange buttons (F7 or F10) on the radio or the GPS microphone
have been programmed as Alarm then pressing them will send a GPS position
report without opening the microphone on transmit. This results in an otherwise
clean data transmission being made that does not carry and ambient wind or other
noise on the signal. Using the values shown, the radio display will dim momentarily
but no transmit arrow will be displayed. Setting Confidence Beep will cause the
radio to emit a single beep confirming that you have sent the report and checking
AVL Alarm Message activates the function.
MRMap will receive this as a standard PTT release position report and not as an
actual alarm. The result is that a position report is plotted on the map but no mic
handling, wind or conversation is transmitted.
Under the above circumstances only, both F7 and F10 will operate even if the
KeyPad Lock is active. If programmed for any other function, F7 and F10 (the
orange buttons) are subject to the keypad lock.

This manual suits for next models

1

Other Simoco Portable Radio manuals

Simoco SDP560 User manual

Simoco

Simoco SDP560 User manual

Simoco SRP8000 SERIES User manual

Simoco

Simoco SRP8000 SERIES User manual

Simoco SDM630 User manual

Simoco

Simoco SDM630 User manual

Simoco SRP9180 P25 User manual

Simoco

Simoco SRP9180 P25 User manual

Simoco P25 User manual

Simoco

Simoco P25 User manual

Simoco SRP9170 User manual

Simoco

Simoco SRP9170 User manual

Simoco SDP650 User manual

Simoco

Simoco SDP650 User manual

Simoco SDP660 User manual

Simoco

Simoco SDP660 User manual

Simoco SDP760 User manual

Simoco

Simoco SDP760 User manual

Simoco SDP650 User manual

Simoco

Simoco SDP650 User manual

Simoco SRP9170 User manual

Simoco

Simoco SRP9170 User manual

Simoco SPR180 User manual

Simoco

Simoco SPR180 User manual

Simoco SRP9180 User manual

Simoco

Simoco SRP9180 User manual

Simoco SRP9180-P25 User manual

Simoco

Simoco SRP9180-P25 User manual

Simoco SRP9100 User manual

Simoco

Simoco SRP9100 User manual

Simoco SDP600UW User manual

Simoco

Simoco SDP600UW User manual

Simoco SRP9170 User manual

Simoco

Simoco SRP9170 User manual

Simoco SDP650 User manual

Simoco

Simoco SDP650 User manual

Simoco SDP650 User manual

Simoco

Simoco SDP650 User manual

Popular Portable Radio manuals by other brands

Hytera PD68 Series user manual

Hytera

Hytera PD68 Series user manual

Hytera PD78X Series manual

Hytera

Hytera PD78X Series manual

Sangean ATS-404 datasheet

Sangean

Sangean ATS-404 datasheet

Roadstar TRA-2425PSW user manual

Roadstar

Roadstar TRA-2425PSW user manual

auna RCD-230 manual

auna

auna RCD-230 manual

Kenwood TH-D7A instruction manual

Kenwood

Kenwood TH-D7A instruction manual

BT INTERNET RADIO user guide

BT

BT INTERNET RADIO user guide

Talkpod D30 user manual

Talkpod

Talkpod D30 user manual

Hytera PD98X user manual

Hytera

Hytera PD98X user manual

Motorola PRO2150 Quick reference manual

Motorola

Motorola PRO2150 Quick reference manual

PYE PR277B user manual

PYE

PYE PR277B user manual

Hytera TC-508 owner's manual

Hytera

Hytera TC-508 owner's manual

Matra Nortel G2 Series Installation handbook

Matra Nortel

Matra Nortel G2 Series Installation handbook

Teac SR-L110i owner's manual

Teac

Teac SR-L110i owner's manual

Hytera PD602 owner's manual

Hytera

Hytera PD602 owner's manual

Motorola MTX-800 Classic user guide

Motorola

Motorola MTX-800 Classic user guide

Motorola GP366R user guide

Motorola

Motorola GP366R user guide

Sangean U-1 Operating	 instruction

Sangean

Sangean U-1 Operating instruction

manuals.online logo
manuals.online logoBrands
  • About & Mission
  • Contact us
  • Privacy Policy
  • Terms and Conditions

Copyright 2025 Manuals.Online. All Rights Reserved.