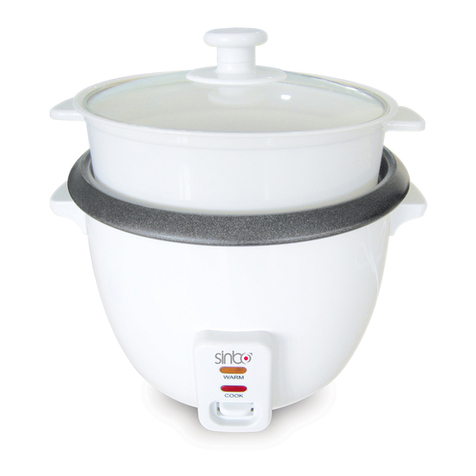
Sinbo SCO-5019 User manual

SCO 5019, SCO 5020 BUHARLI PÜÞÜRÜCÜ
KULLANMA KILAVUZU
SCO 5019
SCO 5020
TR
EN
FR
NL
DE
ES
RU
UA
AR
HR
www.sinbo.com.tr

- 1 -
DeÛerli MŸßterimiz,
†rŸn se•iminde SÜNBO'yu tercih ettiÛiniz i•in teßekkŸr ederiz.
Uzun ve verimli bir kullanÝm i•in cihazÝ kullanmadan šnce bu kÝlavuzu šzellikle gŸvenlik
talimatlarÝna dikkat ederek okumanÝzÝ ve devamlÝ suretle saklamanÝzÝ tavsiye ederiz.
Garantiden doÛan haklarÝn kullanÝlmasÝ ile ilgili olarak •Ýkabilecek uyußmazlÝklarda
yerleßim yerinin bulunduÛu veya tŸketici ißleminin yapÝldÝÛÝ yerdeki TŸketici Hakem
Heyetine veya TŸketici Mahkemesine baßvurabilirsiniz.
Ayrõca, malÝn ayÝplÝ olduÛunun anlaßÝlmasÝ durumunda, 6502 sayÝlÝ TŸketicinin KorunmasÝ
HakkÝnda Kanunun 11 inci maddesinde yer alan;
a- Sšzleßmeden dšnme,
b- SatÝß bedelinden indirim isteme,
c- †cretsiz onarÝlmasÝnÝ isteme,
•- SatÝlanÝn ayÝpsÝz bir misli ile deÛißtirilmesini isteme, haklarÝndan birini kullanabilirsiniz.
SaygÝlarÝmÝzla,
Sinbo KŸ•Ÿk Ev Aletleri
DÜKKAT: Sadece ev aleti olarak kullanÝm i•indir.
BakanlÝk•a belirlenen ve ilan edilen kullanÝm šmrŸ 7 yÝldÝr.
Cihazla oynamamalarõnõ gŸvenceye almak i•in •ocuklar gšzetim altõnda tutulmalõdõr.
Bu ŸrŸn (•ocuklar dahil ) fiziksel hassasiyeti az, zihinsel olarak yetersiz, deneyimsiz ve yeterli bilgiye
sahip olmadan yada kendilerinin gŸvenliÛinden sorumlu olan kißiler tarafõndan bu ŸrŸnŸ kullanmak
i•in gerekli talimatlar verilmemiß kißilerin kullanõmõna uygun deÛildir.
¥ Bu cihazõn, aßaÛõda belirtilen yerler gibi, ev ve benzeri uygulamalarda kullanõlmasõ ama•lanõr.
(IEC 60335-2-15/A2):
¥ DŸkk‰nlarda, bŸrolarda ve diÛer •alõßma ortamlarõndaki personele ait mutfak alanlarõ,
¥ ‚iftlik evleri
¥ MŸßteriler tarafõndan, motellerde, otellerde kullanõlan yerler ve diÛer mesken tipi •evreler,
¥ Yatma yerleri ve kahvaltõ yapõlan ortamlar.
Children being supervised not to play with the appliance.
This appliance is not intended for use by persons (including children) with reduced physical, sensory
or mental capabilities, or lack of experience and knowledge, unless they have been given supervision
or instruction concerning use of the appliances by a person responsible for their safety. Children
should be supervised to ensure that they do not play with the appliance.
This appliance is intended to be used in household and similar applications such as:
(IEC 60335-2-15/A2)
- staff kitchen areas in shops, offices and other working environments;
- farm houses;
- by clients in hotels, motels and other residential type environments;
- bed and breakfast type environments.
- 2 -
SCO 5019= 230V~, 50Hz, 400 W, 1 Lt.
SCO 5020= 230V~, 50Hz, 700 W, 1.8Lt.
TEKNÜK …ZELLÜKLER ¥ TECHNICAL SPECIFICATION
DONNESE TECHNIQUES ¥ TECHNISCHE GEGEVENS
¥Tehniÿcki Podaci
CÜHAZIN TANITIMI ¥ NAME OF PARTS ¥ NOM DES PIéCES
NAAM VAN ONDERDELEN ¥ ¥ OPIS APARATA
9. Gšvde Tutma Kulpu
10. Gšvde
11. SÝcaklÝk Muhafaza Gšstergesi
12. Pißirme Gšstergesi
13. Pißirme DŸÛmesi
14. Plastik KaßÝk
15. …l•Ÿ KabÝ
1. Paslanmaz ‚elik Kapak
2. Tencere
3. ‚alÝßtÝrma DŸÛmesi
4. Alnico Termal SÝnÝrlayÝcÝ
5. IsÝtma PlakasÝ
6. Kapak Tutma Kulpu
7. Buhar ‚ÝkÝß AÛzÝ
8. Buhar Borusu
1
2
3
4
5
67
8
9
10
11
12
13
14
15
…ZELLÜKLERÜ
1. LŸks ve gšsterißli zarif tasarÝm, yŸksek kalite.
2. CihazÝn i•inde her yerde ÝsÝ yayÝlÝm ve dolaßÝmÝ, taban ve yanlardan ÝsÝtma
šzelliÛi.
3. Paslanmaz ‚elik Kapak, otomatik olarak pißirme ve sÝcak tutma ve sÝcaklÝÛÝ
saatlerce muhafaza etme šzelliÛi...

- 3 -
CÜHAZIN TANITIMI ¥ NAME OF PARTS ¥ NOM DES PIéCES
NAAM VAN ONDERDELEN ¥ ¥ OPIS APARATA ¥ NOMBRES DE LAS PIEZAS
1. Roestvrij stalen deksel
2. Binnenpan (kookpan)
3. Schakelknop
4. Alnico Thermostaat
5. Verwarmingsplaat
6. Dekselhandvat
7. Stoomopening
8. Stoompijp
9. PoignŽe pour saisir le bloc
10. Bloc
11. Indicateur de conservation de chaleur
12. Indicateur de cuisson
13. Interrupteur de cuisson
14. Cuill•re en plastique
15. Pot de mesure
1. Stainless Steel Lid
2. The pot
3. Switch
4. Alnico Thermal Limitation
5. Heating Plate
6. Handle
7. Steam nozzle
8. Steam rack
9. Body Handle
10. Housing
11. Keeping warm indicator
12. Cooking indicator
13. Cooking button
14. Plastic spoon
15. Measuring cup
1. Couvercle en acier inoxydable
2. Casserole
3. Bouton de mise en marche
4. DŽlimiteur thermal Alnico
5. Plaque de chauffage
6. PoignŽe pour saisir le couvercle
7. Orifice de sortie de vapeur
8. Tuyau de vapeur
9. Handgrepen
10. Romp
11. Warmhoud-indicatielampje
12. Kook-indicatielampje
13. Kookknop
14. Plastic lepel
15. Maatbeker
1. Tapa de cristal
2. Olla
3. Bot—n de encendido/apagado
4. Conductor tŽrmico de alnico
5. Placa de calentamiento
6. Mango de la tapa
7. Boquilla de salida del vapor
8. Cestillo para la salida del vapor
9. Mango del armaz—n
10. Armaz—n
11. Indicador de mantenimiento de la temperatura
12. Indicador de cocci—n
13. Bot—n de cocci—n
14. Cuchara de pl‡stico
15. Vaso medidor
1.
2.
3.
4.
5.
6.
7.
8.
9.
10.
11.
12.
13.
14.
15.

- 4 -
…NEMLÜ G†VENLÜK UYARILARI
¥ Bakõm, Onarõm ve Kullanõmda Uyulmasõ Gereken Kurallar
Elektrikli cihaz kullanÝlmadan šnce aßaÛÝda belirtilen temel gŸvenlik
kurallarÝna mutlaka uyulmasÝ gerekmektedir:
TopraklamasÝ yapÝlmÝß olan prizler kullanÝnÝz ve cihaz Ÿzerinde gšsterilen
voltaj ile elektrik devresinin voltajÝnÝn aynÝ olmasÝnÝ saÛlayÝnÝz.
Tencere tabanÝ ile pißirme plakasÝ yŸzeyinin elektronik bir arÝzaya neden
olmayacak ßekilde temiz ve kuru bulundurulmasÝnÝ saÛlayÝnÝz.
Tencereyi deforme olmasÝna yol a•abilecek •arpma ve darbelere karßÝ
koruyunuz. Tencereyi hi•bir zaman diÛer ÝsÝtÝcÝlar Ÿzerinde kullanmayÝnÝz.
Aletleri dŸz ve saÛlam bir zemin Ÿzerine yerleßtiriniz; tencereyi hi•bir zaman
kolayca tutußabilecek ve yanabilecek bir ßeyin Ÿzerine koymayÝnÝz.
Pißirme esnasÝnda aletin buhar •ÝkÝßÝna •ok fazla yaklaßmayÝnÝz. Buhar
nedeniyle yŸz ve elleriniz haßlanarak yanabilir.
Gšvdeyi hi•bir zaman su ile yÝkamayÝnÝz veya doÛrudan su i•erisine koymayÝnÝz.
Bu elektrik arÝzasÝna neden olabilir.
Yiyecekleri dÝßarÝ almak i•in, ilave olarak verilen plastik kaßÝÛÝ kullanÝnÝz.
Metal kaßÝklar tencere tabanÝnÝn •izilmesine neden olabilir ve kaplamasÝnÝn
zarar gšrmesine yol a•abilir.
Pißirme esnasÝnda buhar •ÝkÝßÝnÝn Ÿzerini kapatmayÝnÝz. Bu pißiricinin deforme
olmasÝna yol a•abilir.
Hi•bir zaman kendi kendinize elektrikli pißiricinin sškŸmŸnŸ yapmayÝnÝz. Bu
hareket, pißiricinin gŸvenlik ve emniyet šzelliklerini etkileyebilir.
Kapak tutma kulpu sadece kapaÛÝn a•ÝlmasÝ i•in kullanÝlÝr. Tutma kulpunu,
baßta i•i yiyecek dolu iken olmak Ÿzere, hi•bir zaman pilav pißiricisini kaldÝrmak
ve taßÝmak i•in kullanmayÝnÝz. Aksi takdirde, haßlanarak yanabilirsiniz.
Elektrikli pilav pißiricisinin kendi kablo baÛlantÝsÝ ve buna uygun kablo •ÝkÝßÝ
bulunmaktadÝr. Hasar gšrmesi halinde bu kabloyu šzel yumußak bir kablo ile
deÛißtiriniz.

- 5 -
TAÞIMA ESNASINDA
¥ †rŸnŸ dŸßŸrmeyiniz,
¥ Darbelere maruz kalmamasÝnÝ saÛlayÝnÝz,
¥ SÝkÝßmamasÝnÝ, ezilmemesini saÛlayÝnÝz,
¥ Ambalaj Ÿzerindeki ißaretlemelere uyunuz.
¥ Orjinal ambalajõyla taßõmaya šzen gšsteriniz.
‚EVRE VE ÜNSAN SAÚLIÚI
‚evre korumasÝna siz de katkÝda bulunabilirsiniz!
LŸtfen yerel dŸzenlemelere uymayÝ unutmayÝn: ‚alÝßmayan
elektrikli cihazlarÝ, uygun elden •Ýkarma merkezlerine gštŸrŸn
Kullanõm sõrasõnda insan ve •evre saÛlõÛõna tehlikeli veya zararlõ olabilecek
bir durum sšz konusu deÛildir.
CÜHAZIN KULLANIMI
¥ BaÛlantõ veya Montajõn Nasõl YapõlacaÛõnõ Gšsterir Þema ile BaÛlantõ veya
Montajõn Kimin Tarafõndan YapõlacaÛõna (tŸketici, yetkili servis) ilißkin bilgiler
CihazÝnÝzla birlikte gelen aksesuarlarõ kolaylÝkla kendiniz takÝp •Ýkartabilirsiniz.
Olasõ bir arõza durumunda cihazõn i•ini a•mayõnõz.Aksi takdirde cihaz garanti
dõßõ kalacaktõr.
Pilav Pißirme
1. …l•ek ile koyacaÛÝnÝz pirin• miktarÝnÝ tespit edin
Ülave olarak verilen šl•ekli kabÝ kullanarak gerekli pirin• miktarÝnÝ tespit edin.
1šl•ek: 0.18 litre, yaklaßÝk 150g
2. Pirin•leri yÝkayÝn
Pirin•leri yÝkamak i•in diÛer mutfak kaplarÝnÝ kullanÝnÝz. Pißirme tenceresinin
kaplamasÝnÝn aßÝnmalara karßÝ korunmasÝ ve tabanÝnÝn deformasyonunun
šnlenmesi maksadÝyla pirin•lerin doÛrudan tencere i•erisinde yÝkanmasÝ
šnerilmemektedir.
3. Su ilave edin
YÝkanmÝß pirin•leri tencere i•erisine koyun ve tencere i•erisinde eßit ßekilde
daÛÝtÝn (tencere i•erisinde pirin•lerin daÛÝlÝmÝ eßit olmadÝÛÝ takdirde, pißirme
iyi olmayacaktÝr) ve pirin• kalitesi ile damak tadÝnÝ gšz šnŸnde bulundurarak
orta seviyede su ilave edin.

- 6 -
CÜHAZIN KULLANIMI
¥ TŸketicinin Kendi YapabileceÛi Bakõm, Onarõm veya †rŸnŸn TemizliÛine
Ülißkin Bilgiler
1. Tencereyi gšvdenin i•erisinden •ÝkarÝnÝz ve su ile yÝkayarak silip kurulayÝnÝz.
2. Tencerenin dÝß yŸzeylerini siliniz ve yumußak bir bez ile temizleyiniz.
3. Tencereyi temizlemek i•in •elik temizleyicisi veya diÛer kaba ya da aßÝndÝrÝcÝ
temizlik maddeleri kullanmayÝnÝz. Bunlar tencere yŸzeyine zarar verecektir.
4. Pirin• taneleri veya daha baßka kir ve lekeler pißirme plakasÝna yapÝßtÝÛÝ
TEMÜZLÜK
4. Tencereyi gšvde i•erisine yerleßtirin
Tencerenin dÝß kÝsmÝndaki sularÝ, yapÝßmÝß kir ve lekeleri silip temizleyin ve
tencere tabanÝ ile ÝsÝtma plakasÝnÝn Ÿzerini kontrol ederek temizleyin. Tencereyi
gšvde i•erisine yerleßtirerek ve tam olarak oturduÛundan emin olmak i•in,
bir "tÝk" sesi duyulana kadar hafif•e dšndŸrŸn.
5. KapaÛÝ kapatÝn
Paslanmaz •elik kapaÛÝ kapatÝn. Pißirme esnasÝnda, kapaÛa kesinlikle
dokunmayÝnÝz!
6. Elektrik fißini prize takÝn
CihazÝn elektrik fißini prize taktÝÛÝnÝzda, elektrik gšstergesi yanmaya baßlar,
bu durum cihaza elektrik geldiÛini ifade etmektedir.
7. YemeÛi pißirin
Pißirme dŸÛmesini aßaÛÝ indirin, pißirme gšstergesi yanmaya baßlayacaktÝr
ve pißirme ißlemi baßlar.
8. Hafif ateßte pißirme
Pißmekte olan pirincin bŸtŸn suyu buharlaßÝp kaybolduÛunda, pißirme dŸÛmesi
otomatik olarak kapanÝr ve pißirme gšstergesi sšner ve sÝcak muhafaza
gšstergesi yanar. Pirincin rengini, tadÝnÝ ve kÝvamÝnÝ almasÝ i•in bu ßekilde on
beß dakika bekleyiniz.
SICAK MUHAFAZA
1. EÛer yemek hemen yenilmeyecek ise, kullanÝcÝ yemeÛi 70 ûC derecede
otomatik olarak muhafaza edebilecektir.
2. Pißirme ißleminden sonra zamanÝnda elektrik fißini prizden ve cihazdan
•ÝkarÝnÝz.

- 7 -
TEMÜZLÜK
¥ Periyodik Bakõm Gerektirmesi Durumunda, Periyodik Bakõmõn YapõlacaÛõ
Zaman Aralõklarõ ile Kimin Tarafõndan Yapõlmasõ GerektiÛine Ülißkin Bilgiler
Cihaz periyodik bakÝm gerektirmez.
Her kullanÝmdan sonra temizliÛinin yapÝlmasÝnda fayda vardÝr.
BAKIM
1. Elektrik gŸ• gšstergesi yanmÝyor
Pißirme plakasÝ sÝcak deÛil!
Elektrik baÛlantÝsÝ yok
Elektrik dŸÛmesini/kablo •ÝkÝß sigortasÝnÝ&kabloyu kontrol ediniz ve bunlarÝn
dŸzgŸn •alÝßÝp •alÝßmadÝÛÝna bakÝnÝz.
Pißirme plakasÝ sÝcak!
Neden-1. Alet i•erisindeki baÛlantÝlar gevßemißtir.
‚šzŸm-1. Yeniden baÛlantÝlarÝ yapÝnÝz.
Neden 2. Gšsterge hasar gšrmŸßtŸr, arÝza yapmÝßtÝr.
‚šzŸm 2. Gšstergeyi deÛißtiriniz
2. Elektrik gŸ• gšstergesi yanÝyor
Pißirme plakasÝ sÝcak deÛil!
Neden-1 Alet i•erisindeki baÛlantÝlar gevßemißtir.
‚šzŸm-1. Yeniden baÛlantÝlarÝ sÝkÝßtÝrÝnÝz.
Neden-2. Elektrikli pißirme tŸpŸ yanmÝßtÝr.
‚šzŸm-2. Pißirme tŸpŸnŸ deÛißtiriniz.
3. Pirin•ler tam pißmemiß veya pißirme sŸresi •ok uzun
Neden-1. Tencere deforme olmußtur!
‚šzŸm-1. Tencereyi pißirme plakasÝ ile tam temas saÛlayacak ßekilde dŸzeltiniz.
takdirde, pißirme plakasÝnÝn tencere ile tam temasÝnÝ saÛlayacak ßekilde
bunlarÝ temizlemek i•in, 320 # zÝmpara kaÛÝdÝ kullanÝlmalÝ, daha sonra ise
yumußak bir bez ile pißirme plakasÝ silinerek temizlenmelidir.
SORUN GÜDERME

- 8 -
SORUN GÜDERME
Bu cihaz kullanÝcÝ tarafÝndan deÛißtirilebilen par•alara sahip deÛildir. †nitenin
•alÝßmamasÝ durumunda ßu adÝmlarÝ izleyin.
1. TalimatlarÝn doÛru bi•imde izlendiÛini denetleyin.
2. Ana kaynaÛÝnda ißlevselliÛini denetleyin.
Cihaz h‰l‰ •alÝßmÝyorsa, satÝn aldÝÛÝnÝz yere geri gštŸrŸn.
GŸ• kablosu hasar gšrmŸßse, tehlikeleri šnlemek i•in, cihaz Ÿreticisine iade
edilmelidir.
Kendi kendinize tamir etmeye KALKIÞMAYIN.
Þu talimatlarÝ izleyin:
1. Dikkatlice, tercihen orijinal kutusuna paketleyin.
†nitenin temiz olduÛundan emin olun.
2. TŸm yazÝßmalarda, adÝnÝzÝ, adresinizi ve ŸrŸnŸn model numarasÝnÝ belirtin.
3. Üade etme nedeninizi belirtin.
4. Garanti kapsamÝndaysa, nereden, ne zaman alÝndÝÛÝnÝ belirtin ve satÝn alma
kanÝtÝnÝ ekleyin (šrn. kasa fißi).
SATIÞ SONRASI HÜZMETLERÜ
Neden-2. Pißirme plakasÝ deforme olmußtur.
‚šzŸm-2. Hafif deformasyonlar parlatarak gidermek i•in zÝmpara kaÛÝdÝ
kullanÝnÝz. EÛer ciddi boyutlarda deformasyon mevcut ise, deÛißtirilmek Ÿzere
•ÝkarÝnÝz.
Neden-3. Tencere eÛik durmaktadÝr, sÝcaklÝÛÝ etkin olarak almamaktadÝr.
‚šzŸm-3. Tencereyi dšndŸrerek tam temas saÛlayacak ßekilde oturtunuz.
Neden-4. Tencere ve pißirme plakasÝ arasÝnda kir ve pislikler bulunmaktadÝr.
‚šzŸm-4. Temizlemek i•in 320#zÝmpara kaÛÝdÝ kullanÝnÝz.
4. Pirin•ler hafif yanmÝß
Neden-1. Pißirme dŸÛmesi veya seviye baÛlantÝsÝ dŸzgŸn •alÝßmÝyor.
‚šzŸm-1. YanmÝß kÝsÝmlarÝ bir maßa ve benzer bir aletle temizleyiniz.
Neden-2. Alnico termal sÝnÝrlayÝcÝ arÝzalÝ.
‚šzŸm-2. Alnico termal sÝnÝrlayÝcÝyÝ deÛißtiriniz.
5. Otomatik olarak sÝcaklÝÛÝ muhafaza etmiyor
Neden : SÝcaklÝk regŸlatšrŸ arÝzalÝ.
‚šzŸm: SÝcaklÝk regŸlatšrŸnŸ deÛißtiriniz.

- 9 -
ENGLISH
SINBO SCO-5019 & SCO-5020
ELECTRIC RICE COOKER
INSTRUCTION MANUAL
Thanks for your purchase, before using, please read it in detail and keep it
long.
WARNING: Household Use Only
TECHNICAL SPECIFICATION
SCO-5019
VOLTAGE: 230V~, 50Hz
POWER: 400W
CAPACITY: 1 L.
PP Steamer
FEATURES
1. Luxurious elegant design, high quality.
2. All round heat circulation, heat from the base and the sidewalls.
3. Stainless steel lid, automatically cooks and keeps warm and to conduct
heat efficiently for several hours..
COOKING QUALITY
Instruction:
Cook Rice
1. Measure out the rice.
Use the attached cup to measure out the needed rice. 1cup: 0.18 litres, about
150g
2. Wash the rice
Use other utensils to wash the rice clean. That washing rice directly in the pot
is not allowed, in order to avoid abrading the coating or deforming the base.
3. Add water
Put the washed rice into the pot and distribute evenly in the pot, (uneven
distribution will cause bad cooking effect)add moderate water according to
the rice quality and one's taste.
SCO-5020
VOLTAGE: 230V~, 50Hz
POWER: 700W
CAPACITY: 1.8L
Aluminum Steamer

- 10 -
COOKING
4. Place the pot into the housing.
Wipe the water, sticking stains away from the outside of the pot, check and
clean the pot base and the heating plate, place the pot into the housing, rotate
lightly to ensure a full contact between the a click sound is heard.
5. Close the covers
Close the stainless steel lid. During the cooking, do not touch it!
6. Connect power
After attaching the plug to the appliance, plug cord into the outlet, the power
indicator will illuminate then, which means power has got through.
7. Cook food
Push down the cooking button, the cooking indicator illuminates and cooking
begins.
8. Stew food
When all the water in the rice has been dried away, the cooking button bounces
off automatically, the cooking indicator goes off and the warm keeping indicator
goes on. keep this state for fifteen minutes to improve the food's color, flavour
and taste.
KEEP WARM
1. lf not for immediate enjoyment, the cooker will keep the food warm
at 70 centigrade automatically.
2. Unplug from the outlet and the appliance in time after cooking.
CLEANING
1. Take out the pot, wash them with water and wipe dry.
2. Wipe the outside of the pot and clean it with soft cloth.
3. Do not use steel scourer or other coarse or abrasive cleaners to clean the
pot these will damage the surface.
4.In case that rice grain or other stains may be attached to the heating
plate, 320#sand paper is used to rub them away, then wipe the heating plate
clean with soft cloth to ensure full contact between the pot and the heating
plate.

- 11 -
IMPORTANT SAFEGUARDS
Use plug to ensure the appliances to be earthed; ensure that the voltage
indicated on the appliances corresponds with mains voltage.
Ensure the pot base and the surface of the heating plate dry and clean to avoid
electronic break down.
Protect the pot against bump may cause the pot to be deformed. Never use
the pot on other heat sources.
Place the appliances on a stable level surface; never place the pot on something
that causes fire easily.
Do not be so near to the appliances' steam nozzle when cooking. Face or
hands may be scalded by steam.
Never wash the housing with water or place the housing directly into the
water, this will cause power failure.
Use the attach plastic spoon to take food out; such spoons as metal spoons
may scratch the pot base and damage the coating.
No not cover the steam nozzle while cooking .this will cause the cooker to the
deformed
Never disassemble the electric cooker on your own, this may influence the
cooker's safety features.
The cover handle is only used to open the cover, never use the handle to pick
up and move the rice cooker, especially when filled with food, scalding would
happen otherwise.
The electric rice cooker has its own linkage and corresponding outlet; Replace
the cord with special soft cord once it is damaged.
PROBLEM AND CAUSES
1. Power indicator does not illuminate.
Heating plate is not hot!
Not connect with power
Check the switch/plug outlet fuse & cord and see whether they do work well
or not.
Heating plate is hot!
Cause 1. The connections inside are loose.
Solution 1. Join them together again.

- 12 -
HOW TO OPERATE
You can help protect the environment!
Please remember to respect the local regulations, hand in the
non-working electrical equipments to an appropriate waste
disposal center.
ENVIRONMENTAL DISPOSING
Cause 2. The indicator are damaged.
Solution 2. Replace them
2. Power indicator illuminates.
Heating plate is not hot!
Cause 1. The connections are loose
Solution 1. Fasten them again.
Cause 2. Electric heating tube has been burn.
Solution 2. Replace the heating tube.
3. Rice is not ripe or the cooking time is too long.
Cause 1. The pot has been deformed!
Solution 1. Adjust the pot to ensure a full contact with the heating plate.
Cause 2. The heating plate has been deformed
Solution 2. Use sand paper to polish for slight deform; send away to replace
if it is seriously deformed.
Cause 3. The pot slants, absorbing heat inefficiently.
Solution 3. Rotate the pot slightly to ensure full contact.
Cause 4. There are stains between the pot and the heatingplate.
Solution 4. Use 320#sand paper to clean.
4. Rice is scotched.
Cause 1. The cooking button or lever linkage does not work well.
Solution 1. Clear burn with pinchers or something.
Cause 2. Alnico thermal limitation fails.
Solution 2. Replace alnico thermal limitation.
5. Cannot keep warm automatically
Cause : The thermal stat fails
Solution : Replace the thermal stat

- 13-
FRAN‚AIS
SINBO SCO-5019 & SCO-5020
CUISEUR ƒLECTRIQUE DE RIZ
MODE D'EMPLOI
Merci d'avoir achetŽ notre produit. Veuillez lire attentivement ce manuel avant
de commencer ˆ utiliser l'appareil et prŽservez pour consultation ultŽrieure.
ATTENTION: uniquement pour usage domestique.
SPƒCIFICATIONS TECHNIQUES
SCO-5019
VOLTAGE: 230V~, 50Hz
PUISSANCE: 400W
CAPACITƒ: 1 Litre
Vaporisation PP
CARACƒTRISTIQUES
1. Conception luxe, dŽcorative et ŽlŽgante, haute qualitŽ.
2. Diffusion et circulation de la chaleur dans l'appareil, fonction de chauffage
par la semelle et les c™tŽs.
3. Couvercle en acier inoxydable, fonction de cuisson automatique, de maintenir
chaud et de prŽserver chaud pendant des heurs...
QUALITƒ DE CUISSON
Instructions:
Cuisson de riz
1. DŽterminez avec la mesure Žchelle la quantitŽ de riz que vous allez cuire
DŽterminez en vous servant du pot de mesure fourni supplŽmentairement la
quantitŽ nŽcessaire de riz. 1 mesure: 0.18 litres, environ 150g
2. Lavez le riz
Pour lavez le riz, utilisez autres rŽcipients de cuisine. En vue de protŽger le
rev•tement de la casserole de cuisson contre les corrosions et d'Žviter la
dŽformation de la semelle, il est dŽconseillŽ de laver le riz directement dans
la casserole.
SCO-5020
VOLTAGE: 230V~, 50Hz
PUISSANCE: 700W
CAPACITƒ: 1.8L
Vaporisation Aluminium

- 14 -
QUALITƒ DE CUISSON
3. Rajoutez de l'eau
Mettez le riz lavŽ ˆ l'intŽrieur de la casserole et Žtalez de fa•on Žgale (si la
dispersion du riz n'est pas Žgale dans la casserole, la cuisson ne sera pas
rŽussie). Et rajoutez de l'eau au niveau moyen en considŽrant la qualitŽ du riz
et le gožt.
4. Installez la casserole ˆ l'intŽrieur du bloc
Essuyez et nettoyez l'eau, les saletŽs et les taches adhŽrŽes ˆ la partie
extŽrieure de la casserole et nettoyez en contr™lant la semelle de la casserole
et le dessus de la plaque de chauffage. Installez la casserole ˆ l'intŽrieur du
bloc et faites-la tourner lŽg•rement jusqu'ˆ ce qu'un dŽclic s'entent pour •tre
sur qu'elle est installŽ compl•tement.
5. Fermez le couvercle
Fermez le couvercle en acier inoxydable. Ne touchez jamais le couvercle
lors de la cuisson!
6. Branchez la fiche Žlectrique ˆ la prise
L'indicateur d'Žlectrique commencera ˆ s'allumer lorsque vous aurez branchŽ
la fiche Žlectrique de l'appareil, cela signifie que l'Žlectrique s'est transmise
ˆ l'appareil.
7. Faites cuire le repas
Faites descendre l'interrupteur de cuisson vers le bas, l'indicateur de cuisson
commencera ˆ s'allumer et l'opŽration de cuisson commencera.
8. Cuisson ˆ feu doux
Lorsque la totalitŽ de l'eau du riz s'est ŽvaporŽe et a disparue, l'interrupteur
de cuisson s'arr•te automatiquement et l'indicateur de cuisson s'Žteint puis
l'indicateur de maintien chaud s'allumera. Attendez ainsi pendant quinze
minutes, pour que le riz prenne sa couleur, son gožt et sa consistance.
MAINTIEN CHAUD
1. Si le repas ne va pas •tre mangŽ tout de suite, l'utilisateur peut prŽserver
le repas automatiquement ˆ 70 degrŽ centigrades.
2. Apr•s l'opŽration de cuisson, dŽbranchez ˆ temps la fiche Žlectrique de la
prise et de l'appareil.

- 15 -
NETTOYAGE
1. Retirez la casserole de l'intŽrieur du bloc et essuyez-le apr•s l'avoir lavŽ
ˆ l'eau.
2. Essuyez les surfaces extŽrieures de la casserole et nettoyez ˆ l'aide d'un
chiffon humide.
3. N'utilisez pas de nettoyant en acier ou d'autres produits de nettoyage
abrasifs et rudes pour nettoyer la casserole car ceux-lˆ endommageront votre
casserole.
4. Dans le cas o• le riz ou d'autres saletŽs et taches s'adh•rent ˆ la plaque
de cuisson, en vue d'assurer le contact total de la plaque de cuisson avec le
casserole, il convient de nettoyer ces restes avec du papier Žmeri 320 #,
ensuite il faudra nettoyer la plaque de cuisson en l'essuyant avec un chiffon
doux.
PRƒCAUTIONS DE SƒCURITƒ IMPORTANTES
Utilisez des prises de terre et veillez ˆ ce que le voltage indiquŽ sur l'appareil
soit le m•me voltage que celui du circuit Žlectrique.
Maintenez la semelle de la casserole et la surface de la plaque de cuisson
propres et s•ches pour ne causer aucune panne Žlectrique.
ProtŽgez la casserole contre les chocs et les coups pouvant causer des
dŽformations. N'utilisez jamais la casserole sur d'autres ŽlŽments chauffants.
Placez les outils sur une surface plate et solide; n'apposez jamais la casserole
sur un objet facilement inflammable et combustible.
Lors de la cuisson, ne vous approchez pas trop de la sortie de vapeur de
l'appareil. Votre visage et vos mains peuvent bržler en bouillant ˆ cause de
la vapeur.
Ne lavez jamais le bloc avec de l'eau ou ne le plongez jamais directement
dans l'eau. Cela peut causer une panne Žlectrique.
Pour prŽlever les aliments dehors, servez-vous de la cuill•re en plastique qui
est fournie supplŽmentairement. Les cuill•res en mŽtal peuvent rayer la
semelle de la casserole et endommager le rev•tement.
Ne couvrez pas le dessus de la sortie de vapeur lors de la cuisson. Cela peut
causer une dŽformation du cuiseur.
Ne dŽmontez jamais le cuiseur Žlectrique tout seul. Cette action peut influencer
les fonctions de sžretŽ et de sŽcuritŽ du cuiseur.

- 16 -
PRƒCAUTIONS DE SƒCURITƒ IMPORTANTES
La poignŽe pour saisir le couvercle doit •tre utilisŽe uniquement pour soulever
le couvercle. N'utilisez jamais cette poignŽe de couvercle pour soulever ou
porter le cuiseur de riz, surtout pas si le cuiseur contient de l'aliment dedans.
Sinon vous pouvez vous bržler en bouillant.
Le cuiseur Žlectrique de riz dispose de sa propre connexion de cordon et sa
sortie de cordon appropriŽe ˆ celle-ci. En cas d'endommagement, remplacez
ce cordon avec un cordon doux spŽcial.
PROBLéMES ET CAUSES
1. L'indicateur de la puissance Žlectrique ne s'allume pas.
La plaque de cuisson n'est pas chaude!
Il n y a pas de connexion Žlectrique.
VŽrifiez le bouton d'Žlectrique/le fusible de sortie du cordon&le cordon et
voyez si ceux-lˆ fonctionnent correctement.
La plaque de cuisson est chaude!
Cause 1 Les connexions qui sont ˆ l'intŽrieur de l'appareil sont rel‰chŽes.
Solution 1. Refaites les raccordements.
Cause 2. L'indicateur est endommagŽ ou a fait panne.
Solution 2. Remplacez l'indicateur
2. L'indicateur de la puissance Žlectrique s'allume.
La plaque de cuisson n'est pas chaude!
Cause 1 Les connexions qui sont ˆ l'intŽrieur de l'appareil sont rel‰chŽes.
Solution 1. Resserrez les connexions
Cause 2. Le tube Žlectrique de cuisson est bržlŽ.
Solution 2. Remplacez le tube de cuisson.
3. Le riz n'est pas bien cuit ou la durŽe de cuisson est tr•s longue.
Cause 1. La casserole est dŽformŽe!
Solution 1. Aplanissez la casserole de fa•on ˆ ce qu'elle soit en contact total
avec la plaque de cuisson.
Cause 2. La plaque de cuisson est dŽformŽe.
Solution 2. Pour supprimer les dŽformations lŽg•res en polissant, utilisez du

- 17 -
PROBLéMES ET CAUSES
Vous pouvez aider ˆ protŽger lÕenvironnement !
Veuillez vous rappeler de respecter les rŽgulations locales :
disposez des appareils Žlectriques qui ne fonctionnent plus
dans un centre de tri appropriŽ.
APPAREIL RESPECTUEUX DE ÕENVIRONNEMENT
papier Žmeri. S'il est question de graves dŽformations, retirez-la afin de la
remplacer.
Cause 3. La casserole est tordue, ne re•oit pas la chaleur de fa•on effective.
Solution 3. Faites installer la casserole en la faisant tourner de fa•on ˆ ce
qu'elle entre en contact total.
Cause 4. Il y a des saletŽs et des restes entre la casserole et la plaque de
cuisson.
Solution 4. Utilisez du papier Žmeri 320# pour nettoyer.
4. Le riz est lŽg•rement bržlŽ.
Cause 1. L'interrupteur de cuisson ou la connexion de niveau ne fonctionne
pas correctement.
Solution 1. Nettoyez les parties bržlŽes avec une pince ou un outil similaire.
Cause 2. Le dŽlimiteur thermal Alnico est en panne.
Solution 2. Remplacez le dŽlimiteur thermal Alnico.
5. Ne prŽserve pas la chaleur automatiquement
Cause : Le rŽgulateur de tempŽrature est en panne.
Solution : Remplacez le rŽgulateur de tempŽrature.

- 18 -
NEDERLANDS
SINBO SCO-5019 & SCO-5020
ELEKTRISCHE RIJSTKOKER
GEBRUIKSHANDLEIDING
Wij danken u voor de aankoop van ons product. Gelieve voordat u dit product
gebruikt de gebruikshandleiding aandachtig te lezen en ze zorgvuldig te
bewaren.
OPGELET: Dit product is uitsluitend bestemd voor huishoudelijk gebruik.
TECHNISCHE SPECIFICATIES
SCO-5019
NETSPANNING: 230V~, 50Hz
VERMOGEN: 400W
INHOUDSVERMOGEN: 1 Liter
PP Stomer
BIJZONDERE EIGENSCHAPPEN
1. Luxe uitvoering, esthetische vormgeving, hoge kwaliteit.
2. Gelijkmatige warmteverdeling in het hele apparaat door
verwarmingselementen in bodem en zijwanden.
3. Roestvrij stalen deksel, automatische kook- en warmhoudfunctie, behoudt
de warmte urenlang.
KOOKFUNCTIE
Aanwijzingen:
Rijst koken
1. De hoeveelheid rijst afmeten.
Gebruik de bijgeleverde maatbeker om te bepalen hoeveel rijst u gaat gebruiken.
1 maatje : 0.18 liter, ongeveer 150g
2. De rijst wassen
Gebruik hiervoor een andere pan of schaal. Om de anti-aankleeflaag niet te
beschadigen en de bodem van de pan tegen vervorming te behoeden is het
niet aan te raden de rijst rechtstreeks in de kookpan te wassen.
SCO-5020
NETSPANNING: 230V~, 50Hz
VERMOGEN: 700W
INHOUDSVERMOGEN: 1.8L
Aluminium Stomer

- 19 -
KOOKFUNCTIE
3. Water toevoegen
Doe de gewassen rijst in de kookpan en verdeel gelijkmatig over de bodem
(als de rijst niet gelijkmatig over het oppervlak van de pan verdeeld is verkrijgt
u geen goed kookresultaat) en voeg een middelmatige hoeveelheid water toe,
volgens uw eigen smaak, rekening houdend met de kwaliteit van de rijst.
4. De gevulde pan in de rijstkoker plaatsen
Verwijder aanklevende rijstkorreltjes en andere onreinheden van de buitenkant
van de pan en wrijf goed droog. Controleer ook of de verwarmingsplaat schoon
en droog is. Plaats vervolgens de kookpan in de romp van de rijstkoker en
draai eventjes voorzichtig heen en weer tot u een klikje hoort. Zodoende weet
u zeker dat de pan goed in de rijstkoker is aangebracht.
5. Deksel opleggen.
Plaats het roestvrij stalen deksel op de kookpan. Raak het deksel in geen
geval aan tijdens het kookproces!
6. Stekker in stopcontact steken
Als u de stekker in het stopcontact steekt gaat het elektrische
stroomindicatielampje branden, dit toont aan dat het apparaat op het stroomnet
is aangesloten.
7. Het gerecht koken
Door de kookknop in te drukken gaat het kook-indicatielampje branden en
het kookproces vangt aan.
8. Op lage temperatuur laten gaar worden
Als al het water van de kokende rijst opgenomen en verdampt is zal de
kookknop automatisch in de hoogste positie klikken; de kookfunctie wordt
uitgeschakeld, het kook-indicatielampje gaat uit en het warmhoud-
indicatielampje licht op. Laat de rijst op die manier nog een vijftiental minuten
trekken. Zo bekomt u mooie loskorrelige rijst, perfect van smaak en kleur.
WARM HOUD-FUNCTIE
1. Als het gerecht niet dadelijk wordt opgediend zal het in de rijstkoker
automatisch op een temperatuur van 70 graden warm gehouden worden.
2. Neem na het gebruik de stekker uit het stopcontact en het contra-stekkertje
uit het apparaat.
Other manuals for SCO-5019
2
This manual suits for next models
1
Table of contents
Languages:
Other Sinbo Kitchen Appliance manuals

Sinbo
Sinbo SFD 7401 User manual

Sinbo
Sinbo SSPM 7201 User manual

Sinbo
Sinbo SJ 3138 User manual

Sinbo
Sinbo SJ 3141 User manual

Sinbo
Sinbo SP 5210 User manual

Sinbo
Sinbo SMS 5610 User manual

Sinbo
Sinbo SSM 2530 User manual

Sinbo
Sinbo SCO 5054 User manual

Sinbo
Sinbo SP 5204 User manual

Sinbo
Sinbo SHB 3127 User manual

Sinbo
Sinbo SJ 3127 User manual

Sinbo
Sinbo SK 7381 User manual

Sinbo
Sinbo SCM 2943 User manual

Sinbo
Sinbo SSM 2547 User manual

Sinbo
Sinbo SHB 3065 User manual

Sinbo
Sinbo SSM 2529 User manual

Sinbo
Sinbo SSM 2548 User manual

Sinbo
Sinbo DZ-280/A User manual

Sinbo
Sinbo SCO 5052 User manual

Sinbo
Sinbo SK 2395 User manual