Sinbo SCO 5053 User manual

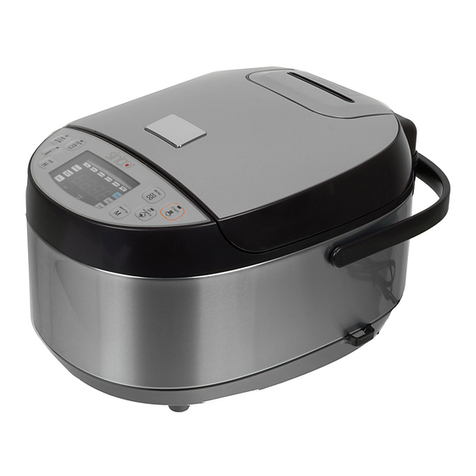
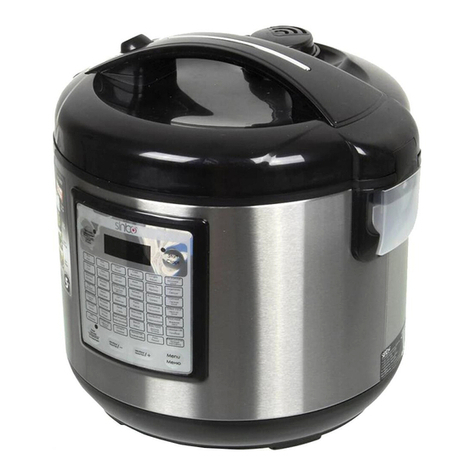
SCO 5053 MULTICOOKER
INSTRUCTION MANUAL
EN
RU
www.sinbo.com

- 1 -
ENGLISH
SINBO SCO 5053 MULTICOOKER
INSTRUCTION MANUAL
PARTS DESCRIPTION
1. Case
2. Control panel
3. Display panel
4. Flap cover
5. Pot
6. Steamer
7. Measuring cup
8. Ladle
9. The container for collecting condensed water
10. Steam outlet valve
TECHNICAL DETAILS
• AC220-240V, 50Hz, 700W
• 2.6 / 3.1Kg
• 6 programs
• 4-digit display
• 1.0mm inner pot with single side nonstick coating
• 5L capacity
SAFETY MEASURES
Important safety instructions.
Please read carefully and save for future reference.
• Incorrect use of the device may damage the device and harm the user.
• Before switching on the device for the first time check whether the technical
characteristics of the device listed on the sticker correspond to the characteristics of the
electric line.
CAUTION! The plug of the power cord is grounding type and has a wire. Plug the device
only into the corresponding grounded sockets.
• Use the device only for household purposes and in accordance with this Operating
Manual. The device is not intended for industrial use
• Do not use outside.
• Always unplug the device from the socket before cleaning the device or if you are not
using the device.
• The device may not be used by persons (including children) with underdeveloped
physical, mental and sensual abilities when these persons do not have the experience
or the knowledge or if they are not supervised or guided by a person who is responsible
for their safety.

- 2 -
• Children should be supervised at all times and should never play with the device.
• Do not leave switched-on device unattended.
• Do not use the parts which are not included in the package.
• Do not use the device if the power cord or/and the plug are damaged. To avoid danger
the damaged cord should be replaced by an authorized service center.
• Do not submerge the device or the power cord in water or other liquids. However, if
this happened unplug the device from the socket immediately and before using the device
again have qualified specialists check the operability of the device.
• Make sure that the power cord doesn’t touch sharp edges and hot surfaces.
• Do not pull the power cord and do not twist or wrap the cord around the device.
• The multicooker is to be used only for cooking food. Never use the multicooker for
drying clothes, paper and other items.
• Do not turn the multicooker when the pot is empty.
• Do not use the multicooker without the pot.
• The device is not intended for preserving food.
• Do not put the foodstuffs on the bottom of the multicooker, always use the pot.
• Do not replace the pot with any other container.
• Do not use metal items which may scratch the pot.
• The inner coating of the pot may initially wear off, therefore be careful when using the
pot.
• Follow cooking recipes.
• Do not let water get into the vent holes in order to avoid short circuit.
• Failure to keep the multicooker safe may lead to the deterioration of its surface which
may negatively affect the operation of the device and may be harmful for the user.
• If using an extension cord make sure that maximum capacity of the cord corresponds
to the capacity of the device.
• Caution! The device becomes hot during operation! If you need to touch the multicooker
when it is operating use tacks or cooking gloves.
• Protect your face and hands from the steam coming out of the valve.
• Do not insert metal and other items into the outlet hole or into any other parts of the
device.
• Do not cover the cover of the multicooker with the towels or other items.
- This appliance should not be used by physically, sensually or mentally handicapped
ones (including children) without supervision and guidance of someone who can undertake
the responsibility for safety but by the ones who are sufficiently informed and experienced
about the use.
- Close supervision is required to ensure that children don't play with the appliance.
- Warning: Do not use this appliance for any other purpose than its intended purpose
This appliance is for use in home and similar environments:
- personnel kitchens in stores, offices or other work environments;
- ranches;
- 3 -
- customers in hotels, motels and similar environments;
- bed and breakfast environments.
- The appliance is not designed to be operated by an external timer or a separate remote
control system.
- This appliance can be operated by children of 8 years and above, people with limited
physical, auditory and cognitive skills or people with lack of experience and knowledge
as long as they are under supervision or they are provided instructions regarding the
operation of the appliance. In case they are not older than 8 years old or unsupervised,
children should not clean or maintain the kettle.
Keep the appliance and its cable from the reach of children aged <8.
CONTROL PANEL
PROGRAM “Rice/Pilaf”
• Put the pot inside the multicooker and add water and ingredients. Close the cover until
you hear a click.
• Plug the multicooker into the socket. Do not plug the device into the socket until you
finished all the preparation steps – it may damage the multicooker.
• Press button “Rice/Pilaf” on the control panel. A red indicating lamp on the button will
turn on. You will see the default cooking time 00:45 on the display. The program “Rice/Pilaf”
will start operating within 5 seconds . When the cooking is started, the cooking time will
count down.
• The default cooking time for Rice/Pilaf is 45 minutes. If necessary you may increase
or reduce the time. Press “+” or “-“ in the center of the panel?you can change the cooking
time with the range of 10 minutes to 2 and a half hours. The time step is 5 minutes. After
the cooking is finished the indicating lamp on this mode button will turn off and you will
hear a sound, the multicooker will switch into the “Keep warm/Cancel” mode automatically.
• To turn off the warming mode press “Keep warm/Cancel” button.
• Unplug the multicooker from the socket.

- 4 -
PROGRAM “PORRIDGE/Soup”
This mode is used for cooking liquid dairy porridge from various types of cereal. It is
recommended that you use milk instead of water for cooking porridge.
• Measure the cereal by using the measuring cup. Wash the cereal until the water is
clear. Do not use the pot of the multicooker for washing since you may damage its coating.
Put the cereal into the pot of the multicooker and pour cold milk.
• Place the pot inside the multicooker. Close the cover until you hear a click.
• Plug the multicooker into the socket. Do not plug the device into the socket until you
finished all the preparation steps – it may damage the multicooker.
• Press the button “Porridge/Soup” on the control panel. You will see a red indicating
lamp on this button turn on. You will see the default cooking time 01:00 on the display
screen. The program “Porridge/Soup” will start working within 5 seconds. When the
cooking is started, the cooking time will count down.
• The default cooking time for porridge is 1 hour. If necessary you may increase or reduce
the time; Press “+” or “-“ in the center of the panel, you can change the cooking time
with the range of 10 minutes to 2 and a half hours. The time step is 5 minutes. After the
cooking is finished the indicating lamp on this mode button will turn off and you will hear
a sound, the multicooker will switch into the “Keep warm/Cancel” mode automatically.
• Unplug the multicooker from the socket. This program may be used for cooking soup
as well.
PROGRAM “Fry”
• Place the pot inside the multicooker.
• Pour the oil into the pot. After the oil is boiling, put the ingredients in the pot.
• Plug the multicooker into the socket. Do not plug the device into the socket until you
finished all the preparation steps – it may damage the multicooker.
• Press the button “Fry” on the control panel. You will see a red indicating lamp on this
button turn on. You will see the default cooking time 00:25 on the display screen. The
program “Fry” will start working within 5 seconds. When the cooking is started, the
cooking time will count down.
• Please don’t close the lid during the cooking process.
• The default cooking time for fry is 25 minutes. If necessary you may increase or reduce
the time; Press “+” or “-“ in the center of the panel, you can change the cooking time
with the range of 10 minutes to 2 and a half hours. The time step is 5 minutes. After the
cooking is finished the indicating lamp on this mode button will turn off and you will hear
a sound, the multicooker will switch into the “Keep warm/Cancel” mode automatically.
• Unplug the multicooker from the socket.
PROGRAM “STEW”
This mode is same as slow cook.
• Put all the ingredients and seasoning in the pot of the multicooker. Place the pot inside

- 5 -
the multicooker. Close the cover until you hear a click.
• Plug the multicooker into the socket. Do not plug the device into the socket until you
finished all the preparation steps – it may damage the multicooker.
• Press the button “Stew” on the control panel. You will see a red indicating lamp on this
button turn on. You will see the default cooking time 02:00 on the display screen. The
program “ Stew” will start working within 5 seconds. When the cooking is started, the
cooking time will count down.
• The default cooking time for stew is 2 hours. If necessary you may increase or reduce
the time. Press “+” or “-“ in the center of the panel, you can change the cooking time
with the range of 1 hour to 10 hours. The time step is 30 minutes. After the cooking is
finished the indicating lamp on this mode button will turn off and you will hear a sound,
the multicooker will switch into the “Keep warm/Cancel” mode automatically.
PROGRAM “STEAM”
This mode is used for steaming the food. The mode “Steam” requires the steamer. It is
important to remember that the steaming time is determined by the amount of water in
the pot. Pour enough water for the whole cooking time. If the water boils off completely,
the program will switch off automatically.
Pour the needed amount of water in the pot (see table for approximate quantities of
water).
Cooking time Approximate volume of water, measuring cups
10-30 minutes 4
30-60 minutes 5
• Place the food inside the steamer and place the steamer inside the pot. Place the pot
inside the multicooker.
• Close the cover until you hear a click. Plug the multicooker into the socket. Do not plug
the device into the socket until You finished all the preparation steps – it may damage
the multicooker.
• Press the button “Steam” on the control panel. You will see a red indicating lamp on
this button turn on. You will see the default cooking time 00:40 on the display screen.
The program “ Steam” will start working within 5 seconds. When the cooking is started,
the cooking time will count down.
• The default steaming time is 40 minutes. If necessary you may increase or reduce the
time; Press “+” or “-“ in the center of the panel, you can change the cooking time with
the range of 10 minutes to 2 and a half hours. The time step is 5 minutes.
• After the cooking is finished the indicating lamp on this mode button will turn off and
you will hear a sound, the multicooker will switch into the “Keep warm/Cancel” mode
automatically.
• Unplug the multicooker from the socket.

- 6 -
PROGRAM “BAKE”
Put all the ingredients in the pot of the multicooker. Place the pot inside the multicooker.
Close the cover until you hear a click.
• Plug the multicooker into the socket. Do not plug the device into the socket until you
finished all the preparation steps – it may damage the multicooker.
• Press the button “Bake” on the control panel. You will see a red indicating lamp on this
button turn on. You will see the default cooking time 00:50 on the display screen. The
program “ Bake” will start working within 5 seconds. When the cooking is started, the
cooking time will count down.
• The default cooking time for Bake is 50 minutes. If necessary you may increase or
reduce the time. Press “+” or “-“ in the center of the panel, you can change the cooking
time with the range of 5 minutes to 4 hours. The time step is 5 minutes. After the cooking
is finished the indicating lamp on this mode button will turn off and you will hear a sound,
the multicooker will switch into the “Keep warm/Cancel” mode automatically.
PROGRAM “KEEP WARM/CANCEL’’
This mode is used to maintain the temperature of the cooked food.
This mode is turned on automatically after all the programs are finished.
• Press button “Keep warm/Cancel” on the control panel. You will see a red indicating
lamp on this button turn on. You will see “bb” on the display screen. The program “Keep
warm/Cancel” will start operating within 5 seconds.
• This program maintains the temperature of the food at 70˚C for 24 hours. After the
program is finished you may continue warming up the food by pressing the button “Keep
warm/Cancel” again. Unplug the multicooker from the socket after the program is
finished.
CHANGING THE COOKING TIME
Please follow these steps when setting up the time: 1. Select the cooking mode. You will
see the default cooking time on the display screen (see the table for setting up the time
below). 2. Using “+” and “-“ buttons set the time. 3. Within 5 seconds after you set up the
time the cooking regime will start operating.
IMPORTANT! Set the cooking delay after the final correction of the cooking time (see
COOKING DELAY “TIMER” of this operating manual). You WILL NOT BE ABLE to change
the time after you have set up cooking delay!
Time setting table
Cooking regime The predetermined cooking time, min The cooking time range
Rice/Pilaf 45 mins 00:10 ~ 2:30
Porridge/Soup 1 hour 00:10 ~ 2:30
Deep Fry 25 mins 00:10 ~ 2:30
Stew 2 hours 01:00~10:00

Steam 35 mins 00:10 ~ 2:30
Bake 50 mins 00:05~04:00
COOKING DELAY “TIMER”
The range of delaying the cooking time for 30 minutes and up to 24 hours
• Select the cooking mode.
• Change the cooking time as you want.
• Press the “Timer” button. A red indicating lamp on the button turn on. Using the “+/-
“ buttons set up the cooking delay time (30 minutes up to 24 hours, step 30 minutes).
Press the selected programm button
• Cooking delay time will appear on the display within 1 minute, and the countdown will
begin, the step of the countdown is 1 minute.
CLEANING AND MAINTENANCE
• The device needs to be cleaned regularly; remove all of the food residue from the
surface of the multicooker
• Before cleaning turn off the multicooker and unplug it from the socket. Let the device
cool off completely.
• Wipe the control panel, the outer and the inner surfaces of the multicooker with a wet
cloth and detergent, wipe dry.
• Wash the pot in warm water with detergent and wipe dry. You should wash the pot
immediately after you finished cooking. Wash the container for collecting the condensed
water and the steam outlet valve.
• Do not use aggressive substances or abrasive materials.
STORAGE
• Make sure that the device is unplugged from the socket and is completely cooled off.
• Follow all of the steps mentioned in “CLEANING AND MAINTENANCE” section.
• Store the multicooker with the cover half open in a dry and clean place.
WHILE HANDLING
* Do not drop the product,
* Ensure it does not suffer impact,
* Ensure it doesn't get crushed or squeezed,
* Observe the marks on the packaging.
ENVIRONMENT FRIENDLY DISPOSAL
You can also contribute to environmental protection!
Please do not forget to adhere to local regulations.
Take the non-operational electrical appliance to the suitable disposal centers.
There is no situation that might harm human health or the environment during use.
- 7 -


- 15 -

- 16 -
Made in China
Produced at: 05-2017
Deima Elektromekanik A.S.
Cihangir Mh. Guvercin Cd.
No:4 Avcilar-ISTANBUL-TURKEY
05-2017
Cihangir Mh. Guvercin Cd. No:4 Avcilar-ISTANBUL-TURKEY
Deima Elektromekanik A.S.

Made in China
Produced at: 05-2017
Deima Elektromekanik A.S.
Cihangir Mh. Guvercin Cd.
No:4 Avcilar-ISTANBUL-TURKEY
05-2017
Cihangir Mh. Guvercin Cd. No:4 Avcilar-ISTANBUL-TURKEY
Deima Elektromekanik A.S.


1
Table of contents
Other Sinbo Kitchen Appliance manuals

Sinbo
Sinbo SP 5210 User manual

Sinbo
Sinbo SCO-5019 User manual

Sinbo
Sinbo DZ-280/A User manual

Sinbo
Sinbo SJ 3141 User manual

Sinbo
Sinbo SCO 5024 User manual

Sinbo
Sinbo SSM-2549 User manual

Sinbo
Sinbo SJ 3138 User manual

Sinbo
Sinbo SJ 3127 User manual

Sinbo
Sinbo SHB 3065 User manual

Sinbo
Sinbo SMS 5610 User manual

Sinbo
Sinbo SCO-5019 User manual

Sinbo
Sinbo SK 2396 User manual

Sinbo
Sinbo SK 2395 User manual

Sinbo
Sinbo SCO 5052 User manual

Sinbo
Sinbo SJ 3133 User manual

Sinbo
Sinbo SCM 2943 User manual

Sinbo
Sinbo SSM 2521G User manual

Sinbo
Sinbo SSM 2548 User manual

Sinbo
Sinbo SHB 3078 User manual

Sinbo
Sinbo SSM 2528 User manual