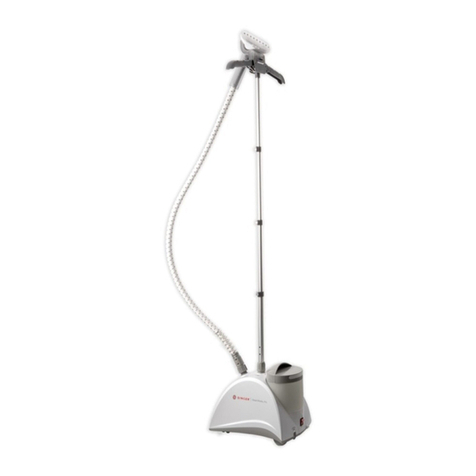
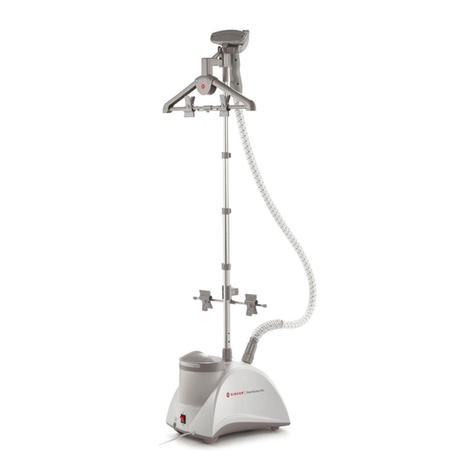
Singer SteamWorks Pro User manual

ON
OFF
11.2011
GBR
DEU
ITA
ESP
FRA
INSTRUCTION MANUAL
Garment Steamer
SWP.02E
NOR
DNK
FIN
SWE
SWP 02E_Instruction Manual.indd 1 12.12.2011 17:18:35

1. Read all instructions before using this product.
2. Use this product only as described in this manual. Other uses not
recommended may cause fire or electrical shock.
3. Do not immerse this product in water or any liquid; electric shock and
injury could result.
4. Always unplug this appliance before coming into contact with liquid of any
kind. This includes filling and emptying the water tank.
5. Close supervision is necessary when the appliance is used near children.
6. Do not leave this appliance unattended while it is in operation.
7. This appliance operates using high heat and steam that can cause burns
to skin. Use caution around the Steam Head.
8. Do not touch the hot metal parts, hot water or steam to avoid burns.
9. Do not operate the steamer without filling the water reservoir. Always
check the water level before and during operation.
10. Do not lay the hose on the ground or wind it.
11. Do not direct steam at people or animals.
12. Do not steam clothing while it is being worn.
13. Do not pour water directly into the reservoir. Pour water only into the water
tank.
14. Turn the appliance OFF and let cool before changing Steam Head
attachments to avoid burns.
15. The use of accessories or attachments not provided by SINGER Home
Essentials may result in fire, electric shock, or injury.
16. Never insert any objects into the tank or hose.
17. Keep the hose and steam head elevated above the tank.
18. Steam only in a vertical motion. Never use this appliance in a horizontal
position.
19. Allow the appliance to cool completely for at least 30 minutes and drain
the water tank and water reservoir before storing.
20. Move the appliance by grasping the telescopic pole. Do not force the
casters if they are stuck. Turn off the unit, cool completely, drain the water
tank and water reservoir before inspecting the casters.
21. Unplug the unit from the outlet when not in use, when moving unit from
one location to another, and before cleaning.
22. Do not place the unit or any parts near an open flame, cooking or other
heating appliance.
23. If the cord becomes damaged or the appliance has been dropped or
damaged, do not operate the product.
24. To avoid the risk of electrical shock, do not disassemble the steamer.
Ship it to the nearest authorized SINGER-approved service center for
examination and repair. Incorrect reassembly or repair can cause a risk of
fire, electric shock, or injury while the appliance is in use.
25. No detergent can be added into the water tank or it will cause damage.
Distilled or de-mineralized water is recommended.
26. Use this appliance indoors only.
SPECIAL INSTRUCTIONS:
To avoid a circuit overload, do not operate another high-wattage appliance on
the same circuit. If an extension cord is absolutely necessary, a 15-amp cord
should be used. Cords rated with less amperage may overheat. Use care to
arrange the cord so that it cannot be pulled or tripped over.
SAVE THESE INSTRUCTIONS
FOR HOUSEHOLD USE ONLY
IMPORTANT SAFETY INSTRUCTIONS
SWP 02E_Instruction Manual.indd 2 12.12.2011 17:18:36
1
Thank you for purchasing a SINGER Home Essentials product. For
over 150 years, we’ve been in homes around the globe providing
expert garment care with quality, durable tools to keep your garments
and fabrics looking fresh.
TECHNICAL SPECIFICATIONS: Voltage: 220-240V, ~50/60 Hz Power: 1500 Watts
1. Handle
2. Steam Head
3. Steam Head Hanger
4. Clothes Hanger Hook
5. Flexible Cool Touch Hose
6. Hose Connector
7. On/Off Switch
8. Drain Plug
9. Hose Base
10. Pole Base
11. Water Tank
12. Telescopic Pole
13. Rotating Hanger
14. Fabric Brush
15. Crease Attachment
16. Garment Clips
17. Water Reservoir
18. Caster Wheel System
19. Pole Clips
20. Valve Cap
21. Garment Clip Bar
22. Handheld Steaming Board
23. Protective Glove
24. Power Indicator Light
GBR
12
1
2
4
5
7
13
6
10
3
19
16
9
11
14
15
18
16
17
8
20
21 22
23
24
GETTING TO KNOW YOUR GARMENT STEAMER
SWP 02E_Instruction Manual.indd 1 12.12.2011 17:18:37

2
Assembling Your Steamer
•Removeallpackaging
•PlacethesteamerbaseonthefloorandremovetheWaterTank.
•InserttheTelescopicPoleintothePoleBaseandtwistthering
clockwise to lock.
•ConnecttheClothesHangerHooktothetopoftheTelescopicPole
as shown.
•ExpandtheTelescopicPolebyunlockingtheclipsandfully
extending the pole. Lock clips to secure.
•AttachtheCoolTouchHosebypushingthehoseontotheHose
Base and turning 1/4 turn clockwise to lock.
•HangtheSteamHeadontheSteamHeadHanger.
WARNING:
ALWAYS HANG THE STEAM HEAD ON THE STEAM HEAD HANGER
WHEN NOT IN USE TO PREVENT INJUR Y AND SURFACE DAMAGE .
MAKE SURE THE TELESCOPIC POLE IS FULLY EXTENDED DURING
USE TO ENSURE A SMOOTH STEAM FLOW THROUGH THE HOSE .
DO NOT PULL THE HOSE WITH EXCESSIVE FORCE OR MOVE IT BY
PULLING ON THE HOSE. DAMAGE OR INJURY MAY RESULT.
ASSEMBLY
SWP 02E_Instruction Manual.indd 2 12.12.2011 17:18:38

3
Crease Attachment Assembly and Use
•Turnthesteameroffandwaituntilthereisnosteamcomingfrom
the Steam Head. And it is completely cool to the touch.
•ConnectthefluteoftheCreaseAttachmenttothepegsatthe
bottom of the Steam Head.
•PushtheCreaseAttachmentintoplacegentlyuntilitclicks.
•Touse,placethefabricbetweentheSteamHeadandtheCrease
Attachment to create the crease. Move the Steam Head in a vertical
motion to press the crease.
Fabric Brush Assembly and Use
•Turnthesteameroffandwaituntilthereisnosteamcomingfrom
the Steam Head and it is completely cool to the touch.
•InsertthepegsontheFabricBrushintotheholesintheSteam
Head.
•Steamasusual,usingtheFabricBrushtosmoothstubborn
wrinkles.
GBR
SWP 02E_Instruction Manual.indd 3 12.12.2011 17:18:38

4
Folding Hanger Assembly
•SecuretheSteamHeadHangerassemblytotheTelescopicPole.
•TiltthehookoftheRotatingHangerandinsertitintotheholeon
the flat side of the Steam Head Hanger. Press gently to lock.
•PullthearmoftheRotatingHangerupuntilthesidesare
completely extended.
•Lockthehorizontalbarinplacebyaligningthedotsonthebar.
Garment Clips Assembly and Use
•SnaptheGarmentClipsintotheholesonthehorizontalbarofthe
Folding Hanger.
•CliptheGarmentClipBartothebottomoftheTelescopicPole.
•Touse,hangthegarmentfromthetopclipsandsecurewiththe
bottom clips, pulling the garment taut to steam or crease.
WARNING: ALWAYS TURN OFF THE STEAMER BEFORE ATTACHING
ACCESSORIES TO AVOID IN JURY.
SWP 02E_Instruction Manual.indd 4 12.12.2011 17:18:39

5
GBR
Filling the Water Tank
•Turnthesteameroffandunplugit.
•RemovetheWaterTankbypullingupwardonthehandle.
•UnscrewtheValveCapfromtheWaterTank,fillthetankwithcool
water, and replace the Valve Cap. Do not use hot water. To prolong
the life of your steamer we recommend using distilled or de-
mineralized water.
•Thetankholds2.5Litersofwater.
•InserttheWaterTankintothebase,makingsuretheplugonthe
bottom of the tank meets the post on the steamer base and fits
securely in the cavity.
NOTE: Do not operate the steamer without water as this could cause
damage to the unit.
Never use water with additives, including scents, starches, or fabric
conditioners, as they can cause deposits to form in the steamer that
can stain your clothing.
SWP 02E_Instruction Manual.indd 5 12.12.2011 17:18:40

6
Remote Control Instruction
Instruction Guide
Assemble the machine and make sure the steam hose fix well to the
body. Turn on and indicator lights up. Press remote button to control
steam out or not. The remote control cannot work if you turn off the
unit.
Use Instruction
Plug and make sure the steam hose fix well
to the body. Open the cell cover on the
handle and remove the film. (Make sure the
button cell for remote control is powerful
enough to operate) Turn on and indicator
lights up.
Press the button on the handle, steamer is
in a ready mode and no steam will come
out. Press button again then steam will
come out.
The remote control cannot work if you turn off the unit.
Change Button Battery
You need to change the button battery when
it fails to work.
Remove the cover screw on handle and
change button battery with these specs
(GPA76 LR44 1.5V). Please notice the place
of anode and cathode when put in the batteries. Close the cover and
apply screws to secure it.
Caution: Lightly press the remote button and do not overexert.
SWP 02E_Instruction Manual.indd 6 12.12.2011 17:18:41

7
GBR
•FilltheWaterTank.
•ExpandtheTelescopicPolebyunlockingtheclipsandfully
extending the pole. Lock clips to secure.
•Pluginthepowercordtoagroundedelectricaloutletandturnon
the power at the ON/OFF switch. The Power Indicator Light will
glow.
•Theunitwillbereadytouseinjust45seconds.
•HangthegarmentontheRotatingHanger.Youmayalsouse
a clean, rust-free clothes hanger, and place the hanger on the
Clothes Hanger Hook.
•Placetheprotectivegloveonthehandthatwillbeholdingthe
garment.
•HoldtheSteamHeadwiththesteamventspointingawayfromyour
body.
•TouchtheSteamHeadtothegarmentlightly,movingitinanup
and down vertical motion, beginning at the bottom of the garment
and moving upward.
•Steamwillrisealongtheinsideandoutsideofthefabrictoremove
wrinkles. Continue to steam the garment, smoothing with your free
(gloved) hand.
•Repeatuntilfabriciswrinklefree.
•Whenfinished,switchthepoweroffattheOn/OffSwitch.
•Unplugthesteamer.
•HangtheSteamHeadontheSteamHeadHangerwhennotinuse.
•EmptytheWaterTankbeforestoring.
HOW TO STEAM
ON
OFF
SWP 02E_Instruction Manual.indd 7 12.12.2011 17:18:41

8
Steaming Tips:
•Donotallowkinkstoforminthehoseatanytime.
•Certaindraperiescanbesteamedwhilehanging.
•Toremovestubbornwrinkles,theFabricBrushmayalsobeused.
NOTE: Do not operate the steamer without water as this could cause
damage to the unit.
Never use water with additives, including scents, starches, or fabric
conditioners, as they can cause deposits to form in the steamer that
can stain your clothing.
Handheld Steaming Board
Use Steam Board for help with collars, pockets and every corner.
WARNING:
OPERATE THE GARMENT STEAMER ON THE FLOOR AT ALL TIMES.
THE HOSE MAY MAKE A GURGLING NOISE DURING USE. THIS IS
NORMAL AND IS CAUSED BY CONDENSATION IN THE HOSE. HOLD
THE HOSE UP TO ALLOW CONDENSATION TO FLOW BACK INTO THE
TANK .
NEVER STEAM A GARMENT WHILE IT IS BEING WORN. BURNS AND
INJURY MAY RESULT.
PULLING ON A GARMENT WITH TOO MUCH FORCE MAY CAUSE THE
GARMENT STEAMER TO TIP.
DO NOT OPERATE THE GARMENT STEAMER WITHOUT WATER IN THE
TANK .
DO NOT OPERATE THE GARMENT STEAMER FOR MORE THAN 3
HOURS AT A TIME.
DO NOT LIFT THE GARMENT STEAMER BY THE WATER TANK HANDLE.
SWP 02E_Instruction Manual.indd 8 12.12.2011 17:18:44

9
GBR
SINGER recommends cleaning your garment steamer at least once a
week. Remove the Water Tank by pulling upward on the handle.
•Turntheswitchto“Off”andunplugthegarmentsteamer.
•Allowthegarmentsteamertocoolforatleast30minutes.
•RemovetheCoolTouchHose.CollapseandremovetheTelescopic
Pole.
•RemoveanddraintheWaterTank.Rinseitwithfreshwaterandlet
it drain completely. Place it back on the Water Reservoir.
•DrainthewatertankbyremovingtheDrainPlugandemptyingthe
contents.
•FlushtheunitbyfillingtheWaterReservoirandtheHoseConnector
with fresh water and draining completely. Replace the Drain Plug.
•WrapthehosearoundtheTelescopicPoleonce,placingtheSteam
Head on the Steam Head Hanger to store.
Removing Mineral Build-Up
It is common for minerals found in hard water to build up inside the
steamer, causing intermittent or weak steam. Depending on your
water quality, SINGER recommends removing the mineral build-up
after the first 1 to 2 weeks of using this steamer. If you do not use
de-mineralized or distilled water in your steamer, follow these steps
monthly.
•Turntheswitchto“Off”andunplugthesteamer.
•RemovetheCoolTouchHose.CollapseandremovetheTelescopic
Pole.
•DraintheWaterReservoir,andemptythewaterfromtheWater
Tank.
•Prepareasolutionof1cupvinegarand1cupwater.
•SlowlypourthesolutionintotheHoseConnectoruntiltheWater
Reservoir is about half full, near the top of the hose.
•Letthesolutionstandforabout40minutes.
•DrainthesolutionbyremovingtheDrainPlugandemptyingthe
solution into a sink or tub.
•DrainthesolutionfromtheHoseConnectorbytiltingtheunitovera
sink or tub and pouring the water out.
•PourcleanwaterintotheHoseConnectorandWaterReservoirinlet
and drain. Repeat this step until the vinegar odor dissipates.
•Reassembletheunit.
CLEANING
SWP 02E_Instruction Manual.indd 9 12.12.2011 17:18:45

10
Handy Tips:
•DonottouchtheSteamHeadtosilk,velvetorotherdelicate
fabrics.
•Especiallyondelicatefabrics,testtheheatsettinginan
inconspicuous place (like an inside seam) before steaming the entire
garment.
•Alwaysconsultthegarmentcarelabelonapieceofclothingbefore
steaming. The symbol indicates that the garment can be
steamed, and the symbol indicates that the garment should
not be steamed.
•Heavierfabricsmayrequiremoresteam.
ACCESSORIES AND FEATURES :
Steam Power in Seconds Ready to steam in just 45 seconds.
Telescopic Hanger Pole Adjustable height for steaming longer clothing items.
Conveniently folds for easy storage.
Durable and flexible, stays cool while in use.
Delivers 90 minutes of continuous steam.
Large 2.5 Liter capacity tank.
Convenient clips hold garments in place.
Adds stability and mobility, rolls for easy storage.
Crease Attachment and Fabric Brush.
Built-in 360-degree rotating hanger makes steaming
garments from any angle easy.
Safety feature switches the steamer off automatically
if the tank runs out of water.
360˚ Rotating Hanger
Collapsible Hanger System
Heavy Gauge Fabric Hose
Auto-Off
Extra Large Transparent
Water Tank
Easy Fill
Removable Tank
Garment Clip System
Deluxe 4-Caster
Wheel System
Accessory Kit:
SWP 02E_Instruction Manual.indd 10 12.12.2011 17:18:45

11
SINGER®is a registered trademark of the SINGER Company Limited S.à r.l. or its
affiliates.
TROUBLESHOOTING
GBR
PROBLEM REASON & SOLUTION
The unit fails to steam
Two indicating lamps do
not illuminate
The unit fails to steam
Two indicating lamps do
not illuminate
Excessive gurgling of
hose and steam nozzle
Steam is intermittent
•Steamerisnotpluggedin-plugintoelectricaloutlet.
•Householdcircuitbreaker/groundfaultinterrupter
is tripped or fuse is blown-check the power outlet
or if further assistance is needed, call a qualified
electrician.
•Mineralbuild-upintheunit-followtheRemoving
Mineral Build-up procedure.
•Thewatertankisempty-refillthewatertank.
•Condensationinhose-somegurglingisanatural
effect of the steam process.
•Forexcessivegurgling,extendthehoseverticallyto
allow water to drain back into the water reservoir.
•Mineralbuild-upintheunit-it’snormalfortheunitto
periodically stop steaming for a few seconds.
•Ifthesteamstaysoffforlongerperiods,followthe
Removing Mineral Build-up procedure.
SWP 02E_Instruction Manual.indd 11 12.12.2011 17:18:46

12
SWP 02E_Instruction Manual.indd 12 12.12.2011 17:18:46

13
ON
OFF
11.2011
DEU
BEDIENUNGSANLEITUNG
Dampfapparat für Bekleidungen
SWP.02E
SWP 02E_Instruction Manual.indd 13 12.12.2011 17:18:46

14
1. Lesen Sie bitte alle Anweisungen vor dem Gebrauch dieses Produktes durch.
2. Dieses Produkt nur in der Anleitung angegebene Weise verwenden. Sonstige
Verwendungsarten werden nicht empfohlen und können zum Brand oder
Stromschlag führen.
3. Dieses Produkt nicht ins Wasser oder andere Flüssigkeiten eintauchen; es kann zu
Stromschlag und Verletzungen führen.
4. Vor dem Kontakt mit jegliche Flüssigkeiten den Stecker aus der Steckdose ziehen.
Dazu gehört auch die Entleerung und Ausfüllung des Wassertanks.
5. Bei der Verwendung des Gerätes in der Umgebung von Kindern, müssen diese unter
nahe Aufsicht stehen.
6. Lassen Sie das Gerät während dem Betrieb nicht ohne Ausicht.
7. Dieses Gerät arbeitet unter Verwendung von hohe Temperaturen und Dampf, was zu
Hautverbrennungen führen kann. Seien Sie deshalb vorsichtig in der Umgebung des
Dampfkopfes.
8. Kontaktieren Sie nicht mit heissen Metallteilen, heisses Wasser oder Dampf, damit
Verbrennungen vermeiden werden können.
9. Nehmen Sie das Gerät nicht in Betrieb, bevor die Dampfmaschine und das
Wassbehälter ausgefüllt sind. Den Wasserspiegel vor der Inbetriebnahme des
Gerätes und während dem Betrieb immer überprüfen.
10. Lassen Sie den Schlauch nicht auf dem Boden liegen, rollen Sie diesen bei Bedarf
zusammen.
11. Kein direkter Dampf an Menschen und Tiere versprühen.
12. Geben Sie kein Dampf, wenn Sie die Kleidungsstücke an haben.
13. Geben Sie das Wasser nicht direkt in das Reservoir. Das Wasser nur in den
Wasserbehälter giessen.
14.Vor der Änderung der Anschlüsse des Dampfkopfes, das Gerät ausschalten und
abwarten bis es kalt wird, damit Verbrennungen vorgebeugt werden können.
15. Die Verwendung von Zubehörteilen oder Anschlüssen, die nicht SINGER Home
Essentials gehören, können zum Brand, Stromschlag oder Verbrennungen führen.
16. Stecken Sie niemals irgendwelche Gegenstände in den Tank oder Schlauch hinein.
17. Lassen Sie den Schlauch und den Dampfkopf über dem Tank stehen.
18. Geben Sie den Dampf nur mit senkrechten Bewegungen. Das Gerät niemals in
waagrechte Stellung benutzen.
19. Warten Sie mindestens 30 Minuten, damit das Gerät ganz abkühlt, entleeren Sie
anschliessend den Wassertank und den Wasserreservoir aus, bevor das Gerät an
den Platz gestellt wird.
20. Um das Gerät fortzubewegen, die teleskopische Stange festgreifen. Das Gerät nicht
beanspruchen, falls die Räder sich festgeklemmt haben. Vor der Überprüfung der
Räder das Gerät ausschalten und abwarten bis es abgekühlt ist, den Wassertank
und Wasserreservoir ausleeren.
21. Bei nicht Verwendung, Transport und Reinigung des Gerätes sollte der Stecker aus
der Steckdose gezogen werden.
22. Das Gerät oder irgendwelche Teile des Gerätes nicht in die Nähe von offenen
Flammen, Koch- und Heizgeräte stellen.
23.Das Produkt nicht in Betrieb setzen, wenn das Kabel beschädigt ist oder das Gerät
auf den Fussboden fällt oder beschädigt wird.
24. Die Dampfmaschine nicht herausnehmen, damit Stromschlag verhindert wird.
Schicken Sie das Gerät zum nächsten SINGER Kundendienst für Kontrolle und
Reparatur. Die wiederholte zusammenmontierung oder Reparatur des Gerätes in
fehlerhafte Form, kann zum Brand, Stromschlag oder Verletzungen führen.
25. In den Wassertank wird kein Reinigungsmittel gegeben, das kann zu
Beschädigungen des Gerätes führen. Es wird die Verwendung von pures Wasser
oder vollentsalztes Wasser empfohlen.
26. Das Gerät nur in geschlossenen Räumen verwenden.
SONDERANWEISUNGEN:
To avoid a circuit overload, do not operate another high-wattage appliance on the same
circuit. If an extension cord is absolutely necessary, a 15-amp cord should be used.
Cords rated with less amperage may overheat. Use care to arrange the cord so that it
cannot be pulled or tripped over.
BEWAHREN SIE DIESE ANWEISUNGEN GUT AUF.
NUR FÜR DEN GEBRAUCH INNERHALB DES HAUSES
WICHTIGE SICHERHEITSANWEISUNGEN
SWP 02E_Instruction Manual.indd 14 12.12.2011 17:18:47

15
DEU
Wir danken Ihnen, dass Sie dieses SINGER Home Essentials Produkt
gekauft haben. Wir sind seit über 150 Jahren in Haushalten überall
auf der Welt, um das Neu-Aussehen Ihrer Bekleidungen und Stoffe
mit hochwertigen und stabilen Geräten aufbewahren zu können.
TECHNISCHE EIGENSCHAFTEN: Spannung : 220-240V, ~50/60 Hz 1500 Watt
1. Griff
2. Dampfkopf
3. Halterung Dampfkopf
4. Bügelhaken für
Bekleidungen
5. Elastischer
wärmeundurchlässiger
Schlauch
6. Anschlussstück für den
Schlauch
7. Ein/Aus Taste
8. Entleerungsstöpsel
9. Schlauchboden
10. Stangenboden
11. Wassertank
12. Teleskopische Stange
13. Drehbarer Bügel
14. Stoffbürste
15. Pliseeverbindung
16. Kleiderklammer
17. Wasserreservoir
18. Radsystem
19. Stangenkalmmer
20. Ventilklappe
21. Stab der Kleiderklammer
22. Von Hand betätigte
Dampfplatte
23. Schutzhandschuh
24. Leistungsanzeigelict
12
1
2
4
5
7
13
6
10
3
19
16
9
11
14
15
18
16
17
8
20
21 22
23
24
LERNEN SIE IHR DAMPFGERÄT KENNEN
SWP 02E_Instruction Manual.indd 15 12.12.2011 17:18:48

16
Die Montage Ihres Dampfgeräts
•NehmenSiealleVerpackungenab.
•StellenSiedenBodendesDampfgerätesaufdenFussbodenund
nehmen Sie den Wassertank heraus.
•BringenSiedieteleskopischeStangeandenBodenderStangean
und drehen Sie den Ring in Uhrrichtung für die Verriegelung.
•MontierenSiedenBügelhakenderKleidungenaufdie
teleskopische Stange, wie im Bild gezeigt wird.
•StreckenSiedieteleskopischeStangeaus,indemdieKlammer
geöffnet und die Stange ganz ausgestreckt wird. Verriegeln Sie die
Klammer, um es befestigen zu können.
•BringenSiedenwärmeundurchlässigenSchlauchan,indem
der Schlauch über den Schlauchboden geschoben und um zu
verriegeln, 1/4 Drehung in Uhrichtung gedreht wird.
•HängenSiedenDampfkopfaufdenDampfkopfhalterungauf.
WARNUNG :
HÄNGEN SIE DEN DAMPFKOPF IMMER AUF SEINE HALTERUNG AUF,
DAMIT VERLETZUNGEN UND SCHÄDEN AUF DER OBERFLÄCHE
VERMIEDEN WERDEN.
VERGEWISSERN SIE SICH, DASS DIE TELESKOPISCHE STANGE
GANZ AUSGESTRECKT IST, DAMIT BEI DER VERWENDUNG EIN
GANZ ZARTER DAMPFABFLUSS ERZIELT WIRD.
ZIEHEN SIE DEN SCHLAUCH NICHT MIT GEWALT AN ODER
BEWEGEN SIE DAS GERÄT NICHT FORT, IN DEM DAS GERÄT VOM
SCHLAUCH GEZOGEN WIRD.
SIE KÖNNEN DADURCH SCHADEN ANRICHTEN ODER
VERLETZUNGEN VERURSACHEN.
MONTAGE
SWP 02E_Instruction Manual.indd 16 12.12.2011 17:18:49

17
DEU
Montage und Verwendung der Pliseeverbindung
•SchaltenSiedasDampfgerätaus.WartenSiesolangeab,biskein
Dampf aus dem Dampfkopf herauskommt und das Gerät abgekühlt
ist, so dass es angefasst werden kann.
•HängenSiedieRillederPliseeverbindungandieNägelunterdem
Dampfkopf auf.
•SchiebenSiediePliseeverbindunglangsamhereinbisesklickt.
•LegenSiedenStofffürdieVerwendungundPliseeherstellung
zwischen dem Dampfkopf und Pliseeverbindung hinein. Für die
Pressung der Plisee, den Dampfkopf mit senkrechten Bewegungen
bewegen.
Montage und Verwendung der Stoffbürste
•SchaltenSiedasDampfgerätaus.WartenSiesolangeab,biskein
Dampf aus dem Dampfkopf herauskommt und das Gerät abgekühlt
ist, so dass es angefasst werden kann.
•DieNägelderStoffbürsteindieLöcherdesDampfkopfeseinführen.
•MitDampfwieüblichbügeln,wobeidieStoffbürstefürdie
Beseitigung der hartnäckigen Falten verwendet wird.
SWP 02E_Instruction Manual.indd 17 12.12.2011 17:18:49

18
Zusammenfalten Der Bügelvorrichtung
•FixierenSiedieVorrichtungderDampfkopfhalterungandie
teleskopische Stange.
•BiegenSiedenHakenderDrehhalterungabundsteckenSieihn
in das Loch auf der ebene Seite der Dampfkopfhalterung hinein.
Drücken Sie leicht an um verriegeln zu können.
•ZiehenSiedenArmderDrehhalterungsolange,bisdieSeitenganz
ausgestreckt sind.
•VerriegelnSiedenwaagrechtenStab,indemdiePunkteaufdem
Stab gerichtet werden.
Montage Und Verwendung Der Klei derklammer
•SetzenSiedieKleiderklammeraufdieLöcherderwaagrechten
Stab der Faltbügel auf.
•BefestigenSiedenStabderKleiderklammerunterdieteleskopische
Stange.
•FürdieVerwendunghängenSiedieBekleidungaufdieobere
Klammer auf und befestigen mit den unteren Klammern. So können
Sie die Bekleidung straff für Dampfbügel oder Plisee halten.
WARNUNG : SCHALTEN SIE DAS DAMPFGERÄT BEIM ANBRINGEN
DER ZUBEHÖRTEILE IMMER AUS, DAMIT VERLETZUNGEN
VERHINDERT WERDEN.
SWP 02E_Instruction Manual.indd 18 12.12.2011 17:18:50
Other manuals for SteamWorks Pro
3
Table of contents
Languages:
Other Singer Steam Cleaner manuals

Singer
Singer ESP36T1 User manual

Singer
Singer SP-550 User manual

Singer
Singer SteamWorks Pro User manual

Singer
Singer SteamWorks Classic User manual

Singer
Singer SteamWorks Pro User manual

Singer
Singer SteamWorks Pro SWP User manual

Singer
Singer SG50 User manual

Singer
Singer Garment Steamer User manual

Singer
Singer SteamWorks Pro User manual
Popular Steam Cleaner manuals by other brands

Rowenta
Rowenta REF. 3460984 Instructions for use

emerio
emerio SB-130292.1 instruction manual

Sunbeam
Sunbeam GCSBES-100 owner's guide

Morphy Richards
Morphy Richards Multi Floors VC70465MUK instructions

Scarlett
Scarlett SC-GS130S05 instruction manual

OspreyFrank
OspreyFrank SteamForce SF Eco operating instructions