SINTERIT SANDBLASTER User manual

SINTERIT SANDBLASTER
USER MANUAL
Read the instruction manual before starting the device


1. Description of the Device:
Pressure indicator Air regulation Foot control Tee
Glove LED Filter
2

2. Specification:
Type
Manual
Warranty
12 months
TECHNICAL DATA
Dimensions
480 x 370 x 360 mm (18,9 x 14,5 x 14,1 in)
Weight
15 kg (33 lbs)
Working area
410 x 310 x 200 mm (16,1 x 12,2 x 7,9 in)
POWER
Power
6 W
Max. pressure
125 psi / 8.62 bar
Abrasive material container capacity
5,44 kg (12 lbs)
Input voltage
230 V / 50 Hz or 120 V / 60 Hz
Air consumption (suggested air compressor
parameter)
290 l / min
ABRASIVE MATERIAL
Glass balls
200 μm
PACKAGING
Size of package
500 x 500 x 500 mm (19,7 x 19,7 x 19,7 in)
Package weight
20 kg (44 lbs)
Package contain
Sandblaster and 4 kg (8.8 lbs) of abrasive
material
SAFETY
Certificates
CE, FCC
3. Assembly:
A. Connecting the power supply: Connect the power supply output to the sandblaster
socket.
3
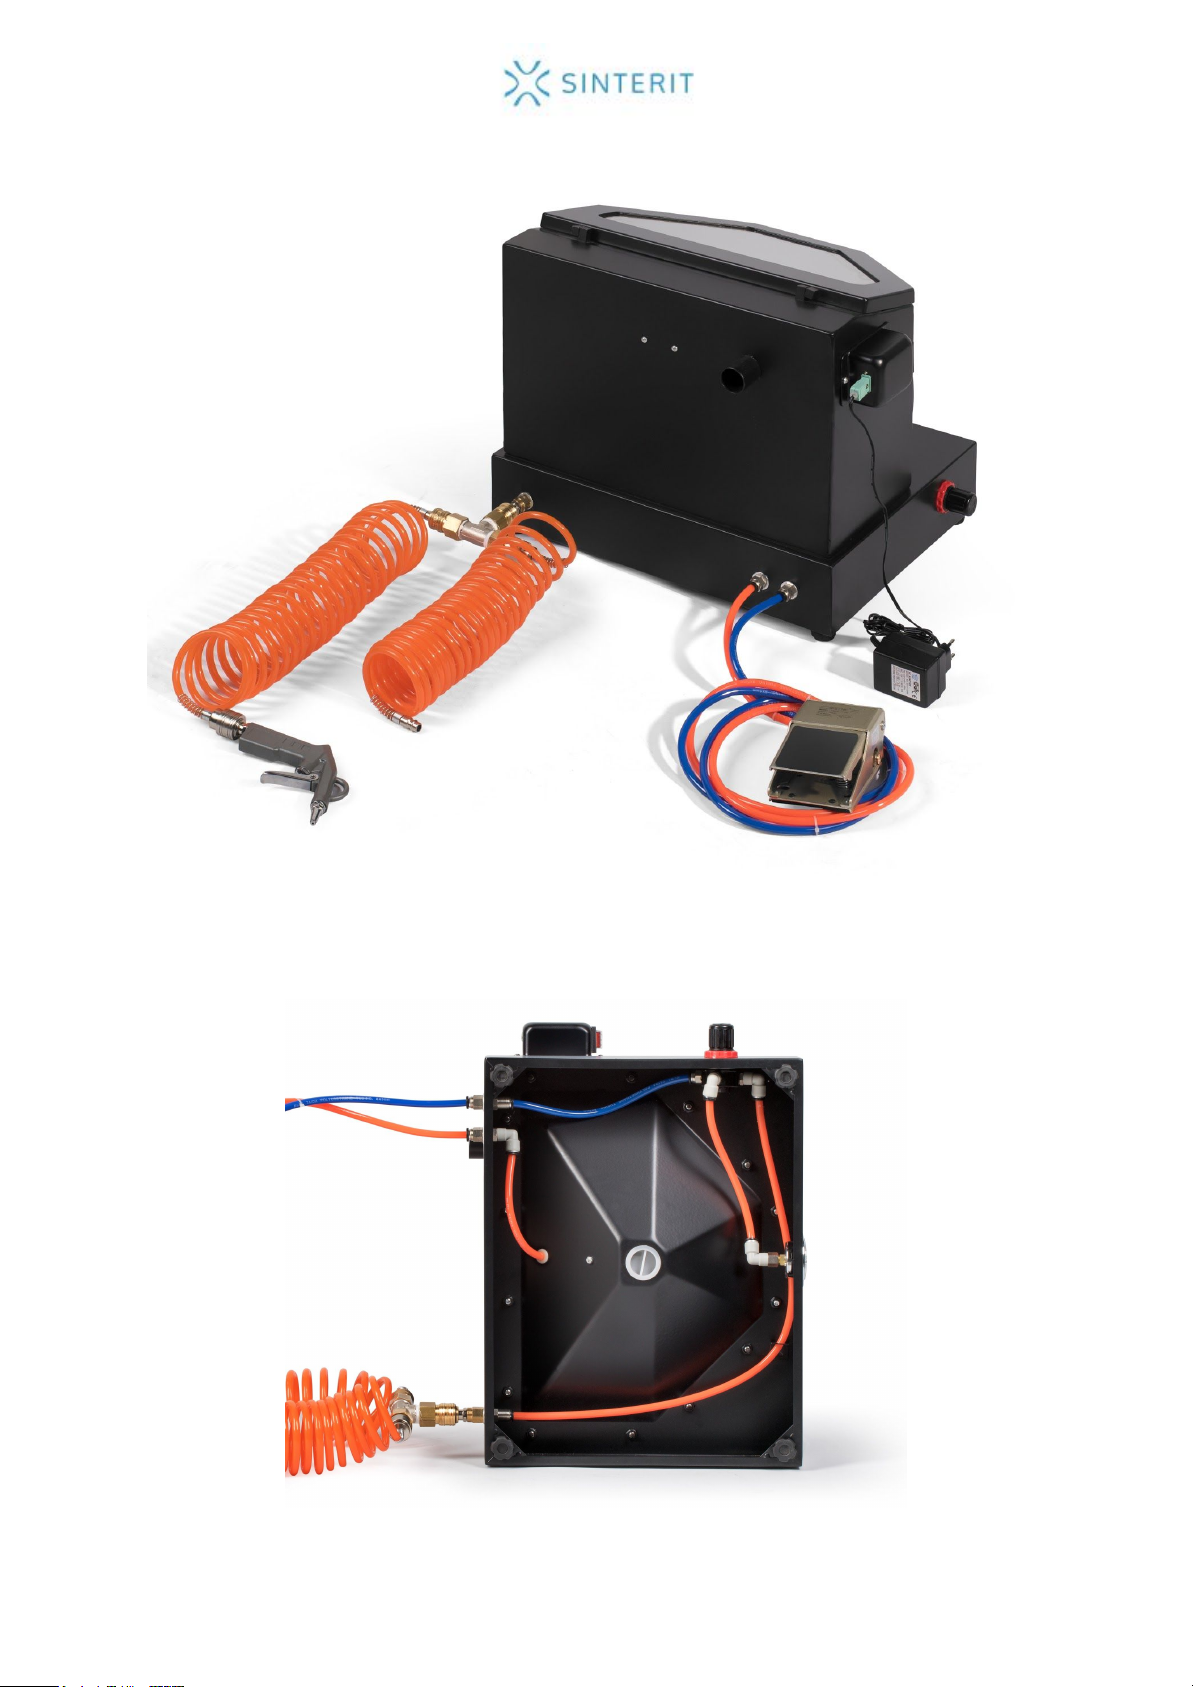
B. Connecting the foot control: Connect the control cable to the sandblaster. Pay attention
to the colours of the cables.
4
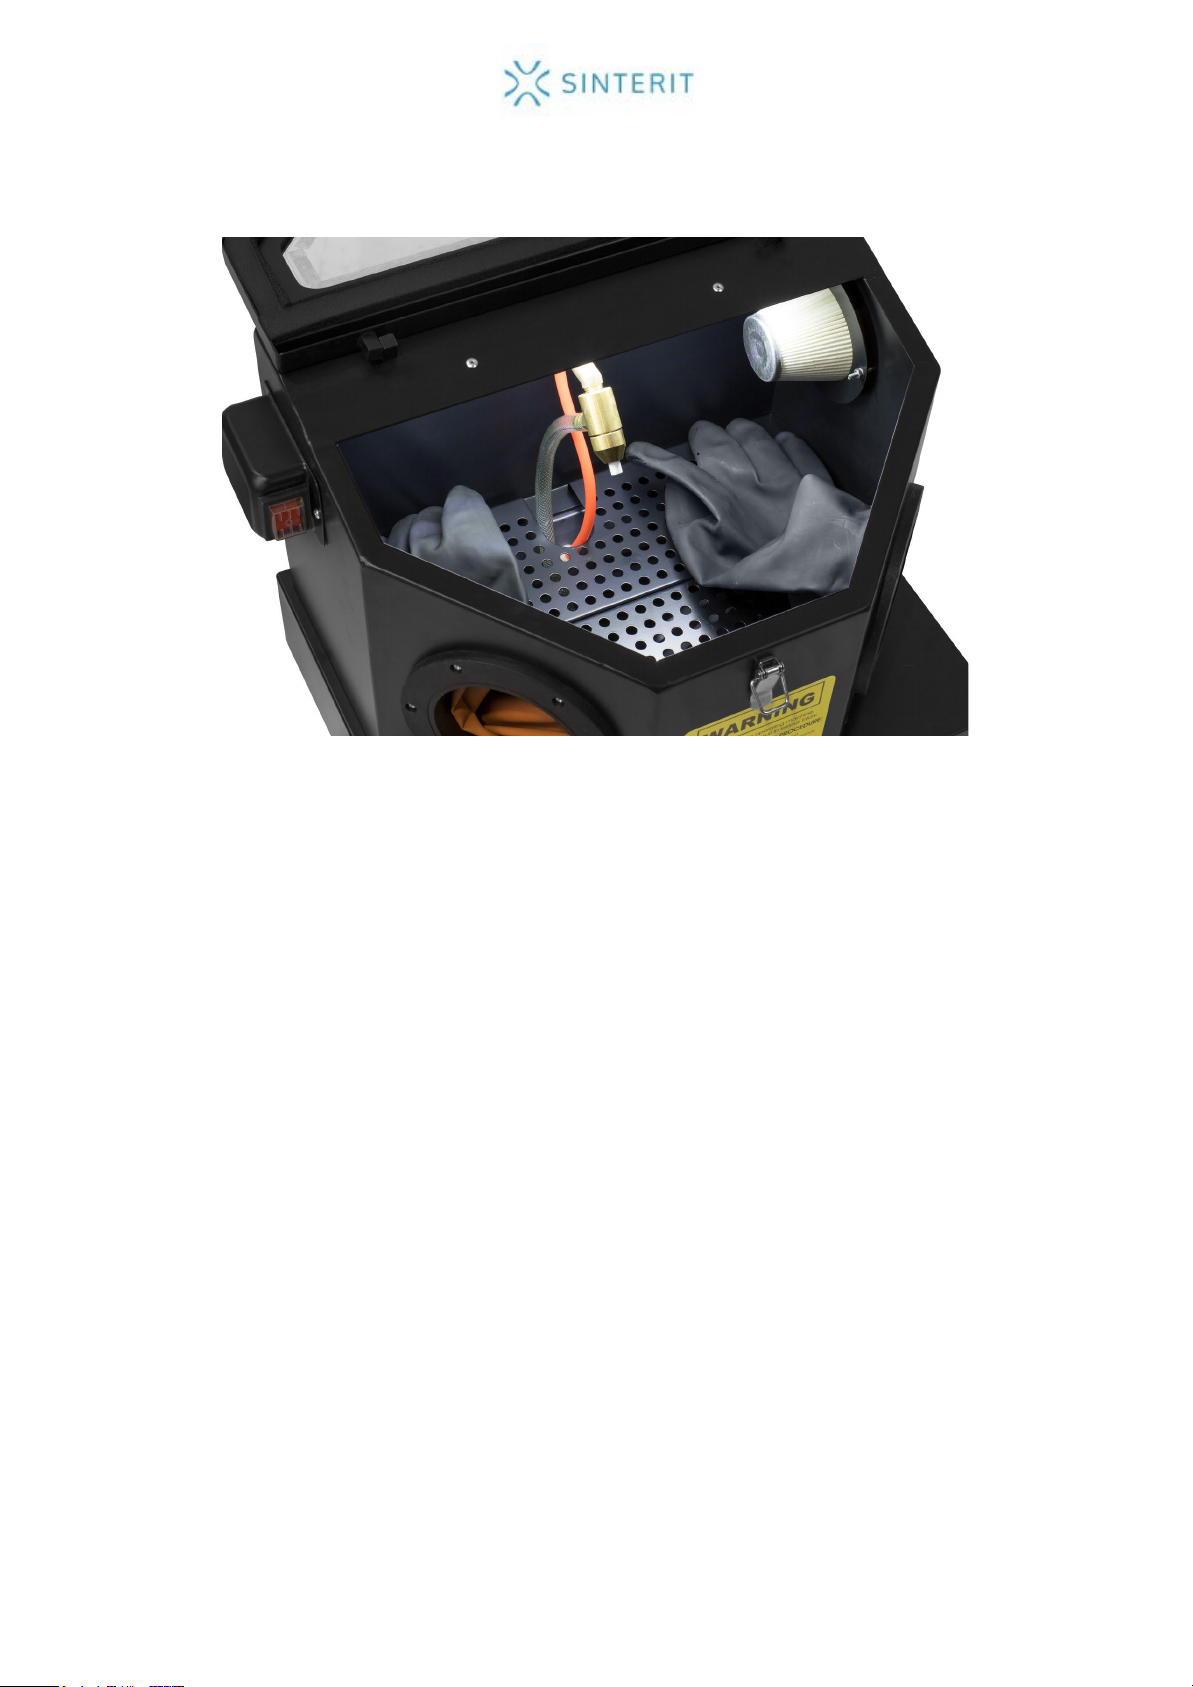
C. Placing the abrasive material in the sandblaster:
D. Adjusting the cleaning intensity:
Adjust the sandblasting intensity as appropriate, depending on the type of the object to be
cleaned. For solid, thick-walled objects, the pressure may be near the maximum (0.8MPa).
For objects with an openwork structure, it is recommended to lower the pressure to 0.6MPa.
If, despite lowering the pressure, the object becomes damaged, select a lower pressure
value empirically, as appropriate.
In order to adjust the cleaning intensity, unlock the regulating device by pulling the knob, and
use the readings of the pressure indicator to select an appropriate value. After performing the
adjustment, lock the regulating device by pushing the knob.
4. Usage:
Before supplying the sandblaster with air, follow the instructions below.
1. Place the sandblaster in the intended working place.
2. Connect the air supply (max. 115 psi) to the connector on the sandblaster side.
3. Check the integrity of all conduits. If there is any leakage, it must be repaired or
sealed with Teflon tape.
4. Connect the 12V power supply to the power socket. Check that the LED is working.
5

5. Stick the PE sheeting onto the inner surface of the glass. By default, the sheeting is
already affixed in the sandblaster.
6. Pour the box of the abrasive material provided into the sandblaster. When
replacing/replenishing the abrasive material, pour no more than 4.53kg. Too much
abrasive material will cause ineffective operation. When pouring the abrasive material
into the sandblaster, wear safety goggles.
7. Carefully close the sandblaster cover.
8. Put your hands into the protective gloves, place the object to be cleaned below the
nozzle
and begin cleaning by pressing the foot control.
9. Perform sandblasting with a continuous stream of air, moving the object in circular
motion.
10. In order to empty the sandblaster, remove the plastic plug from the bottom of the
device.
5. Maintenance:
Before performing maintenance of the device, disconnect the power and the air.
Clean the cover and parts of the sandblaster with soft cloth. Do not use solvents for
cleaning.
Avoid allowing moisture into the abrasive material, as it may cause clogging of the nozzle.
Attempt to remove such clogging with a drill.
6. Safety Information:
The sandblaster may create a powerful stream of abrasive particles. In order to avoid bodily
injury and/or property damage, carefully read the instruction manual before assembling,
operating or performing maintenance of the sandblaster.
CAUTION !
1. During operation, do not expose your skin or hands directly to the line of operation of
the sandblaster nozzle.
2. Check that all components of the sandblaster are properly sealed.
3. Do not exceed the maximum operating pressure of the sandblaster.
4. Before replacing the accessories or beginning the assembly, repair, transport, or any
form of maintenance, disconnect the sandblaster from the air container.
5. Check the quality of all hoses and pneumatic conduits before each use. Check that
all connections are secured.
6. Do not direct the nozzle at people or objects.
6
After each use of the sandblaster, wash your hands.
During the blowing and cleaning of printouts, dust may form.
Protect your eyes and airway. Wear protective clothing.
Fire and explosion hazard! Do not use the sandblaster
around flammable liquids, dusts, gases and other materials
that are flammable or may explode. Some abrasives may
create sparks upon contact with metal. Abrasive material
similar to aluminium oxide may generate sparks that will
cause fire or explosion in a hazardous environment.
Electrocution may be painful. Wear leather or rubber soles
or shoes and stand on the ground to avoid electrocution. An
earthed wire attached to the sandblaster gun will safely
remove electrostatic charges.
7

7. Problem Solving:
Fault symptoms
Possible causes
Remedial actions
Excessive dust in the
sandblaster
1. Blocked vent or airflow.
2. Leakage at the pneumatic
connections.
3. Too much abrasive material
in the sandblaster.
1. Clean the vent and keep it
away from the wall.
2. Tighten up the
connections and check
that they are all correct.
3. Remove the excessive
abrasive material.
Inconsistent effects of the
abrasive material.
1. Moisture in the sandblaster.
1. See the Safety
Information.
Incorrect speed or inefficient
sandblasting.
1. Abrasive material running
out.
2. Too low pressure.
1. Replace the abrasive
material.
2. Increase the inlet pressure
and check that the control
valve is fully open.
The nozzle does not turn off.
1. Incorrectly connected control
cable.
2. Lack of integrity in the
control cable.
Connect the control cable
properly.
Flow of abrasive is too weak
1. Nozzle is clogged.
1. Remove
the
Nozzle
and
clean
it
with
compressed
air
2.
install
it
back
Flow of abrasive is to week
and the Nozzle has been
cleaned.
1. Remove
the
Nozzle,
close
a
sandblaster
and
start
the
abrasive
flow.
2.
This
process
should
remove
every
object
that
is
in
line
duct
3.
Install
the
Nozzle
back
8
Other manuals for SANDBLASTER
1
Table of contents
Other SINTERIT 3D Printer manuals

SINTERIT
SINTERIT Lisa X Installation and operating instructions

SINTERIT
SINTERIT LISA User manual

SINTERIT
SINTERIT LISA User manual

SINTERIT
SINTERIT LISA User manual

SINTERIT
SINTERIT Lisa Pro User manual

SINTERIT
SINTERIT Lisa Pro User manual

SINTERIT
SINTERIT LISA User manual

SINTERIT
SINTERIT Lisa X Installation and operating instructions

SINTERIT
SINTERIT LISA User manual

SINTERIT
SINTERIT Lisa X User manual


