manuals.online logo
Brands
  1. Home
  2. •
  3. Brands
  4. •
  5. Sirius Range Hoods
  6. •
  7. Ventilation Hood
  8. •
  9. Sirius Range Hoods S900 Quick start guide

Sirius Range Hoods S900 Quick start guide




󲵅

INFORMAZIONI COMMERCIALI PER I CONSUMATORI
COMMERCIAL INFORMATION FOR THE CONSUMER
INFORMATIONS COMMERCIALES POUR LE CLIENT
INFORMACIONES COMERCIALES PARA EL CLIENTE
HANDELSINFORMATIONEN FÜR DEN KUNDEN
COMMERCIËLE INFORMATIES VOOR DE KLANT
ISTRUZIONI PER L’USO S-DD3
INSTRUCTIONS FOR USE S-DD3
INSTRUCTIONS POUR L’EMPLOI S-DD3
ISTRUCCIÓNES DE USO S-DD3
BEDIENUNGSANLEITUNG S-DD3
GEBRUIKSAANWIJZIGING S-DD3
IT
EN
FR
ES
DE
NL
INFORMAZIONI TECNICHE
TECHNICAL INFORMATION
INFORMATION TECHNIQUES
INFORMACIONES TÉCNICAS
TECHNISCHE INFORMATIONEN
TECHNISCHE INFORMATIES
TYPE: FSEE
2
 
󲵃
󲵃
󲵅󲵃
󲵃󲵃
   󲵃    

󲵃󲵅󲵃



3






4

󲵃
󲵃


󲵃

 󲵃  󲵃  

󲵃

 󲵃  󲵃

󲵃
󲵃

󲵃
   

  󲵃󲵃     

󲵃
 󲵃  
 󲵃  󲵅󲵃 
   
  󲵅 󲵃 

 󲵃  
    󲵃

   󲵅 
     
󲵃

󲵃
󲵃󲵃


󲵃
 󲵃 󲵃 
 󲵃  

󲵃
󲵃
 

󲵃
      

  󲵃 


󲵃



   󲵃  
     󲵃


 󲵃   

󲵃

    
     
     


   
    
󲵃󲵅

     
    
 󲵃  󲵅 
󲵅󲵃
    
    

5

  󲵃  󲵅
󲵃󲵃󲵅

󲵃  󲵅󲵃 
󲵃
󲵅󲵃󲵅󲵃


󲵃      
󲵃

󲵃
󲵃󲵅󲵃


󲵃
󲵃


󲵃

 󲵃  󲵃  

󲵃

 󲵃  󲵃

  󲵃  
    󲵃 

    󲵃 
󲵅󲵃󲵃
󲵅󲵃
 󲵃     
󲵅󲵃

󲵃󲵃󲵃
󲵅


󲵃󲵃

󲵅󲵃󲵃
󲵃

󲵃




    󲵃  



     



󲵃󲵃
󲵃

󲵃
  󲵃  󲵃 󲵃 
󲵃
󲵃  󲵃  󲵃 


󲵃󲵅󲵃
󲵃
󲵃


6


󲵃
󲵃󲵃󲵅

󲵅
 
 
 
 
󲵃 °~°
 
󲵃
󲵃󲵃




󲵃

󲵃



 󲵃    
󲵃
   
     
  󲵅   
󲵅
 
󲵅󲵃
    󲵃  


󲵃
󲵅      
󲵃  
󲵃

󲵃
     
󲵅

󲵅


󲵃󲵃

󲵃
    󲵃 
󲵃󲵃

13
WORKING
OPERATION
M
O
D
E
Standard con
fii
gu
r
a
tii
on:
Standard configuration requires all “cooker hoods
–
radio control
-
system”
to
be provided with the same
transmission code.
In
the event two cooker hoods
–
radio control system are installed
in
the same
room
or
nearby, each system may affect the operation
of
the another. Therefore, the code
of
one radio
control
system must be
changed.
Generatiing a new transmiissiion
cod
e
:
The
radio control
system
is
provided
with
preset
codes. Should new codes
be
required, proceed
as
follows: Press simultaneously
buttons:
for
two seconds. When Leds light on, press buttons:
(within 5
seconds). Leds flashing
3
times indicate
the procedure
is
completed.
W
ARN
I
N
G
!
This operation deletes permanently
the
preset
codes.
RC001
GB
R
ADIO
C
O
N
T
R
O
L
Radio control used
for
the remote operation
of duct-
ed cooker
hoods.
T
ECHNIICAL
DA
T
A
-
Alkaline battery
powered :
12 V mod. 23 A
-
Operating
frequency :
433.92
Mhz
- Combinations : 32.768
-
Max.
consumption :
25
mA
-
Operating
temperature :
-20
÷ +
55
°C
- Dimensions :
120
x
45
x
15
mm.
O
PERATIING
D
E
S
C
R
II
P
T
II
O
N
The transmitter
is
equipped with
5
buttons
for cook-
er hood management, as specified
below:
:
Light ON/OFF
command.
:
Motor ON (speed level
1) /
OFF
command.
:
Reduce
speed.
:
Increase
speed.
:
10-minute
timer.
I
NIITIIAL
O
PERATIING
CO
ND
II
T
II
O
N
The manufacturer supplies
the radio control unit
ready
to
be used with codes preset
in
the
Factory.
Learniing the new transmiissiion cod
e
:
Once the transmission code
is
changed
in
the
radio
control unit, the electronic central unit
of
the cooker
hood must be made
to
set the new code
in
the
fol-
lowing
way:
Press
the main
power-off button
of the hood and
then
restore
power to the
electronic
control unit.
Within the next
15
seconds, press the Liight
Button
to
synchronise the central unit with the
code.
Reset
of
the Factory
con
fii
gu
r
a
tii
on:
To restore the Factory configuration, follow the
pro-
cedure described below: press simultaneously
but-
tons
for 2
seconds. When Leds light on, press buttons
(within 5
seconds). Leds flashing
6
times indicate
the procedure
is completed.
W
ARN
I
N
G
!
This operation deletes permanently
the
preset
codes.
Emergency
bu
tt
on:
In the event that the radio control does not work,
use
the
emergency button
to
switch
the
appliance
off.
After any
necessary repairs have been performed,
reset the emergency
button.
W
ARN
II
N
G
The battery should be replaced every year
to guar-
antee the optimal range
of
the
transmitter.
To
replace
the
exhausted battery, take
the
plastic
lid
off, remove the battery and replace
it
with a
new
one, observing the correct battery
polarities.
Used batteries should be discarded
in
special
col-
lection
bins.
The
below product:
RC001
Radiio
C
on
tr
o
ll
complies
with the
specifications
set out in the
R&TTE Directive 99/5/EC.
W
ARN
I
N
G
Any adjustments
or
modifications which have
not
been expressly approved by the holder
of
the
legal
conformity
certificate
may
invalidate
the
user’s
rights relating
to
the operation
of
the
device.
Rev. 0 2 6 /08/14
OPERATION
M
O
D
E
Standard con
fii
gu
r
a
tii
on:
Standard configuration requires all “cooker hoods
–
radio control
-
system”
to
be provided with the same
transmission code.
In
the event two cooker hoods
–
radio control system are installed
in
the same
room
or
nearby, each system may affect the operation
of
the another. Therefore, the code
of
one radio
control
system must be
changed.
Generatiing a new transmiissiion
cod
e
:
The
radio control
system
is
provided
with
preset
codes. Should new codes
be
required, proceed
as
follows: Press simultaneously
buttons:
for
two seconds. When Leds light on, press buttons:
(within 5
seconds). Leds flashing
3
times indicate
the procedure
is
completed.
W
ARN
I
N
G
!
This operation deletes permanently
the
preset
codes.



     

󲵃

󲵃
     
󲵅
󲵅


  󲵃  󲵅 
     
  󲵃   

13
WORKING
OPERATION
M
O
D
E
Standard con
fii
gu
r
a
tii
on:
Standard configuration requires all “cooker hoods
–
radio control
-
system”
to
be provided with the same
transmission code.
In
the event two cooker hoods
–
radio control system are installed
in
the same
room
or
nearby, each system may affect the operation
of
the another. Therefore, the code
of
one radio
control
system must be
changed.
Generatiing a new transmiissiion
cod
e
:
The
radio control
system
is
provided
with
preset
codes. Should new codes
be
required, proceed
as
follows: Press simultaneously
buttons:
for
two seconds. When Leds light on, press buttons:
(within 5
seconds). Leds flashing
3
times indicate
the procedure
is
completed.
W
ARN
I
N
G
!
This operation deletes permanently
the
preset
codes.
RC001
GB
R
ADIO
C
O
N
T
R
O
L
Radio control used
for
the remote operation
of duct-
ed cooker
hoods.
T
ECHNIICAL
DA
T
A
-
Alkaline battery
powered :
12 V mod. 23 A
-
Operating
frequency :
433.92
Mhz
- Combinations : 32.768
-
Max.
consumption :
25
mA
-
Operating
temperature :
-20
÷ +
55
°C
- Dimensions :
120
x
45
x
15
mm.
O
PERATIING
D
E
S
C
R
II
P
T
II
O
N
The transmitter
is
equipped with
5
buttons
for cook-
er hood management, as specified
below:
:
Light ON/OFF
command.
:
Motor ON (speed level
1) /
OFF
command.
:
Reduce
speed.
:
Increase
speed.
:
10-minute
timer.
I
NIITIIAL
O
PERATIING
CO
ND
II
T
II
O
N
The manufacturer supplies
the radio control unit
ready
to
be used with codes preset
in
the
Factory.
Learniing the new transmiissiion cod
e
:
Once the transmission code
is
changed
in
the
radio
control unit, the electronic central unit
of
the cooker
hood must be made
to
set the new code
in
the
fol-
lowing
way:
Press
the main
power-off button
of the hood and
then
restore
power to the
electronic
control unit.
Within the next
15
seconds, press the Liight
Button
to
synchronise the central unit with the
code.
Reset
of
the Factory
con
fii
gu
r
a
tii
on:
To restore the Factory configuration, follow the
pro-
cedure described below: press simultaneously
but-
tons
for 2
seconds. When Leds light on, press buttons
(within 5
seconds). Leds flashing
6
times indicate
the procedure
is completed.
W
ARN
I
N
G
!
This operation deletes permanently
the
preset
codes.
Emergency
bu
tt
on:
In the event that the radio control does not work,
use
the
emergency button
to
switch
the
appliance
off.
After any
necessary repairs have been performed,
reset the emergency
button.
W
ARN
II
N
G
The battery should be replaced every year
to guar-
antee the optimal range
of
the
transmitter.
To
replace
the
exhausted battery, take
the
plastic
lid
off, remove the battery and replace
it
with a
new
one, observing the correct battery
polarities.
Used batteries should be discarded
in
special
col-
lection
bins.
The
below product:
RC001
Radiio
C
on
tr
o
ll
complies
with the
specifications
set out in the
R&TTE Directive 99/5/EC.
W
ARN
I
N
G
Any adjustments
or
modifications which have
not
been expressly approved by the holder
of
the
legal
conformity
certificate
may
invalidate
the
user’s
rights relating
to
the operation
of
the
device.
Rev. 0 2 6 /08/14
OPERATION
M
O
D
E
Standard con
fii
gu
r
a
tii
on:
Standard configuration requires all “cooker hoods
–
radio control
-
system”
to
be provided with the same
transmission code.
In
the event two cooker hoods
–
radio control system are installed
in
the same
room
or
nearby, each system may affect the operation
of
the another. Therefore, the code
of
one radio
control
system must be
changed.
Generatiing a new transmiissiion
cod
e
:
The
radio control
system
is
provided
with
preset
codes. Should new codes
be
required, proceed
as
follows: Press simultaneously
buttons:
for
two seconds. When Leds light on, press buttons:
(within 5
seconds). Leds flashing
3
times indicate
the procedure
is
completed.
W
ARN
I
N
G
!
This operation deletes permanently
the
preset
codes.
13
WORKING
OPERATION
M
O
D
E
Standard con
fii
gu
r
a
tii
on:
Standard configuration requires all “cooker hoods
–
radio control
-
system”
to
be provided with the same
transmission code.
In
the event two cooker hoods
–
radio control system are installed
in
the same
room
or
nearby, each system may affect the operation
of
the another. Therefore, the code
of
one radio
control
system must be
changed.
Generatiing a new transmiissiion
cod
e
:
The
radio control
system
is
provided
with
preset
codes. Should new codes
be
required, proceed
as
follows: Press simultaneously
buttons:
for
two seconds. When Leds light on, press buttons:
(within 5
seconds). Leds flashing
3
times indicate
the procedure
is
completed.
W
ARN
I
N
G
!
This operation deletes permanently
the
preset
codes.
RC001
GB
R
ADIO
C
O
N
T
R
O
L
Radio control used
for
the remote operation
of duct-
ed cooker
hoods.
T
ECHNIICAL
DA
T
A
-
Alkaline battery
powered :
12 V mod. 23 A
-
Operating
frequency :
433.92
Mhz
- Combinations : 32.768
-
Max.
consumption :
25
mA
-
Operating
temperature :
-20
÷ +
55
°C
- Dimensions :
120
x
45
x
15
mm.
O
PERATIING
D
E
S
C
R
II
P
T
II
O
N
The transmitter
is
equipped with
5
buttons
for cook-
er hood management, as specified
below:
:
Light ON/OFF
command.
:
Motor ON (speed level
1) /
OFF
command.
:
Reduce
speed.
:
Increase
speed.
:
10-minute
timer.
I
NIITIIAL
O
PERATIING
CO
ND
II
T
II
O
N
The manufacturer supplies
the radio control unit
ready
to
be used with codes preset
in
the
Factory.
Learniing the new transmiissiion cod
e
:
Once the transmission code
is
changed
in
the
radio
control unit, the electronic central unit
of
the cooker
hood must be made
to
set the new code
in
the
fol-
lowing
way:
Press
the main
power-off button
of the hood and
then
restore
power to the
electronic
control unit.
Within the next
15
seconds, press the Liight
Button
to
synchronise the central unit with the
code.
Reset
of
the Factory
con
fii
gu
r
a
tii
on:
To restore the Factory configuration, follow the
pro-
cedure described below: press simultaneously
but-
tons
for 2
seconds. When Leds light on, press buttons
(within 5
seconds). Leds flashing
6
times indicate
the procedure
is completed.
W
ARN
I
N
G
!
This operation deletes permanently
the
preset
codes.
Emergency
bu
tt
on:
In the event that the radio control does not work,
use
the
emergency button
to
switch
the
appliance
off.
After any
necessary repairs have been performed,
reset the emergency
button.
W
ARN
II
N
G
The battery should be replaced every year
to guar-
antee the optimal range
of
the
transmitter.
To
replace
the
exhausted battery, take
the
plastic
lid
off, remove the battery and replace
it
with a
new
one, observing the correct battery
polarities.
Used batteries should be discarded
in
special
col-
lection
bins.
The
below product:
RC001
Radiio
C
on
tr
o
ll
complies
with the
specifications
set out in the
R&TTE Directive 99/5/EC.
W
ARN
I
N
G
Any adjustments
or
modifications which have
not
been expressly approved by the holder
of
the
legal
conformity
certificate
may
invalidate
the
user’s
rights relating
to
the operation
of
the
device.
Rev. 0 2 6 /08/14
OPERATION
M
O
D
E
Standard con
fii
gu
r
a
tii
on:
Standard configuration requires all “cooker hoods
–
radio control
-
system”
to
be provided with the same
transmission code.
In
the event two cooker hoods
–
radio control system are installed
in
the same
room
or
nearby, each system may affect the operation
of
the another. Therefore, the code
of
one radio
control
system must be
changed.
Generatiing a new transmiissiion
cod
e
:
The
radio control
system
is
provided
with
preset
codes. Should new codes
be
required, proceed
as
follows: Press simultaneously
buttons:
for
two seconds. When Leds light on, press buttons:
(within 5
seconds). Leds flashing
3
times indicate
the procedure
is
completed.
W
ARN
I
N
G
!
This operation deletes permanently
the
preset
codes.
13
WORKING
OPERATION
M
O
D
E
Standard con
fii
gu
r
a
tii
on:
Standard configuration requires all “cooker hoods
–
radio control
-
system”
to
be provided with the same
transmission code.
In
the event two cooker hoods
–
radio control system are installed
in
the same
room
or
nearby, each system may affect the operation
of
the another. Therefore, the code
of
one radio
control
system must be
changed.
Generatiing a new transmiissiion
cod
e
:
The
radio control
system
is
provided
with
preset
codes. Should new codes
be
required, proceed
as
follows: Press simultaneously
buttons:
for
two seconds. When Leds light on, press buttons:
(within 5
seconds). Leds flashing
3
times indicate
the procedure
is
completed.
W
ARN
I
N
G
!
This operation deletes permanently
the
preset
codes.
RC001
GB
R
ADIO
C
O
N
T
R
O
L
Radio control used
for
the remote operation
of duct-
ed cooker
hoods.
T
ECHNIICAL
DA
T
A
-
Alkaline battery
powered :
12 V mod. 23 A
-
Operating
frequency :
433.92
Mhz
- Combinations : 32.768
-
Max.
consumption :
25
mA
-
Operating
temperature :
-20
÷ +
55
°C
- Dimensions :
120
x
45
x
15
mm.
O
PERATIING
D
E
S
C
R
II
P
T
II
O
N
The transmitter
is
equipped with
5
buttons
for cook-
er hood management, as specified
below:
:
Light ON/OFF
command.
:
Motor ON (speed level
1) /
OFF
command.
:
Reduce
speed.
:
Increase
speed.
:
10-minute
timer.
I
NIITIIAL
O
PERATIING
CO
ND
II
T
II
O
N
The manufacturer supplies
the radio control unit
ready
to
be used with codes preset
in
the
Factory.
Learniing the new transmiissiion cod
e
:
Once the transmission code
is
changed
in
the
radio
control unit, the electronic central unit
of
the cooker
hood must be made
to
set the new code
in
the
fol-
lowing
way:
Press
the main
power-off button
of the hood and
then
restore
power to the
electronic
control unit.
Within the next
15
seconds, press the Liight
Button
to
synchronise the central unit with the
code.
Reset
of
the Factory
con
fii
gu
r
a
tii
on:
To restore the Factory configuration, follow the
pro-
cedure described below: press simultaneously
but-
tons
for 2
seconds. When Leds light on, press buttons
(within 5
seconds). Leds flashing
6
times indicate
the procedure
is completed.
W
ARN
I
N
G
!
This operation deletes permanently
the
preset
codes.
Emergency
bu
tt
on:
In the event that the radio control does not work,
use
the
emergency button
to
switch
the
appliance
off.
After any
necessary repairs have been performed,
reset the emergency
button.
W
ARN
II
N
G
The battery should be replaced every year
to guar-
antee the optimal range
of
the
transmitter.
To
replace
the
exhausted battery, take
the
plastic
lid
off, remove the battery and replace
it
with a
new
one, observing the correct battery
polarities.
Used batteries should be discarded
in
special
col-
lection
bins.
The
below product:
RC001
Radiio
C
on
tr
o
ll
complies
with the
specifications
set out in the
R&TTE Directive 99/5/EC.
W
ARN
I
N
G
Any adjustments
or
modifications which have
not
been expressly approved by the holder
of
the
legal
conformity
certificate
may
invalidate
the
user’s
rights relating
to
the operation
of
the
device.
Rev. 0 2 6 /08/14
OPERATION
M
O
D
E
Standard con
fii
gu
r
a
tii
on:
Standard configuration requires all “cooker hoods
–
radio control
-
system”
to
be provided with the same
transmission code.
In
the event two cooker hoods
–
radio control system are installed
in
the same
room
or
nearby, each system may affect the operation
of
the another. Therefore, the code
of
one radio
control
system must be
changed.
Generatiing a new transmiissiion
cod
e
:
The
radio control
system
is
provided
with
preset
codes. Should new codes
be
required, proceed
as
follows: Press simultaneously
buttons:
for
two seconds. When Leds light on, press buttons:
(within 5
seconds). Leds flashing
3
times indicate
the procedure
is
completed.
W
ARN
I
N
G
!
This operation deletes permanently
the
preset
codes.
13
WORKING
OPERATION
M
O
D
E
Standard con
fii
gu
r
a
tii
on:
Standard configuration requires all “cooker hoods
–
radio control
-
system”
to
be provided with the same
transmission code.
In
the event two cooker hoods
–
radio control system are installed
in
the same
room
or
nearby, each system may affect the operation
of
the another. Therefore, the code
of
one radio
control
system must be
changed.
Generatiing a new transmiissiion
cod
e
:
The
radio control
system
is
provided
with
preset
codes. Should new codes
be
required, proceed
as
follows: Press simultaneously
buttons:
for
two seconds. When Leds light on, press buttons:
(within 5
seconds). Leds flashing
3
times indicate
the procedure
is
completed.
W
ARN
I
N
G
!
This operation deletes permanently
the
preset
codes.
RC001
GB
R
ADIO
C
O
N
T
R
O
L
Radio control used
for
the remote operation
of duct-
ed cooker
hoods.
T
ECHNIICAL
DA
T
A
-
Alkaline battery
powered :
12 V mod. 23 A
-
Operating
frequency :
433.92
Mhz
- Combinations : 32.768
-
Max.
consumption :
25
mA
-
Operating
temperature :
-20
÷ +
55
°C
- Dimensions :
120
x
45
x
15
mm.
O
PERATIING
D
E
S
C
R
II
P
T
II
O
N
The transmitter
is
equipped with
5
buttons
for cook-
er hood management, as specified
below:
:
Light ON/OFF
command.
:
Motor ON (speed level
1) /
OFF
command.
:
Reduce
speed.
:
Increase
speed.
:
10-minute
timer.
I
NIITIIAL
O
PERATIING
CO
ND
II
T
II
O
N
The manufacturer supplies
the radio control unit
ready
to
be used with codes preset
in
the
Factory.
Learniing the new transmiissiion cod
e
:
Once the transmission code
is
changed
in
the
radio
control unit, the electronic central unit
of
the cooker
hood must be made
to
set the new code
in
the
fol-
lowing
way:
Press
the main
power-off button
of the hood and
then
restore
power to the
electronic
control unit.
Within the next
15
seconds, press the Liight
Button
to
synchronise the central unit with the
code.
Reset
of
the Factory
con
fii
gu
r
a
tii
on:
To restore the Factory configuration, follow the
pro-
cedure described below: press simultaneously
but-
tons
for 2
seconds. When Leds light on, press buttons
(within 5
seconds). Leds flashing
6
times indicate
the procedure
is completed.
W
ARN
I
N
G
!
This operation deletes permanently
the
preset
codes.
Emergency
bu
tt
on:
In the event that the radio control does not work,
use
the
emergency button
to
switch
the
appliance
off.
After any
necessary repairs have been performed,
reset the emergency
button.
W
ARN
II
N
G
The battery should be replaced every year
to guar-
antee the optimal range
of
the
transmitter.
To
replace
the
exhausted battery, take
the
plastic
lid
off, remove the battery and replace
it
with a
new
one, observing the correct battery
polarities.
Used batteries should be discarded
in
special
col-
lection
bins.
The
below product:
RC001
Radiio
C
on
tr
o
ll
complies
with the
specifications
set out in the
R&TTE Directive 99/5/EC.
W
ARN
I
N
G
Any adjustments
or
modifications which have
not
been expressly approved by the holder
of
the
legal
conformity
certificate
may
invalidate
the
user’s
rights relating
to
the operation
of
the
device.
Rev. 0 2 6 /08/14
OPERATION
M
O
D
E
Standard con
fii
gu
r
a
tii
on:
Standard configuration requires all “cooker hoods
–
radio control
-
system”
to
be provided with the same
transmission code.
In
the event two cooker hoods
–
radio control system are installed
in
the same
room
or
nearby, each system may affect the operation
of
the another. Therefore, the code
of
one radio
control
system must be
changed.
Generatiing a new transmiissiion
cod
e
:
The
radio control
system
is
provided
with
preset
codes. Should new codes
be
required, proceed
as
follows: Press simultaneously
buttons:
for
two seconds. When Leds light on, press buttons:
(within 5
seconds). Leds flashing
3
times indicate
the procedure
is
completed.
W
ARN
I
N
G
!
This operation deletes permanently
the
preset
codes.
13
WORKING
OPERATION
M
O
D
E
Standard con
fii
gu
r
a
tii
on:
Standard configuration requires all “cooker hoods
–
radio control
-
system”
to
be provided with the same
transmission code.
In
the event two cooker hoods
–
radio control system are installed
in
the same
room
or
nearby, each system may affect the operation
of
the another. Therefore, the code
of
one radio
control
system must be
changed.
Generatiing a new transmiissiion
cod
e
:
The
radio control
system
is
provided
with
preset
codes. Should new codes
be
required, proceed
as
follows: Press simultaneously
buttons:
for
two seconds. When Leds light on, press buttons:
(within 5
seconds). Leds flashing
3
times indicate
the procedure
is
completed.
W
ARN
I
N
G
!
This operation deletes permanently
the
preset
codes.
RC001
GB
R
ADIO
C
O
N
T
R
O
L
Radio control used
for
the remote operation
of duct-
ed cooker
hoods.
T
ECHNIICAL
DA
T
A
-
Alkaline battery
powered :
12 V mod. 23 A
-
Operating
frequency :
433.92
Mhz
- Combinations : 32.768
-
Max.
consumption :
25
mA
-
Operating
temperature :
-20
÷ +
55
°C
- Dimensions :
120
x
45
x
15
mm.
O
PERATIING
D
E
S
C
R
II
P
T
II
O
N
The transmitter
is
equipped with
5
buttons
for cook-
er hood management, as specified
below:
:
Light ON/OFF
command.
:
Motor ON (speed level
1) /
OFF
command.
:
Reduce
speed.
:
Increase
speed.
:
10-minute
timer.
I
NIITIIAL
O
PERATIING
CO
ND
II
T
II
O
N
The manufacturer supplies
the radio control unit
ready
to
be used with codes preset
in
the
Factory.
Learniing the new transmiissiion cod
e
:
Once the transmission code
is
changed
in
the
radio
control unit, the electronic central unit
of
the cooker
hood must be made
to
set the new code
in
the
fol-
lowing
way:
Press
the main
power-off button
of the hood and
then
restore
power to the
electronic
control unit.
Within the next
15
seconds, press the Liight
Button
to
synchronise the central unit with the
code.
Reset
of
the Factory
con
fii
gu
r
a
tii
on:
To restore the Factory configuration, follow the
pro-
cedure described below: press simultaneously
but-
tons
for 2
seconds. When Leds light on, press buttons
(within 5
seconds). Leds flashing
6
times indicate
the procedure
is completed.
W
ARN
I
N
G
!
This operation deletes permanently
the
preset
codes.
Emergency
bu
tt
on:
In the event that the radio control does not work,
use
the
emergency button
to
switch
the
appliance
off.
After any
necessary repairs have been performed,
reset the emergency
button.
W
ARN
II
N
G
The battery should be replaced every year
to guar-
antee the optimal range
of
the
transmitter.
To
replace
the
exhausted battery, take
the
plastic
lid
off, remove the battery and replace
it
with a
new
one, observing the correct battery
polarities.
Used batteries should be discarded
in
special
col-
lection
bins.
The
below product:
RC001
Radiio
C
on
tr
o
ll
complies
with the
specifications
set out in the
R&TTE Directive 99/5/EC.
W
ARN
I
N
G
Any adjustments
or
modifications which have
not
been expressly approved by the holder
of
the
legal
conformity
certificate
may
invalidate
the
user’s
rights relating
to
the operation
of
the
device.
Rev. 0 2 6 /08/14
OPERATION
M
O
D
E
Standard con
fii
gu
r
a
tii
on:
Standard configuration requires all “cooker hoods
–
radio control
-
system”
to
be provided with the same
transmission code.
In
the event two cooker hoods
–
radio control system are installed
in
the same
room
or
nearby, each system may affect the operation
of
the another. Therefore, the code
of
one radio
control
system must be
changed.
Generatiing a new transmiissiion
cod
e
:
The
radio control
system
is
provided
with
preset
codes. Should new codes
be
required, proceed
as
follows: Press simultaneously
buttons:
for
two seconds. When Leds light on, press buttons:
(within 5
seconds). Leds flashing
3
times indicate
the procedure
is
completed.
W
ARN
I
N
G
!
This operation deletes permanently
the
preset
codes.
13
WORKING
OPERATION
M
O
D
E
Standard con
fii
gu
r
a
tii
on:
Standard configuration requires all “cooker hoods
–
radio control
-
system”
to
be provided with the same
transmission code.
In
the event two cooker hoods
–
radio control system are installed
in
the same
room
or
nearby, each system may affect the operation
of
the another. Therefore, the code
of
one radio
control
system must be
changed.
Generatiing a new transmiissiion
cod
e
:
The
radio control
system
is
provided
with
preset
codes. Should new codes
be
required, proceed
as
follows: Press simultaneously
buttons:
for
two seconds. When Leds light on, press buttons:
(within 5
seconds). Leds flashing
3
times indicate
the procedure
is
completed.
W
ARN
I
N
G
!
This operation deletes permanently
the
preset
codes.
RC001
GB
R
ADIO
C
O
N
T
R
O
L
Radio control used
for
the remote operation
of duct-
ed cooker
hoods.
T
ECHNIICAL
DA
T
A
-
Alkaline battery
powered :
12 V mod. 23 A
-
Operating
frequency :
433.92
Mhz
- Combinations : 32.768
-
Max.
consumption :
25
mA
-
Operating
temperature :
-20
÷ +
55
°C
- Dimensions :
120
x
45
x
15
mm.
O
PERATIING
D
E
S
C
R
II
P
T
II
O
N
The transmitter
is
equipped with
5
buttons
for cook-
er hood management, as specified
below:
:
Light ON/OFF
command.
:
Motor ON (speed level
1) /
OFF
command.
:
Reduce
speed.
:
Increase
speed.
:
10-minute
timer.
I
NIITIIAL
O
PERATIING
CO
ND
II
T
II
O
N
The manufacturer supplies
the radio control unit
ready
to
be used with codes preset
in
the
Factory.
Learniing the new transmiissiion cod
e
:
Once the transmission code
is
changed
in
the
radio
control unit, the electronic central unit
of
the cooker
hood must be made
to
set the new code
in
the
fol-
lowing
way:
Press
the main
power-off button
of the hood and
then
restore
power to the
electronic
control unit.
Within the next
15
seconds, press the Liight
Button
to
synchronise the central unit with the
code.
Reset
of
the Factory
con
fii
gu
r
a
tii
on:
To restore the Factory configuration, follow the
pro-
cedure described below: press simultaneously
but-
tons
for 2
seconds. When Leds light on, press buttons
(within 5
seconds). Leds flashing
6
times indicate
the procedure
is completed.
W
ARN
I
N
G
!
This operation deletes permanently
the
preset
codes.
Emergency
bu
tt
on:
In the event that the radio control does not work,
use
the
emergency button
to
switch
the
appliance
off.
After any
necessary repairs have been performed,
reset the emergency
button.
W
ARN
II
N
G
The battery should be replaced every year
to guar-
antee the optimal range
of
the
transmitter.
To
replace
the
exhausted battery, take
the
plastic
lid
off, remove the battery and replace
it
with a
new
one, observing the correct battery
polarities.
Used batteries should be discarded
in
special
col-
lection
bins.
The
below product:
RC001
Radiio
C
on
tr
o
ll
complies
with the
specifications
set out in the
R&TTE Directive 99/5/EC.
W
ARN
I
N
G
Any adjustments
or
modifications which have
not
been expressly approved by the holder
of
the
legal
conformity
certificate
may
invalidate
the
user’s
rights relating
to
the operation
of
the
device.
Rev. 0 2 6 /08/14
OPERATION
M
O
D
E
Standard con
fii
gu
r
a
tii
on:
Standard configuration requires all “cooker hoods
–
radio control
-
system”
to
be provided with the same
transmission code.
In
the event two cooker hoods
–
radio control system are installed
in
the same
room
or
nearby, each system may affect the operation
of
the another. Therefore, the code
of
one radio
control
system must be
changed.
Generatiing a new transmiissiion
cod
e
:
The
radio control
system
is
provided
with
preset
codes. Should new codes
be
required, proceed
as
follows: Press simultaneously
buttons:
for
two seconds. When Leds light on, press buttons:
(within 5
seconds). Leds flashing
3
times indicate
the procedure
is
completed.
W
ARN
I
N
G
!
This operation deletes permanently
the
preset
codes.

󲵃󲵃󲵅
       󲵅 

󲵃
󲵅󲵃


󲵃


 󲵃   
   󲵅 
    

13
WORKING
OPERATION
M
O
D
E
Standard con
fii
gu
r
a
tii
on:
Standard configuration requires all “cooker hoods
–
radio control
-
system”
to
be provided with the same
transmission code.
In
the event two cooker hoods
–
radio control system are installed
in
the same
room
or
nearby, each system may affect the operation
of
the another. Therefore, the code
of
one radio
control
system must be
changed.
Generatiing a new transmiissiion
cod
e
:
The
radio control
system
is
provided
with
preset
codes. Should new codes
be
required, proceed
as
follows: Press simultaneously
buttons:
for
two seconds. When Leds light on, press buttons:
(within 5
seconds). Leds flashing
3
times indicate
the procedure
is
completed.
W
ARN
I
N
G
!
This operation deletes permanently
the
preset
codes.
RC001
GB
R
ADIO
C
O
N
T
R
O
L
Radio control used
for
the remote operation
of duct-
ed cooker
hoods.
T
ECHNIICAL
DA
T
A
-
Alkaline battery
powered :
12 V mod. 23 A
-
Operating
frequency :
433.92
Mhz
- Combinations : 32.768
-
Max.
consumption :
25
mA
-
Operating
temperature :
-20
÷ +
55
°C
- Dimensions :
120
x
45
x
15
mm.
O
PERATIING
D
E
S
C
R
II
P
T
II
O
N
The transmitter
is
equipped with
5
buttons
for cook-
er hood management, as specified
below:
:
Light ON/OFF
command.
:
Motor ON (speed level
1) /
OFF
command.
:
Reduce
speed.
:
Increase
speed.
:
10-minute
timer.
I
NIITIIAL
O
PERATIING
CO
ND
II
T
II
O
N
The manufacturer supplies
the radio control unit
ready
to
be used with codes preset
in
the
Factory.
Learniing the new transmiissiion cod
e
:
Once the transmission code
is
changed
in
the
radio
control unit, the electronic central unit
of
the cooker
hood must be made
to
set the new code
in
the
fol-
lowing
way:
Press
the main
power-off button
of the hood and
then
restore
power to the
electronic
control unit.
Within the next
15
seconds, press the Liight
Button
to
synchronise the central unit with the
code.
Reset
of
the Factory
con
fii
gu
r
a
tii
on:
To restore the Factory configuration, follow the
pro-
cedure described below: press simultaneously
but-
tons
for 2
seconds. When Leds light on, press buttons
(within 5
seconds). Leds flashing
6
times indicate
the procedure
is completed.
W
ARN
I
N
G
!
This operation deletes permanently
the
preset
codes.
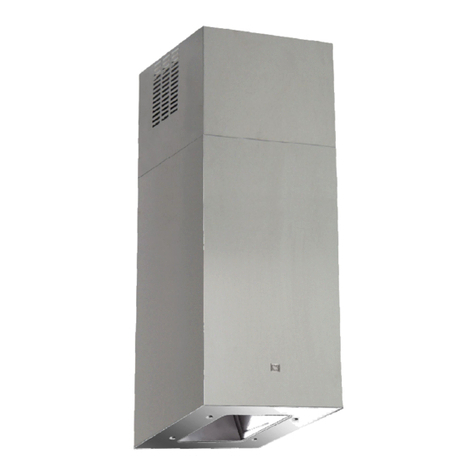
Emergency
bu
tt
on:
In the event that the radio control does not work,
use
the
emergency button
to
switch
the
appliance
off.
After any
necessary repairs have been performed,
reset the emergency
button.
W
ARN
II
N
G
The battery should be replaced every year
to guar-
antee the optimal range
of
the
transmitter.
To
replace
the
exhausted battery, take
the
plastic
lid
off, remove the battery and replace
it
with a
new
one, observing the correct battery
polarities.
Used batteries should be discarded
in
special
col-
lection
bins.
The
below product:
RC001
Radiio
C
on
tr
o
ll
complies
with the
specifications
set out in the
R&TTE Directive 99/5/EC.
W
ARN
I
N
G
Any adjustments
or
modifications which have
not
been expressly approved by the holder
of
the
legal
conformity
certificate
may
invalidate
the
user’s
rights relating
to
the operation
of
the
device.
Rev. 0 2 6 /08/14
OPERATION
M
O
D
E
Standard con
fii
gu
r
a
tii
on:
Standard configuration requires all “cooker hoods
–
radio control
-
system”
to
be provided with the same
transmission code.
In
the event two cooker hoods
–
radio control system are installed
in
the same
room
or
nearby, each system may affect the operation
of
the another. Therefore, the code
of
one radio
control
system must be
changed.
Generatiing a new transmiissiion
cod
e
:
The
radio control
system
is
provided
with
preset
codes. Should new codes
be
required, proceed
as
follows: Press simultaneously
buttons:
for
two seconds. When Leds light on, press buttons:
(within 5
seconds). Leds flashing
3
times indicate
the procedure
is
completed.
W
ARN
I
N
G
!
This operation deletes permanently
the
preset
codes.
7
󲵃
     






󲵃󲵃

󲵅󲵃
󲵃
  
󲵃󲵃
󲵅

󲵃     󲵃󲵃 

     
󲵅󲵃
 󲵃     
     

󲵃
󲵅
   

     󲵅





󲵃
󲵅
󲵅󲵃
  󲵅󲵃   
 󲵅󲵃󲵃

󲵅󲵃

 󲵅󲵃   
󲵅
󲵃
󲵃󲵅󲵃
     

14
MAINTENANCE
After 30 hours working (model), the push
button control panel will signal the saturation
of the grease lter by lighting all the buttons.
Press the timer button to reset.
The grease lter needs cleaning by regular
hand-washing or in dishwashers every two
months at least or depending on its use.
* In case the appliance is used in its ltering
version, the active coal lter (Fig.7) needs to
be periodically replaced. The coal lter can
be removed by removing the grease lter
rst (Fig.3), and by pulling its special plastic
tongue until it is unfastened from its slot.
Re-insert the coal lter by operating in the
opposite way. The coal lter needs replacing
depending on the use, but however every six
months at least.
* To clean the appliance itself tepid water and
neutral detergent are recommended, whi-
le abrasive products should be avoided. For
steel appliances specialized detergents are
recommended (please follow the instructions
indicated o the product itself to obtain the
desired results).
* To replace the halogen lamps, remove rst
the glass-blocking ring (Fig.8A), by levering
with a screw-driver and thus removing the
opaque glass (Fig.8B) - when performing this
operation hold the opaque glass carefully.
Remove the lamp (Fig.8C) without touching
it with uncovered hands. Replace it with ano-
ther lamp of the same kind. After the repla-
cement, re-insert the glass-blocking ring and
fasten it.
* Warning! To take down the appliance from
the cabinet, remove the denitive xing
screws (g. 6) using a screw-driver, get o
the grease lters (g.3B) and the active car-
bon lters, if they are inserted (g. 7A). Act
on the small handle of the springs, which are
inside the built-in unit, with the necessary
strength to unhook the appliance from the
cabinet.
* If the supply cord is damaged, it must be
replaced by the manufacturer or its sevice
agent or a similarly qualied person in order
to avoid a hazard.
* An accurate maintenance guarantees good
functioning and long-lasting performance.
* Particular care is due to the grease lter pa-
nel. It can be removed by pushing its special
handle toward the back-side of the cooker
hood and turning the lter downwards so to
unfasten it from its slot (Fig.3).
To insert the lter just perform the opposite
operation.
TEMPORISATEUR
Nos produits ont été adaptés pour se con-
former aux nouvelles normes de l’Union Eu-
ropéenne en matière de l’EU65 « Étiquette-
Énergie » et l’EU66 « Écoconception » (à partir
du 1er janvier 2015).
La nouvelle électronique des produits ayant
l’ « Étiquette-Énergie » sont pourvus d’un
dispositif de temporisation pour le contrôle
de la vitesse d’aspiration si le débit d’air en
évacuation dépasse les 650m³/h.
En eet, les modèles avec moteur intégré
ayant un débit d’air en évacuation supérieur à
650m³/h sont pourvus d’un dispositif qui
réduit automatiquement la vitesse IV à la vi-
tesse III après 5 minutes de fonctionnement.
Les modèles avec moteur extérieur (combiné
seulement avec des moteurs à distance com-
me pour les modèles avec moteur intégré)
sont pourvus d’un dispositif qui réduit la vi-
tesse si le débit d’air en évacuation dépasse
les 650m³/h. (Voir section « Moteurs à di-
stance »).
Les moteurs extérieurs ayant un débit d’air
en évacuation supérieur à 650m³/h à la vi-
tesse IV et III sont temporisés comme suit :
Automatiquement de la vitesse IV à la vitesse
II après 6 minutes de fonctionnement.
Si l’appareil est réglé à la vitesse III, il pas-
se automatiquement à la vitesse II après 7
minutes de fonctionnement. De toute façon
il est possible de modier la vitesse lors du
fonctionnement.
La consommation de appareil en mode veille
est inférieure à 0.5 W.
󲵃
󲵃
 󲵅󲵃   

󲵃

󲵃
  󲵅󲵃 󲵅 
󲵅󲵃
󲵅󲵃
󲵅󲵃
  󲵅󲵃   󲵅 
󲵅󲵃
󲵅󲵃
󲵅
󲵅󲵃󲵃

    
     
    

   


󲵃
󲵅󲵅
       
󲵅



    󲵃 
󲵃󲵅󲵅

󲵃
󲵃
󲵅󲵃󲵅󲵃







8
37
12
4
3
5



FIG.3
FIG.6
FIG.7
FIG.8
5
13
12
3
4
SM905 da 850 834x265mm.
SM905 da 520 502x265mm.



FIG.3
FIG.6
FIG.7
FIG.8
S900 da 52 495x272mm.
S900 da 70 675x272mm.
SM905 da 850 834x265mm.
SM905 da 520 502x265mm.
9
38
7
6
8



FIG.3
FIG.6
FIG.7
FIG.8



FIG.3
FIG.6
FIG.7
FIG.8
6. ábra
7. ábra
10
39
910
11
00000000000 - GM 05/15
Importőr:
MULTIKOMPLEX BUDAPEST KFT.
a páraelszívók szakértője... 1995 óta
H - 1211 Budapest, Mansfeld Péter u. 27
(volt Bajáki Ferenc utca)
tel.: +(36-1) 427 0325, +(36-1) 427-0326;
fax: +(36-1)427 0327
www.multikomplex.hu
INFORMAZIONI COMMERCIALI PER I CONSUMATORI
COMMERCIAL INFORMATION FOR THE CONSUMER
INFORMATIONS COMMERCIALES POUR LE CLIENT
INFORMACIONES COMERCIALES PARA EL CLIENTE
HANDELSINFORMATIONEN FÜR DEN KUNDEN
COMMERCIËLE INFORMATIES VOOR DE KLANT
INFORMAZIONI TECNICHE
TECHNICAL INFORMATION
INFORMATION TECHNIQUES
INFORMACIONES TÉCNICAS
TECHNISCHE INFORMATIONEN
TECHNISCHE INFORMATIES
TYPE: FSLA - FSLB - FSLC - FSLD
ISTRUZIONI PER L’INSTALLAZIONE, USO E MANUTENZIONE
INSTALLATION, USE AND MAINTENANCE INSTRUCTION
INSTRUCTIONS D’UTILISATION ET AVIS DE MONTAGE
INSTRUCCIONES DE USO Y DE MONTAJE
BEDIENUNGSANLEITUNG MIT MONTAGEANWEISUNGEN
GEBRUIKSAANWIJZIGING
S900-SM900-SL900-SLT900-SM905
ENERGY LABEL
IT
GB
F
E
D
NL
CONTENTS
Warnings
Uses
Installation
Working
Maintenance
10
GB
11
If the rating lable in the cooker-hood does
not show the symbol , the appliance is
built in class I° and it needs the earth con-
nection.
* When performing the electrical connections on
the appliance, please make sure that the current-
tap is provided with earth connection and that
voltage values correspond to those indicated on
the label placed inside the appliance itself.
* Before carrying out any cleaning or main-
taining operations, the appliance needs to
be removed from the electric grid. If the ap-
pliance is not provided with a non-separable
exible cable and plug, or with another de-
vice ensuring omnipolar disconnections from
the grid, with an opening distance between
the contacts of at least 3 mm, then such di-
sconnecting devices must be supplied within
the xed installation.
If the xed appliance is endowed with a sup-
ply cord and a plug, the appliance has to be
put in a place where the plug can be reached
easily.
* The use of materials which can burst into
ames should be avoided in close proxi-
mity of the appliance. When frying, plea-
se pay particular attention to re risk due
to oil grease. Being highly inammable,
fried oil is especially dangerous. Do not
use uncovered electric grills. In order to
avoid possible re risk, all instructions
for grase-lter cleaning and for removing
eventual grease deposits should be strictly
followed.
WARNINGS
Before installing the appliance, make sure
that none of the parts is damaged in any way.
In case of damaged parts, contact your retai-
ler and do not proceed with installation.
Read all of the following instructions with
care before installing the appliance.
- Use an air outlet pipe of the shortest pos-
sible length.
- Limit the number of pipe bends.
- Use a material approved by standards and
regulations.
- Avoid any sudden changes in pipe section
(recommended constant diameter: 150 mm
or equal surface area).
* The appliance is not intended for use by
young children or inrm persons without
supervision. Young children should be su-
pervised to ensure they do not play with
the appliance.
* The cooker surface and the inferior part
of the cooker hood must be at a minimun
distance of 65 cm.
* The air sucked can’t be conveyed throu-
gh or into a duct used to let out fumes
from appliances fed by energy other than
electric power (eg. centralized heating, ra-
diators, water-heaters, etc.).
* To evacuate the air outlet, please comply
with the pertaining rules given by compe-
tent authorities.
* Provide the room with an adequate aeration
when a cooker hood and appliances fed by
energy other than electric power (gas-, oil-,
or coal- stoves, etc.) are used simultaneously.
The cooker hood, when evacuating the sucked
air, could generate a negative pressure in the
room- which can’t exceed the limit of 0.04
mbar, in order to avoid the suck of exhausts
deriving from the heat-source. Therefore the
room should be provided with air-intakes to
allow a costant ow of fresh air.
If the rating lable in the cooker-hood
shows the symbol , the appliance is
built in class II° and it does not need any
earth connection.
12
INSTALLATION
Before installing the appliance, make sure
that none of the parts is damaged in any way.
In case of damaged parts, contact your retai-
ler and do not proceed with installation.
Read all of the following instructions with
care before installing the appliance.
- Use an air outlet pipe of the shortest pos-
sible length.
- Limit the number of pipe bends.
- Use a material approved by standards and
regulations.
- Avoid any sudden changes in pipe section
(recommended constant diameter: 150 mm
or equal surface area).
* Before installing the appliance, in order not
to damage the appliance itself, the metal gra-
se lter should be removed. Such lter can be
removed by pushing the special lter handle
toward the back side of the cooker hood and
turning it downwards so to unfasten it from
its slot (Fig.3).
Essential precautions to respect before in-
stalling the appliance are the following:
To have made a cut-out on the bottom of the
cabinet which is suitable to hold the applian-
ce in position (g.4).
* prepare the power supply.
* prepare a hole for the exhaust of the air
both in the ltering and in the exhauting ver-
sion.
To install the appliance, adjust the position
of the stop side-springs using the appropria-
te screws (g.5), according to the thickness
of the board previously drilled, on which the
appliance will be xed.
Insert the built-in unit in the hole made in
the cabinet until the stop click of the side-
springs is heard and the built-in unit is blo-
cked.
Insert the screws provided in the holes inside
the appliance (g.6) to block it completely.
Blocking of the stop valve
Warning!
Before connecting the exible exhausting
pipe to the motor, make sure the stop valve,
which is on the air outlet of the motor, can
swing.
Exausting version
Connect the ange to the exhausting hole
with an appropriate pipe. Connect the ap-
pliance with the electrical mains through the
supply cord.
Filtering version
Connect the ange with a pipe suitable to
convey the air to the top of the cabinet. Con-
nect the appliance with the electrical mains
through the supply cord.
USES
The appliance is already arranged both for
ltering and for suction performances.
* In its ltering version (Fig.1), the air and
fumes conveyed by the appliance are depured
both by a grease lter and by an active coal
lter, and put again into circulation through
the hole made on the top of the cabinet.
* In its sucking version (Fig.2), fumes are di-
rectly conveyed outside, through an evacua-
tion duct connected with the superior part of
the wall or the ceiling. Both coal lter and air
deector are not necessary in this case.
13
WORKING
OPERATION
M
O
D
E
Standard con
fii
gu
r
a
tii
on:
Standard configuration requires all “cooker hoods
–
radio control
-
system”
to
be provided with the same
transmission code.
In
the event two cooker hoods
–
radio control system are installed
in
the same
room
or
nearby, each system may affect the operation
of
the another. Therefore, the code
of
one radio
control
system must be
changed.
Generatiing a new transmiissiion
cod
e
:
The
radio control
system
is
provided
with
preset
codes. Should new codes
be
required, proceed
as
follows: Press simultaneously
buttons:
for
two seconds. When Leds light on, press buttons:
(within 5
seconds). Leds flashing
3
times indicate
the procedure
is
completed.
W
ARN
I
N
G
!
This operation deletes permanently
the
preset
codes.
RC001
GB
R
ADIO
C
O
N
T
R
O
L
Radio control used
for
the remote operation
of duct-
ed cooker
hoods.
T
ECHNIICAL
DA
T
A
-
Alkaline battery
powered :
12 V mod. 23 A
-
Operating
frequency :
433.92
Mhz
- Combinations : 32.768
-
Max.
consumption :
25
mA
-
Operating
temperature :
-20
÷ +
55
°C
- Dimensions :
120
x
45
x
15
mm.
O
PERATIING
D
E
S
C
R
II
P
T
II
O
N
The transmitter
is
equipped with
5
buttons
for cook-
er hood management, as specified
below:
:
Light ON/OFF
command.
:
Motor ON (speed level
1) /
OFF
command.
:
Reduce
speed.
:
Increase
speed.
:
10-minute
timer.
I
NIITIIAL
O
PERATIING
CO
ND
II
T
II
O
N
The manufacturer supplies
the radio control unit
ready
to
be used with codes preset
in
the
Factory.
Learniing the new transmiissiion cod
e
:
Once the transmission code
is
changed
in
the
radio
control unit, the electronic central unit
of
the cooker
hood must be made
to
set the new code
in
the
fol-
lowing
way:
Press
the main
power-off button
of the hood and
then
restore
power to the
electronic
control unit.
Within the next
15
seconds, press the Liight
Button
to
synchronise the central unit with the
code.
Reset
of
the Factory
con
fii
gu
r
a
tii
on:
To restore the Factory configuration, follow the
pro-
cedure described below: press simultaneously
but-
tons
for 2
seconds. When Leds light on, press buttons
(within 5
seconds). Leds flashing
6
times indicate
the procedure
is completed.
W
ARN
I
N
G
!
This operation deletes permanently
the
preset
codes.
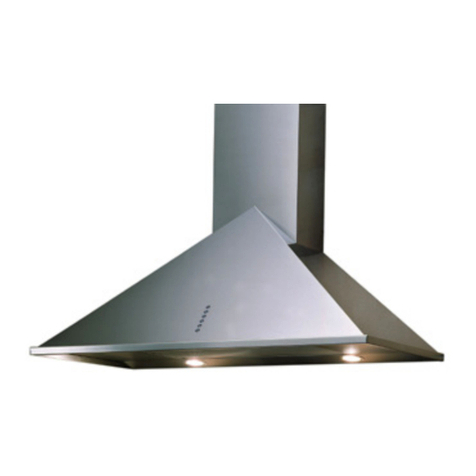
Emergency
bu
tt
on:
In the event that the radio control does not work,
use
the
emergency button
to
switch
the
appliance
off.
After any
necessary repairs have been performed,
reset the emergency
button.
W
ARN
II
N
G
The battery should be replaced every year
to guar-
antee the optimal range
of
the
transmitter.
To
replace
the
exhausted battery, take
the
plastic
lid
off, remove the battery and replace
it
with a
new
one, observing the correct battery
polarities.
Used batteries should be discarded
in
special
col-
lection
bins.
The
below product:
RC001
Radiio
C
on
tr
o
ll
complies
with the
specifications
set out in the
R&TTE Directive 99/5/EC.
W
ARN
I
N
G
Any adjustments
or
modifications which have
not
been expressly approved by the holder
of
the
legal
conformity
certificate
may
invalidate
the
user’s
rights relating
to
the operation
of
the
device.
Rev. 0 2 6 /08/14
OPERATION
M
O
D
E
Standard con
fii
gu
r
a
tii
on:
Standard configuration requires all “cooker hoods
–
radio control
-
system”
to
be provided with the same
transmission code.
In
the event two cooker hoods
–
radio control system are installed
in
the same
room
or
nearby, each system may affect the operation
of
the another. Therefore, the code
of
one radio
control
system must be
changed.
Generatiing a new transmiissiion
cod
e
:
The
radio control
system
is
provided
with
preset
codes. Should new codes
be
required, proceed
as
follows: Press simultaneously
buttons:
for
two seconds. When Leds light on, press buttons:
(within 5
seconds). Leds flashing
3
times indicate
the procedure
is
completed.
W
ARN
I
N
G
!
This operation deletes permanently
the
preset
codes.
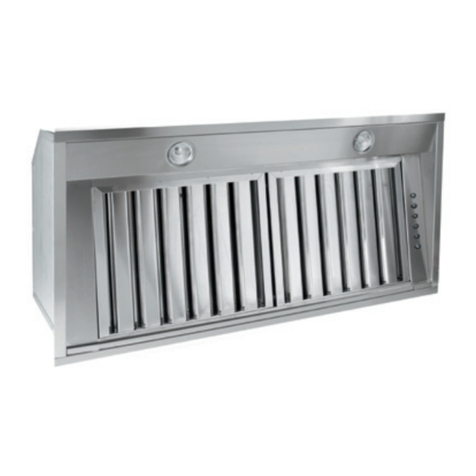
14
MAINTENANCE
After 30 hours working (model), the push
button control panel will signal the saturation
of the grease lter by lighting all the buttons.
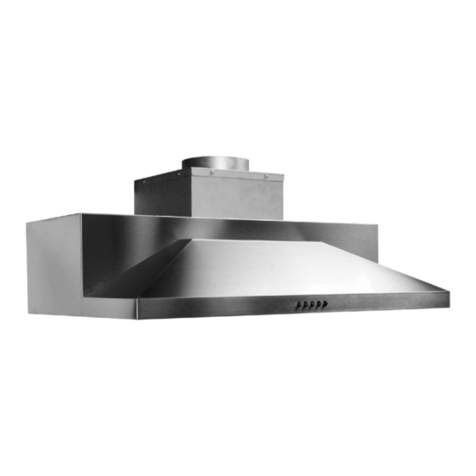
Press the timer button to reset.
The grease lter needs cleaning by regular
hand-washing or in dishwashers every two
months at least or depending on its use.
* In case the appliance is used in its ltering
version, the active coal lter (Fig.7) needs to
be periodically replaced. The coal lter can
be removed by removing the grease lter
rst (Fig.3), and by pulling its special plastic
tongue until it is unfastened from its slot.
Re-insert the coal lter by operating in the
opposite way. The coal lter needs replacing
depending on the use, but however every six
months at least.
* To clean the appliance itself tepid water and
neutral detergent are recommended, whi-
le abrasive products should be avoided. For
steel appliances specialized detergents are
recommended (please follow the instructions
indicated o the product itself to obtain the
desired results).
* To replace the halogen lamps, remove rst
the glass-blocking ring (Fig.8A), by levering
with a screw-driver and thus removing the
opaque glass (Fig.8B) - when performing this
operation hold the opaque glass carefully.
Remove the lamp (Fig.8C) without touching
it with uncovered hands. Replace it with ano-
ther lamp of the same kind. After the repla-
cement, re-insert the glass-blocking ring and
fasten it.
* Warning! To take down the appliance from
the cabinet, remove the denitive xing
screws (g. 6) using a screw-driver, get o
the grease lters (g.3B) and the active car-
bon lters, if they are inserted (g. 7A). Act
on the small handle of the springs, which are
inside the built-in unit, with the necessary
strength to unhook the appliance from the
cabinet.
* If the supply cord is damaged, it must be
replaced by the manufacturer or its sevice
agent or a similarly qualied person in order
to avoid a hazard.
* An accurate maintenance guarantees good
functioning and long-lasting performance.
* Particular care is due to the grease lter pa-
nel. It can be removed by pushing its special
handle toward the back-side of the cooker
hood and turning the lter downwards so to
unfasten it from its slot (Fig.3).
To insert the lter just perform the opposite
operation.
TEMPORISATEUR
Nos produits ont été adaptés pour se con-
former aux nouvelles normes de l’Union Eu-
ropéenne en matière de l’EU65 « Étiquette-
Énergie » et l’EU66 « Écoconception » (à partir
du 1er janvier 2015).
La nouvelle électronique des produits ayant
l’ « Étiquette-Énergie » sont pourvus d’un
dispositif de temporisation pour le contrôle
de la vitesse d’aspiration si le débit d’air en
évacuation dépasse les 650m³/h.
En eet, les modèles avec moteur intégré
ayant un débit d’air en évacuation supérieur à
650m³/h sont pourvus d’un dispositif qui
réduit automatiquement la vitesse IV à la vi-
tesse III après 5 minutes de fonctionnement.
Les modèles avec moteur extérieur (combiné
seulement avec des moteurs à distance com-
me pour les modèles avec moteur intégré)
sont pourvus d’un dispositif qui réduit la vi-
tesse si le débit d’air en évacuation dépasse
les 650m³/h. (Voir section « Moteurs à di-
stance »).
Les moteurs extérieurs ayant un débit d’air
en évacuation supérieur à 650m³/h à la vi-
tesse IV et III sont temporisés comme suit :
Automatiquement de la vitesse IV à la vitesse
II après 6 minutes de fonctionnement.
Si l’appareil est réglé à la vitesse III, il pas-
se automatiquement à la vitesse II après 7
minutes de fonctionnement. De toute façon
il est possible de modier la vitesse lors du
fonctionnement.
La consommation de appareil en mode veille
est inférieure à 0.5 W.
37
12
4
3
5



FIG.3
FIG.6
FIG.7
FIG.8
5
13
12
3
4
SM905 da 850 834x265mm.
SM905 da 520 502x265mm.



FIG.3
FIG.6
FIG.7
FIG.8
S900 da 52 495x272mm.
S900 da 70 675x272mm.
SM905 da 850 834x265mm.
SM905 da 520 502x265mm.
38
7
6
8



FIG.3
FIG.6
FIG.7
FIG.8



FIG.3
FIG.6
FIG.7
FIG.8
39
910
11

This manual suits for next models

3

Other Sirius Range Hoods Ventilation Hood manuals

Sirius Range Hoods SIU 404 User manual

Sirius Range Hoods

Sirius Range Hoods SIU 404 User manual

Sirius Range Hoods SUT950 User manual

Sirius Range Hoods

Sirius Range Hoods SUT950 User manual

Sirius Range Hoods SU900 User manual

Sirius Range Hoods

Sirius Range Hoods SU900 User manual

Sirius Range Hoods SL 80 FRESCO 900 Quick start guide

Sirius Range Hoods

Sirius Range Hoods SL 80 FRESCO 900 Quick start guide

Sirius Range Hoods SUF1 User manual

Sirius Range Hoods

Sirius Range Hoods SUF1 User manual

Sirius Range Hoods SIU 404 Guide

Sirius Range Hoods

Sirius Range Hoods SIU 404 Guide

Sirius Range Hoods SU107 User manual

Sirius Range Hoods

Sirius Range Hoods SU107 User manual

Sirius Range Hoods SU1 User manual

Sirius Range Hoods

Sirius Range Hoods SU1 User manual

Sirius Range Hoods SL-EM4190X Parts list manual

Sirius Range Hoods

Sirius Range Hoods SL-EM4190X Parts list manual

Sirius Range Hoods SU909 User manual

Sirius Range Hoods

Sirius Range Hoods SU909 User manual

Sirius Range Hoods SU906-L User manual

Sirius Range Hoods

Sirius Range Hoods SU906-L User manual

Sirius Range Hoods SUT900 User manual

Sirius Range Hoods

Sirius Range Hoods SUT900 User manual

Sirius Range Hoods SIU4 User manual

Sirius Range Hoods

Sirius Range Hoods SIU4 User manual

Sirius Range Hoods SU1 User manual

Sirius Range Hoods

Sirius Range Hoods SU1 User manual

Sirius Range Hoods SU900 Guide

Sirius Range Hoods

Sirius Range Hoods SU900 Guide

Sirius Range Hoods SUF1 User manual

Sirius Range Hoods

Sirius Range Hoods SUF1 User manual

Sirius Range Hoods SU 207 Guide

Sirius Range Hoods

Sirius Range Hoods SU 207 Guide

Sirius Range Hoods S-DD2-L User manual

Sirius Range Hoods

Sirius Range Hoods S-DD2-L User manual

Sirius Range Hoods SCH31A User manual

Sirius Range Hoods

Sirius Range Hoods SCH31A User manual

Sirius Range Hoods SIU401-22 User manual

Sirius Range Hoods

Sirius Range Hoods SIU401-22 User manual

Sirius Range Hoods SU906 User manual

Sirius Range Hoods

Sirius Range Hoods SU906 User manual

Sirius Range Hoods SU1 User manual

Sirius Range Hoods

Sirius Range Hoods SU1 User manual

Popular Ventilation Hood manuals by other brands

Tecnowind Tiger Service manual

Tecnowind

Tecnowind Tiger Service manual

Bosch dhdrm36uc installation instructions

Bosch

Bosch dhdrm36uc installation instructions

Cosmo COS-QS75 Manual and installation guide

Cosmo

Cosmo COS-QS75 Manual and installation guide

Electrolux EFCI 90542 instruction manual

Electrolux

Electrolux EFCI 90542 instruction manual

ZUG DWPQG operating instructions

ZUG

ZUG DWPQG operating instructions

ROBLIN Aqua 1200 Inox manual

ROBLIN

ROBLIN Aqua 1200 Inox manual

Zephyr Pisa ZPI-E30AG290 Use, care and installation guide

Zephyr

Zephyr Pisa ZPI-E30AG290 Use, care and installation guide

ELICA ETR836WT Use, care and installation guide

ELICA

ELICA ETR836WT Use, care and installation guide

AEG X76263MK1 user manual

AEG

AEG X76263MK1 user manual

arietta AAR428SSA Installation instruction guide

arietta

arietta AAR428SSA Installation instruction guide

Hotpoint Creda LI2I3A Instructions for installation and use

Hotpoint

Hotpoint Creda LI2I3A Instructions for installation and use

Baumatic BT85GL user manual

Baumatic

Baumatic BT85GL user manual

Thermador HMWN30 use and care manual

Thermador

Thermador HMWN30 use and care manual

GE PVW7361 installation instructions

GE

GE PVW7361 installation instructions

Lapetek JONA SLIM X3 90 Installation and user manual

Lapetek

Lapetek JONA SLIM X3 90 Installation and user manual

Astivita bo0h663/e User instructions

Astivita

Astivita bo0h663/e User instructions

Electrolux EFP 60150 user manual

Electrolux

Electrolux EFP 60150 user manual

AEG 8709 D Installation and operating instructions

AEG

AEG 8709 D Installation and operating instructions

manuals.online logo
manuals.online logoBrands
  • About & Mission
  • Contact us
  • Privacy Policy
  • Terms and Conditions

Copyright 2025 Manuals.Online. All Rights Reserved.