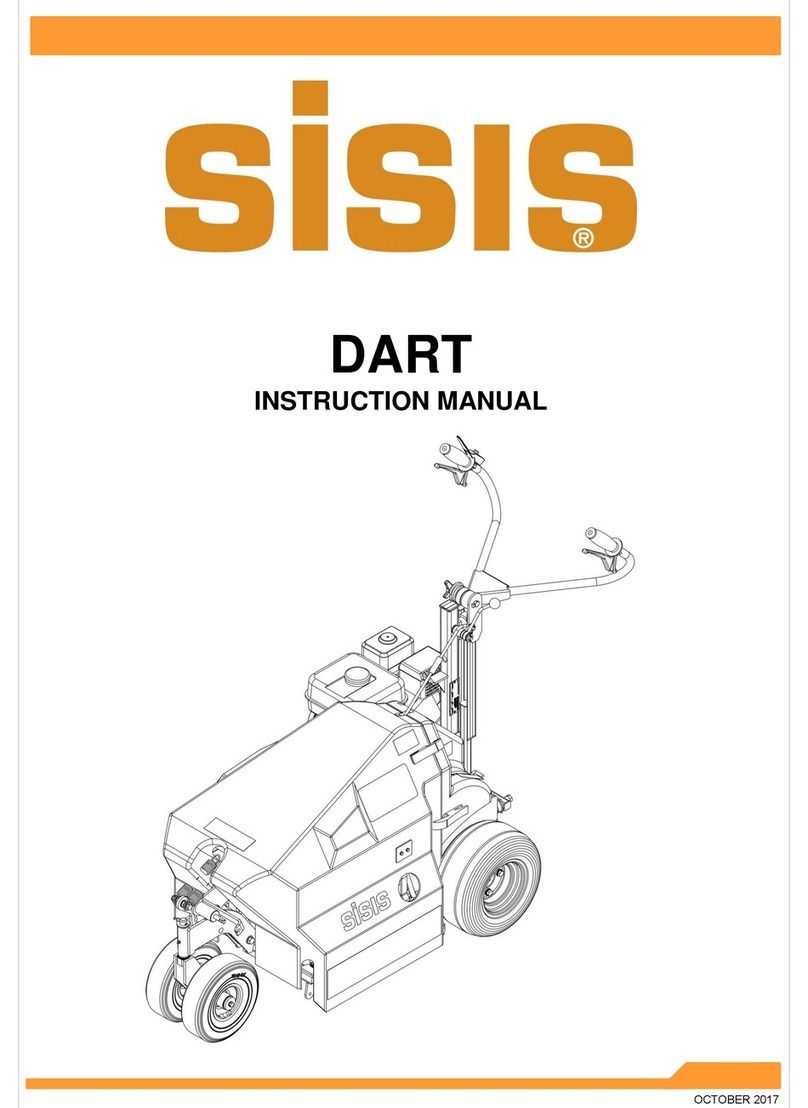
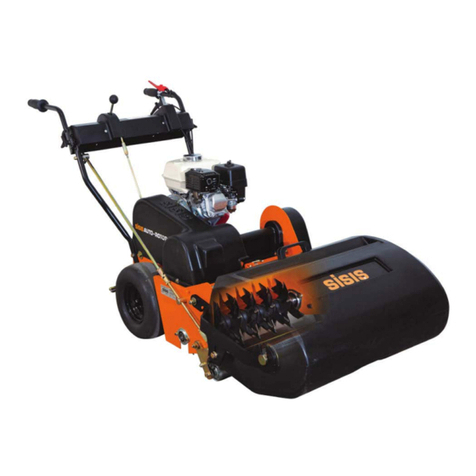
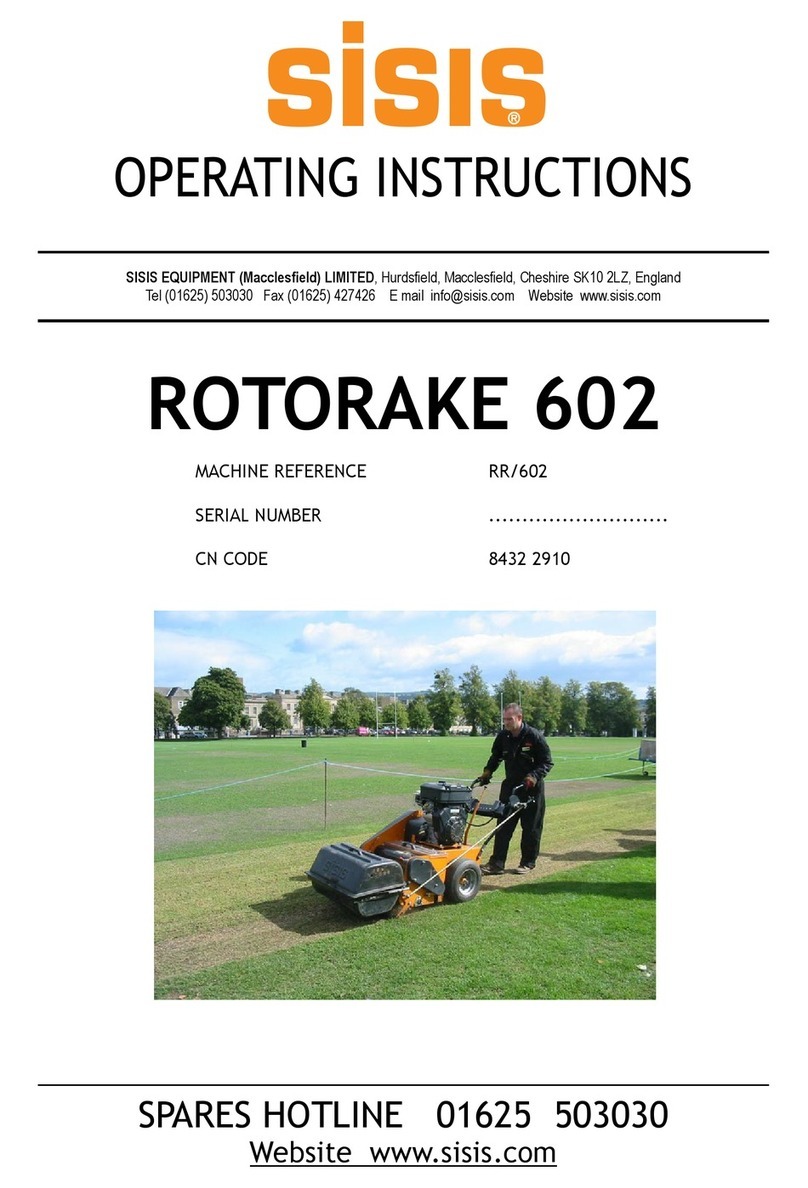
Sisis ROTORAKE RR600HD User manual

ROTORAKE RR600HD
INSTRUCTION MANUAL
R
SP20035_REV_0
06/13

ROTORAKE JUN ‘13
2
Certicate of Conformity
RR600HD CN Code: 8432 29 10
Manufacturer:- Howardson Ltd, Howardson Works, Kirk Langley, Derby, DE6 4NJ. UK
Owner of Technical Document:- Mr I.D. Howard, Howardson Ltd, Howardson Works Kirk Langley, Derby, DE6 4NJ, UK
I the under signed Declare that these machines:-
The reliability and quality of performance of the SISIS Rotorake depends upon some simple care maintenance
carried out regularly. This manual has been prepared to allow the user to carry out all such work.
It is advisable to read the instructions carefully. Proper care and attention will enable the machine to give a continuous,
satisfactory, and reliable service. Failure to carry out regular lubrication and maintenance as outlined in this manual may
render any guarantee or warranty invalid.
In the case of any difculty, or if further information or advice is required, our Service Department is always at your call. In
the interests of speed and accuracy of information please quote the serial numbers of the machine and engine when
making enquiries.
For the machine, this is to be found on a plate attached to the side frame. The engine number is stamped
on either the crank case or the gear casing facing towards the front of the machine. We suggest you write
the numbers on the front page of this book.
Introduction
Serial Numbers
MACHINE SERIAL NUMBER
MAKE A NOTE OF THE SERIAL NUMBERS OF YOUR MACHINE & ENGINE AND ALWAYS
QUOTE THEM IN ANY COMMUNICATION WITH PERSONNEL AT DENNIS.
NOTE
ENGINE SERIAL NUMBER
Model Operating Width Power (Honda) Measured Sound Power
Level
Guaranteed Sound
Power Level Serial Number
RR600HD 24” (610mm) GX390 94dB Lwa 103dB Lwa See Product ID range
Tested at:- Howardson Works test site September 2011
Complies with the applicable requirements of:-
- Machine Directive 2006/42/EC
- Noise Directive 2000/14/EC (Annex VI Procedure 1)
Managing Director
Ian Howard

ROTORAKE JUN ‘13
3
Contents
Page
Declaration of Conformity..................................................................................................................................................... 2
Serial Numbers..................................................................................................................................................................... 2
Introduction........................................................................................................................................................................... 2
Technical Data...................................................................................................................................................................... 3
Machine Description............................................................................................................................................................. 4
Important Safety Instructions................................................................................................................................................ 5
Operating Instructions ..................................................................................................................................................... 6 - 7
The Reel............................................................................................................................................................................... 8
General Adjustments ......................................................................................................................................................9 - 11
Parts Listings............................................................................................................................................................... 12 - 22
Notes .................................................................................................................................................................................. 23
Technical Data
Model Rotorake RR600HD
A - Width (mm) 830
B - Length inc. Collector (mm) 1966
C - Length (mm) 1500
D - Height (mm) 970
E - Main Body Length (mm) 1000
F - Main Body Height (mm) 880
Weight (Kg) 180
Operating Width (mm) 610mm (24”)
Cutting Range (mm) 50
Approx Ground Coverage
- Light / Medium (m2/hr)
- Deep (m2/hr)
1250
750
Tyre Pressures (PSI / Bar) 30 / 2
Hand Arm Vibration (m/sec2)4.5
Measured Sound Power Level (dB(A)) 98
Guaranteed Sound Power Level (dB(A)) 103
Introduction
Engine Honda GX390
Engine Type Air Cooled 4-stroke OHV Petrol Engine
Displacement (cm3)389
Net Power 8.7 kW (11.7 Hp) @ 3600rpm
Cont. Rated Power 6.4 kW (8.6 Hp) @ 3000rpm
7.0 kW (9.4 Hp) @ 3600rpm
Max. Net Torque 26.5 Nm / 2.7 kgfm @ 2500rpm
Fuel Tank Capacity (Ltr) 6.1
Fuel Cons (Cont. Rated Power) 3.5Ltr / hr
Engine Oil Capacity (Ltr) 1.1
*Oil Type SAE10W-30
* Ref. to engine manual for further details.
A
C
F
EB
D

ROTORAKE JUN ‘13
4
Machine Description
OVERVIEW
We want you to obtain the best performance from this machine. If, after reading the following instructions, you have any
problems please contact SISIS or your local area manager or SISIS dealer.
DESCRIPTION
The name “ROTORAKE” has become synonymous with effective thatch
removal and control. However the new SISIS rotorake, RR600HD is more
than a scarier.
A superb thatch remover for regular routine use when used at a shallow
setting, but with the capability to work deeper where severe thatch problems
occur. These conditions are becoming more common with climatic changes
and with some of the newer species of grass. A range of interchangeable
blades are available for year-round use.
The RR600HD incorporates the well proven SISIS rotorake contra-rotation
principle, whereby the reel rotates at high speed against the direction of
travel. The blades therefore cut upwards continuously throwing the thatch
forwards rather than pushing it into the surface. This action also holds the
machine to the ground, maintaining a regular working depth.
As well as thatch removal the RR600HD also aids aeration. The clean continuous slits assist water and air absorption
through the thatch layer. These characteristic slits also improve the integration of top dressing etc. into the surface
The RR600HD is ideal to improve all ne turf areas such as golf greens, bowling greens, cricket squares, lawn tennis
courts etc.
B
C
A
9
6
4
3
1
9
7
2
15
5
10
8
8
7
4
3
11
13 & 14
5
12
10
6
1. Handle Switch
2. Engine Switch
3. Operator Presence Lever
4. Handle Drive Lever
5. Gear Lever
6. Depth Control
7. Drive Lever
8. Reel Drive Lever
9. Handle Locking Knob
10. Throttle Lever
11. Deector Flap Adjuster
12. Depth Control Lock
13. Fuel Tap
14. Choke
15. Recoil Starter
Important Safety Instructions

ROTORAKE JUN ‘13
5
Important Safety Instructions
Keep in mind that the operators / users of the machinery are responsible for accidents or hazards occurring to
themselves, other people and property. People who are unfamiliar with these instructions should not use this machinery.
Local regulations or insurance may restrict the age of the operator. Children should not use this machinery.
Take note of the following:
• Do not put hands and feet near or under the rotating parts.
• Always wear substantial footwear and long trousers. Do not operate the machine barefoot or in open sandals
• Do not operate the engine in a conned space where dangerous CARBON MONOXIDE fumes can collect.
• Only operate in daylight or good articial light.
• Avoid operating the machine in wet grass where possible.
• Do not operate on excessively steep slopes.
• Always be sure of your footing on slopes.
• Exercise extreme care on slopes when changing direction.
• Walk across the face of slopes, never up and down.
• Walk, never run.
• Exercise extreme caution when reversing or pulling the machine toward you.
• Stop the reel if the machine has to be tilted for transportation or manoeuvring.
• Never operate the machine with defective guards or safety devices.
• Do not change the engine governor settings or over speed the engine.
• Keep clear of the discharge opening at all times.
• Never operate the machine while people, especially children, or pets are nearby.
CAUTION READ THE INSTRUCTIONS CAREFULLY AND ALSO THE SEPARATE INSTRUCTION
DETAILS ON THE ENGINE.

ROTORAKE JUN ‘13
6
Operating Instructions
PREPARATION (Ref. Machine Description)
• Thoroughly inspect where the equipment is to be used and remove all hazards and foreign objects including stones,
sticks, wire, bones etc.
• Thoroughly inspect the machine for missing components, damage and wear. Replace components were necessary.
This check must include:
• All safety switches / operator presents devices
• All guards
• Engine components.
• Check Engine oil level and top up in accordance engine manufactures recommendations. (ref. engine manual supplied
with the machine. [SAE 10W-30])
• Check Fuel level, ll if necessary. Note:
• Store fuel in containers specically designed for this purpose
• Refuel outdoors only.
• Do not smoke while refuelling.
• Do not refuel while engine is running or hot.
• If fuel is spilled, do not attempt to start the engine. Move the machine away from the area of spillage to avoid
creating any source of ignition.
• Petrol is highly ammable and will damage grass if spilt.
• Adjust the reel blades to be clear of the ground (Machine Description, Item 6). Note: there is a lock on this lever
(item 12), this will need to be lifted before the handle can be rotated.
• Adjust the deector ap to the required position (item 11)
• Check the machine is in Neutral (item 5)
• Check the Reel Drive Lever (item 8) is disengaged.
• Check the Drive Lever (item 7) is disengaged.
STARTING / STOPPING THE ENGINE (Ref. Machine Description)
• Switch the Engine Switch and Handle Switch to ON position (items 1 and 2).
• Switch the fuel ON at the engine (item 13)
• Switch the choke ON if required (item 14). Note: often only required for a few seconds.
• Set the Throttle Lever (item 10) to half open.
• Pull the Recoil (item 15) to start the engine. Repeat until engine runs.
• Switch off the choke so the engine ticks over.
• The engine can be stopped by returning the Handle Switch to OFF (item 1)
• Close fuel tap when transporting (item 13)
ENGAGING DRIVE TO THE WHEELS (Ref. Machine Description)
• With the engine running, select the appropriate gear (item 5). For those unfamiliar with the machine, select 1st gear.
• Adjust the Throttle Lever (item 10) to half revs
• Depress Operator Presence Lever (item 3).
• Engage the Handle Drive Lever (item 4) and the machine will start to move.
• To increase speed, release Handle Drive Lever (item 4), select a higher gear. DO NOT change gear when the machine
is moving.
• Drive can also be engaged using Drive Lever (item 7). Using this lever eliminates the need to continually hold the
Handle Drive Lever (item 4). NOTE: Releasing the Operator Presence Lever (item 3) while the Drive Lever (item 7) is
engaged will cause the engine to stop.
PLEASE READ THESE OPERATING INSTRUCTIONS CAREFULLY BEFORE
COMMENCING WORK.
CAUTION
Operating Instructions

ROTORAKE JUN ‘13
7
Operating Instructions
Operating Instructions
ENGAGING DRIVE TO THE REEL (Ref. Machine Description)
• Ensure the blades are clear of the ground. This is achieved by adjusting the Depth Control (item 6).
• With the engine running, depress Operator Presence Lever (item 3).
• Engage the Reel Drive Lever (item 8) NOTE: Releasing the operator presence lever (item 3) while the Reel Drive
Lever (item 8) is engaged will cause the engine to stop.
TO START SCARIFYING (Ref. Machine Description)
• With the engine running at full power (Throttle [item 10] fully open) and the Drive Reel engaged as above, start to
lower the blades using the Depth Control (item 6)
• Engage drive to the wheels as above.
• The Depth can be adjusted as the machine is moving.
• When nished, lift the blades clear of the ground (item 6)
STORAGE (Ref. Machine Description)
• Ensure the machine is cool before storing inside.
• DO NOT power wash the machine.
• Always switch the fuel OFF at the engine (item 13)
PLEASE READ THESE OPERATING INSTRUCTIONS CAREFULLY BEFORE
COMMENCING WORK.
CAUTION

ROTORAKE JUN ‘13
8
The Reel
The RR600HD has a quick change reel system. This not only allows damaged or worn blades to be changed easily and
quickly, but also makes the machine multi-purpose.
REMOVING / REPLACING THE REEL (Ref. Figure 2)
• Raise the blades to the maximum clearance from the ground.
• Remove the cover on the non-drive side of the machine.
(large at screw driver)
• Remove the bearing (2 x 13mm spanner)
• Lower the Reel and pull to disengage it from the
square drive.
NOTE: Caution should be taken
when handling the Reel shaft as the blades
are very sharp. Wear gloves.
• Replace the Reel in the same way,
ensuring that the square end is
securely located in the drive socket
and the bearing bolts are tight.
REPLACING BLADES ON THE SHAFT (Ref. Figure 3)
• Remove shaft from machine
• Remove split pin from square end of shaft
(item 2)
• Remove square bore washer (item 4)
• Remove old blades and rubber spacers.
NOTE: The direction of rotation of the
blade.
• Rebuild the Reel with the new blade, and
square bore washer.
• With the Allen key provided (8mm), tighten
the M10 x 25 bolts (item 9) to clamp the
Tine Compression tool to the shaft as
shown.
• With the same Allen key, tighten the
M10 x 80 bolts (item 10). This will
compress the assembly of tines and
spacers until the split pin hole is revealed.
• Replace the split pin.
• Remove the Tine Compression Tool.
NOTE: Tine Compression Tool part number, FS0966
AVAILABLE REELS
• 1mm light scarifying Reel (FS1156)
• 2mm scarifying / thatch removal Reel (2-tip) (FS1155)
• 2mm scarifying / thatch removal Reel (6-tip) (FS1253)
• Verticutting Reel [Triangular blade) (FS1252)
• Brush Reel Std (FS1157)
• Rolaspike (FS1158)
• Faze-Mo (FS1159)
53
2
1
4
9
7
10
8
6
Tine Compression
Tool
Figure 2
Figure 3

ROTORAKE JUN ‘13
9
HANDLE BARS (Ref. Figure 4)
• Slacken the locking knob (item 9)
• Rotate the handle around the toothed disc.
• Select the required position and retighten the
locking knob (item 9)
• Repeat for the other handle.
COLLECTOR BOX (Ref. Figure 4)
• Slacken the M12 bolts (item 14)
(19mm spanner)
• Slide to achieve correct position for
collector box
• Tighten the M12 bolts (item 14) (19mm spanner)
REAR WHEEL SCRAPER (Ref. Figure 4)
• Slacken the M8 bolts (13mm spanner) retaining the scraper (item 11)
• Slide the scraper to the desired position.
• Retighten the M8 bolts (13mm spanner)
FRONT ROLLER SCRAPER (Ref. Figure 5)
• Slacken the M8 nuts (2 x 13mm spanner) (item 1), on both sides of the scraper bar.
• Slide the scraper to the desired position.
• Retighten the M8 nuts (13mm spanner)
BELT TENSION (Ref. Figure 5)
There are 4-off belts on the machine:
F21779 TIMING BELT (Item 4)
• Tensioner (item 2), push up to the belt and lock off using 17mm socket.
NOTE: the nut is captive
SP11037 BELT B46 (Item 5)
• Tensioner (item 3), push up to the belt and lock off using 17mm socket.
NOTE: the nut is captive.
The Reel
General Adjustments
9
6
4
3
1
9
7
2
11
5
10
812
13
14
3
2
13
9
10
8
2
1
4
10
13
11 5
3
7
6
Figure 4
Figure 5

ROTORAKE JUN ‘13
10
General Adjustments
F21440 A SECTION (Item 6)
This is tensioned by sliding the 90 degree gearbox (item 7)
• Slacken the M10 x 30 bolts (17mm spanner) that retain the gearbox (item 7)
• Slide the gearbox to the desired position.
• Retighten the M10 x 30 bolts (17mm spanner)
SP11036 BELT Z51 (ref. parts section Wheel and Axle)
This is located under the machine driving the axle from the 90 deg gearbox
• Tensioner (item 32 , 2), push up to the belt and lock off using 17mm socket. NOTE: the nut is captive
CABLES (ref. Parts Section Controls)
There are 2-off cables on the machine:
SP12002 THROTTLE CABLE
• This is adjusted at the connection to the engine.
SP12053 CABLE DRIVE (from drive lever on handle)
• This can be adjusted at the connection to the drive lever and chassis.
• Remove rubber boot.
• Slacken lock nut (13mm spanner)
• Adjust the tensioner screw.
• Retighten the lock nut (13mm spanner)
DRIVE LEVER (ref. g 4 and g 6)
• Remove guard (item 12, g 4) (large at screw driver & 13mm spanner)
• Remove clevis pin (item 1 g 6)
• Rotate clevis rod assy (item 3 g 6).
This will adjust M8 nut (item 2 g 6)
• Reassembly clevis pin, and try
• Repeat if necessary. NOTE: The drive must not
engage without the lever being operated.
4
2
8
6 & 7
5
1
3
Figure 6

ROTORAKE JUN ‘13
11
General Adjustments
General Adjustments
Figure 6.1
TINE DRIVE LEVER (ref. g 4 and g 6)
• Remove guards (item 12 and 13, g 4) (large at screw driver & 13mm spanner)
• Remove split pin and clevis pin (item 6 and 7 g 6)
• Slacken lock nut (13mm spanner) (item 4)
• Rotate spring cup (item 8 g 6) to adjust the tension.
NOTE: When operated the spring (item 5) must extent betwee
5mm and 5.5mm (see g 6.1) this applies approximately 22kgf
• Reassembly the split pin and clevis pin, measure the
spring extension (see g 6.1)
• Repeat if necessary. NOTE: The lever on the clutch
must be fully returned
when the Drive Lever
(item 8 g 4) is not operated.
This is to ensure the brake
within the clutch is fully engaged.
* * SPRING MUST EXTEND BETWEEN
5MM & 5.5MM
FRONT ROLLER (ref. g 5)
To ensure a level cut, the RR600HD has a
fully independent Front Roller adjustment
mechanism. Item 11, g 5 shows a threaded
connection rod. There is a rod on both sides of the
machine. These can be adjusted independently to set the blades level to the surface.
NOTE: Before levelling, ensure the rear tyres are inated to the same pressures.
• Remove both side guards (large at screw driver)
• Slacken the 2-off M12 nuts on the Roller (item 10)
• Slacken the M12 lock nut (item 13)
• Remove the clevis pin (item 8)
• Screw the clevis end to achieve the correct adjustment.
• Replace the clevis pin (item 8)
• Check if the blades are level with the surface.
• Repeat if necessary
• Tighten the M12 lock nut (item 13)
• Tighten the 2-off M12 nuts on the Roller (item 10).

ROTORAKE JUN ‘13
12
Item No. Part No. Description Quantity
- SP12002 Throttle Cable G860 / G760 1
- SP12053 Cable Drive 1
- SP12052 Wiring Harness 1
- F21440 Belt V A37 Cotton 1
(See Drive Axle)
- SP11036 Belt Z51 1
(See Drive Axle)
- F21779 Belt Timing 1
(See Tine Drive)
- SP11037 Belt B46 Aramid Cored 1
(See Tine Drive)
1.01 Common Spares

ROTORAKE JUN ‘13
13
2.01 Chassis Assembly
Item No. Part No. Description Quantity
1 240188 Belt Guard Stud 3
2 290000 Chassis (RR600) 1
3 290020 Engine Base Plate 1
4 290021 Gearbox Plate 1
5 290022 DeectorFlap 1
6 290023 Cover Plate Front 1
7 290024 Cover Plate Rear 1
8 290025 Cover Plate Side 1
9 290026 Cover Plate Guard 1
10 290027 Grassbox Arm 2
11 290028 DeectorArm 1
12 290030 Control Column 1
13 290050 GrassboxArmStop 2
14 290051 ClutchSupportPlate 1
15 290073 Arm Pivot 2
16 290095 GuardBracketAssy1 2
17 290096 GuardBracket1 2
18 290097 GuardBracketAssy2 1
19 290126 AnchorPoint 2
20 604761 ThackeryWasher 2
21 D1871 Rivet 3.2 x 6 2
22 E1-1061 M6SpringWasher 2
23 E1-1065 SpringWasherM12SquareSection 2
24 F21463 Clevis 8mm GKML 832 2
25 F21464 SpringClevisPin8mm 2
26 F21922 VibrationMount(MetalastikNo17/1386/01) 4
27 F36000 Serial No Plate (SISIS) 1
28 F37422 Hinge 602 1
29 F37704 Scraper 2
30 J209243 Handle Grassbox 1
31 SP01005 HexSetScrewM8x30 4
32 SP01006 Button Head M8 x 20 12
33 SP01009 HexSetScrewM8x20 11
34 SP01019 Button Head M6 x 16 9
35 SP01028 HexSetScrewM6x20 2
36 SP01034 HexSetScrewM10x20 2
37 SP01035 HexSetScrewM10x25 4
38 SP01045 HexSetScrewM8x25 2
Item No. Part No. Description Quantity
39 SP01065 HexSetScrewM12x30 2
40 SP01074 HexSetScrewM5x12 1
41 SP01136 CskCapHeadM10x40 2
42 SP02002 NutM5Nyloc(T) 1
43 SP02004 NutM6Nyloc 9
44 SP02006 NutM8Nyloc(T) 3
45 SP02010 NutM12Nyloc(T) 8
46 SP02044 Rivnut Hex M8 (0.5-3.0) [No Head] 1
47 SP02045 Rivnut Hex M8 (4.0-6.0) [No Head] 32
48 SP02047 Rivnut Hex M10 (3.0-6.0) [No Head] 8
49 SP03004 Washer M8 Toothed 12
50 SP03008 Washer M8 Form A 20
51 SP03010 Washer M6 Form A 20
52 SP03011 Washer M10 Form A 6
53 SP03012 Washer M12 Form A 10
54 SP03015 Washer M8 Form C 2
55 SP03022 Washer M20 Form A 2
56 SP03029 WasherM8SpringLock 14
57 SP03034 WasherM10SpringLock 6
58 SP14009 KnobPlasticM8Male 1
48
33,56,50
28 43,51,34
35,51
4
52,57,37
49,32
50,56,33
40,42
17
16
50,56,33 1916
1
14 1
57,52,36
50,56,33
52,57,36 12
3
45,53
26
48
31,56,50
19
29
2
47
18
58,54,25,24
21
27
41
20
55
47
15
11
10
39,23,53,13
25,24
5
6
43,51,34
30
13
10
21
27
21
7
49,32
45,53
47
47
33
47

ROTORAKE JUN ‘13
14
3.01 Controls Assembly
Item No. Part No. Description Quantity
1 127434 Red Knob M10 1
2 290055 DriveActuatorAssy 1
3 290058 ControlLeverAssy 1
4 290060 DriveLeverAssy 1
5 290063 ControlLeverAssy30Deg 1
6 290103 Sensor Angle Plate 2
7 290120 SpringCup 1
8 290121 Over Centre Rod 1
9 D1040 SplitPin3/32”x3/4”” 4
10 D1887 ThackeryWasherM12 2
11 F21463 Clevis 8mm GKML 832 1
12 F21464 SpringClevisPin8mm 1
13 176457 Knob 1
14 J209011 TensionSpring 1
15 J209021 SplitPin1/16”x1/2” 1
16 J209047 TensionerPulley 1
17 SP01029 Shoulder Bolt 12 x 25 M10 1
18 SP01070 CapHeadM2x12 4
19 SP01071 HexSetScrew3/8”UNFx11/2” 1
20 SP01126 Shoulder Bolt 12 x 50 M10 2
21 SP01128 Rod M8 x 160 1
22 SP01135 HexSetScrewM5x16 4
23 SP02002 NutM5Nyloc(T) 4
24 SP02008 NutM10Nyloc(T) 1
25 SP02012 M8ThinLockNut 3
26 SP02018 Nut3/8”UNFNyloc(T) 1
27 SP02032 Nut M2 Std 4
28 SP03008 Washer M8 Form A 5
29 SP03009 Washer M5 Form A 8
30 SP03011 Washer M10 Form A 1
31 SP03012 Washer M12 Form A 2
32 SP03027 Washer M2 8
33 SP05006 Clevis Pin 8 x 30 1
- SP12002 Throttle Cable G860 / G760 1
- SP12053 Cable Drive 1
- SP12052 Wiring Harness 1
14
3
9
28
10
20
25
4
25
15
28
25
6
17
12
2
26
19
16
11
21
33
28
7
1
18
6
27
23,22,29,29
20
31
9
9
28
5
8
13

ROTORAKE JUN ‘13
15
4.01 Roller Assembly
Item No. Part Number Description Quantity
1 290039 Roller Pivot Bush 2
2 290040 RollerArmAssyL.H. 1
3 290045 RollerArmAssyR.H. 1
4 290048 BraceEnd 4
5 290049 RollerScraper 1
6 290052 Roller Torsion Bar 1
7 290053 Roller Torsion Arm 2
8 290054 Torsion Bar Arm 1
9 290081 RollerAdjBlock 1
10 290082 Roller Adjuster Bar 1
11 290083 Roller Adj Nut 1
12 290084 Roller Adj Rod 1
13 D1947 GreaseNippleM6 2
14 D7907 Universal Joint 2
15 F21064 SwivelJoint 1
16 F21150 Bearing Ref. BPFT-5 (25mm Bore) 2
17 J24550 FrontRoller24” 1
18 SP01021 HexSetScrewM12x20 1
19 SP01045 HexSetScrewM8x25 6
20 SP01052 CapHeadM10x35 3
21 SP01130 CapHeadM12x45 2
22 SP01132 Button Head M12 x 20 1
23 SP01134 Rod M12 x 190 2
24 SP02005 Nut M8 Std 2
25 SP02006 NutM8Nyloc(T) 2
26 SP02010 NutM12Nyloc(T) 4
27 SP02014 NutM12Lock(Thin) 11
28 SP03008 Washer M8 Form A 6
29 SP03012 Washer M12 Form A 1
30 SP03015 Washer M8 Form C 4
31 SP03017 Washer M12 Form C 7
32 SP03029 WasherM8SpringLock 6
33 SP14020 ClevisClipM12Short 4
34 SP14022 Rod End M12 Female 1
35 SP14023 Handwheel 1
29
27
31
26
3
24 30
33
4
27
18
31
9
27
15
6
16
19,32,28
20
27
23
13
4
33
26
31
27
23
33
4
31
27
26
13
5
17
231 26
25 30
2
21
1
27 33
4
7
20
19,32,28
8
10
11
27
14
27
12
27
22
34
35

ROTORAKE JUN ‘13
16
5.01 Drive & Axle Assembly
Item No. Part No. Description Quantity
1 290062 TorqueStrap 2
2 290079 Belt Tensioner Post 1
3 290080 SpacerPulley 1
4 D8154 GrubScrewM8x16 6
5 D8360 Wheel Nut M12 8
6 E1-1065 SpringWasherM12SquareSection 8
7 E1-1114 Hex Bolt M8 x 65 4
8 F20171 WheelAssy16x650-804Ply4Stud4”PCD 2
9 F20527 Gearbox Angle Drive R.H. 1
10 F20558 WoodruffKeyNo6(505) 1
11 F21440 Belt ‘V’ A 37 Cotton 1
12 F21629 Axle 1
13 F21722 E-Clip5/8”0.584”DiaAm1500/75 2
14 F21782 I.D19.2x34O/Dx1.5Thk
NylonWasherSkiffy 2
15 F35773 Wheel Hub 2
16 F36029 PulleyVSPZ224PCD 1
17 F36030 PulleyVSPA125PCD 1
18 F36031 PulleyGearboxDriven 1
19 F36169 WheelSpacer 4
20 J20457 Key3/16”x3/16”x1”RdEnd 2
21 J20462 KeyWoodruff(606)3/16”x3/4” 2
22 SP01009 HexSetScrewM8x20 2
23 SP01017 GrubScrewM6x12 4
24 SP01034 HexSetScrewM10x20 1
25 SP01086 HexSetScrew5/16”UNFx5/8” 2
26 SP01095 HexSetScrew3/8”UNFx1” 1
27 SP01105 HexSetScrewM10x30 3
28 SP01111 HexSetScrewM12x35 8
29 SP02006 NutM8Nyloc(T) 4
30 SP02008 NutM10Nyloc(T) 2
31 SP03008 Washer M8 Form A 12
32 SP03011 Washer M10 Form A 4
33 SP03029 WasherM8SpringLock 4
34 SP03034 WasherM10SpringLock 2
35 SP11035 PulleyIdler19mm 1
36 SP11036 Belt Z51 1
30,32,32,27
36
6
5
28
15
13
20
19
23
8
14
19
1
16
21
8
4
21
9
30,32,32,27
24
2
16
7,29,31
27
35 26,34,3 7,29,31
4,10
36
17
4
16
12 1
31,33,25
33,31,22
11
24
2
35
36
18
9
4,21
VIEW FROM REAR
1

ROTORAKE JUN ‘13
17
5.02 Engine & Clutch Assembly
Item No. Part Number Description Quantity
1 SP01031 HexSetScrewM10x50 4
2 SP01138 HexSetScrew3/8”UNFx11/4” 1
3 SP01133 HexBolt3/8”UNFx43/4” 1
4 SP02008 NutM10Nyloc(T) 4
5 SP02018 Nut3/8”UNFNyloc(T) 1
6 SP03011 Washer M10 Form A 9
7 SP03034 WasherM10SpringLock 1
8 SP11033 ClutchCB228 1
9 SP15004 GX390 UT2-QX-Q4 1
10 290127 SecuringPlate 1
* NOTE:- This is a sealed unit, DO NOTopen.
8
9
5,2
6
7
3
8
1,6,6,4
6
7
3
10

ROTORAKE JUN ‘13
18
6.01 Gear Lever Assembly
Item No. Part No. Description Quantity
1 290110 GearLeverAssy(600Hd) 1
2 D1239 HexSetScrew1/4”UNFx3/4” 1
3 D8485 Ball Joint M8 Ref.R108-M8. 2
4 F21772 Knob 1
5 F37454 Gear Shift Lever 1
6 J20553 Rod M8 x 60 1
7 J209085 Bush Oilite AM1216 - 20 1
8 SP01029 Shoulder Bolt 12 x 25 M10 1
9 SP02006 NutM8Nyloc(T) 2
10 SP02012 M8ThinLockNut 2
11 SP03012 Washer M12 Form A 1
12 SP03014 Washer M6 Form C 1
13 SP03019 Washer M12 Wave 1
4
1
1
9
5
12
2
3
6
10
9
3
13
8
11

ROTORAKE JUN ‘13
19
7.01 Grassbox Assembly
Item No. Part Number Description Quantity
1 290070 GrassCollector24” 1
2 290071 Washer 16 x 100 x 3 2
3 290072 Grassbox Pivot 2
4 290123 GrassboxDecalPlate 1
5 290124 Grassbox Front Plate 1
6 J209064 Handle Plate Grass Box 1
7 J209243 Handle Grassbox 1
8 J249062 Mesh 1
9 J249063 24”GrassboxEdgingStrip 1
10 SP01028 HexSetScrewM6x20 2
11 SP02028 NutM16Nyloc(T) 2
12 SP03010 Washer M6 Form A 2
13 SP03021 Washer M16 Form C 2
14 SP03032 WasherM5Repair 13
15 SP05018 Rivet 4.8 x 18 13
7
3
13
6
8
14
15
10
7
12
4
5
15
1
9
15
14
11
2

ROTORAKE JUN ‘13
20
8.01 Tine Drive Assembly
Item No. Part No. Description Quantity
1 290065 BeltTensionerAssy 1
2 290074 StubQuickRelease 1
3 290075 Stub Bearing Housing 1
4 290076 Layshaft 1
5 290077 Belt Tensioner Bush 1
6 290078 PulleyLayshaft 1
7 D8153 GrubScrewM8x10 2
8 F21150 BearingRef.Bpft-5(25mmBore) 4
9 F21779 Timing Belt 1
10 F22418 Bearing 6008 2RS 1
11 F37410 Tine Shaft 1
12 SP01009 HexSetScrewM8x20 6
13 SP01020 HexSetScrewM10x40 2
14 SP01034 HexSetScrewM10x20 1
15 SP01035 HexSetScrewM10x25 2
16 SP01045 HexSetScrewM8x25 7
17 SP02006 NutM8Nyloc(T) 12
18 SP03008 Washer M8 Form A 25
19 SP03011 Washer M10 Form A 2
20 SP03029 WasherM8SpringLock 7
21 SP03034 WasherM10SpringLock 4
22 SP10002 Key8x7x40RdEnd 2
23 SP10006 Key8x7x30 1
24 SP11002 Pulley22-8M-30Htd(Tapered) 1
25 SP11003 Pulley34-8M-30Htd(Tapered) 1
26 SP11005 TaperedBush1108-25 1
27 SP11007 TaperedBush1615-25 1
28 SP11034 PulleyIdler38mm 1
29 SP11035 PulleyIdler19mm 1
30 SP11037 Belt B46 Aramid Cored 1
29
5
14
9
22
28
8,15,16,18
8
11
6
22
7
30
4
12,18,18,17
8
5
16,20,18
3
25
27
17,18
2
23
8
9
21,13
28
26
22
24
19,21,15
1
13,21
Table of contents
Other Sisis Lawn And Garden Equipment manuals
Popular Lawn And Garden Equipment manuals by other brands

Premier designs
Premier designs WindGarden 26829 Assembly instructions

BOERBOEL
BOERBOEL Standard Floating Bar Gravity Latch installation instructions

Rainbow
Rainbow Quantum instruction manual
AL-KO
AL-KO Combi Care 32.3 VLE Comfort operating instructions

Pro-Elec
Pro-Elec PE01137 manual
Jata hogar
Jata hogar mosquitoTRAP MATL9120 Instructions of use
