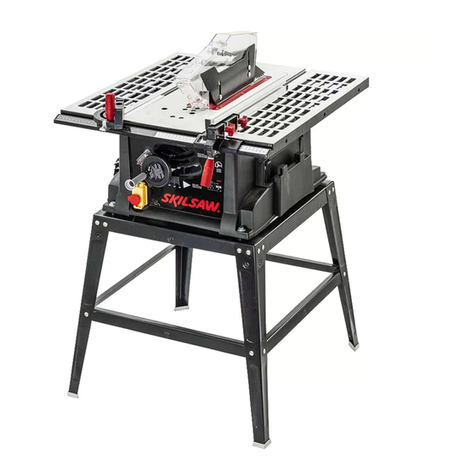
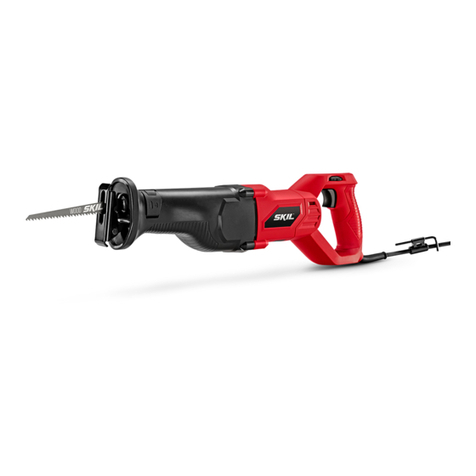
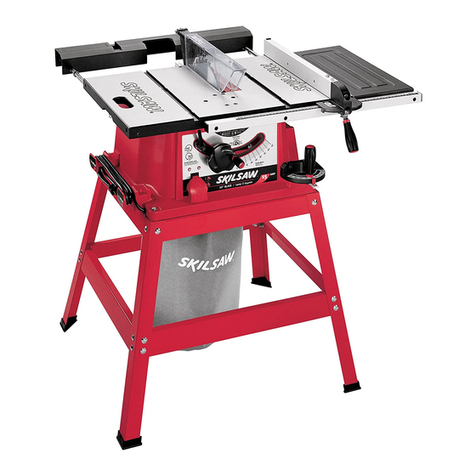
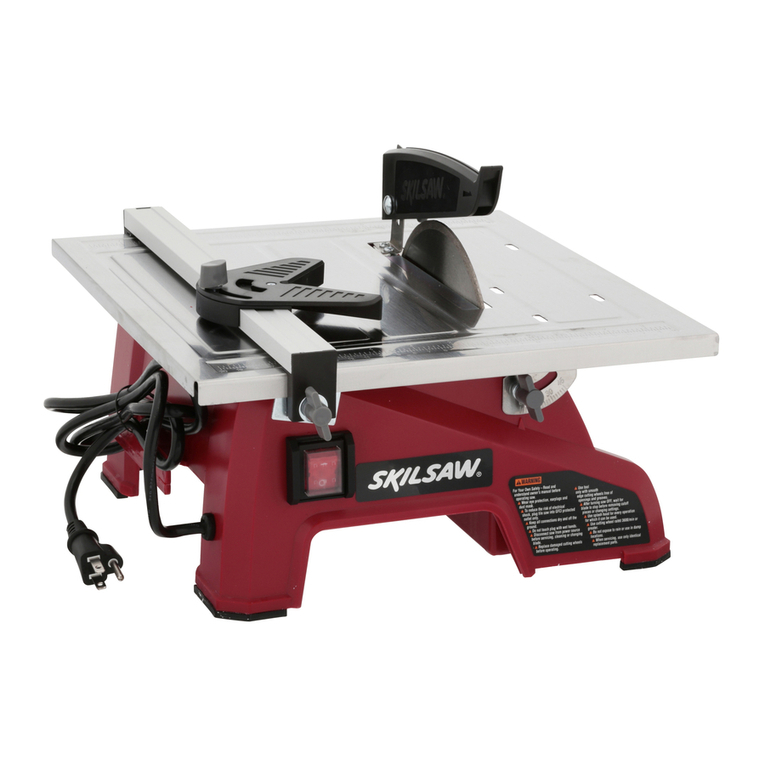
Skil 3510 Assembly instructions

IMPORTANT: IMPORTANT : IMPORTANTE:
Read Before Using Lire avant usage Leer antes de usar
For English Version Version française Versión en español
See page 2 Voir page 18 Ver la página 3
Operating/Safety Instructions
Consignes de fonctionnement/sécurité
Instrucciones de funcionamiento y seguridad
1-877-SKIL999 (1-877-75 -5999) www.skil.com
Call Toll Free for
Consumer Information
& Service Locations
Pour obtenir des informations
et les adresses de nos centres
de service après-vente,
appelez ce numéro gratuit
Llame gratis para
obtener información
para el consumidor y
ubicaciones de servicio
3510
3510 2610008262 ENG:SM 2610008262 12-09 3/26/10 9:03 AM Page 1

-2-
WORK AREA SAFETY
Keep work area clean and well-lit. Cluttered
or dark areas invite accidents.
Do not operate power tools in explosive
atmospheres, such as in the presence of
flammable liquids, gases or dust. Power tools
create sparks which may ignite the dust or fumes.
Keep children and bystanders away while
operating a power tool. Distractions can
cause you to lose control.
ELECTRICAL SAFETY
Power tool plugs must match the outlet.
Never modify the plug in any way. Do not
use any adapter plugs with earthed
(grounded) power tools. Unmodified plugs
and matching outlets will reduce risk of
electric shock.
Avoid body contact with earthed or
grounded surfaces such as pipes,
radiators, ranges and refrigerators. There
is an increased risk of electric shock if your
body is earthed or grounded.
Do not abuse the cord. Never use the cord
for carrying, pulling or unplugging the power
tool. Keep cord away from heat, oil, sharp
edges or moving parts. Damaged or entangled
cords increase the risk of electric shock.
When operating a power tool outdoors,
use an extension cord suitable for outdoor
use. Use of a cord suitable for outdoor use
reduces the risk of electric shock.
If operating the power tool in damp
locations is unavoidable, use a Ground
Fault Circuit Interrupter (GFCI) protected
supply. Use of a GFCI reduces the risk of
electric shock.
Grounded tools must be plugged into an
outlet properly installed and grounded in
accordance with all codes and ordinances.
Never remove the grounding prong or
modify the plug in any way. Do not use any
adapter plugs. Check with a qualified
electrician if you are in doubt as to
whether the outlet is properly grounded.
If the tools should electrically malfunction or
break down, grounding provides a low-
resistance path to carry electricity away from
the user. Improper grounding can shock, burn
or electrocute. Grounded tools are equipped
with a three-conductor cord and three-prong
type plugs. Before plugging in the tool, be
certain the outlet voltage supplied is within the
voltage marked on the nameplate. Do not use
“AC only” rated tools with a DC power supply.
PERSONAL SAFETY
Stay alert, watch what you are doing and
use common sense when operating a
power tool. Do not use a power tool while
you are tired or under the influence of
drugs, alcohol or medication. A moment of
inattention while operating power tools may
result in serious personal injury.
Use personal protective equipment.
Always wear eye protection. Protective
equipment such as dust mask, non-skid
safety shoes, hard hat or hearing protection
used for appropriate conditions will reduce
personal injuries.
Prevent unintentional starting. Ensure the
switch is in the OFF position before
connecting to power source and/or battery
pack, picking up or carrying the tool.
Carrying power tools with your finger on the
switch or energizing power tools that have
the switch on invites accidents.
Remove any adjusting key or wrench
before turning the power tool on. A wrench
or a key left attached to a rotating part of the
power tool may result in personal injury.
Do not overreach. Keep proper footing and
balance at all times. This enables better
control of the power tool in unexpected
situations.
Dress properly. Do not wear loose clothing
or jewelry. Keep your hair, clothing and
gloves away from moving parts. Loose
clothes, jewelry or long hair can be caught in
moving parts.
General Power Tool Safety Warnings
Read all safety warnings and instructions. Failure to follow the warnings
and instructions may result in electric shock, fire and/or serious injury.
SAVE ALL WARNINGS AND INSTRUCTIONS FOR FUTURE REFERENCE
The term “power tool” in all of the warnings refers to your mains-operated (corded) power tool
or battery-operated (cordless) power tool.
3510 2610008262 ENG:SM 2610008262 12-09 3/26/10 9:03 AM Page 2

If devices are provided for the connection
of dust extraction and collection facilities,
ensure these are connected and properly
used. Use of dust collection can reduce dust-
related hazards.
POWER TOOL USE AND CARE
Do not force the power tool. Use the
correct power tool for your application.
The correct power tool will do the job better
and safer at the rate for which it was
designed.
Do not use the power tool if the switch
does not turn it on and off. Any power tool
that cannot be controlled with the switch is
dangerous and must be repaired.
Disconnect the plug from the power
source and/or the battery pack from the
power tool before making any
adjustments, changing accessories or
storing power tools. Such preventive safety
measures reduce the risk of starting the
power tool accidentally.
Store idle power tools out of the reach of
children and do not allow persons
unfamiliar with the power tool or these
instructions to operate the power tool.
Power tools are dangerous in the hands of
untrained users.
Maintain power tools. Check for
misalignment or binding of moving parts,
breakage of parts and any other condition
that may affect the power tools operation.
If damaged, have the power tool repaired
before use. Many accidents are caused by
poorly maintained power tools.
Keep cutting tools sharp and clean.
Properly maintained cutting tools with sharp
cutting edges are less likely to bind and are
easier to control.
Use the power tool, accessories, tool bits,
etc. in accordance with these instructions,
taking into account the working
conditions and the work to be performed.
Use of the power tool for operations different
from those intended could result in a
hazardous situation.
Inspect guards before using a tool. Keep
guards in place. Check moving parts for
binding or any other condition that may
affect the normal operation or safety
features of the tool. If damaged, have
tool serviced before using the tool.
Many accidents are caused by poorly
maintained tools.
Do not alter or misuse tool. Any alteration
or modification is a misuse and may result in
serious personal injury.
The use of any other accessories not
specified in this manual may create a
hazard. Accessories that may be suitable for
one type of tool may become hazardous
when used on an inappropriate tool.
SERVICE
Have your power tool serviced by a
qualified repair person using only
identical replacement parts. This will
ensure that the safety of the power tool is
maintained.
When servicing a tool, use only identical
replacement parts. Follow instructions in
the Maintenance section of this manual.
Use of unauthorized parts or failure to follow
maintenance instructions may create a
hazard.
-3-
3510 2610008262 ENG:SM 2610008262 12-09 3/26/10 9:03 AM Page 3

CUTTING PROCEDURES
Keep hands and body away
from and to the side of
wheel. Contact with wheel will result in
serious personal injury.
Adjust the cutting depth to the thickness
of the workpiece. Less than 1/2 in.
(13 mm) of the blade should be visible below
the workpiece.
Never hold piece being cut in your hands
or across your leg. Secure the workpiece
to stable platform. It is important to support
the work properly to minimize body
exposure, blade binding or loss of control.
Hold power tool by the insulated gripping
surfaces when performing an operation
where the cutting tool may contact hidden
wiring or its own cord. Contact with a “live”
wire will also make exposed metal parts of
the tool “live” and shock the operator.
When cutting, always use a fence if
possible. This improves accuracy of cut and
reduces the chance for blade binding.
Always use blades with correct size and
shape (diamond vs. round) of arbor holes.
Blades that do not match the mounting
hardware of the saw will run eccentrically,
causing loss of control.
Never use damaged or incorrect blade
washers or bolts. The blade washers and
bolt were specially designed for your saw, for
optimum performance and safety of
operation.
Hold the saw firmly to prevent loss of
control. Figures in this manual illustrate
typical hand support of the saw.
To reduce the risk of electric shock, plug
tile saw into Ground Fault Circuit
Interrupter (GFCI) protected outlet only. If a
GFCI protected outlet is not available, use
a portable receptacle with built-in GFCI
protection.
To reduce the risk of
electrocution, keep all
connections dry and off the ground. Do
not touch plug with wet hands.
Depending upon use, the switch may not
last the life of the saw. If the switch should
fail in the OFF position, the saw may not
start. If it should fail while the saw is
running, the saw may not shut off. If either
occurs, unplug the saw immediately and do
not use until repaired.
This tile saw should not be mounted to a
table and converted to a table saw. Hand-
held tile saws are not designed or intended
to be used as table saws.
NEVER use toothed blade or bonded
abrasive wheels on the tile saw. Use only
steel continuous rim cutting wheels rated at
least 12,000/min.
Make sure the cutting tool rotates in the
same direction as the rotation arrow on
the upper guard. Also make sure the cutting
tool, arbor collars and arbor nut are installed
properly. eep the cutting tool as low as
possible for the operation being performed.
Do not use any blade or other cutting tool
marked for an operating speed less than
12,000 RPM. Never use a cutting tool larger
in diameter than the diameter for which the
saw was designed.
Replace damaged tile blades before
operating.
Cut only one workpiece at a time. Multiple
workpieces cannot be adequately clamped or
braced and may bind on the blade or shift
during cutting.
DANGER
!
DANGER
!
- -
Safety Rules for Tile Saws
Read all safety warnings and all instructions.
!
WARNING
3510 2610008262 ENG:SM 2610008262 12-09 3/26/10 9:03 AM Page 4

-5-
LOCATION
Use the tile saw in a well-lit area and on a
level surface, clean and smooth enough to
reduce the risk of trips and falls. Use it where
neither the operator nor the casual observer
is forced to stand in line with the blade.
To avoid the possibility of the appliace plug
or receptacle getting wet, position tile saw to
one side of a wall-mounted receptacle to
prevent water from dripping onto the
receptacle or plug. The user should arrange
a “drip loop” in the cord connecting the saw
to a receptacle. The “drip loop” is that part of
the cord below the level of the receptacle, or
the connector if an extension cord is used, to
prevent water traveling along the cord and
coming in contact with the receptacle.
To reduce the risk of
electrocution, DO NOT
unplug the cord if the plug or receptacle
gets wet. Disconnect the fuse or circuit
breaker that supplies power to the tool.
Then unplug and examine for presence of
water in the receptacle.
Fig. 1
DANGER
!
DRIP
LOOP
POWER
SUPPLY
CORD
CAUSES AND OPERATOR
PREVENTION OF KICKBACK
ickback is a sudden reaction to a pinched,
bound or misaligned saw blade, causing an
uncontrolled saw to lift up and out of the
workpiece toward the operator.
When the blade is pinched or bound tightly
by the kerf closing down, the blade stalls and
the motor reaction drives the unit rapidly
back toward the operator.
If the blade becomes twisted or misaligned in
the cut, the cutting surface at the back edge
of the blade can dig into the top surface of
the workpiece, causing the blade to climb out
of the kerf and jump back toward the
operator.
ickback is the result of tool misuse and/or
incorrect operating procedures or conditions
and can be avoided by taking proper
precautions as given below:
Maintain a firm grip on the saw and
position your body and arm to allow you
to resist kickback forces. Position your
body to either side of the blade, but not in
line with the blade. ickback could cause
the saw to jump backwards, but kickback
forces can be controlled by the operator, if
proper precautions are taken.
When blade is binding, or when
interrupting a cut for any reason, release
the trigger and hold the saw motionless in
the material until the blade comes to a
complete stop. Never attempt to remove
the saw from the work or pull the saw
backward while the blade is in motion or
kickback may occur. Investigate and take
corrective action to eliminate the cause of
blade binding.
When restarting a saw in the workpiece,
center the saw blade in the kerf and check
that the blade is not engaged into the
material. If saw the blade is binding, it may
walk up or kick back from the workpiece as
the saw is restarted.
Do not use dull or damaged blades.
Unsharpened or improperly set blades
produce narrow kerf, causing excessive
friction, blade binding and kickback.
Kickback and Related Warnings
3510 2610008262 ENG:SM 2610008262 12-09 3/26/10 9:03 AM Page 5

-6-
Blade depth lever and bevel adjustment
nut must be tight and secure before
making cut. If blade adjustment shifts while
cutting, it may cause binding and kickback.
Use extra caution when making “plunge
cuts” into existing wall or other blind
areas. The protruding blade may cut
objects that can cause kickback.
Never place your hand behind the saw
blade. ickback could cause the saw to jump
backwards over your hand.
Do not use the saw with an excessive
depth of cut setting. Too much blade
exposure increases the likelihood of the
blade twisting in the kerf and increases the
surface area of the blade available for
pinching that leads to kickback.
Additional Safety Warnings
Do not use AC-only rated tools with a DC
power supply. While the tool may appear to
work, the electrical components of the AC-
rated tool are likely to fail and create a
hazard to the operator.
Keep handles dry, clean and free from oil
and grease. Slippery hands cannot safely
control the power tool.
Use clamps or other practical way to
secure and support the workpiece to a
stable platform. Holding the work by hand or
against your body is unstable and may lead
to loss of control.
Develop a periodic maintenance schedule
for your tool. When cleaning a tool, be
careful not to disassemble any portion of
the tool since internal wires may be
misplaced or pinched or safety guard
return springs may be improperly
mounted. Certain cleaning agents such as
gasoline, carbon tetrachloride, ammonia, etc.
may damage plastic parts.
Risk of injury to user. The power cord must
only be serviced by a Skil Factory Service
Center or Authorized Skil Service Station.
Some dust created by
power sanding, sawing,
grinding, drilling and other construction
activities contains chemicals known to
cause cancer, birth defects or other
reproductive harm. Some examples of
these chemicals are:
• Lead from lead-based paints
• Crystalline silica from bricks and
cement and other masonry products
• Arsenic and chromium from chemically
treated lumber
Your risk from these exposures varies,
depending on how often you do this type of
work. To reduce your exposure to these
chemicals, work in a well-ventilated area, and
work with approved safety equipment such
as those dust masks that are specially
designed to filter out microscopic particles.
!
WARNING
3510 2610008262 ENG:SM 2610008262 12-09 3/26/10 9:03 AM Page 6

-7-
Symbol Name Designation/Explanation
V Volts Voltage (potential)
A Amperes Current
Hz Hertz Frequency (cycles per second)
W Watt Power
kg ilograms Weight
min Minutes Time
s Seconds Time
Diameter Size of drill bits, grinding wheels, etc.
n0No load speed Rotational speed, at no load
n Rated speed Manufacturer’s rated speed
.../min Revolutions or reciprocation Revolutions, strokes, surface speed,
per minute orbits, etc. per minute
0 OFF position Zero speed, zero torque...
1, 2, 3, ... Selector settings Speed, torque or position settings.
I, II, III, Higher number means greater speed
Infinitely variable selector with off Speed is increasing from 0 setting
Arrow Action in the direction of arrow
Alternating current Type or a characteristic of current
Direct current Type or a characteristic of current
Alternating or direct current Type or a characteristic of current
Class II construction Designates Double Insulated
Construction tools
Earthing terminal Grounding terminal
Warning symbol Alerts user to warning messages
Li-ion RBRC seal Designates Li-ion battery recycling
program
Ni-Cad RBRC seal Designates Ni-Cad battery recycling
program
Read manual symbol Alerts user to read manual
Wear eye protection symbol Alerts user to wear eye protection
0
Symbols
IMPORTANT: Some of the following symbols may be used on your tool. Please study them
and learn their meaning. Proper interpretation of these symbols will allow you to operate the
tool better and safer.
3510 2610008262 ENG:SM 2610008262 12-09 3/26/10 9:03 AM Page 7

-8-
This symbol designates that this tool is listed by Underwriters Laboratories.
This symbol designates that this tool is listed by the Canadian Standards
Association.
This symbol designates that this tool is listed by the Canadian Standards
Association, to United States and Canadian Standards.
This symbol designates that this tool complies to NOM Mexican Standards.
This symbol designates that this tool is listed by Underwriters Laboratories, to
United States and Canadian Standards.
This symbol designates that this tool is listed by the Intertek Testing Services,
to United States and Canadian Standards.
3510 2610008262 ENG:SM 2610008262 12-09 3/26/10 9:03 AM Page 8

-9-
Functional Description and Specifications
Disconnect the plug from the power source before making any assembly,
adjustments or changing accessories. Such preventive safety measures
reduce the risk of starting the tool accidentally.
Tile Saw
Fig. 2
Model number 3510
Maximum Capacities
Blade 4-3/8"
Blade arbor hole 3/4"Round
Depth of cut at 90° 1-3/8"
Depth of cut at 45° 1-7/8"
Depth of cut at 51° 1"
NOTE: For tool specifications, refer the name
plate on your tool.
BEVEL
ADJUSTMENT
NUT
FENCE
ADJUSTMENT
NUT
GRADUATED
QUADRANT
LOCK
BUTTON
TRIGGER
SWITCH
SWITCH
LOCK
BUTTON
DEPTH
ADJUSTMENT
LEVER
WATER
SUPPLY
VALVE
WATER
SUPPLY
LINE
HOSE
ADAPTER
FENCE
CUTTING
LINE
GUIDE
FOOT
BLADE
GUARD
!
WARNING
3510 2610008262 ENG:SM 2610008262 12-09 3/26/10 9:03 AM Page 9

-10-
ATTACHING THE BLADE
Disconnect the plug from
the power source before
making any assembly, adjustments or
changing accessories. Such preventive
safety measures reduce the risk of starting
the tool accidentally.
1. Press the LOC BUTTON and turn
wrench until lock button engages. Saw
shaft is now locked. Continue to depress
button, turn BLADE WRENCH clockwise
and remove BLADE STUD and OUTER
WASHER (Fig. 3).
2. Make sure the DIRECTION ARROW on
the blade points in the same direction as
the DIRECTION ARROW on the BLADE
GUARD.
3. Slide blade into the BLADE GUARD and
mount it against the INNER WASHER on
the shaft. Be sure the raised center faces
the blade.
4. Install the OUTER WASHER, making
sure the flat side faces the blade. First
tighten BLADE STUD finger tight, then
TIGHTEN BLADE STUD 1/8 TURN (45˚)
WITH THE WRENCH PROVIDED.
Do not use wrenches with longer handles,
since it may lead to over-tightening of the
blade stud.
!
WARNING
Assembly
Fig. 3
INNER
WASHER
(Raised center
faces blade)
OUTER
WASHER
(Flat side
faces blade)
BLADE
DIRECTION
ARROW
LOCK
BUTTON
BLADE
GUARD BLADE
STUD
BLADE
WRENCH
Loosen
Tighten
3510 2610008262 ENG:SM 2610008262 12-09 3/26/10 9:03 AM Page 10

-11-
DEPTH ADJUSTMENT
Disconnect plug from power source. Loosen
the DEPTH ADJUSTMENT LEVER located
between the guard and handle of saw. Hold
the FOOT down with one hand and raise or
lower saw by the handle. Tighten lever at the
depth setting desired. Check desired depth
(Fig. 4).
Fig.
Adjust the cutting depth to the thickness
of the workpiece. Less than 1/2 in. (13 mm)
of the blade should be visible below the
workpiece.
Fig. 5
1/2"
DEPTH
ADJUSTMENT
LEVER
FOOT
90° CUTTING ANGLE CHECK
Disconnect plug from power source. Set
FOOT to maximum depth of cut setting.
Loosen bevel adjustment lever, set to 0° on
quadrant, retighten lever and check for 90°
angle between the BLADE and bottom plane
of foot with a square (Fig. 6).
If adjustment is necessary, loosen the
POINTER ADJUSTMENT SCREW and move
the pointer to the zero (Fig. 6).
Fig. 6
BEVEL ADJUSTMENT
Disconnect plug from power source. The
FOOT can be adjusted up to 45° by
loosening the BEVEL ADJUSTMENT NUT at
the front of the saw. Align to desired angle on
the GRADUATED QUADRANT and then
tighten bevel adjustment nut (Fig. 7).
Because of the increased amount of blade
engagement in the work and decreased
stability of the foot, blade binding may occur.
eep the saw steady and the foot firmly on
the workpiece.
Fig. 7
0
15
30
FOOT
GRADUATED
QUADRANT
BEVEL
ADJUSTMENT
NUT
15
30
45
FOOT BLADE
POINTER
ADJUSTMENT
SCREW
90˚
Operating Instructions
3510 2610008262 ENG:SM 2610008262 12-09 3/26/10 9:03 AM Page 11

-12-
CUTTING LINE GUIDE
For a straight 90° cut, use left side of notch in
the foot. For 45° bevel cuts, use the right
side (Fig. 8). The cutting guide notch will give
an approximate line of cut. Make sample cuts
in scrap material to verify actual line of cut.
This will be helpful because of the number of
different blade types and thicknesses
available. To ensure minimum chipping or
splintering on the good side of the material to
be cut, face the good side down.
Fig. 8
45 0
45°
BEVEL
CUTS
90°
VERTICAL
CUTS
ATTACHING THE WATER SUPPLY
The diamond blade
supplied with this saw is a
wet type. You must use water when cutting
with the supplied blade. If water is not
used, blade may overheat and cause
premature blade failure.
Connect the hose adapter from the water
supply line to a garden hose or a faucet with
the correct fitting and tighten securely. Turn
on the faucet that the supply line is
connected to. Do not turn the faucet on high.
Turn the water supply valve clockwise to the
ON position to start the flow of water. To turn
the water off, turn the valve counterclockwise
to the OFF position. You can adjust the flow
of water by turning the valve either clockwise
or counterclockwise between the ON and
OFF positions. When finished cutting, turn
the water off.
Fig. 9
WATER
ON
WATER
OFF
CAUTION
!
SWITCH
When starting the tool,
hold it firmly in your hand.
The torque from the motor can cause the tool
to twist.
To turn tool on, push in the switch lock button
and squeeze the trigger switch. To turn the
tool off, release the trigger switch, which is
spring-loaded and will return to the OFF
position automatically.
Your saw should be running at full speed
BEFORE starting the cut, and turned off only
AFTER completing the cut. To increase
switch life, do not turn switch on and off while
cutting.
!
WARNING
3510 2610008262 ENG:SM 2610008262 12-09 3/26/10 9:03 AM Page 12

-13-
GENERAL CUTS
This tile saw was designed
for cutting tile and marble
only. This saw was not designed for and
should not be used to cut metal, wood or
plastic.
Always hold the saw handle with one hand.
Maintain a firm grip and operate the switch
with a decisive action. Never force the saw.
Use light and continuous pressure.
After completing a cut and
after releasing the trigger,
be aware of the necessary time it takes for
the blade to come to a complete stop
during coast-down. Do not allow the saw
to brush against your leg or side. Be aware
of the blade exposures that exist below
guard area.
When cutting is interrupted, to resume
cutting: squeeze the trigger and allow the
blade to reach full speed, reenter the cut
slowly and resume cutting.
Do not attempt to cut
pieces too small. When
cutting any material, make sure that the
workpiece is properly supported and
secured.
!
WARNING
!
WARNING
CAUTION
!
CROSS CUTS
Cross cuts are straight 90° cuts made with
the bevel angle set at 0°. Make sure the saw
is unplugged before making any adjustments.
Set the depth adjustment to the proper depth
for the material to be cut. Mark your cutting
line on the tile with a marker. Make sure the
workpiece is secured before cutting.
Turn the water supply valve to ON. Line up
the 0° cutting line guide with the marked line.
Start the saw and slowly and smoothly move
the saw forward and follow your line straight
across the tile. If you stray from your cutting
line, do not try to force the saw back to your
line. Shut the saw off and when the blade
stops, back the saw up. Start the saw again
and slice off a small amount of material until
you are lined up with the line again. Once the
cut is completed, turn the water supply valve
to OFF.
Fig. 10
3510 2610008262 ENG:SM 2610008262 12-09 3/26/10 9:03 AM Page 13

PLUNGE CUTS
Disconnect the plug from the power source
before making adjustments. Set depth
adjustment according to material to be cut.
Turn the water supply valve to ON. Tilt saw
forward with cutting guide notch lined up with
the line you’ve drawn (Fig. 12).
With the blade just clearing the material to be
cut, start the motor. Gradually lower the back
end of saw, using the front end of the foot as
the hinge point.
As blade starts cutting the material, slowly
lower the saw into the workpiece. When the
foot rests flat on the surface being cut,
proceed cutting in forward direction to end of
cut.
Allow blade to come to a
complete stop before
lifting the saw from cut. Also, never pull
the saw backward since blade will climb
out of the material and KICKBACK will
occur.
Turn saw around and finish the cut in the
normal manner, cutting forward.
Fig. 12
!
WARNING
-1 -
BEVEL CUTS
Bevel cuts can be made anywhere from 1° to
45° by adjusting the position of the saw head
to the FOOT. Make sure the saw is
unplugged before making any adjustments.
Set the bevel angle by loosening the BEVEL
ADJUSTMENT NUT and moving the saw
head. Tighten the nut when the saw is at the
desired angle. Mark your cutting line on the
tile with a marker. Make sure the workpiece
is secured before cutting. Because of the
increased amount of blade engagement in
the work and decreased stability of the foot,
blade binding may occur. eep the saw
steady and the foot firmly on the workpiece.
Turn the water supply valve to ON. If making
a 45° cut, line up the 45° cutting line guide
with the marked line. Start the saw and
slowly and smoothly move the saw forward
and follow your line straight across the tile. If
you stray from your cutting line, do not try to
force the saw back to your line. Shut the saw
off and when the blade stops, back the saw
up. Start the saw again and slice off a small
amount of material until you are lined up with
the line again. Once the cut is completed,
turn the water supply valve to OFF.
Fig. 11
0
15
30
FOOT
GRADUATED
QUADRANT
BEVEL
ADJUSTMENT
NUT
3510 2610008262 ENG:SM 2610008262 12-09 3/26/10 9:03 AM Page 14

Maintenance
SERVICE
Preventive maintenance
performed by unauthorized
personnel may result in misplacing of
internal wires and components, which
could cause serious hazard. We
recommend that all tool service be performed
by a Skil Factory Service Center or
Authorized Skil Service Station.
Tool Lubrication
Your Skil tool has been properly lubricated
and is ready to use. It is recommended that
tools with gears be regreased with a special
gear lubricant at every brush change.
Carbon Brushes
The brushes and commutator in your tool
have been engineered for many hours of
dependable service. To maintain peak
efficiency of the motor, we recommend every
two to six months the brushes be examined.
Replace the brushes when they wear down
to approximately 3/16 in. (4.8 mm) or when
excessive sparking occurs within the motor
housing. Brushes on both sides of the motor
should be replaced at the same time. Only
genuine Skil replacement brushes specially
designed for your tool should be used.
Bearings
After about 300-400 hours of operation, or at
every second brush change, the bearings
should be replaced at Skil Factory Service
Center or Authorized Skil Service Station.
Bearings which become noisy (due to heavy
load or very abrasive material cutting) should
be replaced at once to avoid overheating or
motor failure.
CLEANING
To avoid accidents, always
disconnect the tool from
the power supply before cleaning or
performing any maintenance. The tool may
be cleaned most effectively with compressed
dry air. Always wear safety goggles when
cleaning tools with compressed air.
Ventilation openings and switch levers must
be kept clean and free of foreign matter. Do
not attempt to clean by inserting pointed
objects through openings.
Certain cleaning agents
and solvents damage
plastic parts. Some of these are: gasoline,
carbon tetrachloride, chlorinated cleaning
solvents, ammonia and household
detergents that contain ammonia.
CARE OF BLADES
Blades become dull even from regular
cutting. If you find yourself forcing the saw
forward to cut instead of guiding it through
the cut, replace the blade.
CAUTION
!
!
WARNING
!
WARNING
-15-
STRAIGHT CUTS USING FENCE
Straight cuts are easy to do with a FENCE
(Fig. 13). To attach fence, insert fence
through slots in foot to desired width as
shown and secure with the FENCE
ADJUSTMENT NUT.
Fig. 13
DESIRED
WIDTH
OF CUT
FENCE
FENCE
ADJUSTMENT
NUT
3510 2610008262 ENG:SM 2610008262 12-09 3/26/10 9:03 AM Page 15

-16-
Accessories
If an extension cord is
necessary, a cord with
adequate size conductors that is capable
of carrying the current necessary for your
tool must be used. This will prevent
excessive voltage drop, loss of power or
overheating. Grounded tools must use 3-wire
extension cords that have 3-prong plugs and
receptacles.
NOTE: The smaller the gauge number, the
heavier the cord.
RECOMMENDED SIZES OF
EXTENSION CORDS
120 VOLT ALTERNATING CURRENT
*Blade
*Wrench
*Fence
*Carrying Case
(*= standard equipment)
Tool’s Cord Size in A.W.G. Wire Size in mm2
Ampere
Rating
25 50 100 150 15 30 60 120
Cord Length in Feet Cord Length in Meters
36 18 16 16 14 0.75 0.75 1.5 2.5
68 18 16 14 12 0.75 1.0 2.5 4.0
810 18 16 14 12 0.75 1.0 2.5 4.0
1012 161614121.0 2.5 4.0 —
1216 1412——————
!
WARNING
3510 2610008262 ENG:SM 2610008262 12-09 3/26/10 9:03 AM Page 16

Troubleshooting
Read instruction manual first! Remove plug from the power source before
making adjustments or assembling the blade.
TROUBLE: SAW WILL NOT START
PROBLEM 1. Power cord is not plugged in.
2. Power source fuse or circuit breaker tripped.
3. Cord damaged.
4. Burned out switch.
5. Trigger does not turn tool on.
REMEDY 1. Plug saw in.
2. Replace fuse or reset tripped circuit breaker.
3. Inspect cord for damage. If damaged, have cord replaced by an Authorized
Skil Service Center or Service Station.
4. Have switch replaced by an Authorized Skil Service Center or Service
Station.
5. Have switch replaced by an Authorized Skil Service Center or Service
Station.
TROUBLE: BLADE DOES NOT COME UP TO SPEED
PROBLEM 1. Extension cord too light or too long.
2. Low house voltage.
REMEDY 1. Replace with adequate cord.
2. Contact your electric company.
TROUBLE: EXCESSIVE VIBRATION
PROBLEM 1. Blade out of balance.
2. Workpiece not clamped or supported properly.
REMEDY 1. Discard blade and use different blade.
2. Clamp or support workpiece as shown on pages 11 and 14.
TROUBLE: CANNOT MAKE S UARE CUT
PROBLEM 1. Foot not adjusted properly.
REMEDY 1. See “Operating Instructions” section, “Bevel Adjustment”
(page 11), and “Cross Cuts” (page 13).
TROUBLE: CUT BINDS, BURNS, STALLS MOTOR WHEN CUTTING
PROBLEM 1. Dull blade.
2. Warped tile.
3. Blade binds.
4. Improper workpiece support.
REMEDY 1. Discard blade and use a different blade.
2. Make sure concave or hollow side is facing “DOWN”; feed slowly.
3. Assemble blade and tighten per “Assembly” instructions (page 10).
4. Clamp or support workpiece as shown on pages 11 and 14.
TROUBLE: BLADE SLIPPING
PROBLEM 1. Tool does not cut workpiece.
REMEDY 1. Assemble blade and tighten per “Assembly” instructions (page 10).
!
WARNING
-17-
3510 2610008262 ENG:SM 2610008262 12-09 3/26/10 9:03 AM Page 17

-18-
SÉCU ITÉ DE LA ZONE DE
T AVAIL
Maintenez la zone de travail propre et bien
éclairée. es zones encombrées ou sombres
peuvent donner lieu à des accidents.
N’utilisez pas d’outils électriques dans des
atmosphères explosives, par exemple en
présence de liquides inflammables, de gaz
ou de poussière. es outils électriques
génèrent des étincelles qui peuvent mettre le
feu à la poussière ou aux vapeurs.
Eloignez les enfants et les observateurs
pendant l’utilisation d’un outil électrique.
es distractions peuvent donner lieu à des
pertes de contrôle.
SÉCU ITÉ ÉLECT IQUE
Les fiches de l’outil électrique doivent être
adaptées à la prise. Ne modifiez jamais la
fiche de quelque manière que ce soit.
N’utilisez pas de fiches d’adaptation avec
des outils électriques mis à la terre (à la
masse). Des fiches non modifiées et des
prises adaptées réduisent les risques de choc
électrique.
Evitez tout contact du corps avec des
surfaces mises à la terre ou à la masse,
telles que tuyaux, radiateurs, cuisinières et
réfrigérateurs. e risque de choc électrique
augmente si votre corps est mis à la terre ou à
la masse.
Ne malmenez pas le cordon. N’utilisez
jamais le cordon pour transporter, tirer ou
débrancher l’outil électrique. Eloignez le
cordon de la chaleur, de l’huile, des arêtes
vives et des pièces en mouvement. es
cordons endommagés ou entortillés
augmentent le risque de choc électrique.
Si vous utilisez un outil électrique à
l’extérieur, utilisez une rallonge adaptée à
l’utilisation extérieure. ’utilisation d’un
cordon adapté à l’utilisation extérieure réduit
le risque de choc électrique.
S’il est inévitable d’utiliser l’outil électrique
dans des endroits humides, utilisez une
alimentation protégée par un disjoncteur
de fuite à la terre (CFCI). ’utilisation d’un
disjoncteur de fuite à la terre réduit les risques
de choc électrique.
Les outils mis à la terre doivent être
branchés dans une prise correctement
installée et mise à la terre conformément à
tous les codes et réglementations. Ne
retirez jamais la broche de terre et ne
modifiez jamais la fiche de quelque
manière que ce soit. N’utilisez pas de
fiches d’adaptation. Consultez un
électricien qualifié en cas de doute
concernant la mise à la terre correcte de la
prise. En cas de mauvais fonctionnement
électrique ou de panne des outils, la mise à la
terre fournit un trajet de faible résistance, qui
éloigne l’électricité de l’utilisateur. Une mise à
la terre incorrecte peut provoquer des chocs
électriques, des brûlures ou des
électrocutions. es outils mis à la terre sont
équipés d’un cordon à trois conducteurs et de
fiches à trois broches. Avant de brancher
l’outil, assurez-vous que la tension de la prise
correspond à la tension indiquée sur la plaque
signalétique de l’outil. N’utilisez pas les outils
prévus pour un courant C.A. avec une
alimentation électrique C.C.
SÉCU ITÉ INDIVIDUELLE
estez vigilant, soyez attentif à ce que
vous faites et faites preuve de bon sens
lorsque vous utilisez un outil électrique.
N’utilisez pas un outil électrique si vous
êtes fatigué ou sous l’effet de drogues,
d’alcool ou de médicaments. Un moment
d’inattention pendant l’utilisation d’outils
électriques peut entraîner de graves blessures
corporelles.
Utilisez des équipements de protection
individuels. Portez toujours des lunettes
de protection. es équipements de protection
tels que masques, chaussures de sécurité
antidérapantes, casques de sécurité ou
protections pour les oreilles utilisés dans des
conditions appropriées réduisent les risques
de blessures corporelles.
Avertissements généraux concernant la sécurité des outils électriques
Lisez tous les avertissements et les consignes de sécurité. e non-
respect des avertissements et des consignes peut entraîner un choc
électrique, un incendie et/ou des blessures graves.
CONSE VEZ TOUS LES AVE TISSEMENTS ET CONSIGNES POU TOUTE
CONSULTATION ULTÉ IEU E
Dans tous les avertissements, le terme “outil électrique” fait référence à un outil motorisé
fonctionnant sur secteur (avec fil) ou sur batterie (sans fil).
!
AVERTISSEMENT
3510 2610008262 FR.qxp:SM 2610008262 12-09 3/26/10 9:07 AM Page 18

Evitez les démarrages involontaires.
Vérifiez que l’interrupteur est en position
d’A ÊT avant de brancher l’alimentation
et/ou la batterie, de saisir ou de transporter
l’outil. Transporter des outils électriques avec
le doigt sur l’interrupteur ou mettre sous
tension des outils électriques dont
l’interrupteur est allumé expose à des
accidents.
etirez les clés de réglage ou de serrage
avant de mettre l’outil électrique sous
tension. Une clé restée attachée à une pièce
rotative de l’outil électrique risque de
provoquer des blessures corporelles.
Gardez toujours votre équilibre. Assurez-
vous que vous ne risquez pas de
trébucher ou de perdre l’équilibre. Cela
permettra un meilleur contrôle de l’outil
électrique dans des situations imprévues.
Portez des vêtements appropriés. Ne
portez pas de vêtements flottants ou de
bijoux. Eloignez vos cheveux, vos
vêtements et vos gants des pièces en
mouvement. es vêtements flottants, les
bijoux et les cheveux longs risquent d’être
happés dans les pièces en mouvement.
Si des dispositifs sont prévus pour le
branchement de systèmes d’extraction et
de captation des poussières, vérifiez qu’ils
sont correctement branchés et utilisés.
’utilisation d’un système d’extraction de
poussières peut réduire les risques liés à la
poussière.
UTILISATION ET ENT ETIEN DE
L’OUTIL ÉLECT IQUE
Ne forcez pas l’outil électrique. Utilisez
l’outil électrique adapté à l’application
prévue. Un outil électrique adapté effectuera
le travail plus efficacement et plus sûrement, à
la vitesse pour laquelle il a été conçu.
N’utilisez pas l’outil électrique si
l’interrupteur ne parvient pas à l’allumer ou
à l’éteindre. Un outil électrique qui ne peut
pas être commandé par l’interrupteur est
dangereux et doit être réparé.
Débranchez l’outil électrique de la source
d’alimentation et/ou de la batterie avant
d’effectuer des réglages, de changer des
accessoires ou de ranger l’outil. Ces
mesures de sécurité préventives réduisent les
risques de démarrage accidentel de l’outil
électrique.
angez les outils électriques à l’arrêt hors
de la portée des enfants et ne permettez
pas à des personnes qui ne sont pas
familières avec l’outil ou ces instructions
d’utiliser l’outil électrique. es outils
électriques sont dangereux dans les mains
d’utilisateurs non qualifiés.
Entretenez les outils électriques.
echerchez le mauvais alignement ou le
grippage des pièces en mouvement, la
rupture de pièces et toute autre condition
qui pourrait compromettre le bon
fonctionnement de l’outil électrique. En
cas de dommages, faites réparer l’outil
avant l’utilisation. De nombreux accidents
sont causés par des outils électriques mal
entretenus.
Maintenez les outils de coupe affûtés et
propres. Des outils de coupe correctement
entretenus, avec des arêtes tranchantes,
risquent moins de se gripper et sont plus
faciles à contrôler.
Utiliser l’outil électrique, les accessoires,
les grains, etc. conformément à ces
instructions, en tenant compte des
conditions de travail et du travail à
effectuer. ’utilisation de l’outil électrique pour
des opérations différentes de celles pour
lesquelles il est conçu peut donner lieu à des
situations dangereuses.
Examinez les carters de protection avant
d’utiliser l’outil. Laissez les carters de
protection en place. Examinez les pièces
en mouvement à la recherche de grippage
ou de toute autre condition qui pourrait
compromettre le fonctionnement normal
ou les organes de sécurité de l’outil.
En cas de dommages, faites réparer l’outil
avant de l’utiliser. De nombreux accidents
sont causés par des outils mal entretenus.
N’altérez pas l’outil et n’en faites pas un
usage abusif. Toute altération ou
modification est un usage abusif qui peut
entraîner des blessures corporelles graves.
L’utilisation d’accessoires qui ne sont pas
spécifiés dans ce manuel peut comporter
un danger. es accessoires qui sont conçus
pour un seul type d’outil peuvent devenir
dangereux s’ils sont utilisés sur un outil non
approprié.
ENT ETIEN
Faites entretenir votre outil électrique par
un réparateur qualifié qui utilise
exclusivement des pièces de rechange
identiques. Cela garantira la sécurité
continue de l’outil électrique.
Pour réparer l’outil, utilisez exclusivement
des pièces de rechange identiques. Suivez
les instructions de la section Entretien de
ce manuel. ’utilisation de pièces non
autorisées ou le non-respect des instructions
d’entretien peuvent comporter un danger.
-19-
3510 2610008262 FR.qxp:SM 2610008262 12-09 3/26/10 9:07 AM Page 19

P OCÉDU ES DE COUPE
Eloignez vos mains et votre
corps de la roue et tenez-
vous sur le côté. Tout contact avec la roue
peut provoquer de graves blessures
corporelles.
églez la profondeur de coupe à
l’épaisseur de la pièce à couper. Moins de
1/2 po. (13 mm) de la lame doit être visible
sous la pièce à couper.
Ne tenez jamais la pièce à couper dans vos
mains ou en travers de votre jambe. Fixez-
la sur une plateforme stable. Il est important
de soutenir correctement la pièce à couper
afin de réduire l’exposition du corps, le
coincement de lame ou la perte de contrôle.
Tenez l’outil électrique par les surfaces de
prise isolées pour effectuer une opération
pendant laquelle l’outil de coupe peut être
en contact avec des câbles cachés ou son
propre cordon. Tout contact avec un fil
“sous tension” mettra aussi “sous tension”
les pièces métalliques exposées de l’outil et
provoquera un choc électrique.
Pendant la coupe, utilisez toujours un
guide dans la mesure du possible. e guide
améliore la précision de la coupe et réduit les
risques de coincement de la lame.
Utilisez toujours des lames de taille et de
forme correcte (diamant /ronde) pour les
alésages centraux. es lames qui ne
correspondent pas au matériel de montage
de la scie risquent de tourner de façon
excentrique et de causer une perte de
contrôle.
N’utilisez jamais de rondelles ou de
boulons de lame endommagés ou
incorrects. es rondelles et le boulon des
lames ont été spécialement conçus pour la
scie, afin de garantir des performances
optimales et une utilisation sans danger.
Tenez la scie fermement pour éviter toute
perte de contrôle. es figures de ce manuel
illustrent un support manuel type de la scie.
Pour réduire les risques de choc
électrique, branchez la scie exclusivement
dans une prise protégée par un
disjoncteur de fuite à la terre. Si ce type de
prise n’est pas disponible, utilisez une
prise portative avec disjoncteur de fuite à
la terre intégré.
Pour réduire les risques
d’électrocution, maintenez
tous les branchements secs et dégagés du
sol. Ne touchez pas la fiche avec des
mains humides.
En fonction de l’utilisation, il est possible
que l’interrupteur ne dure pas aussi
longtemps que la scie. Si l’interrupteur
tombe en panne en position A ÊT, il se
peut que la scie ne puisse pas démarrer.
S’il tombe en panne pendant que la scie
est en mouvement, il se peut que la scie ne
puisse pas s’arrêter. Dans les deux cas,
débranchez immédiatement la scie et ne
l’utilisez pas tant qu’elle n’a pas été réparée.
Cette scie à carrelage ne doit pas être
montée sur une table pour être utilisée
comme scie de table. es scies à carrelage
portatives ne sont pas conçues ou prévues
pour être utilisées comme des scies de table.
N’utilisez JAMAIS de lames dentées ou de
meules abrasives agglomérées sur la scie
à carrelage. Utilisez exclusivement des
meules de coupe circulaires ayant une
vitesse d’au moins 12.000 tours/mn.
Assurez-vous que l’outil de coupe tourne
dans la même direction que la flèche de
rotation située sur le carter de protection
supérieur. Vérifiez également que l’outil de
coupe, les bagues intermédiaires et l’écrou
d’arbre sont installés correctement.
Maintenez l’outil de coupe aussi bas que
possible pour effectuer l’opération.
N’utilisez pas de lames ou d’autres outils
de coupe prévus pour une vitesse de
fonctionnement inférieure à 12.000 tr/mn.
N’utilisez jamais d’outils de coupe dont le
diamètre est supérieur au diamètre pour
lequel la scie a été conçue.
emplacez les lames endommagées
avant d’effectuer l’opération de coupe.
Coupez une seule pièce à la fois. Il n’est
pas possible de fixer ou de caler plusieurs
pièces correctement. es pièces risquent de
se coincer sur la lame ou de bouger pendant
la coupe.
DANGER
!
DANGER
!
-20-
ègles de sécurité pour les scies à carrelage
Lisez toutes les consignes de sécurité et toutes les
instructions.
!
AVERTISSEMENT
3510 2610008262 FR.qxp:SM 2610008262 12-09 3/26/10 9:07 AM Page 20
Other manuals for 3510
1
Table of contents
Languages:
Other Skil Saw manuals

Skil
Skil 3410 Assembly instructions

Skil
Skil 5380 Assembly instructions

Skil
Skil 1061 User manual

Skil
Skil 9205 User manual

Skil
Skil BT1 1305 Series User manual

Skil
Skil 9216 User manual

Skil
Skil HD77M Assembly instructions

Skil
Skil MASTERS 5065 User manual

Skil
Skil BW9501-00 User manual

Skil
Skil HD5825 Assembly instructions