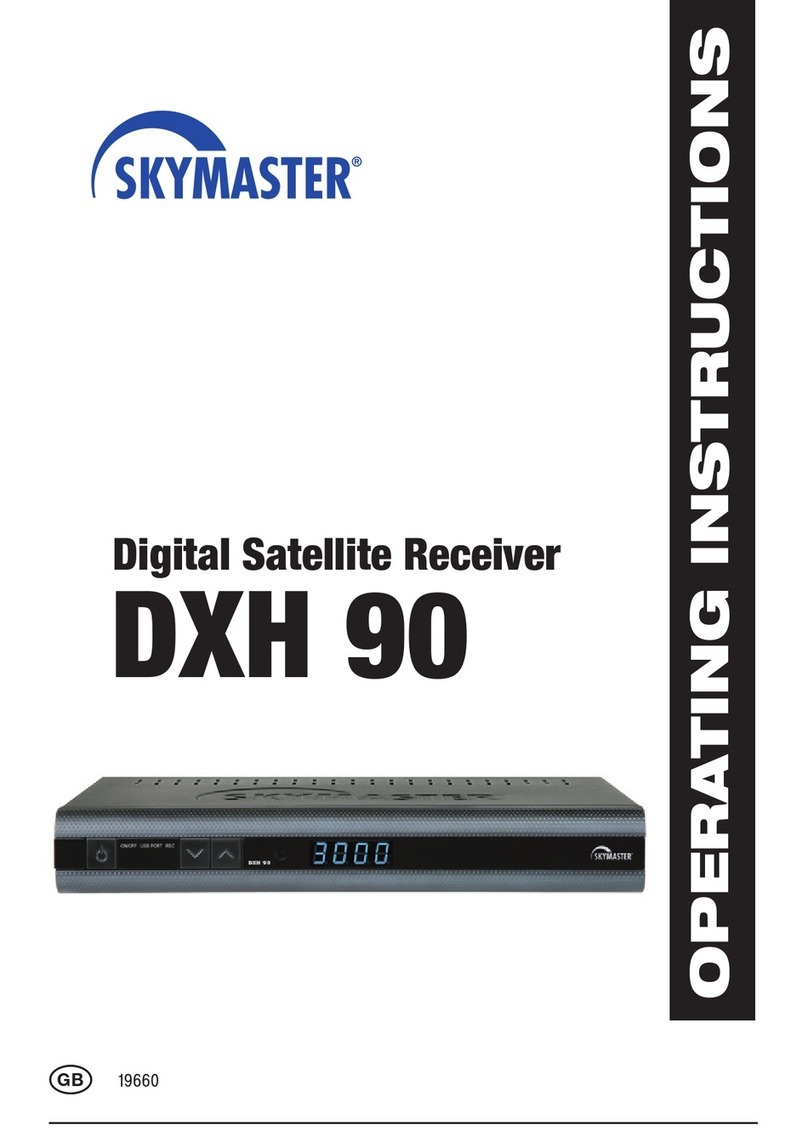
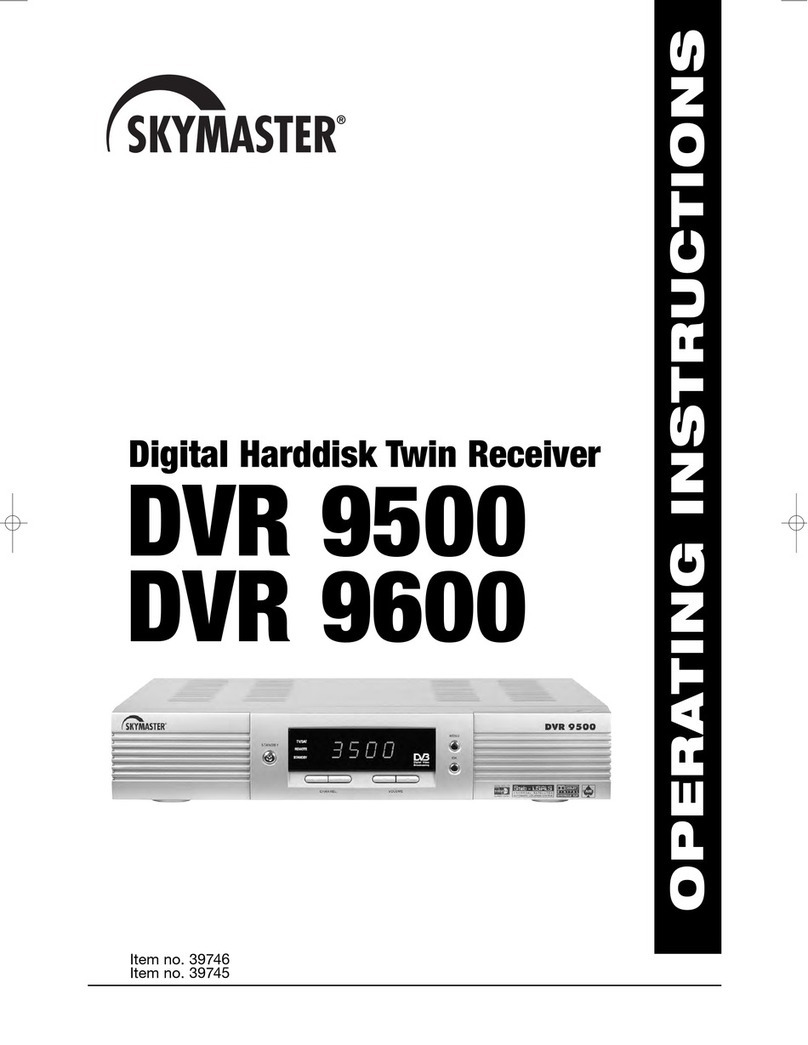
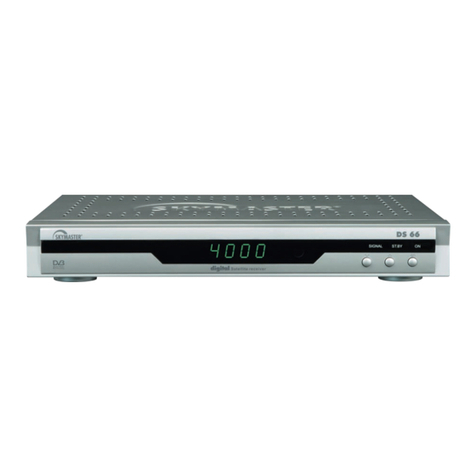
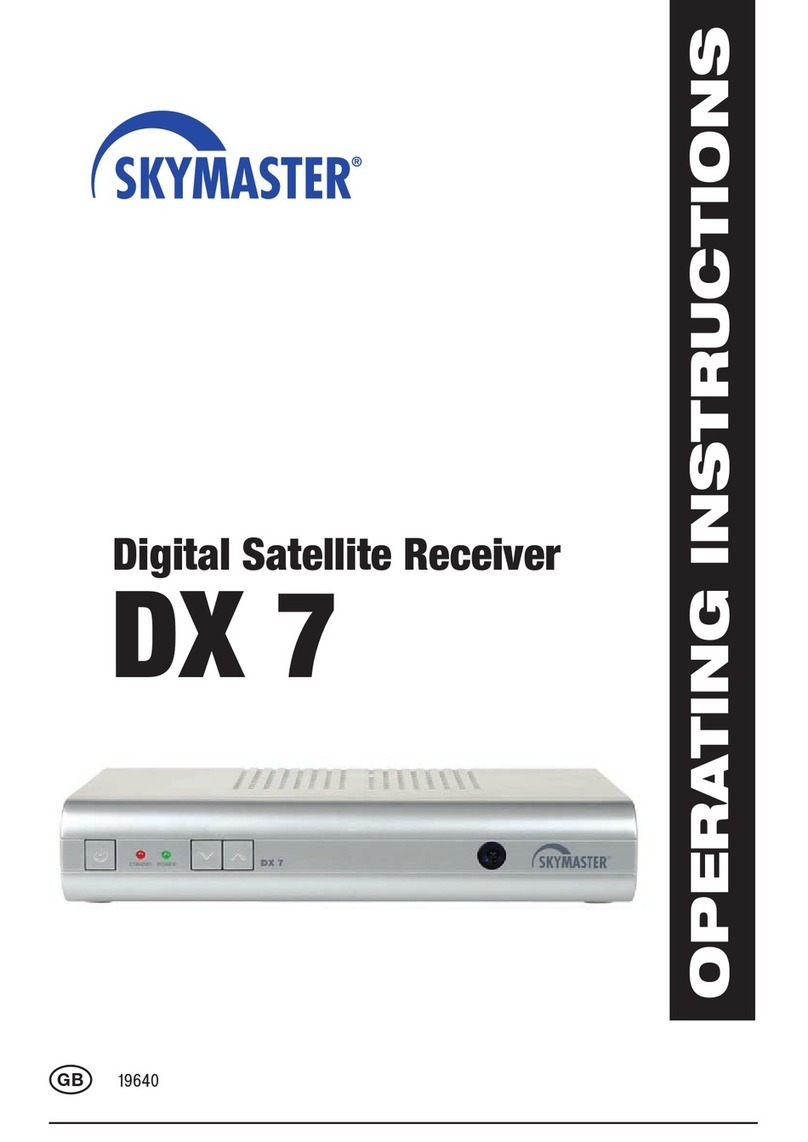
Sky Master DXR 8000 User manual

SATELLITE RECEIVER
DXR 8000
DVR 8080
OPERATING INSTRUCTIONS
39718 39748

GB 2
1. Contents
Congratulations! You have purchased a quality product from our SKYMASTER®range. Our products are subject to continuous, strict quality checks
which guarantee product satisfaction. Welcome to the new era of digital television! The SKYMASTER®DXR 8000/DVR 8080 digital receiver are
designed to receive digital satellite TV channels and radio stations.
For the reception of digital channels you require a satellite antenna which is suitable for digital reception. Therefore, check the technical details of
the reception unit (LNB) first. The reception range should be specified as 10.7 to 12.75 GHz. If you own an older LNB, it has to be replaced for
digital reception (e.g. SKYMASTER®37302).
The DXR 8000 can be rapidly turned into a digital VCR by using a hard drive. With a maximum hard drive of 240 GB you can record up to
120 hours.
The DVR 8080 has an 80 GB hard drive as standard (subject to changes).
1. Introduction . . . . . . . . . . . . . . . . . . . . . . . . . . . 2
2. Safety notes . . . . . . . . . . . . . . . . . . . . . . . . . . 3
3. Operating elements receiver . . . . . . . . . . . . . . . 3
4. Remote control . . . . . . . . . . . . . . . . . . . . . . . . 3
Connections/wiring . . . . . . . . . . . . . . . . . . . . . 4
Hard disc installation . . . . . . . . . . . . . . . . . . . . 5
5. The OSD menu: the most important functions . . 6
Invoking and closing OSD . . . . . . . . . . . . . . . . . . . . . . . . . . . 6
Navigating inside OSD . . . . . . . . . . . . . . . . . . . . . . . . . . . . . 6
General tips . . . . . . . . . . . . . . . . . . . . . . . . . . . . . . . . . . . . . 6
6. General operating instructions . . . . . . . . . . . . . 6
Daily use and special functions . . . . . . . . . . . . . . . . . . . . . . . 6
Programme lists . . . . . . . . . . . . . . . . . . . . . . . . . . . . . . . . . . 6
TV-/radio programme information . . . . . . . . . . . . . . . . . . . . . 6
Selecting audio channels . . . . . . . . . . . . . . . . . . . . . . . . . . . 7
Volume control . . . . . . . . . . . . . . . . . . . . . . . . . . . . . . . . . . . 7
Muting . . . . . . . . . . . . . . . . . . . . . . . . . . . . . . . . . . . . . . . . . 7
Favourite lists . . . . . . . . . . . . . . . . . . . . . . . . . . . . . . . . . . . . 7
Compiling favourites . . . . . . . . . . . . . . . . . . . . . . . . . . . . . . . 7
Teletext/Videotext . . . . . . . . . . . . . . . . . . . . . . . . . . . . . . . . . 7
EPG (Electronic Program Guide) . . . . . . . . . . . . . . . . . . . . . . 8
7. Welcome . . . . . . . . . . . . . . . . . . . . . . . . . . . . . 9
Easy speed set-up of your receiver! . . . . . . . . . . . . . . . . . . . 9
Language settings . . . . . . . . . . . . . . . . . . . . . . . . . . . . . . . . 9
OSD language: . . . . . . . . . . . . . . . . . . . . . . . . . . . . . . . . . 9
Audio language/subtitles: . . . . . . . . . . . . . . . . . . . . . . . . . 9
Satellite selection – Initial set-up of the satellite antenna: . . . 9
Final installation features . . . . . . . . . . . . . . . . . . . . . . . . . . . 9
Starting a search run . . . . . . . . . . . . . . . . . . . . . . . . . . . . . 10
Further configurations . . . . . . . . . . . . . . . . . . . . . . . . . . . . . 10
8. Reception . . . . . . . . . . . . . . . . . . . . . . . . . . . 11
Satellite and reception settings . . . . . . . . . . . . . . . . . . . . . . 11
LNB setup . . . . . . . . . . . . . . . . . . . . . . . . . . . . . . . . . . . . . 11
Satellite settings . . . . . . . . . . . . . . . . . . . . . . . . . . . . . . . . . 11
Transponder setup . . . . . . . . . . . . . . . . . . . . . . . . . . . . . . . 12
Add transponder . . . . . . . . . . . . . . . . . . . . . . . . . . . . . . . . . 12
Change transponder . . . . . . . . . . . . . . . . . . . . . . . . . . . . . . 12
DiSEqC 1.2 . . . . . . . . . . . . . . . . . . . . . . . . . . . . . . . . . . . . 12
USALS . . . . . . . . . . . . . . . . . . . . . . . . . . . . . . . . . . . . . . . . 12
9. Programmes . . . . . . . . . . . . . . . . . . . . . . . . . 13
Managing programmes and favourites . . . . . . . . . . . . . . . . . 13
Managing programmes . . . . . . . . . . . . . . . . . . . . . . . . . . . . 13
Managing favourites . . . . . . . . . . . . . . . . . . . . . . . . . . . . . . 13
10. Environment . . . . . . . . . . . . . . . . . . . . . . . . . .14
TV, time, timer and password settings . . . . . . . . . . . . . . . . . 14
TV settings . . . . . . . . . . . . . . . . . . . . . . . . . . . . . . . . . . . . . 14
Software update . . . . . . . . . . . . . . . . . . . . . . . . . . . . . . . . . 14
Execute OTA update . . . . . . . . . . . . . . . . . . . . . . . . . . . . . . 14
Setting the time of day . . . . . . . . . . . . . . . . . . . . . . . . . . . . 14
Setting the timer . . . . . . . . . . . . . . . . . . . . . . . . . . . . . . . . . 15
Setting up the password . . . . . . . . . . . . . . . . . . . . . . . . . . . 15
Changing the password . . . . . . . . . . . . . . . . . . . . . . . . . . . 15
Reset . . . . . . . . . . . . . . . . . . . . . . . . . . . . . . . . . . . . . . . . . 15
Information . . . . . . . . . . . . . . . . . . . . . . . . . . . . . . . . . . . . . 15
11. Recorder – Menu . . . . . . . . . . . . . . . . . . . . . . 16
Recording manager . . . . . . . . . . . . . . . . . . . . . . . . . . . . . . 16
Audio recording . . . . . . . . . . . . . . . . . . . . . . . . . . . . . . . . . 17
Picture recording . . . . . . . . . . . . . . . . . . . . . . . . . . . . . . . . 17
Recording guide . . . . . . . . . . . . . . . . . . . . . . . . . . . . . . . . . 17
Video guide . . . . . . . . . . . . . . . . . . . . . . . . . . . . . . . . . . . . 17
Audio guide . . . . . . . . . . . . . . . . . . . . . . . . . . . . . . . . . . . . 17
Photo guide . . . . . . . . . . . . . . . . . . . . . . . . . . . . . . . . . . . . 17
Managing the hard disc . . . . . . . . . . . . . . . . . . . . . . . . . . . 18
Hard disc information . . . . . . . . . . . . . . . . . . . . . . . . . . . . . 18
Hard disc: additional settings . . . . . . . . . . . . . . . . . . . . . . . 18
Formatting the hard disc . . . . . . . . . . . . . . . . . . . . . . . . . . . 18
Transferring to a VCR (Video recorder) . . . . . . . . . . . . . . . . 19
12. Recorder – Control functions . . . . . . . . . . . . . 19
Video playback and starting a slide show . . . . . . . . . . . . . . 19
Playback (“Normal”) . . . . . . . . . . . . . . . . . . . . . . . . . . . . . . 19
Playback slide show . . . . . . . . . . . . . . . . . . . . . . . . . . . . . . 20
Display information during playback . . . . . . . . . . . . . . . . . . 20
Pause & Time shift . . . . . . . . . . . . . . . . . . . . . . . . . . . . . . . 20
Fast picture search . . . . . . . . . . . . . . . . . . . . . . . . . . . . . . . 20
Slow motion . . . . . . . . . . . . . . . . . . . . . . . . . . . . . . . . . . . . 20
Picture fast selection . . . . . . . . . . . . . . . . . . . . . . . . . . . . . 20
Playback Skip: . . . . . . . . . . . . . . . . . . . . . . . . . . . . . . . . . 21
Loop . . . . . . . . . . . . . . . . . . . . . . . . . . . . . . . . . 21
Repeat . . . . . . . . . . . . . . . . . . . . . . . . . . . . . . . . 21
Direct recording . . . . . . . . . . . . . . . . . . . . . . . . . . . . . . . . . 21
13. Troubleshooting . . . . . . . . . . . . . . . . . . . . . . . 21
14. DVB-T dictionary –
explanation of technical terms . . . . . . . . . . . . 22
15. Performance features . . . . . . . . . . . . . . . . . . 23
16. Technical data . . . . . . . . . . . . . . . . . . . . . . . . 23
17. Services, contact addresses, hotline . . . . . . . 23

GB 3
2. Safety notes
3. Operating elements receiver (see packaging)
4. Remote control
1. IR receiver for remote control
2. Operating mode display
3. Standby (standby display)
4. Antenna signal display
5. ON / OFF switch (operating mode)
6. Programme stepping - upward
7. Programme stepping - downward
8. Display
9. Hard disc slot cover (only with DXR 8000)
1. Connection to SATELLITE system
2. Loop-through tuner output
3. Stereo audio output, for connection to a stereo system
4. Scart jack, for connection to a TV set
5. Scart jack, for connection to a VCR
6. RS232 interface (only for service purposes)
7. Power supply cable 230V
8. Digital audio output (coaxial)
9. S-VHS jack
10.Video output
11 Mains switch
A B
Please read this safety information thoroughly before commissioning the device! Prolonged absence: In the event of prolonged
absence or thunderstorms, remove the mains plug of the device from the wall socket. Also disconnect the antenna connections to
avoid storm damage.
SM Electronic GmbH hereby declares that Article No. 39718 and 39748 complies with the basic requirements and other relevant regulations of
directives 89/336/EWG and 73/23/EWG.
Cleaning: Remove the mains plug before cleaning the device. Use a
dry or damp cloth and make sure that no moisture penetrates the
device!
Objects in the device: Make sure that no objects can enter the
ventilation slots. There is risk of death through electric shock!
Repair: Repairs must be performed by qualified experts. In the event
of improper intervention by a third party, the warranty will be voided
and the safety of the device can no longer be guaranteed! Never open
the housing of the device yourself: Even when disconnected from the
mains, there is an acute risk of death through electric shock. Internal
components can be damaged if touched.
Place of installation: Place the device on a straight and even
surface. To protect the surface from being discoloured as a result of
the natural heat generated by the device, place the device on a
suitable underlay.
Adequate ventilation: The ventilation slots on the device must never
be covered. Ensure that the device has a clearance of at least 10 cm at
the sides and top, and that the heat can be dissipated upwards
unimpeded.
External influences: Never expose the device to moisture
(e.g. condensation or splash water) or direct sunlight. Do not place the
device in the vicinity of heat sources, such as e.g. heaters or devices
that heat up.
Mains voltage: Use the equipment with the voltage specified on
the case only! Do not plug the equipment into the mains until all
connection and installation work has been completed.
Earthing: Antenna systems must always be earthed, paying heed to
the pertinent local and VDE regulations.
ASTRA, EUTELSAT, TÜRKSAT, DiSEqC and Skymaster are registered trademarks.
1. Audio ON / OFF mutes the sound. Pressing the button again
turns on the sound once again.
2. TV-/radio operation: One press of the button switches
between TV and radio.
3. ON / OFF (standby): This button switches the receiver on or to
standby operation (Standby).
4. Freeze: records screenshots.
5. TV: turning the switching voltage ON and OFF
(12 Volt, Scart socket).
6. EPG: invokes the EPG (Electronic Program Guide).
7. Numerical keys 0 - 9: these keys are used to switch between
certain programmes, to enter numeric values, to enter
passwords, or to change station names.
8. SUB – subtitle: For the display of subtitles relating to the
current broadcast.
9. Audio – audio channel selection: displays all available audio
channels.
10. EXIT – exit menu: Closes the current OSD screen menu and
shows the superordinate menu or the TV screen.
11. Alt: switches between the current programme and the
programme that was last set.
12. Menu – OSD screen menu: invokes the screen menu in
which one can determine all receiver and programme settings.
13. P+/P-: to scroll page by page in displayed programmes,
favourites or other lists
14. Control button Channel/Programme shift: These buttons
are for the navigation within the OSD menu (up/down) or to
switch programmes in ascending or descending order.
15. Control button/Volume: These buttons are for the navigation
within OSD menus (left/right) or to regulate the volume
16. OK/acknowledgement button: Press the OK button to
confirm the changes made or to carry out an action.
17. F+/F-: (optional, no function).
18. Skip: Invokes a certain frame during the recording.
19. PVR: Invokes a list of all recorded programmes.
20. Text: to invoke Teletext/Videotext pages.
21. Loop: The playback of a recording runs continuously/in a loop.
22. Sleep: Set automatic switching off of hard disc.
23. Repeat: Setting a playback loop (A/B).
24. Image search, reverse: image search with different speeds.
25. Playback: to playback recorded programmes.
26. Image search, forward: Image search with different speeds.
27. Direct recording: records the displayed programme.
28. Stop: stops the playback/recording.
29. Pause: Pauses the playback, starts the time shift mode in TV
mode
30. Functions keys/favourite programmes: Function keys in the
OSD menu or direct access the favourites list.
31. Function key/information: function keys in the OSD menu or
to invoke information.
C
Please always observe correct polarity when inserting batteries! Correct polarity is dis-
played in the battery compartment. Batteries: 2 x AAA, UM-4, Micro or R03.
Used batteries are considered hazardous waste – always
dispose of them correctly! Range approx. 6 m.

GB 4
Connection/Cabling
Connections
Connection to a TV set
Please use a SCART cable for the TV set connection. The TV settings can be adjusted in the
receiver's on-screen menu, for example, if you own a TV set with 16:9 screen. The pre-setting of
the screen format is 4:3. If your TV set does not have a Scart jack, use an appropriate adapter
(HF modulator) or the S-Video output (9) and the stereo outputs (3).
Note: The majority of TV sets with Scart jacks is automatically switched to AV mode by the connected
devices (e.g. VCR, DVB-T or SATELLITE receiver). This is achieved by a switching voltage (12 V),
which forces the TV to switch to AV mode. The useful function can be deactivated by pressing the
TV button on the remote control of your receiver. The TV can then be operated manually.
Connection to a VCR
If your VCR has a Scart jack, you can use it to connect the receiver. Please refer to the operating
instructions of your VCR for information about which VCR buttons are required to record digital TV
and how to display the picture on your TV. If your VCR does not have a free Scart jack, we
recommend the SKYMASTER®Video Selector 1100 (Art. No. 2404).
D

GB 5
Hard disc installation
Hard disc installation for upgrading the DXR 8000
1. Disconnect the mains plug.
2. Unscrew the four screws on top of the device.
3. Set the hard disc's jumper (c) to position MASTER (MA). Please check the hard disc's manual if
the setting of the jumper is not clearly described!
4. Connect both, the 40-pin male connector (b) and the 4-pole power connector (a) with the hard
disc. Ensure the connectors are aligned properly and firmly connected!
5. Close the cover and turn the device on.
6. Initialising/formatting of the hard disc may take several minutes.
Note: A variety of the most common IDE hard discs (40 - 240 GB) were used to test the DXR 8000.
We would like to point out that not all commercially available hard discs are suitable for the PVR use,
e.g. IDE hard discs having very high power consumption or discs requiring a high starting current are
not recommended. Generally speaking, SATA hard discs are not suitable! SM ELECTRONIC GmbH
can not be held responsible for any damages resulting from improper installation!
(b) 40-pin connector
(b) Data cable
(a) Current supply
(a) Power supply
(c) Jumper

GB 6
5. The OSD menu: the most important functions
6. General operating instructions
Invoking and closing the OSD: All settings of the satellite receiver will be made via the OSD
(On Screen Display). To invoke the menu, press the MENU button. To turn the OSD off, press the
MENU or EXIT button until all menus are closed.
Navigating inside OSD: navigating inside the OSD is done via the control buttons or directly via
the coloured pushbuttons. The buttons and their functions are displayed on the OSD. In most cases
you can use the numerical key pad on the remote control unit.
General instructions for OSD: The receiver is preset, meaning that it will not be necessary for you
to alter the settings; although, you may undertake minor changes. The OSD is designed with ease in
mind and the buttons you may have to push to change certain settings are displayed on the screen.
Please keep your instruction manual in a convenient place and refer to it whenever necessary.
If digital TV reception is new territory for you, please take your time to read the instruction manual
thoroughly. In the instructions you will find possible alternatives to use the antenna unit to its fullest.
Daily use and special functions
Programme lists
To invoke the programme list, press the BROWSE or OK button To close the list, press on EXIT. Due
to the digital receiver technology and ever increasing programme selections, the list can include
numerous stations and become very complex. For this reason, several options are available to filter
the programme lists.
Select you favourite programme by using the navigational button UP/DOWN; you can change the
options by pressing the button LEFT/RIGHT.
The following lists are available within the option function:
• All: all programmes in one single overview
• FTA: All freely available programmes
• Encrypted: Only encrypted programmes (PAY-TV)
• FAV 1-4: 4 clearly arranged lists of all your favourite programmes
You can create and manage your own favourites lists in the menu programme.
Note: If the receiver is currently in recording or time shift mode, only the available programmes are
displayed! This refers to programmes, which are on the same channel as the recording programme.
As a rule, there are approx. 4 to 8 digital TV programmes per channel, which can be accessed, even
during recording mode.
TV-/radio programme information
When changing channels or when pressing the [ i ] button, information about the current program
channel is displayed. Note: To switch between TV and radio mode, press the TV/RAD button.
• Programme storage place, e.g. 0022
• Programme name
• Time of day and date
• Programme provider
• Current programme and up-coming programmes (from ... to)
• Signal strength
• Teletext availability (page symbol)
• Number of audio channels, e.g. “Audio 01/02”: Channel 1 (German) of 2 (German and French) is
played back.

GB 7
6. General operating instructions
Selecting audio channels
Some broadcastings or TV programmes (e.g. Arte) are broadcast in different languages and on
several sound channels. When pressing the AUDIO button, all available languages/channels will be
displayed. In addition, some stations broadcast in AC3/Dolby Digital Sound. The output is the S/PDIF
socket on the rear of the device. In order to avoid operating mistakes, the AC3 output is deactivated
by default in the menu “Environment” 앶앸 “TV Settings” 앶앸 “Sound Settings”.
Volume control
Use the VOL (+/-) button to adjust the volume of the TV output. The volume of the video recorder
output will not be influenced; therefore, any currently running recording of your video recorder will not
be disturbed.
Muting
To mute the TV sound, press the Ein/Aus [On/Off] button. Press the button again, and the TV sound
will be heard at the previously selected volume.
Favourites lists
You can create a total of 4 lists of all your favourite programmes. Once created, they can be
accessed by pressing the red, green, yellow, and blue function keys. As described in the “Options”
function above, you can also invoke your favourite lists from the general programme list.
If you do not create your own favourite programmes, empty lists or an error message will be
displayed. To compile your own favourites lists, open menu “Programmes” 앶앸 “Manage pro-
grammes”:
Compiling favourites
Press the MENU button, followed by the yellow function key and select “Manage programmes”: Press
the CHANNEL (Auf/Ab) [Up/Down] button to select your programmes from the programme list; then
simply press buttons [ 1 ], [ 2 ], [ 3 ] and [ 4 ] to select the appropriate favourite list.
Once you have stored the information and after leaving the menu, you are ready to take advantage of
your favourite lists. Other programme management functions will be discussed in more detail later
on.
Teletext/Videotext
Many stations broadcast additional services and informational programmes. Teletext pages are
“electronic news”, which allow you to obtain the latest news reports, sport results, weather forecasts,
commercial offerings, and much more. The coverage and the content are determined by the
programme provider. You will always find the directory on page 100. Here, you will find an overview
of other sub-pages (e.g. page 200 Sports) Always enter the page number using 3 digits or use the
navigation button CHANNEL (Auf/Ab) [Up/Down] and VOL (+/-).

GB 8
6. General operating instructions
EPG (Electronic Program Guide)
The EPG is your electronic guide for all TV and Radio stations, providing additional information about
a particular programme. For instance, you will be provided with the title of the current TV or radio
broadcast. You will also find an overview of upcoming broadcastings of the programme provider.
When pressing the button [ i ] twice, information about the currently running programme will be dis-
played. (see illustration)
Note: Not all programme packages are broadcast with the EPG!
The EPG has different displays and very useful functions. Press the EPG button on the remote control
unit. The EPG main overview will be displayed. Use the navigation buttons CHANNEL and VOL to
select the different programmes and broadcastings.
Using the coloured function keys, different displays and functions can be executed:
• Pressing the red button will provide you with detailed information about the marked broadcast.
• Pressing the green button switches between the daily and weekly overview.
• Pressing the blue button will transfer the marked broadcast to the recording timer.
• Pressing the yellow button will invoke the timer overview.
When pressing the green button, an overview of all currently running and following broadcasts will be
displayed. To receive information about following broadcasts, press the blue button in this display.
If you press the green button, the weekly overview of the selected station will be displayed:
Some stations provide a preview of up to a fortnight. The desired day can be selected by pressing
the VOL (+/-) button.
Nearly all EPG overviews allow the pre-selection of broadcastings for future recording by pressing the
blue button.
There are a total of 8 timer settings. When pressing the blue button the selected broadcast will be
entered into the next available slot. The broadcasts can be adjusted in the menu “Timer Settings”,
which will be displayed automatically. When recording a broadcast, it is recommended to increase the
recording time beyond the original broadcasting time to allow for possible overruns. Under the
function “Type” you can select to either view or record a broadcast once only, daily or weekly. When
selecting “Mode” you determine whether you would like to record the programme with the video
recorder or if you would like to watch the programme at a pre-selected time.
Live: At a selected time, the receiver will switch to the pre-determined programme. This type of
programming is helpful, if you would like to watch a specific programme but you don't want to record it.
Recording: The pre-selected programme in the timer will be stored on the hard disc.
Playback: Recorded broadcasts, which are already stored on the hard disc, can also be started at
any pre-selected time.
Direct recording: You can directly record currently running TV programmes without invoking the
programme list, the EPG or the timer menu. Press the red function key and select the duration of the
recording time, using the VOL (+/-) button. Additional information about “recording” can be found in
Chapter 12 “Recorder”.

GB 9
7. Welcome
Easy speed set-up of your receiver!
Press the EPG button on the remote control unit. The main menu comprises 5 sub menus, which can
be accessed directly by pressing the coloured function buttons (red, green, yellow, blue, and white).
Since the menu layout is very easy to understand, you will never get confused. At the bottom of the
menu you will find all available functions and buttons of the invoked sub-menu.
To navigate within the menu, use the buttons CHANNEL (Auf/Ab) [Up/Down] and VOL (+/-). To
accept a selection, press the OK button, to leave a menu, press the EXIT button.
Language settings
OSD language: Select which language your OSD menu (“On Screen Display menu”) should display,
by pressing “OSD Language”.
Audio language/subtitles: some broadcastings or TV programmes (e.g. arts) are broadcast in
different languages, on several sound channels and with subtitles. Select your preferred language
and a second language of your choice. If none of the languages are available, the station will default
to a language available.
Satellite selection – Initial set-up of the satellite antenna:
To ensure rapid set-up of your receiver, the settings for the reception of the satellite positions
ASTRA (19.2° East) and HOTBIRD (13° East) have been pre-configured. Complicated changes to the
pre-settings are not required when using commercial single or multiple-user satellite systems. Simply
choose the desired selection and start the search run under “Satellite”!
Prior to the search run it is possible to define whether the search should include only Free to Air
(FTA) or also coded channels.
If you own a multifeed system which can receive ASTRA and HOTBIRD, please select “ASTRA & HOT-
BIRD” under “Satellite”. The settings of the LNBs (Low Noise Block downconverter) and change-over
switch (DiSEqC switch, DiSEqC multi-switch) are automatically loaded. If you wish to check the
reception quality prior to the search run, select “Check configuration”.
Check the signal strength and the quality of the first satellite position. If there is no or only a very
weak signal displayed, select another transponder or align the antenna more exactly. The settings of
the receiver are displayed via the signal bars. If the signal bars are in the green area, check –
if available – the second satellite position. Note: You cannot check both positions simultaneously.
Select the position you wish to check via the CHANNEL (Up/Down) buttons.
Final installation features
Setting the correct time is very important for the recording of programmes. The programmes are
broadcast at the station's local times. Due to the different time zones this must be taken into
consideration at your installation site.
The necessary settings can be made in the menu “Environment/Time settings”. Press the blue button
on the remote control and select the sub-menu “Time Setting”. Additional information is provided in
the Chapter “Environment”.

GB 10
7. Welcome
Starting a search run
Once you have carried out all the required settings in the Welcome menu, please select the option
“Start search run”. After a few minutes, completion of the search run is displayed in the lower part.
Press the OK button to save the found TV channels and radio stations.
You can now close all the menus via the EXIT button and call the channel list via the BROWSE button.
Further configurations
The Welcome menu (satellite selection) contains further possibilities to set up another satellite con-
figuration or further positions. You can select the following options via button [ 1 ], [ 2 ], [ 3 ] or [ 4 ]:
1 Add satellite: Select the desired satellite via the VOL buttons. Note: If the satellite has already
been saved, you cannot select the option.
2 Delete satellite: All the channels of the selected position are deleted!
3 Search/Extend: All the saved channels remain, new channels are added to the channel list.
4 Search/Replace: All existing channels are deleted and replaced by the found channels.
Further information in the next section “8. Reception”.

GB 11
8. Reception
Satellite and reception settings
In the “Reception” menu you can adjust the receiver to your satellite system, search for new channels
and add or delete satellites.
• LNB setup: For adjusting the receiver to the satellite system. The LNB is located in the focal point
of the antenna reflector. In order to utilise all the functions of your receiver, you require a digital
LNB!
• Satellite settings: Add or delete satellites, search run
• Transponder setup: Process the transponder of a satellite position, search for individual
transponders
• DiSEqC 1.2: For setting a motorised rotating system.
• USALS: Motorised rotating system with automatic position evaluation.
LNB setup
You can configure up to 8 LNB presettings. If you receive ASTRA (LNB 1) and/or HOTBIRD (LNB 2),
only change the preset values if this is expressly specified in the installation instructions of the
satellite system!
• LNB: Selection LNB 1 - LNB 8.
• LNB type: Select the setting “Digital”. Only use the setting “Others” if this is expressly specified in
the installation instructions of the satellite system!
• Upper/Lower frequency: The values are fixed for a digital LNB. If you do not have a digital LNB,
select the setting “Others” and enter the values from the documentation or the sticker of your
LNB in the fields.
• For the reception of two satellite positions (ASTRA and HOTBIRD) you require a 2-way DiSEqC
switch. For the reception of further positions, e.g. TÜRKSAT, you require a 4-way switch. The
connections of the DiSEqC switch are marked accordingly (1 - 4 or A, B, C, D). If you own a
motorised rotating system, select the system type (DiSEqC 1.2 or USALS).
Satellite settings
In this menu you can add further satellite positions, delete positions and carry out various search run
functions. In the lower part you can monitor the signal strength and quality.
• Satellite: Use the VOL buttons to select the desired satellite position. Note: Before you add a
satellite (button [ 1 ]), please adjust the following settings!
• Transponder: Each satellite has a number of transponders. Each transponder has at least one
channel, usually there are 4 - 10 TV channels and radio stations. If the signal bars are inactive,
select another transponder. If this does not make a difference, check the following settings, the
alignment of the antenna and the antenna cable.
• LNB: LNB 1 should be stated at this position for ASTRA, LNB 2 for HOTBIRD. For further satellite
positions please select LNB 3, LNB 4, etc.
• Search type: There are three different search options. “FTA” searches for all FTA channels.
“FTA + coded“ searches for all channels - even coded PAY-TV channels. Coded channels can
only be viewed with a special decoder. All the channels are easily found via the “Network search“.
ASTRA and HOTBIRD transmit an overview which lists all the channels and transponders. The
receiver can read this overview. Note: Not all satellite operators provide this service!
• Position: Displays the current number of the satellite position.
• Movement: For rotating the system to the satellite position.
You can select the following options via button [ 1 ], [ 2 ], [ 3 ] or [ 4 ]:
1 Add satellite: Select the desired satellite via the VOL buttons. Note: If the satellite has already
been saved, you cannot select the option.
2 Delete satellite: All the channels of the selected position are deleted!
3 Search/Extend: All the saved channels remain, new channels are added to the channel list.
4 Search/Replace: All existing channels are deleted and replaced by the found channels.

GB 12
8. Reception
Transponder setup
Each satellite has a number of transponders. Each transponder has at least one channel, usually
there are 4 - 10 TV channels and radio stations. In the course of time transponders are continuously
being switched off or changed and new transponders added.
• Satellite: Select the satellite whose transponder list you wish to process.
• Transponder: The transponder name of the operator is displayed (e.g. “BetaDigital”).
• Search type: There are three different search options. “FTA” searches for all FTA channels.
“FTA + coded” searches for all channels - even coded PAY-TV channels. Coded channels can
only be viewed with a special decoder. All the channels are easily found via the “Network search”.
ASTRA and HOTBIRD transmit an overview which lists all the channels and transponders. The
receiver can read this overview. Note: Not all satellite operators provide this service!
The information about the current transponder (polarisation, frequency and symbol rate) contains
options which can be called via the buttons [ 1 ], [ 2 ], [ 3 ] and [ 4 ]:
1 New TP: For adding a new transponder (see below)
2 Delete TP: For deleting a transponder
3 Search for TP: Starts the search run on the current transponder in order, e.g., to re-read the data
or to find the new channel
4 Change TP: For changing the transponder settings (see below)
Add transponder
In almost all cases the frequency of the transponder has to be entered as five digits. Please refer to
teletext and specialist or TV magazines for the frequencies - round up/down decimal places. The
symbol rate of a transponder is usually 27500 or 22000. Set the reception level (polarisation) to
“horizontal” or “vertical” (H or V). Under search type set whether the search should only include FTA
or also coded channels. Typical transponder details are, e.g.:
Example TV:
12,449.75 V (= 12450 vertical),
SR 27500 (=27500),
FEC 3/4 (the FEC “error correction” is determined automatically).
Change transponder
If the transponder settings have been changed by the channel, you can correct the transponder
parameters in this menu. You can monitor the effects via the signal indicators.
DiSEqC 1.2
If you own a motorised DiSEqC 1.2 rotating system, you can carry out the necessary presettings in
this menu. Please observe the assembly instructions to ensure correct installation of your DiSEqC
rotors! In order to use the DiSEqC 1.2 function, you have to select the option DiSEqC 1.2 in the LNB
setup menu (under DiSEqC).
Movement: You can rotate the system towards the east or west via the Left/Right control buttons.
Limits: You can limit the easterly and westerly swivel range to ensure that the antenna cannot rotate
unhindered to the outer most end stop. This prevents possible damage by obstacles which are
located in the swivel range (wall, branches). Select the “Off” setting if there are no obstacles in the
swivel range.
Setting limits: Select east and then go to the selection “Movement” in order to rotate the antenna
to the maximum easterly stop. Confirm the position via the OK button and repeat the procedure for
the westerly limit.
Reset position: The DiSEqC 1.2 antenna rotor moves to the 0 position.
USALS
If you own a USALS, all the satellite positions can be calculated automatically. The receiver requires
the exact location of the antenna as the basis for the calculation. Enter the following data for
Hamburg (53.57° North, 10.03° East):
Latitude: 53.6 Hemisphere: Northern
Longitude: 010.0 Location: East
After saving the data, the receiver can calculate all the distances between the satellites and move to
the exact positions. To achieve this, the USALS antenna has to be aligned 100%! If it is not possible
to receive all the available satellites, please refer to the installation instructions of your rotating
system!

GB 13
9. Programmes
Managing programmes and favourites
Managing programmes
In the menu “Programmes”, all stored programmes – including all favourites – can be managed,
deleted, moved, and much more.
There is no difference in managing the radio programmes or managing the TV programmes.
NOTE: Press the OK button to store any selection. This will automatically accept all changes. The
advantage of this type of programme management is that all changes can be done on one single
menu page. Press the numeric keys [ 0 ] - [ 9 ], to select the following functions:
0. Preview
You can navigate within the programme list, make changes and watch a particular programme at the
same time. If you would like to watch another programme, press button [ 0 ]. The selected
programme is displayed in the preview window.
1. - 4. Fav
You can store your personal choice of programmes in up to four favourites lists. Select your
programme and press buttons [ 1 ] - [ 4 ] to store your personal choice in your list of favourites.
5. Lock
You can lock programmes with content unsuitable for minors to prevent unauthorised access. The
programme can later only be accessed by entering a 4-digit password. Note: The programme lock
can be activated in the menu “Environment” 앶앸 “Password Setup”!
6. Renaming
If you would like to rename a certain programme, press button [ 6 ]. An input field with the current
programme names will appear on the screen. To change positions, press the navigation (VOL) button
(+/-). Additional letters can be found on the numerical key pad of the remote control unit. Press the
buttons until the desired character is displayed. Note: You can create a space by pressing the
button [ 1 ]. Press button [ i ] to change from upper to lower case characters.
7. Moving
To move a selected programme to a new position, press button [ 7 ]. The colour of the selected line
will change. Subsequently, use the buttons CHANNEL (Up/Down) to select the new position within the
programme list. Finally, press button [ 7 ] again. The programme is now locked in its new position.
8. Sorting
To sort the entire programme list, press button [ 8 ]:
1. Sorting alphabetically: To sort the programme list alphabetically, press button [ 1 ]:
2. Sorting by FTA/encryption: Encrypted stations are placed at the end of the programme list.
9. Deleting
Press button [ 9 ] to delete any programme from the programme list. For security reasons, answer the
following questions with “Yes” or “No”.
Managing favourites
In the menu “Managing Favourites” four lists of favourites can be managed.
Note: Press the OK button to store any selection. This will automatically accept all changes!
0. Preview
You can navigate within the programme list, make changes and watch a particular programme at the
same time. If you would like to watch another favourite programme, press button [ 0 ]. The selected
programme is displayed in the preview window.
1. - 4. Fav
To select your favourite list, press buttons [ 1 ] - [ 4 ]. The currently displayed list will be shown in
the screen's upper border.
5. Moving
To move a selected favourite programme to a new position, press button [ 5 ] The colour of the
selected line will change. Subsequently, use the buttons CHANNEL (Up/Down) to select the new
position within the list of favourites. Finally, press button [ 5 ] again. The programme is now locked in
its new position.
6. Deleting
Press button [ 6 ] to delete a programme from the favourite list. For security reasons, answer the
following questions with “Yes” or “No”.
Note: Encrypted and locked programmes are identified accordingly in the column “Scr.” and “Lock”.

GB 14
10. Environment
TV, time, timer and password settings
All the receiver settings can be carried out in the “Environment” menu. To achieve this, press the
MENU button and the blue function button.
TV settings
For adapting your receiver to the TV set.
• Video standard: The video standard in central Europe is PAL. Only change the setting if you are
using the device in eastern Europe/France (SECAM) or in the USA/Japan (NTSC).
CAUTION: If you change the setting, extensive presentation problems may occur! Press the
VOL (+/-) buttons until the picture is recognisable!
• Screen format: Set the screen format of your TV set (4:3 or 16:9). You can also set the
presentation for widescreen channels: 4:3 Letterbox (black bars at the top and bottom of the
picture) and 4:3 Pan & Scan (no black bars, left and right-hand side reduced).
• Video output: Setting of the Scart video output signal. RGB is higher quality, FBAS is compatible
with all commercial TV sets and video devices.
• Audio settings: If you have an AC3/ dolby surround amplifier, select the setting AC3. Some
channels (e.g. ProSieben) broadcast additional digital audio channels. Press the AUDIO button on
the remote control and select the AC3 audio channel.
CAUTION: Please set the sound of your surround system to low and gradually increase the volume!
• Transparency: Use this setting to set the transparency of the on-screen menus (OSD). The
transparency can be set between 10% (slight transparency) and 100% (strong transparency).
• LED clock in stand-by: Displays the time in stand-by. Marks (e.g. a colon) to separate the hours
and the minutes cannot be displayed: The time 23:20 is displayed as [ 2320 ].
• Display duration: Here it is possible to determine for how many seconds on-screen displays
and information are to be shown.
Software update
There are various reasons to update the software of the device: To improve the functions with
technical innovations, to eliminate errors or channel reception problems.
The search for the latest software version can take a few minutes. If no software is found after
approx. 30 minutes, the software of the device is up-to-date. Repeat the update procedure as often
as you consider necessary (e.g. weekly) or if malfunctioning occurs.
Select the following possibilities:
•
OTA update (complete): The system software including all the channels and settings is overwritten.
• OTA update (without channel lists): Only the system software is updated, the channels and the
device settings remain the same.
Note: This function is optional!
• Serial update: Load the system software via the serial interface (RS232, COM Port) of the
receiver. The software and further information is provided at http://www.skymaster.de/.
Execute OTA update
If a later software version is available, you can load it via the ASTRA position 19.2° East (frequency
12603 H, symbol rate 22000, PID 335).
Set the setting “Confirm prior to update” to “Yes” or “No”. If the setting is “No”, the update is loaded
without any further questions.
Note: Do not switch off the device during the loading procedure! Always follow the instructions on the
screen!
Setting the time of day
Setting the correct time is very important for the recording of programmes. The programmes are
broadcast at the station's local times. Due to the different time zones this must be taken into
consideration at your installation site.
• Settings: the setting “AUTO” is preferred. The receiver receives the time data from the station.
Select “Manual” if you would like to receive programmes, which do not contain EPG data.
• Time zones/time difference: In the German language area, select the time zone “Berlin”. The time
difference to GMT (+ 1 hour) will be adjusted automatically.
• Summertime period Turn summertime period on or off.
• Time/date: To check or for manual input, if EPG data is not supplied by the broadcasting station.

GB 15
10. Environment
Setting the timer
This menu provides an overview of the 8 timer locations and the option to add timers manually.
• Timer number: use the VOL(+/-) button to select a timer (1-8).
• Programme: press VOL-button and subsequently use the buttons CHANNEL (Up/Down) to select
the desired programme from the list.
• Date: Programme the date manually, using 8 digits (e.g. 8th of January 2006):
[0] [8] [0] [1] [2] [0] [0] [6]. Use the VOL-button to make any corrections.
• Start time: Start time of the programme/recording is in the 24-hour format.
• Duration: The duration of the programme is in hours and minutes. For a programme having a
duration of 90 minutes, set the timer to 01:30 (1 hour: 30 minutes). When recording, it is
recommended to increase the recording time beyond the “duration” to allow for possible overruns.
• Typ: Selecting “Type” lets you choose whether you would like to view or record a broadcast just
once, daily or weekly.
• Reception (TV/VCR): Finally, determine whether you would like to record or watch a certain
broadcast at a pre-selected time.
Live: At a selected time, the receiver will switch to the pre-determined programme. This type of
programming is helpful, if you do not want to miss a specific programme.
Recording: The TV image remains the same at the start, except for a short note that the recording
has started. Check if the video recorder has switched to the recording mode.
Playback: to play back a recorded file at a pre-determined time.
Setting up the password
You can lock programmes with contents unsuitable for minors and the receiver to prevent
unauthorised access. Certain programmes and parts of the screen menu can later only be recalled
by entering a 4-digit password.
• Option “Setup and Programmes”: The OSD menu and all locked programmes can only be recalled
after entering a password.
• Option “Setup”: Password protected OSD menu, unlimited access to all programmes.
• Option “Protection of minors off”: Unlimited access to OSD menu and programmes.
Changing the password
The factory-set password is 0000. To change the password, enter the old number combination once,
then enter the new password twice. Please do remember the password!
Do not use birthdates – this is a very poor selection of a password and it is not safe. Instead, use
easy to remember words and use the letters on your remote control to identify them:
The word „Haus“ would be identified by pressing the following numbers: [ 4 ] [ 2 ] [ 8 ] [ 7 ].
Reset
There are three options to reset the device:
• Factory setting: The device will be reset to the factory settings, using the original settings and
programme lists.
• Delete all programme lists: Retain all device settings and delete all programme lists.
• Basic setting: Reset all device and default settings but retain all own programme lists.
Information
This menu provides you with important addresses, hardware and software information. Please have
this information ready if you contact our hotline.

GB 16
11. Recorder – Menu
The receiver can store TV and radio broadcastings and fixed images on the installed hard disc. If your
receiver does not have a built-in hard disc, you can install any commercially available IDE hard disc in
your device. Please disconnect the device from the power supply prior to installing the hard disc!
Unscrew the four screws on top of the device. The hard disc is equipped with a jumper, which places
the hard disc into Master Mode (MA). The settings Slave (SL) and Cable Select (CS) are not suitable!
Connect the 40-pin connector and the 4-pin connector to the hard disc. The hard disc will
automatically be formatted after switching on the receiver; thereafter, the hard disc is operational.
Recording manager
With the recording manager video, sound, and image recordings can be managed.
To run and manage recorded TV programmes, select the option “Video recordings”.
1.-4. FAV:
All video and audio recordings can be sorted in four favourite lists. Press button [ 1 ] - [ 4 ] to
categorize certain recordings (e.g.: 1 = sports, 2 = thrillers…)
5. Lock:
Playback of certain recordings can be prevented. Select the recording you would like to lock and
press button [ 5 ]. After you have entered the password, a little padlock symbol will be displayed on
the right-hand column.
6. Renaming
If you would like to rename a certain recording, press button [ 6 ]. An input field with the current
name will appear on the screen. To change positions, press the navigation button VOL (+/-).
Additional letters can be found on the numerical key pad of the remote control unit. Press the buttons
until the desired character is displayed.
Note: You can create a space by pressing the button [ 1 ]. Press button [ i ] to change from upper to
lower case characters.
7. Moving
To move a selected recording to a new position, press button [ 7 ] the colour of the selected line will
change. Subsequently, use the buttons CHANNEL (Up/Down) to select the new position within the list
of recordings. Finally, press button [ 7 ] again. The recording is now locked in its new position.
8. Sorting:
All recordings can be sorted alphabetically by pressing button [ 8 ].
9. Deleting
To delete individual recordings, press button [ 9 ].
0. Combining:
You can combine two recordings. First, select the recording, which you would like to be placed first
in line, by pressing button [ 0 ]. Select the next recording and press button [ 0 ] again. After the
security questions have been correctly answered, both recordings will be combined.

GB 17
11. Recorder – Menu
Audio recording
Follow the descriptions in “Recording Manager” 앶앸 “Video Recording” to edit and manage audio
recordings (sorting, renaming, deleting...).
Picture recording
Press the FREEZE button on your remote control to store images.
Follow the descriptions in “Recording Manager” 앶앸 “Video Recording” to edit and manage picture
recordings (sorting, renaming, deleting...).
Note: The stored images cannot be added to your list of favourites.
Recording guide
The recording guide provides you with an overview and selection of all video, audio and picture
recordings.
Video guide
The video guide provides you with a detailed overview of all available TV recordings. It contains a
preview, the duration of the recording and the recording date.
To play back the programme shown in the preview window, press the OK button.
Audio guide
The audio guide provides you with a detailed overview of all available radio recordings. It contains the
duration of the recording and the recording date.
To play back the selected programme, press the OK button.
Photo guide
The photo guide provides you with a detailed overview of all available picture recordings. It contains a
preview and the date it was created.
To view the image shown in the preview window, press the OK button.

GB 18
11. Recorder – Menu
Managing the hard disc
The hard disc management feature provides you with an overview of the status of the hard disc and
setting options of the power saving mode. Using an additional submenu lets you format the hard
disc.
Hard disc information
This feature provides an overview of the number and the type of recordings available. It also lists the
used and free storage space of the hard disc. The storage space allocated for the time shift mode is
displayed in megabytes as well as in chart form.
Hard disc: additional settings
Time shift duration: To prevent the hard disc from reaching its capacity inadvertently and thereby
preventing the recording of pre-programmed broadcastings, you can limit the required storage space
for the time shift mode (see Chapter 12). Reserve 1 - 4 hours of hard disc storage space for the time
shift mode or completely remove the restriction.
Hard disc power shut-off: This feature allows you to switch the power saving mode off and on. If the
power saving mode is turned on, the hard disc will switch off after a certain time of inactivity.
Duration: Determine after what period of inactivity the hard disc should switch to sleep mode. This
period can be selected between 5 minutes and one hour. If required, the hard disc will power up
again on its own (e.g. in case of playback, time shift or recording).
Note: You can select to power off the hard disc directly on your remote control by pressing the
SLEEP button.
Formatting the hard disc
If formatting your hard disc you will delete all existing data on the disc! After formatting, the entire
storage space of the hard disc is again available for new recordings.

GB 19
11. Recorder – Menu
Transferring to a VCR (Video recorder)
At some point in time even a hard disc with the largest storage capacity becomes full and some
recordings may have to be deleted to create new storage space. Using this function, you can easily
store several recordings in any desired order on your video or DVD recorder.
Open the menu “Transfer to VCR”
Unter the function “Duration” set the video tape length or the recording duration of the DVDR(W).
Normal video tapes have a recording time of 120, 180 or 240 minutes. For a 180-minutes tape, set
the recording time to 3 hours (03:00:00). Using a 5-hour tape in long play mode (LP) lets you record
up to 10 hours (10:00:00). DVD recorders can also record in different settings. Setting the DVD to
the highest quality lets you record for approximately 1 hour. Selecting a lesser quality allows for
longer recording times.
Deleting: If you would like to create new storage space on your video tape/DVD, select the option
“Delete”. All check-marked programmes will be deleted from the list.
Select the option “Change”
Following a list of all available video recordings will be displayed. Select the first recording, which you
would like to record on your external video recording device and press the VOL+/VOL- button. You
can determine and store the sequence of all broadcastings in the column on the right-hand side.
Note: If the duration of all programmes selected exceeds the total recording time, an error message
will be displayed.
Switch the video recorder or DVD recorder to recording mode and press the OK button. The available
recordings will be played back in the sequence you determined and recorded on your video or DVD
recorder.
Video playback and starting a slide show
Press the [ > ] button to start the playback. The displayed menu offers the following playback
options:
• Normal: Recalls a list of all previous recordings (see next illustration).
• Intro: The first few seconds of all available recordings will displayed in sequence and in full screen
mode.
• arbitrary playback: The available recordings will be played back in an arbitrary sequence.
• Slide show: To display all or pre-selected images in chronological order.
Playback (“Normal”)
The menu Video Guide provides a quick overview of all available recordings and a preview of the
selected file. In addition, the play time, the title of the programme, and the recording date will be dis-
played.
To start the playback, press the OK button.
12. Recorder – Control functions

GB 20
12. Recorder – Control functions
Playback slide show
With this feature you can determine the order of the images and when the screen should change.
Select the pictures you would like to present in the slide show one after the other. To determine the
sequence of the pictures, press the VOL +/- button. To switch between picture selection and display
duration of each image, press the white button. With this feature you can select the period the image
will be displayed on the screen (1 - 5 sec).
To start the slide show, press the OK button.
Display information during playback
After starting the video playback the most important file information will be displayed for several sec-
onds (set in menu “Environment/TV Settings”): title, file size on the hard disc, position, and duration.
You can also invoke this information during playback by pressing the [ i ] button on your remote con-
trol unit.
Pause & Time shift
While the device is in playback mode of a recording, you can pause the picture by pressing the pause
button. To continue the play back, press the [ > ] button. When pressing the pause button multiple
times, you can view the pictures frame by frame.
If the device is in TV mode, you can change to time shift mode by pressing the pause button. The
time shift mode will be shown on the receiver's display as [ tSht ]. The current TV broadcasting will
be paused on the screen, but continues to be recorded in the background. Press the [ > ] button to
continue the programme at any time or fast forward or rewind the picture. This way, you will never
miss a single scene, even if you have to leave the room or you have to answer the telephone! You
can even watch another programme if it is broadcast on the same channel (see “Programme Speed
Selection”). Press the STOP button to exit the time shift mode. Afterwards you can decide whether
you would like to store the time shift recording or not.
Fast picture search
While in playback mode, recording mode or time shift mode you can fast forward or rewind the
programme at 32- times the normal speed. To increase the speed, press the [ << ] or [ >> ] button
repeatedly. Press the [ > ] button to continue the playback at normal speed.
Slow motion
You can reduce the playback speed to 1/32 of the normal speed by pressing the pause button first,
followed by the [ >> ] button.
Picture fast selection
Press the PVR button to recall an overview of all available video recordings.
Press the VOL+/- button to select the various playback lists (list of favourites).
Press the AUF/AB [UP/DOWN] button to select a recording for playback and leave the menu by
pressing the EXIT button.
This manual suits for next models
1
Table of contents
Other Sky Master Receiver manuals

Sky Master
Sky Master DS 66 User manual

Sky Master
Sky Master DXH 90 User manual

Sky Master
Sky Master DCI 35 User manual

Sky Master
Sky Master DVR 9600 User manual

Sky Master
Sky Master DCI 9410 User manual

Sky Master
Sky Master DVR 9200 User manual

Sky Master
Sky Master DVR 7500 User manual

Sky Master
Sky Master DXS 23 User manual

Sky Master
Sky Master DCX 10 CI User manual

Sky Master
Sky Master DCI 9210 User manual