Smanos SS2800 User manual

EN EN
Introduction
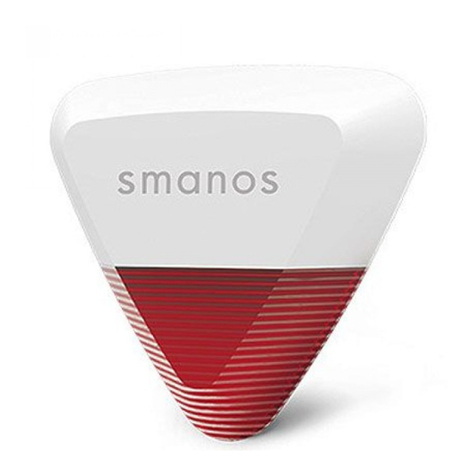
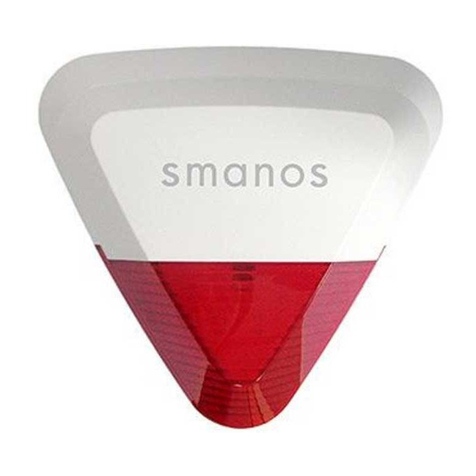
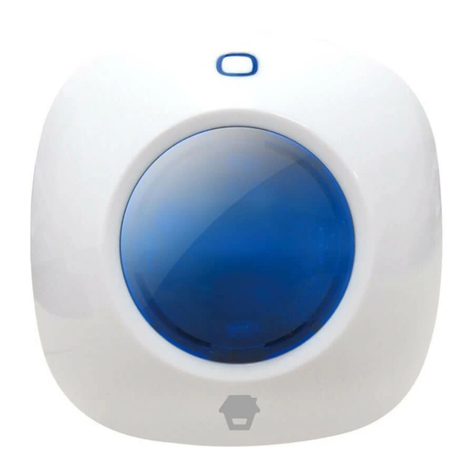
Wireless outdoor strobe siren is to deter the intruders through
hooting once it receives wireless signal from connected control
panel or sensors. More wireless strobe sirens could be connected
to the same control panel to strengthen the deterring effect. When
the siren is connected to control panel as an accessory, it will hoot
and its LED lights will ash once the system is triggered. When the
siren is connected to accessories like remote control, door/window
contact, and PIR motion detector, etc. as a standalone alarm
control panel, it will hoot and its LED lights ash once any sensor is
triggered.
Product Overview
Front View
Alarm LED
Indicators Status LED Indicator
Status LED Indication
Status LED
Arm/Home Mode Flash once every 5 seconds
Disarm No light indication
No disarm operation
after alarm Flash once every 2 seconds for 2 hours
Rear View
Mounting Holes
Back Cover
Tamper Switch
Bracket

EN EN
PCB Layout
Siren Interface
Learn Button
Adapter Jack
DC 12V
Terminals
Wired Sensor Terminals (Normal Zone)
Wired Sensor Terminals (24-H Zone)
Battery Slot
Alarming Volume Setup
Alarming Duration Setup
Jumper Setup
Please setup alarming volume and alarming duration time on the
PCB board accordingly.
Alarming Volume Setup
HIGH MUTE LOW
HIGH
HIGH
HIGH
MUTE
MUTE
MUTE
LOW
LOW
LOW
Default Setting
Note: When the siren is connected to control panel, it will hoot at the pre-
set volume even if the control panel is set to mute alarm. This is to alert the
neighbors and avoid the intrusion. When the control panel is set to mute
disarm/arm, the siren will be disarmed/ armed mutely. When the siren is set
to mute mode, there are still tones for arming and disarming.
Alarming Duration Setup
5 MIN
5MIN
5 MIN
2 MIN
2 MIN
2 MIN
30S
30S
30S
5 MIN 2 MIN 30S
Default Setting

EN EN
Work as Wireless Siren
When it works as a wireless siren, it should be connected with
wireless control panel in advance. When the control panel is
alarming, it hoots and the strobe light ashes to deter illegal
intruders.
Connect to Control Panel
Press the Learn Button for
0.5 second, siren beeps once
and enter connection status.
Press [SOS] or [Arm ] button
on the panel (or press Arm on
App if the panel does not have
a button), the wireless siren and
control panel are connected
successfully after one beep is
heard from siren.
Note: Once the siren is in connection status, please press Learn Button again
to exit. One beep will be heard from siren.
When connecting to control panel, please don't trigger any other sensors to
avoid interference.
Disconnection
Hold the learn button till 2 beeps are heard to disconnect the siren
and control panel.
Work as Standalone Alarm Panel
When it works as a standalone alarm panel, it should be connected
with wireless sensors or wired sensors in advance, when the
intrusion is detected, it hoots and the strobe light ashes to deter
illegal intruders.
Connect with accessory: press the learn button on the siren and
trigger the accessory once, the connection is successful after one
beep is heard from siren.
Wired Terminals
The siren has terminals for power supply and wired sensors. Just
connect the power line or wired sensors to this wired terminals.
Please make sure the positive and negative are distinguished.
-DC12V+ 24-ZONE ZONE
-DC12V+ : Power input
ZONE (normal zone mode): After a wired sensor is connected with
"ZONE" terminal, means it will work as a normal zone sensor, once
it is triggered in Arm or Home Arm state, alarm panel will alarm
immediately.

EN EN
24-ZONE (24-hour zone mode): After a wired sensor is connected
with "24-ZONE" terminal, means it will work as a 24-hour zone
sensor, siren will alarm immediately once it is triggered.
Installation Mode
Installation Mode is designed for users to dismount or remount the
siren without triggering a tamper alarm. Thus not to disturb other
people.
①
Press [Disarm ] button on the remote control continuously for
3 times, then the siren comes to installation mode after a long beep
is heard. Any sensor or tamper triggered during installation mode
will not result in siren hooting but 3 beeps will be heard instead.
②
Press [Arm ] button, the siren will exit from installation mode
after a long beep is heard. Or the siren will exit from connection
status when no operation is carried out within 10 minutes.
Note: Also you can press the tamper switch 7 times to enter installation
mode.
Installation
Please nish all the system setup on the PCB and enter into
installation mode before installation.
①
Hold the positioning paper in right place, stick the gradienter on the
positioning paper to check and adjust the position.
②
Install two screws into the top screw holes.
③
Mount the bracket into the bottom screw holes and tighten with
screws.
④
Tear off the positioning paper.
⑤
Mount the siren to the wall, tighten the screw and make sure the
siren is well positioned.
Gradienter
Positioning
paper
Enter Connection Status
Through Remote Control
This function is designed for users to connect newly-purchased
accessories without dismounting the siren from the wall.
When the siren is in installation mode, press [Home Arm ] on the
remote control continuously for 3 times, then the siren comes to
connection status after a long beep is heard, and then trigger the
new accessory once to complete the pairing.
The siren will exit from connection status when no operation is
carried out in 15 seconds.

EN
Specications
Power Supply: DC 12 V 500 mA
Backup Battery:
18650 3.7 V 1800 mAh rechargeable lithium battery
Maximum Alarm Current: <350 mA
Static Current: <15 mA
Wireless Receiving Distance: <80 m (in open area)
Operating Condition:
Temperature: -10 °C~+55 °C
Relative Humidity: <80% (Non-condensing)
Maximum Siren Volume: 105 dB
Battery Standby Time: <7 days
Radio Frequency: 868 MHz
Housing Material: PC+ABS, ANTI-UV
IP Rating: IP64
Dimensions (L×W×H): 245.2 × 227.5 × 72.4 mm
EN CE Declaration of Conformity DE CE-Konformitätserklärung FR
Déclaration de conformité CE NL CE-conformiteitsverklaring
ES Declaración de conformidad CE PT Declaração de Conformidade CE IT
Dichiarazione di conformità CE
EN According to the EC Council Directive 2014/53/EU Radio Equipment
DE Gemäß der Richtlinie 2014/53/EU des Europäischen Rates über Funkanlagen
FR Conforme à la directive 2014/53/UE du Conseil européen sur les équipements
radioélectriques NL Volgens de EG-Richtlijn 2014/53 / EU Radioapparatuur ES Conforme
a la Directiva del Consejo de la CE 2014/53 / UE sobre Equipos de Radio PT Em
conformidade com a Diretiva do Conselho CE 2014/53/UE relativa aos Equipamentos de
Rádio IT In conformità alla direttiva del Consiglio Europeo 2014/53/UE per apparecchiature
radio
EN We DE erklären wir, FR Nous, NL Wij ES Nosotros, PT Nós, IT Noi
smanos Europe
Postbus 3071, 2130 KB Hoofddorp
The Netherlands
EN Declare that the Product detailed below: DE dass das im Folgenden beschriebene
Produkt FR déclarons que le produit détaillé ci-dessous : NL verklaren dat het product
hieronder wordt beschreven: ES Declaramos que el producto descrito a continuación:
PT Declaramos que o Produto detalhado abaixo: IT Dichiariamo che il prodotto riportato
qui sotto:
EN Model: SS2800 Wireless Outdoor Strobe Siren DE Modell: SS2800 Drahtlose
Stroboskopsirene FR Modèle : Sirène stroboscopique d'extérieur SS2800 NL Model:
SS2800 Draadloze itslicht/sirene ES Modelo: Sirena inalámbrica con luz estroboscópica
para exterior SS2800 PT Modelo: Sirene externa com luz estroboscópica SS2800
IT Modello: Sirene estroboscópica wireless SS2800
EN is herewith conrmed to comply with the requirements set out in the EC Council
Directive 2014/53/EU Radio Equipment. For the evaluation of the compliance with this
Directive, the following standards were applied: DE den in der Richtlinie 2014/53/EU
des Europäischen Rates über Funkanlagen niedergelegten Anforderungen entspricht.
Für die Beurteilung der Konformität mit dieser Richtlinie wurden die folgenden Normen
angewandt: FR est certié conforme aux exigences de la directive 2014/53/UE du Conseil
européen sur les équipements radioélectriques. Pour l’évaluation de la conformité avec
cette directive, les normes suivantes ont été appliquées : NL Hiermee wordt bevestigd
dat het voldoet aan de vereisten uiteengezet in de EG-richtlijn 2014/53 / EU voor
radioapparatuur van de EU. Voor de beoordeling van de naleving van deze richtlijn werden

de volgende normen toegepast: ES cumple con requisitos establecidos en la Directiva del
Consejo de la CE 2014/53 / Equipo de Radio de la UE. Las siguientes normas se aplicaron
para evaluar el cumplimiento de esta Directiva: PT está em conformidade e cumpre os
requisitos denidos na Diretiva do Conselho CE 2014/53/UE relativa aos Equipamentos
de Rádio. Para a avaliação de conformidade com esta diretiva, as seguintes normas foram
aplicadas: IT soddisfa i requisiti contenuti nella direttiva del Consiglio Europeo 2014/53/
UE per apparecchiature radio. Per la valutazione della conformità a tale direttiva, sono stati
applicati i seguenti standard:
EN301 489-1 V2.1.1: 2017
EN301 489-3 V2.1.1: 2017
EN300 220-1 V3.1.1: 2017
EN300 220-2 V3.1.1: 2017
EN62368-1: 2014
Latest copy of the EU Declaration of Conformity is available at:
http://www.smanos.com/english/compliance.asp
Brian P. Borghardt
General Manager
Hoofddorp, 2017-07-17
EN INFORMATION FOR THE USERS
At the end of its life, the device has to be separated from the other waste.
Consign the device and all its components together to a center of electronical and
electrotechnical waste recycling center, designated by your local authorities.
DE INFORMATIONEN FUR DIE BENUTZER
Das Gerat am Ende seiner Lebensdauer von den anderen Abfallen getrennt werden
muss. Der Benutzer sollte das Great und alle seine Komponenten zusammen
mit einem geeigneten Zentrum des elektronischen und elektrotechnischen
Abfallrecyclingzentrum, das von ihren ortlichen Behorden benannt ist, verteilen.
FR INFORMATIONS POUR LES UTILIZATEURS
Qu’en n de vie, l’appareil doit etre séparé des autres déchets. Consigner l’appareil
et tous ses composants dans un centre appropriè de recydage des déchets
électroniques et électrotechniques, désigné par vos autorités locales.
NL INFORMATIE VOOR DE GEBRUIKERS
Aan het einde van zijn levensduur moet het apparaat van het andere afval worden
gescheiden. Verzend het apparaat en alle componenten samen naar een centrum
voor elektronische en elektrotechnische afvalrecycling, aangewezen door uw lokale
autoriteiten.
ES INFORMACION DEL USUARIO
Al nal de su vida util, el dispositivo debe separarse de los otros residuos. El usuario
debe remitir el dispositivo y todos sus componentes a un centro adecuado de
centro de reciclaje electrotécnico, designado por las autoridades locales.
PT A INFORMACAO DOS UTILIZADORES
No nal de sua vida, o dispositivo deve ser separado dos outros residuos. O
usuario deve consignar o dispositivo e todos os seus componentes em um centro
apropriado dereciclagem de residuos eletronicos e elotrotécticos, designado pelas
autoridades locais.
IT INFORMAZIONE AGLI UTENTI
Il simbolo del cassonetto barrato riportato sull’apparecchiatura indica che il prodotto
alla ne della propria vita utile deve essere raccolto separatamente dagli altri
riuti. L’utente dovrà, pertanto, conferire l’apparecchiatura integra dei componenti
essenziali giunta a ne vita agli idonei centri di raccolta differenziata dei riuti
elettrici ed elettronici, oppure riconsegnarla al rivenditore al momento dell’acquisto
di nuova apparecchiatura di tipo equivalente. Lo smaltimento abusivo del prodotto
da parte dell’utente comporta l’applicazione delle sanzioni amministrative di cui al
Decreto Legislativo N. 49 del 14 Marzo 2014.
Other manuals for SS2800
2
Table of contents
Other Smanos Security System manuals
Popular Security System manuals by other brands

Visonic
Visonic CLIP PG2 installation instructions

Chamberlain
Chamberlain 976LMC Security+ user manual

Federal Signal Corporation
Federal Signal Corporation PAGASYS GEN II P-SYS-G Description, Installation, Operations and Maintenance Manual

AL-KO
AL-KO AKS 1300 user manual

Aiphone
Aiphone AI-900 operating instructions

Elkron
Elkron HP501 manual