manuals.online logo
Brands
  1. Home
  2. •
  3. Brands
  4. •
  5. Smartwares
  6. •
  7. Switch
  8. •
  9. Smartwares SH4-99652 User manual

Smartwares SH4-99652 User manual

EN
Outdoor3-channelswitchset
NL 3-kanaalsschakelaarset voor buiten
DE
Außenleuchten 3-Kanal Schalter Set
FR Prises d'extérieur, boîtier 3 canaux
ES Interruptor de 3 vías para exterior
IT Interruttore da esterno a 3 vie
SV
Utomhusbrytarpaket, 3 kanaler
PL
Zewnętrzny 3-kanałowy zestaw przełącznika
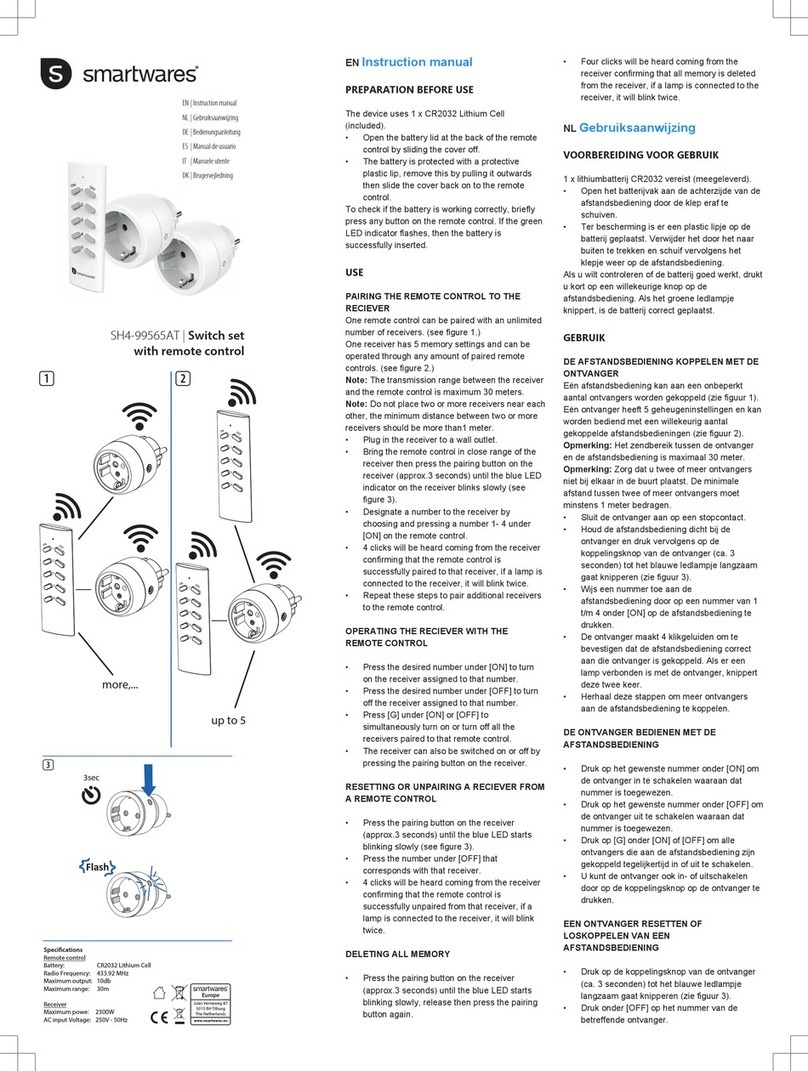
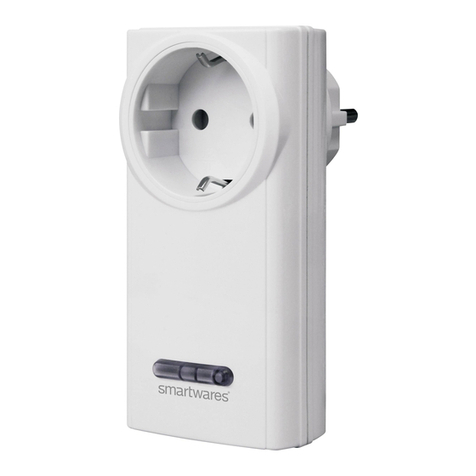
SH4-99652
EN Instruction manual
PREPARATION BEFORE USE
In your electrical circuit panel, locate the circuit breaker control for the
wall switch you will be working on.
Switch the circuit off.
• Open the mounting box by loosening the screws.
• Unscrew the receiver and pull it from the mounting box.
• Puncture the slots at the back of the mounting box to create four
screw holes.
• Use screws to fix the mounting box to the desired spot. Use plugs
when the surface requires this.
• Puncture a hole in the rubber caps at the bottom of the mounting
box. (1)
• Pull the phase wire (brown), neutral wire (blue) and the ground
wire (green/yellow) of the power supply through the left hole. Pull
the black, blue and (optional) the green/yellow wires of the
devices through the remaining holes of the mounting box.
Connecting the receiver to the power supply (2)
• Connect the phase wire (brown) to L, connect the neutral wire
(blue) to N and connect the green/yellow wire to the ground
terminal.
Connecting a device to the receiver (2)
• Connect the blue wire of the device to N and connect the black
wire of the device to L. Connect other devices in the same way to
remaining terminals. If one or more devices is equipped with a
ground wire, connect it to one of the ground terminals.
Mounting the receiver
• Screw the receiver into the mounting box.
• Switch on the mains power in your electric circuit panel.
PAIRING THE RECEIVER TO A REMOTE CONTROL
Be careful when pressing the LEARN button:
- Do not use a sharp object.
- Make sure not to puncture the rubber.
- Only use a suitable tool that can push the learn button accurately.
- Avoid pushing the rubber learn button to the left or right as this will
push it off its guide.
- If the below steps are not working then please use another tool.
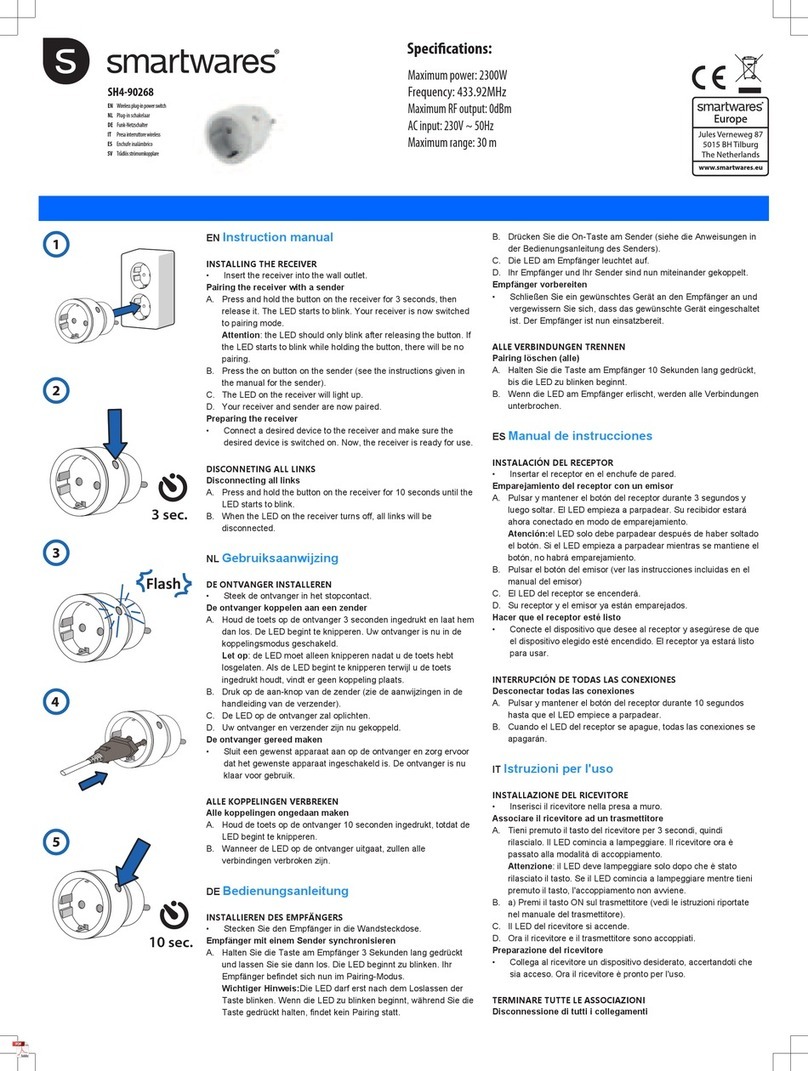
• Press and hold the LEARN button for 3 seconds, then release it .
• After releasing the button the LED starts to blink. Your receiver is
now switched to pairing mode.
Attention: the LED should only blink after releasing the button. If
the LED starts to blink while holding the button, there will be no
pairing.
On the remote control:
• Within 10 seconds, press one of the “ON” buttons to pair it to the
receiver.
• The LED on the receiver turns off if the pairing is complete.
• Repeat for other channels.
Operating the devices (AUTO/ON/OFF)
• Set the switch to AUTO to operate the device with a remote
control.
• Set the switch to ON/OFF to continuously power on/off the
corresponding device.
(NOTE: device cannot be controlled by remote control in this
mode)
A. Press the ”ON” button on the remote control to turn on the
receiver.
B. Press the “OFF” button on the remote control to turn off the
receiver.
C. Press the ”ON” button beneath ALL (on the remote control) to turn
on all paired devices at the same time.
D. Press the ”OFF” button beneath ALL (on the remote control) to
turn off all paired devices at the same time.
Disconnecting all links
• Press and hold the LEARN button until the LED starts to blink
(around 10 seconds).
• While blinking, press the learn button once again and release
(DO NOT HOLD). The LED will turn off and then on again. All
links are undone.
NL Gebruiksaanwijzing
VOORBEREIDING VOOR GEBRUIK
Zoek in uw stoppenkast de stroomonderbreker voor de
wandschakelaar waaraan u gaat werken.
Schakel de stroom uit.
• Open de inbouwdoos door de schroeven los te draaien.
• Schroef de ontvanger los en verwijder deze uit de inbouwdoos.
• Druk de sleuven in de bodem van de inbouwdoos door om vier
schroefgaten te creëren.
• Bevestig de inbouwdoos op de gewenste plek met schroeven.
Gebruik pluggen wanneer de ondergrond dit vereist.
• Doorboor de rubberen doppen onder aan de inbouwdoos. (1)
• Trek de fasedraad (bruin), de neutrale draad (blauw) en de
aardedraad (groen/geel) van de voeding door het linkergat.
Trek de zwarte, blauwe en (optioneel) groene/gele draden van
de apparaten door de vrije gaten in de inbouwdoos.
De ontvanger aansluiten op de voeding (2)
• Sluit de fasedraad (bruin) aan op L, sluit de neutrale draad
(blauw) aan op N en sluit de groene/gele draad aan op de
aardklem.
Een apparaat aansluiten op de ontvanger (2)
• Sluit de blauwe draad van het apparaat aan op N en sluit de
zwarte draad van het apparaat aan op L. Sluit overige
apparaten op dezelfde manier aan op de vrije klemmen. Als
een of meer apparaten zijn voorzien van een aardedraad, sluit
u deze aan op een van de aardklemmen.
De ontvanger bevestigen
• Schroef de ontvanger vast in de inbouwdoos.
• Schakel de stroom in met de hoofdschakelaar in uw meterkast.
DE ONTVANGER KOPPELEN AAN EEN
AFSTANDSBEDIENING
Wees voorzichtig bij het gebruik van de LEARN-knop:
- Gebruik geen scherpe voorwerpen.
- Zorg ervoor dat u het rubber niet doorboort.
- Gebruik alleen geschikte hulpmiddelen waarmee de leerknop
nauwkeurig kan worden ingedrukt.
- Druk de rubberen leerknop niet naar links of rechts; deze wordt
dan van de geleider gedrukt.
- Gebruik een ander hulpmiddel als de onderstaande stappen niet
werken.
• Houd de LEARN-knop 3 seconden ingedrukt (3).
• Nadat u de knop hebt losgelaten, gaat het ledlampje knipperen.
De koppelingsmodus van de ontvanger is nu actief.
Let op: De led mag pas gaan knipperen nadat u de knop hebt
losgelaten. Als het ledlampje al gaat knipperen terwijl u de knop
ingedrukt houdt, wordt de koppelingsmodus niet geactiveerd.
Op de afstandsbediening:
• Druk binnen 10 seconden op een van de ON-knoppen om de
afstandsbediening te koppelen aan de ontvanger.
• Het ledlampje op de ontvanger wordt uitgeschakeld wanneer
het koppelen is voltooid.
• Herhaal dit voor andere kanalen.
De apparaten bedienen (AUTO/ON/OFF) (4)
• Zet de schakelaar op AUTO om het apparaat te bedienen met
een afstandsbediening.
1
2
3
4
5
220-240 VAC
50/60Hz
3 sec
10 sec
Speci cations:
Battery: 1 x 3VDC, type CR 2032 (incl.)
AC input voltage: 230V, 50Hz
Maximum distance: 30 m
Maximum power output: 3 x 400 W
Water resistance: IP55
• Zet de schakelaar op ON/OFF om het bijbehorende
apparaat in- of uitgeschakeld te houden.
(OPMERKING: in deze modus kan het apparaat niet
worden bediend met de afstandsbediening.)
A. Druk op de knop ON op de afstandsbediening om de
ontvanger in te schakelen.
B. Druk op de knop OFF op de afstandsbediening om
de ontvanger uit te schakelen.
C. Druk op de knop ON onder ALL (op de
afstandsbediening) om alle gekoppelde apparaten
tegelijkertijd in te schakelen.
D. Druk op de knop OFF onder ALL (op de
afstandsbediening) om alle gekoppelde apparaten
tegelijkertijd uit te schakelen.
Alle koppelingen ongedaan maken
• Houd de LEARN-knop ingedrukt tot het ledlampje
begint te knipperen (ongeveer 10 seconden) (5).
• Druk terwijl het lampje knippert nog één keer op de
leerknop (NIET INGEDRUKT HOUDEN). Het
ledlampje gaat uit en gaat daarna weer branden.
Alle koppelingen zijn ongedaan gemaakt.
FR Manuel d'instructions
PRÉPARATION POUR L’UTILISATION
Dans votre panneau de circuit électrique, localisez la
commande du disjoncteur pour l'interrupteur mural sur
lequel vous allez travailler.
Coupez le circuit.
• Ouvrez le boîtier de montage en dévissant les vis.
• Dévissez le récepteur et retirez-le du boîtier de
montage.
• Appuyez sur les fentes situées au fond du boîtier de
montage pour créer les quatre trous de vis.
• Fixez le boîtier de montage avec des vis, à l’endroit
désiré. Utilisez des chevilles lorsque le support le
nécessite.
• Pratiquer un trou dans les opercules en caoutchouc
en bas du boîtier de montage. (1)
• Tirer le fil de phase (marron), le fil neutre (bleu) et le
fil de mise à la terre (vert/jaune) de l'alimentation
électrique à travers le trou gauche du boîtier de
montage. Tirer le fil noir, le fil bleu et (facultatif) le fil
vert/jaune des appareils à travers les autres trous du
boîtier de montage.
Raccordement du récepteur à l'alimentation
électrique (2)
• Connecter le fil de phase (marron) àL, le fil neutre
(bleu) àN et le fil vert/jaune à la borne de mise à la
terre.
Raccordement d'un appareil au récepteur (2)
• Connecter le fil bleu de l'appareil àN et le fil noir de
l'appareil àL. Raccorder les autres appareils de la
même manière aux bornes restants. Si un ou
plusieurs appareils sont équipés d'un fil de terre, le
connecter à l'un des bornes de mise à la terre.
Montage du récepteur
• Montage du récepteur.
• Allumez l’interrupteur secteur de votre compteur.
COUPLAGE DU RÉCEPTEUR À UNE
TÉLÉCOMMANDE
Précautions lors de l'utilisation de la touche
LEARN:
- Ne pas utiliser d'objet tranchant.
- Faire attention à ne pas perforer la gomme.
- Utiliser uniquement un outil adapté pouvant enfoncer
sans risque la touche LEARN.
- Éviter de pousser la touche gomme LEARN vers la
gauche ou la droite pour ne pas la faire sortir de son
logement.
- Si les étapes ci-dessous ne fonctionnent pas, utiliser un
autre outil.
• Appuyer sur la touche LEARN et la maintenir
enfoncée pendant 3secondes, puis la relâcher. (3).
• Une fois la touche relâchée, la LED commence à
clignoter. Votre récepteur est maintenant commuté
en mode d'appairage.
Attention: la LED ne doit clignoter qu'une fois le
bouton relâché. Si la LED commence à clignoter
lorsque la touche est maintenue enfoncée, le mode
de couplage n'est pas activé.
Sur la télécommande:
• Dans les 10secondes, appuyer sur la touche
«ON» pour coupler la télécommande avec le
récepteur.
• La LED sur le récepteur s'éteint lorsque le couplage
est terminé.
• Répéter la procédure pour les autres canaux.
Utilisation des appareils (AUTO/ON/OFF) (4)
• Définir l'interrupteur sur AUTO pour utiliser l'appareil
avec une télécommande.
• Définir l'interrupteur sur ON/OFF pour allumer/
éteindre en continu l'appareil correspondant.
(Remarque: il n'est pas possible de contrôler
l'appareil avec la télécommande lorsque ce mode
est sélectionné.)
A. Appuyer sur la touche «ON» de la télécommande
pour allumer le récepteur.
B. Appuyer sur la touche «OFF» de la télécommande
pour éteindre le récepteur.
C. Appuyer sur la touche «ON» sous ALL (sur la
télécommande) pour allumer tous les appareils
couplés en même temps.
D. Appuyer sur la touche «OFF» sous ALL (sur la
télécommande) pour éteindre tous les appareils
couplés en même temps.
Dissociation de tous les liens
• Appuyer sur la touche LEARN et la maintenir
enfoncée jusqu'à ce que la LED commence à
clignoter (environ 10secondes) (5).
• Lorsque la LED clignote, appuyer une nouvelle fois
sur la touche LEARN, puis la relâcher (NE PAS
MAINTENIR APPUYÉ). La LED s'éteint et s'allume à
nouveau. Tous les couplages sont annulés.
DE Bedienungsanleitung
VORBEREITUNG
Suchen Sie in Ihrem Sicherungskasten den
Trennschalter für den Stromkreis des Wandschalters,
den Sie auswechseln wollen.
Schalten Sie den Stromkreis ab.
• Lösen Sie die Schrauben zum Öffnen des
Montagegehäuses.
• Schrauben Sie den Empfänger los und ziehen Sie
ihn aus der Unterputzdose.
• Durchstoßen Sie die Schlitze unten im
Montagegehäuse als Schraublöcher.
• Befestigen Sie das Montagegehäuse an der
gewünschten Stelle, ggf. mit Dübeln.
• Stechen Sie ein Loch in die Gummikappen unten in
der Unterputzdose. (1)
• Ziehen Sie den Phasenleiter (braun), den
Neutralleiter (blau) und den Masseleiter (grün/gelb)
der Stromversorgung durch das linke Loch. Ziehen
Sie den schwarzen, blauen und (optional) den grün/
gelben Leiter des Gerätes durch die übrigen Löcher
der Unterputzdose.
Empfänger an der Stromversorgung anschließen (2)
• Schließen Sie den Phasenleiter (braun) an L, den
Neutralleiter (blau) an N und den grün/gelben Leiter
am Masseanschluss an.
Ein Gerät am Empfänger anschließen (2)
• Schließen Sie den blauen Leiter des Gerätes an N
und den schwarzen Leiter des Gerätes an L an.
Schließen Sie weitere Geräte auf dieselbe Weise an
den übrigen Klemmen an. Falls ein oder mehrere
Geräte einen Masseleiter haben, schließen Sie ihn
an einer der Masseklemmen an.
Empfänger montieren
• Schrauben Sie den Empfänger im Montagegehäuse.
• Schalten Sie den Strom am Sicherungskasten
wieder ein.
EMPFÄNGER MIT EINEM SENDER
SYNCHRONISIEREN
Beim Betätigen der Taste LEARN beachten:
- Keinen scharfen Gegenstand benutzen
- Das Gummi nicht beschädigen
- Ausschließlich ein geeignetes Werkzeug benutzen, um
die Lerntaste korrekt zu betätigen.
- Die gummierte Anlerntaste nicht nach links oder rechts
drücken, weil sie dadurch aus ihrer Führung gerät.
- Sollten die nachfolgenden Schritte nicht funktionieren,
benutzen Sie bitte ein anderes Werkzeug.
• Halten Sie die Anlerntaste 3Sekunden lang
gedrückt und lassen Sie sie dann wieder los (3).
• Nach dem Loslassen der Taste beginnt die LED zu
blinken. Ihr Empfänger befindet sich jetzt im
Synchronisierungsmodus.
Achtung: Die LED sollte nur blinken, nachdem die
Taste losgelassen wurde. Falls die LED zu blinken
anfängt, während Sie die Taste gedrückt gehalten,
findet keine Synchronisierung statt.
An der Fernbedienung:
• Drücken Sie innerhalb von 10Sekunden eine der
Tasten „ON“, um den Empfänger zu
synchronisieren.
• Die LED am Empfänger erlischt, wenn die
Synchronisierung abgeschlossen ist.
• Wiederholen Sie den Vorgang für weitere Kanäle.
Betrieb der Geräte (AUTO/ON/OFF) (4)
• Stellen Sie den Schalter auf AUTO, um das Gerät
mit einer Fernbedienung zu betreiben.
• Stellen Sie den Schalter auf ON/OFF, um das
entsprechende Gerät kontinuierlich ein-/
auszuschalten.
(HINWEIS: Das Gerät kann in diesem Modus nicht
mit einer Fernbedienung gesteuert werden.)
A. Drücken Sie die Taste „ON“ auf der Fernbedienung,
um den Empfänger einzuschalten.
B. Drücken Sie die Taste „OFF“ auf der Fernbedienung,
um den Empfänger auszuschalten.
C. Drücken Sie die Taste „ON“ unter „ALL“ (auf der
Fernbedienung), um alle synchronisierten Geräte
gleichzeitig einzuschalten.
D. Drücken Sie die Taste „OFF“ unter „ALL“ (auf der
Fernbedienung), um alle synchronisierten Geräte
gleichzeitig auszuschalten.
Pairing löschen (alle)
• Halten Sie die Taste LEARN so lange gedrückt, bis
die LED zu blinken beginnt (ca.10Sekunden) (5).
• Drücken Sie während des Blinkens die Anlerntaste
erneut und lassen Sie sie dann wieder los (NICHT
GEDRÜCKT HALTEN). Die LED geht aus und dann
wieder an. Alle Verknüpfungen sind aufgehoben.
ES Manual de instrucciones
PREPARACIÓN PARA EL USO
En el panel del circuito eléctrico, busque el control del
disyuntor del interruptor de pared en el que realizará la
operación.
Apague el circuito.
• Abra la caja de montaje aflojando los tornillos.
• Desenrosque el receptor y extráigalo de la caja de
montaje.
• Presione a través de las ranuras en la parte inferior
de la caja de montaje para crear cuatro agujeros
para los tornillos.
• Fije la caja de montaje en el lugar deseado con los
tornillos. Utilice tacos si es necesario por el tipo de
superficie que se utilice.
• Perfore los tapones de goma de la parte inferior de
la caja de montaje. (1)
• Tire del cable de fase (marrón), del cable neutro
(azul) y del cable de toma de tierra (verde/amarillo)
de la fuente de alimentación a través del orificio
izquierdo. Tire del cable negro, azul y
(opcionalmente) verde/amarillo de los dispositivos
para pasarlos a través de los orificios restantes de la
caja de montaje.
EN
Outdoor3-channelswitchset
NL 3-kanaalsschakelaarset voor buiten
DE
Außenleuchten 3-Kanal Schalter Set
FR Prises d'extérieur, boîtier 3 canaux
ES Interruptor de 3 vías para exterior
IT Interruttore da esterno a 3 vie
SV
Utomhusbrytarpaket, 3 kanaler
PL
Zewnętrzny 3-kanałowy zestaw przełącznika
SH4-99652
Conexión del receptor a la fuente de alimentación (2)
• Conecte el cable de fase (marrón) a L, conecte el cable neutro
(azul) a N y conecte el cable verde/amarillo al terminal de toma de
tierra.
Conexión de un dispositivo al receptor (2)
• Conecte el cable azul del dispositivo a N y conecte el cable negro
del dispositivo a L. Conecte los demás dispositivos del mismo
modo a los terminales restantes. Si uno o más dispositivos están
equipados con un cable de toma de tierra, conéctelos a uno de
los terminales de toma de tierra.
Montaje del receptor
• SAtornille el receptor dentro de la caja de montaje.
• Conecte la alimentación con el interruptor principal del armario del
contador.
EMPAREJAMIENTO DEL RECEPTOR CON UN MANDO A
DISTANCIA
Tenga cuidado al pulsar el botón LEARN:
- No utilice un objeto afilado.
- Asegúrese de no perforar la goma.
- Utilice solo una herramienta adecuada que permita pulsar el botón
Learn con precisión.
- Evite pulsar el botón Learn de goma hacia la izquierda o la derecha,
ya que esto puede sacarlo de su guía.
- Si los pasos siguientes no funcionan, utilice otra herramienta.
• Mantenga pulsado el botón LEARN durante 3 segundos y
después suéltelo. (3).
• Cuando suelte el botón, el LED empezará a parpadear. Ahora el
receptor está en el modo de emparejamiento.
Atención: El LED solo debe parpadear después de soltar el
botón. Si el LED empieza a parpadear mientras se mantiene
pulsado el botón, no se realizará el emparejamiento.
En el mando a distancia:
• En los siguientes 10 segundos, pulse uno de los botones “ON”
para emparejarlo con el receptor.
• El LED del receptor se apagará si se ha completado el
emparejamiento.
• Repita esto para otros canales.
Funcionamiento de los dispositivos (AUTO/ON/OFF) (4)
• Coloque el interruptor en la posición AUTO para utilizar el
dispositivo con un mando a distancia.
• Coloque el interruptor en la posición ON/OFF para encender y
apagar continuamente el dispositivo correspondiente.
(NOTA: El dispositivo no se podrá controlar mediante el mando a
distancia en este modo)
A. Pulse el botón “ON” del mando a distancia para encender el
receptor.
B. Pulse el botón “OFF” del mando a distancia para apagar el
receptor.
C. Pulse el botón “ON” situado debajo de ALL (en el mando a
distancia) para encender todos los dispositivos emparejados al
mismo tiempo.
D. Pulse el botón “OFF” situado debajo de ALL (en el mando a
distancia) para apagar todos los dispositivos emparejados al
mismo tiempo.
Desconectar todas las conexiones
• Mantenga pulsado el botón LEARN hasta que el LED empiece a
parpadear (alrededor de 10 segundos) (5).
• Durante el parpadeo, vuelva a pulsar el botón Learn de nuevo y
suéltelo (NO LO MANTENGA PULSADO). El LED se apagará y
se encenderá de nuevo. Todos los emparejamientos se desharán.
IT Istruzioni per l'uso
PREPARAZIONE ALL’USO
Nel quadro elettrico, individuare l'interruttore automatico relativo
l'interruttore a muro su cui si sta lavorando.
Interrompere il circuito elettrico.
• Aprire la scatola d’installazione allentando le viti.
• Svitare il ricevitore ed estrarlo dalla scatola di montaggio.
• Premere nelle apposite sedi presenti nella parte inferiore della
scatola d’installazione per ottenere quattro fori adibiti
all’avvitamento.
•
•
Fissare la scatola d’installazione con le viti nella posizione
desiderata. Utilizzare dei tasselli di fissaggio quando richiesto dal
tipo di materiale di supporto.
Praticare un foro nei tappi di gomma sul fondo della scatola di
montaggio. (1)
• Far passare il filo di fase (marrone), il filo neutro (blu) e il filo di
terra (verde/giallo) dell'alimentazione attraverso il foro sinistro.
Far passare i fili nero, blu e verde/giallo (opzionale) dei
dispositivi attraverso i restanti fori della scatola di montaggio.
Collegamento del ricevitore all'alimentazione (2)
• Collegare il filo di fase (marrone) a L, collegare il filo neutro (blu)
a N e collegare il file verde/giallo al terminale di terra.
Collegamento di un dispositivo al ricevitore (2)
• Collegare il filo blu del dispositivo a N e il filo nero del dispositivo
a L. Ripetere la procedura per collegare gli altri dispositivi ai
terminali rimanenti. Se uno o più dispositivi sono dotati di un filo
di terra, collegarlo ad uno dei terminali di terra.
Montare il ricevitore
• Avvitare il ricevitore all’interno della scatola d’installazione.
• Fornire l’alimentazione elettrica tramite l’interruttore situato nel
quadro contatore.
ASSOCIARE UN RICEVITORE AD UN TELECOMANDO
Premere il pulsante di apprendimento LEARN facendo attenzione
a:
- NON usare un oggetto appuntito.
- Non forare la gomma.
- Usare esclusivamente uno strumento adatto che possa premere con
precisione il pulsante di apprendimento.
- Non spingere il pulsante di apprendimento in gomma a sinistra o a
destra, per evitare di farlo uscire dalla guida.
- Se i passaggi seguenti non hanno esito positivo, utilizzare un altro
strumento.
• Tenere premuto il pulsante di apprendimento LEARN per 3
secondi e rilasciarlo (3).
• Dopo il rilascio del pulsante, il LED inizia a lampeggiare. Il
ricevitore si trova ora in modalità di associazione.
Attenzione: il LED deve lampeggiare solo dopo aver rilasciato il
pulsante. Se il LED inizia a lampeggiare mentre il pulsante è
premuto, l’associazione non verrà eseguita.
Sul telecomando:
• Entro 10 secondi, premere uno dei tasti "ON" per associarlo al
ricevitore.
• Il LED sul ricevitore si spegne quando l'associazione è avvenuta
correttamente.
• Ripetere la procedura per gli altri canali.
Azionare i dispositivi (AUTO/ON/OFF) (4)
• Impostare l'interruttore su AUTO per azionare il dispositivo con
un telecomando.
• Impostare l'interruttore su ON/OFF per accendere/spegnere
continuamente il dispositivo corrispondente.
(NOTA: in questa modalità il dispositivo non può essere comandato
tramite un telecomando)
1
2
3
4
5
220-240 VAC
50/60Hz
3 sec
10 sec
Speci cations:
Battery: 1 x 3VDC, type CR 2032 (incl.)
AC input voltage: 230V, 50Hz
Maximum distance: 30 m
Maximum power output: 3 x 400 W
Water resistance: IP55
B. Premere il tasto “OFF” del telecomando per
spegnere il ricevitore.
C. Premere il tasto “ON” sotto ALL (del telecomando)
per accendere contemporaneamente tutti i dispositivi
associati.
D. Premere il tasto “OFF” sotto ALL (del telecomando)
per spegnere contemporaneamente tutti i dispositivi
associati.
Disconnessione di tutti i collegamenti
• Tenere premuto il pulsante LEARN fino a quando il
LED inizia a lampeggiare (circa 10 secondi) (5).
• Mentre lampeggia, premere nuovamente il pulsante
di apprendimento LEARN e rilasciarlo (NON
TENERLO PREMUTO). Il LED si spegne, poi si
riaccende. Tutte le connessioni sono state annullate.
SV Instruktionshandbok
FÖRBEREDELSER FÖRE ANVÄNDNING
Leta upp säkringen för den brytare du ska jobba med på
säkringspanelen.
Slå av kretsen.
• Öppna apparatdosan genom att lossa på skruvarna.
• Skruva loss mottagaren och dra ut den ur dosan.
• Tryck genom skårorna på apparatdosans botten för
att skapa fyra skruvhå.
• Fäst apparatdosan med skruvar på önskad plats.
Använd skruvpluggar om underlaget kräver detta.
• Gör ett hål i gummilocken längts ner på
monteringsdosan. (1)
• Dra ut strömförsörjningens fastråd (brun), neutral
tråd (blå) och jordledning (grön/gul) genom det
vänstra hålet. Dra enheternas svarta, blå och
(valfritt) gröna/gula trådar genom de återstående
hålen på monteringsdosan.
Anslut mottagaren till strömkällan (2)
• Anslut fastråden (brun) till L och anslut den neutrala
tråden (blå) till N och anslut den gröna/gula tråden
till jordterminalen.
Ansluta en enhet till mottagaren (2)
• Anslut enhetens blå tråd till N och anslut enhetens
svarta tråd till L. Anslut andra enheter på samma
sätt till återstående terminaler. Om en eller fler
enheter är utrustade med jordkabel, anslut den till en
av jordterminalerna.
Montering av mottagaren
• Skruva fast mottagaren i apparatdosan.
• Slå på strömmen med huvudbrytaren i ditt
mätarskåp.
PARKOPPLA MOTTAGAREN MED EN
FJÄRRKONTROLL
Var försiktig när du trycker på LEARN-knappen:
- Använd inte ett vasst föremål.
- Se till att inte sticka hål på gummit.
- Använd endast ett lämpligt verktyg som kan trycka på
learn-knappen korrekt.
- Undvik att trycka på gummits learn-knapp till vänster
eller höger eftersom detta skjuter ut den från dess skena.
- Om nedanstående steg inte fungerar använd ett annat
verktyg.
• Håll LEARN-knappen nedtryckt i 3 sekunder och
släpp sedan. (3).
• LED-lampan börjar att blinka när du har släppt
knappen. Mottagaren är nu i parkopplingsläge.
Observera: LED-lampan ska börja blinka först efter
att du har släppt knappen. Om LED-lampan börjar
blinka när du håller knappen nedtryckt, sker ingen
parkoppling.
På fjärrkontrollen:
• Tryck på en av "ON"-knapparna inom 10 sekunder
flr att parkoppla den till mottagaren.
• LED-lampan på mottagaren släcks om
parkopplingen är genomförd.
• Upprepa för andra kanaler.
Använda enheterna (AUTO/ON/OFF) (4)
• Sätt brytaren på AUTO för att använda enheten med
en fjärrkontroll.
• Ställ in brytaren på ON/OFF för att kontinuerligt slå
på/av motsvarande enhet.
(OBS: enheten kan inte styras med fjärrkontroll i
detta läge)
A. Tryck på knappen ”ON” på fjärrkontrollen för att slå
på mottagaren.
B. Tryck på knappen ”OFF” på fjärrkontrollen för att
stänga av mottagaren.
C. Tryck på knappen ”ON” under ”ALL” (på
fjärrkontrollen) för att slå på alla parkopplade enheter
samtidigt.
D. Tryck på knappen ”OFF” under ”ALL” (på
fjärrkontrollen) för att stänga av alla parkopplade
enheter samtidigt.
Avlänkning av alla länkar
• Tryck ner och håll LEARN-knappen intryckt tills
LED-lampan börjar blinka (cirka 10 sekunder) 5..
• När den blinkar, tryck på learn-knappen en gång till
och släpp (HÅLL INTE INTRYCKT) LED-lampan
stängs av och tänds igen. Alla kopplingar försvinner.
PL Instrukcje użytkowania
PRZYGOTOWANIE DO UŻYTKOWANIA
Na panelu elektrycznym znajdź bezpiecznik chroniący
obwód danego przełącznika ściennego.
Wyłącz obwód.
• Otworzyć puszkę montażową poluzowując śruby.
• Odkręć odbiornik i wyciągnij go z puszki
montażowej.
• Wycisnąć szczeliny w dolnej części puszki
montażowej, by utworzyć cztery otwory na wkręty.
• Za pomocą wkrętów zamontować puszkę
montażową w wybranym miejscu. Jeśli podłoże tego
wymaga, użyć dybli.
• Przebij otwór w gumowych zatyczkach na spodzie
puszki montażowej. (1)
• Przeciągnij przewód fazowy (brązowy), neutralny
(niebieski) i uziemienia (zielono-żółty) zasilania
przez lewy otwór. Przeciągnij przewody czarne,
niebieskie i (opcjonalnie) zielono-żółte urządzeń
przez pozostałe otwory w puszce montażowej.
Podłączanie odbiornika do źródła zasilania (2).
• Podłącz przewód fazowy (brązowy) do L, neutralny
(niebieski) do N, a zielono-żółty do zacisku
uziemienia.
Podłączanie urządzenia do odbiornika (2)
• Podłącz niebieski przewód urządzenia do N, czarny
przewód urządzenia do L. Podłącz tak samo inne
urządzenia do pozostałych zacisków. Jeśli
przynajmniej jedno urządzenie jest wyposażone w
przewód uziemienia, podłącz go do jednego z
zacisków uziemienia.
Montaż odbiornika
• Przykręcić odbiornik do wnętrza puszki montażowej.
• Za pomocą głównego wyłącznika w szynce
bezpiecznikowej włączyć zasilanie.
PAROWANIE ODBIORNIKA Z PILOTEM
Przyciskając przycisk LEARN (nauka), postępuj
ostrożnie:
- Nie używaj ostro zakończonych przedmiotów.
- Uważaj, aby nie przebić gumy.
- Używaj wyłącznie odpowiedniego narzędzia, które
może prawidłowo nacisnąć przycisk nauki.
- Nie naciskaj gumowego przycisku nauki z lewej ani
prawej strony, ponieważ spowoduje to wysunięcie się
przycisku z prowadnicy.
- Jeśli poniższe kroki nie działają, użyj innego narzędzia.
• Naciśnij i przytrzymaj przez 3 sekundy przycisk
LEARN, po czym go puść. (3).
• Po puszczeniu przycisku kontrolka LED zaczyna
migać. Odbiornik jest teraz w trybie parowania.
Uwaga: kontrolka LED powinna migać dopiero po
puszczeniu przycisku. Jeśli kontrolka LED zacznie
migać, gdy przycisk jest wciśnięty, parowanie nie
zadziała.
Na pilocie:
• W ciągu 10 sekund naciśnij jeden z przycisków
„ON” (wł.), aby sparować go z odbiornikiem.
• Kontrolka LED na odbiorniku zgaśnie, gdy
parowanie zostanie zakończone.
• Powtórz, aby sparować pozostałe kanały.
Obsługa urządzeń (AUTO/wł./wył.) (4)
• Ustaw przełącznik w położeniu AUTO, aby
obsługiwać urządzenie pilotem.
• Ustaw przełącznik na ON/OFF (wł./wył.), aby
włączać/wyłączać odpowiednie urządzenie
normalnie.
(UWAGA: w tym trybie urządzeniem nie można
sterować za pomocą pilota)
A. Naciśnij przycisk „ON” (wł.) na pilocie, aby włączyć
odbiornik.
B. Naciśnij przycisk „OFF” (wył.) na pilocie, aby
wyłączyć odbiornik.
C. Naciśnij przycisk „ON” (wł.) pod ALL (wszystkie) (na
pilocie), aby włączyć wszystkie sparowane
urządzenia naraz.
D. Naciśnij przycisk „OFF” (wył.) pod ALL (wszystkie)
(na pilocie), aby wyłączyć wszystkie sparowane
urządzenia naraz.
Anulowanie wszystkich połączeń
• Naciśnij i przytrzymaj przycisk LEARN (nauka), aż
kontrolka LED zacznie migać (ok. 10 s) (5).
• Gdy kontrolka miga, naciśnij przycisk nauki jeszcze
raz i od razu go puść (NIE TRZYMAJ GO
WCIŚNIĘTEGO). Kontrolka LED zgaśnie i zapali się
znowu. Wszystkie powiązania są anulowane.
A. Premere il tasto “ON” del telecomando per
accendere il ricevitore.

Other Smartwares Switch manuals

Smartwares SH4-99559 User manual

Smartwares

Smartwares SH4-99559 User manual

Smartwares SH5-SET-RD User manual

Smartwares

Smartwares SH5-SET-RD User manual

Smartwares SHS-51001-EU User manual

Smartwares

Smartwares SHS-51001-EU User manual

Smartwares SH4-99574FR User manual

Smartwares

Smartwares SH4-99574FR User manual

Smartwares SH8-90604 User manual

Smartwares

Smartwares SH8-90604 User manual

Smartwares 10.037.12 User manual

Smartwares

Smartwares 10.037.12 User manual

Smartwares SH4-99572 User manual

Smartwares

Smartwares SH4-99572 User manual

Smartwares SH4-99650 User manual

Smartwares

Smartwares SH4-99650 User manual

Smartwares SH4-99650FR User manual

Smartwares

Smartwares SH4-99650FR User manual

Smartwares SH5-RPS-36A/FR User manual

Smartwares

Smartwares SH5-RPS-36A/FR User manual

Smartwares SH4-99566 User manual

Smartwares

Smartwares SH4-99566 User manual

Smartwares SH4-99558 User manual

Smartwares

Smartwares SH4-99558 User manual

Smartwares 10.037.07 User manual

Smartwares

Smartwares 10.037.07 User manual

Smartwares SH4-90451 User manual

Smartwares

Smartwares SH4-90451 User manual

Smartwares 10.900.36 User manual

Smartwares

Smartwares 10.900.36 User manual

Smartwares SH4-90259 User manual

Smartwares

Smartwares SH4-90259 User manual

Smartwares SH4-90262 User manual

Smartwares

Smartwares SH4-90262 User manual

Smartwares SH5-TSW-C User manual

Smartwares

Smartwares SH5-TSW-C User manual

Smartwares SH4-90268 User manual

Smartwares

Smartwares SH4-90268 User manual

Smartwares SH5-RBU-4A User manual

Smartwares

Smartwares SH5-RBU-4A User manual

Smartwares SH4-90162 User manual

Smartwares

Smartwares SH4-90162 User manual

Smartwares SH5-RPD-02A User manual

Smartwares

Smartwares SH5-RPD-02A User manual

Smartwares SH4-99562 User manual

Smartwares

Smartwares SH4-99562 User manual

Smartwares SH4-99578 User manual

Smartwares

Smartwares SH4-99578 User manual

Popular Switch manuals by other brands

Enterasys VH-4802 user guide

Enterasys

Enterasys VH-4802 user guide

H3C S6800 Series Command reference

H3C

H3C S6800 Series Command reference

Raloy DVIKVM112 series user manual

Raloy

Raloy DVIKVM112 series user manual

Foundry Networks FESX Guide

Foundry Networks

Foundry Networks FESX Guide

Siemens RUGGEDCOM M969F installation guide

Siemens

Siemens RUGGEDCOM M969F installation guide

D-Link Web Smart Switch DGS-1210-16 reference guide

D-Link

D-Link Web Smart Switch DGS-1210-16 reference guide

LEGRAND PRO 21 7756 36 manual

LEGRAND

LEGRAND PRO 21 7756 36 manual

CAMDEN CM-9800 installation instructions

CAMDEN

CAMDEN CM-9800 installation instructions

CYP EL-41S-4K22 Operation manual

CYP

CYP EL-41S-4K22 Operation manual

Kramer KDS-USB2 Kit user manual

Kramer

Kramer KDS-USB2 Kit user manual

FXC FXC5016 user manual

FXC

FXC FXC5016 user manual

Hirschmann GREYHOUND GRS1020 Reference manual

Hirschmann

Hirschmann GREYHOUND GRS1020 Reference manual

Enterasys Vertical Horizon VH-8G Management guide

Enterasys

Enterasys Vertical Horizon VH-8G Management guide

Allied Telesis LanEdge FastHub16 installation guide

Allied Telesis

Allied Telesis LanEdge FastHub16 installation guide

Micas M2-S6510-32C Hardware  installation and reference guide

Micas

Micas M2-S6510-32C Hardware installation and reference guide

Siemens SIMATIC NET S7-300 operating instructions

Siemens

Siemens SIMATIC NET S7-300 operating instructions

MuxLab 500136-US installation guide

MuxLab

MuxLab 500136-US installation guide

Edimax ES-5816PHG Specifications

Edimax

Edimax ES-5816PHG Specifications

manuals.online logo
manuals.online logoBrands
  • About & Mission
  • Contact us
  • Privacy Policy
  • Terms and Conditions

Copyright 2025 Manuals.Online. All Rights Reserved.