manuals.online logo
Brands
  1. Home
  2. •
  3. Brands
  4. •
  5. Smartwares
  6. •
  7. Switch
  8. •
  9. Smartwares SH4-99653 User manual

Smartwares SH4-99653 User manual

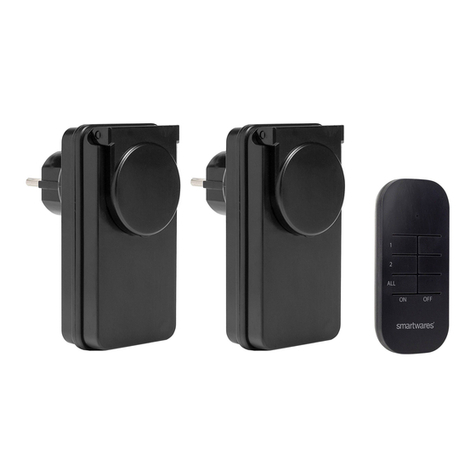
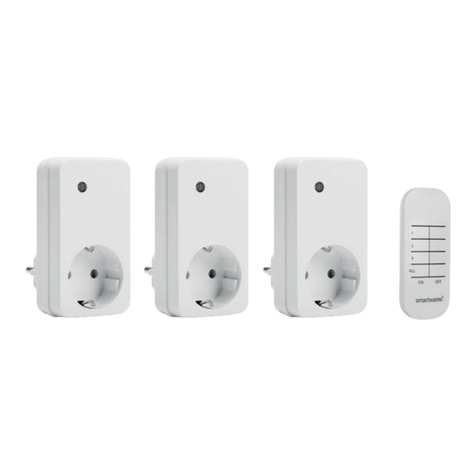
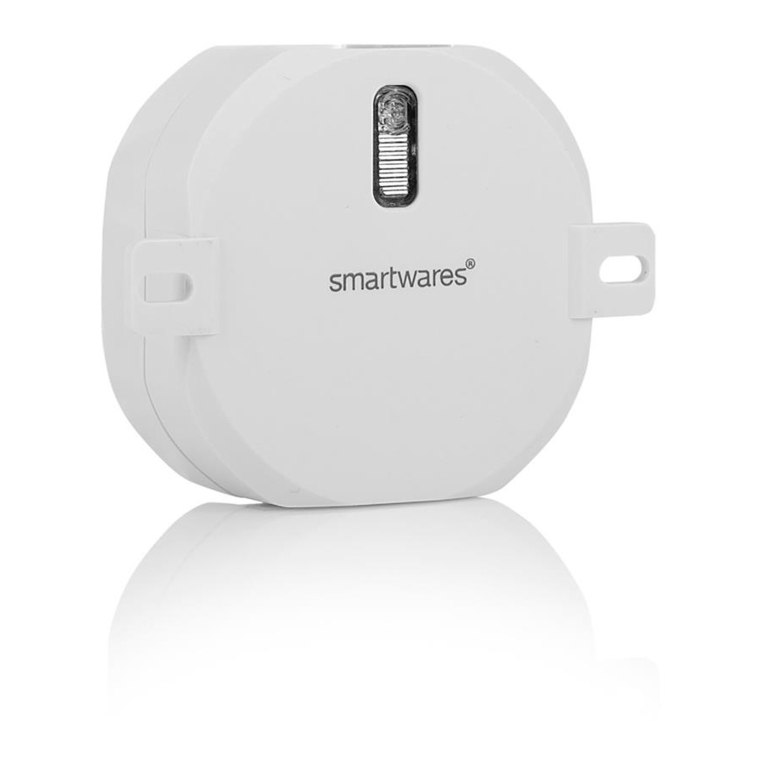
EN Outdoormini switchset
NL Mini schakelset voor buiten
DE Outdoor-Mini-Stecker-Set
FR Kitt de mini-prises commandées d'extérieur
ES Set de mini enchufes para exterior
IT Set prese interruttore da esterni
SV Utomhus miniomkopplarset
PL Zewn. zestaw miniprzełącznik
SH4-99653
r
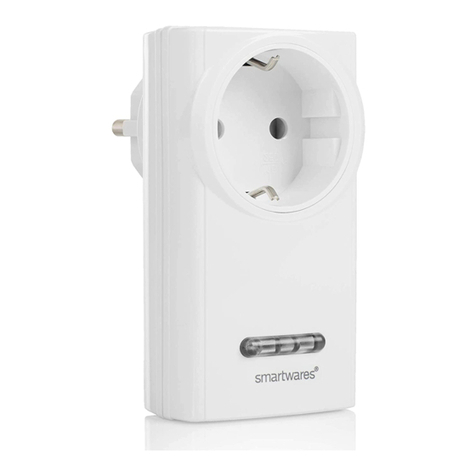
Receivers Sender
EN Instruction manual
PREPARATION BEFORE USE
• Pull out the battery tab of the remote control before use.
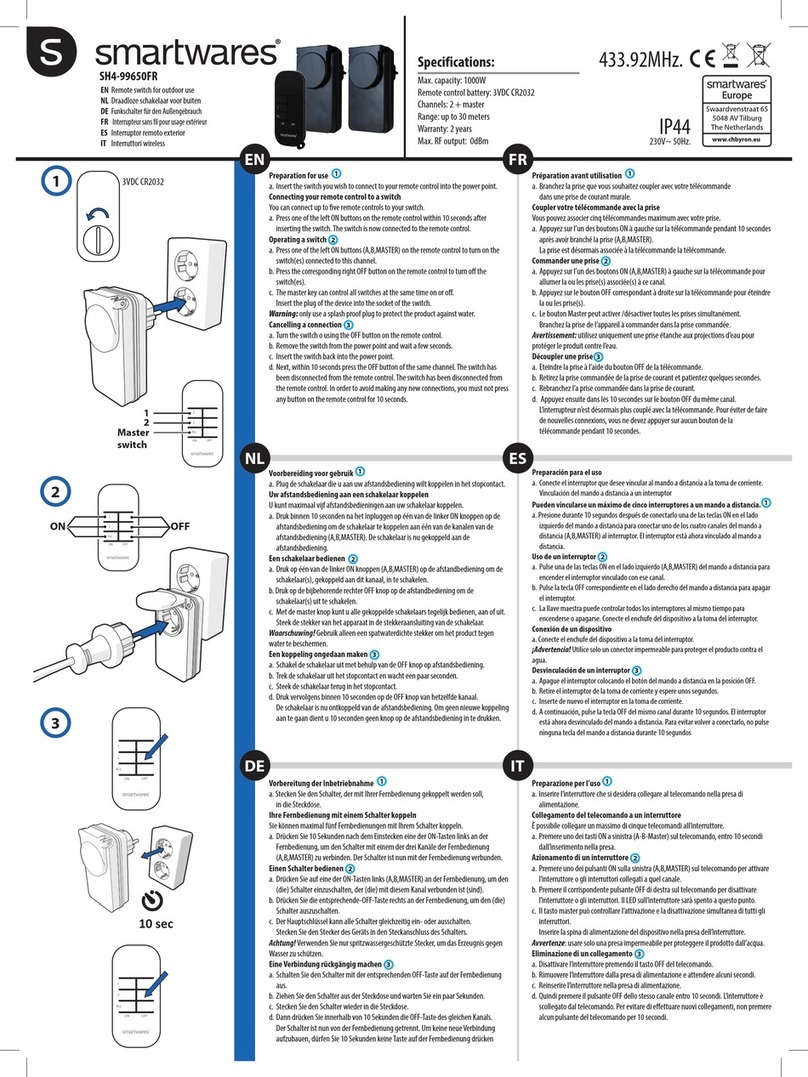
• Insert the receiver into the wall outlet (1).
Pairing the receiver with a sender
A. Within 10 seconds after the receiver is inserted in the wall socket:
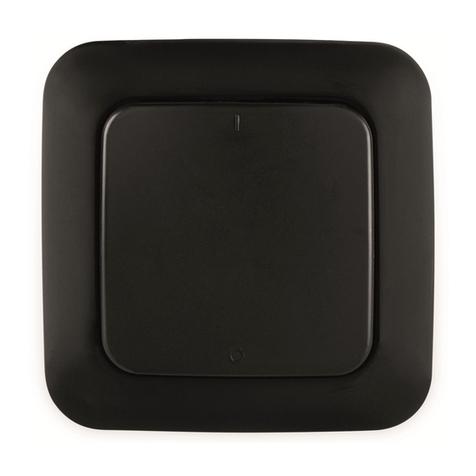
B. Press the ”ON” button on the remote control to pair it with the
receiver.
C. Repeat these steps for any other receiver.
• Connect a device to the receiver and make sure the device is
switched on. Now, the receiver is ready for use.
• You can switch the receiver on and off by using the
corresponding buttons on the remote control.
DISCONNECTING THE SENDER FROM THE RECEIVER
Disconnecting a link
A. Remove the receiver from the wall outlet and wait 10 seconds (3).
B. Insert the receiver into the wall outlet.
C. Within 10 seconds, perform one of the following steps:
– Press the “OFF” button on the sender to disconnect it from a
receiver.
– Press the ”OFF” button beneath ALL (on the sender) to
disconnect all links.
NOTE: In order to avoid making new connections, do not press any
button on the remote control for another 10 seconds!
NL Gebruiksaanwijzing
VOORBEREIDING VOOR GEBRUIK
• Trek voor gebruik het batterijlipje van de afstandsbediening uit.
• Plaats de ontanger in het stopcontact (1).
De ontvanger koppelen aan een zender
A. Binnen 10seconden nadat de ontvanger in het stopcontact is
geplaatst:
B. Druk op de knop ON (AAN) op de afstandsbediening om deze te
koppelen met de ontvanger.
C. Herhaal deze stappen voor eventuele andere ontvangers.
• Verbind een apparaat met de ontvanger en controleer of het
apparaat is ingeschakeld. De ontvanger is nu klaar voor gebruik.
• U kunt de ontvanger in- en uitschakelen met de
corresponderende knoppen op de afstandsbediening.
DE VERBINDING TUSSEN DE ZENDER EN DE ONTVANGER
VERBREKEN
Een koppeling verbreken
A. Haal de schakelaar uit het stopcontact en wacht 10seconden (3).
B. Doe de ontvanger in het stopcontact.
C. Voer binnen 10seconden een van de volgende stappen uit:
– Druk op de knop OFF (UIT) op de zender om de verbinding
met een ontvanger te verbreken.
– Druk op de knop OFF (UIT) naast ALL (ALLE, op de
afstandsbediening) om alle koppelingen te verbreken.
OPMERKING: Om te voorkomen dat er nieuwe verbindingen tot
stand worden gebracht, moet u nog 10seconden geen knoppen op
de afstandsbediening indrukken.
DE Bedienungsanleitung
VORBEREITUNG
• Ziehen Sie vor Gebrauch die Batterielasche aus der
Fernbedienung heraus.
• Stecken Sie den Empfanger in die Steckdose (1).
Empfänger mit einem Sender verbinden
A. Innerhalb von 10Sekunden nach dem Anschließen des
Empfängers an der Steckdose:
B. Drücken Sie die Taste „ON“ auf der Fernbedienung, um den
Empfänger zu synchronisieren.
C. Wiederholen Sie diese Schritte für weitere Empfänger.
• Schließen Sie ein Gerät am Empfänger an und achten Sie
darauf, dass es eingeschaltet ist. Der Empfänger ist nun
einsatzbereit.
• Sie können den Empfänger mit den entsprechenden Tasten auf
der Fernbedienung ein- und ausschalten.
SENDER UND EMPFÄNGER TRENNEN
Eine Verbindung trennen
A. Trennen Sie den Empfänger von der Steckdose ab und warten
Sie 10Sekunden (3).
B. Schließen Sie den Empfänger an der Steckdose an.
C. Führen Sie innerhalb von 10Sekunden einen der folgenden
Schritte aus:
– Drücken Sie die Taste „OFF“ am Sender, um ihn von einem
Empfänger zu trennen.
– Drücken Sie die Taste „OFF“ unter „ALL“ (am Sender), um
alle Verbindungen zu trennen.
HINWEIS: Um keine neuen Verbindungen herzustellen, dürfen Sie
nun 10Sekunden lang keine Taste auf der Fernbedienung betätigen!
FR Manuel d'instructions
PRÉPARATION AVANT UTILISATION
• Tirez la languette de la pile de la télécommande avant de
l'utiliser.
• Branchez le récepteur sur la prise murale (1).
Couplage du récepteur à un émetteur
A. Dans les 10 secondes qui suivent l'insertion du récepteur dans la
prise murale:
B. Appuyer sur la touche «ON» de la télécommande pour l'appairer
avec le récepteur.
C. Répéter la procédure pour tout autre récepteur.
• Connectez un appareil au récepteur et assurez-vous que celui-ci
est allumé. Le récepteur est maintenant prêt à être utilisé.
• Vous pouvez allumer et éteindre le récepteur en utilisant les
boutons correspondants de la télécommande.
DÉCONNEXION DE L'ÉMETTEUR DU RÉCEPTEUR
Déconnexion d'une liaison
A. Retirer le récepteur de la prise murale et attendre 10 secondes
(3).
B. Insérer le récepteur dans la prise murale.
C. Dans les 10 secondes, procéder de l'une des façons suivantes:
– Appuyer sur le bouton «OFF» de l'émetteur pour le
déconnecter d'un récepteur.
– Appuyer sur la touche «OFF» à côté de ALL (sur
l'émetteur) pour déconnecter tous les liens.
REMARQUE: Afin de ne pas créer de nouvelle connexion, n'appuyer
sur aucun autre bouton de la télécommande pendant 10secondes de
plus!
ES Manual de instrucciones
PREPARACIÓN ANTES DEL USO
• Saque la pestaña de las pilas del mando a distancia antes del
uso.
• lntroduzca el receptor en el enchufe de la pared (1).
Emparejamiento del receptor con un emisor
1
2
3
ON OFF
1
2
ALL
Master
switch
1
2
ON OFF
1
2
ON OFF
ALL
ON OFF
1
2
ALL
ON OFF
1
2
ALL
10 sec
Specifications:
Max. switch output: 3000W
Max. RF output: 0dBm
Frequency: 433.92MHz
Input AC voltage: 230V~ / 50Hz
Outdoor plug:
Remote control
Battery: 3V type CR2032 (incl.)
Frequency: 433.92MHz
Max. RF output: 0dBm
A. En los 10 segundos posteriores tras insertar el
receptor en la toma de pared:
B. Pulse el botón “ON” del mando a distancia para
emparejarlo con el receptor.
C. Repita estos pasos con otros receptores.
• Conecte un aparato al receptor y asegúrese de que
el aparato esté encendido. Ahora, el receptor está
listo para el uso.
• Para encender y apagar el receptor, utilice los
botones correspondientes del mando a distancia.
DESCONEXIÓN DEL EMISOR Y EL RECEPTOR
Desconexión de un enlace
A. Retire el receptor de la toma de corriente de la toma
de corriente y espere 10 segundos (3).
B. Inserte el receptor en la toma de pared.
C. En los 10 segundos posteriores, realice uno de los
siguientes pasos:
– Pulse el botón “OFF” del emisor para
desconectarlo de un receptor.
– Pulse el botón “OFF” situado debajo de ALL (en
el emisor) para desconectar todos los enlaces.
NOTA: Para evitar realizar nuevas conexiones, no pulse
ningún botón en el mando a distancia durante 10
segundos.
IT Istruzioni per l'uso
PREPARAZIONE PER L’USO
• Prima dell'uso estrarre la linguetta dalle batterie del
telecomando.
• lnserire il ricevitore nella presa a muro (1).
Associare l'interruttore da incasso ad un
trasmettitore
A. Entro 10 secondi dall'inserimento del ricevitore nella
presa elettrica:
B. Premere il tasto “ON” del telecomando per
associarlo al ricevitore.
C. Ripetere questi passaggi per eventuali altri ricevitori.
• Collegare un dispositivo al ricevitore ed accertarsi
che il dispositivo sia acceso. A questo punto, il
ricevitore è pronto all'uso.
• È possibile accendere e spegnere il ricevitore
utilizzando i tasti corrispondenti sul telecomando.
SCOLLEGAMENTO DEL TRASMETTITORE DAL
RICEVITORE
Annullamento di un'associazione
A. Estrarre il ricevitore dalla presa elettrica ed attendere
10 secondi (3).
B. Inserire il ricevitore nella presa elettrica.
C. Attendere 10 secondi, poi eseguire uno dei passaggi
seguenti:
– Premere il tasto “OFF” del trasmettitore per
scollegarlo da un ricevitore.
– Premere il tasto "OFF" a lato di ALL (TUTTI) del
trasmettitore per scollegare tutte le
associazioni.
NOTA: Per evitare di eseguire nuove connessioni, non
premere alcun tasto del telecomando per ulteriori 10
secondi!
SV Instruktionshandbok
FÖRBEREDELSER FÖRE ANVÄNDNING
• Dra ut batterifliken från fjärrkontrollen innan
användning.
• Sätt in mottagaren i vägguttaget (1).
Parkoppla mottagaren med en sändare
A. Gör följande inom 10 sekunder när mottagaren har
satts in i uttaget:
B. Tryck på knappen ”ON” på fjärrkontrollen för att
parkoppla den med mottagaren.
C. Upprepa dessa steg för alla andra mottagare.
• Anslut en enhet till mottagaren och se till att enheten
är påslagen. Nu är mottagaren klar att användas.
• Du kan slå på och stänga av mottagaren med
motsvarande knappar på fjärrkontrollen.
KOPPLA BORT SÄNDAREN FRÅN
MOTTAGAREN
Koppla bort en länk
A. Ta ut mottagaren ur vägguttaget och vänta i 10
sekunder (3).
B. Sätt i mottagaren i vägguttaget.
C. Utför ett av följande steg inom 10 sekunder:
– Tryck på knappen ”OFF” på sändaren för att
koppla bort den från en mottagare.
– Tryck på knappen ”OFF” under ”ALL” (på
sändaren) för att koppla bort alla länkar.
OBS! För att inte skapa några nya anslutningar trycker
du inte på någon knapp på fjärrkontrollen på ytterligare
10 sekunder!
PL Instrukcje użytkowania
PRZYGOTOWANIE PRZED UŻYCIEM
• Przed użyciem wyciągnij osłonę baterii pilota
zdalnego sterowania.
• Odbiornik wloiyc do gniazda sciennego (1).
Parowanie odbiornika z nadajnikiem
A. W ciągu 10 s po włożeniu odbiornika do gniazdka:
B. Naciśnij przycisk „ON” (wł.) na pilocie, aby sparować
go z odbiornikiem.
C. Powtórz te kroki w przypadku innych odbiorników.
• Podłącz urządzenie do odbiornika i upewnij się, że
jest włączone. Odbiornik jest gotowy do użytku.
• Możesz włączać i wyłączać odbiornik przy użyciu
odpowiednich przycisków na pilocie.
ODŁĄCZANIE NADAJNIKA OD ODBIORNIKA
Rozłączanie powiązania
A. Wyciągnij odbiornik z gniazdka i poczekaj 10 sekund
(3).
B. Włóż odbiornik do gniazdka elektrycznego.
C. W ciągu 10 s wykonaj jedną znastępujących
czynności:
– Naciśnij przycisk „OFF” (wył.) na nadajniku, aby
odłączyć go od odbiornika.
– Naciśnij przycisk „OFF” (wył.) pod ALL
(wszystkie) (na nadajniku), aby rozłączyć
wszystkie połączenia.
UWAGA: Jeśli nie chcesz tworzyć nowego powiązania,
przez kolejne 10 sekund nie naciskaj na pilocie żadnego
przycisku!

Other Smartwares Switch manuals

Smartwares SH5-RPS-23A/CH User manual

Smartwares

Smartwares SH5-RPS-23A/CH User manual

Smartwares SH5-RPD-02A User manual

Smartwares

Smartwares SH5-RPD-02A User manual

Smartwares SH4-90268 User manual

Smartwares

Smartwares SH4-90268 User manual

Smartwares SH5-SET-RD User manual

Smartwares

Smartwares SH5-SET-RD User manual

Smartwares SH4-99652 User manual

Smartwares

Smartwares SH4-99652 User manual

Smartwares SH4-99572 User manual

Smartwares

Smartwares SH4-99572 User manual

Smartwares SH4-99566 User manual

Smartwares

Smartwares SH4-99566 User manual

Smartwares SHS-51001-EU User manual

Smartwares

Smartwares SHS-51001-EU User manual

Smartwares SH4-99578 User manual

Smartwares

Smartwares SH4-99578 User manual

Smartwares 10.037.08 User manual

Smartwares

Smartwares 10.037.08 User manual

Smartwares SH5-TSW-C User manual

Smartwares

Smartwares SH5-TSW-C User manual

Smartwares SH4-99562 User manual

Smartwares

Smartwares SH4-99562 User manual

Smartwares SH4-99565AT User manual

Smartwares

Smartwares SH4-99565AT User manual

Smartwares SH5-RBU-4A User manual

Smartwares

Smartwares SH5-RBU-4A User manual

Smartwares SH5-RBU-04A User manual

Smartwares

Smartwares SH5-RBU-04A User manual

Smartwares SH4-90451 User manual

Smartwares

Smartwares SH4-90451 User manual

Smartwares SH4-99558 User manual

Smartwares

Smartwares SH4-99558 User manual

Smartwares SH4-99574FR User manual

Smartwares

Smartwares SH4-99574FR User manual

Smartwares 10.037.12 User manual

Smartwares

Smartwares 10.037.12 User manual

Smartwares SH4-99751 Technical specifications

Smartwares

Smartwares SH4-99751 Technical specifications

Smartwares SH4-99650 User manual

Smartwares

Smartwares SH4-99650 User manual

Smartwares SH4-90259 User manual

Smartwares

Smartwares SH4-90259 User manual

Smartwares SH4-90260 User manual

Smartwares

Smartwares SH4-90260 User manual

Smartwares SH4-99567 User manual

Smartwares

Smartwares SH4-99567 User manual

Popular Switch manuals by other brands

Plasma Ions PS-502 manual

Plasma Ions

Plasma Ions PS-502 manual

Hirschmann RS2-4R Description and operating instructions

Hirschmann

Hirschmann RS2-4R Description and operating instructions

Audioplex AB-1 A installation manual

Audioplex

Audioplex AB-1 A installation manual

Cisco Nexus 7000 Series Command reference

Cisco

Cisco Nexus 7000 Series Command reference

Dell EMC VEP4600 Operating system installation guide

Dell EMC

Dell EMC VEP4600 Operating system installation guide

EMC Connectrix B Series Hardware reference manual

EMC

EMC Connectrix B Series Hardware reference manual

Ubiquiti NanoSwitch N-SW quick start guide

Ubiquiti

Ubiquiti NanoSwitch N-SW quick start guide

molex DRL-750 Hardware reference guide

molex

molex DRL-750 Hardware reference guide

Hewlett Packard Enterprise FlexFabric 5940 Series Configuration guide

Hewlett Packard Enterprise

Hewlett Packard Enterprise FlexFabric 5940 Series Configuration guide

Acuity Brands nLight rPOD Micro instructions

Acuity Brands

Acuity Brands nLight rPOD Micro instructions

StarTech.com SV231DVIDDU instruction manual

StarTech.com

StarTech.com SV231DVIDDU instruction manual

Omron F3S-TGR-N C - datasheet

Omron

Omron F3S-TGR-N C - datasheet

ENSA ENSA-PS1 instruction manual

ENSA

ENSA ENSA-PS1 instruction manual

Vetra MegaTouch VIP-802-V-TS Series User instructions

Vetra

Vetra MegaTouch VIP-802-V-TS Series User instructions

Avocent AutoView 1000R Specifications

Avocent

Avocent AutoView 1000R Specifications

IBM RackSwitch G8264CS installation guide

IBM

IBM RackSwitch G8264CS installation guide

ABB Zenith ZTX Series Operation, maintenance, and installation guide

ABB

ABB Zenith ZTX Series Operation, maintenance, and installation guide

Turning Point Propellers MasterGuard 501 installation instructions

Turning Point Propellers

Turning Point Propellers MasterGuard 501 installation instructions

manuals.online logo
manuals.online logoBrands
  • About & Mission
  • Contact us
  • Privacy Policy
  • Terms and Conditions

Copyright 2025 Manuals.Online. All Rights Reserved.