manuals.online logo
Brands
  1. Home
  2. •
  3. Brands
  4. •
  5. Smartwares
  6. •
  7. Switch
  8. •
  9. Smartwares 10.037.07 User manual

Smartwares 10.037.07 User manual

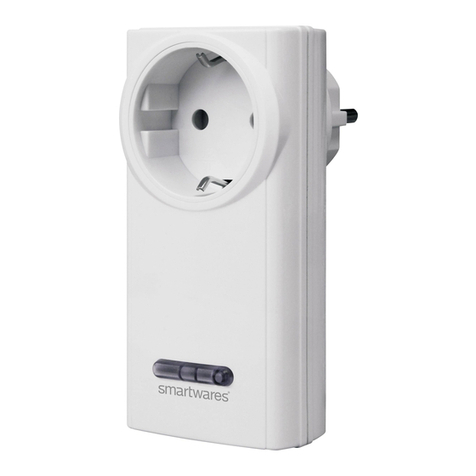
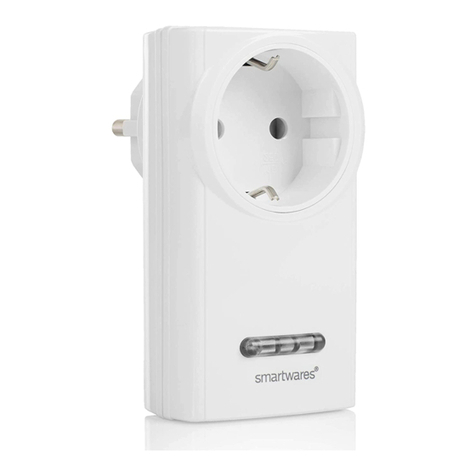
Connecter le récepteur (SH5-RPS-04A) à un émetteur
a. Insérer le récepteur dans la prise murale 1. Pendant cette opération, la DEL commence
à clignoter.Votre récepteur est à présent en mode de connexion. Après 10 secondes, la
DEL s’éteindra. Si cela se produit, débranchez le récepteur de la prise murale, attendez 3
secondes et réessayez.
b. Appuyez sur le bouton“I”/“ON”de l’émetteur pour le connecter à un récepteur. Pendant
cette opération, la DEL du récepteur s’allumera 2.
Attention : il est possible de connecter un récepteur à de multiples émetteurs, six
positions de mémoire sont disponibles.
Attention : Lorsque la DEL du récepteur continue à clignoter rapidement, la mémoire
est pleine. Déconnecter un émetteur ou déconnecter tous les liens.
Connecter un appareil
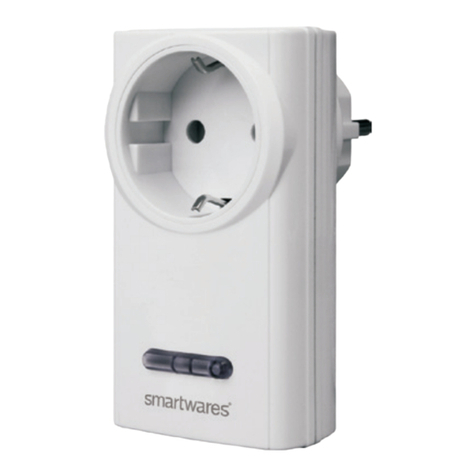
• Insérez la prise de l’appareil dans la prise de l’interrupteur 3.
Utiliser les récepteurs
a. Appuyez sur le bouton“I”/“ON”de l’émetteur pour mettre le récepteur en marche.
b. Appuyez sur le bouton“0”/“OFF”de l’émetteur pour éteindre le récepteur.
Déconnecter un lien
a. Débranchez le récepteur de la prise murale et attendez 3 secondes 4.
b. Insérer le récepteur dans la prise murale. Pendant cette opération, la DEL commence à
clignoter.
c. Suivez l’une des étapes suiantes :
- Appuyez sur le bouton“0”/“OFF”de l’émetteur pour le déconnecter d’un récepteur.
Pendant cette opération, la DEL du récepteur s’éteindra.
- Appuyez sur le bouton ”OFF”sous l’indication ALL (de l’émetteur) pour déconnecter
tous les liens. Pendant cette opération, la DEL du récepteur s’éteindra.
EN
Verbindung des Empfängers (SH5-RPS-04A) mit einem Transmitter
a. Führen Sie den Empfänger in dieWandsteckdose ein 1.Während diesesVorgangs
beginnt die LED zu blinken. Ihr Empfänger wurde jetzt in den Verbindungsmodus
geschaltet. Nach 10 Sekunden erlischt die LED. Wenn dies geschieht, entfernen Sie den
Empfänger aus derWandsteckdose, warten Sie 3 Sekunden und versuchen Sie es erneut.
b. Drücken Sie die„I“ /„EIN“-Taste am Transmitter, um ihn mit dem Empfänger zu
verbinden. Bei diesemVorgang leuchtet die LED am Empfänger auf 2.
Achtung: Es ist möglich, einen Empfänger mit mehreren Transmittern zu verbinden, es
sind sechs Speicherstellen vorhanden.
Achtung: Wenn die LED am Empfänger weiterhin schnell blinkt, ist der Speicher voll.
Trennen Sie einen Transmitter oder trennen Sie alleVerbindungen.
Anschluss eines Geräts
• Führen Sie den Stecker des Geräts in die Steckdose des Schalters ein 3.
Bedienung der Empfänger
a. Drücken Sie die„I“ /„EIN“-Taste am Transmitter, um den Empfänger einzuschalten.
b. Drücken Sie die„O“ /„AUS“-Taste amTransmitter, um den Empfänger auszuschalten.
Eine Verbindung trennen
a. Entfernen Sie den Empfänger aus derWandsteckdose und warten Sie 3 Sekunden lang 4.
b. Führen Sie den Empfänger in dieWandsteckdose ein.Während diesesVorgangs beginnt
die LED zu blinken.
c. Führen Sie einen der folgenden Schritte aus:
- Drücken Sie amTransmitter die„0“ /„AUS“-Taste, um ihn vom Empfänger zu trennen.
Bei diesem Vorgang erlischt die LED am Empfänger.
- Drücken Sie die„AUS“-Taste unter ALLE (am Transmitter), um alleVerbindungen zu
trennen. Bei diesemVorgang erlischt die LED am Empfänger.
DE
De ontvanger (SH5-RPS-04A) met een zender koppelen
a. Plaats de ontvanger in het stopcontact 1. De LED op de ontvanger zal gedurende 10
seconden knipperen. Uw ontvanger bevindt zich nu in de koppelmodus.Wanneer u
langer wacht zal de LED doven.Trek in dit geval uw ontvanger uit het stopcontact, wacht
3 seconden en probeer het opnieuw.
b. Druk op“I”/ “ON”op de zender om deze te koppelen. Bij deze handeling gaat de LED op
de ontvanger branden 2.
Let op! Het is mogelijk om een ontvanger aan meerdere zenders te koppelen, zes
geheugenplaatsen zijn beschikbaar.
Let op!Wanneer de LED op de ontvanger snel blijft knipperen, zijn alle
geheugenplaatsen vol. Ontkoppel dan één ontvanger of maak alle koppelingen
ongedaan.
Een apparaat aansluiten
• Steek de stekker van het apparaat in de stekkeraansluiting van de schakelaar 3.
Een ontvanger bedienen
a. Druk op“I”/ ”ON”op de zender om de ontvanger in te schakelen.
b. Druk op“0”/ “OFF”op de zender om de ontvanger uit te schakelen.
Een koppeling ongedaan maken
a. Trek de schakelaar uit het stopcontact en wacht 3 seconden 4.
b. Steek de schakelaar terug in het stopcontact, de led van de schakelaar zal knipperen.
c. Voer een van de volgende handelingen uit:
- Druk op“0”/ “OFF”op de zender om deze te ontkoppelen. Bij deze handeling dooft de
LED op de ontvanger.
- Druk op“OFF”onder ALL (op de zender) om het gehele geheugen van de ontvanger te
wissen. Bij deze handeling dooft de LED op de ontvanger.
NL
FR
ES
1
2
3
4
Conectar el receptor (SH5-RPS-04A) a un transmisor
a. Introduzca el receptor en la toma de corriente 2. Durante esta operación el LED
comenzará a parpadear. El receptor pasará a modo conexión. Pasados 10 segundos el
LED se apagará. Si sucede, saque el receptor de la toma de corriente, espere 3 segundos
y pruebe otra vez.
b. Pulse el botón“I”/“ON”del transmisor para conectarlo a un receptor. Durante la
operación se encenderá el LED del receptor 2.
Atención: es posible conectar un receptor a múltiples transmisores, dispone de seis
posiciones de memoria.
Atención: Cuando el LED del receptor siga parpadeando rápidamente, la memoria
estará llena. Desconecte un transmisor o desconecte todas las conexiones.
Conectar un dispositivo
• Introduzca el enchufe del dispositivo en la toma del interruptor 3.
Uso de receptores
a. Pulse el botón“I”/“ON”en el transmisor para encender el receptor.
b. Pulse el botón“0”/“OFF”en el transmisor para apagar el receptor.
Desconectar una conexión
a. Saque el receptor de la toma de corriente y espere 3 segundos 4.
b. Introduzca el receptor en la toma de corriente. Durante esta operación el LED comenzará
a parpadear.
c. Realice uno de los pasos siguientes:
- Pulse el botón“0”/“OFF”del transmisor para desconectarlo de un receptor. Durante la
operación se apagará el LED del receptor.
- Pulse el botón“OFF”debajo de ALL (en el transmisor) para desconectar todas las
conexiones. Durante la operación se apagará el LED del receptor.
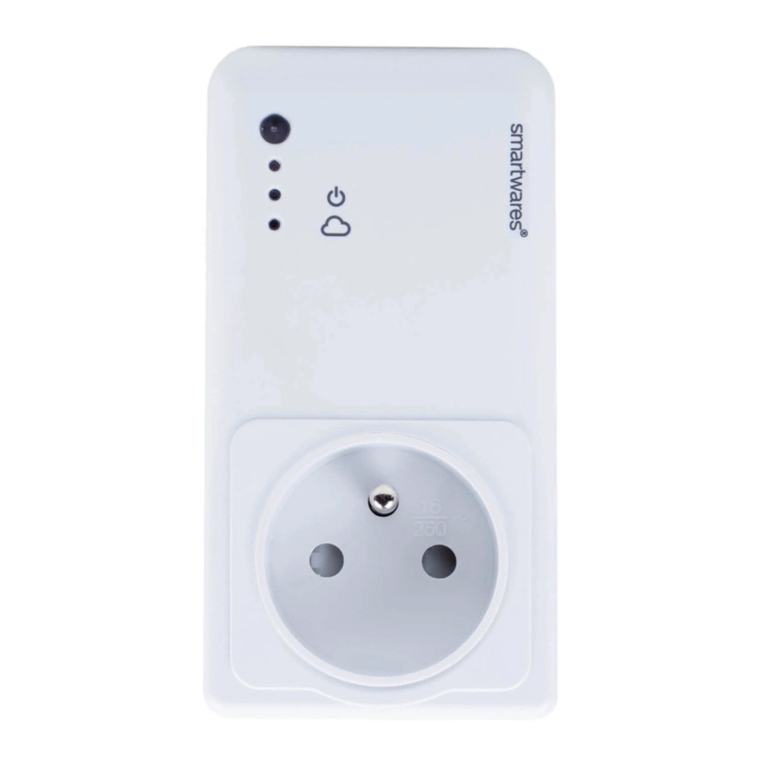
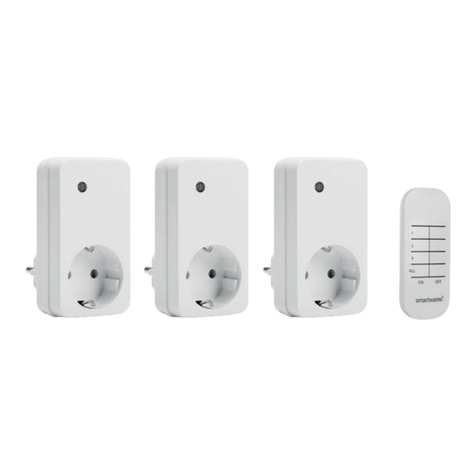
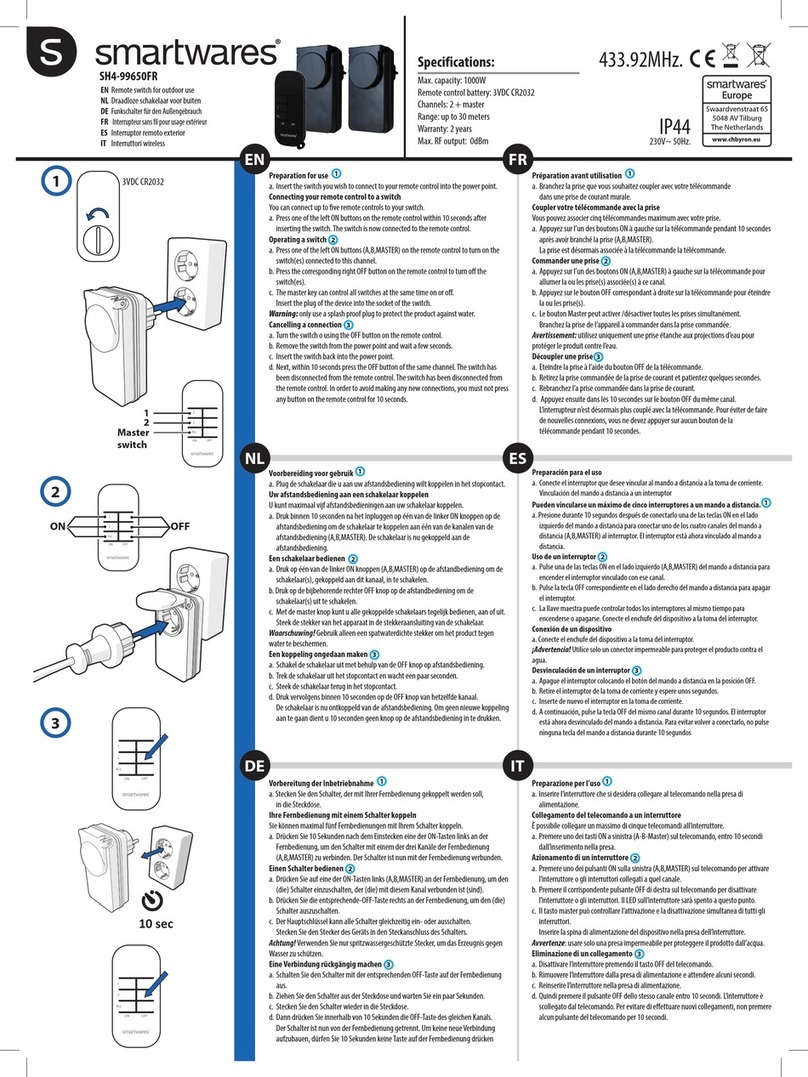
Pairing the receiver (SH5-RPS-04A) with a transmitter
a. Insert the receiver into the wall outlet 1. During this operation the LED starts to blink.
Your receiver is now switched into the pairing mode. After 10 seconds the LED will turn
o. If this happens, remove the receiver from the wall outlet, wait 3 seconds and try
again.
b. Press the“I”/ ”ON”button on the transmitter to pair it with a receiver. During this
operation the LED on the receiver will light up 2.
Attention: It is possible to pair a receiver with multiple transmitters, six memory
positions are available.
Attention: When the LED on the receiver keeps blinking rapidly, the memory is full.
Disconnect one transmitter or disconnect all links.
Connecting a device
• Insert the plug of the device into the socket of the switch 3.
Operating receivers
a. Press the“I”/ ”ON”button on the transmitter to turn on the receiver.
b. Press the“0”/“OFF”button on the transmitter to turn o the receiver.
Disconnecting a link
a. Remove the receiver from the wall outlet and wait 3 seconds 4.
b. Insert the receiver into the wall outlet. During this operation the LED starts to blink.
c. Perform one of the following steps:
- Press the“0”/“OFF”button on the transmitter to disconnect it from a receiver. During
this operation the LED on the receiver turns o.
- Press the ”OFF”button beneath ALL (on the transmitter) to disconnect all links. During
this operation the LED on the receiver turns o.
Specifications:
Max. capacity: 460W
Range: 30 m
Voltage: 230V~50Hz.
Warranty: 2 years
10.037.07 | SH5-RPS-04A 433.92MHz.
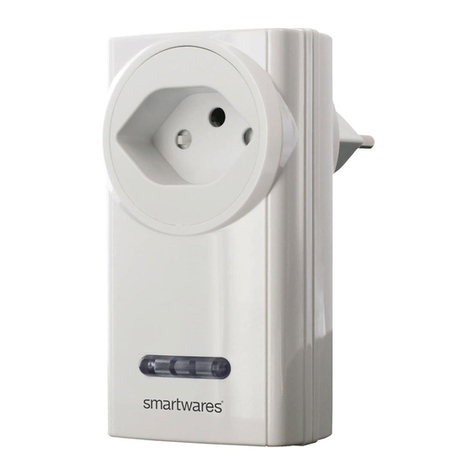
EN Wireless plug-in light switch
NL Draadloze plug-in lichtschakelaar
DE Funk-Einstecklichtschalter
FR Interrupteur d’éclairage sans fil à brancher
ES Interruptor de luz inalámbrico con enchufe
IT Prese interruttore
IT
Associazione di un ricevitore (SH5-RPS-04A
con un trasmettitore
a. Inserire il ricevitore nella presa a parete 1. Durante questa operazione il LED inizia a
lampeggiare. Il ricevitore a questo punto è in modalità di associazione. Dopo 10 secondi
il LED si spegne. In tal caso, rimuovere il ricevitore dalla presa, attendere 3 secondi e
riprovare.
b. Premere il pulsante“I”/“ON”sul trasmettitore per associarlo al ricevitore. Durante
questa operazione il LED sul ricevitore si accende 2.
Attenzione: È possibile associare un ricevitore a vari trasmettitori, sono disponibili sei
posizioni di memoria.
Attenzione: Quando il LED sul ricevitore continua a lampeggiare rapidamente, la
memoria è piena. Scollegare un trasmettitore o tutti i collegamenti.
Collegamento di un dispositivo
• Inserire la spina di alimentazione del dispositivo nella presa dell’interruttore 3.
Utilizzo dei ricevitori
a. Premere il pulsante“I”/“ON”sul trasmettitore per attivare il ricevitore.
b. Premere il pulsante“0”/“OFF”sul trasmettitore per disattivare il ricevitore.
Scollegamento di un collegamento
a. Rimuovere il ricevitore dalla presa e attendere 3 secondi 4.
b. Collegare il ricevitore alla presa a parete. Durante questa operazione il LED inizia a
lampeggiare.
c. Eettuare una delle seguenti operazioni:
- Premere il pulsante“0”/“OFF”sul trasmettitore per scollegarlo dal ricevitore. Durante
questa operazione il LED sul ricevitore si spegne.
- Premere il pulsante“OFF”sotto ALL (tutti) (sul trasmettitore) per scollegare tutti i
collegamenti. Durante questa operazione il LED sul ricevitore si spegne.
Spárování přijímače (SH5-RPS-04A) s vysílačem
a. Zasuňte přijímač do držáku na zdi 1. Během této činnosti začne blikat LED. Váš přijímač
je nyní přepnut do režimu spárování. Po 10 sekundách se LED vypne. Pokud se tak stane,
vyjměte přijímač z držáku na zdi , vyčkejte 3 sekundy a opět to zkuste.
b. Stiskněte na vysílači tlačítko“I”/“ON”(ZAP) a spárujte jej s přijímačem. Během činnosti
se rozsvítí LED na přijímači 2.
Pozor: je možné spárovat přijímač s více vysílači, je dostupných šest pozic.
Pozor: Pokud LED na přijímači rychle bliká, paměť je plná.
Odpojte jeden vysílač nebo odpojte všechny linky.
Připojení zařízení
• Vložte zástrčku zařízení do zásuvky spínače 3.
Ovládání přijímačů
a. Stiskněte tlačítko“I”/“ON”(ZAP) na vysílači a zapnete přijímač.
b. Stiskněte tlačítko“0”/“OFF”(VYP) na vysílači a vypnete přijímač.
Odpojení linky
a. Vyjměte přijímač z držáku na zeď a vyčkejte 3 sekundy 4.
b. Vložte přijímač do zásuvky ve zdi. Během této činnosti začne blikat LED.
c. Proveďte některý z následujících kroků:
- Stiskněte na vysílači tlačítko“0”/“OFF“ (VYP) a odpojte jej od přijímače. Během
činnosti pohasne LED na přijímači.
- Stiskněte tlačítko“VYP”pod tlačítkem ALL (všechny) (na vysílači) pro vypnutí všech
přijímačů. Během činnosti pohasne LED na přijímači.
Länka mottagaren (SH5-RPS-04A) till en sändare
a. Sätt i mottagaren i ett vägguttag 1. LED:n börjar blinka. Din mottagare är nu i
länkningsläge. LED:n slocknar efter 10 sekunder. Om detta inträar, ta bort mottagaren
från vägguttaget, vänta 3 sekunder och försök igen.
b. Tryck på knappen ”I”/ ”ON”på sändaren för att länka den till en mottagare. Under denna
åtgärd tänds LED:n på mottagaren 2.
Observera: det är möjligt att länka en mottagare till era sändare. Sex
minnespositioner nns tillgängliga.
Observera: Om LED:n på mottagaren blinkar snabbt är minnet fullt.
Stäng av länken till en sändare eller koppla bort alla länkar.
Ansluta en enhet
• Sätt i kontakten på enheten i uttaget i switchen 3.
Använda mottagare
a. Tryck på knappen ”I”/ ”ON”på sändaren för att slå på mottagaren.
b. Tryck på knappen ”0”/ ”OFF”på sändaren för att slå av mottagaren.
Koppla bort en länk
a. RTa bort mottagaren från vägguttaget och vänta 3 sekunder 4.
b. Sätt i mottagaren i vägguttaget. LED:n börjar blinka.
c. Utför ett av följande steg:
- Tryck på knappen ”0”/ ”OFF”på sändaren för att stänga av länken till mottagaren.
Under denna åtgärd släcks LED:n på mottagaren.
- Tryck på knappen ”OFF”under ALL (på sändaren) för att stänga av alla länkar. Under
denna åtgärd släcks LED:n på mottagaren.
SV
CS
1
2
3
4
10.037.07 | SH5-RPS-04A
PT Interruptor de ligação
TR Prizli güç düğmesi
PL Bezprzewodowy wtyczkowy wyłącznik światła
SV Trådlös ljusomkopplare för inkoppling
CS Bezdrátový spínač zapojených světel
SK Bezdrôtová plug-in prepínač svetiel
EN Go to www.smartwares.eu to obtain manuals, product information, images and the document of conformity
NL Ga naar www.smartwares.eu voor handleidingen, product informatie, afbeeldingen of het document van conformiteit
DE Gehen Sie auf www.smartwares.eu, um Handbücher, Produktinformationen, Bilder und die Konformitätserklärung abzurufen
FR Visitez www.smartwares.eu pour obtenir les modes d’emploi, les informations concernant les produits, les images et la documentation de conformité du produit
ES Acceda a www.smartwares.eu para obtener manuales, información de productos, imágenes y la documentación de cumplimiento
IT Visitare il sito www.smartwares.eu per scaricare i manuali, ottenere informazioni, immagini e documento di conformità dei prodotti.
PT Aceda a www.smartwares.eu para obter manuais, informações dos produtos, imagens e o documento de conformidade.
TR Kılavuzlara, ürün bilgisine, resimlere ve uygunluk belgesine ulaşmak için www.smartwares.eu adresini ziyaret edin.
PL Wejdź na stronę www.smartwares.eu, aby uzyskać instrukcje, informacje o produktach, zdjęcia oraz dokument zgodności.
SV Gå till www.smartwares.eu för att hitta handböcker, produktinformation, bilder och deklarationen om överensstämmelse
CS Pro získání návodů, informací o výrobku, obrázků a dokumentů o schodě navštivte stránky www.smartwares.eu
SK Návody, informácie o výrobkoch, obrázky a dokumenty o zhode nájdete na stránkewww.smartwares.eu.
Łączenie odbiornika (SH5-RPS-04A) z nadajnikiem
a. Włożyć odbiornik (SH5-RPS-36B) do gniazdka elektrycznego 1. W trakcie tej operacji
kontrolka LED zaczyna migać. Odbiornik jest teraz przełączony na tryb łączenia. Po 10
sekundach kontrolka LED wyłączy się. Jeśli tak się stanie, wymontuj odbiornik z gniazdka
elektrycznego, zaczekaj 3 sekundy i spróbuj ponownie.
b. Naciśnij przycisk„I”/„ON”na nadajniku, aby połączyć go z odbiornikiem. Podczas
wykonywania tej czynności zaświeci się kontrolka LED na odbiorniku 2.
Uwaga: Możliwe jest połączenie odbiornika z wieloma nadajnikami; sześć miejsc
pamięci jest dostępna.
Uwaga: Gdy kontrolka LED na odbiorniku nadal szybko miga, oznacza to, że pamięć
jest pełna.
Odłącz jeden nadajnik lub rozłącz wszystkie połączenia.
Podłączanie urządzenia
• Wtyczkę urządzenia wsunąć do gniazda przełącznika 3.
Użytkowanie odbiorników
a. Aby włączyć odbiornik, naciśnij przycisk„I”/„ON”na nadajniku.
b. Aby wyłączyć odbiornik, naciśnij przycisk„0”/„OFF”na nadajniku.
Rozłączanie połączenia
a. Wymontuj z gniazdka elektrycznego i odczekaj 3 sekundy 4.
b. Włóż odbiornik do gniazdka elektrycznego.W trakcie tej operacji kontrolka LED zaczyna
migać.
c. Wykonaj jedną z poniższych czynności:
- Naciśnij przycisk„0”/„OFF”na nadajniku, aby przerwać połączenie z odbiornikiem.
Podczas wykonywania tej czynności kontrolka LED na odbiorniku zgaśnie.
- Naciśnij przycisk„OFF”pod ALL (na nadajniku), aby wyłączyć wszystkie połączenia.
Podczas wykonywania tej czynności kontrolka LED na odbiorniku zgaśnie.
PL
Emparelhar o recetor (SH5-RPS-04A) com um transmissor
a. Insira o recetor na tomada de parede 1. Durante esta operação, o LED começa a
piscar. O seu recetor está agora ligado no modo de emparelhamento. Após 10 segundos,
o LED irá apagar-se. Se isto acontecer, retire o recetor da tomada de parede, aguarde 3
segundos e tente novamente.
b. Prima o botão“I”/ “ON”no transmissor para o emparelhar com um recetor. Durante esta
operação, o LED no recetor irá acender-se 2.
Atenção: é possível emparelhar um recetor com vários transmissores, existem
disponíveis seis posições de memória.
Atenção: quando o LED no recetor piscar rapidamente, a memória está cheia. Desligue
um transmissor ou desligue todas as ligações.
Ligar um aparelho
• Insira a cha do aparelho na tomada do interruptor 3.
Operar os recetores
a. Prima o botão“I”/“ON”no transmissor para ligar o recetor.
b. Prima o botão“0”/ “OFF”no transmissor para desligar o recetor.
Desligar uma ligação
a. Retire o recetor da tomada de parede e aguarde 3 segundos 4.
b. Insira o recetor na tomada de parede. Durante esta operação, o LED começa a piscar.
c. Realize um dos seguintes passos:
- Prima o botão“0”/“OFF”no transmissor para o desligar de um recetor. Durante esta
operação, o LED no recetor apaga-se.
- Prima o botão“OFF”por baixo de TODOS (no transmissor) para desligar todas as
ligações. Durante esta operação, o LED no recetor apaga-se.
PT
Alıcıyı (SH5-RPS-04A) verici ile eşleştirme
a. Alıcıyı prize 1takın. Bu işlem esnasında LED yanıp sönmeye başlar. Alıcınız eşleştirme
moduna geçer. 10 saniye sonra LED sönecektir. LED sönerse, alıcıyı prizden çıkarın, 3
saniye bekleyin ve tekrar deneyin.
b. Vericiyi alıcı ile eşleştirmek için vericideki“I”/ “ON”düğmesine basın. Bu işlem esnasında
alıcıdaki LED yanacaktır 2.
Dikkat: Alıcının birden fazla verici ile eşleştirilmesi mümkündür, altı bellek konumu
mevcuttur.
Dikkat: Alıcıdaki LED hızlı bir şekilde yanıp sönmeye devam ediyorsa bellek doludur. Bir
vericinin bağlantısını veya tüm bağlantıları kesin.
Bir cihaz bağlama
• Cihazın şini prizin soketine takın 3.
Alıcıları çalıştırma
a. Alıcıyı açmak için vericideki“I”/“ON”düğmesine basın.
b. Alıcıyı kapatmak için vericideki“0”/“OFF”düğmesine basın.
Bir bağlantıyı kesme
a. Alıcıyı prizden çıkarın ve 3 saniye bekleyin 4.
b. Alıcıyı prize takın. Bu işlem esnasında LED yanıp sönmeye başlar.
c. Şu adımlardan birini gerçekleştirin:
- Vericinin alıcı ile bağlantısını kesmek için vericideki“0”/“OFF”düğmesine basın. Bu
işlem esnasında alıcıdaki LED söner.
- Tüm bağlantıları kesmek için ALL (vericideki) ibaresinin altındaki“OFF”düğmesine
basın. Bu işlem esnasında alıcıdaki LED söner.
TR
Spárovanie prijímača (SH5-RPS-04A) s vysielačom
a. Zasuňte prijímač (SH5-RPS-36B) do nástennej zásuvky 1. Počas tejto činnosti začne
blikať LED.Váš prijímač je teraz prepnutý do režimu spárovania. Po 10 sekundách LED
zhasne. Pokiaľ sa tak stane, vyberte prijímač z nástennej zásuvky, počkajte 3 sekundy a
skúste znova.
b. Stlačte na vysielači tlačidlo I/ON, aby sa spároval s prijímačom. Počas tejto činnosti sa
rozsvieti LED na prijímači 2.
Pozor: Je možné spárovať prijímač s viacerými vysielačmi, k dispozícii je šesť pozícií v
pamäti.
Pozor: Ak LED na prijímači rýchlo bliká, pamäť je plná. Odpojte jeden vysielač alebo
odpojte všetky linky.
Pripojenie zariadenia
• Zasuňte zástrčku zariadenia do zásuvky spínača 3.
Ovládanie prijímačov
a. Stlačte na vysielači tlačidlo I/ON, aby sa prijímač zapol.
b. Stlačte na vysielači tlačidlo 0/OFF, aby sa prijímač vypol.
Odpojenie linky
a. Vyberte prijímač z nástennej zásuvky a počkajte 3 sekundy 4.
b. Zasuňte prijímač do nástennej zásuvky. Počas tejto činnosti začne blikať LED.
c. Vykonajte jeden z týchto krokov:
- Stlačte na vysielači tlačidlo 0/OFF, aby sa odpojil od prijímača. Počas tejto činnosti
zhasne LED na prijímači.
- Stlačte tlačidlo OFF pod tlačidlom ALL (na vysielači), aby sa odpojili všetky linky. Počas
tejto činnosti zhasne LED na prijímači.
SK
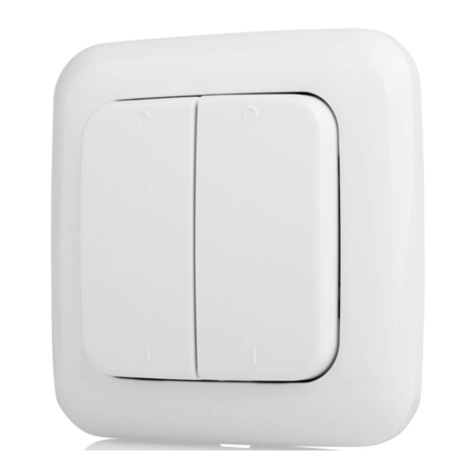
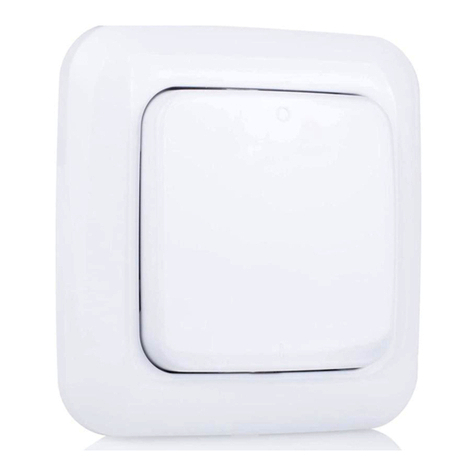
This manual suits for next models

1

Other Smartwares Switch manuals

Smartwares SH4-99650 User manual

Smartwares

Smartwares SH4-99650 User manual

Smartwares SH4-90262 User manual

Smartwares

Smartwares SH4-90262 User manual

Smartwares SH5-RBU-04A User manual

Smartwares

Smartwares SH5-RBU-04A User manual

Smartwares SH5-RBS-10A User manual

Smartwares

Smartwares SH5-RBS-10A User manual

Smartwares SH4-90260 User manual

Smartwares

Smartwares SH4-90260 User manual

Smartwares SH4-90260 User manual

Smartwares

Smartwares SH4-90260 User manual

Smartwares SH4-90160 User manual

Smartwares

Smartwares SH4-90160 User manual

Smartwares SH4-99558 User manual

Smartwares

Smartwares SH4-99558 User manual

Smartwares SH4-99573 User manual

Smartwares

Smartwares SH4-99573 User manual

Smartwares SH4-99751 Technical specifications

Smartwares

Smartwares SH4-99751 Technical specifications

Smartwares SH4-99565AT User manual

Smartwares

Smartwares SH4-99565AT User manual

Smartwares SH4-90451 User manual

Smartwares

Smartwares SH4-90451 User manual

Smartwares SH5-RPS-23A/CH User manual

Smartwares

Smartwares SH5-RPS-23A/CH User manual

Smartwares SH5-RBS-04A User manual

Smartwares

Smartwares SH5-RBS-04A User manual

Smartwares SH4-99566 User manual

Smartwares

Smartwares SH4-99566 User manual

Smartwares SH5-RBD-01A User manual

Smartwares

Smartwares SH5-RBD-01A User manual

Smartwares SH5-TSW-A User manual

Smartwares

Smartwares SH5-TSW-A User manual

Smartwares SHS-51001-EU User manual

Smartwares

Smartwares SHS-51001-EU User manual

Smartwares SH4-99552FR User manual

Smartwares

Smartwares SH4-99552FR User manual

Smartwares SH4-99562 User manual

Smartwares

Smartwares SH4-99562 User manual

Smartwares SH4-99578 User manual

Smartwares

Smartwares SH4-99578 User manual

Smartwares SH5-RPD-02A User manual

Smartwares

Smartwares SH5-RPD-02A User manual

Smartwares SH4-99567 User manual

Smartwares

Smartwares SH4-99567 User manual

Smartwares SH4-90268 User manual

Smartwares

Smartwares SH4-90268 User manual

Popular Switch manuals by other brands

smart home X10WS12A owner's manual

smart home

smart home X10WS12A owner's manual

HIK VISION DS-3D2208P Hardware installation

HIK VISION

HIK VISION DS-3D2208P Hardware installation

Tripp Lite B005-004-R user manual

Tripp Lite

Tripp Lite B005-004-R user manual

Elmo CRC-1 instruction manual

Elmo

Elmo CRC-1 instruction manual

Tripp Lite B005-008 user manual

Tripp Lite

Tripp Lite B005-008 user manual

Data Video DAC-10 instruction manual

Data Video

Data Video DAC-10 instruction manual

Planet GSW-1601 user manual

Planet

Planet GSW-1601 user manual

Rocket Fish RF-WHD200 user guide

Rocket Fish

Rocket Fish RF-WHD200 user guide

Data Video SE-2800 instruction manual

Data Video

Data Video SE-2800 instruction manual

Planet POE-1200 user manual

Planet

Planet POE-1200 user manual

Alfalaval 9611-99-5751 Mounting instructions

Alfalaval

Alfalaval 9611-99-5751 Mounting instructions

protech 4PET0301SC user manual

protech

protech 4PET0301SC user manual

SMART-AVI SM-DPN-2Q quick start guide

SMART-AVI

SMART-AVI SM-DPN-2Q quick start guide

Black Box IC445A Specifications

Black Box

Black Box IC445A Specifications

Black Box ServSwitch Octet KV1701 instructions

Black Box

Black Box ServSwitch Octet KV1701 instructions

BZB Gear BG-UHD-KVM41-KIT user manual

BZB Gear

BZB Gear BG-UHD-KVM41-KIT user manual

Ruby Tech FGS-2824 Specifications

Ruby Tech

Ruby Tech FGS-2824 Specifications

Black Box ServSelect III KV22016A Specifications

Black Box

Black Box ServSelect III KV22016A Specifications

manuals.online logo
manuals.online logoBrands
  • About & Mission
  • Contact us
  • Privacy Policy
  • Terms and Conditions

Copyright 2025 Manuals.Online. All Rights Reserved.