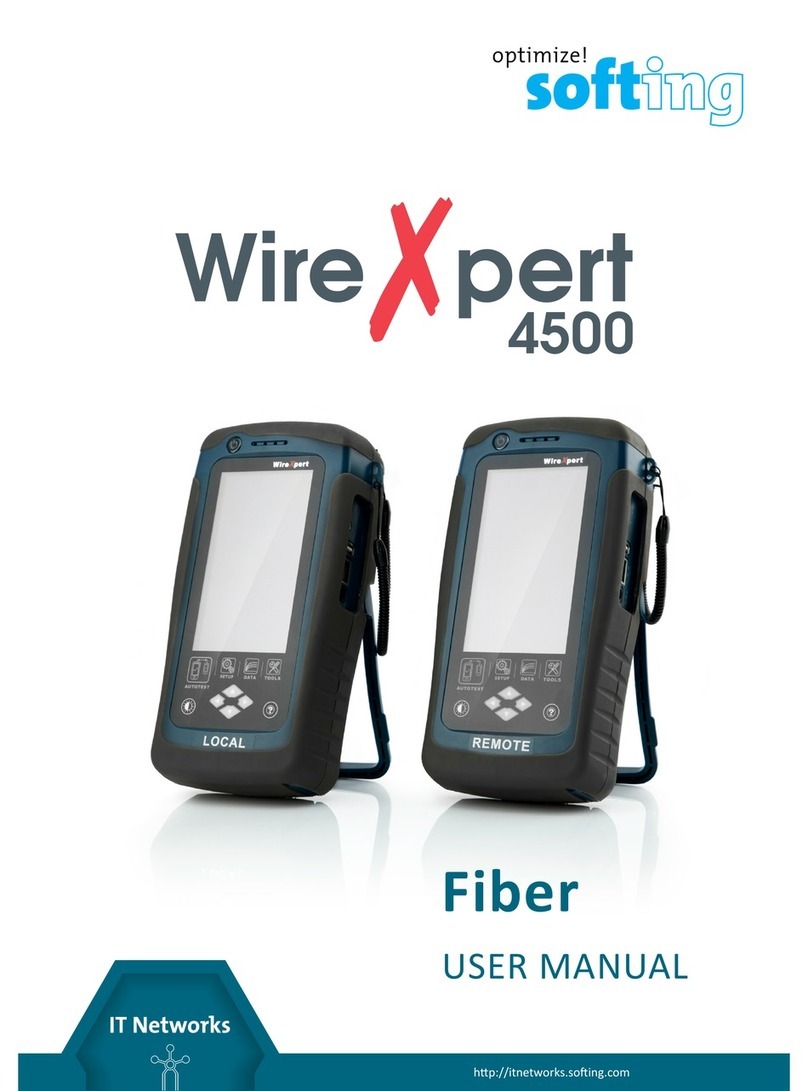
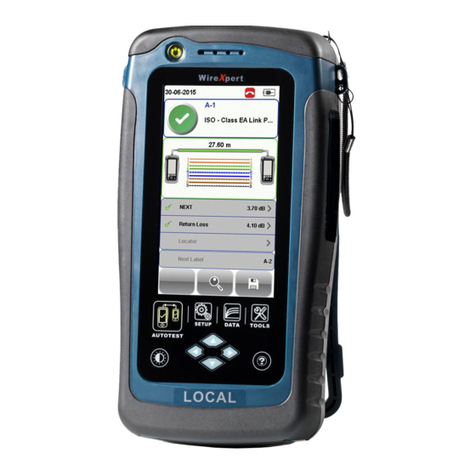
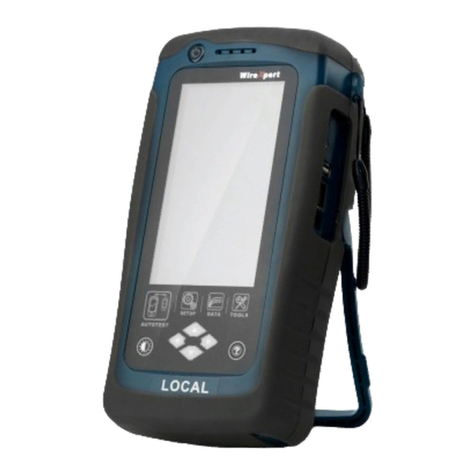
Softing WireXpert 500 User manual

Version: WireXpert4500_Copper_IT_EN_202002
© Copyright 2020 Softing Singapore Pte Ltd
User Manual

Disclaimer of liability
The information contained in these instructions corresponds to the technical status at the time of printing of it and is passed on with the
best of our knowledge. The information in these instructions is in no event a basis for warranty claims or contractual agreements
concerning the described products, and may especially not be deemed as warranty concerning the quality and durability. We reserve the
right to make any alterations or improvements to these instructions without prior notice. The actual design of products may deviate from
the information contained in the instructions if technical alterations and product improvements so require.
It may not, in part or in its entirety, be reproduced, copied, or transferred into electronic media.
Softing Singapore Pte Ltd
73 Science Park Drive
#02-12/13 Cintech I
Singapore Science Park 1
Singapore 118254
http://itnetworks.softing.com
+ 65 6569 6019
+ 65 6899 1016
The latest version of this manual is available in the Softing download area at: http://itnetworks.softing.com.

Table of Contents
© Copyright 2020 Softing IT Networks 3
Table of Contents
Table of Contents........................................................................................................... 3
Introduction ................................................................................................... 6
1.1 About product.............................................................................................................................6
1.2 Safety precautions ......................................................................................................................6
1.3 Intended use ...............................................................................................................................7
1.4 About this document ..................................................................................................................7
1.5 Before you start ..........................................................................................................................8
1.6 Scope of delivery.........................................................................................................................8
1.7 System requirements..................................................................................................................9
WireXpert PC Software and Firmware .......................................................... 10
2.1 Install software .........................................................................................................................10
2.2 Upgrade firmware.....................................................................................................................10
Understanding WireXpert............................................................................. 12
3.1 WireXpert Overview .................................................................................................................12
3.2 Dual Control System (DCS)........................................................................................................13
3.3 WireXpert Adapters..................................................................................................................13
3.4 Cabling Certification and Testing..............................................................................................14
3.5 Memory.....................................................................................................................................16
3.6 Battery Information ..................................................................................................................17
3.7 Power Supply ............................................................................................................................18
3.8 Dimension .................................................................................................................................18
3.9 Environmental Conditions ........................................................................................................18
WireXpert User Interface.............................................................................. 19
4.1 Touch Screen Layout.................................................................................................................19
4.2 The One Touch Access Button ..................................................................................................20
Setting Reference ......................................................................................... 41
Configuring an AUTOTEST............................................................................. 42
6.1 Setting up WireXpert ................................................................................................................42
6.2 Testing Guide for Permanent Link Testing ...............................................................................43
6.3 Testing Guide for Channel Testing............................................................................................44
Performing an AUTOTEST ............................................................................. 45
7.1 Understanding AUTOTEST ........................................................................................................45
7.2 NEXT and RL Fault Locating.......................................................................................................47
7.3 Managing test result(s).............................................................................................................48
7.4 Exporting test results into eXport PC Software........................................................................50
Declarations ................................................................................................. 53
Appendix...................................................................................................... 56
Glossary........................................................................................................ 58
Table of Contents
4 © Copyright 2020 Softing IT Networks
Related documents....................................................................................... 61
Technical Support......................................................................................... 62

Table of Contents
© Copyright 2020 Softing IT Networks 5
This page is left intentionally blank

Introduction
6 © Copyright 2019 Softing IT Networks
Introduction
1.1 About product
Softing's WireXpert, with its unparalleled 2,500 MHz measurement range, is the first cable certifier with
capability to certify the highest performance cabling systems in enterprise networks and data centers.
Cable installers make significant gain in productivity with WireXpert‘s industry leading test speed and
ease of use. With certification testing up to Class FA and CAT8 copper cabling, as well as MPO, SM, MM
and MMEF fiber optic cabling, WireXpert is ready for 40G and beyond.
Starting from v7.4, WireXpert is available in four variants- WireXpert 500 copper (up to 500MHz) only,
WireXpert 500 fiber only, WireXpert 500-plus; copper + fiber and WireXpert 4500- to provide more
flexibility to suit your certification requirements. The WireXpert 500 series provides an affordable
solution that can grow with your cable certification needs. Upgrade the copper only or fiber only
variants to the combined WireXpert 500-plus or WireXpert 4500 for the full 2,500MHz capability.
With v8.0, cloud-based data management features have been integrated into WireXpert and eXport PC
Software. Users will be able to connect unlimited numbers of WireXpert and transfer test data to and
from their private network using Wi-Fi or mobile hotspot. The cloud feature is available in all variants of
WireXpert.
1.2 Safety precautions
Read this manual before starting
For damages due to improper connection, implementation or operation Softing refuses
any liability according to our existing warranty obligations.
Note
This symbol is used to call attention to notable information that should be followed
during installation, use, or servicing of this device.
Hint
This symbol is used when providing you with helpful user hints.
CAUTION
Selection of option may cause all or partial of saved data and/or settings in the device
to be erased or restored to non-reversible original factory state. Backing up of saved
result(s) is recommended before executing option.

Introduction
© Copyright 2020 Softing IT Networks 7
CAUTION
CAUTION indicates a potentially hazardous situation which, if not avoided, may result
in minor or moderate injury.
WARNING
WARNING indicates a potentially hazardous situation which, if not avoided, could result in
death or serious injury
DANGER
DANGER indicates an imminently hazardous situation which, if not avoided, will result in
death or serious injury. This signal word is to be limited to the most extreme situations.
1.3 Intended use
WireXpert series has been designed for use in factory, process and building control. The unit must not
be used in explosion hazard areas. The permissible ambient conditions given in the Technical Data must
be complied with.
The faultless and safe operation of the product requires proper transport, proper storage and
installation, and expert operation and maintenance in accordance with the manual.
1.4 About this document
Read this manual before starting
For damages due to improper connection, implementation or operation Softing refuses
any liability according to our existing warranty obligations.
1.4.1 Conventions used
The following conventions are used throughout Softing customer documentation:
Keys, buttons, menu items, commands and other
elements involving user interaction are set in bold
font and menu sequences are separated by an
arrow
Open Start Control Panel Programs
Buttons from the user interface are enclosed in
brackets and set to bold typeface
Press [Start] to start the application
Coding samples, file extracts and screen output
are set in Courier font type
MaxDlsapAddressSupported=23

Introduction
8 © Copyright 2019 Softing IT Networks
Filenames and directories are written in italic
Device description files are located in
C:\<product
name>\delivery\software\Device
Description files
1.5 Before you start
Check that the latest eXport PC software and firmware is installed in the workstation and WireXpert
respectively to ensure the latest features are available.
Key differences between WX4500 and WX500 series
Features WX4500-FA WX500-PLUS WX500-CU WX500-FIBER
Frequency of
measurement
2500 MHz
500 MHz
500 MHz
N/A
Accuracy Specification
TIA Level 2G
ISO/IEC Level VI
TIA Level IIIe
ISO/IEV Level
IIIe
TIA Level IIIe
ISO/IEC Level
IIIe
N/A
Fiber Testing option
Yes
Yes
No
Yes
Class FA/CAT 8 options
Yes
No
No
No
Patch Cord Test adapters
Yes
Yes
Yes
No
Softing recommends WireXpert to be calibrated annually. Starting from v7.4, WireXpert will remind the
user to calibrate the units if the last calibration was more than one year ago. This notification can be
closed by clicking the [OK] button, but will be displayed on every boot up until the units are calibrated.
Calibration can only be done by the service center. Please contact your local vendor for more
information.
1.6 Scope of delivery
WireXpert WX-4500-FA or WX-500-CU comprises the following parts:
Soft or Hard carrier case
(WX_AC_SOFTCASE) or
(WX_AC_HARDCASE)
WireXpert WX4500 or
WireXpert WX500
(LOCAL and REMOTE)
Calibration Certificate
& USB Flash Drive

Introduction
© Copyright 2020 Softing IT Networks 9
Power Adapters -
Input: 100-240VAC/1.2A
Output: 12VDC/3.0A
(WX_AC_PWRAD)
Talk-set headphones
(WX_AC_TALKSET1)
LCD Protective Cover
(WX_LCD_COVER)
CAT 6A Channel
adapters
(WX_AD_6ACH2)
Permanent Link
adapters & cords
(WX_AD_6ALKIT2)
Straps
1.7 System requirements
Hardware
PC
Operating system
Windows 7, 8.x or 10 (32 bit or 64 bit)
Intel Core 2 Duo, 2GHz
1 GB of RAM
200 MB of free space of installation
Microsoft .NET framework

WireXpert PC Software and Firmware
10 © Copyright 2019 Softing IT Networks
WireXpert PC Software and Firmware
2.1 Install software
1Download the latest eXport PC software from https://itnetworks.softing.com/
2Run eXport setup v8.x.x64.exe
3Follow through the instructions on the screen and click [Next] to proceed.
4Click [Install]to begin installation.
5Click [Finish]to complete installation.
6If this is an upgrade from an earlier version from 6.x and above, click [Yes]to proceed.
7Follow the instructions to complete installation.
User Manuals
For more information on installation and using eXport PC software, please refer to
“Installation Guide for eXport PC software” and “User Manual for eXport PC software”.
Note
Softing IT Networks has ceased support for ReportXpert v5.x and earlier. Please contact
asia-[email protected] for more information.
2.2 Upgrade firmware
1Download and install the latest eXport PC software.
2Connect an USB flash drive to the workstation.
3Run eXport PC software.
4Go to Tools Update Device Firmware
5Click [OK]and select USB drive from “Export to USB” window.
6Click [Export]and [OK]to proceed.
7Please wait while exporting takes place. This process may take a while.
8Remove USB flash drive from workstation and connect to WireXpert.
9Select [Upgrade Firmware] from prompt and click [OK] button to continue.
Note: Both LOCAL and REMOTE units must be upgraded.

WireXpert PC Software and Firmware
© Copyright 2020 Softing IT Networks 11
10 If prompt did not appear, check that USB icon is present on the status bar, and press the [SETUP]
button System Settings Settings 2 Storage USB.
11 Please wait while upgrading takes place. This process may take a while.
12 Upgrade process is complete.
CAUTION
Saved test results and settings may be erased during upgrading. You are recommended
to save all test results before upgrading the firmware.

Understanding WireXpert
12 © Copyright 2019 Softing IT Networks
Understanding WireXpert
3.1 WireXpert Overview
Power ON/OFF button
Touch sensitive color LCD screen
USB device port
Audio port
USB host connector for flash drive
RJ-45 Ethernet port for remote control
Power supply port (12V)
One-Touch access buttons
Brightness control button
Navigation scroll buttons
Context sensitive Help button
Probe interface connector
Battery compartment
Part Functionality
Power ON/OFF Button
To turn on the device, press the power button for 5 seconds.
To turn off the device, press the power button, and select OK on the
power off dialog box. Alternately, press and hold the power button for
10 seconds (not recommended). The LED in the power button turns
green if the unit is turned on.
The LED on the power button turns red when the device is charging in
stand-by mode, orange if it’s turned on.
Touch Sensitive LCD
screen
Performs test executions and viewing of results.
USB device port
Enables remote connection to the PC for remote control update and
exporting saved results.
Audio port
Enables vocal communication between LOCAL and REMOTE units when
connected to talk set headphones (WX_AC_TALKSET).
USB Host port
Enables results to be exported and firmware upgrade via USB flash
drive.
Enables loading of custom limits and labels for list-based testing.
RJ-45 Ethernet port
Enables communication between two sets of WireXpert for Alien
Crosstalk testing. Currently not available.
Power Supply port
Performs charging of device when connected to power adapter shipped
with WireXpert. (WX_AC_PWRAD)
One-touch access buttons
Main functional buttons AUTOTEST, SETUP, DATA and TOOLS for
WireXpert. Enables quick AUTOTEST and results viewing in a single click.
Brightness Control
Adjusts the brightness level of the LCD display.
Navigation scroll buttons
Performs navigation in long lists.
Context sensitive help
Provides simple explanation relevant to the functionality on the current
screen (available in future version).

Understanding WireXpert
© Copyright 2020 Softing IT Networks 13
Part Functionality
Probe interface
connector
When connected with different probe adapters (e.g. CAT6A channel or
Permanent Link), WireXpert will enable specified certification test to be
conducted.
Battery compartment
Battery storage compartment. Unscrew to replace battery
(WX_AC_BAT1).
3.2 Dual Control System (DCS)
WireXpert consists of two identical devices, LOCAL and REMOTE, for dual-end testing and certification.
Both devices utilize easy to use LCD touch-screen technology and graphical user interface. The DCS
ensures the same graphical data on the LOCAL units are received on the REMOTE unit real-time,
improving efficiency and productivity significantly as test data and settings can be viewed from REMOTE
and LOCAL side.
In the event of a wire map failure, the DCS will enable the operator on the far-end to visually identify
which pair of wires is causing the error, instead of just a LED indication on traditional testers.
Traditional tester with single display screen, usually
on LOCAL unit only
WireXpert with LCD screens display on both LOCAL
and REMOTE units
3.3 WireXpert Adapters
All test adapters are designed to fit onto every WireXpert units. The device automatically detects
adapters when connected and prompts to change in the matching interface depending on the type of
adapter. Press the [SETUP] button Quick Setup to change the test limit using generic configurations.
3.3.1 Permanent Link (PL) and Channel (Ch) Adapters
Every standard WireXpert kit includes adapters for testing copper cablings in Permanent Link and
Channel configurations.
Channel adapters connect to the patch cords at the wall plates and telecommunication panels.
WireXpert software compensates for the adapter’s transmission characteristics to ensure test results’
accuracy.
Permanent Link adapters connect to the wall plates and telecommunication panel jacks. WireXpert
software compensates for the adapter’s transmission characteristics to ensure test results will not be
affected.
WireXpert’s Permanent Link adapters’ high precision interface reduces the degrading issue between the
RJ-45 jack and link cord, providing highly accurate and repeatable measurements, and cost-efficient
method of replacing the link cords instead of the expensive link adapters.
3.3.2 Adapter Configuration Warnings
WireXpert will display a warning a potential conflict is detected between the adapter and the test
settings. It is important to use the appropriate adapters as accuracy of measurements will be affected.
2 m2 m
2 m
30m10 m
2 m2 m
2 m
30m10 m

Understanding WireXpert
14 © Copyright 2019 Softing IT Networks
3.3.3 Adapter Insertion Counts
Every WireXpert adapter can keep track of the number of tests performed. This data ensures up to date
information on the adapter’s lifespan. WireXpert will indicate a warning when the adapter insertion
counts have expired the specified insertion counts lifespan. This can be checked by pressing the [SETUP]
button System Settings System Settings 2 Device Info Probe Test Count
3.4 Cabling Certification and Testing
Certification testing with WireXpert is highly intuitive and simple. The AUTOTEST function performs a
series of measurements between the LOCAL and REMOTE devices and analyses the results to determine
if the cabling run passes or fails the selected standards.
3.4.1 Copper Cable Certification Testing
Test at both ends of structured twisted pair cables for the worst-case performance is required in
accordance to the ISO/TIA standards. All certification testing requires a two-part test consisting of a
main and remote unit, both bearing similar test capabilities. The test would be conducted with one end
from the telecommunication closet, and the other at the outlet.
There are two primary considerations regarding the test method:
•Whether the user patch cords are included in the cabling run during the test.
If so, channel test configuration is required.
If not, link test configuration is required.
•Which standard – TIA or ISO should be used (Category or Class)
3.4.2 Permanent Link Configuration Tests
The Permanent Link configuration is generally used in facilities still under construction and does not
include user patch cords. As the link configuration does not include the two additional connections of
the patch cords, performance standards are more stringent. Special link adapters are used on both
LOCAL and REMOTE units for links that are under test.
3.4.3 Channel Configuration Tests
User patch cords are included for the Channel configuration. The pass/fail limits for this configuration
allows performance degradation inherent in the two additional patch cords included in the
measurements, thus are less stringent. Special channel adapters are used on both LOCAL and REMOTE
units for channels that are under test.

Understanding WireXpert
© Copyright 2020 Softing IT Networks 15
3.4.4 End-to-End (E2E) Link Configuration Tests
Starting from v7.3, WireXpert has included the E2E test limits to certify links that are more suitable for
the industrial environment. E2E links are applicable when application is required to connect directly to
machines or machines to network devices. The Industrial Ethernet test kit is required to perform a E2E
link test. The Industrial Ethernet test kit consist of a pair of End-to-End test adaptors and test cords of
TERA-TERA, TERA-RJ45, TERA-M12 D-coded or TERA-M12 X-coded variation depending on the
application requirement. Press the [SETUP] button Test Settings Test Limit End to End to
select the required E2E test limit.
The Industrial Ethernet E2E test kit is not part of the standard WireXpert kit. Please contact your local
vendor for more information.
User Guide
Refer “Application Notes - E2E Link Test” for more information.
4 Segments, 5 Connections
1 Segment(s); 2 Connections (V)
2 Segment(s); 3 Connections
3 Segment(s); 4 Conn.
(Coupler as 1 Conn.)
3 Segment(s); 4 Conn.
(Coupler as 2 Conn.)
3 Segments, 4 Connections
5 Segments, 6 Connections
1 Connection
1 Connection
2 Connections
2 Connections

Understanding WireXpert
16 © Copyright 2019 Softing IT Networks
3.4.5 Modular Plug Terminated Link (MPTL)
Starting from v7.4, WireXpert has included the MPTL test limits to certify links that features a socket on
the patch panel, and a plug on the opposite side of the link. This is similar to the E2E link, however, is
used when IP-capable devices are permanently installed, e.g, LED lights, building automation elements
or surveillance cameras. The installation cable is plugged directly into the termination deice without the
addition of a socket plus patch cable. A Permanent Link and a Patch Cord test adapter is required to
perform the MPTL test. Press the [SETUP] button Test Settings Test Limit TIA to select the
required MPTL test limit.
The Patch Cord adapter is not part of the standard WireXpert kit. Please contact your local vendor for
more information.
User Guide
Refer “Application Notes - MPTL” for more information.
3.5 Memory
1 Gigabyte internal flash memory.
External USB Flash Drive included allows for flexible data management and storage.
WireXpert only supports FAT/FAT32/exFAT file system.
3.5.1 Memory Requirements
The amount of memory that each test result takes up depends on the options that is configured before
starting the test. If plots are saved with each test, file size of test results will be generally larger than one
that has plots option omitted.
WireXpert allocates approximately 1 GB of internal flash memory for test result storage.
Permanent Link
Test Cord
MODULAR PLUG
TERMINATION
Horizontal Cabling
Horizontal Cabling
with Consolidation Point
MODULAR PLUG
TERMINATION
INTERCONNECT
INTERCONNECT
CP
Fixed Installed Cabling
Correct measurement of MPTL link
Permanent Link Adapter
Patch Cord Adapter

Understanding WireXpert
© Copyright 2020 Softing IT Networks 17
3.6 Battery Information
WireXpert units are powered by Lithium Ion rechargeable batteries. These batteries contain circuitry
that reports their state of charge to WireXpert. The units can be powered by external AC/DC power
adapters.
A fully charged battery can operate WireXpert for five to eight hours before requiring recharging.
Reducing the screen brightness and enabling the sleep function allows WireXpert to run longer on a
charge.
WARNING
Do not set reference or operate WireXpert while the battery is hot immediately after
charging.
Make sure that the WireXpert is always operated within the allowed temperature range
from 0-40°C. If a significant increase or decrease of the temperature is discovered, repeat
the set reference procedure to remain the instrument’s accuracy.
CAUTION
Use only the supplied power supplies with the WireXpert kit. Using other
powers may damage the tester and void its warranty.
3.6.1 Battery Safety
•To avoid the risk of fire, burns or damage to your battery pack, do not allow metal objects to touch the
battery contacts.
•The battery pack is suitable for use only with compatible WireXpert devices.
•Do not disassemble the battery pack. There are no user serviceable parts inside. Do not dispose the
battery pack in fire or water.
•Handle a damaged or leaking battery with extreme care. If you come into contact with the electrolyte,
wash the exposed area with soap and water. If the electrolyte contacts the eye, flush the eye with
water for 15 minutes and seek medical attention.
•Do not expose the battery pack to high storage temperatures (above 55°C).
•When discarding a battery pack, contact your local waste disposal provider regarding local restrictions
on the disposal or recycling of Lithium Ion batteries.
•To obtain a replacement battery (part number WX_AC_BAT1), contact your local dealer.
•Do not charge the batteries pack if the ambient temperature is above 40°C.
3.6.2 Replacing Battery
The batteries are located and secured at the bottom of the WireXpert units for safety reasons. To
replace the batteries;
1. Switch off WireXpert and disconnect external power supplies.
2. Unscrew the battery compartment and remove the cover.

Understanding WireXpert
18 © Copyright 2019 Softing IT Networks
3. Remove and replace a new battery into the compartment.
4. Close, fasten and secure the screw onto the compartment cover.
3.7 Power Supply
•Removable/rechargeable Li-Ion batteries provide more than 8 hours of continuous operation.
•AC power: 100~240V AC plugs directly into the battery. Alternatively, the batteries can be recharged using
an external charging kit that can be ordered separately (WX_AC_CHARGER).
3.8 Dimension
•Size: 223mmH x 124mmW x 74mmD
•Weight: approx. 1.0 kg (approx. 2.2 lbs.)
3.9 Environmental Conditions
•Operating temperature: 0°C to 40°C
•Storage Temperature: 20°C to 60°C
•Relative humidity: 10% to 80%
H
W
D

WireXpert User Interface
© Copyright 2020 Softing IT Networks 19
WireXpert User Interface
Starting from v7.3, users are required to read and agree to the “End User License Agreement (EULA)” on
the first launch or after a firmware upgrade to use WireXpert. The EULA can be found in [TOOLS]
About Us Info after agreeing the first time.
4.1 Touch Screen Layout
The Graphical User Interface (GUI) in version 7.0’s firmware has been updated with a more responsive
system and quick-access menus.
WireXpert boots up to the SETUP screen. It is categorized into 5 groups:
1. Status bar
2. Quick Setup group
3. Test Settings group
4. Project Settings group
5. System Settings group
1. The Status bar displays the current date, Wi-Fi connectivity status, USB connectivity status, talk set
connectivity status and battery level. Tap icons to change or view setting.
2. The Quick Setup group provides quick selection with predefined configurations.
3. The Test Settings group provides results-oriented configurations necessary to perform an AUTOTEST.
4. The Project Settings group provides non-results-oriented configurations before performing an
AUTOTEST.
5. The System Settings group settings provides device, time, localization and device related
configurations.

WireXpert User Interface
20 © Copyright 2019 Softing IT Networks
4.2 The One Touch Access Button
The fundamental philosophy behind the WireXpert User Interface is simplicity in its ease of use. The
main functions of the One-Touch access buttons as follows:
4.2.1 The [AUTOTEST] button
The [AUTOTEST]button will perform an immediate certification test on the last
configured settings. If no settings were configured, default settings will be used.
Test results will be generated automatically after the test is completed.
You will receive any of the following 4 results after performing AUTOTEST:
Green “PASS” – Good test result in accordance to pre-defined settings.
Green “PASS*” – “PASS” result with one or more test parameters that have margin in the range
of uncertainty of the tester.
Red “FAIL” – Unacceptable results with severe disturbance on one or more test parameters.
Red “FAIL*” – “FAIL” result with one or more test parameters that have negative margin in the
range of uncertainty of the tester.
Note
Marginal Pass/Fail is enabled by default. Press the [SETUP] button
Test Settings
Test Options
Lab
Marginal Pass/Fail to change the presentation of the test result
to clear “PASS” or “FAIL” results. Uncertainty of the tester is then not taken into
consideration. Contact Softing for more information.
You will be given the following option after performing an AUTOTEST:
•[Retest] can be conducted on a PASS or FAIL result (if list-based testing labelling scheme is selected).
•[View] details will display additional test parameters and plots.
•[Save] test results to device
An AUTOTEST will fail in the event of missing connection between the LOCAL and REMOTE units, wrong
settings configured or if setting reference are required. WireXpert will perform an initial wire map test
before testing other parameters. Disable wire map test at Test Settings Test Options Lab Wire
map to bypass this test.
This manual suits for next models
7
Table of contents
Other Softing Cable Tester manuals

Softing
Softing WX500-PLUS User manual

Softing
Softing WireXpert 4500 User manual

Softing
Softing WireXpert 4500 User manual

Softing
Softing WireXpert 4500 User manual

Softing
Softing WX4500-FA User manual

Softing
Softing WireXpert 4500 Fiber MPO User manual

Softing
Softing CableMaster 200 User manual

Softing
Softing CableMaster CM200 User manual

Softing
Softing CableMaster CM200 User manual

Softing
Softing NetXpert XG User manual