manuals.online logo
Brands
  1. Home
  2. •
  3. Brands
  4. •
  5. SOMFY
  6. •
  7. Receiver
  8. •
  9. SOMFY INTEO EOLIS RECEIVER RTS 2 User manual

SOMFY INTEO EOLIS RECEIVER RTS 2 User manual

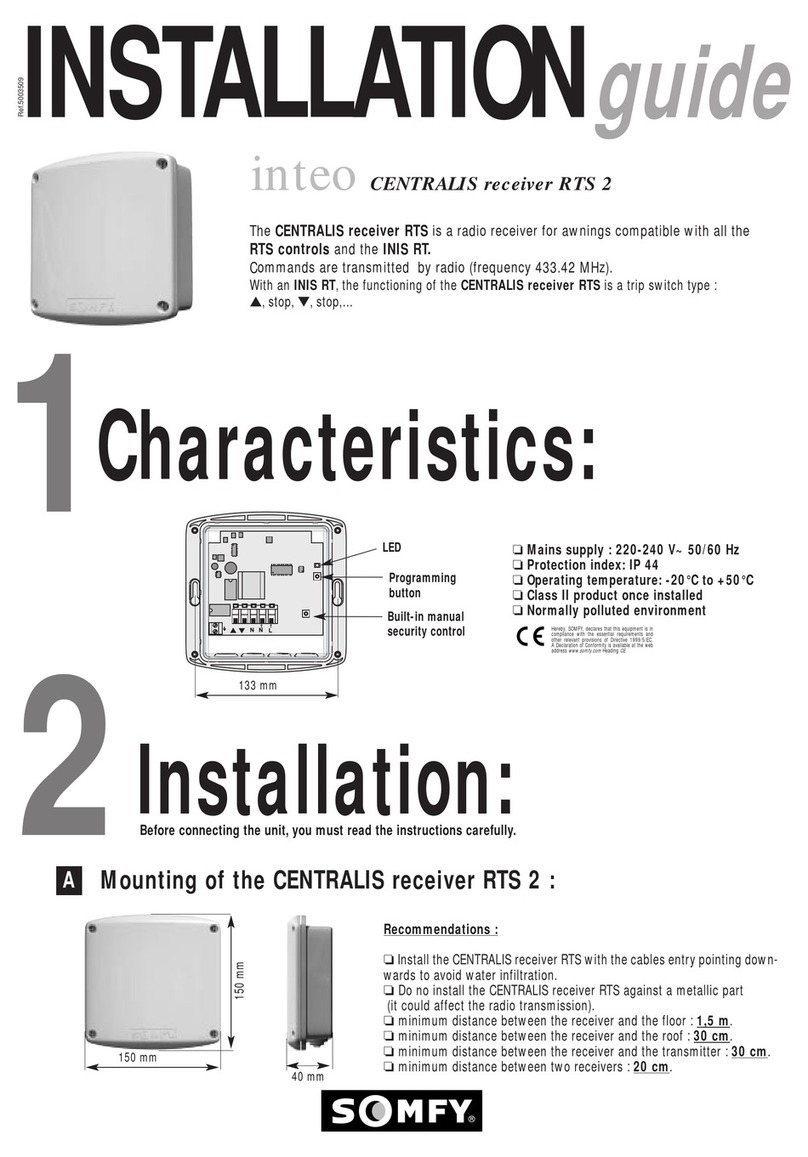
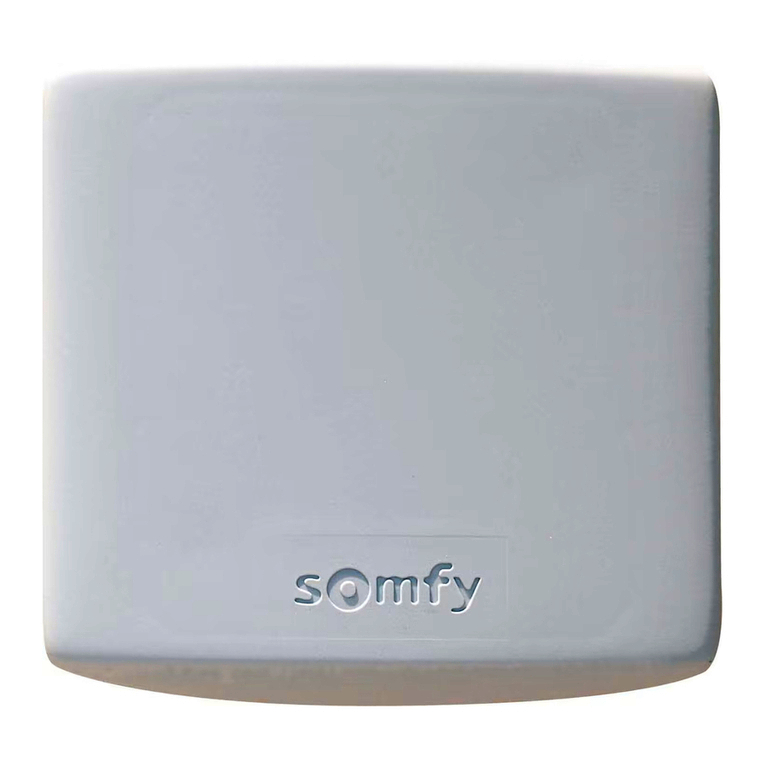
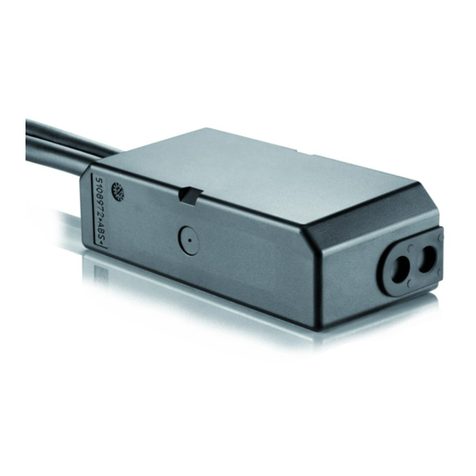
The EOLIS receiver RTS is a radio receiver for awnings with protection
against wind damage.
The EOLIS receiver RTS is compatible with the EOLIS sensor,all the RTS
controls and the INIS RT.
Commands are transmitted by radio (frequency 433.42 MHz).
With an INIS RT,the functioning of the EOLIS receiver RTS is a trip switch type :
▲, stop, ▼, stop,…
®
❏Mains supply : 220-240 V~ 50/60 Hz
❏Protection index: IP 44
❏Operating temperature: -20°C to +50°C
❏Class II product once installed
❏Normally polluted environment
inteo EOLIS receiver RTS 2
INSTALLATION
guide
Ref.5003510
Characteristics:
Installation:
2Before connecting the unit, you must read the instructions carefully.
▲ ▼ N N L SC
Programming
button
LED
Built-in manual
security control
1
Mounting of the EOLIS receiver RTS 2 :
A
Recommendations :
❏Install the EOLIS receiver RTS with the cables entry pointing downwards
to avoid water infiltration.
❏Do no install the eolis receiver RTS against a metallic part
(it could affect the radio transmission).
❏minimum distance between the receiver and the floor : 1,5 m.
❏minimum distance between the receiver and the roof : 30 cm.
❏minimum distance between the receiver and the transmitter :30 cm.
❏minimum distance between two receivers :20 cm.
Hereby, SOMFY, declares that this equipment is in
compliance with the essential requirements and
other relevant provisions of Directive 1999/5/EC.
A Declaration of Conformity is available at the web
address
www.somfy.com
Heading
CE
150 mm
150 mm
40 mm
Cabling of the EOLIS receiver RTS 2 :
B
The EOLIS receiver RTS is compatible with all standard SOMFY motors. Cabling arrangements are shown in
the diagram. Respect the electrical standards in force as well as the following points:
- disconnect the mains before carrying out any work.
- be careful to avoid static electricity which could damage some electronic components.
- use flexible cables
- ensure that no longitudinal forces act on the cable carriers after installation
- do not forget to connect the earth wires.
Cabling of the EOLIS sensor
▲ ▼ N N L SC
common
NL
SUPPLY
230V -50 Hz
Phase
Earth
Neutral
LTmotor
EOLISsensor
SC
SC
= Main phase
= Main neutral
= Motorneutral
= Motorup
= Motordown
= WIND input
= COMMONinput
N
N
L
▲
▼
Mains
Eolis sensor
Eolis receiver RTS
OR
RTS control or INIS RT
Wind function :
C
The wind threshold can be adjusted by the potentiometer to accommodate
wind speeds between 10 to 50 Km/h.
Principle :
When the wind speed exceeds the threshold set by the EOLIS receiver RTS,
after 2 seconds, an UP order is given to the motor.
As long as the measured wind speed is higher than the adjusted threshold,
any order from the RTS control is inhibited.
When the wind speed falls below the threshold setting, a time delay of 30
seconds is activated.
After this time delay any order can be given with the RTS control.
“S” jumper :
When the jumper is cut, if a down control has been given just before the
wind appearance, the EOLIS receiver RTS will automatically send a down
control to the motor after 12 minutes.
The EOLIS receiver RTS is able to protect awnings against wind damage using EOLIS sensor
Cabling / fixing of the EOLIS sensor
1. Connect the cable
to the terminal. 2. Put the cover 3. Fix the sensor
to the wall. 4. Put and screw the
front box.
,,
,,
yy
yy
,,yy
,
,
y
y
,,
,,
yy
yy
Mounting of the EOLIS sensor
WARNING : if the awning moves DOWN when pressing the UP button of the RTS control, invert the brown and black motor wires.
▲ ▼ N N L SC
Wind threshold
adjustment
▲▼N N L SC
“S” jumper
Km/h
5010
REMOVEA RTS CONTROL FROMTHE MEMORY OF THE RECEIVER
(ON AN EXISTING INSTALLATION)
3
• To remove the adresses of all the controls from the memory of a EOLIS receiver RTS, press the programming button of the EOLIS receiver RTS
until the LED blinks .
➭The memory of the receiver is erased.
4
DProgramming :
REMOVEALLTHE CONTROLS FROM THE MEMORY OF THE RECEIVER
(RESET OF THE EOLIS RECEIVER RTS)
ADD A NEW CONTROL IN THE MEMORY OFA RECEIVER
(ON AN EXISTING INSTALLATION)
2
INITIAL INSTALLATION
1
with an RTS control (TELIS soliris RTS ; Centralis RTS ; TELIS 1 or 4 RTS).
with an INIS RT.
The LED of the
EOLIS receiver RTS
blinks indicating
that the address of
the INIS RT is
memorized in recei-
ver which automatically quits its
programming mode.
Set the EOLIS receiver
RTS in its programming
mode by pressing the
PROG button until the
LED lights.
This indicates that the SOLIRIS
receiver RTS is ready to receive the address of a control for
one minute (After this time limit, the LED will go out).
Press shortly
the program-
ming button
on the RTS
control.
The LED of the EOLIS
receiver RTS blinks
indicating that the
address of the RTS
control is memorized in
receiver which automatically quits its
programming mode.
Set the EOLIS recei-
ver RTS in its pro-
gramming mode by
pressing the PROG
button until the LED
lights.
This indicates that the EOLIS receiver RTS is ready to
receive the address of a control for one minute (After
this time limit, the LED will go out).
1. remove
the battery 2. press shortly
the push button 4. press shortly
the push button
3. replace
the battery
GENERAL OR GROUP CONTROL
• Set all the EOLIS receiver RTS you wish to control by one control in
their programming mode and record the control following the same
procedure as described above.
➭ The LEDs of all the EOLIS receiver RTS blink indicating that the address of the control is
memorized in all these receivers.
MULTIPLE CONTROL
• Assign several controls to the EOLIS receiver RTS following the same
procedure as described above.
You can assign up to 12 controls to one receiver. If you try to enter a
13th,your instruction will be ignored,the led of the receiver will go out.
• To add a new control in the memory of a RTS receiver, set the EOLIS receiver RTS in its programming mode (see § D1), then press shortly the
prog button of the RTS control you wish to add (to add an INIS RT, remove/replace the battery then press the front button).
• It is also possible to “wake up” the EOLIS receiver RTS with another control.
From a RTS control : press for more than 2 seconds on the prog button of the RTS control, then press shortly the prog button of the
RTS control you wish to add (to add an INIS RT, remove/replace the battery then press the front button).
From a RT control : remove/replace the battery and press the front button of the INIS RT, then press shortly the prog button of the RTS
control you wish to add (to add another INIS RT, remove/replace the battery then press the front button).
•To remove a RTS control from the memory of a RTS receiver, set the EOLIS receiver RTS in its programming mode (see § D1),then press short-
lythe prog button of the RTS control you wish to remove (to remove an INIS RT, remove/replace the battery then press the front button).
• It is also possible to “wake up” the EOLIS receiver RTS with another control (see § D2), then press shortly the prog button of the RTS control
you wish to remove (to remove an INIS RT, remove/replace the battery then press the front button).
IP 2
EIntermediate position
(WITH A RTS CONTROL ONLY)
With the EOLIS receiver RTS and a RTS control, it is possible to set one or two intermediate positions (IP)
: one accessible from the top of the awning (IP1) and one from the bottom (IP2).
To record these positions, the EOLIS receiver RTS has to record the time for the awning to go from its top
to the IP and also the time from its bottom one to the IP.
RECORD THE INTERMEDIATE POSITION FROM THE TOP OF THE AWNING
®
Diagnosis
Non-binding document. Products and references in this document are subject to change without prior notice. Please consult SOMFY before using such references. © SOMFY 12/99
REACH THE INTERMEDIATE POSITIONS
1- Press the built-in manual security control of the EOLIS receiver RTS.
2- Check the programming.
3- Check the good wiring of the motor and the EOLIS receiver RTS.
The led of the RTS control lights, but the motor
does not operate.
The LED on the RTS control does not light. Check the battery of the RTS control.
STOP
Set the awning at
its UP limit with
the RTS control.
Push simulta-
neoustly on the
DOWN and IP
button of the
RTS control until the
awning begins to move
(about three seconds).
Stop the
awning at the
intermediate
position you
wish with the RTS control
(if necessary, adjust this
position with ▲and ▼
push buttons).
Push the IP
button of the
RTS control
during two seconds.
➭The EOLIS receiver RTS has
memorized the 1st intermediate
position.
2s
STOP
Set the awning
at its DOWN limit
with the RTS
control.
Push simulta-
neoustly on the
UP and IP but-
ton of the RTS
control until the awning
begins to move (about
three seconds).
Stop the
awning at the
intermediate
position you
wish with the RTS control
(if necessary, adjust this
position with ▲and ▼
push buttons).
Push the IP
button of the
RTS control
during two seconds.
➭The EOLIS receiver RTS has
memorized the 2nd intermediate
position.
2s
IP 1
IP1 or IP2
RECORD THE INTERMEDIATE POSITION FROM THE BOTTOM OF THE AWNING
DELETE AN INTERMEDIATE POSITION
To delete an intermediate position,
press briefly the IP button of the RTS
control to reach the intermediate
position you wish to delete, then
press continuoustly the IP button of
the control until the led stops blin-
king (approx. 8 sec.).
➭The concerned IP is deleted.
To reach one of
the intermedia-
te positions, set
the awning is at
its UP (for IP1) or DOWN (for IP2)
limit, then press briefly the IP button
of the RTS control.
➭The awning will move and stop at the dedica-
ted intermediate position.

Other SOMFY Receiver manuals

SOMFY SLIM IO RECEIVER PERGOLA+PLUG User manual

SOMFY

SOMFY SLIM IO RECEIVER PERGOLA+PLUG User manual

SOMFY ROLLIXO io User manual

SOMFY

SOMFY ROLLIXO io User manual

SOMFY PLATINE RTS User manual

SOMFY

SOMFY PLATINE RTS User manual

SOMFY Lighting Receiver io User manual

SOMFY

SOMFY Lighting Receiver io User manual

SOMFY ROLLIXO io User manual

SOMFY

SOMFY ROLLIXO io User manual

SOMFY Rollixo Optimo RTS User manual

SOMFY

SOMFY Rollixo Optimo RTS User manual

SOMFY SOLIRIS SO10802 User manual

SOMFY

SOMFY SOLIRIS SO10802 User manual

SOMFY Heating Slim Receiver RTS 2kW User guide

SOMFY

SOMFY Heating Slim Receiver RTS 2kW User guide

SOMFY Screen+Plug User manual

SOMFY

SOMFY Screen+Plug User manual

SOMFY IZYMO ON-OFF RECEIVER io User manual

SOMFY

SOMFY IZYMO ON-OFF RECEIVER io User manual

SOMFY Lighting Slim Receiver RTS User manual

SOMFY

SOMFY Lighting Slim Receiver RTS User manual

SOMFY animeo KNX EnOcean 1860229 User manual

SOMFY

SOMFY animeo KNX EnOcean 1860229 User manual

SOMFY 1810872 User manual

SOMFY

SOMFY 1810872 User manual

SOMFY Rollixo Smart io User manual

SOMFY

SOMFY Rollixo Smart io User manual

SOMFY inteo RTS 25 DC User manual

SOMFY

SOMFY inteo RTS 25 DC User manual

SOMFY 1870359 User manual

SOMFY

SOMFY 1870359 User manual

SOMFY White LED Receiver io User manual

SOMFY

SOMFY White LED Receiver io User manual

SOMFY Variation io Assembly instructions

SOMFY

SOMFY Variation io Assembly instructions

SOMFY inteo LIGHTING indoor RTS User manual

SOMFY

SOMFY inteo LIGHTING indoor RTS User manual

SOMFY Universal Slim Receiver RTS Plug User manual

SOMFY

SOMFY Universal Slim Receiver RTS Plug User manual

SOMFY Axroll User manual

SOMFY

SOMFY Axroll User manual

SOMFY 1811632 User manual

SOMFY

SOMFY 1811632 User manual

SOMFY SO1870656 User manual

SOMFY

SOMFY SO1870656 User manual

SOMFY Smoove UNO io Operating instructions

SOMFY

SOMFY Smoove UNO io Operating instructions

Popular Receiver manuals by other brands

Pioneer DMH-A345BT Operation manual

Pioneer

Pioneer DMH-A345BT Operation manual

Marantz M-CR611 Quick setup guide

Marantz

Marantz M-CR611 Quick setup guide

Yamaha R-S500 owner's manual

Yamaha

Yamaha R-S500 owner's manual

Philips DTR4610 Specifications

Philips

Philips DTR4610 Specifications

JVC KD-DV4202 instructions

JVC

JVC KD-DV4202 instructions

Marantz NR1604 owner's manual

Marantz

Marantz NR1604 owner's manual

Onkyo TX-SR608 Quick setup

Onkyo

Onkyo TX-SR608 Quick setup

Sony ACC-DHL2 operating instructions

Sony

Sony ACC-DHL2 operating instructions

Pioneer Elite VSX-32 Specifications

Pioneer

Pioneer Elite VSX-32 Specifications

Sony CX-BK2 Service manual

Sony

Sony CX-BK2 Service manual

AEG KRC 4350 BT instruction manual

AEG

AEG KRC 4350 BT instruction manual

MOBILUS C-ZR user manual

MOBILUS

MOBILUS C-ZR user manual

Ericsson MASTR II Maintenance manual

Ericsson

Ericsson MASTR II Maintenance manual

Alinco DR-M03R Service manual

Alinco

Alinco DR-M03R Service manual

Multiplex RX 12 DS IPD manual

Multiplex

Multiplex RX 12 DS IPD manual

GOBC M SERIES user manual

GOBC

GOBC M SERIES user manual

Spektrum DX6R Service information

Spektrum

Spektrum DX6R Service information

Extron electronics MTP 1500RL 15HD A SEQ Setup guide

Extron electronics

Extron electronics MTP 1500RL 15HD A SEQ Setup guide

manuals.online logo
manuals.online logoBrands
  • About & Mission
  • Contact us
  • Privacy Policy
  • Terms and Conditions

Copyright 2025 Manuals.Online. All Rights Reserved.