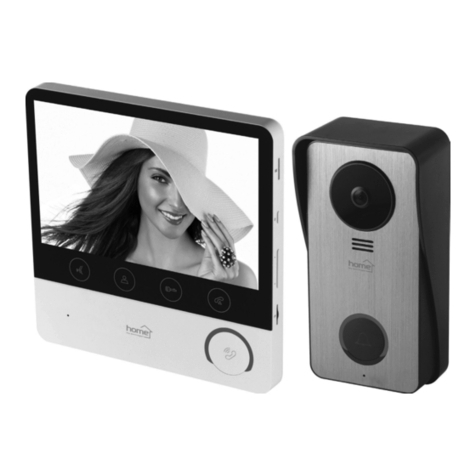
Somogyi home DPV 270 User manual

instruction manual
eredeti használati utasítás
návod na použitie
manual de utilizare
uputstvo za upotrebu
návod k použití
DPV 270
uputa za uporabu
EN -Safety and maintenance / H - Biztonság és karbantartás /
SK - Bezpečnosť a údržba / RO - Siguranță și întreținere /
SRB-MNE - Bezbednost i održavanje / CZ - Bezpečnost a údržba /
HR-BIH - Sigurnost i održavanje
6 – 14
EN -Functions / H - Funkciók / SK - Funkcie / RO - Funcții /
SRB-MNE - Funkcije / CZ - Funkce / HR-BIH - Funkcije 15 – 42

2
fi gure 1. • 1. ábra • 1. obraz • fi gura 1. • 1. skica • 1. obrázek • 1. slika
fi gure 2. • 2. ábra • 2. obraz • fi gura 2. • 2. skica • 2. obrázek • 2. slika
fi gure 3. • 3. ábra • 3. obraz • fi gura 3. • 3. skica • 3. obrázek • 3. slika
1. 2. 3. 4. 5. 6.
7.
1.
2.
3.
4.
6.
5.
7.
6.
4.
5.
1. 2. 3.
7.
8.
9.
10.

3
EN H SK RO
CONTENTS OF THE PACKAGE
(Figure 1.) A CSOMAG TARTALMA
(1. ábra) OBSAH BALÍKA
(1. obrázok) CONȚINUT PACHET
(fig. 1.)
1. indoor monitor beltéri monitor vnútorný monitor monitor interior
2. outdoor camera kültéri kamera vonkajšia kamera cameră de exterior
3. rain cover frame esővédő keret rám proti dažďu cadru protecție ploaie
4. adapter adapter adaptér adaptor
5. wall hanger fali akasztó nástenný háčik suport de perete
6. screws csavarok skrutky șuruburi
7. dowels tiplik hmoždinky dibluri
SRB-MNE CZ HR-BIH
SADRŽAJ KUTIJE
(1. skica) OBSAH BALENÍ
(1. schéma) SADRŽAJ PAKIRANJA
(Slika 1.)
1. unutrašnji monitor interiérový monitor unutrnji monitor
2. spoljna kamera venkovní kamera vanska kamera
3. okvir za zaštitu protiv kiše rám proti dešti okvir za zaštitu od kiše
4. strujni adapter adaptér adapter
5. zidni nosač nástěnná konzole zidni nosač
6. šarafi šrouby vijci
7. tiple hmoždinky tiple
EN H SK RO
STRUCTURE OF THE OUTDOOR
UNIT (Figure 2.) A KÜLTÉRI EGYSÉG FELÉPÍTÉSE
(2. ábra) ŠTRUKTÚRA VONKAJŠEJ
JEDNOTKY (2. obrázok) UNITATEA EXTERIOARĂ
(fig. 2.)
1. rain cover frames esővédő keret rám proti dažďu cadru protecție ploaie
2. infra LED lighting infra LED világítás infra LED osvetlenie iluminat cu LED infraroșu
3. camera kamera kamera cameră
4. speaker hangszóró reproduktor difuzor
5. RFID module RFID egység RFID modul unitate RFID
6. bell button csengő gomb tlačidlo zvončeka buton sonerie
7. microphone mikrofon mikrofón microfon
SRB-MNE CZ HR-BIH
SASTAVNI DELOVI SPOLJNE
JEDINICE (2. skica) INSTALACE VENKOVNÍ JEDNOTKY
(2. schéma) DIJELOVI VANJSKE JEDINICE
(Slika 2.)
1. okvir za zaštitu protiv kiše rám proti dešti okvir za zaštitu od kiše
2. infra LED osvetljenje infračervené LED osvětlení infracrveno LED svjetlo
3. kamera kamera kamera
4. zvučnik reproduktor zvučik
5. RFID jedinica RFID modul RFID jedinica
6. taster zvona tlačítko zvonku tipka zvona
7. mikrofon mikrofon mikrofon

4
figure 4. • 4. ábra • 4. obraz • figura 4. • 4. skica • 4. obrázek • 4. slika
DC 12V
SLAVE OUT
Slave monitor
SLAVE IN
DC 12V
4
volume + -
volume + -
123456
123456 Main monitor
SLAVE OUT
SLAVE IN
ALM
CAM
ALM2
CAM2
DC 12 V
DC 12 V
ALM
GND
VIDEO
ALM
GND
VIDEO
4 4
The products in the frame are not part of the set! / A keretben lévő termékek nem részei a szettnek! / Výrobky v rámoch nie sú súčasťou setu! / Produsele din chenar nu sunt incluse
în set! / Uokvireni proizvodi nisu u setu isporuke! / Produkty v rámečku nejsou součástí sady! / Proizvodi u okviru nisu dio seta!
EN H SK RO
STRUCTURE OF THE INDOOR UNIT
(Figure 3.) A BELTÉRI EGYSÉG FELÉPÍTÉSE
(3. ábra) ŠTRUKTÚRA VNÚTORNEJ
JEDNOTKY (3. obrázok) UNITATEA INTERIOARĂ
(fig. 3.)
1. Intercom Intercom Intercom intercom
2. view on/off kitekintés be/ki za- / vypnúť pozorovanie vizor pornit/oprit
3.
answer válasz odpoveď răspuns
4. hang up hívás vége koniec hovoru încheiere apel
5.
door lock opener ajtózárnyitó otvárač zámky deschidere yală
6. card slot kártyafoglalat zásuvka pre kartu soclu cartelă
7. setting beállítás nastavenie setare
8. scrolling
léptetés fel
krokovanie hore pas sus
9. scrolling
léptetés le
krokovanie dole pas jos
10. volume
hangerő
hlasitosť volum
SRB-MNE CZ HR-BIH
SASTAVNI DELOVI UNUTRAŠNJE
JEDINICE (3. skica) INSTALACE VNITŘNÍ JEDNOTKY
(3. schéma) DIJELOVI UNUTARNJE JEDINICE
(Slika 3.)
1. Intercom Intercom Intercom
2. posmatranje okoline uklj./isklj. zapínání /vypínání výhledu ven prikaz on/off
3.
otključavanje el. brave odpověď uspostavi vezu
4. kraj poziva ukončení hovoru prekini vezu
5.
odgovor otevírání dveří otvaranje vrata
6. ležište memorijske kartice slot pro kartu utor za karticu
7. podešavanje nastavení podešavanje
8. korak vyhledávání pomicanje
9. korak vyhledávání pomicanje
10. jačina zvuka hlasitost glasnoća

5
figure 5. • 5. ábra • 5. obraz • figura 5. • 5. skica • 5. obrázek • 5. slika
figure 7. • 7. ábra • 7. obraz • figura 7. • 7. skica • 7. obrázek • 7. slika
Audio
GND
Video
Power
Audio
GND
Video
Power
Alarm
GND
Video
–
Alarm
GND
Video
–
GND
TV Out
A
B
C
D
A
B
C
D
DOOR1DOOR2
CAM1CAM2
SLAVE-INSLAVE-OUT
12 VTV-G
+ -
EN H SK RO
DOOR1-2 outdoor units with camera kültéri kamerás egységek vonkajšie kamerové jednotky unități exterioare cu cameră
CAM1-2 surveillance camera
and opening sensor options megfigyelő kamera
és nyitásérzékelő opció pozorovacia kamera
a senzor otvorenia je opcia cameră supraveghere și opțiune de
sesizare deschidere
SLAVE IN-OUT additional indoor unit on/off további beltéri egység be/ki za- / vypnutie ďalšej vnútornej
jednotky pornit/oprit unități interioare
suplimentare
12 V the connector of the accessory
adapter a tartozék adapter csatlakozója prípojka priloženého adaptéra soclu pentru adaptorul de rețea
inclus
TV-G video output option for the TV,
monitor video kimenet opció TV-hez,
monitorhoz opcia video výstup k TV, monitoru opțiune de ieșire video pentru tv,
monitor
SRB-MNE CZ HR-BIH
DOOR1-2 spoljna jedinica sa kamerom venkovní kamerové jednotky vanjska jedinica sa kamerom
CAM1-2 kamera za video nadzor i opcija
senzora otvaranja opce monitorovací kamery
a senzoru otevírání dveří nadzorna kamera i opcionalno
senzor za otvaranje brave
SLAVE IN-OUT dodatne unutrašnje jedinice
ulaz / izlaz zapínání / vypínání další interiérové
jednotky dodatna unutarnja jedinica on/off
12 V priključak strujnog adaptera zapojení adaptéru dodávaného
v příslušenství konektor za napojni adapter
TV-G vido izlaz je opcija za TV ili monitor opce video výstupu k televizoru,
monitoru video izlaz za TV, monitor
figure 6. • 6. ábra • 6. obraz • figura 6. • 6. skica • 6. obrázek • 6. slika
123456
EN H SK RO SRB-MNE CZ HR-BIH
1. Intercom hang / zöld zvuk / zelený sunet / verde zvuk / zeleno zvuk / zelená Interkom
2. Ground test ( - ) / fekete telo ( - ) / čierna masă (-) / negru masa ( - ) / crno tělo ( - ) / černá uzemljenje
3. Video kép / sárga obraz / žltá imagine / galben slika / žuto obraz / žlutá video
4. Power táp ( + ) / piros napájanie ( + ) /
červená alimentare (+)
/ roșu napajanje ( + )
crveno napájení ( + ) /
červená napajnje
5. Lock+ zár +12 V zámka +12 V yală +12 V brava +12 V zámek +12 V brava +
6. Lock- zár ( - ) zámka ( - ) yală (-) brava ( - ) zámek ( - ) brava -

6
COLOR VIDEO DOORPHONE
IMPORTANT SAFETY INSTRUCTIONS
READ THE INSTRUCTION MANUAL CAREFULLY BEFORE USE AND RETAIN IT FOR LAT
-
ER REFERENCE!
WARNINGS
• Before using the product for the first time, please read the instructions for use below and retain
them for later reference. The original instructions were written in Hungarian language.
• After unpacking, make sure that the device has not get damaged during transport. Keep chil
-
dren away from the packaging, if it contain a bag or other dangerous packaging material.
• This appliance may only be used by persons with impaired physical, sensory or mental ca
-
pabilities, or lacking in experience or knowledge, as well as children from the age of 8, if they
are under supervision or have been given instruction concerning use of the appliance and
they have understood the hazards associated with use. Children should not be allowed to play
with the unit. Children may only clean or perform user maintenance on the appliance under
supervision.
• Use only indoor, in dry circumstances. • In case of injury of the mains adapter or any other type
of malfunction, immediately power it off and contact a specialist. • When it is not in use, unplug
it from the mains. • Keep the cables connecting the units away from other power cables. • Using
thin wire may cause the deterioration of sound and image quality. • Do not operate the device
near strong magnetic field. • Protect it from dust, humidity, liquids, heat, dampness, frost, shock
and direct thermal radiation or sunshine. • Do not expose the unit to splashing water and do not
place objects filled with liquid, for example glass on it. • Open flame-source, such as lighting
candle must not be placed on the unit. • Do not disassemble or transform the unit as it may
cause a fire, accident or electric shock. • Due to the presence of mains voltage, observe the
usual rules of life protection. • It is forbidden to touch the adapter or the connection cable with
wet hands. • The appliance is not intended for public domain use but is intended for domestic
use. • IP44: protected against objects >1 mm and against water splashing from any angle. •
Due to continuous improvements, the technical data and design may change without any prior
notice. • The actual instruction manual is downloadable from www.somogyi.hu website. • We
don’t take the responsibility for printing errors which may occur, and apologize for them.
Caution: Risk of electric shock! Do not attempt to disassemble of modify the unit or its
accessories. In case any part is damaged, immediately power off the unit and seek the
assistance of a specialist.
EN -Safety and maintenance / H - Biztonság és karbantartás / SK - Bezpečnosť a údržba /
RO - Siguranţă și întreţinere / SRB-MNE - Bezbednost i održavanje / CZ - Bezpečnost a údržba /
HR-BIH - Sigurnost i održavanje

7
DISPOSAL
Waste equipment must be collected and disposed separately from household waste be-
cause it may contain components hazardous to the environment or health. Used or waste
equipment may be dropped off free of charge at the point of sale, or at any distributor
which sells equipment of identical nature and function. Dispose of product at a facility spe
-
cializing in the collection of electronic waste. By doing so, you will protect the environment
as well as the health of others and yourself. If you have any questions, contact the local
waste management organization. We shall undertake the tasks pertinent to the manufac
-
turer as prescribed in the relevant regulations and shall bear any associated costs arising.
SZÍNES VIDEO-KAPUTELEFON
FONTOS BIZTONSÁGI UTASÍTÁSOK
OLVASSA EL FIGYELMESEN ÉS ŐRIZZE MEG A KÉSŐBBI FELHASZNÁLÁSHOZ!
FIGYELMEZTETÉSEK
• A termék használatba vétele előtt, kérjük, olvassa el az alábbi használati utasítást és őrizze is
meg. Az eredeti leírás magyar nyelven készült.
• Kicsomagolás után győződjön meg róla, hogy a készülék nem sérült meg a szállítás során.
Tartsa távol a gyermekeket a csomagolástól, ha az zacskót vagy más veszélyt jelentő össze
-
tevőt tartalmaz!
• Ezt a készüléket azok a személyek, akik csökkent fizikai, érzékelési vagy szellemi képessé
-
gekkel rendelkeznek, vagy akiknek a tapasztalata és a tudása hiányzik, továbbá gyermekek
8 éves kortól csak abban az esetben használhatják, ha az felügyelet mellett történik, vagy a
készülék használatára vonatkozó útmutatást kapnak, és megértik a biztonságos használatból
eredő veszélyeket. Gyermekek nem játszhatnak a készülékkel. Gyermekek kizárólag felügye
-
let mellett végezhetik a készülék tisztítását vagy felhasználói karbantartását.
• Kizárólag száraz, beltéri körülmények között használható! • A hálózati adapter megsérülése
vagy bármilyen más rendellenesség esetén azonnal áramtalanítsa és forduljon szakember
-
hez! • Ha hosszabb ideig nem használja, húzza ki a hálózatból! • Az egységeket összekötő
kábeleket tartsa távol más hálózati kábelektől! • Vékony vezetékek használata a hang- és
képminőség romlását okozhatja. • Ne működtesse a készüléket erős elektromágneses tér
vagy berendezések közelében! • Óvja portól, párától, folyadéktól, nedvességtől, fagytól és
ütődéstől, valamint a közvetlen hő- vagy napsugárzástól! • A készüléket ne érje fröccsenő
víz, és ne tegyen folyadékkal töltött tárgyakat, pl. poharat a készülékre! • Nyílt lángforrás,
mint égő gyertya, nem helyezhető a készülékre! • Ne szedje szét, ne alakítsa át a készüléket,
mert tüzet, balesetet vagy áramütést okozhat! • A hálózati feszültség jelenléte miatt tartsa be
a szokásos életvédelmi szabályokat! • Nedves kézzel tilos a készülék vagy a csatlakozókábel
megérintése! • A készülék nem közületi, hanem háztartási használatra készült. • IP44: minden
irányból védett >1 mm tárgyak és freccsenő víz ellen. • A folyamatos továbbfejlesztések miatt
8
műszaki adat és a dizájn előzetes bejelentés nélkül is változhat. • Az aktuális használati utasí-
tás letölthető a www.somogyi.hu weboldalról. • Az esetleges nyomdahibákért felelősséget nem
vállalunk, és elnézést kérünk.
Áramütésveszély! Tilos a készülék vagy tartozékainak szétszerelése, átalakítása! Bár-
mely rész megsérülése esetén azonnal áramtalanítsa és forduljon szakemberhez.
ÁRTALMATLANÍTÁS
A hulladékká vált berendezést elkülönítetten gyűjtse, ne dobja a háztartási hulladékba,
mert az a környezetre vagy az emberi egészségre veszélyes összetevőket is tartalmazhat!
A használt vagy hulladékká vált berendezés térítésmentesen átadható a forgalmazás he-
lyén, illetve valamennyi forgalmazónál, amely a berendezéssel jellegében és funkciójában
azonos berendezést értékesít. Elhelyezheti elektronikai hulladék átvételére szakosodott
hulladékgyűjtő helyen is. Ezzel Ön védi a környezetet, embertársai és a saját egészségét.
Kérdés esetén keresse a helyi hulladékkezelő szervezetet. A vonatkozó jogszabályban
előírt, a gyártóra vonatkozó feladatokat vállaljuk, az azokkal kapcsolatban felmerülő
költségeket viseljük. Tájékoztatás a hulladékkezelésről: www.somogyi.hu
FAREBNÝ VCHODOVÝ VIDEOTELEFÓN
DÔLEŽITÉ BEZPEČNOSTNÉ UPOZORNENIA
POZORNE SI PREČÍTAJTE TENTO NÁVOD NA OBSLUHU A USCHOVAJTE HO PRE
BUDÚCE POUŽITIE!
UPOZORNENIA
• Pred použitím výrobku si pozorne prečítajte tento návod na použitie a starostlivo si ho uscho
-
vajte. Tento návod je preklad originálneho návodu.
• Po rozbalení výrobku skontrolujte, či sa výrobok počas prepravy nepoškodil. Nedávajte deťom
balenie výrobku, keď obsahuje sáčok alebo iný nebezpečný komponent!
• Spotrebič nie je určený na používanie osobami so zníženými fyzickými, zmyslovými alebo
mentálnymi schopnosťami, alebo s nedostatkom skúseností a vedomostí, vrátane detí od 8
rokov, používať ho môžu len pokiaľ im osoba zodpovedá za ich bezpečnosť, poskytuje dohľad
alebo ich poučí o používaní spotrebiča a pochopia nebezpečenstvá pri používaní výrobku.
Deti by mali byť pod dohľadom, aby sa so spotrebičom nehrali. Čistenie alebo údržbu výrobku
môžu vykonať deti len pod dohľadom.
• Len na vnútorné použitie! • V prípade poškodenia sieťového adaptéra alebo akejkoľvek inej
poruchy prístroj okamžite odpojte od elektrickej siete a obráťte sa na odborníka! • Keď prístroj
dlhší čas nepoužívate a odpojte od elektrickej siete! • Prepojovacie káble jednotiek neumiestni
-
te do blízkosti iných káblov! • Používanie tenkých káblov môže spôsobiť zníženie kvality zvuku.
• Neprevádzkujte výrobok v blízkosti silného magnetického pola! • Chráňte pred prachom,
tekutinou, teplom, vlhkosťou, mrazom, nárazom, priamym slnečným a tepelným žiarením! •

9
Dbajte na to, aby sa prístroj nestýkal so striekajúcou vodou a nepoložte naň predmet s vodou,
napr. pohár! • Na prístroj nepoložte otvorený oheň, napr. horiacu sviečku! • Prístroj nerozo
-
berajte a neprerábajte, lebo môžete spôsobiť požiar, nehodu alebo úder elektrickým prúdom!
• Z dôvodu prítomnosti sieťového napätia dodržujte obvyklé bezpečnostné predpisy! • Nikdy
sa nedotýkajte prístroja alebo kábla mokrou rukou! • Prístroj nie je určený na verejné účely,
ale len na domáce použitie. • IP44: ochrana pred vniknutím telies s priemerom nad 1 mm a
odolné voči striekajúcej vode. • Z dôvodu priebežného vývoja technické údaje a dizajn výrobku
sa môžu zmeniť aj bez oznámenia vopred. • Aktuálny návod na použitie si môžete stiahnuť z
webovej stránky www.somogyi.sk. • Za prípadné chyby v tlači nezodpovedáme a ospravedl
-
ňujeme sa za ne.
Nebezpečenstvo úrazu prúdom! Rozoberať, prerábať prístroj alebo jeho súčasť je prísne
zakázané! V prípade akéhokoľvek poškodenia prístroja alebo jeho súčasti okamžite ho
odpojte od elektrickej siete a obráťte sa na odborný servis!
ZNEHODNOCOVANIE
Výrobok nevyhadzujte do bežného domového odpadu, separujte oddelene, lebo môže
obsahovať súčiastky nebezpečné na životné prostredie alebo aj na ľudské zdravie! Za
účelom správnej likvidácie výrobku odovzdajte ho na mieste predaja, kde bude prijatý
zdarma, respektíve u predajcu, ktorý predáva identický výrobok vzhľadom na jeho ráz
a funkciu. Výrobok môžete odovzdať aj miestnej organizácii zaoberajúcej sa likvidáciou
elektroodbadu. Tým chránite životné prostredie, ľudské a teda aj vlastné zdravie. Prípadné
otázky Vám zodpovie Váš predajca alebo miestna organizácia zaoberajúca sa likvidáciou
elektroodpadu.
VIDEO INTERFON COLOR
INSTRUCȚIUNI IMPORTANTE PRIVIND SIGURANȚA
CITIȚI MANUALUL CU ATENȚIE ȘI PĂSTRAȚI-L ÎNTR-UN LOC ACCESIBIL PENTRU UTI
-
LIZARE ULTERIOARĂ!
ATENȚIONĂRI
• Înainte de punerea în funcțiune vă rugăm citiți instrucțiunile de utilizare de mai jos și păstrați-le.
Manualul original a fost scris în limba maghiară.
• După despachetare asigurați-vă că produsul nu s-a deteriorat în timpul transportului. Țineți co
-
pii departe de ambalaje, mai ales dacă acestea conțin pungi sau alte componente cu potențial
periculos!
• Acest aparat nu este destinat utilizării de către persoane cu capacităţi fizice, senzoriale sau
mentale diminuate, ori de către persoane care nu au experienţă sau cunoştinţe suficiente (in
-
clusiv copii); copiii peste 8 ani pot utiliza aparatul în cazul în care sunt supravegheaţi de către o
persoană care răspunde de siguranţa lor, sau sunt informați cu privire la funcţionarea aparatu
-

10
lui în condiţii de siguranţă şi au înţeles ce pericole pot rezulta din utilizarea necorespunzătoare.
Nu lăsați copii să se joace cu aparatul. Curăţarea sau utilizarea produsului de către copii este
permisă numai cu supravegherea unui adult.
• Poate fi utilizat doar în interior, în mediu uscat! • În cazul deteriorării sau defectării adaptorului
de rețea scoateți-l imediat de sub tensiune și adresați-vă unei persoane calificate! • Dacă nu
folosiți aparatul o perioadă mai lungă, scoateți adaptorul din priză! • Țineți cablurile de conec
-
tare a unităților departe de alte cabluri de rețea! • Utilizarea unui cablu cu secțiune mică poate
diminua calitatea imaginii și a sunetului. • Nu folosiți aparatul în apropierea unor câmpuri elec
-
tromagnetice puternice sau lângă alte echipamente! • Feriți de praf, aburi, lichide, umezeală,
îngheț și lovituri, respectiv de radiații termice ori solare directe! • Feriți aparatul de stropirea
cu apă și nu așezați pe acesta obiecte umplute cu lichide, de ex. pahar cu apă! • Nu așezați
sursă de flacără deschisă pe aparat, de ex. lumânare aprinsă! • Nu desfaceți și nu modificați
aparatul, deoarece puteți cauza incendiu, accidentare sau electrocutare! • Datorită prezenței
tensiunii de rețea respectați regulile generale privind siguranța! • Nu atingeți aparatul sau ca
-
blul de conectare niciodată cu mâna udă! • Aparatul este produs pentru utilizare casnică, nu
industrială. • IP44: protejat împotriva pătrunderii obiectelor >1mm și a apei, din toate direcțiile.
• Datorită îmbunătățirii continue a produselor, unele date tehnice și de design pot fi modificate
fără o înștiințare în avans. • Actualul manual de utilizare poate fi descărcat de pe pagina www.
somogyi.ro. • Nu ne asumăm răspunderea pentru eventualele greșeli tipografice și ne cerem
scuze.
Pericol de electrocutare! Niciodată nu demontaţi, modificaţi aparatul sau componentele
lui! În cazul deteriorării oricărei părţi al aparatului întrerupeţi imediat alimentarea aparatului
şi adresaţi-vă unui specialist!
ELIMINARE
Colectaţi în mod separat echipamentul devenit deşeu, nu-l aruncaţi în gunoiul mena-
jer, pentru că echipamentul poate conţine şi componente periculoase pentru mediul
înconjurător sau pentru sănătatea omului! Echipamentul uzat sau devenit deşeu poate
fi predat nerambursabil la locul de vânzare al acestuia sau la toţi distribuitorii care au
pus în circulaţie produse cu caracteristici şi funcţionalităţi similare. Poate fi de aseme
-
nea predat la punctele de colectare specializate în recuperarea deşeurilor electronice.
Prin aceasta protejaţi mediul înconjurător, sănătatea Dumneavoastră şi a semenilor. În
cazul în care aveţi întrebări, vă rugăm să luați legătura cu organizațiile locale de tratare
a deșeurilor. Ne asumăm obligațiile prevederilor legale privind producătorii și suportăm
cheltuielile legate de aceste obligaţii.

11
SRB MNE KOLOR VIDEO INTERFON
BITNE BEZBEDNOSNE ODREDBE
PAŽLJIVO PROČITAJTE I SAČUVAJTE ZA DALJU UPOTREBU!
NAPOMENE
• Pre prve upotrebe radi bezbednog i tačnog rada pažljivo pročitajte i proučite ovo uputstvo.
Sačuvajte uputstvo! Originalno uputstvo je pisano na mađarskom jeziku.
• Uverite se da uređaj nije oštećen u toku transporta! Držite decu dalje od ambalaže ako sadrži
kesu ili drugi opasan sastojak!
• Ovaj uređaj nije predviđen za upotrebu licima sa smanjenom mentalnom ili psihofizičkom mo
-
gućnošću, odnosno neiskusnim licima uključujući i decu, deca starija od 8 godina smeju da
rukuju ovim uređajem samo u prisustvu odrasle osobe ili da su upućena u bezbedno rukovanje
i svesna su svih opasnosti pri radu. Deca se ne smeju igrati sa ovim proizvodom. Korisničko
održavanje i čišćenje ovog proizvoda deca smeju da vrše samo u prisustvu odrasle osobe.
• Uređaj je namenjen za upotrebu u suvim zatvorenim prostorijama! • U slučaju oštećenja struj
-
nog adaptera ili drugih oštećenja dalja upotreba je zabranjena, obratite se stručnom licu! •
Ukoliko duže vreme ne koristite uređaj, isključite ga iz struje! • Kablove koji povezuju jedinice
montirajte dalje od ostalih električnih vodova! • Tanki kablovi kvare kvalitet prenosa signala i
smanjuju domet. • Uređaj ne koristite u blizini jakog magnetnog polja! • Uređaj štitite od praši
-
ne, pare, tečnosti, vlage, smrzavanja i prevelike toplote, odnosno direktnog sunca! • Uređaj šti-
tite od prskajuće vode, ne postavljajte ga u blizinu sa posudama (primer čaše) sa tečnostima!
• Ne postavljajte ništa sa otvorenim plamenom u blizinu uređaja (sveća itd.)! • Ne rastavljajte i
ne prepravljajte uređaj, opasnost od požara i strujnog udara! • Zbog prisustva napona opasnog
po život držite se standardnih mera bezbednosti! • Uređaj i priključni kabel nikada ne dodirujte
mokrim ili vlažnim rukama! • Ovaj uređaj je namenjen za kućnu upotrebu, nije predviđen za
ustanove ili profesionalnu upotrebu! • Značenje IP44 otporna na prodor predmeta većih od 1
mm. Zaštićena od prskajuće vode (iz svih pravaca). • Zbog konstantnih usavršavanja karakte
-
ristika i dizajna promene su moguće i bez predhodne najave. • Aktuelno uputstvo za upotrebu
možete pronaći na adresi www.somogyi.hu. • Za eventualne štamparske greške ne odgovara
-
mo i unapred se izvinjavamo.
Opasnost od strujnog udara! Zabranjeno rastavljati uređaj i njegove delove prepravljati!
U slučaju bilo kojeg kvara ili oštećenja, odmah isključite uređaj i obratite se stručnom licu!
ODLAGANJE
Uređaje kojima je istekao radni veka sakupljajte posebno, ne mešajte ih sa komunalnim
otpadom, to oštećuje životnu sredinu i može da naruši zdravlje ljudi i životinja! Ovakvi se
uređaji mogu predati na reciklažu u prodavnicama gde ste ih kupili ili prodavnicama koje
prodaju slične proizvode. Elektronski otpad se može predati i određenim reciklažnim cen
-
trima. Ovim štitite okolinu, svoje zdravlje i zdravlje svojih sunarodnika. U slučaju nedoumi-
ca kontaktirajte vaše lokalne reciklažne centre. Prema važećim propisima prihvatamo i
snosimo svu odgovornost.

12
BAREVNÝ DOMOVNÍ VIDEOTELEFON
DŮLEŽITÉ BEZPEČNOSTNÍ POKYNY
TYTO POKYNY SI POZORNĚ PŘEČTĚTE A USCHOVEJTE PRO DALŠÍ POUŽITÍ!
BEZPEČNOSTNÍ UPOZORNĚNÍ
• Předtím, než začnete zařízení používat, si pečlivě přečtěte tento uživatelský manuál a tento si
uschovejte. Původní popis byl vyhotoven v maďarském jazyce.
• Po vybalení se ujistěte o tom, zda přístroj nebyl během přepravy poškozen. Obal se nesmí
dostat do rukou dětem, jestliže obsahuje sáčky nebo jiné nebezpečné komponenty!
• Tento přístroj mohou osoby, které mají snížené fyzické, smyslové nebo duševní schopnosti,
nebo které nemají zkušenosti a potřebné vědomosti, dále děti od 8 let, používat pouze v pří
-
padě, když je zajištěn odpovídající dohled nebo když byly takové osoby poučeny o používání
tohoto zařízení a pochopily možná nebezpečí spojená s bezpečným používáním. Je zakázá
-
no, aby si s přístrojem hrály děti. Čištění přístroje nebo běžnou uživatelskou údržbu smí děti
provádět výhradně pod dohledem.
• Určeno výhradně k používání v suchých interiérech! • V případě poškození síťového napájecí
-
ho kabelu nebo jiné anomálie přístroj okamžitě odpojte z elektrické sítě a kontaktujte odborně
vyškolenou osobu! • Nebudete-li přístroj delší dobu používat, odpojte jej z elektrické sítě! • Ka
-
bely spojující jednotky umísťujte v dostatečné vzdálenosti od jiných síťových kabelů! • Použití
příliš tenkých kabelů může způsobovat snížení kvality zvuku a obrazu. • Nepoužívejte zařízení
v blízkosti působení silného magnetického pole nebo magnetických zařízení. • Chraňte před
prachem, vysokou relativní vlhkostí vzduchu, tekutinami, vlhkem, mrazem a nárazy, dále před
působením zdrojů bezprostředně sálajícího tepla nebo slunečního záření. • Chraňte před stří
-
kající vodou, na přístroj nepokládejte předměty naplněné tekutinou, např. sklenici! • Na přístroj
nikdy nepokládejte zdroje otevřeného ohně, jakým je například hořící svíčka! • Přístroj neroze
-
bírejte, ani nijak neupravujte, protože byste mohli způsobit požár, úraz nebo zásah elektrickým
proudem! • Z důvodu přítomnosti elektrického napětí vždy dodržujte zásadní pravidla ochrany
zdraví a života. • Přístroje nebo napájecího kabelu je zakázáno dotýkat se vlhkýma rukama! •
Přístroj je určen k používání v domácnosti, není určen do veřejných prostor. • IP44: chráněno
ze všech směrů proti částečkám >1 mm a stříkající vodě. • Z důvodu průběžného vývoje se
technické parametry a design mohou měnit i bez předcházejícího oznámení. • Text aktuálního
návodu k používání je dostupný na webových stránkách www.somogyi.hu. • Neneseme odpo
-
vědnost za případné chyby v tisku a za tyto se předem omlouváme.
Nebezpečí úrazu elektrickým proudem!R ozebírání a přestavba přístroje nebo jeho
příslušenství je zakázáno! Při poškození kterékoliv části ihned odpojte ze sítě a vyhledejte
odborníka!

13
LIKVIDACE
Přístroje, které již nebudete používat, shromažďujte zvlášť a tyto nevhazujte do běžného
komunálního odpadu, protože mohou obsahovat látky nebezpečné pro životní prostředí
nebo škodlivé lidskému zdraví! Nepotřebné nebo nepoužitelné přístroje můžete zdarma
odevzdat v místě distribuce, respektive u všech takových distributorů, kteří se zabývají
prodejem zařízení, která mají stejné parametry a funkci. Odevzdat můžete i na sběrných
místech určených ke shromažďování elektronického odpadu. Tak chráníte životní pros
-
tředí, své zdraví a zdraví ostatních. V případě jakéhokoli dotazu kontaktujte místní organi-
zaci zabývající se zpracováváním odpadu. Úlohy předepsané příslušnými právními před-
pisy vztahujícími se na výrobce vykonáváme a neseme s tímto spojené případné náklady.
BiH
HR KOLOR VIDEO INTERFON
UPOZORENJA
• Prije prve uporabe proizvoda, pročitajte upute za uporabu i zadržite ih za kasniju uporabu.
Izvorne upute napisane su na mađarskom jeziku.
• Nakon raspakiranja uređaja, provjerite da nije oštećen tijekom transporta. Pakirni materijal
držite dalje od djece ako sadrži plastične vrećice ili druge potencijalno opasne komponente.
• Ovaj uređaj mogu koristiti djeca od 8 godina ili starija te osobe s fizičkim ili mentalnim nedosta
-
cima ili osobe bez iskustva, samo ako su pod odgovarajućim nadzorom ili ako su obaviještene
o tome kako koristiti proizvod na siguran način te ako razumiju potencijalne opasnosti. Djeci
se ne smije dopustiti igranje s ovim proizvodom. Djeca ne smiju obavljati čišćenje i korisničko
održavanje osim ako su starija od 8 godina i pod nadzorom.
• Samo za unutarnju uporabu, u suhim uvjetima. • U slučaju kvara napojnog adaptera ili bilo
koje druge vrste kvara, odmah ga isključite i obratite se ovlaštenoj osobi. • Kad se ne koristi,
isključite ga iz električne mreže. • Kablove koji povezuju jedinice postavite dalje od ostalih
kabela za napajanje. • Korištenje tanke žice može prouzročiti pogoršanje kvalitete zvuka i
slike. • Ne upotrebljavajte uređaj u blizini jakog magnetskog polja. • Zaštitite ga od prašine,
vlage, tekućina, vrućine, mraza, udara i izlaganja izravnom toplinskom zračenju ili sunčevog
svjetlu. • Ne izlažite uređaj prskanju vode i ne stavljajte predmete napunjene tekućinom ( npr .:
čaša ) na njega. • Ne izlažite uređaj otvorenom plamenu niti stavljajte izvor plamena na uređaj
(svijeća). • Ne pokušavajte rastaviti ili modificirati uređaj ili njegovu dodatnu opremu jer može
izazvati požar, nezgodu ili strujni udar. • Zbog prisutnosti mrežnog napona pridržavajte se
uobičajenih pravila zaštite života. • Zabranjeno je dodirivati adapter ili priključni kabel mokrim
rukama. • Uređaj je namijenjen samo za kućnu uporabu, ne za javnu uporabu. • IP44: zaštićen
PAŽLJIVO PROČITAJTE
UPUTE PRIJE UPORABE I SAČUVAJTE IH ZA DALJNJU UPORABU!

14
od predmeta >1 mm i od prskanja vode iz svih smjerova. • Zbog stalnog poboljšanja, dizajn i
specifikacije mogu se promijeniti bez prethodne najave. • riručnik s uputama može se preuze
-
ti s web stranice www.somogyi.hu. • Ne preuzimamo odgovornost za tiskarske pogreške i
ispričavamo se ako ih ima.
Opasnost od strujnog udara! Zabranjeno je rastaviti, modificirati uređaj ili njegov pribor!
U slučaju oštećenja bilo kog dijela proizvoda, odmah ga isključite iz struje i obratite se
stručnoj osobi!
RASPOLAGANJE
Uređaji koji se odlažu u otpad se trebaju izdvojeno prikupljati, odvojeno od otpada iz
kućanstva, jer mogu u sebi sadržati komponente koje su opasne po okoliš i ljudsko zdravl
-
je! Korišteni ili uređaji koji se odlažu u otpad se besplatno mogu odnijeti na mjesto njihove
distribucije, odnosno kod takvog distributera koji vrši prodaju uređaja istih karakteristika i
funkcije. Mogu se odložiti i na deponijima koji su specijalizirani za odlaganje elektronskog
otpada. Ovime Vi štitite Vaš okoliš, Vaše i zdravlje drugih ljudi. Ukoliko imate pitanja, obra
-
tite se lokalnoj organizaciji za odlaganje otpada. Prihvaćamo na sebe zakonom određene
obveze koje su propisane za proizvođače i sve troškove koji su u vezi s tim.

15
EN -Functions / H - Funkciók / SK - Funkcie / RO - Funcții / SRB-MNE - Funkcije / CZ - Funkce /
HR-BIH - Funkcije
FEATURES
EXPANDABLE INTO A VERSATILE SECURITY SYSTEM • 7” (17,5 cm)
extra thin monitor and outdoor camera unit • expandability: 2 outdoor units
with camera, 3 indoor units with monitor, 2 surveillance camera, 2 opening
sensors, television output* • fast, convenient, safe, hygienic door opening
for your family members • 5+2 pcs proximity keys for contactless unlock-
ing** • takes a photo or a video recording of the visitor • automatic and
manual recording options • memory expandable with microSD card (not
included) • ring volume and duration can be set according to the time of the
day • InterCom: home phone function for multiple indoor units • illuminated
touch buttons below the display • outdoor wall-mountable unit • night cam-
era mode with hidden infrared LEDs • illuminated bell button and aluminium
front panel • per unit selectable ringtone (12) • view function with photo and
video recording • lock opening when using an external electric lock (option)
• adjustable microphone sensitivity and speech volume • adjustable monitor
brightness, sharpness, color, volume • 4-wire wired connection between
the units • graphic menu languages: EN, HU, SK, CZ, CN • accessories:
rain protection frame, wall bracket for monitor, connection cable (~10 m),
mains adapter, fittings, 7 pcs RFID proximity keys (DPV 270RFID) • power
supply: mains adapter, accessory • outdoor / indoor unit: ~80 x 160 x 30
mm / 180 x 180 x 20 mm
USE
The device is ideal for replacing regular door phone systems and doorbells.
It can be expanded by connecting a second outdoor unit with camera and a
second indoor unit (not included). In addition, regardless of its type, two ad-
ditional surveillance cameras and external opening sensors (not included)
can be connected. The video output can be connected to any television or
monitor. These expansions require the help of a specialist and the purchase
of the accessories. Photos or video recordings can be taken from visitors
automatically or manually, the storage of them can be expanded by insert-
ing a microSD card (not included) into the device. Two electric locks can be
opened from the apartment, they need to be connected to the outdoor units.
The appropriate sound and image quality depends on the distance between
the devices and the cross-section of the cable used. For the given length
we recommend at least the following cable cross sections: 0 - 10 m: 4 x 0,3
mm2 / 10 - 30 m: 4 x 0,5 mm
2 / 30 - 50 m: 4 x 0,75 mm
2
You need to purchase the appropriate 4-wire cable separately if you need
longer than the nearly 10 meters long cable included in the packaging.
Make sure that the cable is connected correctly for both units. The order
of the colored wires of the outdoor unit is from left to right, the same is the
order of the wires of the indoor unit from top to bottom (e.g. DOOR1). It is
necessary to check, but usually these colors are used:
green: AUDIO / black: (-) GND / yellow: VIDEO / red: +12V
Terminals 5 and 6 of the outdoor unit can be connected with an electric
lock. To do this, use two-core cable, in the desired lengt2h :x 1,0 mm 2
(not included).
If you have an electric lock installed, family members arriving home can
conveniently open the lock using the supplied blue, contactless proximity
keys (RFID).
Ask a specialist to install the doorphone system. The menu is multilingual,
depending on the user, a basic knowledge of English may be required dur-
ing use.
INSTALLATION
Outdoor unit
Weather protection must be provided. Install the outdoor unit into a dry
place protected from rain and direct sunlight. Direct sunlight can degrade
image quality. Use a special protective cover if necessary. The external
unit is powered form the monitor. Connect with spring-cage connectors
according to the wiring diagram. On the back, you can use a screwdriver to
adjust the microphone sensitivity (left screw) and the speaker volume (right
screw). After installing the rain cover, place the camera on the hanger on
the inside and top of the rain cover, then pull it down and secure it to the
bottom with a short screw (supplied). Remove the protective film from the
lens, if equipped. If you also use an electric lock, it must be connected to
the external unit. If you do not use an external door opener circuit, the power
requirement of the electric lock must not exceed the parameters 12 V DC
/ 500 mA. An external transformer and relay must be used to operate a
higher power lock, but this is basically recommended in all cases.
If you purchase another outdoor unit of the same type, you can also connect
it to the indoor unit (DOOR2). This ensures that the system works at both
entrances.
Indoor unit
Depending on the distance between the two units, the connection cable
included in the package may be extended or replaced by a specialist as
described in the “USE” section. The required wiring must be purchased
separately based on individual needs. Guide them so that they are not in-
jured and are protected from the weather and physical influences. Before
plugging in the AC adapter, check that it is connected properly.
Screw the accessory metal frame to the wall, hang it, and then pull down
the indoor unit until it stops. First, plug the AC adapter into the rightmost
socket on the top row. The outdoor unit is connected to the upper left front
connector (DOOR1). Make sure that the order of the last four colored wires
is the same for the outdoor and indoor units.
If you purchase one or two additional indoor units of the same type, you
can also connect it to the first indoor unit (SLAVE IN or SLAVE OUT). This
ensures the operation of the system in up to three rooms / floors / buildings.
Do not place the device in a place exposed to sunlight, high temperatures
and moisture. There should be no electrical equipment nearby that could
interfere with its operation; e.g. TV, WiFi router, microwave, computer…
POSSIBILITY OF COMPLETE ALARM AND MONITORING SYSTEM
This device can be the center of a complete home alarm and surveillance
system. In addition to the outdoor unit with up to 2 cameras, you can con-
nect two additional surveillance cameras and opening sensor switches to
the indoor unit, for example to indicate the opening of a door and window.
An image of an unauthorized intruder can even be viewed on a television
or monitor while a photo or video is taken of it on a microSD card inserted
in the indoor unit.
Have this solution discussed with a specialist, taking into account local spe-
cifics. You can obtain the necessary additional accessories from specialist
shops, based on the wiring diagram above.
RECEIVING VISITORS
By pressing the bell button on the outdoor unit, the outdoor and indoor unit
beeps repeatedly (approx. 30s) and the screen turns on during the call (ap-
prox. 90s). The visitor’s image is displayed on the monitor.
If you want to talk with him/her, press the large ANSWER button and
the tone mutes, the conversation can be started.
If you have an electric lock, you can let the visitor in with the lock
release button. When the shutter is opened, the color of the LED ring
on the outdoor unit changes. The lock can only be opened from the
inside during a connection - this protects against accidental opening.
Finally, hang up the conversation. (You can also use this key to cancel
a call when the ringtone sounds.)
• If you have two outdoor units and (almost) press the ring button on both at
the same time, the first call button unit will take precedence. The monitor
will not indicate if the other external unit is receiving an alarm in the mean-
time - only if you have finished talking from that first unit.
• The monitor also turns off automatically after approx. After 2 minutes. That
can be the length of a conversation.
COLOR VIDEO DOORPHONE

16
• If you do not answer the call, approx. the monitor will turn off after one
and a half minutes.
• In ANSWER mode, depending on the status of the SETTING menu, you
can take a manual photo or video by pressing the SETTING button on
the side of the monitor. A recording is made automatically at the moment
of ringing.
CALL FORWARDING BETWEEN THE INDOOR UNITS
If the conversation with the visitor is already taking place as described
above, you have the option of a second indoor unit - e.g. to a more distant
room - forward the call to a family member.
Press the INTERCOM button and a ringtone will sound.
You can answer the call on the other indoor unit with the ANSWER
button.
If it has an electric lock, the visitor can also be admitted from the sec
-
ond device with the lock release button.
Hang up the conversation.
• When you forward a call, the first indoor unit turns off and the target unit
rings. At the same time, the visitor’s image is displayed on the screen.
• Call forwarding only works if one unit has “MASTER” and the other
“SLAVE” in the menu and they are connected properly.
VIEW
In standby mode, you can check the area around the entrance (approx.
60s) by pressing the VIEW button. You can hear what is happening outside,
but your voice cannot be heard through the speaker of the outdoor unit.
2 external camera units and 2 additional cameras can be connected to the
indoor unit at the same time. If all are enabled in the SETTING menu, up to
4 camera images can be viewed in succession on the indoor unit.
By pressing the VIEW button, you can scroll through the images of the
cameras for approx. operating them for 60-60 s in a row: DOOR1-CAM1-
DOOR2-CAM2, then turn off the monitor
In the meantime, if you want to talk to a person near that outdoor unit,
press the ANSWER button.
If you have an electric lock, you can let the visitor in with the lock
release button.
Finally, hang up the conversation and turn off the screen.
• If you have only one outdoor unit, you can exit this function by pressing
the VIEW button again - or exit automatically after approx. 60 s. In the
SETTING menu, the other camera options must be turned off: DOOR2,
CAM1, CAM2.
• In case of two indoor units, you can initiate the viewing of images from
outdoor cameras on each.
• If a conversation with the outdoor unit is in progress while the CALL button
is pressed on another outdoor unit, the conversation will be interrupted
and the new visitor’s image will be displayed on the monitor with a ringing
tone. The call must then be answered with the ANSWER button.
• In VIEW mode, depending on the status of the SETUP menu, you can
take a manual photo or video by pressing the SETUP ( ) button on
•
•
•
the side of the monitor.
TAKING A PHOTO OR VIDEO RECORDING
When the visitor rings or the buildable surveillance-alarm system alarms a
photo or video is taken automatically - depending on the menu settings you
can also use the side SETTING button to take recordings manually while
talking or using the view function. In PHOTO mode, you can store about
80-120 photos in the internal memory (64M), which can be expanded with a
microSD card. The amount (size) of photos depends on their content, such
as lighting conditions and colors.
To insert the VIDEO mode, a memory card (not supplied) is required. One
of the two recording options must be selected in the MODE menu. The
completed recordings can be viewed and managed in the FILES menu.
• Some video recordings that can only be made on a memory card are
about 14 seconds long.
• The recommended microSD card must be at least CLASS10 class and
up to 32GB in size.
• A symbol flashes in the center of the top bar of the screen during suc-
cessful shooting. On the left is the name of the active camera (DOOR1,
DOOR2, CAM1, CAM2).
• When you select a recording in the FILES menu, the SETUP button pro-
vides three options: view, delete the photo or video, or delete all record-
ings.
• The names of the files include the date and time they were created.
• Photos are taken in JPG format and videos in AVI format. You can also
view the recordings by transferring the memory card to a computer.
• You can copy (back up) photos stored in the internal memory to the mem-
ory card: SYSTEM / INFORMATION / BACKUP PICTURES
VIEWING THE IMAGE OF THE OUTDOOR CAMERAS ON TV
You can display the current image of the indoor unit on a TV or monitor with
video input. To do this, connect the TV-G (VIDEO OUT) connector on the
back of the indoor unit to the TV using a custom-made connection cable
(optional). To do this, consult a specialist.
As the system can also be expanded with opening sensors and surveillance
cameras - see the wiring diagram - an image of an unauthorized intruder
can even be displayed on the television immediately while recording.
INTERCOM: CONVERSATION BETWEEN THE INDOOR UNITS
If you have at least two indoor devices, they can call each other in standby
mode.
Press the INTERCOM button and the ringtone sounds.
Answer the call with the ANSWER button on the indoor unit.
Finally, hang up the conversation.
• If a visitor arrives during an internal conversation, the conversation is inter-
rupted, a ring tone is heard, and the visitor is displayed on the screen. As
usual, the call must be answered with the ANSWER button.
• The InterCom function only works if one unit is set to “MASTER” and the
other to “SLAVE” in the menu.
MENU SETTINGS
On the right side of the monitor - going from top to bottom - is the microSD
memory card slot for photos and videos, the SETTING (gear) button, the
up / down scroll buttons and the volume control of the monitor speaker.
SETTING button: take a photo or video during a conversation or view
/ activates the MENU function in standby mode / enters the selected
submenu and function / confirms the selected parameter
SCROLL buttons: you can select the desired menu / move for-
ward-backward in the different lists / change the parameters / setting
• If you use the scroll buttons to select the RETURN symbol and then press
the SET button, you can move up one level until you exit the menu.
• You can also exit the setup menu with the HANG UP button
• If you do not operate the unit, it will exit the MENU automatically after
about 60 s.
Press the SETTING button to display the main MENU. Use the SCROLL
buttons to select the desired menu item and confirm with the SETTING
button. Most menus have additional submenus or other setting options. You
can access them and select a function in a similar way. When you have
made the setting, go back one level by selecting the RETURN icon and
then pressing the SETTING button.
•
•
•
a numerical value

17
Example of setting the time: SETTING button to display the main menu
/ use the scroll buttons to move to the SYSTEM icon / SETTING button
/ move to the TIME icon / SETTING button / move to the year / SETTING
button / move the flashing year with the scroll buttons / fix with the SET-
TING button / move to the months / SETTING button / set the actual month
/ SETTING button / move to the days / SETTING button / set the actual day
/ SETTING button / move to the hours / SETTING button / set the number
of hours/ SETTING button / move to the minutes / SETTING button / scroll
the minutes / fix with the SETTING button / move to the RETURN icon /
with the SETTING button you can scroll back one level in the menu system
SYSTEM
• select the menu language
• set the current time and date
• you can check the firmware version number and release date, format
memory, save photos, firmware update and reboot (professional only)
• it is recommended to format the inserted microSD card (option) firstly
• not all the functions are available depending on the condition of the device
RING
• you can select different beeps for the two outdoor units, if you buy a sec
-
ond one later
• set different ring volumes and durations for up to three times of the day
(e.g. quieter and shorter beeps when resting)
• period: 00:00-23:59 / volume: 00-10 / duration: 15-60 s
• if you adjust the volume in the menu, first set the side manual volume
control to maximum (they affect each other)
MODE
• set the first indoor unit as the priority: MASTER
• if you later buy a second indoor unit, it must be the SLAVE device (marked
SLAVE socket in the wiring diagram.) In the case of two indoor units, the
• the outdoor units and additional cameras / opening sensors are connected
to the MASTER unit
• when using an outdoor unit, turn off the status of Door2: OFF
• the operating duration of the lock (not included) can be separately for each
outdoor unit (the lock set by a specialist installer)
• the lock must be obtained and installed in accordance with the design
of the door
• you can select if you want a photo taken or a video recorded when the
bell is ringed
• you can also record manually later by pressing the side SETTING button
ALARM
• with the involvement of a specialist, you can expand the doorphone with
max. two additional surveillance cameras and opening sensors of any
type in addition to the max. two outdoor units (see wiring diagram)
• in case of CAM1, CAM2 Sensor Type „ON” setting, the system detects
whether a closing or opening (quiescent current) contact is connected as
an opening sensor
• after the installation of the sensors, the surveillance cameras are also able
to sound an alarm or make an automatic recording of the intruder
• the ALARM settings are set by the installer specialist
COLOUR
• sets the image quality of the max. 4 cameras that can be connected to the
system (brightness – sharpness- color)
• when using the basic set, you can control the image quality of one outdoor
unit
SYSTEM LANGUAGE English, Deutsch,
Francais… selectable
languages
TIME Year, Month,
Day, Hour,
Minute
setting the year,
month, day, hour,
minutes
INFORMATION
Software
Version, Release
Date, Format
SD, Format
Flash, Backup
Pictures, Update,
Reboot
software version
and date, format
memory card
and internal
memory, back up
photos to card,
update, restart
RING Ring Select Door1: 01-12 ,
Door2: 01-12
12 selectable
ringtones for
the two outdoor
units
Ring Volume
Ring Vol1, Ring
Vol2, Ring Vol3
(Time / Volume /
Ring Time)
three different
volumes and ring
times can be set
for three periods
MODE Mode Master / Slave primary or secon-
dary device
Door 2 Status ON-OFF activation of a
second external
unit
Door1 Unlock
Time 0 - 10s 1.electric lock
operating time
Door2 Unlock
Time 0 - 10s 2.electric lock
operating time
Record Mode Snapshot /
Record shoothing mode:
photo or video
ALARM CAM1 Sensor
Type ON / OFF 1.opening sensor
activation
CAM2 Sensor
Type ON / OFF 2.opening sensor
activation
CAM1 ON / OFF 1.survelliance
camera acti-
vation
CAM2 ON / OFF 2.survelliance
camera acti-
vation
CAM1 Ring
Time 0 - 30s 1.opening sensor
signal duration
CAM2 Ring
Time 0 - 30s 2.opening sensor
signal duration
Alarm Record Snapshot /
Record recording mode:
photo or video
COLOUR Door 1 Brightness
/ Contrast /
Colour
1.outdoor unit:
brightness /
sharpness / color
(0-50)
Door 2 Brightness
/ Contrast /
Colour
2.outdoor unit:
brightness /
sharpness / color
(0-50)
CAM 1 Brightness
/ Contrast /
Colour
1.survelliance
camera: bright-
ness / sharpness
/ color (0-50)
CAM 2 Brightness
/ Contrast /
Colour
2.survelliance
camera kamera:
brightness /
sharpness / color
(0-50)
FILES Record Files Play / Delete File
/ Delete All play video, dele-
te, delete all
Snapshot Files Play / Delete File
/ Delete All view photo,
delete, delete all
RETURN one level up / exit
alarms are indicated by the Master device.

18
FILES
• find photos and videos separately in the two separate libraries
• the names of the files include the creation date and time
• for a file selected with the scroll buttons, the SETTING button offers three
options: view, delete, or delete all photos/recordings
RETURN
• by selecting the RETURN icon and pressing the SETTING button, you
can always move up one level in the menu system until the complete exit
• if you don’t press a button, approx. after 60 seconds it automatically exits
the settings
ADDITIONAL INFORMATION ABOUT ALARM FUNCTIONS (ALARM
OPTION)
In addition to the two outdoor units with camera, the doorphone can be ex
-
panded by a specialist with two surveillance cameras of any type and open-
ing sensors. (CAM1 and CAM2 connectors on the MASTER indoor unit)
When the ALM and GND contacts are operated, the alarm is heard
on the speaker of the indoor unit for about 120 s. If you touch HANG
UP button during this time, the alarm stops. Depending on the menu
setting, a photo or video can be taken automatically.
• the two sensors can have opening or closing contacts
• in case of CAM1, CAM2 Sensor Type „ON” setting, the system recogniz
-
es that wether there is a closing or an opening contact connected as an
opening sensor –either version can be used
• external +12V power supply required for opening sensors and “foreign”
cameras (without it only max. 150 mA)
• the ALARM menu functions for installation can be set by a specialist
USING THE PROXIMITY KEYS (RFID)
If you have an electric lock, you can not only let guests in by the touch of
a button while you are at home, but you and your family members can
also conveniently enter when arriving home. If you approach one of the
supplied 5 blue keys to the RFID module on the outdoor unit, the lock opens
for about 3s. This is indicated on the outdoor unit by a short beep and a
change in the blue light ring. The keys are aligned to your door phone via
unique coding.
In addition to opening, the RFID module can also delete keys or re-pair
them. Should you lose one of them or want to restrict the access of some-
one formerly given a key, you can delete all keys by a single move, so that
unauthorized people cannot enter your home. After deleting, you have to
re-pair the blue keys with the door phone. If you do not re-pair either of
them (for example, a lost one) it can no longer open the lock. If you want to
grant access to more than five people, or replace a lost or damaged key,
additional key sets can be purchased: “DPV 270RFID”. You have to register
these with the device before you can use them. Up to 24 keys can be paired
with the system.
Meaning of the colours: the blue user (USER) key is used for opening the
lock, the red one (CLEAN) for deleting all cards from the system at once,
and the yellow one (ADD) for adding blue keys. The cards supplied with the
door phone are already configured for the unit. If necessary, you can use
the following options.
Adding a new blue user key:
Move the yellow key close to the sensor. Double short beeps indicate that
you have switched to adding mode. Place the blue key you want to add
close to the sensor.
blue key to be registered, and so on. After app 20 second of inactivity, or
if you approach with the yellow key again, the
key adding mode. This is confirmed by a long beep. Keys beep. Keys
Deleting all previously paired (blue) user keys:
Move the red delete key (CLEAN) close to the sensor. A long beep indi-
cates that you have deleted all blue user keys used so far. After the beep,
the device returns to normal mode. The next time you use a deleted key,
you will hear triple beeps and it will no longer open the lock. If you want, you
can use the yellow key to re-pair the blue keys you want to use in the future.
Should you encounter any problem registering your keys, please, contact
our authorised service shop.
TROUBLESHOOTING
If there is no sound or image, check, that
- whether connection is according to the regulation
- whether there is power supply
- no wire is damaged
If the conversation can be heard quietly or the image quality is poor, check
that
- have used wires of sufficiently large cross-section
- do not exceed the recommended distances
- do not interfere with nearby electrical equipment for operation
- whether the menu and side volume control settings are correct
CLEANING
Before cleaning, power off the device by unplugging it from the mains! Use
a soft, dry cloth. Do not use aggressive cleaners and liquids.
Three beeps indicate a failed addition. Success .
is indicated by a longer beep.Then you can move on to the next
again, the device exits
newly added will have the same code as the ones previously paired.

19
JELLEMZŐK
SOKOLDALÚ BIZTONSÁGI RENDSZERRÉ BŐVÍTHETŐ • 7” (17,5
cm) extra lapos monitor és kültéri kamerás egység • bővíthetőség: 2 db
kamerás kültéri egység, 3 db beltéri egység monitorral, 2 db megfigyelő
kamera, 2 db nyitásérzékelő, televízió-kimenet* • gyors, kényelmes, biz-
tonságos, higiénikus ajtónyitás a családtagoknak • 5+2 db közelítő kulcs
az érintésmentes zárnyitáshoz • fénykép vagy videofelvételt készít a
látogatóról • automatikus és manuális felvételi lehetőség • microSD kár
tyával bővíthető memória (nem tartozék) • napszakhoz beállítható csen-
getési hangerő és időtartam • InterCom: házi telefon funkció több beltéri
egység esetén • megvilágított érintőgombok a képernyő alatt • falon
kívül szerelhető kültéri egység • éjszakai kameramód rejtett infravörös
LED-ekkel • világító csengőgomb és alumínium előlap • egységenként
külön kiválasztható csengetési dallam (12) • kitekintő funkció fénykép és
videofelvételi lehetőséggel • zárnyitás külső elektromos zár alkalmazása
esetén (opció) • szabályozható mikrofonérzékenység és beszédhangerő •
állítható monitorfényerő, képélesség, szín, hangerő • 4-erű vezetékes ösz-
szeköttetés az egységek között • grafikus menü nyelvei: EN, HU, SK, CZ,
CN • tartozékok: esővédő keret, fali monitortartó, csatlakozókábel (~10 m),
hálózati adapter, szerelvények, 7db RFID közelítő kulcs (DPV 270RFID) •
tápellátás: hálózati adapter, tartozék • külső / belső egység: ~80 x 160 x
30 mm / ~180 x 180 x 20 mm
ALKALMAZÁS
A készülék ideális a hagyományos audio kaputelefon-rendszerek vagy ajtó-
csengők kiváltására. Bővíthető egy második kamerás kültéri egység és má-
sodik beltéri egység (nem tartozékok) csatlakoztatásával. Ezen túlmenően,
típusától függetlenül további két tetszőleges megfigyelő kamera és külső
nyitásérzékelők is csatlakoztathatók (nem tartozék). A video kimenet egy
tetszőleges televízióra vagy monitorra köthető. Ezekhez a bővítésekhez
szakember és a kiegészítők beszerzése szükséges. A látogatókról auto-
matikusan és manuálisan fénykép vagy video felvétel készíthető, amelyek
tárolható mennyisége növelhető, ha microSD kártyát (nem tartozék) helyez
a készülékbe. Két elektromos zár is nyitható a lakásból, amelyek a kültéri
egységekhez csatlakoztatandók.
A megfelelő hang- és képminőség a készülékek közötti távolságtól és az
alkalmazott vezeték keresztmetszetétől függ. Az adott hosszúsághoz mini-
mum következő kábel keresztmetszeteket javasoljuk: 0 - 10 m: 4 x 0,3 mm2
/ 10 - 30 m: 4 x 0,5 mm
2 / 30 - 50 m: 4 x 0,75 mm
2.
A megfelelő 4-erű vezetéket külön kell beszereznie, ha a csomagban lévő
közel 10 méternél hosszabbra van szüksége. Ügyelni kell a vezeték előírás
szerinti bekötésére mindkét egység esetében. A külső egység színes ve-
zetékeinek sorrendje balról jobbra haladva, egyezzen meg a belső egység
vezetékeinek sorrendjével fentről lefelé haladva (pl.DOOR1)! Ellenőrizni
szükséges, de általában ezek a színek kerülnek alkalmazásra:
zöld: AUDIO / fekete: (-) GND / sárga: VIDEO / piros: +12 V
A kültéri készülék 5. és 6. csatlakozói összeköthetők egy elektromos zárral.
Ehhez két erű vezetéket kell alkalmazni, a kívánt hosszban: 2 x 1,0 mm2
(nem tartozék).
Ha van elektromos zár felszerelve, akkor a tartozék kék színű, érintésmen-
tes, közelítő kulcsokkal (RFID) lehetséges a zár kényelmes kinyitása a
haza érkező családtagoknak.
A kaputelefonrendszer üzembe helyezéséhez vegye igénybe szakember
segítségét! A menü többnyelvű, felhasználótól függően alap szintű angol
nyelvismeret szükséges lehet a használatba vételkor.
ÜZEMBE HELYEZÉS
Kültéri egység
Gondoskodni kell az időjárás elleni védelemről. A külső egységet szerelje
csapadéktól és közvetlen napfénytől védett helyre! A közvetlen napfény
ronthatja a képminőséget! Szükség estén alkalmazzon egyedi védő fedelet!
A külső egység tápellátása a monitorból biztosított. A rugós csatlakozókkal
kösse be a kapcsolási rajz alapján. A hátoldalon – csavarhúzóval – szabá-
lyozható a mikrofon érzékenysége (bal csavar) és a hangszóró hangereje
(jobb csavar). Az esővédő keret felszerelése után annak belső-felső részén
található akasztóra helyezze el a kamerát, majd húzza lefelé és rögzítse
alul a kerethez egy rövid csavarral (tartozék). Távolítsa el a védőfóliát az
objektívről, ha ellátták ilyennel! Ha elektromos zárat is alkalmaz, azt a külső
egységhez kell csatlakoztatni. Ha nem alkalmaz külső kapunyitó áramkört,
akkor az elektromos zár teljesítmény igénye ne lépje túl a 12V DC / 500mA
paramétereket! Nagyobb teljesítményű zár működtetéséhez külső transzfor
mátort és relét kell alkalmazni, de ez javasolt alapvetően minden esetben!
Ha beszerez még egy azonos típusú kültéri egységet, azt is csatlakoztat-
hatja a beltéri egységhez (DOOR2). Így biztosítva két bejáratnál is a rend-
szer működését.
Beltéri egység
A két egység távolságától függően a csomagban mellékelt csatlakozókábelt
szakember meghosszabbíthatja vagy kicserélheti az „ALKALMAZÁS” be-
kezdésben leírtak alapján. A szükséges vezetékeket külön kell beszerezni
az egyedi igények alapján. Úgy vezesse el azokat, hogy ne sérüljenek meg
és az időjárástól valamint a fizikai behatásoktól védett helyen legyenek.
Mielőtt a hálózati adaptert bedugja, ellenőrizze le a helyes csatlakoztatást!
A tartozék fém keretet a falra csavarozva, rá kell akasztani, majd ütközésig
lehúzni a beltéri egységet. Előzőleg a hálózati adaptert a felső sor, jobb
szélső aljzatába kell dugni. A kültéri egységet pedig a felső, bal első csat-
lakozójába (DOOR1). Ügyeljen rá, hogy az utóbbi négy színes vezeték
sorrendje egyezzen meg a kültéri és beltéri egységeknél!
Ha beszerez még egy vagy két azonos típusú beltéri egységet, azt is csat-
lakoztathatja az első beltéri egységhez (SLAVE IN vagy SLAVE OUT). Így
biztosítva akár három helyiségben / emeleten / épületben a rendszer mű-
ködését. Ne helyezze a készüléket olyan helyre, ahol napfénynek, magas
hőmérsékletnek és párának van kitéve. Ne legyen a közelében olyan elekt-
romos berendezés, amely zavarhatja működését; pl. televízió, WiFi router,
mikrohullámú sütő, számítógép…
KOMPLETT RIASZTÓ ÉS MEGFIGYELŐ RENDSZER LEHETŐSÉGE
E készülék központja lehet, egy komplett otthoni riasztó és megfigyelő
rendszernek. A beltéri egységhez az akár 2db kamerás kültéri egység
mellett csatlakoztathat további két tetszőleges megfigyelő kamerát és nyi-
tás érzékelő kapcsolókat, például ajtó és ablak kinyitásának jelzésére. Az
illetéktelen behatoló képe akár televízión vagy monitoron is látható, miköz-
ben fénykép vagy video felvétel készül róla a beltéri egységbe helyezett
microSD kártyára.
Ezt a megoldást a helyi sajátosságok figyelembe vételével, szakemberrel
egyeztesse. A szükséges további kiegészítőket szaküzletekben szerezheti
be, a fenti kapcsolási rajz alapján.
LÁTOGATÓ FOGADÁSA
A külső egység csengő gombját megnyomva, a kültéri és beltéri készü-
lék ismétlődő hangjelzést ad (kb.30s) és a híváskor a képernyő bekapcsol
(kb.90s). A monitoron megjelenik a látogató képe.
Ha beszélni akar vele, nyomja meg a nagyméretű VÁLASZ gombot
és a jelzőhang elhallgat, a beszélgetés elkezdődhet.
Ha rendelkezik elektromos zárral, beengedheti a látogatót a zár nyi-
tó gombbal. A zár nyitása közben a kültéri egység LED gyűrűjének
a színe megváltozik. A zár csak létrejött kapcsolat közben nyitható
bentről – ez véd a véletlen nyitástól.
Végül fejezze be beszélgetést. (A csengőhang megszólalásakor is
ezzel a gombbal törölheti a hívást.)
• Ha két kültéri egységgel rendelkezik, és (szinte) egyidejűleg nyomják meg
mindkettőn a csengő gombot, akkor az elsőként benyomott hívógombú
egység élvez elsőbbséget. A monitor nem jelzi, ha időközben a másik
külső egységről is jelzés érkezik – csak ha befejezte az első egységről
indított beszélgetést.
• A monitor automatikusan is kikapcsol kb. 2 perc elteltével. Ennyi lehet egy
beszélgetés hossza.
• Ha nem fogadja a hívást, akkor kb. másfél perc múlva kikapcsol a monitor.
• VÁLASZ módban – a BEÁLLÍTÁS menü állapotától függően – manuális
fotó vagy video felvételt készíthet a monitor oldalán található BEÁLLÍTÁS
gomb megnyomásával. A csengetés pillanatában automatikusan is készül
egy felvétel.
SZÍNES VIDEO-KAPUTELEFON

20
HÍVÁS ÁTIRÁNYÍTÁSA A BELTÉRI EGYSÉGEK KÖZÖTT
Ha a fent leírt módon már zajlik a beszélgetés a látogatóval, lehetősége van
egy második beltéri egységre - pl. egy távolabbi helyiségbe - továbbítani
családtagja felé a hívást.
Nyomja be az INTERCOM gombot és csengőhang hallatszik.
Fogadható a hívás a másik beltéri egységen a VÁLASZ gombbal.
Ha rendelkezik elektromos zárral, a második készülékről is beenged-
hető a látogató a zárnyitó gombbal.
Végül fejezze be beszélgetést.
• Hívás átirányításakor az első beltéri készülék kikapcsol, és a célkészülék
csenget. Ezzel egyidejűleg képernyőjén a látogató képe is megjelenik.
• A hívásátirányítás csak akkor működik, ha az egyik egység „MASTER”, a
másik „SLAVE” beállítással rendelkezik a menüben és azok megfelelően
vannak csatlakoztatva.
KITEKINTÉS
Készenléti állapotban megnyomva a KITEKINTÉS gombot, ellenőrizheti a
bejárat környékét (kb.60s). Hallhatja a kint történteket, de az ön hangja nem
hallható a kültéri egység hangszóróján.
A beltéri egységhez egyidejűleg 2 külső kamerás egység és további 2 ka-
mera csatlakoztatható. Amennyiben a BEÁLLÍTÁS menüben engedélyezve
van valamennyi, a belső egységen akár 4 kamera képe is megtekinthető
egymás után.
A KITEKINTÉS gombot nyomkodva, léptetheti a kamerák képeit, kb. 60-
60s ideig működtetve egymás után azokat: DOOR1-CAM1-DOOR2-CAM2,
majd a monitor kikapcsolása.
Ha eközben beszélni akar az adott kültéri egység közelében lévő em-
berrel, nyomja meg a VÁLASZ gombot.
Ha rendelkezik elektromos zárral, beengedheti a látogatót a zár nyitó
gombbal.
Végül fejezze be beszélgetést és kapcsolja ki a képernyőt.
• Ha csak egy kültéri egységgel rendelkezik, a KITEKINTÉS gomb újabb
benyomásával kiléphet ebből a funkcióból – vagy kilép automatikusan kb.
60s elteltével. A BEÁLLÍTÁS menüben ki kell kapcsolni a többi kamera
opciót: DOOR2, CAM1, CAM2.
• Két beltéri egység esetén mindegyiken kezdeményezheti a kinti kamerák
képének megtekintését.
• Ha éppen tart egy beszélgetés a kültéri egységgel, és közben egy másik
kültéri egységen megnyomják a HÍVÓ gombot, akkor a beszélgetés meg-
szakad és az új látogató képe jelenik meg a monitoron, hívóhang kísére-
tében. A hívást fogadni kell ezután a VÁLASZ gombbal.
• KITEKINTÉS módban – a BEÁLLÍTÁS menü állapotától függően – manu-
ális fotó vagy video felvételt készíthet a monitor oldalán található BEÁLLÍ-
TÁS ( ) gomb megnyomásával.
•
•
•
FOTÓ VAGY VIDEÓFELVÉTEL KÉSZÍTÉSE
A látogató csengetésekor, illetve a kiépíthető megfigyelő-riasztó rendszer
jelzésekor - a menü beállításaitól függően - fénykép vagy video felvétel
készül automatikusan. Az oldalsó BEÁLLÍTÁS gombbal manuálisan is ké-
szíthet felvételeket beszélgetés vagy a kitekintő funkció használata közben.
FOTÓ módban kb.80-120 fényképet tárolhat a belső memória (64M), amely
bővíthető microSD kártyával. A fotók mennyisége (mérete) függ azok tartal-
mától, például a fényviszonyoktól és a színektől.
A VIDEÓ mód működéséhez szükséges a memóriakártya behelyezése
(nem tartozék). A két felvételi lehetőség közül az egyiket a MODE menüben
kell kiválasztani. Az elkészült felvételeket a FILES menüben lehet megte-
kinteni és kezelni.
• A kizárólag a memória kártyára készíthető egyes videó felvételek hossza
kb.14 s.
• A javasolt microSD kártya legalább CLASS10 osztályú és maximum 32GB
méretű legyen.
• Sikeres felvétel készítés közben a képernyő felső sávjának közepén egy
szimbólum villog. A bal oldalon pedig az aktív kamera elnevezése olvas-
ható (DOOR1, DOOR2, CAM1, CAM2).
• A FILES menüben kiválasztva egy felvételt, a BEÁLLÍTÁS gomb három
lehetőséget biztosít: a fénykép vagy videó megtekintése, törlése, vagy az
összes felvétel törlése.
• A fájlok neve tartalmazza az elkészítés dátumát és időpontját.
• A fényképek JPG, a videók AVI formátumban készülnek. A memória kár-
tyát áthelyezve számítógépbe, azon is megtekinthetők a felvételek.
• A belső memóriában tárolt fotókat átmásolhatja (biztonsági mentés) a me-
mória kártyára: SYSTEM / INFORMATION / BACKUP PICTURES
A KÜLSŐ KAMERÁK KÉPÉNEK MEGTEKINTÉSE TELEVÍZIÓN
A beltéri egység aktuális képét megjelenítheti video bemenettel rendelke-
ző televízión vagy monitoron. Ehhez a beltéri egység hátoldalán található
TV-G (VIDEO OUT) csatlakozót kell egy egyedileg elkészített csatlako-
zókábelt (opció) alkalmazva össze kötni a televízióval. Ennek érdekében
forduljon szakemberhez!
Mivel a rendszer nyitásérzékelőkkel és megfigyelő kamerákkal is bővíthető
– lásd a kapcsolási rajzot – akár azonnal megjelenhet az illetéktelen beha-
toló képe a televízión is, miközben felvétel készül róla.
INTERCOM: BESZÉLGETÉS A BELTÉRI KÉSZÜLÉKEK KÖZÖTT
Ha legalább két beltéri készülékkel rendelkezik, készenléti állapotban ezek
hívhatják egymást.
Nyomja be az INTERCOM gombot és csengőhang hallatszik.
Fogadja a hívást a másik beltéri egységen a VÁLASZ gombbal.
Végül fejezze be beszélgetést.
• Ha belső beszélgetés közben látogató érkezik, akkor a beszélgetés meg-
szakad, csengőhang hallatszik és a képernyőn látható a látogató. A szo-
kásos módon, a VÁLASZ gombbal kell fogadni a hívást.
• Az InterCom funkció csak akkor működik, ha az egyik egység „MASTER”,
a másik „SLAVE” beállítással rendelkezik a menüben.
A MENÜ BEÁLLÍTÁSAI
A monitor jobb oldalán található - fentről lefelé haladva - a microSD me-
móriakártya aljzat a fotók és videók számára, a BEÁLLÍTÁS (fogaskerék)
gomb, a fel/le léptető gombok és a monitor hangszórójának hangerő-sza-
bályozója.
BEÁLLÍTÁS gomb: beszélgetés vagy kitekintés közben fotót vagy
videót készít / készenléti állapotban a MENÜ funkciót aktiválja / be-
lép a kiválasztott almenübe és funkcióba / megerősíti a kiválasztott
paramétert.
LÉPTETÉS gombok: kiválaszthatja a kívánt menüpontot / haladhat
előre-hátra a különböző listákban / megváltoztathatja a paramétere-
ket, számérték beállítás
• Ha a léptető gombokkal a RETURN szimbólumot kiválasztja, majd be-
nyomja a BEÁLLÍTÁS gombot, egy szinttel feljebb léphet – egészen a
menüből való kilépésig.
• A beállító menüből kiléphet a HÍVÁS VÉGE gombbal is.
• Ha nem kezeli a készüléket, az kb.60s elteltével automatikusan kilép a
MENÜ-ből.
Nyomja be a fő MENÜ megjelenítéséhez a BEÁLLÍTÁS gombot. A LÉPTE-
TÉS gombokkal válassza ki a kívánt menüpontot, majd ezt erősítse meg
a BEÁLLÍTÁS gombbal. A legtöbb menü rendelkezik további almenükkel
vagy egyéb beállítási lehetőségekkel. Azokba is hasonló módon léphet be
•
•
•
Table of contents
Languages:
Other Somogyi Intercom System manuals

Somogyi
Somogyi home DPV User manual

Somogyi
Somogyi DB 402 User manual

Somogyi
Somogyi home DPV WIFI 100 User manual

Somogyi
Somogyi home DPV User manual

Somogyi
Somogyi home DPV 27 User manual

Somogyi
Somogyi DP 011 User manual

Somogyi
Somogyi home DPV 27 User manual

Somogyi
Somogyi home DPV 30 User manual

Somogyi
Somogyi Home DPV 23 User manual

Somogyi
Somogyi DPV 24 User manual