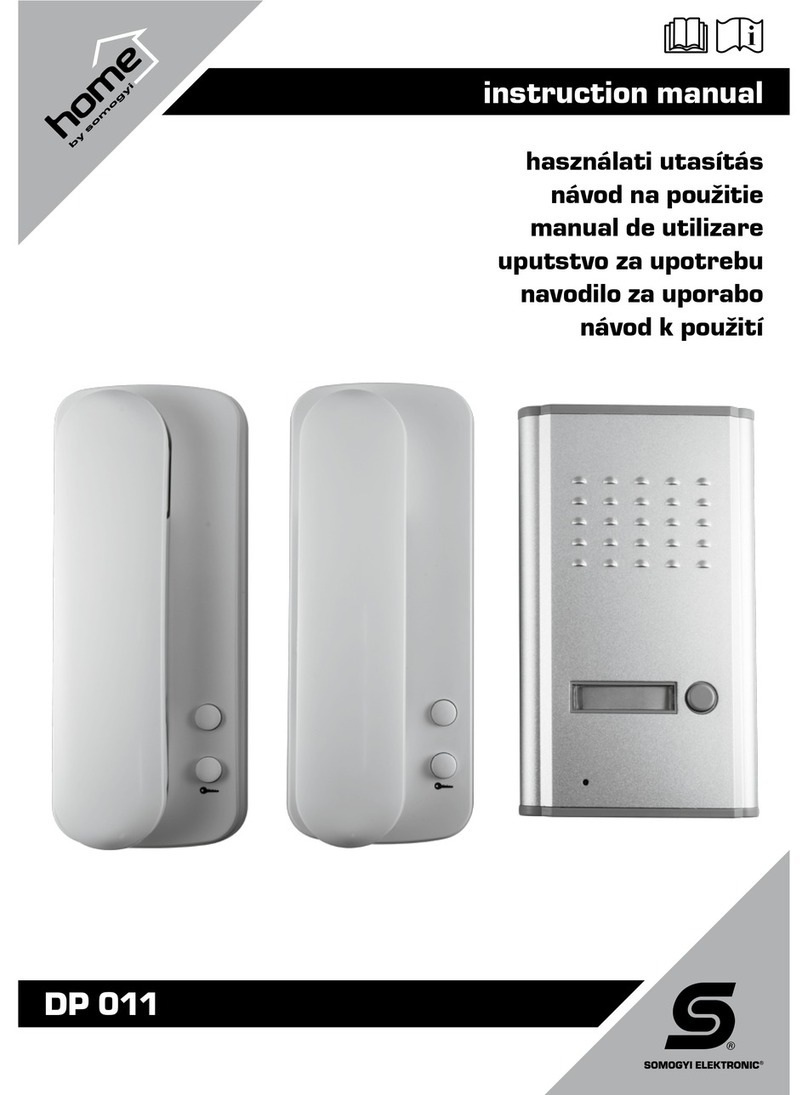
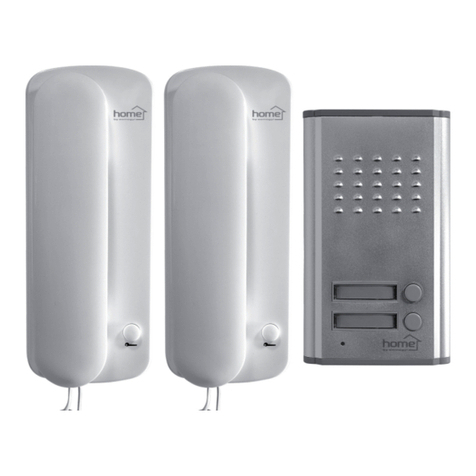
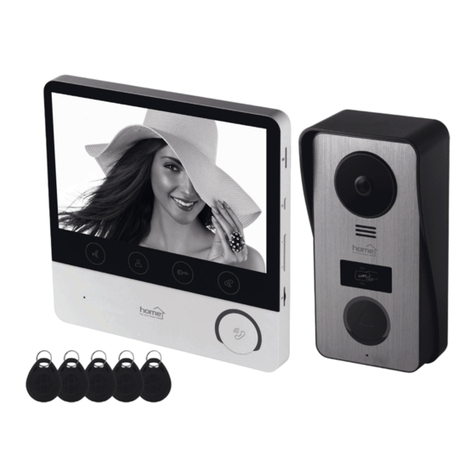
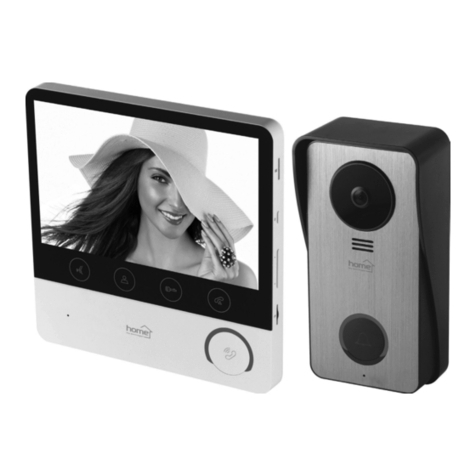
Somogyi home DPV WIFI 100 User manual

DPV WIFI 100
instruction manual
eredeti
használati utasítás
návod na použitie
manual de utilizare
uputstvo
za upotrebu

1.
8.
9.
10.
11.
12.
13.
14.
15.
16.
17.
7.
3.
4.
5.
6.
2.

EN HSK RO SRB-MNE
1. light sensor fényérzékelő senzor svetla senzor de
lumină senzor svetlosti
2. microphone mikrofon mikrofón microfon mikrofon
3. ring button csengő gomb tlačidlo
zvončeka buton sonerie taster zvona
4. indicator LED LED fényjelzés LED kontrolka Indicator
luminos LED LED indikacija
5. PIR sensor mozgásérzékelő senzor pohybu senzor de
mișcare senzor pokreta
6. speaker hangszóró reproduktor difuzor zvučnik
7. rain cover esővédő keret rám proti dažďu cadru de
protecție
împotriva ploii okvir - zaštita
8. camera, infra
LEDs kamera, infra
LED kamera, infra
LED cameră, infra
LED kamera, IR LED
9. card slot inside kártya foglalat
belül zásuvka karty
vo vnútri
slot pentru
carduri în
interior
ležište kartice
sa unutrašnje
strane
10. microUSB port microUSB töltő
aljzat
microUSB
nabíjacia
zásuvka
priză de
încărcare
microUSB
microUSB
utičnica za
punjenje
11. reset button törlés gomb tlačidlo vymazať butonul de
ștergere reset taster
12. anti-theft screw lopásgátló
csavar skrutka proti
krádeži șurub antifurt šaraf protiv
krađe
13. external power
port külső tápellátás externé
napájanie
sursă de
alimentare
externă
spoljno
napajanje
14. volume hangerő hlasitosť volum jačina zvuka
15. melody select dallamválasztó výber melódie selectare
melodie odabir melodije
16. melody select dallamválasztó výber melódie selectare
melodie odabir melodije
17. set beállítás nastavenie setare podešavanje

4
SMART VIDEO DOOR PHONE
WARNINGS
● Before use of the product, please read this instructions manual and keep
it for future reference. The original document was prepared in Hungarian
language. This appliance can be used by children aged 8 years or above
and persons with reduced physical, sensory or mental capabilities or
lack of experience and knowledge, provided that they are supervised
or have been given instructions concerning the use of the appliance
and understand the hazards involved. Children may not play with the
appliance. Children may perform the cleaning or user maintenance of the
appliance subject to supervision. After removal of the packaging, inspect
the product for possible damage during shipment. Keep the packaging
away from children if it contains plastic bags or other potentially hazardous
items. ● Software and hardware circumstances outside the control of
the manufacturer may affect the operation of the device. ● The mobile
application may be altered by a third party independently and without the
knowledge of the manufacturer of the device; therefore, proper operation
cannot be guaranteed under all circumstances. ● The manufacturer
cannot be held responsible for lost or corrupted data, etc., even if the
data, etc., are lost while this product is in use. It is recommended to create
regular backups of the data and photographs found on the mobile device
and the memory card, for example on a personal computer. ● If you are
not planning to use the device for a longer period, remove the charged
battery. ● Do not operate the device near a strong electromagnetic
field. Radio frequency devices operated nearby and larger metal objects
may cause abnormal operation; this does not indicate a malfunction of
the product. ● IP54: dust protection (a non-damaging amount of dust
inside the device is permissible), protected against sprayed water (from
all directions) ● Turn off the device immediately if you notice any errors,
and contact your dealer. Many signs of irregular operation (no picture,
unpleasant smell, foreign object in the device, etc.) are easy to detect. ●
Incorrect installation or unprofessional use will void the product warranty.
● After the useful life of the product, it is to be considered as hazardous

5
waste. After the removal of the battery, it is to be disposed of in accordance
with the local regulations. ● This device is for household use; it is not
intended for industrial or commercial applications. ● Somogyi Elektronic
Kft certifies that the appliance complies with Directive 2014/53/EU. The full
text of the EU Declaration of Conformity is available at somogyi@somogyi.
hu. ● Due to continuous development, the technical specifications and
design of this product may change without prior notice. ● The most recent
instructions manual is available for download from the www.somogyi.
hu website. ● However we regret such inconvenience, we do not take
any responsibility for possible printing errors. ● All trademarks and trade
names form the property of their respective owners. Third party services
are not guaranteed.
The product is not a toy. Keep out of reach of children.
DISPOSAL
Waste equipment must be collected and disposed separately from
household waste because it may contain components hazardous
to the environment or health. Used or waste equipment may be
dropped off free of charge at the point of sale, or at any distributor
which sells equipment of identical nature and function. Dispose
of product at a facility specializing in the collection of electronic
waste. By doing so, you will protect the environment as well as the
health of others and yourself. If you have any questions, contact
the local waste management organization. We shall undertake
the tasks pertinent to the manufacturer as prescribed in the
relevant regulations and shall bear any associated costs arising.
DISPOSING OF ALKALINE AND RECHARGEABLE BATTERIE
Batteries, whether alkaline or rechargeable, must not be handled
together with regular household waste. It is the legal obligation of
the product’s user to dispose of batteries at a nearby collection
center or at a retail shop. This ensures that the batteries are
ultimately neutralized in an environment-friendly way.

6
INTRODUCTION
The product is compatible with smartphones. Accordingly, at the time of
writing of this description, it is assumed that the user has the general
knowledge necessary for handling smart phones and the Internet. Settings
and use are quite similar to that of smart phones or tablet computers. A
basic knowledge of English is recommended.
The device has complex features. Its operation is influenced by many
external software, hardware, service provider, location and environment
related factors that are outside the manufacturer’s control. Malfunctions
may occur that are not deficiencies of the unit.
The operating system and other software or services required for the
operation of the device are supplied by third parties whose current status,
changes, development efforts, updates or functioning are outside the
control of the manufacturer of this product. For this reason, full functioning
cannot be guaranteed in all circumstances. The application is under
continuous development; therefore, descriptions, function, and menus may
change over time. The information provided here is accurate at the time of
the product launch. The quality of the various audio or video files may vary
due to different parameters.
USE AND KEY FUNCTIONS
The device is ideal for replacing traditional door phone systems and
doorbells. The included wireless doorbell plays the selected melody and
gives a light signal as well. In addition, it can also be used as a motion-
detecting light. The exterior unit in internet enabled (WiFi). With the help
of the TUYA application, which can be installed on smartphones, which
have access to the internet and run on Android or iOS operating systems,
you can access and control your door phone remotely from anywhere,
as long as it is connected to the internet. You will hear when someone
rings the doorbell, you can see the visitor, and even take photographs or
video footage of them. The alarm (motion detection) function notifies you
of movement in front of your door even if the doorbell is not rung. You can
set the device up to take photographs automatically either when movement
is detected or the doorbell button is pushed.

7
● When the visitor rings the doorbell, you get a notification on your
smartphone as well. You can see and hear them, even talk to them.
Your mobile telephone should be further away from the door phone
than 5 metres to reduce interference. If your mobile phone does not
notify you of a visitor, check if the application is running and if you
gave it the permissions necessary for its operation. In the battery
saver menu of the energy saving settings, it is recommended to set
the TUYA application as an exception.
● You will also receive a notification and a photograph if the device
detects movement. Provided that you have previously enabled this
option.
● You can also give permission to family members to use the application
on their own smartphones and communicate with the visitor.
● When the doorbell is rung, a photograph is taken and saved to the
microSD card (not included) or a cloud-based storage space (third
party service). Even without these, you can take manual photographs
or video footage and save it to your mobile telephone.
● The automatic night mode allows surveillance both at day and at night.
If the lighting conditions are poor, the image will switch to black and
white. You can also use the hidden infrared light.
INSTALLATION
Choose the place of the exterior unit so that it is not exposed to direct
sunlight or rain. If necessary, use a protective cover (purchased separately)

8
and contact a professional. Install it at a height (approx. 165 cm) and facing
in a direction that allow the face of the visitors to be seen clearly. If installed
on a metal surface, the range of the wireless connection (doorbell and
internet) will be considerably reduced. First mount the outer cover in a
stable manner, then place the exterior unit inside, and finally fix the two
parts to each other using a screw on the bottom. Make sure that the rubber
cover of the charging port is completely sealed. You can also apply a small
piece of adhesive tape to prevent any moisture or dust from entering the
port even in the case of extreme weather.
● Before mounting it on the wall, verify that the entire system functions
correctly by placing the units at their intended locations, taking range
into account. Walls, larger metal objects, and certain electronic
equipment (e.g. router, microwave oven, refrigerator) can reduce
the range of the wireless doorbell and/or the internet network. If
the WiFi connection is weak, place the door phone and the router
closer to each other. In certain cases, a WiFi signal repeater might
be necessary to use.
● The red and black pair of wires on the back are for connecting a
continuous power supply. These have to be connected only if you
intend to operate the device in wired (non-battery) mode. In such
cases, the necessary mains adapter and cable have to be purchased
separately based on individual needs. The cable has to be installed
so that it cannot be damaged by weather or physical impacts. Before
plugging in the mains adapter, check if the polarity is correct. (red:
+ black: - / AC/DC 12-24V/1A) (optional: e.g. NA 12P100 adapter,
connected by a professional)
A., INSTALLATION USING ADHESIVE
Stick the holder onto a flat, clean, dust- and grease-free, non-metallic
surface using double sided tape. After the removal of the protective foil,
press it against the wall with force for 30 seconds. Afterwards, place the
door phone into the holder and fix it in place using the anti-theft screw. The
longevity of the adhesive may be affected by the weather.
9
B., INSTALLATION USING SCREWS (RECOMMENDED)
Mount the cover in a manner appropriate for the material of the wall in
question (using screws and dowels). Afterwards, place the door phone into
the holder. First, push the back rim of the top inwards and upwards until it
will not go any further, then press in the bottom as well. Finally, fix it in place
using the anti-theft screw.
● Place it in a location where it is not exposed to direct sunlight or rain.
If necessary, use a custom cover.
● Moisture must not be able to enter between the holder and the wall.
Seal and insulate it as needed.

10
REMOVAL OF THE DOOR PHONE FROM THE COVER
You can dismount the device from the wall
to take it inside your home to charge or clean it.
Turn it off. Remove the small screw on the bottom.
Grab the device, push it upwards, then lift it
our of the holder.
INSTALLATION of a microSD (TF) CARD (not included)
If a memory card is installed, a photograph is automatically taken of visitors
when they ring the doorbell. It is recommended to purchase and install a
Class10+ max.128GB FAT32 formatted memory card. Turn off the device.
Remove the screw on the bottom and lift the device out of the holder.
Remove the battery – See below. After this, unscrew the six identical
screws holding the backplate on and find the card slot under the backplate.
Carefully insert the memory card. If necessary, contact a professional, to
avoid damaging the device. You can find the recordings saved to the card
under the Playback menu.
● When the doorbell is rung, the automatic photograph is saved to the
card.
● You can save manually made photographs and video footage on your
mobile phone even without a memory card being installed. These are
available in the TUYA application’s and your mobile telephone’s own
gallery. The recordings made by the motion detector are saved on
your mobile telephone and can be found in the Messages folder of
the TUYA application.
● Another option is to use the cloud storage service of a third party;
however, this might incur additional costs.

11
TWO POWER SUPPLY OPTIONS
The device is equipped with a built-in replaceable battery. This allows it to
be used in places where there is no mains power available at the fence or
gate. For example in weekend houses, resorts, or rented properties, where
a mains connection cannot be implemented. It is also useful if you only
need the device temporarily, for a shorter period of time. It can be used as
wireless CCTV as well, since it can be placed anywhere. If necessary, it
can be moved somewhere else within seconds.
In addition, if it is possible to use a mains supply cable, the device can be
operated using a mains adapter (AC/DC 12-24V/1A, not included) as well.
The wires found inside the wall mounter can be used for this purpose. (red:
+, black: -) In this case, it is not necessary to keep the battery charged.
(optional: e.g. NA 12P100 adapter, connected by a professional)
BUILT-IN BATTERY
The built-in battery provides approx. 3 months of continuous operation
on a full charge. This was measured with two half-minute conversations
per day at room temperature. The length of time the device can run on a
single charge can be extended if the motion detector is turned off (PIR)
and the Offline notification option is disabled. If possible, avoid continuous
motion in front of the device as it uses a multi-step energy saving mode.
It only switches to the most energy efficient ‘sleep’ mode after a longer
period of no movement. The current charge level can be checked using the
application. To protect the longevity of the battery, it is not recommended
to let it go below 20-30%. Since capacity is reduced in the cold, it is
recommended to charge it before the winter and pay increased attention to
the charge level in order to ensure continuous operation. The application
can send a notification well before the device runs out of charge.
To charge the device, lift it out of the wall holder after removing the screw
found on the bottom. Clean it using a clean wipe. The charger (5V/2A,
not included) has to be connected to the microUSB port located under
the rubber cover on the side of the device. The full charging process
takes about 5 hours, which is sufficient for 3 months of operation. During
charging, keep the device turn on. After charging is complete, a notification

12
will appear on your mobile telephone. Before the first charge, loosen or
remove the back cover of the battery holder, after unscrewing the 3+2
screws. Pull out the sealing strip if one was installed on the battery. Put
back the middle section of the back cover. Connect the microUSB charging
cable, then turn the device on by holding the bell button down for approx.
5 seconds. The mains charger is not included, the use of e.g. SA 24USB,
SA 50USB chargers is recommended. Charge it for 4-5 hours before the
first use. At the end of its lifecycle, the battery can be replaced. You can
find replacements at speciality retailers. The polarity to be observed is
indicated inside the battery holder.
● ATTENTION! EXPLOSION HAZARD IF THE BATTERY IS NOT
REPLACED CORRECTLY! CAN ONLY BE REPLACED WITH AN
IDENTICAL MODEL OR A SUITABLE REPLACEMENT. DO NOT
EXPOSE THE BATTERY TO DIRECT HEAT OR SUN RADIATION
AND DO NOT THROW IT INTO FIRE! IF ANY FLUIDS HAVE LEAKED
FROM THE BATTERIES, CLEAN THE BATTERY COMPARTMENT
WITH A DRY CLOTH WEARING PROTECTIVE GLOVES.
Keep the BATTERY AWAY FROM CHILDREN. NEVER OPEN
UP, THROW INTO FIRE, OR SHORT CIRCUIT THE BATTERY.
EXPLOSION HAZARD!
● At the end of the lifecycle of the product, the battery has to be removed
and disposed of independently of the device, in accordance with the
local regulations.
SETUP AND OPERATION
The device automatically turns on when a visitor arrives (when it detects
movement). Depending on the settings, it can take a photograph of the
visitor and the blue light of the button, which activates when movement
is detected, shows that it can be pressed. After this, the wireless bell
located inside the apartment will ring and the mobile telephone will show
a notification.
The exterior unit is ready for operation if its battery has been charged or it
is connected to an external power supply via a cable. The device can be
turned on or off by holding the bell button for approx. 4-5 seconds. Later,

13
if the device malfunctions or cannot connect to the mobile telephone, you
can reset it to factory settings using the RESET button under the rubber
cover. Use a paper clip to hold down the hidden button (min. 3s), after
which you will hear an audible indication that the operation was successful.
After turning on the device, the LED ring around the button will flash in
first red, then blue, and finally it will light up continuously. In order to save
battery charge, a motion detector monitors the presence of any visitors.
The rest of the functions of the door phone will only be activated if motion
is detected, and the internet connection is only established and the bell
button can only be pushed if the light is blue. After a while, the device
enters standby mode. After a longer period, it enters into the energy saving
‘sleep’ mode if it does not detect any movement.
The device wakes up similarly if you turn on CCTV surveillance remotely,
using your mobile telephone. After you have finished viewing the image
and exit this function on your mobile telephone, the device will once again
return to the energy saving motion detection mode.
An internet connection is necessary for using all of the functions. The
device can be controlled using an application installed on a mobile
telephone. If necessary, contact a professional to help set up the door
phone system.
WIRELESS DOORBELL WITH MOTION-DETECTING LIGHT
If the doorbell button is pushed, in addition to your mobile telephone, the
doorbell will also play a melody and give a light signal. The wireless doorbell
is supplied with electricity via a microUSB cable. The mains charger is not
included, the use of e.g. SA 24USB, SA 50USB, or similar chargers is
recommended. In addition, it can also be connected to a computer or other
USB port. You can hang the doorbell on the wall or place it on its flat bottom
on top of furniture. Do not place it on its side, as this is where the speaker
is located. Remove the protective foil from its front if one has been applied.
Its range is approx. 35 metres in open field. This is reduced by walls, metal
objects, and nearby devices using radio frequency.

14
The doorbell is operated using the buttons on its side: VOLUME - MELODY
SELECTION FORWARD OR BACKWARD - SET
The door phone and the doorbell are generally paired upon leaving the
factory. If in spite of this, the doorbell does not ring, e.g. because of
interfering nearby radio technology equipment, it might be necessary to
perform the pairing using new encoding. Please follow the steps below.
Hold down the SET (cog) button for at least 3 seconds until the doorbell
makes a sound (bird call). After placing the door phone nearby, press
its button twice within 30 seconds. If the doorbell rings, the pairing was
successful. If it does not ring, press the button of the door phone twice
again. Repeat the process until successful.
Removing a pairing: hold down the SET button for at least 10 seconds,
until the doorbell rings twice.
LIGHT FUNCTION
On the front cover of the doorbell, an LED, a PIR infrared motion detector,
and a light detector can be found. The (white) light turns on when it is dark
and it detects motion and remains on for approx. 30 seconds after the
movement stops. Position the doorbell so that the motion detector can see

15
the desired area. When the doorbell is rung, the light flashes in blue, at the
same time as the melody is played.
TUYA SMART APPLICATION TO BE INSTALLED
With the help of the application, the following key functions are available
anywhere in the world using an internet-enabled mobile telephone or
tablet with the required operating system, provided that there is a working
internet connection both where you are staying and where the device is
installed (at your home).
TAKE PHOTOGRAPHS AND SEND NOTIFICATIONS IF A VISITOR
RINGS THE DOORBELL, CONVERSATION WITH THE VISITOR,
TAKING MANUAL PHOTOGRAPHS OR VIDEO FOOTAGE, MOTION
DETECTION ALARM, VIEW OF THE PROPERTY OR YOUR CAR...
The TUYA application is available on devices running Android and iOS
operating systems as well. Look for the TUYA SMART application in the
app store. Check if the operating system of your telephone is suitable for
installing the application. Downloadable by scanning a QR code as well,
which takes you to the appropriate app store.
THE WiFi ROUTER
The device supports only 2.4GHz connections; it cannot be connected to
5GHz networks. Set up your WiFi router accordingly. The WiFi password
cannot contain special characters, such as ~!@#$%&*... The name of the
network and the password cannot be longer than 24 characters each.
During the setup process, place both the door phone and the mobile
telephone near the router and ensure that they both connect to the same
WiFi network. If you wish to connect the device to a new router later on,
remove the device from the application, then reset it to its factory settings
using the RESET function. Perform the configuration process once again.

16
REGISTRATION
Open the TUYA application. Select registration. Read and accept the terms
and conditions. Provide the data requested. After a successful registration,
open the application.
ADDING THE DOOR PHONE TO THE APPLICATION
Tap the ‘Add Device‘ or the ‘+’ icon. Select the ‘Security & Video
Surveillance‘ category and the ‘Smart Camera (WiFi)‘ or the ‘Smart
Doorbell’ product category within that.
Turn on the door phone by holding down the doorbell button for approx.
5 seconds. The red LED ring will flash rapidly. If prompted by the TUYA
application, confirm that the door phone is already in pairing mode, then
proceed to the next step. Select your own 2.4GHz WiFi network and enter
the network password.
A QR code will appear on your mobile telephone. Scan this code with
the camera of the door phone from a distance of 15-20cm. After a few
seconds, the door phone should give an audio signal. The LED ring, which
has been flashing red until now, will change to blue; this means that the
pairing was successful.

17
If the network name and/or password is too long, they cannot be transferred
to the door phone using the QR code, thus they cannot be paired. In this
case, please choose a shorter network name and/or password. At the time
of the launch of this product, this limit was 24 characters.
On the telephone, tap the ‘I have heard the audio signal‘ button. On the
next screen, you will see a confirmation of your successful registration of
the door phone in the TUYA application: ‘Successfully added‘. If you see
a ‘pencil’ icon, you can tap it to rename the door phone if needed. Tap the
‘Finish‘ button. Exit the ‘Add devices‘ menu.
On the main screen ‘Home‘) you can see this device and any other devices
you have connected to the TUYA system. Tap the door phone.
If the process is unsuccessful, activate the RESET function (see above) and
start the pairing process from the beginning. After installing the application,
you have to give it the necessary permissions as well for its smooth operation.
The telephone usually warns you of this too. In order to receive all messages
and alerts, turn the energy saving settings applicable to the TUYA application
off in the battery management menu of the telephone. Otherwise, the mobile
telephone may restrict the operation of certain functions of the door phone.

18
The SETTINGS menu can be opened with the ‘●●●‘ button in the upper
right corner (when the camera image is displayed). You can find many
services and useful functions in the application. We recommend that you
discover them and try them out. These functions include talking to the
visitor, taking photographs or recording video, full-screen mode, selecting
SD or HD quality, turning the PIR motion detector on or off and adjusting
its sensitivity, viewing the alert log with photographs, turning on the night
visibility mode, setting up the energy saving mode, checking the charge
level and status of the battery, alerts about the interruption of the internet
connection, controlling the device with voice commands and in other ways
(Google Assistant, Alexa, Smart Things, IFTTT), automatic operating
profiles, sharing the access permissions with others... The application
is under continuous development; therefore, descriptions, function, and
menus may change over time. Certain third party services incur fees;
please verify if this is the case before using one (e.g. using cloud storage).
VIEWING FUNCTION / CCTV
When tapping the icon of the door phone, after a few seconds, you can
see a live feed. At the same time, the devices turns on from standby mode
and the LED ring will light up in blue. When you are done viewing the feed,
you can exit using the back button, and the door phone will shortly return
to standby mode. If there is an issue with the internet connection, use
the back button and then try again. In the case of this model, the viewing
restriction of 1 minute, which is typical in the case of similar devices, is
not in effect, allowing you to perform longer surveillance as well. You can
place the wireless camera on furniture as well, while supervising your pets
for example.
NIGHT CAMERA MODE
The sensitivity of colour cameras is significantly worse under poor light
conditions. In order to circumvent this issue, the device automatically
switches to black and white operation in the interest of better image quality.
At the same time, the infrared light is also activated, if this was enabled in
the ‘night vision’ menu.

19
ACCEPTING CALLS
When the doorbell button is pushed,
the door phone takes a picture and s
aves it on the inserted microSD card.
Your mobile telephone will notify you of
the visitor and you can accept the call
similarly to a traditional phone call. On Android devices, the camera image
usually only appears immediately instead of the message if the TUYA
application is running.
MOTION DETECTION
If you did not turn off the PIR motion detector, which has an adjustable
sensitivity, in the SETTINGS menu, it will send a message to your
telephone and automatically take a photograph. It also applies a timestamp
on the photo. You can view the image by tapping the message or you can
find it later in the MESSAGES /Movement detected menu. This photograph
could be the image of a visitor pushing the doorbell as well.
PHOTOGRAPHS AND VIDEO
You can take photographs and record video manually as well. These are
available in a menu separate from where those taken at the time of PIR
alerts are stored. They can be found in the galleries of both the telephone
and the TUYA application. You can view them using the GALLERY and
the PLAYBACK buttons. The latter mode is available if a memory card
has been inserted and includes the images taken automatically when the
doorbell is rung. You can find the steps for inserting the card above.
● ‘PIR’ photographs deleted from the gallery of the mobile telephone
are deleted from the gallery of the door phone as well, and vice versa.
SHARING ACCESS
If you have performed the setup with your own telephone, you can share
the remote access permissions with your family members as well. First,
everyone in question has to install the TUYA application and perform the
registration needed to use the software. After this, select the Share Device

20
option in the SETTINGS menu of the door phone, followed by the Add
Sharing option. Provide the data of your family members as requested.
REMOVING A SHARED DEVICE
If you want to cancel sharing, tap the icon of the family member with whom
you shared the permissions. Swipe to the left and tap the Delete button.
This removes the permissions of the user for managing the device.
Table of contents
Languages:
Other Somogyi Intercom System manuals

Somogyi
Somogyi DPV 24 User manual

Somogyi
Somogyi Home DPV 23 User manual

Somogyi
Somogyi DB 402 User manual

Somogyi
Somogyi home DB 118 User manual

Somogyi
Somogyi home DP 22 User manual

Somogyi
Somogyi home DPV User manual

Somogyi
Somogyi home DPV 27 User manual

Somogyi
Somogyi home DPV 27 User manual

Somogyi
Somogyi home DP 012 User manual

Somogyi
Somogyi home DPV User manual