• introduction • unpacking •
• placement/mounting • connections •
MICRO 3001 MICRO 3001
INTRODUCTION
Thank you for choosing Sonodyne. By choosing the Micro 3001, you are ensured
a natural sound reproduction. The Micro 3001 may be utilized for both music and
home theater; as stand alone or in conjunction with our powered subwoofer. Do
read on to get an idea of how these speakers may be used.
To help you get listening quickly, we have included here our thoughts on the setup
and listening processes. And after you are all set up, do drop us a line through
www.sonodyne.com
UNPACKING
Your carton contains:
• 2 x Micro 3001 speakers
• 2 x mounting brackets
• 1 x Owners manual
Normally, all speakers require a "break-in" period, i.e., played for some time so
that they can quickly start performing at their best! The same is true for the Micro
3001. If you do not want to do this when you are at home, set your source unit,
i.e., CD player, on "repeat entire disc" mode. Then, allow the speakers to play at
moderate volume setting for 6-8 hours
Note: Please retain all packing materials in case you need to transport the Micro
3001 in future.
The Micro 3001 may be placed atop your table/ bookshelf. However, the Micro 3001 can be
mounted on the wall vertically using the key-hole type slot on the back. The Micro 3001 also comes
with a swivel-type mounting bracket that allow it to be mounted on the wall allowing horizontal and
vertical motion. Please see figure below.
While placing the Micro 3001 on a flat surface keep them within 1-2" of the edge of the surface,
than toward the rear so that the sound is not colored as a result of diffraction.
While listening to music in stereo mode, it is best to keep the Micro 3001 at ear level, with at least 6
to 8 ft between them, and angled slightly toward the listening position or the sweet spot. This should
ensure the correct sound-staging. However, since room acoustics play a large part in determining
the performance of speakers, it is best that you experiment with the positioning to attain the optimal
listening settings for your room.
In home theatre setup, the Micro 3001 being used as main speakers should be placed at ear level,
with at least 6 - 8 ft between and angled slightly toward the listening position or the sweet spot.
When used as surround speakers in a 5.1 system, place the speakers to the left and right of your
listening position. Angle them so that they point towards you for the best sound. If side placement is
not possible, place them a few foot behind your listening position and face them forward. Experiment
for best results.
CONNECTIONS
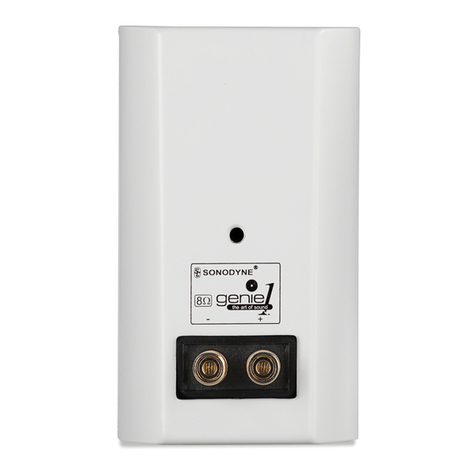
The Micro 3001 has push-type binding posts where red indicates + (positive) and black, - (negative)
as shown in the figure above. Connect the cable from the positive terminal of your AV receiver/
amplifier to the red marked terminal, and the cable from the negative terminal of your AV receiver/
amplifier to the black marked terminal. Always make connections when your AV receiver/amplifier is
powered off.
While setting up your A/V receiver, please indicate that you are using 'small' speakers on all
channels. Refer to your A/V Receiver's owner's manuals for set-up details
NOTE
A. Verify that the wires from + (positive) and - (negative)cables do not touch each other, as short-circuit could
damage the amplifier's output stage.
B. Verify that the speaker is in proper phase; the positive terminal on the speaker is connected to the red
terminal on the amplifier and similarly for the other terminal.
C. You must set the speaker parameter to "SMALL" on the A/V amplifier/ receiver. The reason for doing this is
to optimize bass management since most receivers introduce a high pass filter of around 80Hz to
the speakers when this mode is selected. Failing to do so will not guarantee safe operation of your Micro
3001 in case they are fed the full Bandwidth signals from your A/V amplifier/ receiver.
KEYHOLE BRACKET MOUNTING
THREAD FOR FIXING WALL BRACKET


