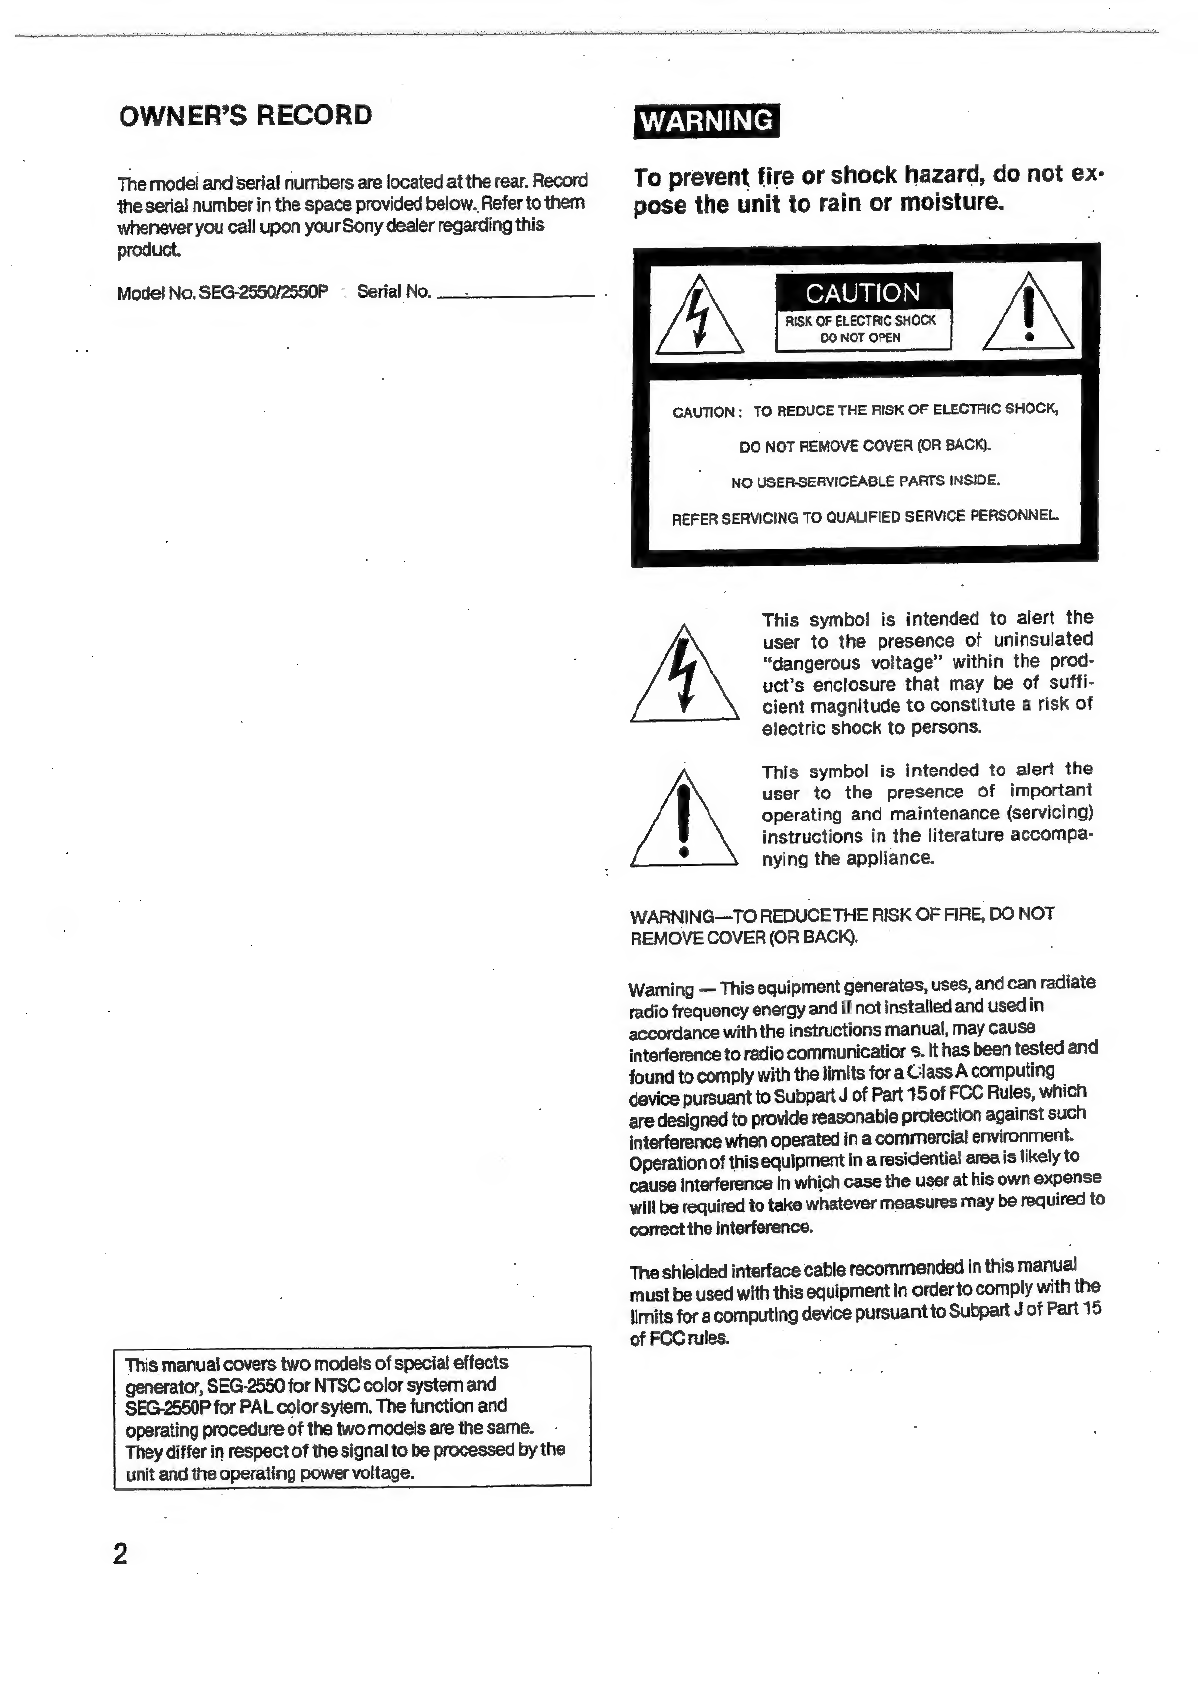
©
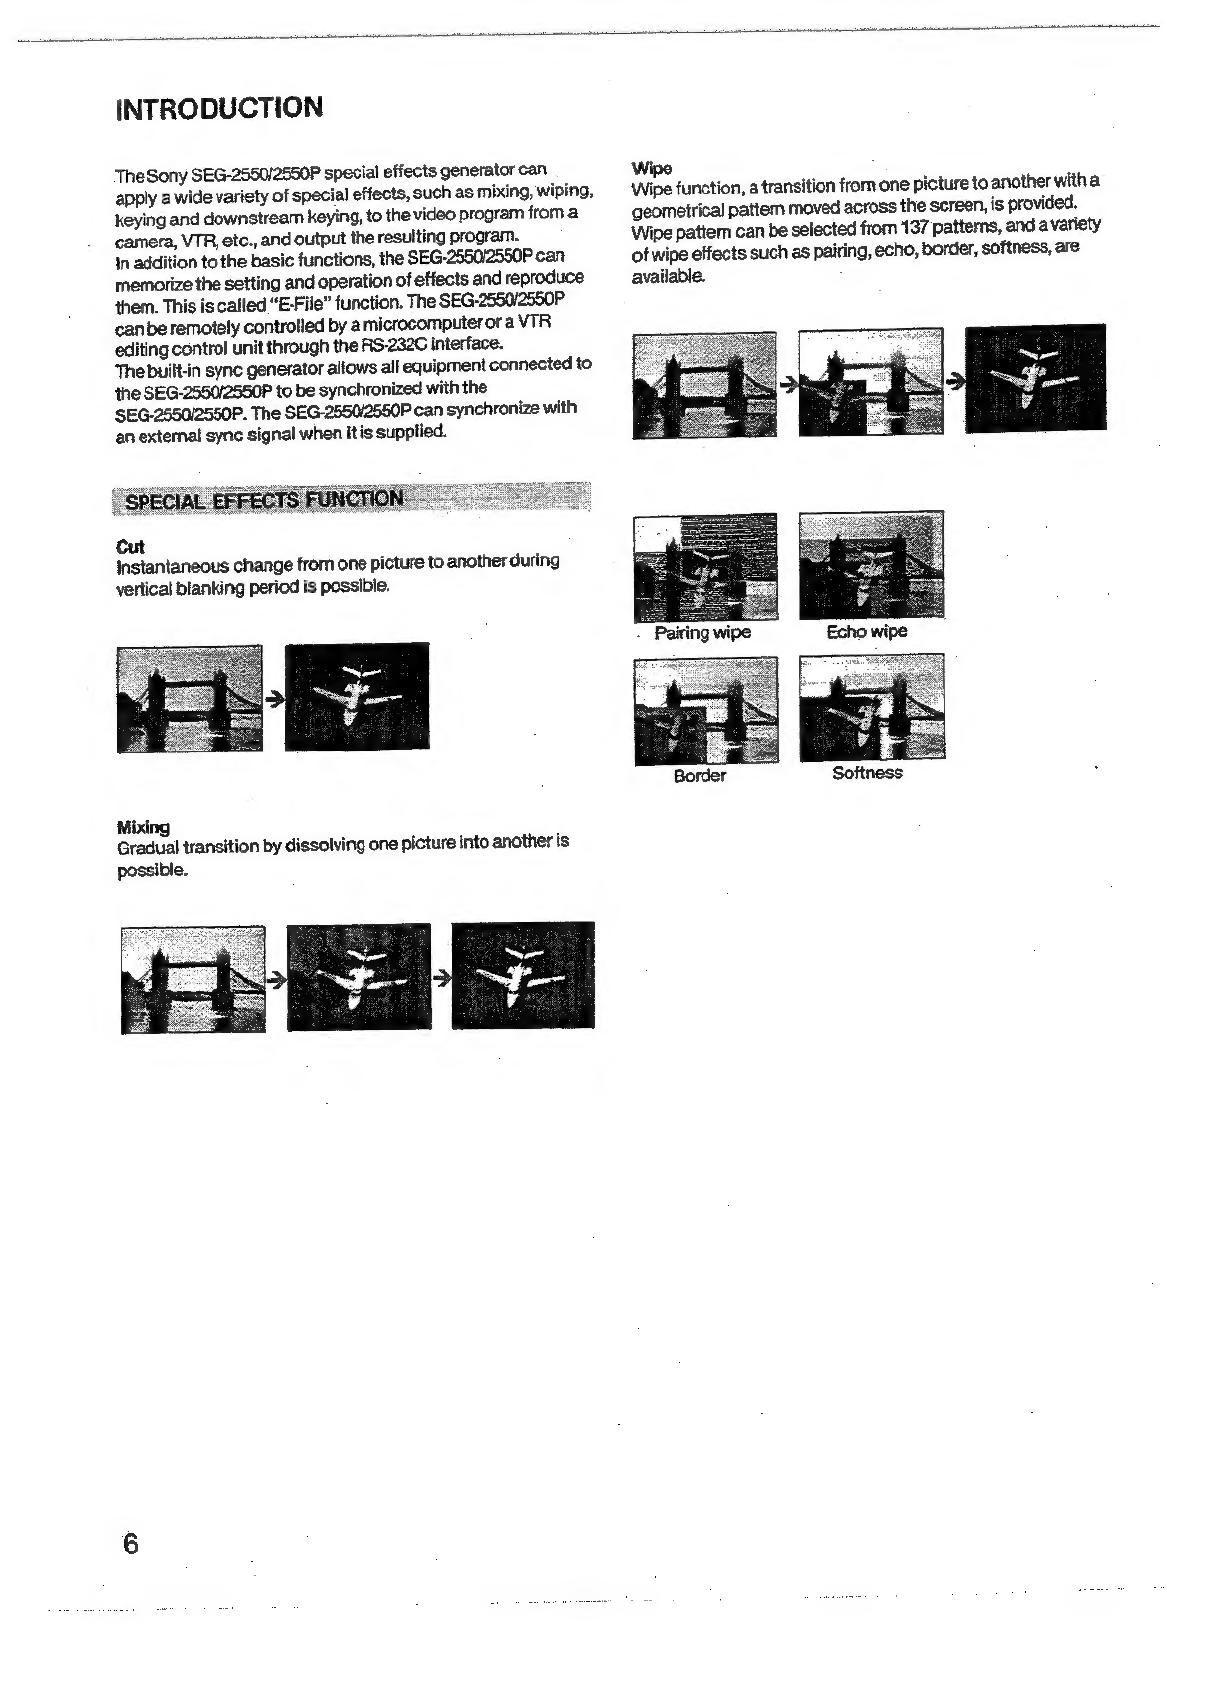
WIpe
nasa
TABLE
OF
CONTENTS
Introduction
eecseennnteonnnine
a
“E-File”
function.
Outline
of
the
SEG
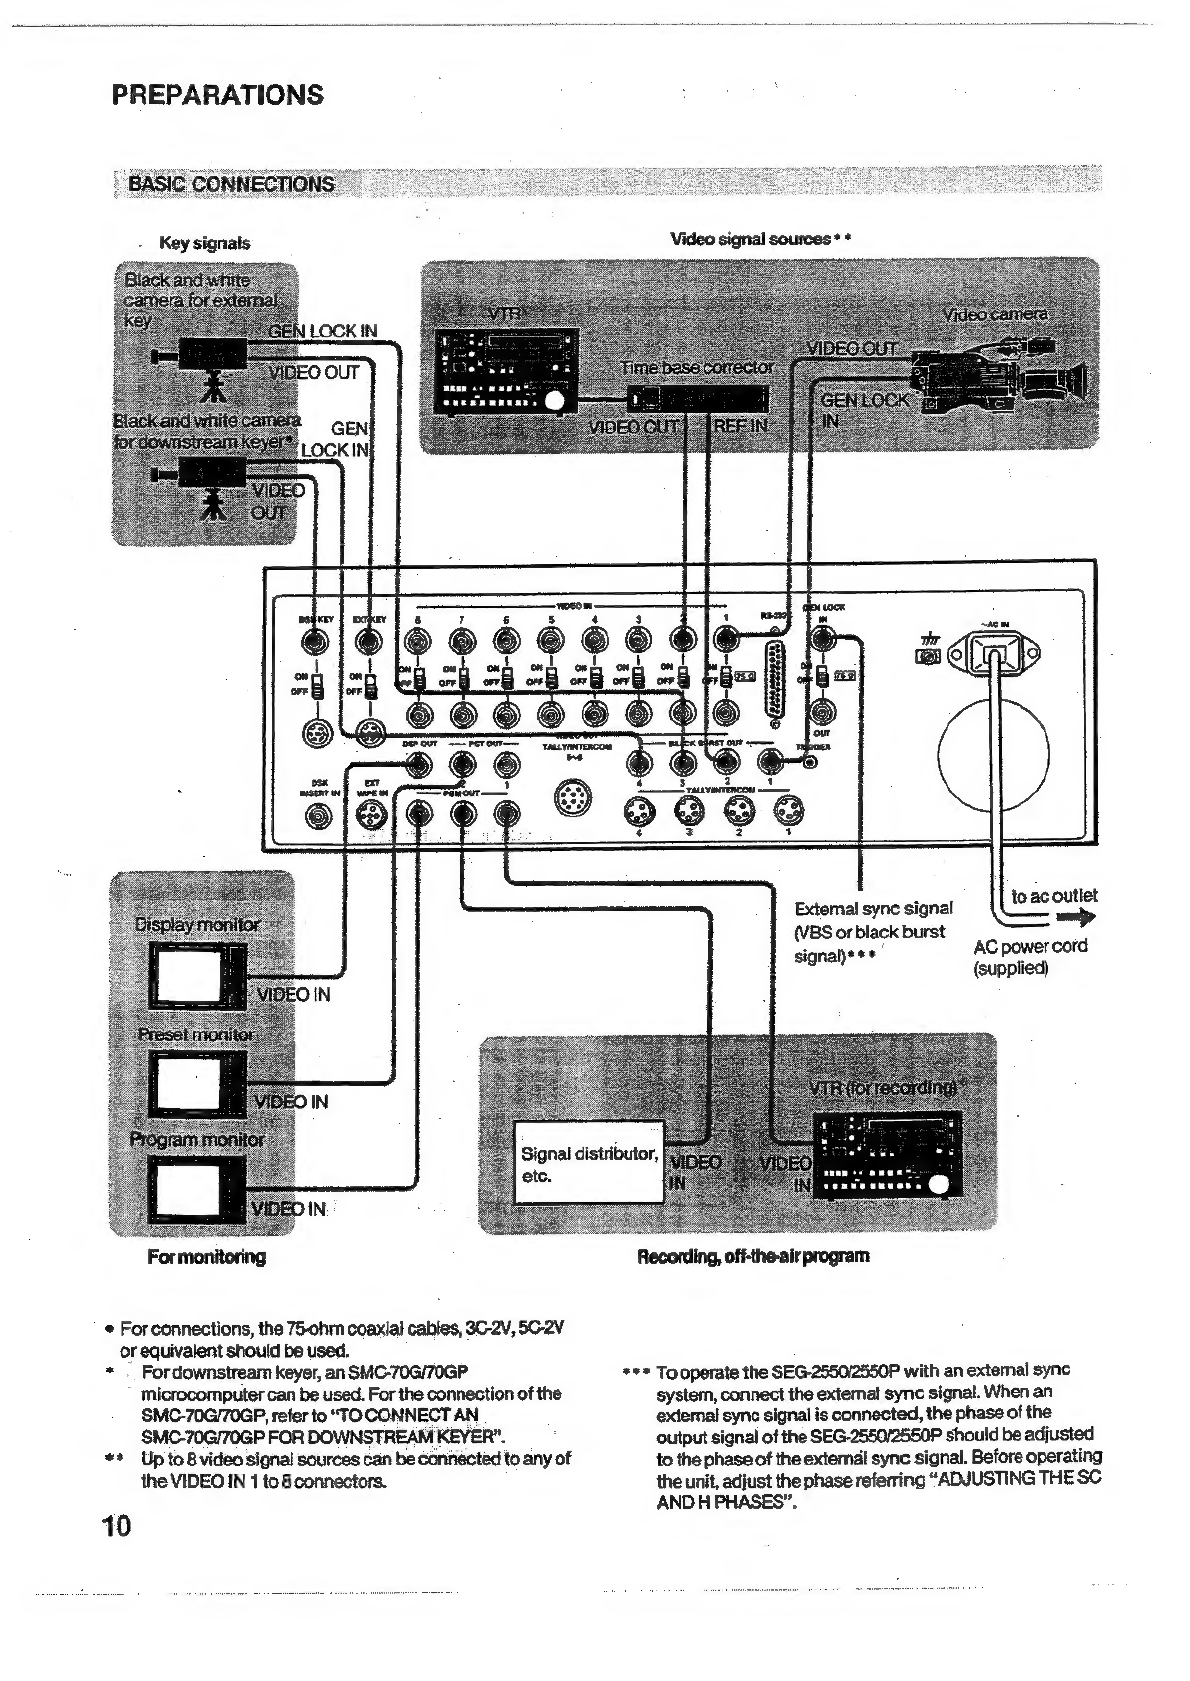
Preparations.......
Basic
connectior
Toconnect
a
camera
using
a
camera
contro!
unit
Monitors
to
be
USC
-----ee-nnnessesotsnseenserensnserneeanes
To
connect
an
SMC-7OGISMC-70GP
for
downstream
3
KOYCP
aassscssuseeersnsssnesnsnrencneresonmetn
ee
Adjustments
of
connected
equipment
BASIC
OPERATION
i
‘Mixing
with
the
EFF
lever...
Rehearsal
-
Operation
using
the
pattem
select
DULLONS
uneven
18
To
select
wipe
pattems
with
pattern
code...
19
‘Sofiness
(to
soften
the
wipe
pattern
edgt
Border
(to
border
the
wipe
pattern
edge)..
Pairing
wipe
(to
wipe
the
picture
in
a
grill
format)...
Echo
wipe
(to
wipe
the
picture
gradually).
Positioner
(to|
postion
the
wipe
patt
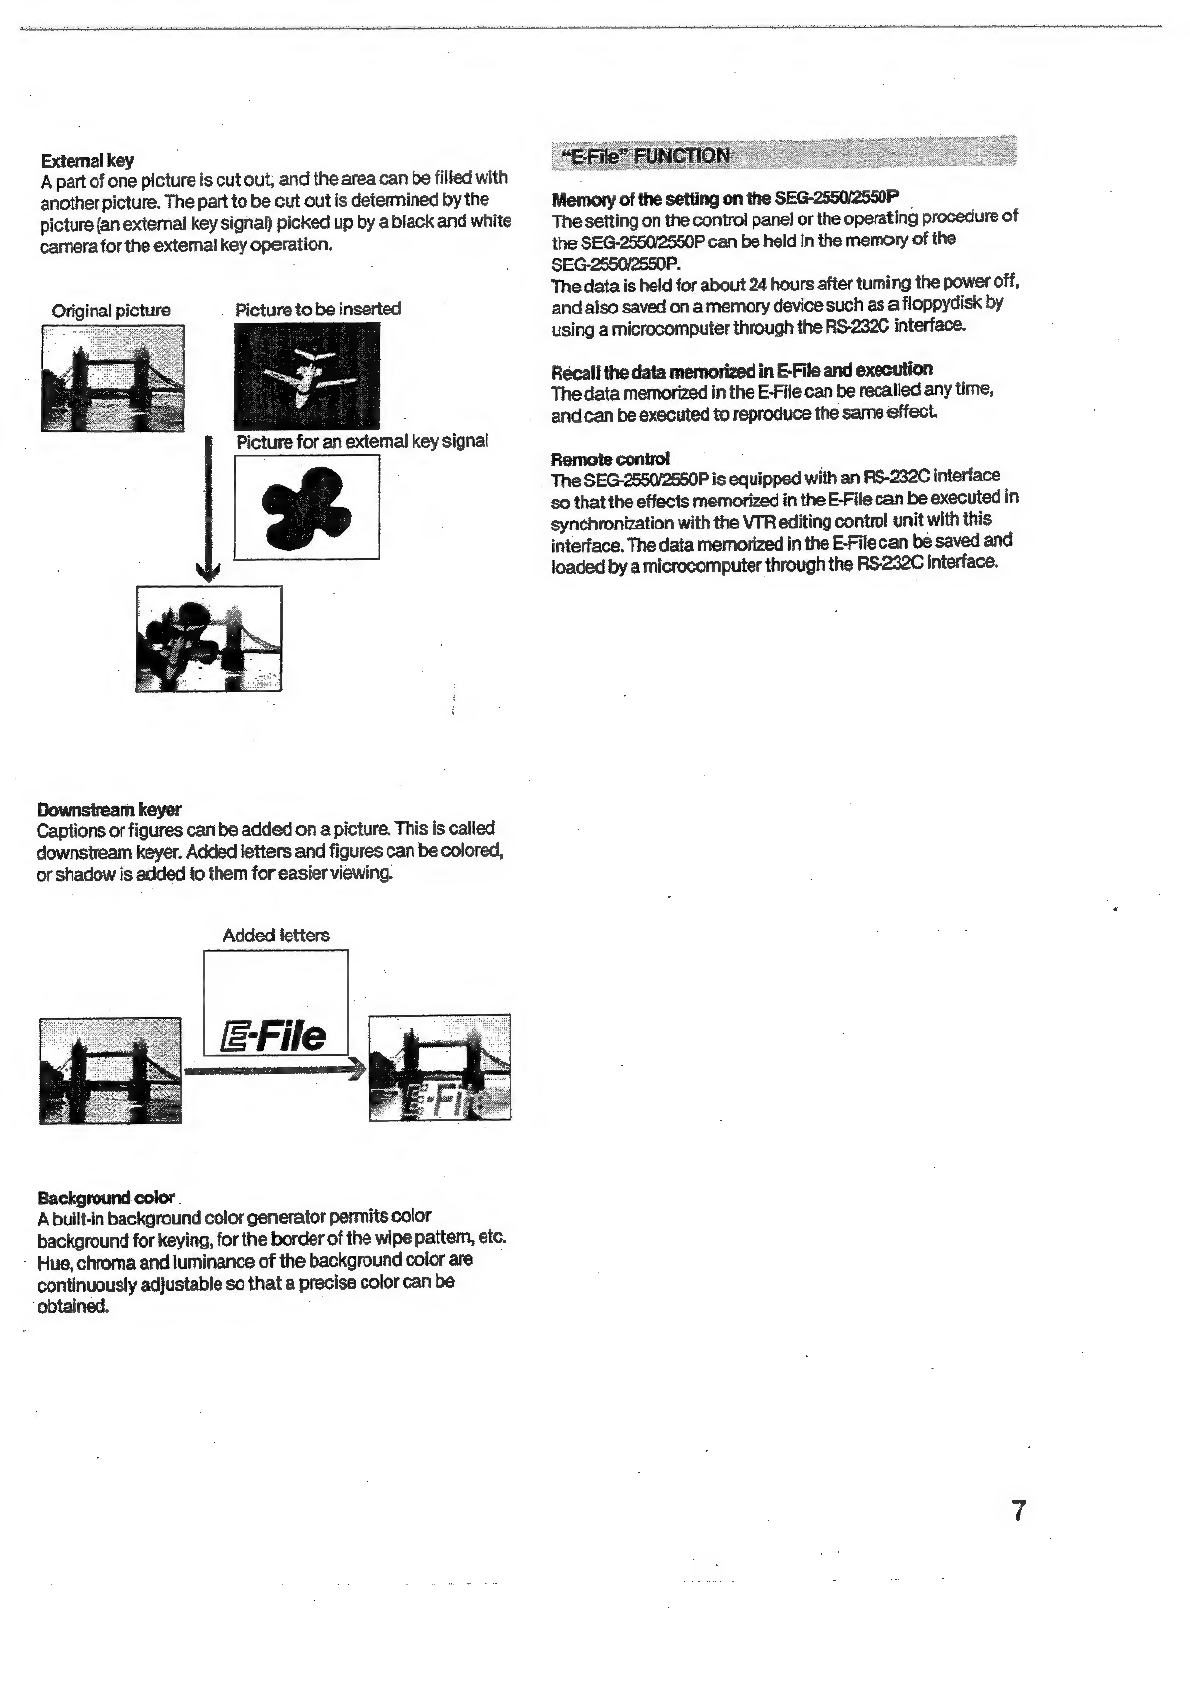
To
delete
the
inserted
letters
To
add
shadow
to
the
inserted
letters.
How
to
select
the
background
color.
Application
vaevssseesesessnetesenneentes
Examples
of
various
effects
Combination
use
of
PGM
CUT
IN/OUT
button
and
©
UNGERT
le
Ver
—ssesssereseesnreestseernenntonrnnanserntennnenn
sate
8
OPERATION
USING
What
is
“E-File”...
Display
of
E-File
data.
-s-sssseinn
Data
on
page
3..
To
memorize
the
data
(Min).
Operation
—.an-sennnseeee
To
recall
and
execute
the
memorized
data
(MR)
OPO
TaBlON
...asseeeceseeneenecccetnenei
~
To
terminate
the
execution.
To
erase
data
(ERASE).
Mode
setting
(MOD)......
To
turn
on
and
off
the
buzzer
....
To
increase
the
event
number
automatically.
To
execute
an
event
repeatedly...
*
To
execute
all
events
repeatedly
.......um
BRRABSELEBBRRELS
Data
comparison
mode
(EDT).
Switch
setting.........
Lever
and
stick
setting
..
To
terminate
the
data
comparison
mod
S888888
Control
with
a
microcomputer
......
Control
with
an
editing
control
unit.
Adjusting
the
torque
of
levers...
Attaching
the
label
on
the
button:
Location
and
function
of
parts
and
control:
Control
panél.....
Connector
pane
....
Specifications...........
Recommended
equipment
and
accessories.
Table
of
wipe
patterns...
Repacking
for
shipment...