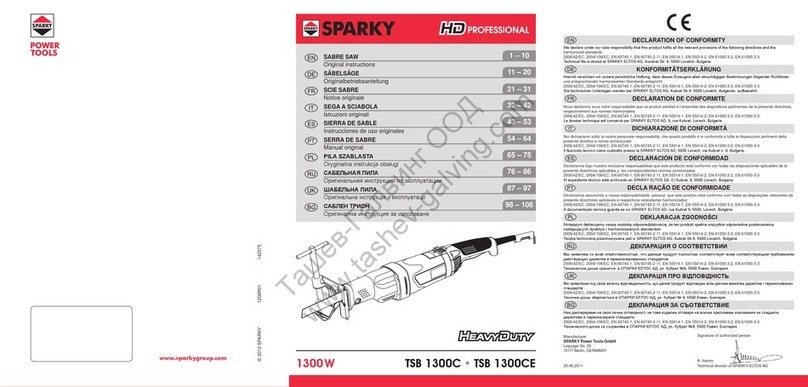
Sparky Group HD PROFESSIONAL TSB 1300C User manual

www.sparky.eu
1603R01 142375V2© 2016 SPARKY
1300 W
TSB 1300C •TSB 1300CE 23 January 2013
Manufacturer
SPARKY Power Tools GmbH
Leipziger Str. 20
10117 Berlin, GERMANY
Signature of authorized person
A. Ivanov
Technical director of SPARKY ELTOS AG
1 – 10
SABRE SAW
Original instructions
21 – 31
SCIE SABRE
Notice originale
76 – 86
11 – 20
SÄBELSÄGE
Originalbetriebsanleitung
87 – 97
65 – 75
54 – 64
SERRA DE SABRE
Manual original
32 – 42
SEGA A SCIABOLA
Istruzioni originali
43 – 53
SIERRA DE SABLE
Instrucciones de uso originales
98 – 108
DECLARATION OF CONFORMITY
standards: , 2011/65/EU,
EN 60745-1, EN 60745-2-11; EN 55014-1, EN 55014-2, EN 61000-3-2, EN 61000-3-3.
KONFORMITÄTSERKLÄRUNG
2004/108/EC (bis 19. April 2016), 2014/30/EU (ab 20. April 2016),
2011/65/EU, EN 60745-1, EN 60745-2-11; EN 55014-1, EN 55014-2, EN 61000-3-2, EN 61000-3-3.
DECLARATION DE CONFORMITE
2004/108/EC (jusqu’au 19 avril 2016), 2014/30/EU (à partir du 20 avril 2016),
2011/65/EU, EN 60745-1, EN 60745-2-11; EN 55014-1, EN 55014-2, EN 61000-3-2, EN 61000-3-3.
Le dossier technique est conservé par SPARKY ELTOS AD, 9, rue Kubrat, Lovech, Bulgarie.
, 2011/65/EU, EN 60745-1,
EN 60745-2-11; EN 55014-1, EN 55014-2, EN 61000-3-2, EN 61000-3-3.
Il fascicolo tecnico viene custodito presso la SPARKY ELTOS AD, 5500 Lovech, via Kubrat n. 9, Bulgaria.
DECLARACIÓN DE CONFORMIDAD
2004/108/EC (hasta el 19 de Abril de 2016), 2014/30/EU (a
partir del 20 de Abril de 2016), 2011/65/EU, EN 60745-1, EN 60745-2-11; EN 55014-1, EN 55014-2, EN 61000-3-2, EN 61000-3-3.
DECLARAÇÃO DE CONFORMIDADE
2004/108/EC (até ao 19 de Abril do 2016), 2014/30/EU (a partir do
20 de Abril do 2016), 2011/65/EU, EN 60745-1, EN 60745-2-11; EN 55014-1, EN 55014-2, EN 61000-3-2, EN 61000-3-3.
, 2011/65/EU,
EN 60745-1, EN 60745-2-11; EN 55014-1, EN 55014-2, EN 61000-3-2, EN 61000-3-3.
, 2011/65/EU,
EN 60745-1, EN 60745-2-11; EN 55014-1, EN 55014-2, EN 61000-3-2, EN 61000-3-3.
, 2011/65/EU,
EN 60745-1, EN 60745-2-11; EN 55014-1, EN 55014-2, EN 61000-3-2, EN 61000-3-3.
2011/65/EU,
EN 60745-1, EN 60745-2-11; EN 55014-1, EN 55014-2, EN 61000-3-2, EN 61000-3-3.

B
1
2
12
13
10 11
14
3b 3c
3a
20
21
19
9
6
12 5
7
3 4
8
17
18
20
21
10 11
15 16 13

1EN
Introduction
Your new SPARKY power tool will more than satisfy your expectations. It has been manufactured
new tool easy and safe to operate, and, with proper care, it will give you many years of dependable
service.
WARNING:
Carefully read through these Original Instructions before using your new SPARKY power tool.
Take special care to heed the Warnings. Your SPARKY power tool has many features that will
make your job faster and easier. Safety, performance, and dependability have been given top
priority in the development of this tool, making it easy to maintain and operate.
Do not dispose of electric tools together with household waste!
Waste electrical products should not be disposed of with household waste. Please recycle
where facilities exist. Check with your local authority or retailer for recycling advice.
ENVIRONMENTAL PROTECTION
The machine, accessories and packaging should be sorted for environmental-friendly
recycling.
The plastic components are labelled for categorised recycling.
UNPACKING
Due to modern mass production techniques, it is unlikely that your power tool is faulty or that a part is
ASSEMBLY
The sabre saw is delivered fully assembled except for the blade. The blade is selected depending
on the application (sawing metal, wood, chipboard, plastics, etc.), and then is mounted onto the
machine.
Contents
Introduction ...............................................................................................................................1
...........................................................................................................3
General power tool safety warnings ..........................................................................................4
Additional safety rules for sabre saws .......................................................................................5
Know your product ................................................................................................................ A/6
Operation ...............................................................................................................................B/6
Maintenance .............................................................................................................................9
Warranty ..................................................................................................................................10

2
EN
DESCRIPTION OF SYMBOLS
The rating plate on your power tool may show symbols. These represent important information about
the product or instructions on its use.
Double insulated for additional protection.
Conforms to the relevant European Directives.
Conforms to the requirements of Customs Union regulations.
Conforms to the requirements of Ukrainian standards.
Refer to Original Instructions.
YYYY-Www Production period, where the variable symbols are:
YYYY- year of manufacture,
ww - calendar week number.
TSB Sabre saw.

3EN
Original instructions
Model TSB 1300C TSB 1300CE
-1 -1
“
“
(170 mm)
“
“
(170 mm)
II II
NOISE AND VIBRATION INFORMATION
A-weighted sound pressure level LpA
pA 3 dB 3 dB
A-weighted sound power level LwA
wA 3 dB 3 dB
Wear hearing protection!
Cutting wood
Vibration emission value ah,CW
Uncertainty Kh,CW 1.5 m/s1.5 m/s
Square cutting metal pipes with support
Vibration emission value ah,CM
Uncertainty Kh,CM 1.7 m/s1.7 m/s
The vibration emission level given in this information sheet has been measured in accordance with
used for a preliminary assessment of exposure.
The declared vibration emission level represents the main applications of the tool. However if the tool
is used for different applications, with different accessories or poorly maintained, the vibration emis-
An estimation of the level of exposure to vibration should also take into account the times when the
the exposure level over the total working period.
Maintain the power tool and the accessories and keep your hands warm during operation to reduce
the harmful effect of vibrations
Dust from material such as paint containing lead, some wood species, minerals and metal may be
harmful. Contact with or inhalation of the dust may cause allergic reactions and/or respiratory dis-
eases to the operator or bystanders.
-
tion with additives for wood conditioning (chromate, wood preservative). Material containing asbestos
must only be treated by specialists.

4
EN
General power tool
safety warnings
WARNING! Read all safety warn-
ings and all instructions. Failure to follow
the warnings and instructions may result in
Save all warnings and instructions for
future reference.
The term “power tool” in the warnings refers
to your mains-operated (corded) power tool or
1) Work area safety
a) Keep work area clean and well lit. Clut-
b) Do not operate power tools in explosive
Power tools create sparks which may ignite
c)
while operating a power tool. Distrac-
2) Electrical safety
a)
not use any adapter plugs with earthed
(grounded) power tools.
plugs and matching outlets will reduce risk
b)
-
There
is an increased risk of electric shock if your
c) Do not expose power tools to rain or wet
conditions. Water entering a power tool
d)
Damaged or entangled cords increase the
e)
-
door use. Use of a cord suitable for out-
f) -
current device (RCD) protected supply.
Use of an RCD reduces the risk of electric
3) Personal safety
a)
a power tool. Do not use a power tool
-
A moment of inattention while operating
power tools may result in serious personal
b)
Always wear eye protection. Protective
equipment such as dust mask, non-skid
safety shoes, hard hat, or hearing protec-
tion used for appropriate conditions will re-
c) Prevent unintentional starting. Ensure
-
tool.
on the switch or energising power tools that
d) -
fore turning the power tool on. A wrench
or a key left attached to a rotating part of
the power tool may result in personal in-
e) Do not overreach. Keep proper footing
This enables
better control of the power tool in unexpect-
f) Dress properly. Do not wear loose cloth-
-
g) If devices are provided for the connec-
tion of dust extraction and collection fa-
properly used. Use of dust collection can
4) Power tool use and care
a) Do not force the power tool. Use the cor-
rect power tool for your application. The
b) Do not use the power tool if the switch
does not turn it on and off. Any power tool
that cannot be controlled with the switch is
c)
-
-

5EN
Original instructions
ing power tools. Such preventive safety
measures reduce the risk of starting the
d) Store idle power tools out of the reach
of children and do not allow persons
instructions to operate the power tool.
Power tools are dangerous in the hands of
e) -
-
-
Many accidents are
f) Keep cutting tools sharp and clean.
Properly maintained cutting tools with
sharp cutting edges are less likely to bind
g)
Use of the power tool for op-
erations different from those intended could
5) Service
a)
-
This will ensure
that the safety of the power tool is main-
Additional safety
rules for sabre
saws
WARNING: Before connecting a tool
to a power source ensure that the voltage
nameplate of the tool.
injury to the user, as well as damage to the
tool.
the nameplate rating is harmful to the motor.
During operation provide eye protec-
-
ing particles. Wear goggles.
-
toxic ingredients. Wear a dust mask and
-
Wear safety gloves.
-
hidden wiring or its own cord. Cutting ac-
cessory contacting a “live” wire may make ex-
posed metal parts of the power tool “live” and
WARNING: Always switch off and un-
plug the power tool prior to any adjustment,
servicing or maintenance.
hot after continuous operation. Do not touch
the blade or the work piece immediately after
operation - they may be extremely hot and
you may get serious burns.
whenever possible.
the blade has come to a complete stop before
placing the machine down.
moderate pressure. Overloading occurs when
you apply excessive pressure, resulting in
decrease of motor speed, which may cause
motor.
never be left around the work area.
switch on and let it run for a while. Operate
and body.
sure no one is below when using the tool in
high locations.

6
EN
purpose. Any use other than those mentioned
in this Manual will be considered a case of
misuse. The user and not the manufacturer
shall be liable for any damage or injury result-
ing from such cases of misuse.
the safety regulations, the assembly instruc-
tions and the operating instructions found in
this Manual. All persons who use and service
the machine have to be acquainted with this
Manual and must be informed about its poten-
tial hazards. Children and frail people must not
use this tool. Children should be supervised
at all times if they are in the area in which the
tool is being used. It is also imperative that
you observe the accident prevention regula-
tions in force in your area. The same applies
for general rules of occupational health and
safety.
changes made to the tool nor for any damage
resulting from such changes.
rainy weather, or in moist environment (after
liquids and gases. The working place should
be well lit.
Know your product
Before using the power tool, familiarize your-
self with all the operating features and safety
requirements.
Use the tool and accessories only for the ap-
plications intended. All other applications are
expressly ruled out.
1. Support
3. Ventilation slots
4. Rear handle
5. Lock-on button
7. Cord protector
9. Holder
10.Screw
11. Strap
13.Blade
14.Centring pin
15.Joint opening
17.Limiting pin
19.Shaft
Operation
This power tool is supplied from single-phase
alternating current mains only. It is double insu-
can be connected to grounded or not grounded
sockets. This power tool is radio suppressed in
compliance with EMC Directive.
This power tool is designed for sawing pipes,
materials (aerated concrete blocks), using suit-
able saw blades
PRIOR TO INITIAL OPERATION
-
sponds to the value indicated on the name plate
with technical data of the tool.
The power tool must be connected to the power
position. If the plug is connected to a recepta-
the power tool will start operating immediately,
which could cause a serious accident.
-
der. If the replacement of the supply cord is nec-
essary, this has to be done by the manufacturer
or his agent in order to avoid a safety hazard.
WARNING: Always switch off and un-
plug the power tool prior to any adjustment,
servicing or maintenance.
SELECTING THE BLADE
Select the blade depending on the processed
material - blade for sawing metal, blade for saw-
ing wood, all-purpose blade, etc.
Each one of the blade types listed above is
available with different cutting length.
To select the appropriate blade consider the
material to be cut (metal, wood, etc.) and the
necessary length.
Choose the blade length, so that the blade
projects out of the material 35 mm at least. Ob-
serving this rule will reduce to minimum the pos-
to preserve blade sharpness and increase blade

7EN
Original instructions
life, always use blades with proper length and
material.
WARNING: The blade heats to high
temperature during operation. Do not touch
the blade immediately after ceasing operation
to avoid a possible burning. We recommend
to lay the saw down for a while until the blade
has cooled and to use protective gloves when
replacing a blade.
INSTALLING AND REPLACING THE
BLADE
1. Ensure that the plug is pulled out of the
supply socket.
-
er (9).
-
-
chine on the cord protector (7) while installing or
replacing the blade (13) - this may result in cord
damage and risk of electric shock.
4. Loosen the screw (10) until its head will
touch the cover wall.
5. Take out the old blade (13) carefully.
6. Position the new blade (13) in such a way,
that the centring pin (14) will engage in the cen-
tring opening of the blade shank.
strap (11) will reach the blade (13).
-
tioned in its strap (11).
-
er (9).
The careful and exact execution of the above
mentioned procedures guarantee the stable and
the blade, the piston and the strap, as well as by
the blade shank. The centring pin is used to ori-
entate initially the blade and it is not intended to
endure force loading during operation.
In case the blade has been mounted in a wrong
way the centring pin will endure force loading
and may warp or shear off, and the machine
has to be presented to the service centre for re-
placement of the centring pin.
If the screw can not tighten the blade attaching
mechanism securely because the screw socket,
the screw thread or the hex wrench are worn,
reason replace the screw or the hex wrench well
before wear becomes excessive.
SWITCHING ON - SWITCHING OFF
WARNING: Before connecting the
power tool to a power source ensure that the
voltage supply is the same as the one speci-
the blade does not touch any object. Push for-
ward the lock-on button (5), and then press the
The machine is equipped with soft-start elec-
tronics - the machine starts at low speed to
reach after 3-4 seconds the rated speed.
STROKE RATE ADJUSTMENT
The optimum speed value for various materials
differs depending on a number of factors (kind of
material, blade type, accessibility to the working
Regulator
position
at no load speed Metal Wood Plastics
concrete
G + + - -
F + + - -
E1750 + - - -
D1500 + - - +
C + - + +
B950 + - + +
A700 + - + +

8
EN
application is achieved experimentally during
operation. Use the information from the table to
choose the speed initially. Rotate the regulator
thumbwheel to place the selected position (let-
SAWING
to prevent electric shock. The gear housing, the
support and the blade can become live if during
operation the saw comes into contact with a live
wire. Hold the machine for the rear handle (4)
-
sibility for electric shock to the minimum.
the machine, so that the bracket shaft (19) in-
serts the joint opening (15) on the machine
groove (16).
square cutting is clean from chips and dirt as
this might result in improper positioning of the
work piece and lack of perpendicularity.
the pipe in such a way, so that the clamping
screw is perpendicular to the pipe.
Tighten with the clamping screw taking care not
to deform the pipe.
Depending on the hand you prefer to use, grasp
and, the machine handle (4) with the other hand
and switch the machine on.
While holding the rear handle (4) with the switch
sawing. Pull the machine rear until the work
piece is cut through.
To achieve better results when cutting pipes
to switch the machine on when the saw blade
touches the work piece.
to protect the blade, adjust the pressure on the
material by slower or faster pulling the machine
rear.
Excessive force does not increase the speed.
Free-hand cutting
work piece securely in a vice or another appro-
To achieve clean cuts when straight cutting
metal or curve cutting (wood, plastics, aerated
concrete, etc.) it is necessary to keep the sup-
the time.
Use only sharp faultless blades, suitable for
the material being cut and with the necessary
length.
Take care to cut at uniform feeding speed to
ensure fast, easy and exact cutting. Excessive
force does not increase the speed, but results in
machine overloading and reduces blade life.
Hold the machine tightly and keep the sup-
-
ing operation.
Always keep the cord toward the machine rear
during operation away from the cutting area.
Plunge cutting (Fig. 4)
-
into the material, and then - to make a hole in
the material.
the saw on the support (1), and the blade tip (13)
- on the marked cutting line. Switch the saw on
and slowly and carefully raise the rear handle,
trying to keep the support (1) permanently in
contact with the material. Rotate the saw until
the blade (13) has plunged entirely into the ma-
terial, and then continue cutting in the desired
direction.
We do not recommend plunge cutting in hard
materials to avoid the risk of injury.
hole suitable for the blade size.
against the material during cutting. Thus you will
achieve uniform operation and lower vibrations.
low viscous lubricant-coolant emulsions to as-
sist chips removal and reduce the temperature
in the cutting area. The use of lubricant-coolant
emulsions increases blade life.
Do not use highly viscous lubricant-coolant
emulsions (thick oil and grease), as they ham-
per the chip ejection and heat dissipation from
the cutting area, and reduce blade life.
Machine use intensity
The driving motor power of this machine enables
cutting 6
“
-
rated during this operation, as well as during
cutting solid metal and wood with dimensions
-
crease of the machine gear temperature.
Despite the use of special high-temperature
grease for the machine gear, exceeding the
temperature above certain critical level causes
oil evaporation from the grease and visible
smoke from the gear. This is an evident indica-
9EN
Original instructions
tion for thermal overload of the power tool. Upon
this event please contact the nearest SPARKY
service centre to diagnose your power tool.
To avoid thermal overload of the power tool we
recommend to switch off the machine after each
prolonged operation until it reaches ambient
temperature. A fair criterion for determination of
the thermal overload beginning is when you feel
the gear high temperature even with your hands
in gloves.
ACCESSORIES
Blades.
Maintenance
WARNING: Always ensure that the
tool is switched off and unplugged before
attempting to perform inspection or mainte-
nance.
BRUSH REPLACEMENT
This power tool is equipped with auto-stop
brushes. When the carbon brushes are worn
out, the machine switches itself off. In this case
both brushes must be replaced simultaneously
with genuine brushes at SPARKY service centre
for warranty and post-warranty service.
GENERAL INSPECTION
Regularly inspect all fasteners and ensure they
are properly tightened. Should any of the screws
be loose, retighten it immediately to avoid haz-
ards.
If the replacement of the supply cord is neces-
sary, this has to be done by the manufacturer or
his agent in order to avoid a safety hazard.
CLEANING
and its ventilation slots clean (3).
Regularly check to see if any dust or foreign
matter has entered the ventilation slots and the
grills around the switches. Use a soft brush and/
or air jet to remove any accumulated dust. Wear
safety glasses to protect your eyes whilst clean-
ing.
Exterior plastic parts may be cleaned with a
damp cloth and mild detergent if necessary.
WARNING:
agents to clean plastic parts.
WARNING: Water must never come
into contact with the tool.
IMPORTANT! To assure product safety and re-
liability, repairs, maintenance and adjustment
(including brush inspection and replacement)
using genuine replacement parts.

10
EN
Warranty
The guarantee period for SPARKY power tools
is determined in the guarantee card.
-
proper handling will be excluded from the guar-
antee.
as well as defects in workmanship will be cor-
rected free of charge through replacement or
repair.
The complaints for defective SPARKY power
tools will be recognized if the machine is sent
back to the dealer or is presented to the author-
ised warranty service centre undismantled, in its
initial condition.
Notes
Carefully read the entire Instruction Manual be-
fore using this product.
The manufacturer reserves the right to make
changes and improvements to the products and
-
try.

11 DE
Originalbetriebsanleitung
Inhalt
Einführung ............................................................................................................................... 11
Technische Daten ....................................................................................................................13
Allgemeine Sicherheitshinweise für Elektrowerkzeuge............................................................ 14
Zusätzliche Sicherheitshinweise für Säbelsägen ....................................................................15
Elemente des Elektrowerkzeugs.......................................................................................... A/16
Betriebshinweise...................................................................................................................B/17
Wartung ...................................................................................................................................
Garantie ..................................................................................................................................
Einführung
Das von Ihnen erworbene Elektrowerkzeug wird Ihre Erwartungen übersteigen. Es ist gemäß den ho-
hen Qualitätsstandards von SPARKY hergestellt, die den strengen Anforderungen des Verbrauchers
entsprechen. Einfach in der Bedienung und ungefährlich bei richtiger Handhabung, wird dieses Gerät
bei bestimmungsgemäßem Gebrauch Ihnen lange Jahre zuverlässig dienen.
WARNUNG!
Lesen Sie die ganze Originalbetriebsanleitung aufmerksam durch, bevor Sie das neu erwor-
bene SPARKY - Elektrowerkzeug in Betrieb nehmen. Beachten Sie besonders die Texte, die mit
die Ihre Arbeit erleichtern werden. Bei der Entwicklung dieses Elektrowerkzeuges ist höchste
Aufmerksamkeit der Sicherheit, den Betriebseigenschaften und der Zuverlässigkeit gewidmet
worden, die es einfach zur Wartung und Bedienung machen.
Die Abfälle von elektrischen Erzeugnissen sollen nicht zusammen mit dem Hausmüll
Elektrogeräte bitte in der nächsten kommunalen Sammelstelle ab.
UMWELTSCHUTZ
Angesichts des Umweltschutzes sollen das Elektrowerkzeug, die Zubehörteile und die
Verpackung einer geeigneten Wiederverwertung zugeführt werden.
Zum sortenreinen Recycling sind die Teile, hergestellt aus Kunststoffen, entsprechend
gekennzeichnet.
AUSPACKEN
Überprüfen Sie unmittelbar nach dem Auspacken ob sämtliche Bestandteile und das beschriebene
kann zu schweren Unfällen führen.
ZUSAMMENBAU
Die Säbelsäge wird in Verpackung und völlig zusammengebaut, mit Ausnahme des Sägeblattes,
geliefert. Das Sägeblatt wird abhängig vom Arbeitseinsatz (Metalle, Holz, Sperrholz, Kunststoffe u.a.)
gewählt und danach am elektrischen Gerät montiert.
.

12
DE
BEDEUTUNG DER SYMBOLE
Auf dem Typenschild des Elektrowerkzeuges sind spezielle Symbole dargestellt. Sie stellen wichtige
Doppelte Isolierung für zusätzlichen Schutz.
Entspricht den einschlägigen Europäischen Richtlinien.
Entspricht den Anforderungen der Zollunion-Regelungen.
Entspricht den Anforderungen der ukrainischen normativen Dokumenten.
Lesen Sie die Originalbetriebsanleitung.
YYYY-Www Zeitabschnitt der Produktion, wobei die variablen Symbole sind:
YYYY - Kalenderjahr der Produktion,
ww - laufende Kalenderwoche.
TSB Säbelsäge.

13 DE
Originalbetriebsanleitung
Technische Daten
Modell TSB 1300C TSB 1300CE
-1 -1
Sägeblattlauf 30 mm 30 mm
“
“
(170 mm)
“
“
(170 mm)
II II
GERÄUSCH-/VIBRATIONSINFORMATION
Der A-bewertete Schalldruckpegel LpA
pA 3 dB 3 dB
Der A-bewertete Schalleistungspegel LwA
wA 3 dB 3 dB
Gehörschutz tragen!
Holz schneiden
Schwingungsemissionswert ah,CW
Unsicherheit Kh,CW 1.5 m/s1.5 m/s
Schwingungsemissionswert ah,CM
Unsicherheit Kh,CM 1.7 m/s1.7 m/s
genormten Messverfahren gemessen worden und kann für den Vergleich von Elektrowerkzeugen
-
gungsbelastung.
Der angegebene Schwingungspegel repräsentiert die hauptsächlichen Anwendungen des Elektro-
werkzeugs. Wenn allerdings das Elektrowerkzeug für andere Anwendungen, mit abweichenden Ein-
satzwerkzeugen oder ungenügender Wartung eingesetzt wird, kann der Schwingungspegel abwei-
chen. Dies kann die Schwingungsbelastung über den gesamten Arbeitszeitraum deutlich erhöhen.
-
den, in denen das Gerät abgeschaltet ist oder zwar läuft, aber nicht tatsächlich im Einsatz ist. Dies
kann die Schwingungsbelastung über den gesamten Arbeitszeitraum deutlich reduzieren.
der Arbeit - dies wird die schädliche Einwirkung erhöhter Schwingungen reduzieren.
Stäube von Materialien wie bleihaltigem Anstrich, einigen Holzarten, Mineralien und Metall können
gesundheitsschädlich sein. Berühren oder Einatmen der Stäube können allergische Reaktionen und/
Bestimmte Stäube wie Eichen- oder Buchenstaub gelten als krebserzeugend, besonders in Verbin-
dung mit Zusatzstoffen zur Holzbehandlung (Chromat, Holzschutzmittel). Asbesthaltiges Material darf
Beachten Sie in Ihrem Land gültige Vorschriften für die zu bearbeitenden Materialien.

14
DE
Allgemeine
Sicherheitshinweise
für Elektrowerkzeuge
WARNUNG: Lesen Sie alle Sicher-
heitshinweise und Anweisungen. Versäum-
nisse bei der Einhaltung der Sicherheitshin-
weise und Anweisungen können elektrischen
-
Bewahren Sie alle Sicherheitshinweise
Der in den Sicherheitshinweisen verwende-
te Begriff „Elektrowerkzeug“ bezieht sich auf
netzbetriebene Elektrowerkzeuge (mit Netzka-
bel) und auf akkubetriebene Elektrowerkzeuge
a)
Unordnung oder un-
beleuchtete Arbeitsbereiche können zu Un-
b)
-
-
Elek-
trowerkzeuge erzeugen Funken, die den
Staub oder die Dämpfe entzünden kön-
c) Halten Sie Kinder und andere Personen
während der Benutzung des Elektro-
werkzeugs fern. Bei Ablenkung können
2) Elektrische Sicherheit
a) Der Anschlussstecker des Elektrowerk-
Der Stecker darf in keiner Weise ver-
ändert werden. Verwenden Sie keine
-
geerdeten Elektrowerkzeugen. Unverän-
derte Stecker und passende Steckdosen
verringern das Risiko eines elektrischen
b)
-
Es
besteht ein erhöhtes Risiko durch elektri-
c) Halten Sie Elektrowerkzeuge von Re-
gen oder Nässe fern. Das Eindringen von
Wasser in ein Elektrowerkzeug erhöht das
d)
-
Steckdose zu ziehen. Halten Sie das Ka-
Be-
schädigte oder verwickelte Kabel erhöhen
e)
Die Anwen-
dung eines für den Außenbereich geeig-
neten Verlängerungskabels verringert das
f)
-
-
Der Einsatz
eines Fehlerstromschutzschalters vermin-
dert das Risiko eines elektrischen Schla-
3) Sicherheit von Personen
a) -
-
rowerkzeug. Benutzen Sie kein Elektro-
Ein Moment
der Unachtsamkeit beim Gebrauch des
Elektrowerkzeuges kann zu ernsthaften
b) -
Das
Tragen persönlicher Schutzausrüstung, wie
Staubmaske, rutschfeste Sicherheitsschu-
Art und Einsatz des Elektrowerkzeuges,
c) -
dass das Elektrowerkzeug ausgeschal-
-
Wenn Sie
beim Tragen des Elektrowerkzeuges den
Finger am Schalter haben oder das Gerät
eingeschaltet an die Stromversorgung an-
d) Entfernen Sie Einstellwerkzeuge oder
Elektrowerkzeug einschalten. Ein Werk-
zeug oder Schlüssel, der sich in einem dre-
-

15 DE
Originalbetriebsanleitung
e) -
-
Gleichgewicht. Dadurch können Sie das
Elektrowerkzeug in unerwarteten Situatio-
f) Tragen Sie geeignete Kleidung. Tragen
-
-
len. Lockere Kleidung, Schmuck oder lan-
ge Haare können von sich bewegenden
g) -
angeschlossen sind und richtig ver-
wendet werden. Verwendung einer Staub-
absaugung kann Gefährdungen durch
4) Verwendung und Behandlung des Elektro-
werkzeuges
a) -
Mit dem
passenden Elektrowerkzeug arbeiten Sie
besser und sicherer im angegebenen Leis-
b)
dessen Schalter defekt ist. Ein Elektro-
werkzeug, das sich nicht mehr ein- oder
ausschalten lässt, ist gefährlich und muss
c) Ziehen Sie den Stecker aus der Steck-
-
Gerät weglegen. Diese Vorsichtsmaßnah-
me verhindert den unbeabsichtigten Start
d) -
Kindern auf. Lassen Sie Personen das
nicht vertraut sind oder diese Anwei-
Elektro-
werkzeuge sind gefährlich, wenn Sie von
e) -
Teile einwandfrei funktionieren und
Vie-
le Unfälle haben ihre Ursache in schlecht
f) Halten Sie Schneidwerkzeuge scharf
werkzeuge mit scharfen Schneidkanten
verklemmen sich weniger und sind leichter
g) -
-
-
Der Ge-
brauch von Elektrowerkzeugen für andere
als die vorgesehenen Anwendungen kann
5) Service
a) Lassen Sie Ihr Elektrowerkzeug nur von
Original-Ersatzteilen reparieren. Damit
wird sichergestellt, dass die Sicherheit des
Zusätzliche
Sicherheitshinweise für
Säbelsägen
WARNUNG:
Vor Anschluss des elektrischen Geräts prü-
fen, ob die auf dem Typenschild angegebene
-
tungsschild angegebene Spannung kann zu
schweren Verletzungen von Personen und zu
Schäden am Elektrowerkzeug führen.
Anschlussstecker des elektrischen Gerätes in
die Steckdose ein.
Leistungsschild angegebene Spannung ist,
kann den Elektromotor beschädigen.
Gehörschutz tragen. Das intensive Ge-
räusch während der Arbeit kann Gehörverlet-
-
Tragen

16
DE
Manche Werkstof-
Handschuhe tragen.
Halten Sie das Gerät nur an den isolierten
-
-
Der Kontakt mit ei-
ner spannungsführenden Leitung kann auch
metallene Geräteteile unter Spannung setzen
WARNUNG: Ziehen Sie den Stecker
aus der Steckdose, bevor Sie Geräteeinstel-
lungen oder Wartung vornehmen, Zubehörtei-
le wechseln oder das Gerät weglegen.
Metallteile und Zubehör aufgeheizt werden.
-
rätes oder des bearbeiteten Materials gleich
nach der Arbeit – es besteht die Gefahr vor
Hautverbrennung.
-
den Teilen. Greifen Sie niemals in sich bewe-
gende (umlaufende) Teile.
Schraubstock, um das Werkstück festzuhal-
ten.
bevor Sie Geräteeinstellungen vornehmen,
Zubehörteile wechseln oder das Gerät weg-
legen.
Verwenden Sie für Ihre Arbeit das dafür be-
stimmte elektrische Gerät. Mit dem passen-
den elektrischen Gerät arbeiten Sie besser
und sicherer im angegebenen Leistungsbe-
reich.
aufgeräumt. Lassen Sie keine Laschen,
Schnüre usw. im Arbeitsbereich.
Gerät eine gewisse Zeit in Betrieb, um sich
zu überzeugen, dass es normal funktioniert.
Während des Betriebs ist das elektrische
Körper entfernt zu halten.
Sie mit dem Gerät auf einer Leiter arbeiten,
überzeugen Sie sich, dass darunter niemand
steht.
Händen fest.
Einsatzwerkzeuge usw. entsprechend diesen
Anweisungen und so, wie es für diesen spe-
ziellen Gerätetyp vorgeschrieben ist. Der Ge-
brauch von elektrischen Geräten für andere
als die vorgesehenen Anwendungen kann zu
gefährlichen Situationen führen. Die Verant-
wortung für jede Beschädigung oder Verlet-
nicht der Hersteller.
-
zugehen, müssen Sie die Sicherheitshinwei-
se und die hier angegebenen allgemeinen
Betriebsanleitungen berücksichtigen. Alle An-
wender sind mit dieser Betriebsanleitung und
den Sicherheitshinweisen bekanntzumachen.
Bewahren Sie unbenutzte elektrische Geräte
außerhalb der Reichweite von Kindern auf.
Lassen Sie Personen das elektrische Gerät
nicht benutzen, die mit diesem nicht vertraut
sind oder diese Anweisungen nicht gelesen
haben. Elektrische Geräte sind gefährlich,
wenn sie von unerfahrenen Personen benutzt
werden.
-
mächtige Veränderung am elektrischen Gerät
und für die daraus folgenden Schäden.
-
fährdeter Umgebung, in der sich brennbare
Der Arbeitsplatz muss gut beleuchtet sein.
Elemente des
Elektrowerkzeugs
Bevor Sie mit der Säbelsäge zu arbeiten begin-
nen, lernen Sie alle operative Besonderheiten
und Sicherheitshinweise kennen. Verwenden
Sie das elektrische Gerät nur bestimmungs-
gemäß und unter Beachtung der allgemeinen
Sicherheits- und Unfallverhütungsvorschriften.
Jede andere Verwendung ist ausdrücklich ver-
boten.
1. Stützschuh
3. Entlüftungsöffnungen
4. Hebel
5. Überlastschutz
6. Tippschalter
7. Knickschutztülle

17 DE
Originalbetriebsanleitung
9. Halter
10.Klemmschraube
11. Spannplatte
13.Sägeblatt
14.Zentrierstift
15.Anschlussöffnung
17.Begrenzungsstift
19.Achse
(TSB 1300CE)
Betriebshinweise
Dieses elektrische Gerät wird nur mit Einpha-
senwechselspannung betrieben. Es ist doppelt
darf an Steckdosen ohne Schutzklemmen ange-
-
chen der Richtlinie über die elektromagnetische
Übereinstimmung.
Dieses elektrische Gerät ist zum Sägen von
(Gasbeton), unter Wahl der geeigneten Säge-
blätter bestimmt
BEVOR SIE DAS GERÄT IN BETRIEB
SETZEN
entspricht.
nur bei ausgeschaltetem Tippschalter ange-
schlossen werden. Wenn Sie das Gerät bei
eingeschaltetem Tippschalter an die Steckdo-
se anschließen, besteht die Voraussetzung
für einen Unfall.
und der Gerätestecker in gutem Zustand sind.
Kontrollieren Sie regelmäßig die Anschluss-
leitung des elektrischen Gerätes und lassen
Vertrags-Kunden-dienstwerkstatt erneuern.
WARNUNG: Ziehen Sie den Stecker
aus der Steckdose, bevor Sie Geräteeinstel-
lungen und Wartung vornehmen, Zubehörtei-
le wechseln oder das Gerät weglegen.
WAHL DES GEEIGNETEN
SÄGEBLATTES
Das Sägeblatt wird abhängig von der Art des be-
arbeiteten Materials gewählt – zum Sägen von
Metall, Holz, Universalsägeblätter u.a.
Jeder der oben genannten Sägeblatttypen wird
mit unterschiedlicher Schneidlänge angeboten.
Bei der Wahl des geeigneten Sägeblattes ist
das zu bearbeitende Material (Metall, Holz usw.)
und die notwendige Länge zu beachten. Wählen
Sie die Sägeblattlänge so, dass das Sägeblatt
mindestens 35 mm aus dem bearbeiteten Ma-
terial hinausragt. Das verringert das Risiko von
Verletzungen.Abb.1)
Halten Sie Schneidwerkzeuge scharf und sau-
scharfen Schneidkanten verklemmen sich weni-
ger und sind leichter zu führen.
WARNUNG: Im Laufe des Sägens
wird das Sägeblatt erhitzt. Berühren Sie das
Sägeblatt nicht gleich nach dem Sägen - es
besteht die Gefahr vor Hautverbrennung. Wir
empfehlen, das Sägeblatt eine gewisse Zeit
kühlen zu lassen. Verwenden Sie Handschu-
he beim Sägeblattaustausch.
MONTAGE UND AUSTAUSCH DES
SÄGEBLATTES
1. Stellen Sie sicher, dass der Stecker der
Anschlussleitung aus der Steckdose gezogen
ist.
3. Legen Sie das Gerät auf eine feste und
Säge zur Montage des Sägeblattes (13) nicht
auf die Knickschutztülle der Anschlussleitung
aufsetzen, da sonst die Anschlussleitung be-
schädigt wird.
4. Klemmschraube (10) lösen.
5. Das alte Sägeblatt (13) herausziehen.
6. Legen Sie das neue Sägeblatt (13) so,
dass der Zentrierstift (14) in die Zentrieröffnung
am Halter passt.
7. Klemmschraube (10) mit Spannplatte (11)

18
DE
fest anziehen.
9. Klemmschraube (10) bis zum Anschlag
fest anziehen.
in den Halter (9) stecken.
Sorgfältige und genaue Ausführung der obenge-
nannten Schritte gewährleisten eine stabile und
-
die genaueAnpassung zwischen dem Sägeblatt,
dem Sägeblattdruckstück und der Spannplatte,
in der Spannplatte. Der Zentrierstift hat nicht die
Aufgabe, das Sägeblatt zu halten und Belastun-
gen während des Sägens zu übernehmen.
Reglerposition
Leerlauf Metall Holz Kunststoff
G + + - -
F + + - -
E1750 + - - -
D1500 + - - +
C + - + +
B950 + - + +
A700 + - + +
Bei falscher Montage des Sägeblattes, wird der
Zentrierstift belastet, wobei er beschädigt oder
abgeschert wird und einem Austausch unter-
liegt.
ist nicht zugelassen!
Kann die Klemmschraube nicht mehr fest ange-
zogen werden, da deren Innensechskant oder
der Innensechskantschlüssel abgenutzt ist,
schert der Zentrierstift ab. Deshalb rechtzeitig
abgenutzte Klemmschraube und Innensechs-
kantschlüssel erneuern.
INBETRIEBNAHME - AUSSERBE-
TRIEBSETZUNG
WARNUNG: Bevor Sie das Gerät in
Betrieb setzen, prüfen Sie, ob die auf dem
Leistungsschild angegebene Spannung der
fest und stabil. Stellen Sie sicher, dass das
Sägeblatt andere Gegenstände nicht berührt.
Schieben Sie den Überlastschutz (5) nach vorn
und drücken Sie dann den Tippschalter (6).
Das Gerät hat Elektronik für stufenlose Inbe-
triebnahme – zuerst läuft die Maschine mit
niedrigen Hubzahlen und nach 3-4 Sekunden
erreicht sie die Betriebshubzahlen.
Tippschalters (6) außer Betrieb setzen.
HUBZAHLREGELUNG
Die optimale Hubzahl unterscheidet sich bei den
verschiedenen Materialien und hängt von einer
Material, dem Typ des benutzten Sägeblatts,
der Zugänglichkeit der Schnittstelle usw.). Die
optimale Hubzahl für die entsprechende An-
Erstauswahl der Hubzahl benutzen Sie die Ta-
belleninformation. Drehen Sie das Stellrad des
Hubzahlreglers so, dass die gewünschte Positi-
SÄGEN
Halten Sie immer das elektrische Gerät so,
wie es auf dem Bild 3 gezeigt ist – es besteht
das Risiko eines elektrischen Schlages. Wenn
während des Betriebs die Säge eine Span-
nungsleitung berührt, dann sind der Reduktor
der Maschine, der vordere Stützschuh und das
Sägeblatt stromleitend. Halten Sie das Gerät
am hinteren Hebel (4) und am Kunststoffgehäu-
-
ges zu vermindern.
This manual suits for next models
1
Table of contents
Languages:
Other Sparky Group Saw manuals

Sparky Group
Sparky Group HeavyDuty TSB 1300C User manual

Sparky Group
Sparky Group TK 50 User manual

Sparky Group
Sparky Group TK 40 User manual

Sparky Group
Sparky Group TK 85 User manual

Sparky Group
Sparky Group TKN 65 User manual

Sparky Group
Sparky Group TK 40 User manual

Sparky Group
Sparky Group HeavyDuty TSB 1300CE User manual

Sparky Group
Sparky Group TKN 80D User manual

Sparky Group
Sparky Group TK 85 User manual

Sparky Group
Sparky Group TK 70 User manual