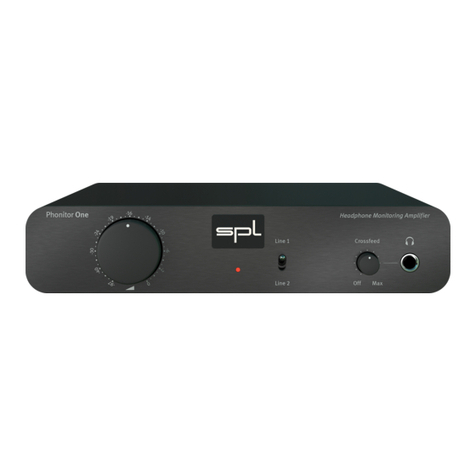
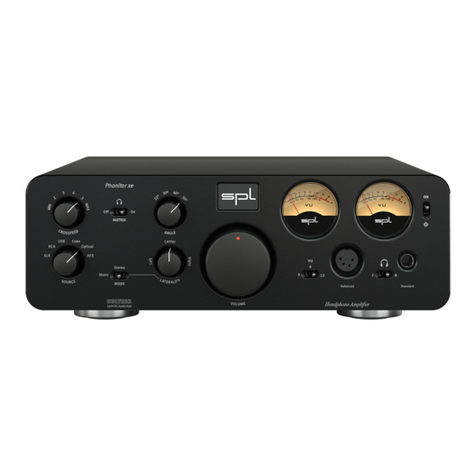
SPL Phonitor se User manual

Professional Fidelity
Mastering Grade Listening
Phonitor se Headphone Amplifier
VOLTAiR
120V DC Audio Rail
Digital
Analog Optic
Coax
USB
C 2
C 1
Off
CROSSFEEDINPUT
V
O
L
U
M
E
ON
Digital
Phonitorse – User Manual
Headphone Amplier
This User Manual is optimized for
Acrobat Reader.
Interactive buttons may not
appear in other applications.

2
Welcome
and thank you for purchasing the Phonitorse.
The Phonitorse is our entry model into the world of VOLTAiR headphone amplifiers. The Phonitor se has the same
audio signal amplification as its bigger brothers Phonitor x and Phonitor xe and therefore offers the same sound
experience. The DACxs is optionally available.
VOLTAiR technology is what we also call the SPL V Rail Technology within the Professional Fidelity series. This
makes the Phonitorse an outstandig device in terms of dynamic range, signal-to-noise ratio and headroom deliver-
ing an exceptional sound experience with invincible serenity, transparancy and realness.
Phonitor se Headphone Amplifier
VOLTAiR
120V DC Audio Rail
Digital
Analog Optic
Coax
USB
C 2
C 1
Off
CROSSFEEDINPUT
V
O
L
U
M
E
ON
Digital
RISK OF E LECTRI C SHOCK
DO NOT OPEN
CAUTION
RISQUE DE CHOC ÉLECTRIQUE
NE PAS OUVRIR
ATTENTION
USB
OPTICAL
COAX
Phonitor se
Voltage Selection:
1. Remove Fuse Holder
2. Exchange Fuses
3. Flip Over
4. Reinstall
Fuses:
230 V: T 315 mA L 250V
115 V: T 630 mA L 250V
~115 V AC/~230 V AC,
50 Hz/60 Hz, P ma x. 30 W
LR
Made in Germany
I
F
R
B

Content
Getting started
Front view
Rearview
Bottom view
DIP switches
VOLTAiR – V Rail Technology
Comparisons
Phonitor Matrix
Basics of stereo listening
Stereo listening with an “traditional“ headphone preamplifier
How does the Phonitor Matrix work?
Angle
Crossfeed
Phonitor Matrix presets
Source selection
Headphone output
DIP switch
Level increase of the headphone output
Specifications
Inputs
Outputs
Internal operating voltages
Power supply
Dimensions (incl. feet)
Weight
Important Notes
Declaration of CE Conformity
I
F
R
B

4
Getting started
Getting started
Read thoroughly and follow the instructions as well as the security advices of the Quickstart
which is enclosed in the scope of delivery! You can also download the Quickstart here.
By pressing the -Button you get to the table of contents.
By pressing the -Button you get to the front view of the unit.
By pressing the -Button you get to the rear view of the unit.
By pressing the -Button you get to the bottom view of the unit.
By pressing the -Button you get to the previous content.
I
F
R
B
I
F
R
B

6
Rearview
Rearview
optional
RISK OF ELECTRIC SHOCK
DO NOT OPEN
CAUTION
RISQUE DE CHOC ÉLECTRIQUE
NE PAS OUVRIR
ATTENTION
USB
OPTICAL
COAX
Phonitor se
Voltage Selection:
1. Remove Fuse Holder
2. Exchange Fuses
3. Flip Over
4. Reinstall
Fuses:
230 V: T 315 mA L 250V
115 V: T 630 mA L 250V
~115 V AC/~230 V AC,
50 Hz/60 Hz, P max. 30 W
LR
Made in Germany
Digital Audio Inputs
11
Mains Switch 8
Mains Voltage 9Analog Audio Input
10
I
F
R
B

8
VOLTAiR – 120V Rail Technology
VOLTAiR – V Rail Technology
VOLTAiR is the synonym for our V Rail Technology within the Professional Fidelity series. The audio signals are
processed with an unequalled +/-V DC, which corresponds to twice that of discrete operational amplifiers and
four-times that of semiconductor operational amplifiers.
VOLTAiR Technology reaches outstanding technical and sonic performances. Technically especially in terms of
dynamic range and headroom and sonically especially in reproducing the finest details and delivering a totally
relaxed sounding audio experience. Music sounds absolutely natural.
SPL’s V Rail Technology is the internal audio processing voltage (+/- V DC).
It is not to be confused with the external mains voltage (e.g. V or V AC).
I
F
R
B

9
VOLTAiR – 120V Rail Technology
Comparisons
These diagrams show how our VOLTAiR Technology compares to other circuits.
The direct relation between operating level and maximum level is fundamental for the classification: the higher
the operating level, the higher the maximum level a circuit can handle. And since virtually all essential acoustic
and musical parameters depend on this relation, a higher operating voltage also has a positive impact on the
dynamic range, distortion limit and signal-to-noise ratio.
0
20
40
60
80
100
120
Volt
30 V
120 V
+ / - Volt + / - Volt
Operating Voltage
120
125
130
135
140
145
dB
124,2
141,4
OPA @ V SPL- OP@ V
Dynamic Range
I
F
R
B

10
VOLTAiR – 120V Rail Technology
Do bear in mind that dB scales do not represent linear but rather exponential increases. A dB increase corresponds
to doubling the acoustic power, +dB correspond to twice the sound pressure level, and +dB correspond to twice
the perceived loudness.
When it comes to volume, the VOLTAiR Technology exhibits a performance, in regard to maximum level and dynamic
range, that is twice that of common components and circuits given that its values are approximately dB higher.
THD measurements show a difference of more than dB compared to the TL at V — in terms of sound pres-
sure level, that corresponds to an improvement of more than %. The operating level most commonly used for
audio equipment is +/- volts.
Max. Audio Level
OPA @ V SPL- OP@ V
0
5
10
15
20
25
30
35
dBu
21,5
33,2
TL @ V SPL-OP@ V
-115
-113
-111
-109
-107
-105
dBu
-106
-114,2
THD&N
I
F
R
B

11
Phonitor Matrix
Phonitor Matrix
Basics of stereo listening
When listening to speakers sound coming from the right is not only perceived with the right ear (red line) but it is
also perceived with the left ear (green line). The sensation is time delayed, lower in level and has a reduced fre-
quency range (this applies to the left speaker accordingly).
Right loudspeaker Left loudspeaker
It arrives later because the signal travels a distance of approx. meters per second and the distance from the right speaker to the left ear is
longer than it is to the right ear. It is quieter and does not deliver the full frequency range, because the signal of the right speaker does not directly
arrive at the left ear but is partially reflected and absorbed by the head.
I
F
R
B

12
Phonitor Matrix
Our brain determines the direction of the sound by perceiving the time delay (interaural time difference) and the
level difference (interaural level difference).
Stereo listening with an “traditional“ headphone preamplier
When listening to music with a traditional headphone amplifier, the right ear only perceives the right signal (red
line) and the left ear only perceives the left signal (green line).
The delayed and quieter signal of the respective opposite side is miss-
ing. This unnatural sound irritates the ear and is stressful for our brain,
because it constantly is busy trying to locate the direction of the sound.
Besides, this super-stereo-effect leads to an exaggerated stereo width.
Instruments that are placed in the stereo field appear to be located
much further outside than desired.
These unnatural effects are corrected by the Phonitor Matrix.
I
F
R
B

13
Phonitor Matrix
How does the Phonitor Matrix work?
In simple terms, the Phonitor Matrix creates a speaker-like listening experience on headphones. It calculates the
time and level differences with their specific frequency responses to deliver a true rendition of a speaker playback.
Because time and level differences are set like real loudspeaker place-
ment, the brain is able to correctly identify the direction of the sound.
You can perceive a speaker-like listening experience.
All instruments appear at the correct position within the stereo image –
just like it was intended when it was mixed in the studio. In comparison
to a traditional headphone amplifier it provides the best conditions min-
imizing hearing fatigue.
I
F
R
B

14
Phonitor Matrix
In Detail
The Phonitorse makes use of analog filter networks to create the interaural level and time differences. The time
difference relates to the standard stereo speaker placement of °. The Phonitorse offers two crossfeed settings
to create the interaural level difference.
Angle
The Phonitorse has a fixed ° speaker angle placement
representing the standard speaker set-up.
30°30°
I
F
R
B

15
Phonitor Matrix
Crossfeed
Crossfeed defines the interaural level difference. The two crossfeed values approximate the influences of room
size, reflection and absorption characteristics.
The interaural level difference and the interaural time difference are frequency-corrected because the sound is
reflected and absorbed by the head in a non-linear fashion.
10
0
0,2
0,4
0,6
0,8
1
100 1 k 10 k Hz
Frequency corrected level difference at Crossfeed C and ° Angle of the
right channel (red = right signal, green = left signal)
10
0
100
200
300
400
µs
100 1 k 10 k Hz
Frequency corrected time difference at Crossfeed C and ° Angle of the
right channel (red = right signal, green = left signal)
I
F
R
B

16
V
O
L
U
M
E
Phonitor se Headphone Amplifier
VOLTAiR
120V DC Audio Rail
Digital
Analog Optic
Coax
USB
C 2
C 1
Off
CROSSFEED
INPUT
V
O
L
U
M
E
ON
Digital
Phonitor Matrix
Phonitor Matrix presets
The Phonitorse offers two presets. The Speaker Angle is fixed to °. For the Crossfeed
there are two settings: C and C.
The value C has less crossfeed and therefore a lower time difference than C.
I
F
R
B

17
Source selection
Source selection
Up to four audio sources can be connected to the Phonitorse.
Connect your analog source to the RCA Input ().
Phonitorse can be equipped with a DA converter. With that installed the analog input is expanded by USB, coaxial
and optical digital stereo inputs ().
• Select the analog or digital audio source by using the INPUT switch ().
• You can select an digital audio source (USB, coaxial, optical) by using the DIGITAL
switch ().
Set the INPUT switch to Digital.
V
O
L
U
M
E
Phonitor se Headphone Amplifier
VOLTAiR
120V DC Audio Rail
Digital
Analog
Optic
Coax
USB
C 2
C 1
Off
CROSSFEEDINPUT
V
O
L
U
M
E
ON
Digital
V
O
L
U
M
E
Phonitor se Headphone Amplifier
VOLTAiR
120V DC Audio Rail
Digital
Analog
Optic
Coax
USB
C 2
C 1
Off
CROSSFEED
INPUT
V
O
L
U
M
E
ON
Digital
I
F
R
B

18
Headphone output
Headphone output
Up to x watts of output power is available at the Headphone Output (). This allows even very power-hungry
headphones such as magnetostats or electrostats to be driven effortlessly.
To protect the headphone power amplifier stage and guarantee a long and consistent performance please note:
• Turn down VOLUME before swapping headphones.
• Never insert a mono jack plug into the front panel stereo jack.
• Make sure that the headphones stereo jack is fully inserted.
• If you use an adapter from , mm to /” (, mm) on your headphone make sure that the adapter is fully
screwed on respectively fully plugged in.
I
F
R
B

19
DIP switch
DIP switch
With the DIP switch () on the bottom the level of the headphone output can be increased:
Level increase of the headphone output
By using the DIP switch you can increase the level of the headphone output to better feed power-hungry
headphones.
DIP switch : ON = The headphone output is boosted to + dB.
DIP switch : n/a
I
F
R
B

20
Specications
Specications
Inputs
RCA input
• Unbalanced
• Impedance: kohms
• Max. Input level: +. dBu
Digital inputs (optional DAC xs) / sample rates
• Coaxial SPDIF (RCA) - sample rates PCM (kHz): ., , ., , .,
• Optical TOSLINK (F) – sample rates PCM (kHz): ., , ., / with Glass fibre <m: ./ kHz
• USB (B), PCM sample rates: ., , ., , ., , ., , .,
USB (B), DSD over PCM (DoP), sample rates: . (DSD), . (DSD), . (DSD) MHz
I
F
R
B
Table of contents
Other SPL Amplifier manuals

SPL
SPL Director Mk2 User manual

SPL
SPL Director Mk2 User manual

SPL
SPL Phonitor 2 User manual

SPL
SPL Gorilla GLA4-400 User manual

SPL
SPL Phonos User manual

SPL
SPL 2047 User manual

SPL
SPL Phonitor e User manual

SPL
SPL Auditor 2910 User manual

SPL
SPL performer s800 User manual

SPL
SPL Performer m1000 User manual

SPL
SPL performer s800 User manual

SPL
SPL HPM User manual

SPL
SPL Phonitor xe User manual

SPL
SPL Reducer 1160 User manual

SPL
SPL Elector User manual

SPL
SPL 9945 User manual

SPL
SPL Phonitor 3 DAC User manual

SPL
SPL Phonitor e User manual

SPL
SPL Phonitor 2 1280 User manual

SPL
SPL Professional Fidelity Elector User manual