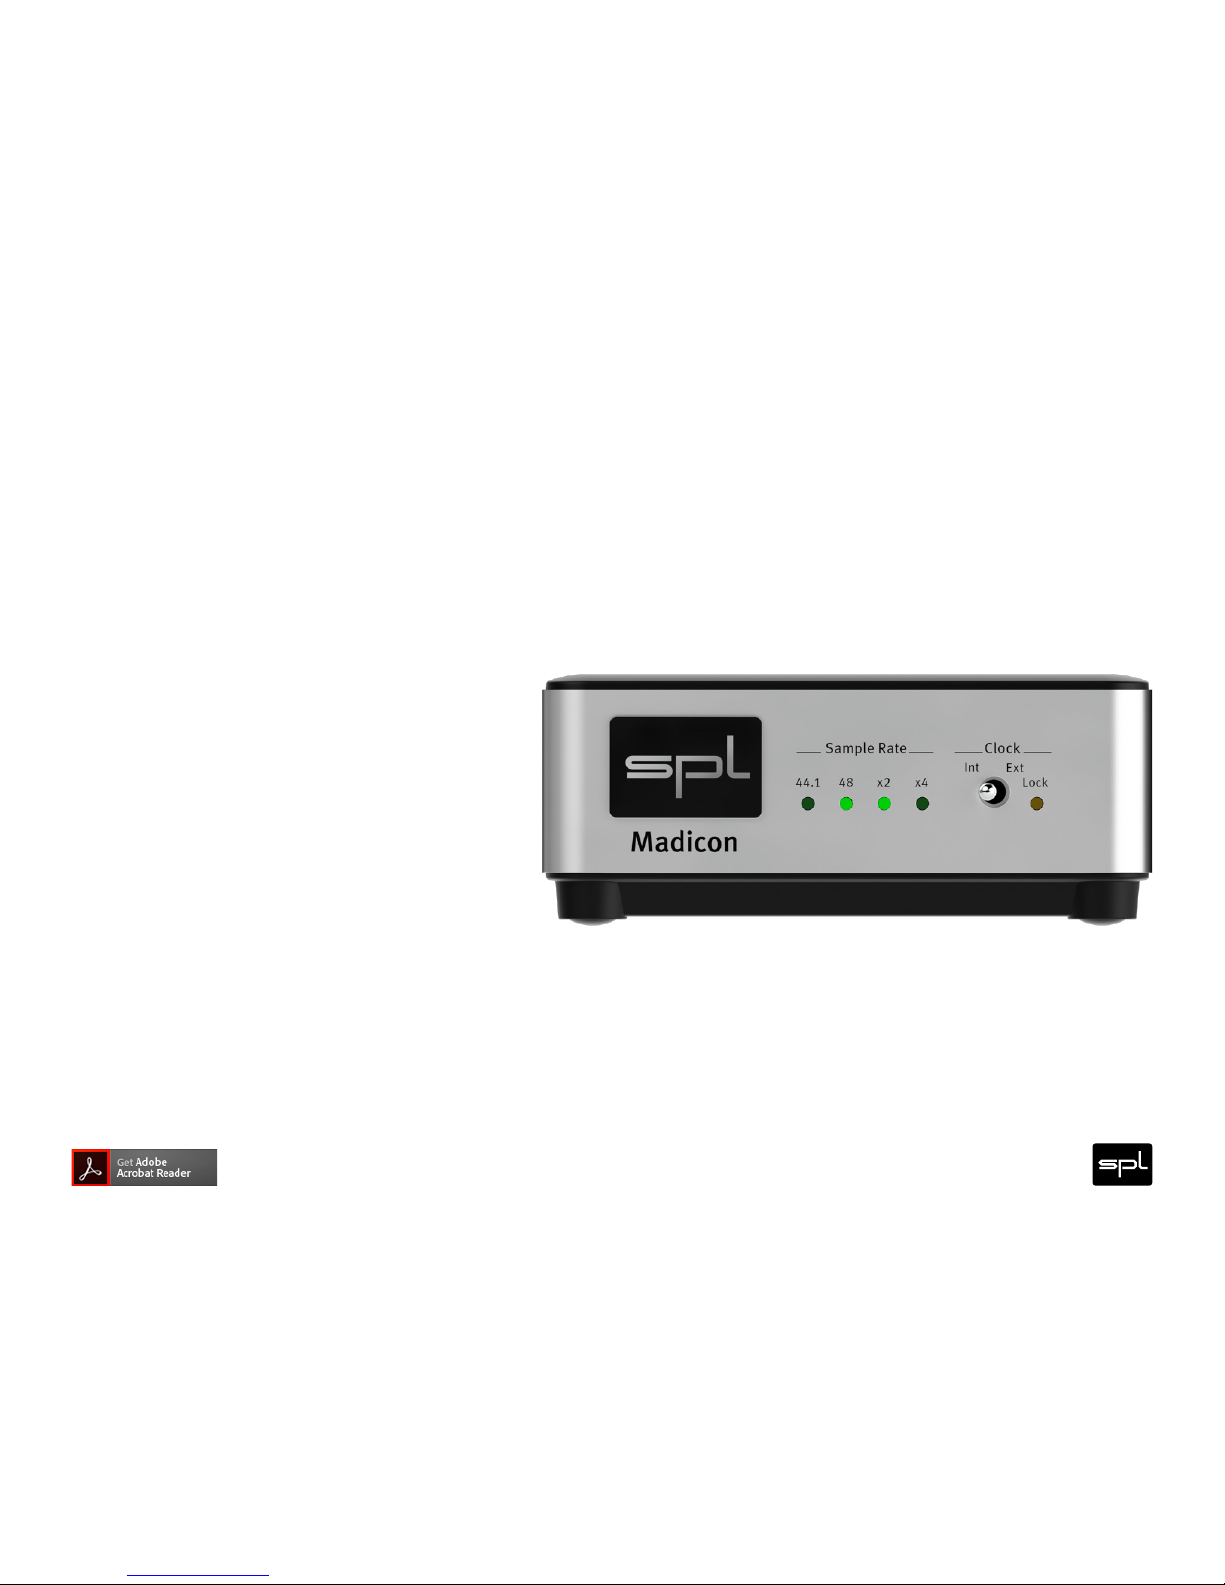
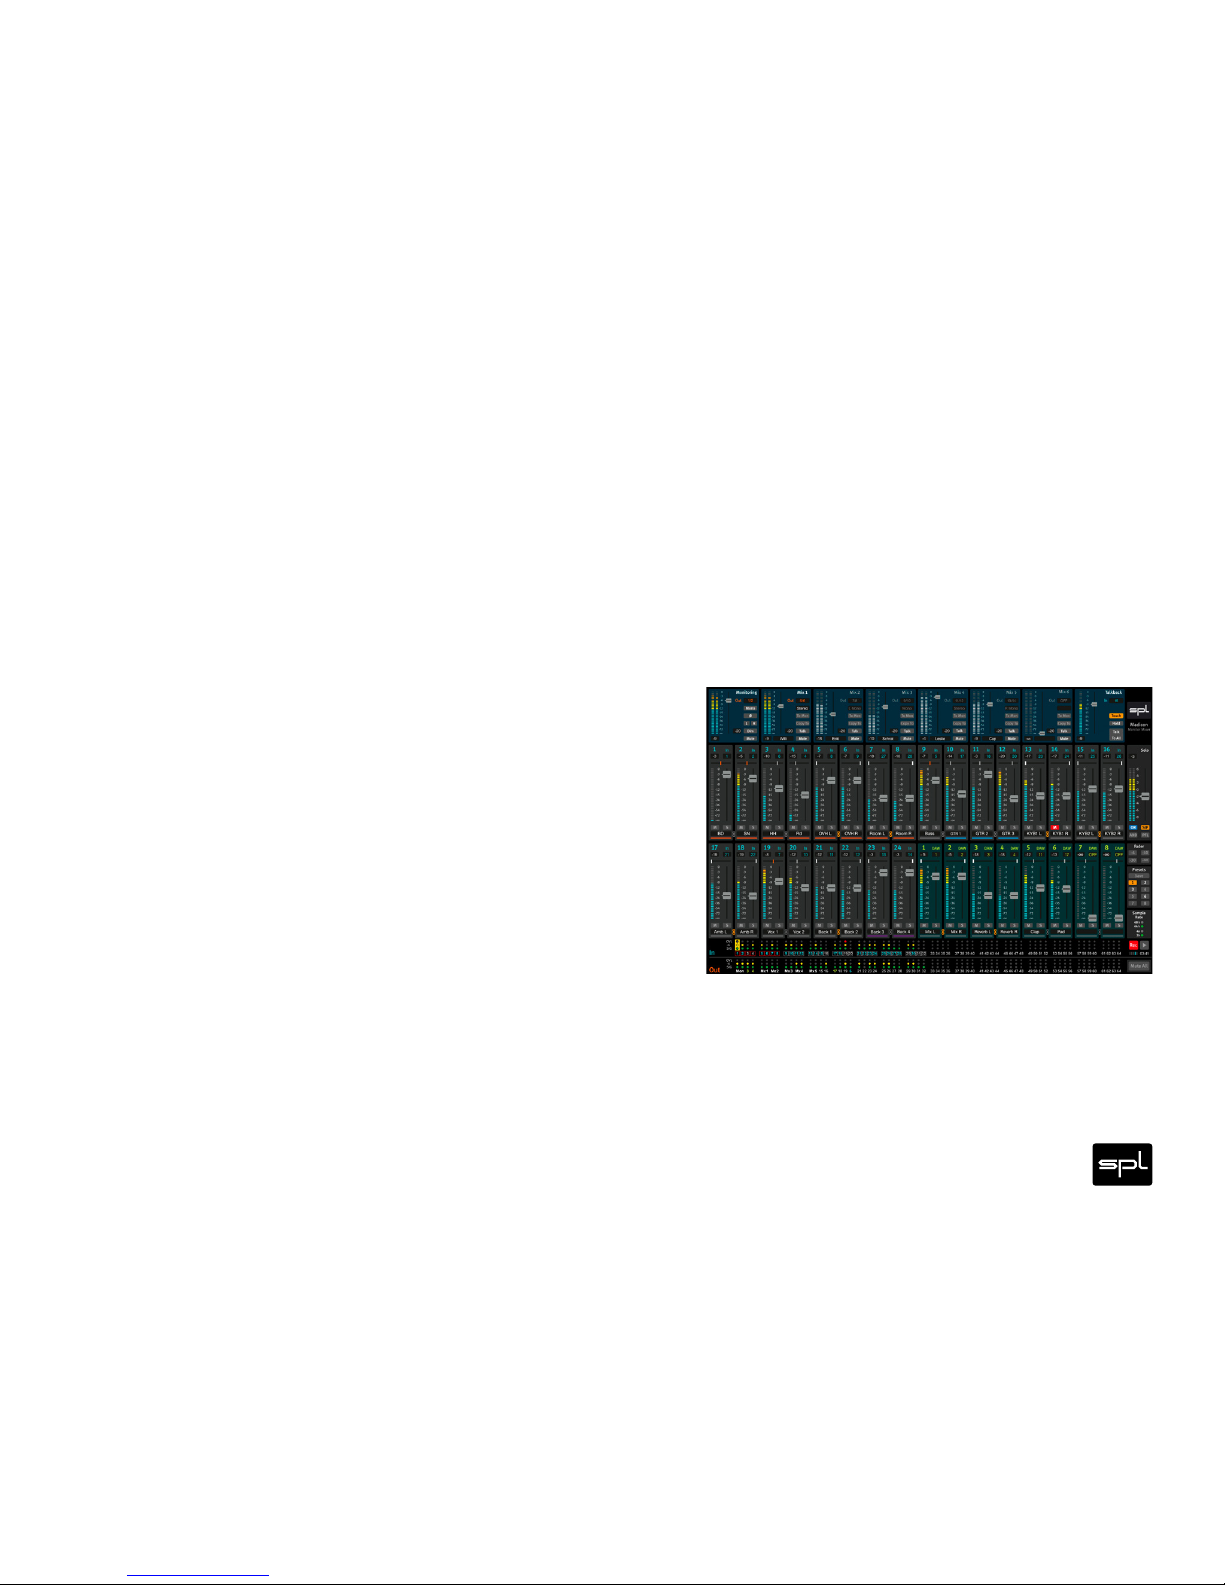
SPL Madicon User manual
Other SPL Recording Equipment manuals

SPL
SPL 1211 User manual

SPL
SPL Atmos User manual

SPL
SPL Vitalizer stereo MK2-T User manual

SPL
SPL Marc One User manual

SPL
SPL Frontliner 2800 User manual

SPL
SPL DynaMaxx 9735 User manual

SPL
SPL Transient Designer 2880 User manual

SPL
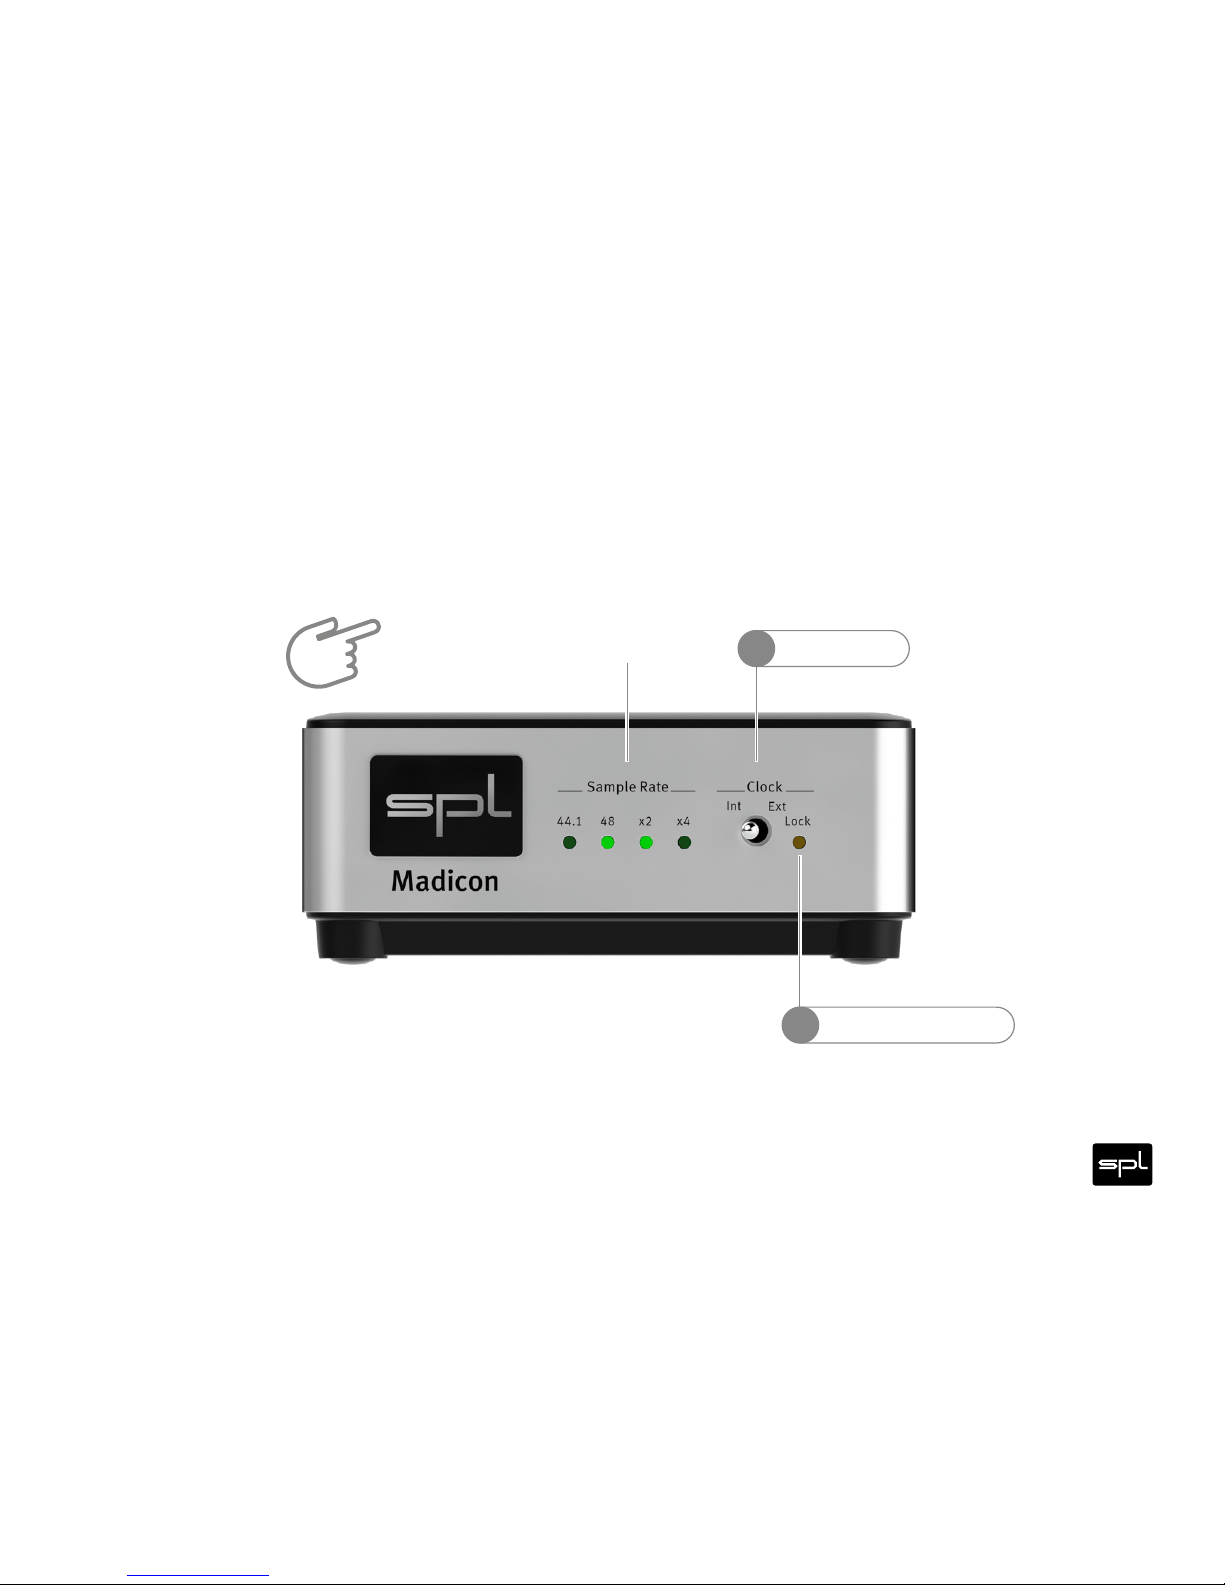
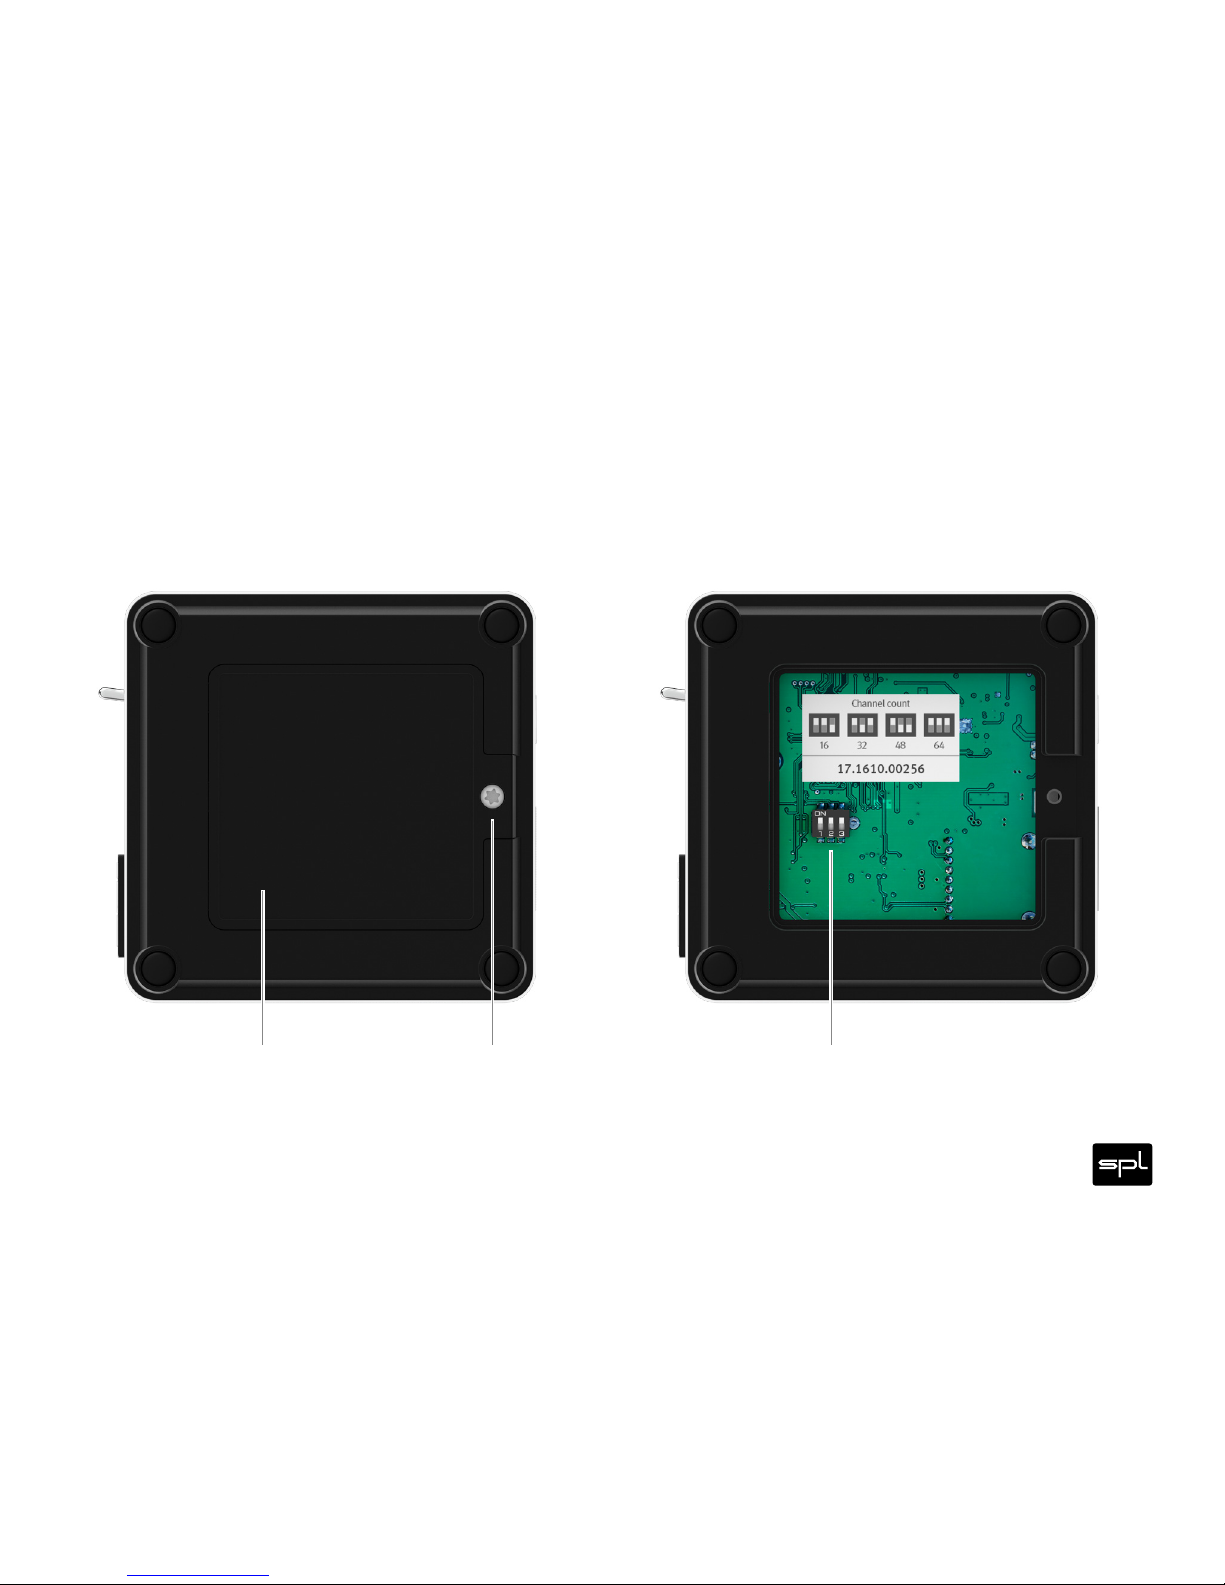
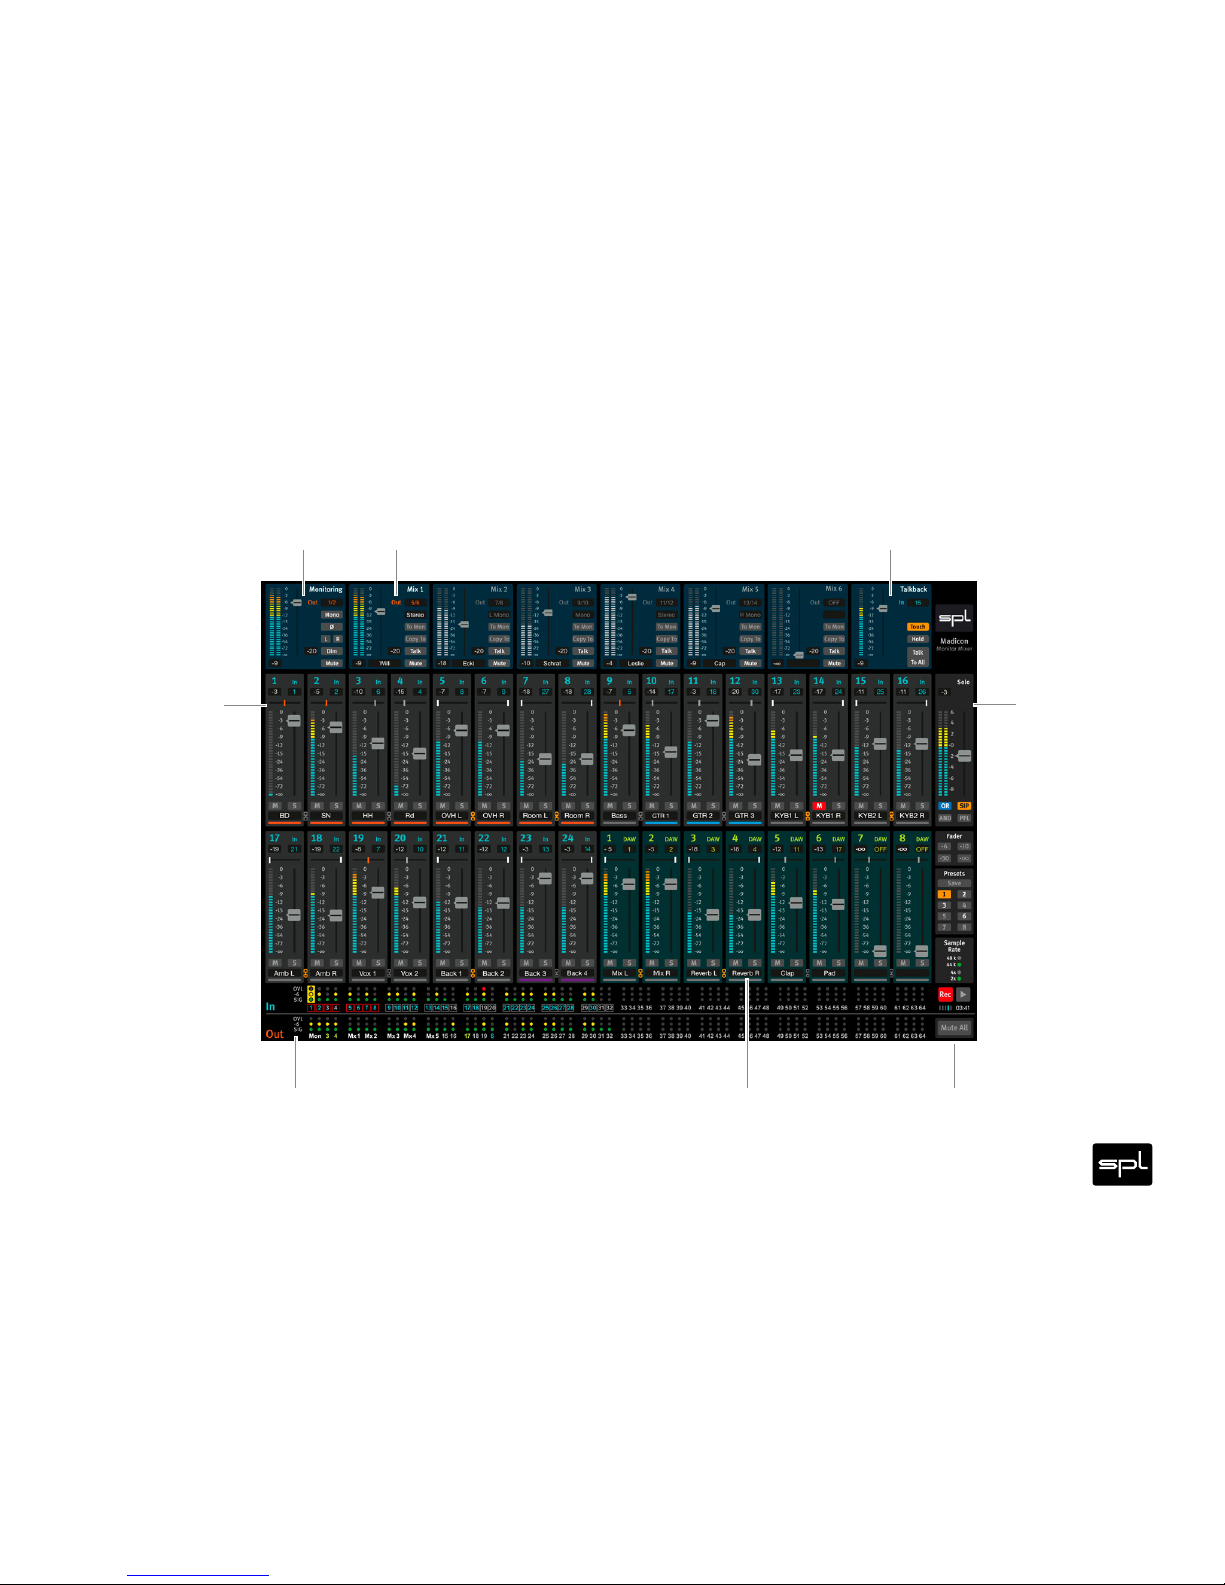
SPL Madicon User manual

SPL
SPL MMC1 User manual

SPL
SPL TwinTube 2920 User manual

SPL
SPL Crossover User manual

SPL
SPL Phonitor 2730 User manual

SPL
SPL Vitalizer stereo MK2-T User manual

SPL
SPL Transient Designer 2715 User manual

SPL
SPL Stereo Vitalizer Jack 9530 User manual

SPL
SPL Attacker2980 User manual

SPL
SPL Crossover User manual

SPL
SPL De-Esser 500 Series User manual

SPL
SPL DeEsser Mk2 User manual

SPL
SPL Phonitor 2 1530 User manual