Spokey Kendo User manual

921560
MODEL: KENDO
(PL)
BIEŻNIA ELEKTRYCZNA /
1
(EN)
ELECTRIC TREADMILL /
7
(DE)
ELEKTRISCHES LAUFBAND /
13
(CZ)
ELEKTRICKÝ BĚŽECKÝ PÁS /
18
SCHEMAT / DIAGRAM
/
24

1
www.spokey.eu
INSTRUKCJA OBSŁUGI
UWAGI Proszę zatrzymać niniejszą instrukcję do późniejszego wykorzystania. Produkt ten przeznaczony jest wyłącznie do użytku domowego.
BIEŻNIA - EFEKTY ĆWICZEŃ
Bieżnie są grupą sprzętu doskonale odpowiadającą osobom, które chcą
poprawić swoją kondycję oraz wzmocnić całe ciało, w szczególności dolne
partie mięśni. W trakcie treningu angażowane są przede wszystkim
mięśnie łydek, ud oraz pośladków, pracuje również obręcz brakowa, a
mięśnie pleców wpływają na utrzymanie prawidłowej postawy.
Ćwiczenia na bieżni do biegania polecane są osobom chcącym utrzymać
dobrą formę przez cały rok. Odpowiednio dobrany trening nie tylko
wzmacnia partie mięśniowe, rzeźbi sylwetkę, ale i pomaga zachować
zdrowie i dobrą kondycję.
Dzięki regulacji prędkości oraz kąta nachylenia pasa bieżnego użytkownik
dobiera parametry do swoich możliwości.
DANE TECHNICZNE
Rozmiar po rozłożeniu (dł. x szer. x wys.): 156 x 69 x 124 cm
Powierzchnia do biegania: 40 x 120 cm Maksymalna waga użytkownika - 110 kg
Napięcie: ~ 220-240 V (50/60Hz)
Przed przystąpieniem do składania urządzenia i przed rozpoczęciem
treningu należy dokładnie zapoznać się z poniższą instrukcją.
Bezpieczne i efektywne użytkowanie urządzenia może być zapewnione
jedynie wtedy, gdy zostanie ono poskładane, konserwowane i używane
we właściwy, opisany w instrukcji sposób. Jeżeli sam nie jesteś
użytkownikiem, proszę przekaż wszystkim użytkownikom niniejszą
instrukcję i poinformuj o wszystkich zagrożeniach i środkach ostrożności.
Przed przystąpieniem do ćwiczeń należy skonsultować się z lekarzem w
celu ustalenia, czy nie ma żadnych uwarunkowań psychicznych lub
fizycznych, które mogłyby stanowić zagrożenie dla Twojego zdrowia i
bezpieczeństwa. Rozmowa z lekarzem może również uchronić przed
niewłaściwym użyciem urządzenia. Lekarz określi, czy zasadne jest
stosowanie leków, które wpływałyby na puls, ciśnienie lub poziom
cholesterolu.
Zwracaj uwagę na sygnały Twojego ciała. Niewłaściwe lub nadmierne
ćwiczenie może w negatywny sposób wpłynąć na Twoje zdrowie. Należy
natychmiast zaprzestać ćwiczenia jeżeli wystąpi którykolwiek z
następujących objawów: ból, ucisk w klatce piersiowej, nieregularny puls,
wyjątkowo skrócony oddech, omdlenia, zawroty głowy, mdłości itp. Jeżeli
wystąpi którykolwiek z powyższych objawów powinieneś natychmiast
skontaktować się ze swoim lekarzem i do tego czasu zaprzestać
treningów.
Dzieci, nie będące pod nadzorem, należy utrzymać z dala od urządzenia.
Urządzenie jest przeznaczone tylko i wyłącznie dla osób dorosłych.
Urządzenie należy ustawić na prostej, stabilnej i twardej powierzchni. Dla
bezpieczeństwa, na około urządzenia należy zostawić po 2 m wolnej
przestrzeni z każdej strony potrzebnej do bezpiecznego użytkowania.
Przed przystąpieniem do ćwiczenia należy upewnić się, że wszystkie
śruby i zakrętki są dokładnie dokręcone. Proszę zwracać szczególną
uwagę na części najbardziej narażone na zużycie.
Bezpieczeństwo sprzętu może być zagwarantowane tylko wtedy, jeżeli
będzie on poddawany regularnym przeglądom i kontrolom.
Należy zawsze używać sprzętu zgodnie z jego przeznaczeniem. Jeżeli
podczas montażu lub użytkowania któraś część okaże się wadliwa, lub
wydaje niepokojące dźwięki, należy zaprzestać używania i oddać
urządzenie do serwisu. Nie wolno używać uszkodzonego urządzenia.
Podczas treningu należy zakładać odpowiedni strój. Należy unikać
luźnych strojów, które mogłyby zaczepiać się o urządzenie lub takich
które mogłyby ograniczać lub uniemożliwiać ruchy. Zaleca się również
ćwiczyć w odpowiednim obuwiu sportowym. Podczas ćwiczenia należy
mieć przypięty do ubrania klucz bezpieczeństwa i trzymać się uchwytów.
Podczas działania bieżni proszę nie dotykać elementów ruchomych
bieżni.
Sprzęt zaliczony został do klasy H i C według normy EN 957 i jest
przeznaczony wyłącznie do użytku domowego. Nie może być używany
jako sprzęt terapeutyczny lub rehabilitacyjny. Sprzęt nie jest odpowiedni
do celów terapeutycznych.
Maksymalna dopuszczalna waga użytkownika wynosi 110 kg.
Należy zachować szczególną ostrożność podczas podnoszenia i
przenoszenia urządzenia. Przenosić urządzenie powinny zawsze dwie
osoby. Podczas podnoszenia lub przenoszenia sprzętu należy zachować
właściwą postawę, aby nie uszkodzić kręgosłupa.
Montując urządzenie należy ściśle stosować się do załączonej instrukcji
i używać tylko części dołączonych do zestawu. Przed rozpoczęciem
montażu, należy sprawdzić czy wszystkie części, które zawiera
dołączona lista, znajdują się w zestawie.
Nie zaleca się pozostawienia urządzeń regulacyjnych, które mogłyby
przeszkadzać w ruchu użytkownika, w takim położeniu, aby wystawał
jakikolwiek ich element.
OSTRZEŻENIE: przed rozpoczęciem treningu na urządzeniu należy
przeczytać instrukcję.
Za ewentualne kontuzje lub uszkodzenia przedmiotów, które zostały
spowodowane niewłaściwym żytkowaniem tego produktu nie ponosimy
odpowiedzialności.
OSTRZEŻENIE. Systemy monitorowania tętna mogą być niedokładne.
Nadmiar ćwiczeń może doprowadzić do poważnych obrażeń lub śmierci.
Jeśli czujesz się słabo, natychmiast przerwij ćwiczenia Urazy dla zdrowia
mogą wynikać z nieprawidłowego lub zbyt intensywnego treningu.
ZESTAWIENIE CZĘŚCI
Nr
opis.
Szt.
Nr
opis.
Szt.
Nr
opis.
Szt.
1
Rama główna
1
54
Konsola licznika
6
14
Sworzeń m8x15
1
3
Lewa kolumna boczna
1
59
Klucz bezpieczeństwa
60
Sworzeń m8x55
1
4
Prawa kolumna boczna
2
Klucz imbusowy 5 mm
67
Zakrzywiona podkładka M8
2
61
Uchwyty konsoli
2
10
Sworzeń m8x50
1
6
Główny przewód kontrolny
56
Plastikowa osłona
4
11
Nakrętka nylonowa M8
1
klucze
MONTAŻ
Przygotowanie do montażu
1. Przed montażem upewnij się, że masz wystarczająco dużo miejsca
2. Użyj zaprezentowanych narzędzi do montażu
3. Przed montażem sprawdź czy w pudełku znajdują się wszystkie części.
Zaleca się, aby produkt był montowany przez co najmniej dwie osoby, aby
uniknąć ewentualnego zranienia
BIEŻNIA SPOKEY KENDO –SPECYFIKACJA
UWAGI DOTYCZĄCE BEZPIECZEŃSTWA
MONTAŻ, USTAWIANIE I KONSERWACJA
PL

2
www.spokey.eu
Większość wymienionego sprzętu montażowego została zapakowana
oddzielnie, ale niektóre elementy zostały wstępnie zainstalowane w
określonych częściach montażowych.. Jeżeli jest to wymagane zdemontuj
je i ponownie zamontuj.
Proszę zapoznać się z poszczególnymi etapami montażu i zapoznać się
ze wszystkimi zainstalowanymi urządzeniami
INSTRUKCJA MONTAŻU (RYSUNKI –STR. 26-28)
UWAGA! Nie podłączaj zasilania przed ukończeniem montażu.
Pamiętaj, że bieżnia zawsze powinna być przenoszona, podnoszona i
montowana przez 2 osoby. Zapewnij sobie pomoc na czas montażu
urządzenia.
KROK 1 Wyciągnij bieżnię z kartonu i umieść ją na równej, płaskiej
powierzchni.
Podmieś konsolę wraz z bocznymi kolumnami (3,4)i wyrównaj je tak, by
otwory na śruby pasowały do siebie.
KROK 2 jedna osoba powinna podtrzymywać kolumny boczne, zaś druga
–prykręcać śruby.
Użyj dwóch sworzni z łbami owalnymi M8x50 (10) oraz dwóch nylonowych
nakrętek M8 (11) do zamocowania lewej oraz prawej kolumny bocznej (3,
4) do ramy głównej (1). Do wkręcania użyj klucza imbusowego oraz klucza
dołączonego do zestawu. Używając klucza imbusowego skręć kolumny
boczne (3, 4) z podstawą (1) za pomocą sworzni M8x15 (14).
Uwaga! Na tym etapie nie dokręcaj jeszcze sworzni. Zrób to dopiero po
wykonaniu czynności z kroku 4.
KROK 3 Jedna osoba podtrzymuje konsolę (61), podczas gdy druga łączy
ze sobą przewody. Należy połączyć przewód wycgodzący z licznika (54) z
głównym przewodem kontrolnym (6) wychodzącym z prawej kolumny (4).
KROK 4 Po podłączeniu kabli nasuń konsolę (61) na kolumny boczne (3,
4). Przykręć uchwyty konsoli do kolumn bocznych za pomocą
zakrzywionych podkładek M8 (67) oraz sworzni M8x55 (60).
WAŻNE! W trakcie nakładania uchwytów konsoli (61) na kolumny boczne
(3, 4) upewnij się, że przewody zostały prawidłowo połączone i znajdują się
w prawej kolumnie (4). Uważaj, by nie przyciąć przewidów.
Teraz możesz dokręcić sworznie zamontowane w kroku 2.
KROK 5 Zamontuj na uchwytach konsoli (61)plastikowe maskownice (56).
Wepnij klucz bezpieczeństwa (59) w gniazdo na konsoli
KROK 6 Sprawdź, czy pas bieżny jest odpowiednio wycentrowany. Przed
pierwszym użyciem dokręć prawą oraz lewą śrubę regulacyjną o ¼ obrotu.
Użyj klucza imbusowego 6mm. .
SKŁADANIE BIEŻNI, PRZENOSZENIE BIEŻNI
Nie próbuj przenosić bieżni, jeśli nie jest w złożonej i zablokowanej pozycji.
Upewnij się, że wtyczka jest odłączona od źródła zasilania.
W celu złożenia bieżni należy podnieść obiema rękami powierzchnię do
biegania aż do momentu usłyszenia delikatnego sygnału, który informuje o
prawidłowym zablokowaniu bieżni w pozycji pionowej.
Natomiast w celu rozłożenia bieżni należy nacisnąć stopą kolorowy
element na tłoku znajdującym się pod pasem bieżnym, co umożliwi
zwolnienia blokady. Następnie należy delikatnie pociągnąć pas bieżny w
dół oraz stanąć w odległości 2 metrów od bieżni gdyż urządzenie rozłoży
się automatycznie. Prosimy zapoznać się z rysunkiem (s.24)
UWAGA: Złożona bieżnia nie może być obsługiwana i użytkowana.
Proszę całkowicie zatrzymać ruchomy pas bieżny przed złożeniem
urządzenia. Złożona bieżnia powinna być odłączona od źródła zasilania.
Nie wolno włączać złożonej bieżni.
Aby przenieść bieznię ostrożnie unieś ją na tylne rolki transportowe i
trzymając po obu stronach przemieść ją w wybrane miejsce.
UWAGA: Przed przenoszeniem bieżni, należy upewnić się, że bieżnia jest
odłączona od źródła zasilania. Przenosić urządzenie powinny zawsze dwie
osoby.
WŁĄCZANIE BIEŻNI
Włącz urządzenie używając przycisku zlokalizowanego z przodu bieżni
(pozycja ON). Przed rozpoczęciem treningu upewnij się, że klucz
bezpieczeństwa jest włożony prawidłowo, a klips klucza jest przyczepiony
do ubrania użytkownika.
Zwróć uwagę: podczas włączania bieżni zawsze stój na bocznych –
nieruchomych elementach ramy podstawy. Nigdy nie włączaj bieżni stojąc
na pasie bieżnym. Zanim na niego wejdziesz, pozwól bieżni osiągnąć
prędkość 1 km/h.
KONSERWACJA
Do czyszczenia urządzenia nie należy używać agresywnych środków
czyszczących. Używaj miękkiej, wilgotnej ściereczki do usuwania
zabrudzeń i kurzu.
Monitor (kopułę zasilającą) należy czyścić wyłącznie suchą ściereczką.
Urządzenie należy przechowywać w miejscach suchych by chronić je
przed wilgocią i korozją.
Używaj miękkiej, wilgotnej ściereczki do wycierana krawędzi pasa i
przestrzeni między pasem a krawędzią ramy. Czyść również krawędź
pasa z jego spodniej strony. Górną część pasa zaleca się myć
szczoteczką i wodą z mydłem raz na miesiąc.
UWAGA: Zanim zaczniesz znów używać bieżnię, poczekaj aż
urządzenie
wyschnie.
Odkurzaj pod urządzeniem co najmniej raz w miesiącu aby zapobiec
gromadzeniu się kurzu oraz sprawdź wszystkie połączenia, w tym
również czy śruby są dobrze dokręcone.
Zaleca się raz w roku zdjęcie czarnej pokrywy silnika i usunięcie kurzu,
który może się tam gromadzić.
UWAGA: Poziom bezpieczeństwa użytkowania sprzętu można utrzymać
tylko dzięki regularnej kontroli dotyczącej uszkodzenia i zużycia.
Elementy łączące są najbardziej narażone na zużycie.
UWAGA: Przed czyszczeniem, smarowaniem należy wyłączyć bieżnię
oraz odłączyć ją od źródła zasilania.
Ustawianie kata nachylenia pasa bieżnego
W tym modelu istnieje możliwość ręcznego ustawienia kata nachylenia
pasa bieżnego.
Aby wybrać preferowany kąt (do wyboru masz 3 stopnie nachylenia),
umieść jedną rękę na tylnej części ramy głównej i podnieś ją. Drugą ręką
wyciągnij blokadę z regulatora kata nachylenia. Wybierz odpowiedni kąt
nachylenia i włóż blokadę w regulator. Pozwoli to zablokować go w
prawidłowym położeniu.
UWAGA! Upewnij się, że oba regulatory mają ustawiony ten sam kąt.
Używanie bieżni, w której regulatory ustawione są pod różnym kątem może
sprawić, że bieżnia utraci stabilność, co może prowadzić do kontuzji
użytkownika.
Regulacja napięcia pasa
jest bardzo ważne dla biegacza, aby zapewnić równą, równomiernie
pracującą powierzchnię. Regulacja musi byś przeprowadzana z prawej
i lewej strony tylnej rolki za pomocą klucza dołączonego do bieżni. Śruby
do regulacji są umieszczone z tyłu bocznych szyn.
Dokręć tylną rolkę tylko do takiego stopnia, aby pas nie ślizgał się po
przedniej rolce. Reguluj delikatnie obydwie śruby (prawą i lewą) zgodnie
z ruchem wskazówek zegara i kontroluj właściwe napięcie pasa.
UWAGA: Nie wolno naciągać pasa zbyt mocno ponieważ może to
skutkować uszkodzeniem pasa i zbyt szybkim zużyciem się łożysk.
PAS BIEŻNY

4
www.spokey.eu
Wyśrodkowanie pasa bieżnego (rysunek, str. 29)
Bieżnia jest skonstruowana w taki sposób, aby pas bieżny był maksymalnie
wycentrowany podczas użytkowania. Normalną właściwością pasów jest
to, że gdy są w ruchu (bez osoby biegnącej), poruszają się przy jednaj z
krawędzi bieżni. Po kilku minutach ruchu pas powinien sam się scentrować.
Jeśli podczas użytkowania pas nadal porusza się w pobliżu jednaj z
krawędzi bieżni, konieczna jest regulacja. Należy ją przeprowadzić z
następujący sposób:
ustaw najmniejszą prędkość
sprawdź, po której stronie prowadnicy porusza się pas (blisko której
krawędzi).
Jeśli pas porusza się przy prawej krawędzi, dokręć prawą śrubę i poluzuj
lewą za pomocą 6 mm klucza aż do momentu, kiedy pas się wycentruje.
Jeśli pas porusza się przy lewej krawędzi, dokręć lewą śrubę i poluzuj
prawą aż do momentu, kiedy pas się wycentruje.
Instrukcja smarowania pasa bieżnego (rysunek –str. 29)
Odłączyć bieżnię od źródła zasilania.
Złożyć bieżnię.
Sprawdzić tylną stronę pasa bieżnego. Gdy powierzchnia jest sucha
należy ją nasmarować. Natomiast gdy powierzchnia jest mokra lub
wilgotna to nie trzeba jej smarować.
Urządzenie jest wyposażone w zasilacz. Ze względu na ochronę
środowiska naturalnego, zużytych baterii, zasilaczy, silniczków itp. nie
należy wyrzucać ze śmieciami gospodarstwa domowego. Zużyte baterie,
zasilacze, akumulatory itp. należy przekazać placówce, która dokona
utylizacji w sposób zgodny z obowiązującym prawem o ochronie
środowiska naturalnego.
Zaleca się okresowe sprawdzanie przewodu elektrycznego i wtyczki. W
przypadku uszkodzenia, urządzenie nie powinno być używane. Nigdy nie
naprawiaj urządzenia na własną rękę! Naprawy powinien dokonać
wykwalifikowany pracownik firmy SPOKEY. Nigdy nie ciągnij za kabel.
Smarowanie pasa bieżnego, podstawy, rolek
Należy smarować urządzenie po pierwszych 30 godzinach użytkowania w
następujący sposób:
Używaj miękkiej, suchej ściereczki do przecierania przestrzeni między
pasem i podstawą.
W czasie gdy urządzenie jest wyłączone, rozprowadź równomiernie
silikon po wewnętrznej powierzchni pasa i podstawy. (rysunek, str. 29)
Od czasu do czasu smaruj przednie i tylne rolki, aby działały w
najlepszy możliwy sposób.
Jeśli pas/podstawa/rolki będą utrzymywane w należytej czystości,
następnego smarowania można dokonać po około 120 godzinach
użytkowania. Proszę skontaktować się z serwisem firmy SPOKEY w
przypadku jakichkolwiek wątpliwości.
PODSTAWOWE INFORMACJE
Rozpoczęcie treningu, zakończenie treningu
Aby rozpocząć trening należy kliknąć napis Start na wyświetlaczu
multimedialnym.
Bieżnia zacznie się poruszać po 3 sekundach od momentu
naciśnięcia/kliknięcia przycisku Start.
Użytkownik może zakończyć trening (zatrzymać bieżnię) w każdym
momencie naciskając/klikając napis Stop.
Bieżnia zatrzyma się również w momencie odłączenia z konsoli klucza
bezpieczeństwa (zatrzymanie awaryjne).
Ustawianie prędkości
Prędkość może być zmieniana po uruchomieniu pasa bieżnego.
Zakres prędkości: 1-16 km/h Aby zmienić prędkość naciśnij przyciski SPEED +/- lub Instant Speed
Informacja o aktualnej prędkości dostępna jest na wyświetlaczu
Pomiar pulsu
Bieżnia wyposażona jest w czujniki umożliwiające mierzenie pulsu przez
dłonie. Aby uzyskać pomiar należy położyć obie dłonie na uchwytach.
Odczyt pojawi się na ekranie po ok. 5 sekundach.
Uwaga: Pokazywane dane są ogólne, podawane dla porównania różnych
sesji treningowych. Nie powinny być wykorzystywane w celach
medycznych
Klucz bezpieczeństwa
Klucz bezpieczeństwa służy do natychmiastowego wyłączenia zasilania
bieżni podczas upadku. Pełni funkcję awaryjnego stopu. Klucz
bezpieczeństwa należy używać tyko w nagłych wypadkach.
Dla bezpiecznego i komfortowego zatrzymania, unieruchamiania używaj
przycisku STOP, aż do całkowitego zatrzymania bieżni. Pas bieżny po
przyciśnięciu STOP będzie powoli zmniejszał swoją prędkość. Bieżnia nie
włączy się dopóki klucz bezpieczeństwa nie będzie odpowiednio włożony
do otworu klucza znajdującego się w środkowej części konsoli licznika co
dodatkowo zabezpiecza uruchomienie bieżni przez osoby trzecie. Drugi
koniec klucza należy przyczepić do ubrania. Podczas upadku klucz
bezpieczeństwa wypadnie z konsoli i bieżnia się zatrzyma. Zalecane jest,
aby podczas ćwiczeń zawsze mieć przypięty klucz bezpieczeństwa.
Proszę podłączyć I sprawdzić działanie klucza bezpieczeństwa przed
rozpoczęciem użytkowania.
LICZNIK
Włączanie
Podłącz wtyczkę do gniazdka, ekran licznika włączy się, bieżnia przejdzie
w stan gotowości.
STAN UŚPIENIA
Po 10 minutach bezczynności, bieżnia przechodzi w stan uśpienia, licznik
gaśnie. Aby ponownie rozpocząć korzystanie z bieżni naciśnij jakikolwiek
przycisk.
Przyciski
START: naciśnij, by rozpocząć trening lub włączyć wybrany program. Po 3
sekundach od włączenia pas bieżni zacznie się przesuwać z najniższą
możliwą prędkością lub prędkością odpowiednią dla wybranego programu.
STOP: naciśnij, by zakończyć trening. Bieżnia będzie zwalniać aż do
zupełnego zatrzymania.
PROG (PROGRAM): naciśnij, by wybrać program
MODE: naciśnij by przejść do ustawiania wartości celów do osiągnięcia w
trybie manualnym (czas, dystans, kalorie).
SPEED +/-: naciśnij, by zmienić prędkość przesuwania się pasa bieżnego
lub ustawić pożądane wartości (w trybie manualnym: czas, dystans, liczba
spalonych kalorii, w programach automatycznych: czas)
INSTANT SPEED (2 / 4 / 6 / 8 / 10): naciśnij przycisk, by wskazać prędkość
z jaką ma się poruszać pas bieżny
DANE NA WYŚWIETLACZU
SPEED: aktualna prędkość. Zakres: 1-16 km/h
TIME: czas ćwiczeń aktualnej sesji treningowej (minuty i sekundy).
Zakres: 0,0-99:59 min.
DISTANCE: dystans pokonany w trakcie aktualnej sesji treningowej.
CALORIES: liczba kalorii spalonych w trakcie aktualnej sesji treningowej..
KONSOLA

5
www.spokey.eu
PULSE: aktualny poziom pulsu podczas treningu. Aby uzyskać
prawidłowy pomiar, należy położyć obie dłonie na sensorach
wbudowanych w kierownicę. Pomiar pojawi się na ekranie po ok. 4
sekundach. Aby sprawdzić czy poziom pulsu jest stabilny należy trzymać
dłonie na sensorach podczas całej sesji treningowej. Uwaga:
Pokazywane dane są ogólne, podawane dla porównania różnych sesji
treningowych. Nie powinny być wykorzystywane w celach medycznych
PROGRAMY
Bieżnia wyposażona została w 16 wstępnie ustawioncyh programów oraz tryb manualny..
Wybór programu, rozpoczęcie i zakończenie treningu
Aby przejść do wybranego programu lub trybu naciskaj przycisk PROG tak
długo, aż pojawi się on na wyświetlaczu. Wybór zatwierdź przyciskiem
MODE.
Po ustawieniu trybu treningu naciśnij przycisk “START”. Po trzech
sekundach biieżnia wystartuje, powoli przyspieszy do wyświetlanej
wartości, następnie będzie płynnie działać ze stałą prędkością.
a) Podczas biegu, naciskaj “SPEED+ “, “SPEED–“ lub przycisk szybkiej
zmiany prędkości - “quick speed key“ regulując prędkość do własnych
potrzeb.
b) Naciśnięcie przycisku “STOP” powoduje zatrzymanie pasa bieżnego.
Szybki start
To najszybszy sposób na rozpoczęcie treningu. Naciśnij przycisk START,
na ekranie wyświetlone zostanie odliczanie, po 3 sekundach pas zacznie
się przesuwać.
Początkowa prędkość, z jaką porusza się pas wynosi 1 km/h, zanim
wejdziesz na pas pozwól bieżni osiągnąć tę prędkość.
W trakcie treningu możesz zmieniać prędkość poruszania się pasa
używając przycisków SPEED +/- lub przycisków zlokalizowanych na
uchwytach. Możesz również skorzystać z opcji szybkiej regulacji prędkości
–wybierając przyciski w obszarze INSTANT SPEED: 2/4/6/8/10, prędkość
zostanie dostosowana do wybranej wartości (2/4/6/8/10 km/h).
Prędkość może być regulowana w zakresie 1-16 km/h. Informacja o tym, z
jaką prędkością obecnie porusza się pas dostępna jest na wyświetlaczu.
W trakcie treningu na wyświetlaczu możesz obserwować swoje
osiągnięcia: czas ćwiczeń, przebyty dystans, liczbę spalonych kalorii,
wartość pulsu.
Trening można zakończyć przyciskając przycisk STOP. W sytuacji
awaryjnej (np. potknięcie) zatrzymanie bieżni może nastąpić po wyrwaniu
z gniazda klucza bezpieczeństwa.
Tryb manualny
W tym trybie możesz skupić się na osiągnięciu wybranego celu: czasie
ćwiczeń, pokonaniu dystansu lub spaleniu założonej liczby kalorii. Wyboru
dokonujesz przed rozpoczęciem treningu, jednorazowo można wybrać
tylko jeden cel.
Aby ustawić wartość celu, który chcesz osiągnąć
1. naciskaj przycisk MODE tak długo, aż odpowiedni parametr (TIME,
DISTANCE, CALORIES) zacznie migać.
2. Użyj przycisków SPEED +/-, by ustawić pożądaną wartość
3. Naciśnij przycisk START by rozpocząć trening, na ekranie widocznie
będzie odliczanie od wybranej przez ciebie wartości do zera.
W trakcie treningu możesz zmieniać prędkość poruszania się pasa
bieżnego naciskając przyciski SPEED +/- lub przyciski z obszaru INSTANT
SPEED.
Trening kończy się, gdy odliczanie dojdzie do zera, bieżnia nada sygnał
dźwiękowy i automatycznie zacznie zwalniać, aż do całkowitego
zatrzymania. Możesz również zakończyć trening w każdym momencie
naciskając przycisk STOP.
Wstępnie ustawione programy (P01-P16)
Wstępnie ustawione programy zapewniają ciekawy, zbilansowany trening
o różnym stopniu trudności. Podczas przeglądu programów na liczniku
wyświetlany jest ich przebieg (rozkład prędkości w czasie, diagramy str.
30-32). Wśród 16 programów przygotowane zostały zarówno wersje
mniej obciążające, interwałowe, jak i bardziej intensywne. Pozwala to na
wybranie programu najlepiej odpowiadającemu potrzebom użytkownika.
Wybór programu następuje poprzez naciskanie przycisku PROG. Po
wybraniu programu użyj przycisków SPEED (w konsoli lub uchwytach) by
ustawić czas treningu.
System podzieli ten czas na 20 sekcji, prędkość będzie się zmieniała
automatycznie w momencie przejścia do kolejnej sekcji. Możesz również
regulować ją za pomocą przycisków SPEED.
Trening rozpoczyna się po 3 sekundach od naciśnięcia przycisku START,
kończy po osiągnięciu limitu czas lub naciśnięciu przycisku STOP
Bieżnia nie startuje
Możliwa przyczyna: Bieżnia nie jest podłączona do prądu
Rozwiązanie: Podłącz wtyczkę do prądu
Możliwa przyczyna: Klucz bezpieczeństwa jest zainstalowany
nieprawidłowo
Rozwiązanie: Włóż klucz prawidłowo
Możliwa przyczyna: Wybity bezpiecznik / bezpiecznik różnicowy domowej
instalacji elektrycznej
Rozwiązanie: Sprawdź, czy bezpieczniki działają prawidłowo, spróbuj je
włączyć. W przypadku braku możliwości włączenia bezpiecznika
skontaktuj się z elektrykiem.
Możliwa przyczyna: Wybity bezpiecznik bieżni
Rozwiązanie: odczekaj 5 minut I spróbuj ponownie uruchomić bieżnię.
Pas się ślizga
Możliwa przyczyna: pas nie jest nałożony wystarczająco ciasno
Rozwiązanie: wyreguluj pas bieżny
Pas bieżny nie porusza się płynnie
Możliwa przyczyna: pas jest zbyt mało nasmarowany
Rozwiązanie: nasmaruj pas
Możliwa przyczyna: pas jest zbyt ciasny
Rozwiązanie: wyreguluj pas
Pas nie jest wyśrodkowany
Możliwa przyczyna: napięcie pasa bieżnego pomiędzy rolkami nie jest
równe
Rozwiązanie: wyśrodkuj pas
Ustawienie bieżni, zakres zastosowania
Bieżnie należy ustawić w miejscu suchym, nie narażonym na strumień
wody i wilgoć.
Bieżnie należy umieścić na czystej i płaskiej powierzchni. Ustawienie bieżni
na nierównym podłożu może spowodować uszkodzenie jej sytemu.
Bieżnie należy umieścić w odległości ok. 2 m od ściany i przedmiotów
stanowiących jakiekolwiek zagrożenie dla użytkownika.
Za urządzeniem należy zostawić obszar bezpieczeństwa: 2 x 1 m.
Ćwiczenia na bieżni zastępują spacer lub bieg. Bieżnia magnetyczna jest
przeznaczona do użytku domowego i nie jest urządzeniem przeznaczonym
do celów terapii i rehabilitacji. Urządzenie nie jest przeznaczone do
długotrwałego działania jak również komercyjnego działania.
ROZWIĄZYWANIE PROBLEMÓW
UŻYTKOWANIE

6
www.spokey.eu
www.spokey.pl
Pozycja
Wejdź na pas bieżny, dłonie możesz oprzeć na poręczach. W trakcie
ćwiczeń należy mieć wyprostowane plecy. Na bieżni możesz wykonywać
ćwiczenia zastępujące spacer lub bieg (patrz rysunki poniżej).
Urazy dla zdrowia mogą wynikać z
nieprawidłowego lub zbyt intensywnego
treningu.
Rozpoczęcie ćwiczeń
Proszę wejść na boczne panele bezpieczeństwa. Nastęnie należy ustawić
prędkość na najniższy poziom. Kolejnym krokiem jest wejście na pas bieżny i
ustawienie pożądanej prędkości.
Zejście z bieżni
a) zejście podstawowe
Naciśnij przycisk STOP. Uwaga: Należy poczekać aż pas bieżny
całkowicie zatrzyma się. Następnie należy odpiąć klucz bezpieczeństwa i
naciśnisnąć główny wyłącznik.
b) zejście awaryjne
W celu zejścia z bieżni w wyniku np. nieprawidłowego działania
urządzenia bądź problemów zdrowotnych proszę stopniowo zwalniać
szybkość biegu. Można zejść z bieżni, gdy pas bieżny zatrzyma się. Można
również skorzystać z klucza bezpieczeństwa.
UWAGA: Zawsze po skończonej sesji ćwiczeń odłącz bieżnię od źródła
zasilania (wyjmij wtyczkę z kontaktu).
Rzeźbienie mięśni
Aby ukształtować mięśnie podczas treningu należy znacznie zwiększyć
opór. Spowoduje to większe napięcie mięśni i może oznaczać, że nie
będziesz mógł trenować tak długo jak byś chciał. Jeżeli również chcesz
trenować swoją kondycję należy zmieniać program treningu. Należy
trenować jak zwykle poprzez fazę rozgrzewki, treningu i odpoczynku, ale
pod koniec fazy treningu należy zwiększyć opór, tak aby wzmocnić pracę
nóg. Należy ograniczyć prędkość, taka by puls utrzymywał się w na
oznaczonym poziomie.
Utrata wagi, sesje treningowe
Ważnym czynnikiem jest tutaj wysiłek jaki należy włożyć w ćwiczenie.
Czym dłużej i ciężej trenujesz tym więcej kalorii stracisz. Sukcesem będzie
uzyskanie takiej samej efektywności jak przy treningu kondycyjnym.
Zalecane jest wykonywanie ćwiczeń 3-4 razy w tygodniu - ok.: 30min.
Intensywny trening pomagający w zrzuceniu wagi powinien być
wykonywany częściej, co najmniej ok.: 45-50 min
Przestrzeganie CYKLU TRENINGOWEGO przynosi wiele korzyści dla zdrowia takich jak: kondycja fizyczna, kształtowanie mięśni oraz w połączeniu z
kontrolą spożywanych kalorii – utratę wagi.
Faza rozgrzewki
Etap ten gwarantuje prawidłowy przepływ krwi przez ciało i zapewnia
prawidłową pracę mięśni. Rozgrzewka redukuje ryzyko powstania skurczu
i uszkodzenia mięśnia. Zalecane jest wykonanie kilku ćwiczeń
rozciągających zgodnie z rysunkami przedstawionymi poniżej. Każda
pozycja powinna być utrzymana przez około 10-15 sekund, nie należy
nadwyrężać lub szarpać mięśni podczas wykonywania ćwiczeń. Jeżeli
odczujesz jakikolwiek ból należy natychmiast przestać.
Każde ćwiczenie powtórz parę razy.
Rozciąganie mięśni ud i pośladków
Wykonaj ćwiczenie jak na rys.
Rozciąganie mięśni ud
Połóż prawą dłoń na ścianie. Lewą ręką chwyć lewą stopę.
Następnie prawą ręką chwyć prawą stopę.
Rozciąganie mięśni ud i kolan
Usiądź na podłodze. Wyciągnij nogi przed siebie.
Następnie zrób skłon starając się dotknąć dłońmi stóp.
Rozciąganie górnych partii ciała
Stań na podłodze w lekkim rozkroku, umieść obie ręce nad
głową (tak jak na rys.), a następnie rozciągnij mięśnie ramion.
Rozciąganie mięśni łydek
Stań przy ścianie w rozkroku. Oprzyj dłonie o ścianę.
Naprzemiennie wyrzucaj nogi do tyłu w celu rościągnięcia
mięsni nóg.
Rozciąganie mięśni nóg
Połóż się na ziemi. Ugnij nogi w kolanach i przyciągnij je do
klatki piersiowej.
Faza treningu, odpoczynek
Etap ten wymaga wysiłku. Z czasem, przy regularnym treningu mięśnie
Twoich nóg staną się bardziej elastyczne. Należy ćwiczyć w swoim
własnym tempie, ale ważne jest, żeby stale utrzymywać to samo tępo.
Odpoczynek pozwala na przywrócenie normalnego pulsu i wystudzenie
mięsni. Etap ten jest powtórką rozgrzewki i należy kontynuować go przez
około 5 minut. Należy powtórzyć ćwiczenia rozciągające, pamiętając o tym,
żeby nie nadwyrężać mięśni. Zalecane jest trenowanie przynajmniej trzy
razy w tygodniu.
Przed naszym sprzętem stawiamy wysokie wymagania, dlatego
dokładamy wszelkich starań by do jego wykonania wykorzystywane były
materiały najwyższej jakości.
Niniejszy model posiada 5 lat gwarancji na ramę oraz pozostałe elementy,
z wyłączeniem podzespołów ulegających normalnemu zużyciu.
Więcej informacji na temat gwarancji znajdziesz w karcie gwaranycyjnej.
INSTRUKCJA TRENINGU
GWARANCJA
Zobacz film:
Rozgrzewka z Rafałem Wieczorowskim.
Zeskanuj kod zamieszczony obok
lub wpisz w przeglądarce adres:
http://bit.ly/spokey-WARMUP
Dotyczy licznika
Oznakowanie sprzętu symbolem przekreślonego kontenera na odpady informuje o zakazie umieszczania zużytego sprzętu elektrycznego i elektronicznego wraz z innymi
odpadami. Zgodnie z Dyrektywą WEE o sposobie gospodarowania zużytymi odpadami elektrycznymi i elektronicznymi, dla tego typu sprzętu należy stosować oddzielne sposoby
utylizacji. Użytkownik, który zamierza pozbyć się tego produktu, zobowiązany jest do oddania go do punktu zbierania zużytego sprzętu elektrycznego i elektronicznego, dzięki
czemu przyczynia się do ponownego użycia, recyklingu, bądź odzysku, a tym samym do ochrony środowiska naturalnego. W tym celu należy skontaktować się z punktem w
którym urządzenie zostało nabyte, lub z przedstawicielami władz lokalnych. Składniki niebezpieczne zawarte w sprzęcie elektronicznym mogą powodować długo utrzymujące
się niekorzystne zmiany w środowisku naturalnym, jak również działać szkodliwie na zdrowie ludzi.

7
www.spokey.eu
www.spokey.pl
USER’S GUIDE
NOTES Please keep this operation manual for future use. This exercise machine is intended for home use only.
TREADMILL –EXERCISE RESULTS
Treadmill is a perfect choice for those who wish to keep fit and
strengthen the entire body, in particular muscles of lower body. When
exercising, calf muscles, thigh muscles and gluteus muscles as well as
a shoulder girdle are primarily involved, while back muscles are
responsible for keeping a proper posture.
Exercises on the treadmill are recommended to persons who aim to
keep fit throughout the year. A well-selected training not only
strengthens muscles, shapes the body but also helps you stay healthy
and be in a good physical condition
Thanks to speed adjustment and inclination angle of the treadmill belt,
you can adapt parameters to your skills.
TECHNICAL SPECIFICATIONS
Dimensions of the assembled exercise machine: 156 x 69 x 124 cm
Running belt: 40 x 120 cm Maximum weight of the user - 110 kg
Voltage: ~ 220-240 V (50/60Hz)
Prior to assembling this exercise machine and before the start of the
training, you should read carefully the following instructions. Safe and
effective use of the equipment can be ensured only if it is put together,
maintained, and used properly, as described herein. If you are not the
user yourself, please pass this operation manual to all users and inform
them about all the hazards and precautions.
Before beginning an exercise program, consult with your doctor to
determine whether there are any mental or physical conditions which
could pose a risk to your health and safety. Talking with your doctor can
also protect you against the improper use of the equipment. Your doctor
will determine whether it is suitable to use medications that affect the
heart rate, blood pressure or cholesterol.
Pay attention to your body’s signals. Improper or excessive exercises can
negatively affect your health. An exercise should be discontinued
immediately if you experience any of the following symptoms: pain,
tightness in the chest, irregular pulse, particularly shortness of breath,
fainting, dizziness, nausea. If any of these symptoms occur, you should
contact your doctor immediately and stop training theretofore.
Children and pets should be kept away from the equipment. The exercise
machine is intended only for adults.
The equipment must be placed on a smooth, solid and hard surface,
which is secured by a mat or carpet. The exercise machine is intended
for internal use only.
Before beginning an exercise program, make sure that all bolts and nuts
are thoroughly tightened up. Please pay special attention to the parts that
are most exposed to wear.
Safety of the equipment can be guaranteed only if it is maintained and
inspected on a regular basis.
You should always use the equipment for its intended purpose. If during
its installation or use whichever part proves to be defective, or it produces
disturbing sounds, you should stop using the equipment and return it to
the service and repair shop. Damaged parts must be replaced
immediately or you must stop using the exercise machine until it has been
repaired. Do not use damaged equipment.
During your training, you should wear proper exercise outfits. Avoid loose
clothing that could catch on equipment and cause an injury or clothes
that could restrict or prevent your movements. Make sure to remove any
jewellery during your workout.
When running, make sure the plastic clip is fastened on your clothing. It
is for your safety, should you fall or move too far back on the treadmill.
Keep hands away from all moving parts
According to EN 957 standard the equipment has been categorized as H
operational use class and C accuracy class, and it is designed exclusively
for home use. It cannot be used as therapeutic or rehabilitation
equipment. The equipment is not suitable for therapeutic purposes.
The maximum permissible weight of the user is 110 kg’s.
When lifting or moving the equipment, you should maintain a proper
posture to prevent any damage to the spine.
During installation of the equipment, you must strictly adhere to the
enclosed instructions and make use of the supplied parts only. Before
installation, check whether all the parts that are contained on the attached
list, are included.
It s not recommended to leave any adjustment device, which could
interfere with the user’s movements, in such a position that protrude any
part thereof
WARNING: Before using the magnetic treadmill, please read these
instructions. We do not accept any liability arising from any injury or
damage to any items that have been caused by misuse of this product.
WARNING! Heart rate monitoring system May be inaccurate. Over
excercising May result In serious injury Or Heath. If you feel faint stop
excercising immediately.
Health injury may result from the incorrect or too intensive training.
LIST OF PARTS - DIAGRAM –P. 19
NO
DES.
QTY
NO
DES.
QTY
NO
DES.
QTY
1
Main frame
1
54
Counter console
6
14
Pin m8x15
1
3
Left side column
1
59
Safety key
60
Pin m8x55
1
4
Right side column
2
Allen wrench 5 mm
67
Curved washer M8
2
61
Console grips
2
10
Pin m8x50
1
6
Main control wire
56
Plastic cover
4
11
Nylon nut M8
1
Wrenches
ASSEMBLY
PREPARATIONS
1. Before assembly make sure there is enough space.
2. Use the recommended tools.
3. Before assembly check if there are all the parts in the box.
It is recommended that product should be assembled by at least two people
to avoid injuries.
Most of the assembly equipment listed here has been packed separately,
but some elements come preassembled in certain assembly parts. If it is
required, dissassemble them and assemble again.
Read the instructions of all assembly steps and familiarize with all the
devices installed.
TREADMILL SPOKEY KENDO –SPECIFICATION
SAFETY NOTES
ASSEMBLY, SETUP AND MAINTENANCE
EN

8
www.spokey.eu
www.spokey.pl
ASSEMBLY INSTRUCTIONS (Drawings –p. 26-28)
ATTENTION! Don’t connect the device to the power source until you finish
the assembly.
Remember that the treadmill should be always transported, lifted and
mounted by 2 people. Provide assistance for the device assembly.
STEP 1 Remove the treadmill from the box and place it on a level, flat
surface.
Lift the console with the side columns (3,4) and align them, so that the
screw holes correspond to each other.
STEP 2 One person should hold the side columns, another one –screw
the bolts.
Use two oval head bolts M8x50 (10) and two nylon nuts M8 (11) to fix the
left and rightside columns (3, 4)to themain frame (1). Use theAllen wrench
and the wrench supplied to screw them. Screw the side columns (3, 4) to
the base (1) with bolts M8x15 (14) using the Allen wrench.
Attention! At this stage do not tighten the bolts yet. Do it after step 4.
STEP 3 One person holds the console (61), while another one connects
the wires. The wire coming from the counter (54) should be connected to
the main control wire (6) coming from the right column (4).
STEP 4 After connecting the wire, slide the console (61) onto the side
columns (3, 4). Screw the console grips into the side columns with curved
washers M8 (67) and bolts M8x55 (60).
IMPORTANT! While placing the console grips (61) on the side columns (3,
4), make sure that the wires have been correctly connected and placed in
the right column (4). Be careful not to cut the wires.
Now you can tighten the bolts mounted in step 2.
STEP 5 Mount the plastic covers (56) on the console grips (61). Push the
safety key (59) into the slot in the console.
STEP 6 Check if the running belt is correctly centered. Before the first use
tighten the right and left adjustment screw by ¼ turn. Use the Allen wrench
6mm.
FOLDING AND TRANSPORT OF THE TREADMILL
Don't try to move the treadmill if it's not folded and locked. Make sure that
the plug is disconnected from power supply.
To fold the treadmill, the running area must be raised with both hands until
a gentle signal is heard, informing that the treadmill has been correctly
locked in vertical position.
To assemble the treadmill, the coloured element on the piston situated
under the treadmill belt should be pressed with one foot, which will release
the lock. Next, the treadmill belt should be gently pulled down and the
operator should back 2 metres away from the treadmill as it will unfold
automatically. Please refer to the drawing 1 (p. 24).
ATTENTION: Folded treadmill cannot be operated and utilized. Stop the
treadmill belt before folding the equipment. Folded treadmill should be
disconnected from power supply. Don't start the treadmill when it's folded.
To move the treadmill, raise it gently onto the rear transport rolls and move
it to the desired location, holding on both sides.
ATTENTION: Before transporting the treadmill make sure that it is
disconnected from power supply. The device should always be transported
by two persons..
TURNING ON THE TREADMILL
Turn the device on with the button at the front of the treadmill (ON position).
Before training, make sure that the safety key has been correctly inserted,
and the key clip is fastened to the user’s clothes.
Note: while turning on the treadmill, always stand on the immovable side
elements of the base frame. Before you climb onto it, let the treadmill reach
the speed of 0.8 km/h.
MAINTANCE
Caution: before cleaning/ lubrication you must take out the power plug from
a socket.
For cleaning the exercise machine, do not use any abrasive detergents.
Use a soft, damp cloth to remove dirt and dust.
The monitor (power supply dome) should be cleaned only with a dry cloth.
The equipment should bestored in dry places in order to protect it from any
moisture and corrosion.
Use a soft, damp cloth to wipe off the edges of the treadmill belt, and the
space between the treadmill belt and the frame edges. Clean the edge of
the belt on its bottom side also. Clean the upper part ofthe belt with a brush
and soap water once a month.
NOTE: Before you start using the treadmill again, wait until the equipment
is completely dry.
Vacuum under the equipment at least once a month to prevent dust from
accumulating.
Once a year, it is recommended to remove the black cover of the engine in
order to remove any dust that may accumulate there.
NOTE: The level of equipment operational safety can be maintained only
by regular inspections checking for any damage and wear.
Connecting elements are the most vulnerable to any wear..
Track inclination angle setting
In this model there is a possibility of setting the inclination angle of the
running belt manually.
To choose a desired angle (there are 3 inclinations to choose), place one
hand on the back of the main frame and lift it. Pull out the lock from the
inclination angle controller with the other hand. Choose a proper inclination
angle and place the lock in the controller. It may thenbe blocked in acorrect
position.
ATTENTION! Make sure that both controllers have the same angle. Using
the treadmill with the controllers set at different angles may make the
treadmill lose its stability, which may cause the user’s injuries.
Counter manual
Belt tension adjustment
Belt Tension Adjustment-It is very important for joggers and runners in
order to provide a smooth, steady running surface. Adjustment must be
made from the right and left rear roller in order to adjust tension with the
Hexagonal Wrench provided in the parts package. The adjustment bolt is
located at the end of the rails as noted in diagram below.
Note: Adjustment is thru the small holes on the end caps.
Tighten the rear roller only enough to prevent slippage at the front roller.
Turn both the right and left bolt clockwise reasonably and inspect for proper
tension. When an adjustment is made to the belt tension, you must also
make a tracking adjustment to compensate for the change in belt tension.
DO NOT OVERTIGHTEN - Over tightening will cause belt damage and
premature bearing failure.
Belt tracking adjustment (picture, p. 29)
This treadmill is designed to keep the belt reasonably centred while in use.
It is normal for some belts to drift near one side while the belt is running
with no one on it. After a few minutes of use, the belt should have a
tendency to centre itself. If during use, the belt continues to move toward
one side, adjustments are necessary. The procedures are as below:
▲ First set speed at lowest position.
▲ Second check the belt shifts to which side.
If the belt shifts to right, tighten the right bolt and loosen the left bolt by
using 6mm Hexagonal Wrench, until the belt is centered itself; if belt shifts
to left, tightenthe left bolt and loosen the right bolt by using 6mm Hexagonal
Wrench, until the belt is centered. When adjusting the belt using the 6 mm
Hexagonal Wrenches, it is important to adjust the belt in half turn
increments. Over adjusting the belt can cause damage to the mat.
TREADMILL BELT

9
www.spokey.eu
www.spokey.pl
How to check the running mat for proper lubrication (picture, p. 29)
Disconnect the main power supply.
Fold the treadmill up into the storage position.
Feel the back surface of the running mat.
Belt/deck/roller lubrication
The mat/deck friction may play a major role in the function and life of your
treadmill and that is why we recommend you constantly lubricate this
friction point to prolong the life time of your treadmill.
You should apply the lubrication after approximately the first 20 hours of
operation. We recommend lubrication of the deck every 30 days.
See below procedures for lubricating:
Use a soft, dry cloth to wipe the area between the belt and deck.
Spread lubricant onto the inside surface of belt and deck evenly (make
sure the machine is turned off and power is disconnected).
Periodically lubricate the front and rear rollers to keep them at their
peak performance.
If the treadmill belt/deck/roller is kept reasonably clean it is possible to
expect over 120 hours before additional re-lubing is necessary.
BASIC INFORMATION
Starting and ending workout
To start training click Start on the multimedia display.
The track will begin to move within 3 seconds of
pressing/clicking the Start button.
You may end the workout (stop the track) at any time by
pressing/clicking on Stop.
The track will also stop when the safety key (emergency stop)
is disconnected from the control panel.
Speed setting
Speed can be changed only when track is running.
Speed range: 1-16 km/h To change the speed press SPEED +/- or Instant Speed
Information about current speed is available on the display
Pulse measure
The treadmill is equipped with sensors to measure the pulse through
hands. You should place both hands on the handlebars. The result will
show up on the screen after about 5 seconds.
Attention: the data shown is general, it is given to compare different training
sessions. It should not be used for medical purposes.
SAFETY KEY
A safety key is intended to deactivate the treadmill immediately if you fall
down. It serves as an emergency stop. The safety key must be used in
urgent cases only.
For safe and convenient stop, use START/STOP button until the treadmill
stops completely. Once you have pressed START/STOP, the treadmill belt
will gradually decreased its speed. The treadmill will not activate until you
have inserted the safety key in the key hole located in the centre of the
counter control desk, which provides additional protection to treadmill
activation by third parties. The other end of the key must be attached to
clothes. If you fall down, the safety key will fall out the control desk and the
treadmill will stop immediately. Use only in urgent situations
COUNTER
Activation
Connect the plug to the socket, the counter display turns on and the track
goes into standby mode.
SLEEP MODE
After 10 minutes of inactivity, the track goes into sleep mode and the
counter is turned off. Press any button to resume the track.
BUTTON FUNCTIONS
START: press to start the training or a chosen programme. 3 seconds after
the start, the running belt will start moving at the lowest possible speed or
at the speed corresponding to a chosen programme.
STOP: press to stop the training. The treadmill will be slowing down until it
stops completely.
PROG (PROGRAMME): press to choose a programme.
MODE: press to start setting target values in the manual mode (time,
distance, calories).
SPEED +/-: press to change the speed of the running belt movement orset
the desired values (in the manual mode: time, distance, burnt calories, in
automatic programmes: time)
INSTANT SPEED (2 / 4 / 6 / 8 / 10): press the button to indicate at which
speed the running belt should be moving.
DISPLAY INFORMATION
SPEED: current speed. Range: 1-16 km/h
TIME: exercise time of the current training session (minutes and seconds).
Range: 0.0-99:59 min.
DISTANCE: distance covered during the current training session.
CALORIES: calories burnt during the current training session.
PULSE: current pulse level during the training. To get a correct
measurement you should place both hands on the sensors incorporated in
the handlebars. The measurement will show up on the screen after about
4 seconds. To check if the pulse level is stable, you should keep the hands
on the sensors during the whole training session. Attention: the data shown
is general, it is given to compare different training sessions. It should not
be used for medical purposes.
PROGRAMS
The track is fitted with 16 preset programs and manual mode..
Program selection, starting and ending workout
To go to the selected program or mode, press the PROG button until it
appears on the display. Confirm the selection with the MODE button.
After setting the training mode, press the "START" button. The track will
start in three seconds, slowly accelerate to the displayed value and
eventually it will run smoothly at a constant speed.
A) While running, press "SPEED +", "SPEED-" or "quick speed key" button
to adjust speed to your needs.
C) Pressing the "STOP" button causes the track to stop.
CONTROL PANEL

10
www.spokey.eu
www.spokey.pl
QUICK START
It’s the fastest way to start the training. Press START button, countdown
will be shown on the screen, after 3 seconds the belt will start moving.
The initial speed of the belt is 1 km/h, let the treadmill reach this speed
before you climb onto the belt.
During the training you can change the belt speed with SPEED +/- buttons
or the ones located on the handlebars. You can also use the quick speed
adjustment option –choosing the button in the area of INSTANT SPEED:
2/4/6/8/10, the speed will be adjusted to the value chosen (2/4/6/8/10
km/h).
The speed can be adjusted in the range of 1 -16 km/h. The belt speed will
be seen on the display.
During the training you can observe your achievements on the display:
training time, distance covered, burnt calories, pulse value.
You can stop the training by pressing STOP button. In case of emergency
(such as slipping) you can stop the treadmill by pulling the safety key from
the slot.
MANUAL MODE
In this mode you can focus on a desired target: exercise time, covering a
distance or burning a certain number of calories. Thechoice is made before
the training, only one target can be chosen at a time.
To set the target value you want to reach:
1. press MODE button until a proper parameter (TIME, DISTANCE,
CALORIES) starts blinking.
2. Use SPEED +/- buttons to set a desired value.
3. Press START button to start the training, the countdown from the value
chosen to zero will be seen on the screen.
During the training you can change the belt speed pressing SPEED +/-
buttons or the buttons from the area of INSTANT SPEED.
The training stops when the countdown reaches zero, the treadmill emits a
sound and slows down automatically until it stops completely. The training
can also be stopped anytime with STOP button.
PRE-SET PROGRAMMES (P01-P16)
Pre-set programmes provide interesting, balanced trainings of different
levels. While looking through the programmes, their process is displayed
on the counter (speed distribution in time, diagrams p. 30-32). Among 16
programmes there are also some easier interval versions as well as more
challenging ones. It provides a wide range of options meeting users’ needs.
Choose a programme by pressing PROG button.
After choosing a programme use SPEED buttons (in the console or in the
handlebars) to set the training time.
The system will divide this time into 20 sections, speed will change
automatically at the moment of switching to the next section. You can also
adjust it with SPEED buttons.
The training starts 3 seconds after pressing START button and stops after
reaching the time limit or pressing STOP button.
Treadmill doesn’t start
Potential reason: the treadmill is not connected to a power source.
Solution: plug in the device.
Potential reason: the safety key has been incorrectly installed.
Solution: insert the key correctly.
Potential reason: the fuse/earth leakage breakerof the electrical installation
has been blown.
Solution: check if the fuses work correctly, try to turn them on. If it’s not
possible, contact an electrician.
Potential reason: the treadmill fuse has been blown.
Solution: wait 5 minutes and try to start the treadmill again.
The belt is sliding
Potential reason: the belt is not tight enough.
Solution: adjust the running belt.
The running belt is not moving smoothly.
Potential reason: the belt is not lubricated enough.
Solution: lubricate the belt.
Potential reason: the belt is too tight.
Solution: loosen the belt.
The belt is not centered
Potential reason: the belt tension between the rolls is not even.
Solution: center the belt.
Placing the treadmill, scope of usage
The treadmill should be placed in a dry place, and not exposed to the
stream of water and moisture. The treadmill should be placed on a clean
and flat surface. Placing the treadmill on an uneven surface can cause
damage to its system. You cannot place the treadmill on a carpeted or
floor covering.
The treadmill is intended for indoor use only.
This equipment may not be exposed to an aerosol spray or oxygen.
Moreover, it may not be placed in areas where gas is used due to
possible sparks coming out of the engine.
The treadmill should be placed at a distance of about 2 m from walls and
objects that may be dangerous to the user.
The security area of 2 x 1 m must be left behind the exercise machine.
Treadmill exercises replace walks and jogging. The treadmill is intended
for home use only and it is not designed for any therapeutic or
rehabilitation purposes.
The device is not designed for a long-term operation or any commercial
activities.
Your body position
Get onto the treadmill belt; you canrest your hands on the handrails. While
doing your exercises, you should have your back straight. On the treadmill,
you can perform exercises which replace walks or jogging (see figure).
Any injuries may result from incorrect or
intensive training.
NOTE: You should keep your hands away
from moving parts.
Shaping your muscles
To shape your muscles during exercises, you should increase the
resistance substantially. This will bring about the increased muscle tension
and it may mean that you will not be able to train for as long as you want.
If you would also like to exercise your fitness, you should change your
training programme. You should exercise practising the following stages:
warm-up stage, proper training stage and
relaxation stage. However, at the end of your
training, you should increase the resistance,
so that you can enhance the workout of your leg muscles. You should also
reduce your speed, so that the pulse remains at the indicated level.
TROUBLESHOOTING
USAGE

11
www.spokey.eu
www.spokey.pl
Weight loss, Training sessions
An important factor here is the effort you put into yourexercises. The longer
and harder you train, the more calories you will burn. It will be asuccess to
obtain the same efficiency as for fitness training.
It is recommended to perform your exercises 3-4 times per week –for
approx.: 30 minutes.
Intensive training, which helps you to lose your weight, should be carried
out more frequently, for at least approx.: 45-50 minutes
Adherence to the following TRAINING CYCLE will bring many benefits to your health, such as physical fitness, muscle development and weight loss - in
conjunction with the calorie intake control.
Warm-up stage
This step guarantees a proper flow of blood through the body systems, as
well as it ensures the correct work of your muscles. Warming up reduces
the risk of contraction and muscle damage. It is recommended to do a few
stretching exercises as set out in the figures set out below. Each position
should be maintained for about 10-15 seconds. Do not strain or pull
muscles during your exercises. If you happen to experience any pain, you
should stop immediately.
Repeat every exercise several times.
Stretching the muscles of your thighs and buttock
Do the exercise as shown in the figure.
Stretching the muscles of your thighs
Put your right hand on the wall. Grasp your left foot with the
left hand. Then grasp your right foot with the right hand.
Stretching the muscles of your thighs and knees
Sit on the floor. Pull the legs forward.
Then bend forward to touch the feet with your hands.
Stretching the muscles of your upper body
Stand on the floor with your legs slightly apart, place both
hands over your head (as shown in figure), and then stretch
the arm muscles.
Stretching the muscles of your calves
Stand next to the wall with your legs apart. Put your
hands against the wall. Throw your legs back alternately
to stretch the leg muscles.
Stretching the muscles of your legs
Lie down on the floor. Bend your knees and pull them to the
chest.
Starting the exercise
Stand on the foot rail. Next, set the speed to the lowest possible value. The next step is stepping onto the running belt and setting the desired
speed
Training stage, relaxation
This stage requires your effort. In time, with regular training, your leg
muscles become more flexible. You should exercise at your own pace, but
it is important to constantly keep the same speed.
Relaxation allows you to restore a normal heartbeat and “cool down” your
muscles. This stage is a repetition of the warm-up and it should be
continued for about 5 minutes. Please repeat the stretching exercises,
remembering not tostrain your muscles. It is recommended to train at least
three times a week.
How to get off the treadmill
a) standard stopping procedure
Press the STOP button.
Attention: Wait till the running belt is completely still. Next, remove the
safety key and press the main switch.
b) emergency method
In order to get off the treadmill as a result of the equipment malfunction or
your health problems, please slow down your running speed gradually. You
can get off the treadmill when the belt stops running. You can also use the
security key.
NOTE: Always after finishing your exercise session on the treadmill,
disconnect the treadmill from the power source.
TRAINING MANUAL
The equipment label depicting a crossed-out wheeled bin symbol informs that it is forbidden to dispose of waste electrical and electronic equipment together with other types of
waste. In accordance with the WEE directive on waste electrical and electronic equipment, separate waste management processes should be applied for this type of equipment.
The user who intends to dispose of such a product is obliged to return it to an electronic equipment collection point thanks to which they can contribute to its re-use, recycling,
and recovery and, in this way, protect the environment. To do this, contact the sales point where the equipment was purchased or a representative of the local authorities.
Hazardous substances included in electronic equipment can have negative long-term influence on the natural environment and they can also have negative effect on human
health.
Watch the movie:
A warm-up with Rafał Wieczorowski.
Scan the presented code
or type the address into your web browser:
http://bit.ly/spokey-WARMUP

12
www.spokey.eu
www.spokey.pl
BEDIENUNGSANLEITUNG
BEMERKUNG Vorliegende Bedienungsanleitung bitte aufbewahren. Gerät ausschließlich für den Hausgebrauch geeignet.
LAUFBAND –ÜBUNGSRESULTATE
Laufbänder sind eine ausgezeichnete Gruppe von Gymnastikgeräten für
Personen, die ihre Kondition verbessern und seinen Körper – vor allem die
unteren Muskelpartien –stärken wollen. Beim Training werden vor allem
Waden-, Oberschenkel- und Hinterbacken-Muskeln in Anspruch
genommen, es arbeitet auch der Schultergürtel und die Rückenmuskeln
sorgen für eine korrekte Körperhaltung.
Die Übungen auf dem Laufband werden Personen empfohlen, die das
ganze Jahr über eine gute Form erhalten wollen. Ein entsprechend
gewähltes Training stärkt nicht nur die Muskelpartien und bildet die Figur,
sondern hilft auch Gesundheit und eine gute Kondition zu erhalten.
Dank Einstellungsmöglichkeit der Geschwindigkeit und des Laufbandes
passt der Benutzer die Parameter seinen Bedürfnissen an.
TECHNISCHE DATEN
Abmessungen nach dem Aufbau: (Länge x Breite x Höhe):
156 x 69 x 124 cm
Lauffläche:40 x 120 cm
Höchstbelastung - 110 kg
Spannung: ~ 220-240 V (50/60Hz)
Vor dem Aufbau des Gerätes und vor der ersten Trainingseinheit lesen
Sie die vorliegende Bedienungsanleitung sorgfältig durch. Eine sichere
und effiziente Nutzung des Gerätes kann nur dann gewährleistet werden,
wenn dieses zweckgemäß und entsprechend der Bedienungs- und
Montageanleitung aufgebaut, gewartet und benutzt wird.
Sollten Sie nicht der Benutzer sein, geben Sie bitte die in der
vorliegenden Bedienungsanleitung enthaltenen Informationen an alle
Benutzer weiter und informieren Sie sie über sämtliche mögliche
Gefahren und zu treffende Sicherheitsvorkehrungen.
Bevor Sie mit dem Training beginnen, holen Sie ärztlichen Rat ein, um
abzuklären, ob psychische bzw. physische Gegenanzeigen für ihre
Gesundheit und Sicherheit bestehen. Dadurch kann ebenfalls eine für
Sie nicht passenden Benutzung des Gerätes verhindert werden. Der Arzt
stellt fest, ob Anwendung von Arzneimitteln, die den Puls, Druck, bzw.
Cholesterin beeinflussen, begründet ist.
Achten Sie auf die Signale Ihres Körpers. Nicht richtiges bzw. zu
intensives Training kann sich negativ auf Ihre Gesundheit auswirken. Sie
sollen mit dem Training sofort aufhören, sobald eines der folgenden
Symptome auftritt: Schmerzen, insbesondere Brustschmerzen,
unregelmäßiger Pulsschlag, Kurzatmigkeit, Ohnmacht, Schwindelgefühl,
Übelkeit. Sollte eines der o. g. Symptome auftreten, sollte dies
umgehend mit ihrem Arzt abgeklärt werden. Das Training sollte bis auf
weiteres eingestellt werden.
Kinder und Tiere sind vom Gerät fernzuhalten. Das Gerät ist
ausschließlich für Erwachsene geeignet.
Das Gerät ist auf ebenem, hartem Untergrund, der mit Matte bzw.
Teppich gesichert ist, aufzustellen. Für einen Sicherheitsabstand von 2
m rund um das Gerät ist Sorge zu tragen.
Vor dem Training prüfen, ob sämtliche Schrauben und Mutter richtig
festgezogen sind. Dabei ist insbesondere auf die Verschleißteile zu
achten.
Die Sicherheit des Gerätes kann nur dann gewährleistet werden, wenn
es regelmäßig und systematisch gewartet und kontrolliert wird.
Das Gerät ist immer gemäß seiner Bestimmung zu benutzen. Sollte sich
beim Aufbau bzw. bei der Benutzung eins der Teile als mangelhaft
erweisen, oder sollte das Gerät beunruhigende Geräusche von sich
geben, ist das Training sofort zu beenden und das Gerät ist bei der
Servicestelle abzugeben. Ein defektes Gerät darf nicht benutzt werden.
Beim Training sollte angemessene Sportbekleidung getragen werden.
Vermeiden Sie lose Kleidungsstücke, die sich im Gerät verhaken,
verfangen könnten bzw. solche, die die Bewegungsfreiheit einschränken
bzw. unmöglich machen könnten. Ebenfalls empfiehlt es sich
entsprechende Sportschuhe zu tragen. Zu Beginn empfiehlt es sich, ein
langsames Tempo einzustellen. Während des Trainings sollten Sie sich
an den Griffen festhalten. Keine beweglichen Elemente des Laufbandes
berühren, wenn die Anlage in Betrieb ist.
Das Gerät ist der Klasse H und C gemäß der Norm EN 957 zugeordnet
und ist ausschließlich für den Hausgebrauch bestimmt. Es darf weder für
Therapie- noch für Rehabilitationszwecke benutzt werden und ist nicht
für therapeutische Zwecke geeignet.
Das erlaubte Höchstgewicht des Benutzers beträgt 110 kg.
Besondere Vorsicht ist beim Anheben und Verstellen des Gerätes
geboten. Das Gerät sollte immer von zwei Personen verlegt werden.
Beim Anheben bzw. Verlegen des Gerätes ist auf die richtige
Körperhaltung zu achten, damit die Wirbelsäule keinen Schaden davon
trägt.
Beim Aufbau des Gerätes ist die beiliegende Aufbauanleitung strikt zu
befolgen und es sind nur die dem Set beiliegenden Teile zu benutzen.
Vor dem Aufbau ist zu überprüfen, ob sämtliche Teile der beigefügten
Liste im Set vorhanden sind.
Vermeiden Sie, dass die Vorrichtungen zum Einstellen der Anlage, in
solchen Positionen verbleiben, die den Benutzer der Anlage durch
hervorstehende Elemente in seiner Bewegungsfreiheit stören bzw.
einschränken könnten.
WARNUNG!! Vor der Benutzung des Gerätes Bedienungsanleitung
durchlesen.
Für eventuelle Verletzungen bzw. Beschädigungen am Gerät, die auf eine
unsachgemäße Benutzung zurückzuführen sind, übernehmen wir keine
Verantwortung.
WARNUNG! Überwachungssysteme des Pulsschlags können nicht präzise
sein. Zu intensives Training kann zu ernst zunehmenden Verletzungen
bzw. zum Tod führen. Bei auftretendem Schwächegefühl Training sofort
beenden. Bei unsachgemäßem und übermäßigem Training sind
Gesundheitsschäden nicht auszuschließen.
ÜBERSICHT DER TEILE - SCHEMA –S.19
Lfd. Nr.
Beschreibung
Menge
Lfd. Nr.
Beschreibung
Menge
Lfd. Nr.
Beschreibung
Menge
1
Hauptrahmen
1
54
Zähler-Konsole
6
14
Bolzen m8x15
1
3
Linke seitliche Säule
1
59
Sicherheitsschlüssel
60
Bolzen m8x55
1
4
Rechte seitliche Säule
2
Innensechskant-Schlüssel 5
mm
67
Gekrümmte Unterlegscheibe M8
2
61
Konsolen-Halterungen
2
10
Bolzen m8x50
1
6
Haupt-Kontrollkabel
56
Plastikverkleidung
4
11
Nylonmutter M8
1
Schlüssel
VORBEREITUNG
1. Vergewissern Sie sich vor der Montage, dass Sie ausreichend viel Platz
haben
2. Verwenden Sie die dargestellten Werkzeuge für die Montage
3. Prüfen Sie vor der Montage, ob sich alle Teile in der Schachtel befinden.
Es wird empfohlen, dass das Produkt von mindestens zwei Personen
montiert werden sollte, um eventuelle Verletzungen zu vermeiden.
Der Großteil der genannten Montageausrüstung wurde gesondert
verpackt, abermanche Elemente wurden in den bestimmten Montageteilen
LAUFBAND SPOKEY KENDO –SPEZIFIZIERUNG
SICHERHEITSHINWEISE
MONTAGE, EINSTELLUNG UND PFLEGE
DE

13
www.spokey.eu
www.spokey.pl
vorinstalliert. Wenn dies erforderlich ist, bauen Sie diese aus und erneut
ein. Machen Sie sich bitte mit den einzelnen Montageschritten und allen
installierten Geräten vertraut.
MONTAGEANLEITUNG (BILDER –SEITEN 26-28)
ACHTUNG! Schließen Sie die Stromversorgung nicht vor Beendigung der
Montage an.
Denken Sie daran, dass das Laufband immer von 2 Personen getragen,
gehoben und montiert werden sollte. Stellen Sie sicher, dass Sie während
der Montage des Geräts jemanden haben, der Ihnen hilft.
SCHRITT 1 Nehmen Sie das Laufband aus dem Karton und stellen Sie es
auf einer flachen, ebenen Oberfläche ab.
Heben Sie die Konsole zusammen mit den seitlichen Säulen hoch (3,4) und
gleichen Sie diese so an, dass die Öffnungen für Schrauben zueinander
passen.
SCHRITT 2 eine Person sollte die seitlichen Säulen hochhalten, die
andere hingegen –die Schrauben festschrauben.
Verwenden Sie zwei Bolzen mit ovalen Köpfen M8x50 (10) sowie zwei
Nylonmuttern M8 (11) zur Befestigung der linken und rechten seitlichen
Säule (3, 4) am Hauptrahmen (1). Zum Hineinschrauben verwenden Sie
den Innensechskantschlüssel sowie den im Lieferumfang enthaltenen
Schlüssel. Verschrauben Sie mithilfe des Innensechskantschlüssels die
seitlichen Säulen (3, 4) mit der Basis (1) mithilfe der Bolzen M8x15 (14).
ACHTUNG! Schrauben Sie die Bolzen an dieser Stelle noch nicht fest.
Machen Sie dies erst nach der Durchführung der Tätigkeiten aus Schritt 4.
SCHRITT 3Eine Person hält die Konsole hoch (61), während die andere
die Kabel miteinander verbindet. Verbinden Sie das aus dem Zähler
hinausgehende Kabel (54) mit dem Haupt-Kontrollkabel (6) das aus der
rechten Säule hinausgeht (4).
SCHRITT 4 Schieben Sie nach dem Anschluss der Kabel dieKonsole (61)
auf die seitlichen Säulen (3, 4). Schrauben Sie die Konsolen-Halterungen
an die seitlichen Säulen mithilfe der gekrümmten Unterlegscheiben M8 (67)
und Bolzen M8x55 (60).
WICHTIG! Während des Auflegens der Konsolen-Halterungen (61) auf die
seitlichen Säulen (3, 4), vergewissern Sie sich, dass die Kabel korrekt
angeschlossen wurden und sich in der rechten Säule befinden (4). Passen
Sie auf, dass Sie keine Kabel einklemmen.
Nun können Sie die in Schritt 2 montierten Bolzen festschrauben.
SCHRITT 5 MontierenSie die Plastikverkleidungen (56) auf den Konsolen-
Halterungen (61). Stecken Sie den Sicherheitsschlüssel (59) in das
Schloss auf der Konsole
SCHRITT 6 Überprüfen Sie, ob das Laufband ausreichend zentriert ist.
Schrauben Sie vor der ersten Verwendung die rechte und linke
Regulierungsschraube um ¼ Drehung fest. Verwenden Sie den
Innensechskantschlüssel 6mm.
ZUSAMMENKLAPPEN, TRANSPORTIEREN
Versuchen Sie niemals, das Laufband zu transportieren, wenn es sich nicht
in der zusammengelegten und gesperrten Position befindet. Vergewissern
Sie sich, dass der Stecker vom Strom abgeschlossen ist.
Um das Laufband zusammenzulegen, heben Sie die Lauffläche mit beiden
Händen, bis Sie ein zartes Signal hören, dass über die korrekte Sperre in
senkrechter Position informiert.
Zum Aufklappen des Laufbands hingegen, drücken Sie mit dem Fuß das
bunte ELemente auf dem Kolben unter dem Laufband, was die Lösung der
Sperre ermöglicht. Danach ziehen Sie den Riemen des Laufbands zart
nach unten und stellen Sie sich in einer Entfernung von 2 Metern vom
Laufband auf, da das Gerät sich automatisch aufstellt. Machen Sie sich
bitte mit Abbildung 1 (S. 24) vertraut.
ACHTUNG: Das zusammengelegte Laufband darf weder bedient noch
verwendet werden.
Bitte halten Sie den beweglichen Riemen des Laufbands vor dem
Zusammenlegen des Geräts vollständig an. Das zusammengelegte
Laufband sollte von der Stromquelle getrennt sein. Das zusammengelegte
Laufband darf nicht eingeschaltet werden.
Um das Laufband zu transportierten, heben Sie es leicht auf die hinteren
Transportrollen an und tragen Sie dieses, an beiden Seiten haltend, an den
gewünschten Ort.
ACHTUNG: Vergewissern Sie sich vor dem Transport des Laufbands, dass
dieses von der Stromquelle getrennt ist. Das Gerät sollte immer von zwei
Personen transportiert werden.
EINSCHALTEN DES LAUFBANDS
Schalten Sie das Gerät mithilfe des Knopfes ein, der sich vorne am
Laufband befindet (ON-Position). Vor dem Trainingsbeginn vergewissern
Sie sich, dass der Sicherheitsschlüssel korrekt eingelegt ist und der
Schlüssel-Clip an der Kleidung des Benutzers befestigt ist.
Beachten Sie: Stehen Sie während des Einschaltens des Laufbands immer
auf den seitlichen –unbeweglichen –Elementen des Basisrahmens.
Schalten Sie das Laufband niemals am Laufgurt stehend ein. Bevor Sie
diesen betreten, erlauben Sie dem Laufband, eine Geschwindigkeit von 1
km/h zu erreichen..
PFLEGE UND WARTUNG
Benutzen sie für die Reinigung keine aggressiven Reinigungsmittel. Mit
einem weichen, feuchten Tuch entfernen Sie Staub von der Anlage.
Der Bildschirm (Versorgungskuppel) ist ausschließlich mit einem
trockenen Tuch zu reinigen.
Die Anlage ist in trockenen Räumen vor Feuchte und Korrosion
geschützt aufzubewahren.
Benutzen Sie ein weiches, feuchtes Tuch zum Reinigen der Kante der
Laufmatte und der Fläche zwischen der Laufmatte und der
Rahmenkante. Reinigen Sie ebenfalls die Kante der Laufmatte von
unten. Das Laufband von oben mit Bürste und Seifenwasser einmal
monatlich abwischen.
ACHTUNG: Das Laufband erst wieder benutzen, wenn es vollständig
getrocknet ist.
Saugen Sie mindestens einmal monatlich den Staub, welcher sich
möglicherweise unter dem Laufband angesammelt hat, ab und
überprüfen Sie alle Verbindungen, als auch Schrauben auf ihr Festsitzen
hin.
Entfernen Sie einmal jährlich das schwarze Gehäuse des Motors und
wischen Sie die Staubpartikel ab, welche sich möglicherweise dort
angesammelt haben.
Nur durch eine regelmäßige Kontrolle bzw. Wartung zur Feststellung
möglicher Beschädigungen und Verschleiß kann die sichere Benutzung
der Anlage gewährt werden.
Verbindungselemente sind Verschleißteile.
ACHTUNG: Vor der Reinigung, Schmierung schalten Sie das Laufband
aus und ziehen Sie den Stecker aus der Steckdose.
EINSTELLUNG DES NEIGUNGSWINKELS VON DEM LAUFBAND
In diesem Modell besteht die Möglichkeit der manuellen Einstellung des
Neigungswinkel des Laufbands.
Um den bevorzugten Winkel auszuwählen (Ihnen stehen 3 Neigungswinkel
zur Auswahl), legen Sie eine Handauf den hinteren Teil des Hauptrahmens
und heben Sie diesen an. Mit der zweiten Hand ziehen Sie die Sperre aus
dem Regler des Neigungswinkels. Wählen Sie den entsprechenden
Neigungswinkel und legen Sie die Sperre in den Regler. Dies erlaubt die
Sperrung von diesem in der richtigen Position.
ACHTUNG! Vergewissern Sie sich, dass beide Regler denselben Winkel
haben. Die Verwendung eines Laufbands, in dem die Regler unter
verschiedenem Winkel eingestellt sind, kann dazu führen, dass das
Laufband seine Stabilität verliert, was zur Verletzung des Benutzers führen
kann.
LAUFMATTE

14
www.spokey.eu
www.spokey.pl
Spannen der Laufmatte
Sehr wichtig beim Benutzen des Gerätes ist, dass die Lauffläche stets
gleichmäßig arbeitet und nicht wegrutscht. Das Spannen der Laufmatte
erfolgt an der rechten und linken Seite der hinteren Rolle mithilfe des
beigefügten Schlüssels. Einstellschrauben befinden sich im hinteren
Teil der seitlichen Trittflächen.
Drehen Sie die hintere Rolle fest, damit die Laufmatte von der
vorderen Rolle nicht wegrutscht. Spannen Sie beide Einstellschrauben
(rechts und links) vorsichtig im Uhrzeigersinn und überprüfen Sie, ob die
Laufmatte ausreichen gespannt ist.
ACHTUNG: Spannen Sie die Laufmatte nicht zu stark, da dadurch die
Laufmatte beschädigt werden kann und die Kugellager zu schnell
verschlissen werden
Zentrierung der Laufmatte (Abbildung, S. 29)
Die Laufmatte ist normalerweise maximal zentriert. Es kann vorkommen,
dass sich die Laufmatte in Bewegung (ohne den Benutzer) in Richtung der
Kanten (rechts oder links) bewegt. Nach einigen Minuten sollte sich die
Laufmatte selbstständig zentrieren. Wenn sich bei der Benutzung die
Laufmatte nach wie vor in die Nähe einer der Kanten bewegt, ist eine
Zentrierung notwendig. Die Zentrierung erfolgt wie folgt:
stellen Sie die niedrigste Geschwindigkeit ein,
prüfen Sie auf welche Seite der Führung sich die Laufmatte bewegt
(welche Kante).
Wenn sich die Laufmatte in Richtung rechte Kante bewegt, drehen Sie die
rechte Einstellschraube fest und lockern Sie die linkeSchraube mithilfe des
Schlüssels um etwa 6 mm bis die Laufmatte zentriert ist.
Wenn sich die Laufmatte in Richtung linke Kante bewegt, drehen Sie die
linke Einstellschraube fest und lockern Sie die rechte Schraube mithilfe des
Schlüssels etwa 6 mm bis die Laufmatte zentriert ist.
Schmierung der Laufmatte (Abbildung–Seite 29)
Das Laufband von der Stromversorgung abnehmen.
Das Laufband zusammen klappen.
Überprüfen Sie die hintere Seite der Laufmatte. Wenn die Oberfläche
trocken ist, ist sie zu schmieren. Wenn sie dagegen nass oder feucht
ist, entfällt das Schmieren.
Die Anlage wird an die Stromversorgung angeschlossen. Aus
Umweltschutzgründen sind leere Batterien, alte Spannungsversorgungen,
Motoren usw. nicht in den Haushaltsmüll zu werfen.
Geben Sie leere Batterien, Akkus bei einer örtlichen Sammelstelle ab,
damit sie einer sachgerechten und umweltschonenden Entsorgung
zugeführt werden können.
Es empfiehlt sich, das Elektrokabel und den Netzstecker regelmäßig zu
überprüfen. Bei Beschädigung darf das Gerät nicht benutzt werden. Führen
Sie nötige Reparaturen niemals selbst durch! Die Reparatur ist durch einen
qualifizierten Mitarbeiter der Firma SPOKEY durchzuführen.
Schmierung Laufmatte, Gestell, Rollen
Die Anlage ist nach den ersten30 Nutzungsstunden wie folgt zu schmieren:
Benutzen Sie ein weiches, trockenes Tuch zum Abwischen der Fläche
zwischen Laufmatte und Gestell.
Wenn die Anlage ausgeschaltet ist, verteilen Sie gleichmäßig Silikon auf
der inneren Oberfläche der Laufmatte und des Gestells. (Abbildung, S.
29)
Wir raten dazu auch die vorderen und hinteren Transportrollen für ein
bestmögliches Funktionieren gelegentlich zu schmieren.Wenn die
Laufmatte/Gestell/Rollen in angemessener Sauberkeit gehalten werden,
kann die nächste Schmierung nach ca. 120 Nutzungsstunden erfolgen.
Bei sämtlichen Fragen und Zweifeln nehmen Sie Kontakt mit der
Servicestelle der Firma SPOKEY auf.
GRUNDINFORMATIONEN
BEGINN UND ENDE DES TRAININGS
Um mit dem Training anzufangen, klicke auf dem multimedialen Display
auf die Taste START.
Die Laufmatte setzt sich nach 3 Sekunden nach dem Klicken auf START
in Bewegung
Der Benutzer kann jederzeit sein Training beenden(die Laufmatte
stoppen), indem er auf die Taste STOP drückt.
Die Laufmatte hält auch dann an, wenn der Sicherheitsschlüssel von der
Konsole abgeschaltet wird (Not-Halt)
EINSTELLUNG DER GESCHWINDIGKEIT
Die Geschwindigkeit kann nach der Betätigung der Laufmatte geändert
werden
Geschwindigkeitsbereich: 1-16 km/h
Um die Geschwindigkeit zu ändern, drücke die Taste SPEED +/- oder
Instant Speed
Die Information über die aktuelle Geschwindigkeit ist auf dem Display zu
sehen
PULSMESSUNG
Das Laufband ist mit Sensoren ausgerüstet, die die Puls-Messung über die
Hände ermöglichen. Um eine Messung zu erhalten, legen Sie beide Hände
auf die Halterungen. Die Anzeige erscheint nach ca. 5 Sekunden auf dem
Bildschirm.
ACHTUNG: Die angezeigten Daten sind allgemein und werden für den
Vergleich unterschiedlicher Trainingssitzungen angegeben. Sie sollten
nicht zu medizinischen Zwecken verwendet werden
SICHERHEITSSCHLÜSSEL
Der Sicherheitsschlüssel dient dazu, dass das Laufband bei einem Sturz
des Benutzers zum sofortigen Halt kommt. Er fungiert als Notausschalter.
Der Sicherheitsschlüssel ist nur im Gefahrenfall zu betätigen.
Für ein sicheres Anhalten drücken Sie die Taste START/STOP bis zum
vollständigen Stoppen des Laufbandes. Nach der Betätigung der
START/STOP-Taste wird die Laufmatte langsam ihre Geschwindigkeit
herabsetzen. Das Laufband schaltet nicht ein, solange der
Sicherheitsschlüssel nicht in der Konsole steckt. Dadurch wird das
Laufband auch vor dem Einschalten durch unbefugte Dritte zusätzlich
abgesichert. Bringen Sie den Sicherheitsclip an Ihrer Kleidung an. Sollten
Sie stürzen, löst sich der Sicherheitsschlüssel aus der Konsole und das
Laufband hält an. Achten Sie darauf, dass der Sicherheitsclip sich während
des Trainings nicht von Ihrer Kleidung lösen kann. Vor Benutzung des
Laufbandes überprüfen Sie, ob der Sicherheitsschlüssel vorschriftsmäßig
funktioniert
KONSOLE

15
www.spokey.eu
www.spokey.pl
ZÄHLER
EINSCHALTEN
Stecken Sie den Stecker in die Steckdose. Das Display von dem Zähler
schaltet ein, das Laufband ist in der Bereitschaft.
STAND-BY-MODUS (RUHEZUSTAND)
Nach 10 Minuten der Inaktivität wechselt das Laufbahn in den
Ruhezustand, der Zähler schaltet aus. Um das Laufbahn wieder zu
betätigen, drücke eine beliebige Taste.
TASTEN-FUNKTIONEN
START: drücken, um das Training zu beginnen oder das ausgewählte
Programm zu starten. 3 Sekunden nach dem Einschalten beginnt das
Laufband sich mit der niedrigsten möglichen Geschwindigkeit zu bewegen,
oder mit der für das gewählte Programm entsprechenden Geschwindigkeit.
STOP: drücken, um das Training zu beenden. Das Laufband wird
langsamer, bis es zum kompletten Halt gekommen ist.
PROG (PROGRAM): drücken, um das Programm auszuwählen
MODE: drücken, um zur Einstellung der Werte der zu erreichenden Ziele
im manuellen Modus zu gehen (Zeit, Distanz, Kalorien).
SPEED+/-: drücken, um die Laufgeschwindigkeit des Laufbands zu ändern
oder die gewünschten Werte einzustellen (im manuellen Modus: Zeit,
Distanz, Anzahl verbrannter Kalorien, in den automatischen Programmen:
Zeit)
INSTANT SPEED (2 / 4 / 6 / 8 / 10): Taste drücken, um die Geschwindigkeit
anzugeben, mit der das Laufband sich bewegen soll
INFORMATIONEN AM DISPLAY
SPEED: aktuelle Geschwindigkeit. Bereich: 1-16 km/h
TIME: Übungsdauer der aktuellen Trainingssitzung (Minuten und
Sekunden). Bereich: 0,0-99:59 min.
DISTANCE: im Laufe der aktuellen Trainingssitzung bewältigte Distanz.
CALORIES: Anzahl der im Laufe der aktuellen Trainingssitzung
verbrannten Kalorien.
PULSE: aktueller Puls während des Trainings. Um eine korrekte Messung
zu erhalten, legen Sie beide Hände auf die im Lenker eingebauten
Sensoren. Die Messung erscheint nach ca. 4 Sekunden auf dem Bildschirm.
Um zu überprüfen, ob der Puls stabil ist, sind die Hände während der
gesamten Trainingssitzung auf den Sensoren zu halten. ACHTUNG: Die
angezeigten Daten sind allgemein und werden für den Vergleich
unterschiedlicher Trainingssitzungen angegeben. Sie sollten nicht zu
medizinischen Zwecken verwendet werden
MESSBEREICH
Programmdauer –standardmäßig: 30 Minuten, Einstellmöglichkeit des
Werts zwischen 5:00 und 99:00
Geschwindigkeit –es besteht die Möglichkeit der Einstellung eines Werts
zwischen 0 und 16 km
Kalorien –standardmäßig: 50, Möglichkeit der Einstellung eines Werts
zwischen 0 und 999
PROGRAMME
Das Laufband ist mit 16 eingestellten Programmen und einem manuellen Modus.
AUSWAHL DES PROGRAMMS, BEGINN UND ENDE DES TRAININGS
Um an das ausgewählte Programm oder den Modus zu kommen drücke
die Taste PROG so lange, bis er in dem Anzeigefenster angezeigt wird.
Drücke die Taste MODE, um die Auswahl zu bestätigen. Nach der
Einstellung von dem Modus des Trainings drücke die Taste START. Nach
ca. 3 Sekunden setzt sich das Laufband in Bewegung und langsam
beschleunigt bis zur angezeigten Geschwindigkeit und dann arbeitet mit
der gleichen Geschwindigkeit.
a) beim Laufen drücke die Taste SPEED +, SPEED- oder die Taste für die
schnelle Änderung der Geschwindigkeit – QUICK SPEED KEY, um die
Geschwindigkeit an den persönlichen Bedarf anzupassen.
Drücke die Taste STOP, um das Laufband anzuhalten.
PULS-MESSUNG
Das Laufband ist mit Sensoren ausgerüstet, die die Puls-Messung über die
Hände ermöglichen. Um eine Messung zu erhalten, legen Sie beide Hände
auf die Halterungen. Die Anzeige erscheint nach ca. 5 Sekunden auf dem
Bildschirm.
Damit die Pulsmessung korrekt ist, ist diese im Moment durchzuführen,
wenn das Laufband angehalten ist, indem beide Hände für mindestens 30
Sekunden auf den Sensoren gehalten werden.
Achtung: Die angezeigten Daten sind allgemein und werden für den
Vergleich unterschiedlicher Trainingssitzungen angegeben. Sie sollten
nicht zu medizinischen Zwecken verwendet werden.
SCHNELLER START
Dies ist die schnellste Methode, um das Training zu beginnen. Drücken Sie
die START Taste, auf dem Bildschirm wird der Countdown angezeigt, nach
3 Sekunden beginnt das Laufband sich zu bewegen.
Die Anfangsgeschwindigkeit, mit der das Band sich bewegt, beträgt 1km/h,
bevor Sie das Band betreten, erlauben Sie diesem, diese Geschwindigkeit
zu erreichen.
Im Laufe des Trainings können Sie die Laufgeschwindigkeit des Bands
mithilfe der Tasten SPEED +/- oder den auf den Griffen angebrachten
Knöpfen ändern. Sie können auch die Option der schnellen
Geschwindigkeits-Regulierung verwenden –durch Auswahl der Tasten im
Bereich INSTANT SPEED: 2/4/6/8/10, wird die Geschwindigkeit an den
gewählten Wert angepasst (2/4/6/8/10 km/h).
Die Geschwindigkeit kann im Bereich 1 –16 km/h reguliert werden. Die
Information darüber, mit welcher Geschwindigkeit das Laufband sich
aktuell bewegt, ist auf dem Display sichtbar.
Im Laufe des Trainings können Sie auf dem Display Ihre Errungenschaften
beobachten: Übungsdauer, bewältigte Distanz, Anzahl verbrannter
Kalorien, Pulswert.
Das Training kann beendet werden, durch Drücken der STOP Taste. In
einer Not-Situation (z. B. Stolpern) kann das Anhalten des Laufbands nach
dem Herausreißen des Sicherheitsschlüssels aus dem Schloss erfolgen
INSTANT SPEED.
Das Training endet, wenn der Countdown Null erreicht, das Laufband gibt
ein Tonsignal von sich und beginnt automatisch, zu bremsen, bis zum
vollständigen Halt. Sie können das Training auch jederzeit durch Drücken
der STOP Taste beenden..
MANUELLER MODUS
In diesem Modus können Sie sich auf das Erreichen eines bestimmten
Ziels konzentrieren: Übungsdauer, bewältigte Distanz oder Verbrennung
einer angenommenen Kalorienzahl. Die Auswahl erfolgt vor
Trainingsbeginn, mit einem Mal kann nur ein Ziel gewählt werden.
Um den Wert des Ziels, das Sie erreichen möchten, einzustellen
1. drücken Sie die MODE Taste so lange, bis der entsprechende Parameter
(TIME, DISTANCE, CALORIES) zu blinken beginnt.

16
www.spokey.eu
www.spokey.pl
2. Verwenden Sie die Tasten SPEED +/-, um den gewünschten Wert
einzustellen
3. Drücken Sie die Taste START um das Training zu beginnen, auf dem
Bildschirm wird der Countdown mit dem von Ihnen gewählten Wert bis Null
angezeigt.
Im Laufe des Trainings können Sie die Bewegungsgeschwindigkeit des
Laufbands durch Drücken der Tasten SPEED +/- oder Tasten aus dem
Bereich ändern.
VOREINGESTELLTE PROGRAMME
Die voreingestellten Programme garantieren ein interessantes,
ausgewogenes Training mit unterschiedlichem Schwierigkeitsgrad.
Während der Übersicht der Programme am Zähler wird deren Verkauf
angezeigt (Geschwindigkeitsverteilung in der Zeit, Diagramme S. 30-32).
Unter den 16 Programmen wurden sowohl weniger belastende, Intervall-
als auch intensivere Versionen vorbereitet. Dies erlaubt die Auswahl des
Programms, das den Bedürfnissen des Benutzers am besten entspricht.
Die Auswahl des Programms erfolgt durch Drücken der Taste PROG.
Verwenden Sie nach der Auswahl des Programms die Taste SPEED (in
der Konsole oder den Halterungen) um die Trainingszeit einzustellen.
Das System teilt diese Zeit in 20 Abschnitte, die Geschwindigkeit wird sich
automatisch im Moment des Übergangs zum nächsten Abschnitt ändern.
Sie können diese auch mithilfe der SPEED Tasten regulieren.
Das Training beginnt 3 Sekunden nach dem Drücken der Taste START,
endet nach dem Erreichen des Zeit-Limits oder Drücken der STOP-Taste
PROBLEMLÖSUNG
Das Laufband startet nicht
Mögliche Ursache: Das Laufband ist nicht an den Strom angeschlossen
Lösung: Stecken Sie den Stecker an den Strom
Mögliche Ursache: Der Sicherheitsschlüssel ist falsch installiert
Lösung: Legen Sie den Schlüssel korrekt ein
Mögliche Ursache: Herausgeschlagene Sicherung / Differenzsicherung der
Heimelektroinstallation
Lösung: Überprüfen Sie, ob die Sicherungen korrekt funktionieren,
versuchen Sie, diese einzuschalten. Im Fall der fehlenden
Einschaltmöglichkeit der Sicherung, wenden Sie sich an einen Elektriker.
Mögliche Ursache: Herausgeschlagene Laufbandsicherung
Lösung: warten Sie 5 Minuten und versuchen Sie das Laufband erneut zu
starten.
Das Band rutscht
Mögliche Ursache: der Gurt ist nicht ausreichend eng angelegt
Lösung: regulieren Sie das Laufband
Das Laufband bewegt sich nicht fließend
Mögliche Ursache: das Band ist zu wenig geschmiert
Lösung: schmieren Sie das Band ein
Mögliche Ursache: das Band ist zu eng
Lösung: regulieren Sie das Band
Das Band ist nicht zentriert
Mögliche Ursache: die Spannung des Laufgurts zwischen den Rollen ist
nicht gleich
Lösung: zentrieren Sie das Band
Aufstellung des Laufbandes, Anwendungsbereich
Stellen Sie das Laufband an einem trockenen Ort auf. Halten sie das Gerät
fern von Wasser und Feuchtigkeit.
Stellen Sie das Laufband auf ebenen Untergrund. Das Aufstellung des
Laufbandes auf einer nicht ebenen Fläche kann zu System-
Beschädigungen führen.
Stellen Sie das Laufband 2 m von der Wand entfernt auf. Halten Sie diesen
Sicherheitsabstand auch bei Gegenständen ein, die für den
Benutzer eine Gefahr darstellen können.
Hinter dem Laufband muss sich ein Freiraum von: 2 x 1 m befinden.
Das Training auf dem Laufband ersetzt Spaziergang oder Laufen. Das
Magnet - Laufband ist für den Hausgebrauch bestimmt. Es darf weder für
Therapie- noch für Rehazwecke benutzt werden. Nicht für den
kommerziellen Gebrauch geeignet.
Position
Stellen Sie sich auf die Laufmatte, Sie können die Hände auf den
Armstangen abstützen. Achten Sie während des Trainings auf eine gerade
Haltung. Auf dem Laufband können Sie solche Übungen ausführen, die
einen Spaziergang oder das Laufen ersetzen
(siehe nachfolgende Abbildungen).
Zu intensives oder nicht richtiges Training
kann zu Verletzungen führen.
Gewichtabbau
Wichtig ist der Krafteinsatz während der Übung macht. Je länger und
schwerer Sie trainieren, destomehr Kalorien werden verbrannt. Erfolgreich
wäre dabei,
wenn Sie die gleiche Effizienz wie bei dem Konditionstraining erreichen.
Es wird empfohlen, Ihre Übungen 3-4 mal pro
Woche durchzuführen - für ca.: 30 Minuten.
Intensivtraining, das hilft Ihnen, IhrGewicht zu
verlieren, sollten häufiger durchgeführt werden, mindestens ca.: 45-50
Minuten.
TRAININGSANLEITUNG
Befolgung des TRAININGSZYKLUS hat viele Vorteile für die Gesundheit: physische Kondition, Muskelgestaltung und in Verbindung mit der Kontrolle der
konsumierten Kalorien –Gewichtabbau.
Aufwärmphase
Diese Phase garantiert den richtigen Blutdurchfluss im Körper und
gewährleistet die richtige Muskelarbeit. Die Aufwärmphase reduziert die
Gefahr der Krämpfe und Muskelverletzung. Es empfiehlt sich einige
Dehnübungen gemäß den nachfolgenden Abbildungen auszuführen. Jede
Stellung soll ca. 10-15 Sekunden lang gehalten werden, die Muskel sollen
bei den Übungen nicht übermäßig angestrengt und gezerrt werden. Bei
Schmerzen sollen Sie mit den Übungen sofort aufhören.
Jede Übung soll mehrmals wiederholt werden.
BEDIENUNG
Film ansehen:
Aufwärmen mit Rafał Wieczorowski.
Scannen Sie den Code auf der Seite ein
oder geben Sie folgende Adresse im Browser ein:
http://bit.ly/spokey-WARMUP

17
www.spokey.eu
www.spokey.pl
Dehnübungen Oberschenkel und Po
Die Übung gemäß der Abbildung ausführen.
Dehnübungen Oberschenkel
Rechte Hand auf die Wand legen. Mit der linken Hand an dem
linken Fuß greifen. Anschließend mit der rechten
Hand den rechten Fuß greifen.
Dehnübungen Oberschenkel und Knie
Sich auf dem Boden hinsetzen. Beine vor sich strecken.
Anschließend sich beugen und sich bemühen, mit den
Händen die Füße zu berühren.
Dehnübungen Oberkörper
Auf dem Boden in leichter Spreize stehend, die
Hände oberhalb des Kopfes heben (wie abgebildet),
und anschließend Muskel der Oberarme dehnen.
Dehnübungen Waden
Bei der Wand in der Spreize stehen. Die Hände gegen die
Wand stützen.
Abwechselnd die Beine nach hinten werfen zwecks
Dehnung der Beinmuskeln.
Dehnübungen Beine
Sich auf den Boden hinlegen. Die Beine an den Knien
biegen und sie zur Brust anziehen.
Übungen starten
Zum ersten stehen Sie auf den Sicherheitsseitenteile. Dann sollten Sie die
Geschwindigkeit auf die niedrigste Stufe gestellten Dann wenden Sie sich bitte an den laufmatte und die gewünschte
Geschwindigkeit eingestellen
Trainingsphase, Erholung
Diese Phase erfodert Krafteinsatz. mit der Zeit, werden bei
Systematischem Training die Beinmuskel elastischer. in eigenem, immer
gleichem tempo trainieren. während des trainings soll der pulsschlag im
festgelegten bereich bleiben. diese phase soll mindestens 12 minuten
dauern, meistens kann sie zwischen 15-20 minuten dauern.
Die Erholung ermöglicht, den Puls zu normalisieren und die Muskeln
abzukühlen. Diese Phase ist die Wiederholung der Aufwärmphase und sie
soll ca. 5 Minuten lang fortgesetzt werden. Die Dehnübungen sollen
wiederholt werden. Dabei sollen die Muskeln nicht überdehnt werden. Das
Training soll mindestens drei mal wöchentlich wiederholt werden.
Training Beenden
a) Basis-Beendigung
Drücken Sie die Taste STOP. Achtung: Warten Sie ab, bis die Laufmatte
vollständig zum Stillstand gekommen ist. Anschließend den
Sicherheitsschlüssel abnehmen und den Hauptschalter drücken.
b) Notausschalten
Zum vorzeitigen Beenden des Trainings auf dem Laufband wegen z.B.
nicht richtigem Funktionieren der Anlage bzw. gesundheitlichenProblemen
senken Sie allmählich die Geschwindigkeit. Sie dürfen das Laufband
verlassen, wenn die Laufmatte zum Stillstand gekommen ist. Sie können
ebenfalls den Sicherheitsschlüssel benutzen.
ACHTUNG: Nach beendetem Training nehmen Sie das Laufband von der
Stromversorgung ab (ziehen Sie den Stecker aus der Steckdose).
Das Gerät ist mit dem Symbol der durchgestrichenen Mülltonne versehen, welches darüber informiert, dass die Entsorgung ausgedienter Elektro- und Elektronikgeräte über
den normalen Hausmüll verboten ist. Gemäß der WEEE Richtlinie zum Umgang mit Elektronikschrott, sind diese Geräte anderweitig zu entsorgen.
Verbraucher dürfen ausgediente Elektrogeräte nun nicht mehr in den Hausmüll werfen, sondern müssen diese an speziellen Sammelstellen abgeben.
Zu diesem Zweck soll der Verbraucher sich an die Stelle wenden, wo das Gerät erworben wurde, bzw. an Vertreter der örtlichen Behörden. Gefährliche Inhaltsstoffe von
Elektronikgeräten können langfristige ungünstige Auswirkungen auf die natürliche Umwelt haben, als auch die menschliche Gesundheit beeinträchtigen.

18
www.spokey.eu
www.spokey.pl
NÁVOD K OBSLUZE
POZNÁMKY Ponechte si prosím tento návod k pozdějšímu použití.
Produkt je určen výhradně pro domácí použití.
BĚŽECKÝ PÁS - VÝSLEDKY CVIČENÍ
Běžecké pásy jsou skupina zařízení, která dokonale vyhovuje těm, kteří
chtějí zlepšit svůj stav a posílit celé tělo, zejména spodní svaly. Během
tréninku se také podílejí svaly krku, stehna a hýždí, ramena a zádové svaly
také pracují na udržení správné polohy těla.
Cvičení na běžeckém trenažéru se doporučuje těm, kteří chtějí udržovat
dobrý tvar po celý rok. Vhodný trénink nejen posiluje svalové části, vypíná
siluetu, ale také pomáhá udržovat dobré zdraví a pohodu.
Díky nastavitelné rychlosti a úhlu rozteče uživatel vybírá parametry podle
jejich schopnosti.
TECHNICKÉ ÚDAJE
Rozměry po rozložení: 151,5 x 69 x 129,7 cm
Běžecka plochá: 43 x 120 cm Maximální hmotnost uživatele - 100 kg
Napětí: ~ 220-240 V (50/60Hz
Před zahájením montáže zařízení a před zahájením tréninku je nutné se
seznámit s tímto návodem. Bezpečené a efektivní používání zařízení je
zajištěno pouze tehdy, kdy bude složeno, udržováno a používáno
správným způsobem, který je popsán v návodu. Pakliže sám nejsi
uživatelem, seznam prosím s tímto návodem uživatele a informuj je o
všech ohroženích a bezpečnostních opatřeních.
Před zahájením cvičení se poraď se svým lékařem, zda neexistují žádné
psychické a fyzické okolnosti, které by mohly být nebezpečné pro zdraví
a bezpečnost. Lékařská porada může chránit také před nesprávným
použitím zařízení. Lékař určí, zda je opodstatněné používání léků, které
mají vliv na tep, tlak anebo úroveň cholesterolu.
Všímej si signálů Tvého těla. Nesprávné anebo příliš namáhavé cvičení
může negativně ovlivnit Tvé zdraví. Pokud se vyskytne kterýkoliv z dále
uvedených příznaků, tj.: bolest, tlak v hrudi, nepravidelný tep, příliš
zkrácené dýchání, omdlení, závratě, nevolnost, je nutné okamžitě
přerušit cvičení. Pokud některý z výše uvedených příznaků nastane,
musíš se okamžitě setkat se svým lékařem a do té doby přerušit cvičení.
Děti a zvířata se musí zdržovat daleko od tohoto zařízení. Zařízení je
určeno pouze a výhradně pro dospělé osoby.
Přístroj je nutné umístit na rovné, tvrdé ploše zajištěné žíněnkou nebo
kobercem. Zařízení je určeno výhradně pro vnitřní použití. Zařízení musí
stát na rovném, tvrdém povrchu zabezpečeném žíněnkou nebo
kobercem. Pro bezpečnost osob nacházejících se v blízkosti zařízení je
třeba dodržovat zásadu volného prostoru kolem ní – 2 m z každé strany.
Před zahájením cvičení je nutné se ujistit, zda všechny šrouby a matice
jsou dobře dotažené. Zvláště si všímat těch dílů, které se nejvíce
opotřebují.
Bezpečnost zařízení je zaručena pouze tehdy, bude-li pravidelně
kontrolováno.
Zařízení se musí používat vždy v souladu s jeho určením. Pokud během
montáže anebo používání vyjde najevo, že některý díl je vadný nebo
vydává znepokojující zvuky, je nutné přerušit používání a zařízení předat
do servisu. Poškozené díly je nutné okamžitě změnit anebo přestat
používat zařízení až do opravy. Nesmí se používat poškozené zařízení.
Na trénink používat vhodné oblečení. Vyhýbat se volnému oblečení,
které by mohlo zavadit o zařízení a omezovat takto anebo znemožňovat
pohyby. Na čas cvičení je nutné sundat veškerou bižuterii. Je
doporučeno, aby během cvičení byl bezpečnostní klíč vždy
připnutý.Během provozu běžícího pásu, prosím, nedotýkejte
sepohyblivých běžícího pásu
Zařízení je klasifikováno do uživatelské třídy H a třídy přesnosti C dle
normy EN 957 a je určeno výhradně pro domácí použití. Nemůže být
používáno jako terapeutické a rehabilitační zařízení. Zařízení není
vhodné pro terapeutické účely.
Běžecký pás je určen pro domácí použití. Maximální přípustná hmotnost
uživatele činí 100 kg.
Během zvedání a přenášení zařízení je nutné dbát na správný postoj,
aby nedošlo k poškození páteře.
Při montáži zařízení je nutné přesně dodržovat pokyny z přiloženého
návodu a používat jen díly nacházející se v balení. Před zahájením
skládání ověřit, zda všechny díly uvedené na přiloženém seznamu jsou
v balení.
Nástavné prvky zařízení se nedoporučuje ponechávat v takové pozici,
která by mohla omezovat pohyby cvičícího uživatele
Varování: před použitím běžeckého pásu je nutné si přečíst návod. Za
případná zranění anebo poškození předmětů, ke kterým dojde v důsledku
nesprávného používání tohoto zařízení, neneseme odpovědnost.
Varování. Systémy monitorující puls nemusejí být přesné. Přemíra cvičení
může způsobit vážná zranění nebo smrt. Pokud se necítíš dobře, okamžitě
přeruš cvičení zdravotní úrazy mohou vyplývat z nesprávného anebo příliš
intenzivního tréninku.
SEZNAM DÍLŮ
Nr
opis.
Szt.
Nr
opis.
Szt.
Nr
opis.
Szt.
1
hlavní rám
1
54
konzola počitadla
6
14
čep m8x15
1
3
levá boční tyč
1
59
bezpečnostní klíč
60
čep m8x55
1
4
pravá boční tyč
2
imbusový klíč 5 mm
67
zakřivená podložka M8
2
61
držáky konzoly
2
10
čep m8x50
1
6
hlavní kontrolní šňůra
56
umělohmotný kryt
4
11
nylonová matice M8
1
klíče
PŘÍPRAVA
1. Před montáží se ujisti, že máš dostatečně hodně místa pro práci
2. Použij připravené nářadí, jak je zmíněno v návodu
3. Před montáží ověřit, zda jsou v balení všechny díly.
Doporučuje se, aby produkt sestavovaly alespoň dvě osoby, tím se vyhnete
případným zraněním.
Většina montážních dílů byla zabalena samostatně, ale některé prvky byly
předem nainstalovány na určených montážních dílech. Pokud je to nutné,
odmontuj je a pak opětovně namontuj.
Seznam se prosím s jednotlivými fázemi montáže a seznam, se se všemi
instalovanými díly.
SPOKEY KENDO BĚŽECKÝ PÁS - SPECIFIKACE
BEZPEČNOSTNÍ POKYNY
MONTÁŽ, NASTAVENÍ A ÚDRŽBA
CZ

20
www.spokey.eu
NÁVOD NA MONTÁŽ (OBRÁZKY – S. 26-28)
POZOR! Nepřipojujte k elektrickému proudu dříve než ukončíte montáž.
Běžecký pás vždy přenášejte, zvedejte a montujte ve dvojici. Zajistěte si
pomoc na dobu montáže zařízení.
1. KROK Vyjměte běžecký pás z kartonu a položte ho na rovný povrch.
Zvedněte konzolu s bočními tyčemi (3, 4) a vyrovnejte je tak, aby se otvory
na šrouby navzájem kryly.
2. KROK Jeden montér drží boční tyče, druhý připevňuje šrouby.
Použijte dva čepy s oválnými hlavami M8x50 (10) a dvě nylonové matice
M8 (11) k upevnění levé a pravé boční tyče (3, 4) k hlavnímu rámu (1).
Použijte imbusový klíč a klíč, které jsou součástí sady. S použitím
imbusového klíče spojte boční tyče (3, 4) se základnou (1) pomocí čepů
M8x15 (14).
Pozor! Nyní ještě čepy nedotahujte. Udělejte to až poté, co vykonáte 4.
krok.
3. KROK Jeden montér drží konzolu (61), zatímco druhý spojuje vodiče.
Spojte vodič vycházející z počitadla (54) s hlavním kontrolním vodičem (6)
vycházejícím z pravé tyče (4).
4. KROK Po připojení vodičů nasuňte konzolu (61) na boční tyče (3, 4).
Přišroubujte držáky konzoly k bočním tyčím pomocí zakřivených podložek
M8 (67) a čepů M8x55 (60).
DŮLEŽITÉ! Při nasouvání držadel konzoly (61) na boční tyče (3, 4) se
ujistěte, zda byly vodiče správně zapojeny a jsou v pravé tyči (4). Dávejte
pozor, abyste vodiče nepřetrhli.
Nyní můžete dotáhnout čepy namontované ve 2. kroku.
5. KROK Na držáky konzoly namontujte umělohmotné pláště (56). Vložte
bezpečnostní klíč (59) do zásuvky v konzole.
6. KROK Zkontrolujte, zda je běžecký pás vyvážen příslušným způsobem.
Před prvním použitím přitáhněte pravý a levý regulační šroub o ¼ obratu.
Použijte imbusový klíč 6 mm. .
SKLÁDÁNÍ/ROZKLÁDÁNÍ PÁSU, PŘENÁŠENÍ BĚŽECKÉHO PÁSU
Nepřemísťujte běžecký pás, není-li tento složený a v aretované poloze.
Ujistíte se, že zástrčka je odpojena od zdroje napájení.
Za účelem složení złożenia běžeckého pásu je nutné uchopit oběma
rukami běžeckou plochu a tuto nadzvednout až uslyšíte jemné cvaknutí,
jež informuje o správném zablokování běžecké plochy ve svislé poloze.
Místo toho za účelem rozložení běžeckého pásu našlapněte na barevný
element na pístu nacházejícím se pod běžeckou plochou, což umožní
uvolnění blokády. Následně jemně potáhněte běžeckou plochu dolů, jakož
i postavte se ve vzdálenosti 2 metrů od běžeckého pásu, neboť se zařízení
automaticky rozloží. Seznamte se se s obrázkem 1 (s.24)
POZOR: Na složeném běžeckém pásu se nesmí provádět úkony obsluhy
ani jej používat.
Před složením zařízení úplně zastavte běžeckou plochu. Složený běžecký
pás musí být odpojen od zdroje napájení. Zapínání běžeckého pásu ve
složeném stavu je zakázáno!
Za účelem přemístění běžeckého trenážeru opatrně tento nadzvedněte na
zadní transportní kolečka a držíc za oba boky přesuňte jej na zvolené
místo.
POZOR: Před manipulací s běžeckým pásem se ujistíte, že zařízení je
odpojeno od zdroje napájení. Manipulace se zařízením smí provádět vždy
dvě osoby.
ÚDRŽBA
K čištění zařízení nepoužívat agresivní čistící prostředky. Používej měkký,
vlhký hadřík, kterým odstraníš nečistotu a prach.
Monitor (napájecí kopuli) čistit výhradně suchým hadříkem.
Zařízení skladovat na suchých místech, chránit před vlhkem a korozí.
K čištění kraje pásu a prostoru mezi pásem a hranou rámu používej měkký,
vlhký hadřík. Kraj pásu je třeba také čistit od spodu. Vrchní část pásu čistit
kartáčem a vodou s mýdlem, jednou za měsíc.
POZOR: Nežli opět začneš používat běžící pás, počkej až zařízení
vyschne.
Pod zařízením vysávej aspoň jednou za měsíc, aby se tak předešlo
nahromadění prachu a zkontroluj všechny spoje, včetně šroubů, zda jsou
dobře dotažené.
Jednou za rok se doporučuje sundat černý kryt motoru a odstranit prach,
který se zde může hromadit.
POZOR: Bezpečnostní podmínky při používání zařízení lze udržet jen díky
pravidelné kontrole týkající se poškození a opotřebení.
Spojovací prvky jsou nejvíce vystaveny opotřebení.
POZOR: Před čištěním, mazáním vypnout běžící pás a odpojit od zdroje
napájení.
NASTAVENÍ ÚHLU SKLONU BĚŽEHO PÁSU
Tenhle model má možnost ručně nastavit rozteč pásu.
Chcete-li zvolit preferovaný úhel (pro výběr z 3 stupňů sklonu), umístěte
jednu ruku na zadní část hlavního rámu a zvedněte jej. Druhou rukou
vysuňte blok z nastavovače úhlu náklonu. Vyberte příslušný úhel a vložte
blok do nastavovače. To mu umožní zablokovat správnou pozici.
POZOR! Ujistěte se, že oba ovládací prvky mají stejný úhel. Používání
běžeckého pásu, ve kterém jsou nastavovače nastaveny v různých úhlech,
může způsobit ztrátu stability běhžeckéh pásu, což může vést k poranění
uživatele.
Nastavení napnutí pásu
Je velmi důležité pro běžce, aby byla zajištěna rovná, rovnoměrně pracující
plocha. Nastavení musí být provedeno na pravé i levé straně válečku
pomocí klíče, který je přiložen k pásu. Regulační šrouby se nacházejí v
zadní části bočních kolejnic.
Dotáhni zadní váleček, ale jen tolik, aby pás neprokluzoval na předním
válečku. Jemně nastav oba dva šrouby (pravý a levý) podle směru pohybu
hodinových ručiček a kontroluj napnutí pásu.
POZOR: Pás nesmíme napínat příliš silně, protože by to mohlo způsobit
poškození pásu a příliš rychlé opotřebování ložisek.
Centrování běžeckého pásu (obrázek – s.29)
Běžecký pás je vyroben takovým způsobem, aby běžecký pás byl během
používání co nejvíce vycentrovaný. Normální vlastností pásů je to, že když
jsou v pohybu (bez běžce), tak se pohybují u jednoho z okrajů. Po několika
minutách se pás sám vycentruje. Jestliže se během používání pás i nadále
pohybuje blíže okraje, pak je nutné provést regulaci. Tuto provádíme
následujícím způsobem:
•Nastav nejmenší rychlost
•Zkontroluj na které straně se pás pohybuje (blízko kterého z okrajů)
Pokud je to u pravého kraje, pak dotáhni pravý šroub a uvolni levý pomocí
klíče 6 mm dokud se pás nevycentruje. Pohybuje-li se pás u levého okraje,
pak dotáhni levý šroub a uvolni pravý, dokud se pás nevycentruje..
Návod k mazání běžeckého pásu (obrázek – s. 29)
Odpojit pás od zdroje napájení.
Sklopit, složit pás.
Ověřit zadní stranu běžeckého pásu. Je-li povrch suchý - namazat. Avšak
pokud je povrch mokrý nebo vlhký, není třeba mazat.
Zařízení má napájecí zdroj. Z důvodu ochrany životního prostředí vybité
baterie, napájecí zdroje, motorky apod. nevyhazovat spolu s domácími
odpadky. Opotřebované baterie, napájecí zdroje, akumulátory apod. je
nutné předat odběrateli, který tento druh utilizuje způsobem odpovídajícím
právním předpisům.
BĚŽECKÝ PÁS

21
www.spokey.eu
Je doporučeno pravidelně kontrolovat stav kabeláže a zástrčky. Dojde-li k
poškození, zařízení se nesmí používat. Nikdy neopravuj zařízení sám.
Opravy musí provést pověřená osoba firmy SPOKEY. Nikdy netahat za
kabel.
Mazání běžeckého pásu, základu, válečků
Silikon je přiložen k zařízení. Zařízení namazat po prvních 30 hodinách
provozu následujícím způsobem:
Prostor mezi běžeckým pásem a poháněcím pásem ošetřuj měkkým a
suchým hadříkem.
Když je zařízení vypnuto rovnoměrně aplikuj silikon na vnitřním povrchu
pásů.
Občas namaž přední a zadní válečky, aby fungovaly co nejlépe.
Pokud běžecký pás/poháněcí pás/válečky budu udržovány čisté, pak další
mazání je potřebné až za zhruba 120 hodin provozu. Kontaktujte servis
firmy SPOKEY pokud se vyskytnou jakékoliv pochybnosti..
ZÁKLADNÍ INFORMACE
ZAČATÍ TRÉNINKU, UKONČENÍ TRÉNINKU
Chcete-li začít trénovat, klepněte na tlačítko Start na multimediálním
displeji.
Běhací trenažér se začne pohybovat během 3 sekund po stisknutí
tlačítka Start.
Můžete ukončit trénink (zastavit běžecký pás) kdykoli stisknutím /
kliknutím na Stop.
Když se bezpečnostní klíč (nouzové zastavení) odpojí od konzoly, běžící
pás se zastaví.
NASTAVENÍ RYCHOSTI
Rychlost může být změněna po spuštění běžeckého pásu
Rychlostní rozsah: 1-16 km/h Chcete-li změnit rychlost, stiskněte SPEED +/- nebo Quick Speed (2-11)
Aktuální informace o rychlosti jsou k dispozici na displeji
MĚŘENÍ IMPULSŮ
Běžecký pás je vybaven senzory, které vám umožňují měřit impuls
ručně. Chcete-li získat měření, položte obě ruce na držadla. Po 5
sekundách se na displeji zobrazí čtení.
Abyste správně měřili puls, musíte to udělat po zastavení běžícího pásu a
držet ruce na snímačích po dobu nejméně 30 sekund.
Poznámka: Tyto údaje jsou obecné a poskytují se k porovnání různých
školení. Nesmějí být používány k lékařským účelům
BEZPEČNOSTNÍ KLÍČ
Bezpečnostní klíč slouží okamžitému vypnutí napájení běžeckého pásu
během pádu. Má funkci havarijního stopu. Bezpečnostní klíč se smí
používat v náhlých případech.
Za účelem bezpečného a komfortního zastavení používej tlačítko
START/STOP, dokud se pás zcela nezastaví. Běžecký pás po stisknutí
START/STOP bude pomalu zmenšovat svou rychlost.
Pás se nezapne dokud nebude bezpečnostní klíč správně vložený do
otvoru na klíč nacházejícího se ve střední části konzoly počítadla, to je
pojistkou navíc, která chrání přes uvedením do pohybu třetími osobami.
Druhý konec klíče je třeba připevnit k oblečení. Při pádu bezpečnostní klíč
totiž vypadne z konzoly a pás se zastaví. Je proto doporučeno, aby během
cvičení byl bezpečnostní klíč vždy připnutý.
POČÍTADLO
ZAPNUTÍ
Připojte zástrčku ke zástuvce, zapne se obrazovka počítadla, běžecký pás
vstoupí do pohotovostního režimu.
KONTINUÁLNÍ PODMÍNKY
Po 10 minutách nečinnosti se běžecký pás přepne do pohotovostního
režimu, počitadlo zhasne. Chcete-li pás znovu použít, stiskněte jakékoliv
tlačítko.
FUNKCE TLAČÍTEK
START: stiskněte pro zahájení cvičení nebo zapnutí zvoleného programu.
Po třech vteřinách od zapnutí se začne běžecký pás pohybovat s nejnižší
možnou rychlostí nebo rychlostí odpovídající zvolenému programu.
STOP stiskněte pro ukončení cvičení. Běžecký pás se bude zpomalovat
až do úplného zastavení.
PROG (PROGRAM): stiskněte pro zvolení k programu
MODE: stisknutím se dostanete na nastavení hodnot, které chcete
dosáhnout v manuálním režimu (čas, vzdálenost, kalorie).
SPEED +/-: stisknutím změníte rychlost pohybu pásu nebo nastavíte
požadované hodnoty (v manuálním režimu: čas, vzdálenost, počet
spálených kalorií, v automatických programech: čas)
INSTANT SPEED (2 / 4 / 6 / 8 / 10): stlačením tlačítka nastavíte rychlost,
jakou se má pohybovat pás
ÚDAJE NA DISPLEJI
SPEED: aktuální rychlost Rozsah: 1-16 km/h
TIME: doba cvičení v aktuální tréningové fázi (minuty a vteřiny) Rozsah:
0,0-99:59 min.
DISTANCE: vzdálenost zdolaná během aktuální tréningové fáze
CALORIES: počet spálených kalorií během aktuální tréningové fáze
PULSE: aktuální úroveň pulsu během cvičení Pro zjištění správných
hodnot položte obě dlaně na senzory zabudované do řídícího panelu Na
displeji se hodnota objeví asi po čtyřech vteřinách. Stabilitu pulsu zjistíte,
když budete držet dlaně na senzorech po celou dobu tréningové fáze.
Pozor! Zobrazované hodnot jsou obecné, jsou uváděny pro srovnání s
různými tréningovými fázemi. Neměly by být využívány pro lékařské
účely.
PROGRAMY
Běžecký pás je vybaven 16 přednastavenými programy a ručním reżimem.
VÝBĚR PROGRAMU, ZAČÁTEK A KONEC TRÉNINKU
Chcete-li přejít na vybraný program nebo režim, stiskněte tlačítko PROG,
dokud se na displeji nezobrazí. Potvrďte výběr pomocí tlačítka MODE.
Po nastavení režimu tréninku stiskněte tlačítko "START". Po třech
sekundách běžecký pás pomalu zrychluje na zobrazenou hodnotu a poté
běží hladce s konstantní rychlostí.
A) Během běhu stiskněte tlačítko "SPEED +", "SPEED-" nebo "buick start
key" pro přizpůsobení rychlosti podle vašich potřeb.
b) Pro zastavení pásu stiskněte tlačítko "STOP".
KONZOLA
This manual suits for next models
1
Table of contents
Languages:
Other Spokey Treadmill manuals
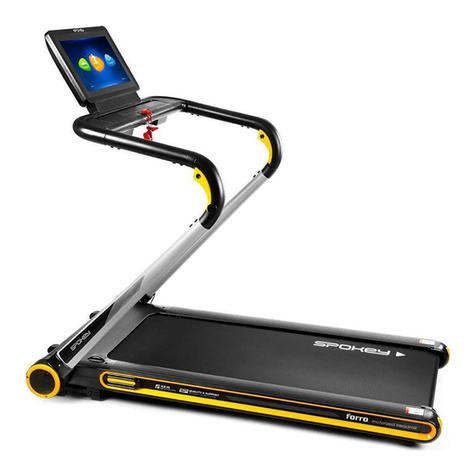
Spokey
Spokey FORRO User manual
Spokey
Spokey HALLET II User manual
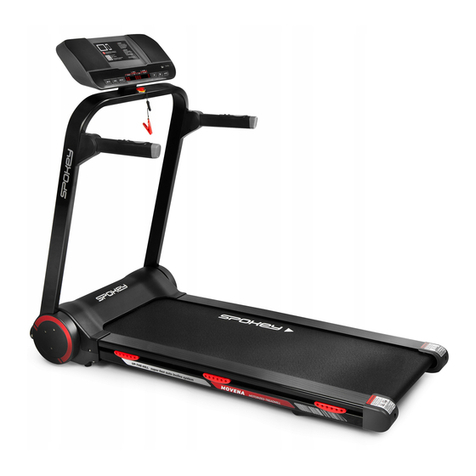
Spokey
Spokey MOVENA User manual
Spokey
Spokey MEDUSA User manual
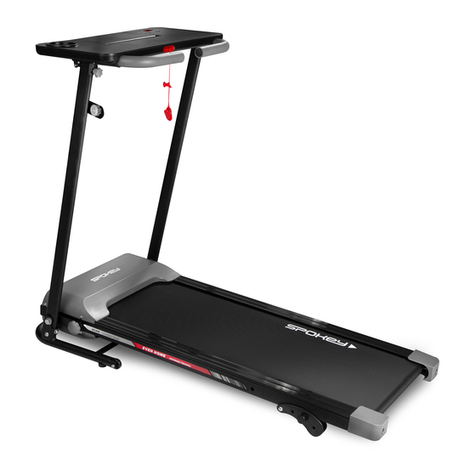
Spokey
Spokey EVEN HOME 940746 User manual
Spokey
Spokey ALHENA User manual
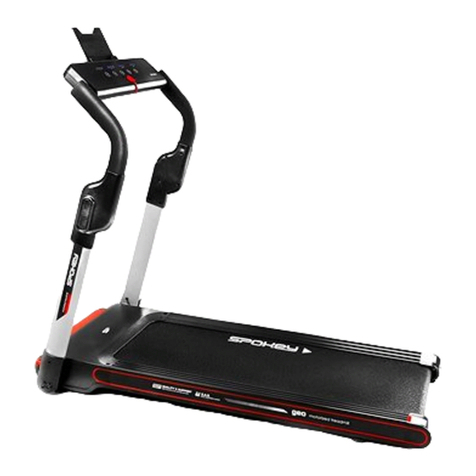
Spokey
Spokey GEO User manual
Spokey
Spokey HALLETT II User manual
Spokey
Spokey EVEN 1 User manual
Spokey
Spokey TRACTUS 928650 User manual
Spokey
Spokey EVEN User manual
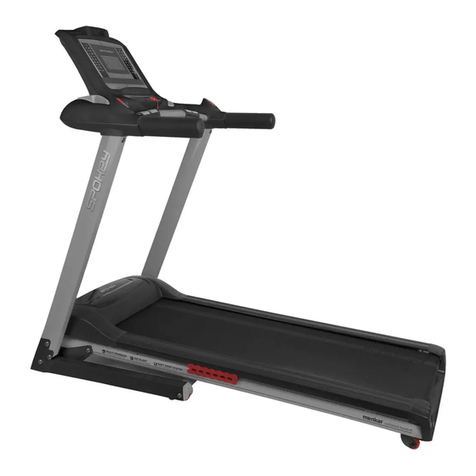
Spokey
Spokey MENKAR II User manual
Spokey
Spokey BROADWAY User manual

Spokey
Spokey ARIZONA User manual
Spokey
Spokey LUNA User manual

Spokey
Spokey ALHENA User manual

Spokey
Spokey ARENA User manual
Spokey
Spokey AURIS User manual
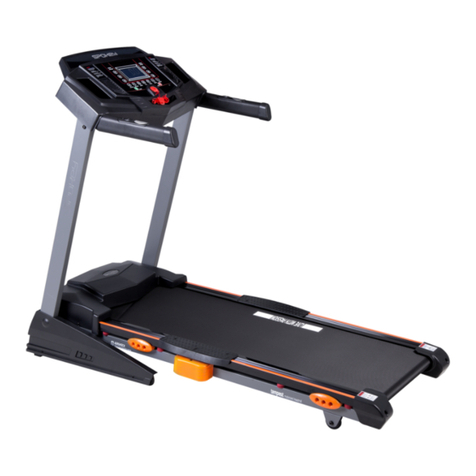
Spokey
Spokey TEMPEST User manual
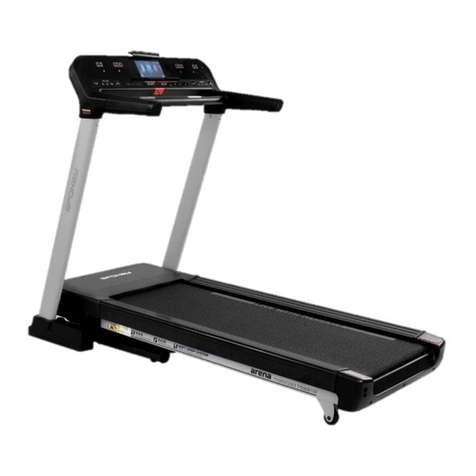
Spokey
Spokey ARENA User manual
