Stagg SLI-MHBHH10 User manual

!
User Manual
HEADHUNTER10
SLI-MHB-HH10

!
Table of Contents
1.BEFORE USAGE
This package contains
Unpacking
Introduction
Specifications
Features
2.INSTALLATION
Power Connection
DMX 512 Connection
3. OPERATION
Control panel Function
Menu Map
Operating Instructions
DMX Channels

!
1.BEFORE USE
This package contains
•1x HeadHunter 10
•1x Power Cable
•1x User Manual
Unpacking
•Thank you for purchasing this product, it has been thoroughly tested
and has been shipped in perfect operating condition.
•Carefully check the packaging for damage that may have occurred during
shipping.
•If the packaging appears to be damaged, carefully inspect your fixture
for any damage and be sure all equipment necessary to operate the unit has
arrived intact.
•If damage has been found or parts are missing, please contact your vendor
or our customer support number for further instructions.
Introduction
•This fixture can operate in four different operating modes: DMX control,
sound active, automatic or in a Master/Slave configuration.
•This product comes with several built-in programs that can be used while
operating as a single unit or with multiple units linked in a master/slave
configuration.
•For best results use fog or special effects smoke to enhance
the beam projection.
•Warning! To prevent or reduce the risk of electrical shock or fire, do not
expose this unit to rain or moisture.
•Warning! This product may cause severe eye damage. Avoid looking directly
into the light source at all times!

!
Specifications
•Voltage:AC100V~240V
•Power Consumption: 150W
•Light source: USA CREE 36×3W (R8+G10+B10+W8)
•LED drive current: 750mA
•Beam angle: 8°
•Max output @1m: 88750 lux
•IP class: IP20
•DMX channels: 9/14 DMX Channels
•Packing Dimensions: 315x295x22mm
•Net weight: 4.9 Kg
•Gross weight: 6 Kg
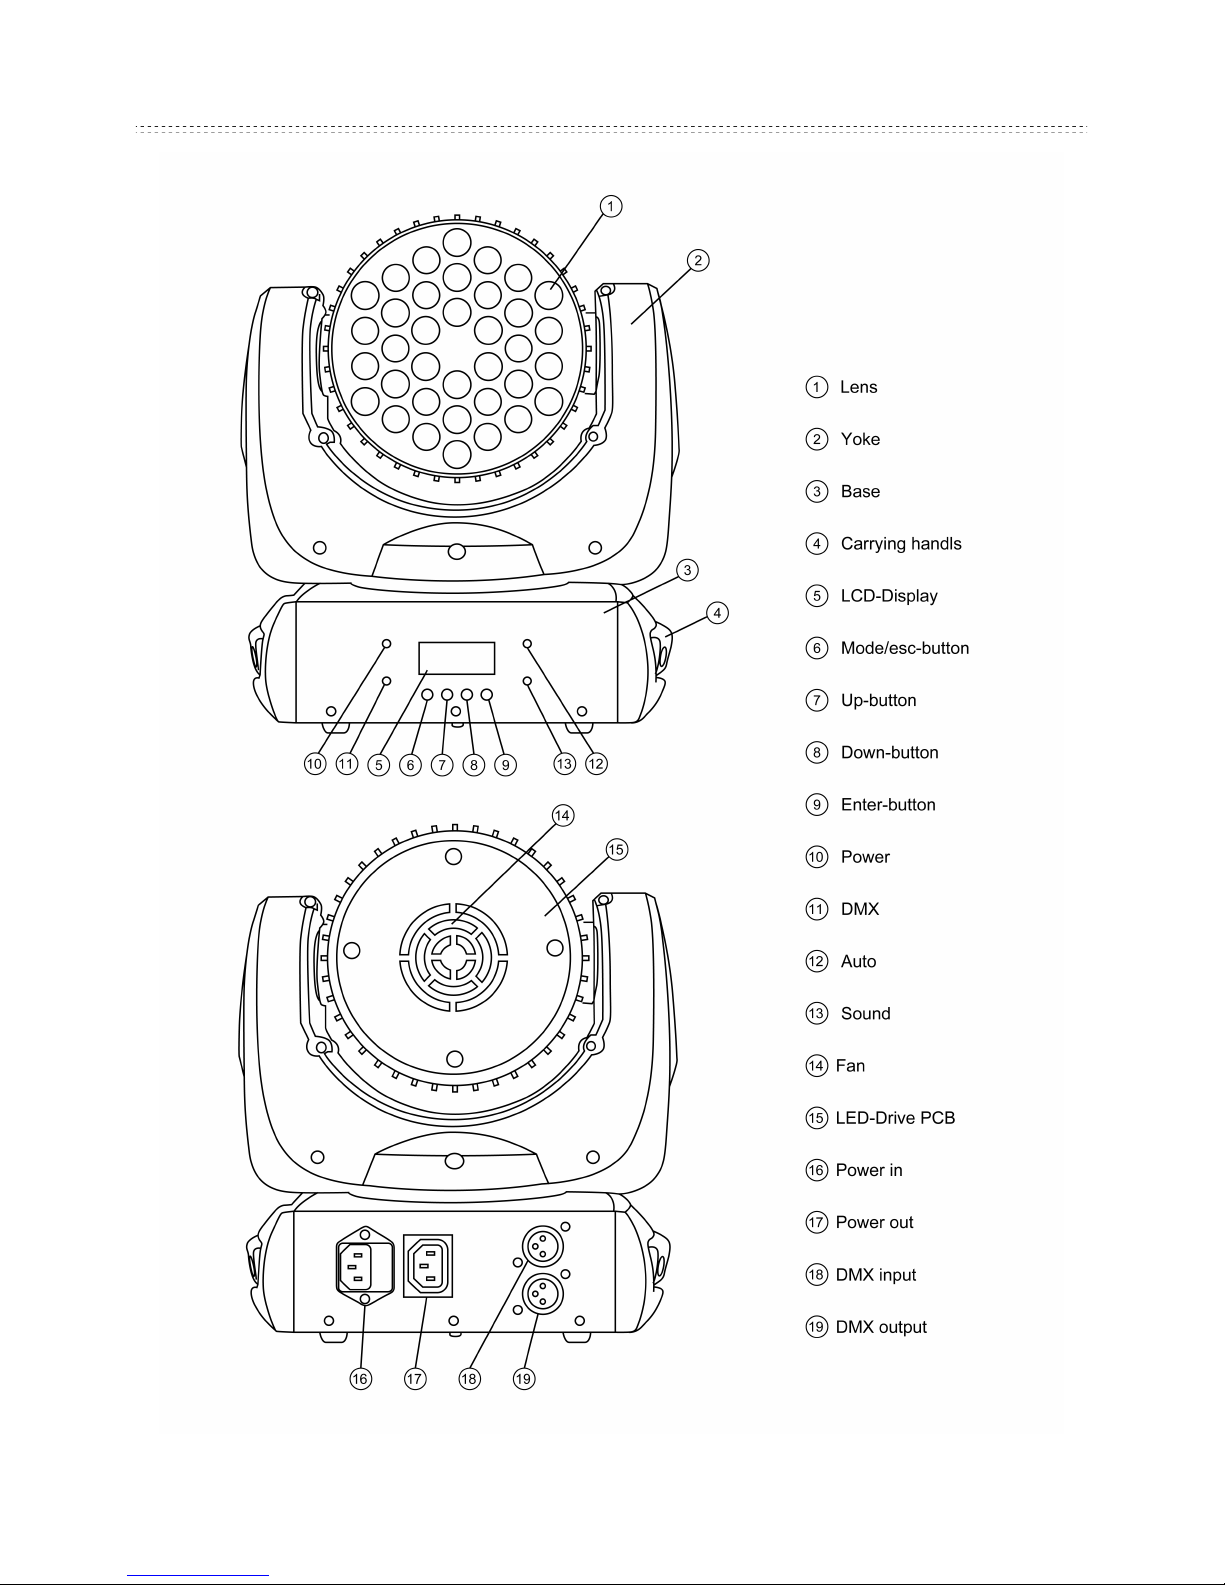
Features
•3PIN XLR DMX in and out
•IEC power in and out
•4control modes: DMX512, automatic programs, sound control, mast/slave
•LCD display for easy setup
•Indoor operation temperature range: -20°C~+40°C
•2 DMX Modes: 9ch/14ch
•Dimmer: 0-100%
•Pan: 630 degree
•Tilt: 220 degree
•Temperature controlled fan cooling (fan will change speed according
to temperature)
!
This manual suits for next models
1
Table of contents
Other Stagg Lighting Equipment manuals

Stagg
Stagg FlatPar 4 User manual

Stagg
Stagg Hyperion 5R User manual

Stagg
Stagg HYPERNOVA SDJ-HYPERNOV1 User manual

Stagg
Stagg HEADBANGER10 MK3 User manual

Stagg
Stagg HeadHunter10 SLI-MHBHH10 User manual

Stagg
Stagg TAGGER 30 User manual

Stagg
Stagg TRITON SDJ-TRITON User manual

Stagg
Stagg EcoPar6 User manual

Stagg
Stagg KINGPAR 1 User manual

Stagg
Stagg EcoParXS User manual


