manuals.online logo
Brands
  1. Home
  2. •
  3. Brands
  4. •
  5. Stanley
  6. •
  7. Stove
  8. •
  9. Stanley Cara User manual

Stanley Cara User manual

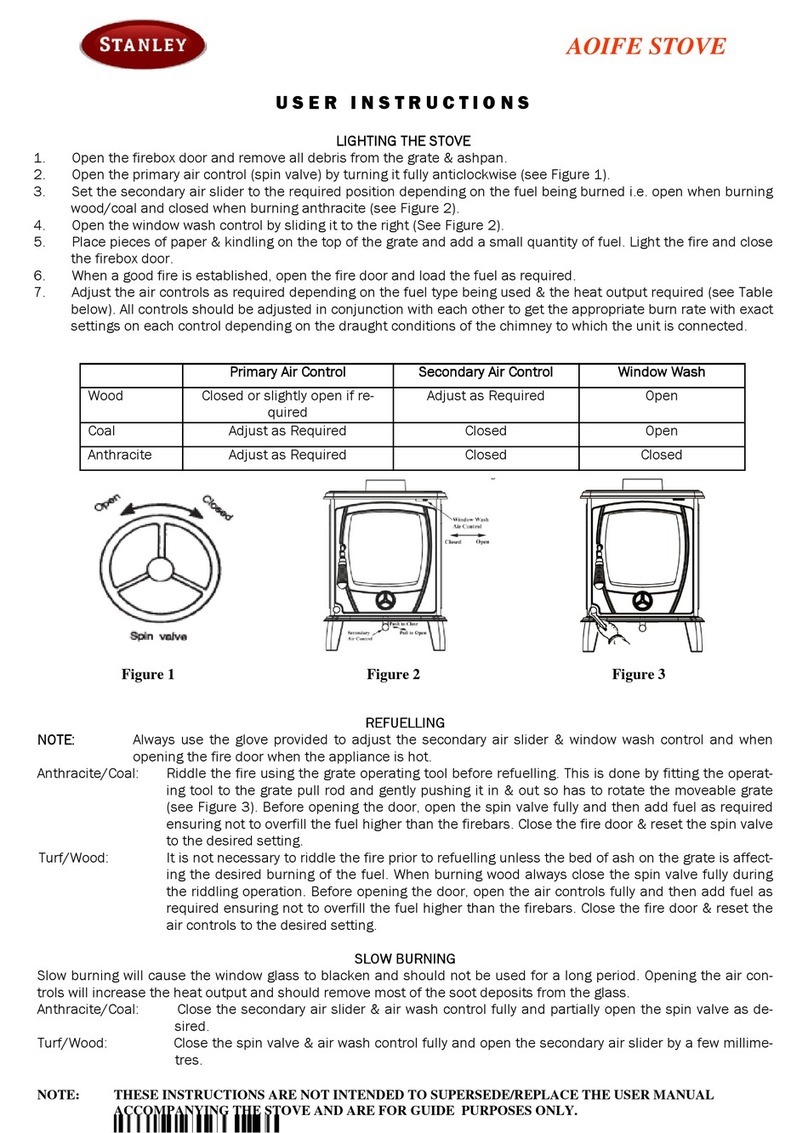
CARA NB MK I STOVE
U S E R I N S T R U C T I O N S
LIGHTING THE STOVE
LIGHTING THE STOVELIGHTING THE STOVE
LIGHTING THE STOVE
1. Open the firebox door and remove all debris from the grate ashpan.
2. Rotate the spin valve on the door fully anti-clockwise to set to maximum opening (see Figure 1).
3. Set the secondary air slider to the required position depending on the fuel being burned i.e. open when burning
wood and closed when burning coal/ anthracite (see Figure 2).
4. Place pieces of paper kindling on the top of the grate and add a small quantity of fuel. Light the fire and close
the firebox door.
5. When a good fire is established, open the fire door and load the fuel as required.
6. Adjust the spin valve the secondary air slider as required depending on the fuel type being used the heat
output required (see Table below). Both controls should be adjusted in conjunction with each other to get the
appropriate burn rate with exact settings on each control depending on the draught conditions of the chimney to
which the unit is connected.
Figure 1 Figure 2
FUEL
FUELFUEL
FUEL
SPIN VALVE
SPIN VALVESPIN VALVE
SPIN VALVE
SECONDARY AIR
SECONDARY AIRSECONDARY AIR
SECONDARY AIR
Anthracite Adjust for Desired Heat Output Fully Closed
Coal Adjust for Desired Heat Output Fully Closed
Turf/Wood Maximum Opening of 50% Adjust for Desired Heat Output
REFUELLING
REFUELLINGREFUELLING
REFUELLING
NOTE:
NOTE:NOTE:
NOTE:
Always use the glove provided to adjust the secondary air slider when the appliance is hot.
Anthracite/Coal: Riddle the fire using the grate operating tool before refuelling. This is done by fitting the operat-
ing tool to the grate pull rod and gently pushing it in out so has to rotate the moveable grate
(see Figure 3). Before opening the door, open the spin valve fully and then add fuel as required
ensuring not to overfill the fuel higher than the firebars. Close the fire door reset the spin valve
to the desired setting.
Turf/Wood: It is not necessary to riddle the fire prior to refuelling unless the bed of ash on the grate is affect-
ing the desired burning of the fuel. When burning wood always close the spin valve fully during
the riddling operation. Before opening the door, open the spin valve fully and then add fuel as
required ensuring not to overfill the fuel higher than the firebars. Close the fire door reset the
spin valve to the desired setting.
SLOW BURNING
SLOW BURNINGSLOW BURNING
SLOW BURNING
Slow burning will cause the window glass to blacken and should not be used for a long period. Opening the air con-
trols will increase the heat output and should remove most of the soot deposits from the glass.
Anthracite/Coal: Close the secondary slider fully and partially open the spin valve as desired.
Turf/Wood: Close the spin valve fully and open the secondary air slide by a few millimetres.
Figure 3
NOTE: THESE INSTRUCTIONS ARE NOT INTENDED TO SUPERSEDE/REPLACE THE USER MANUAL
ACCOMPANYING THE STOVE AND ARE FOR GUIDE PURPOSES ONLY.
CARA NB MK I STOVE
M A I N T E N A N C E I N S T R U C T I O N S
MONTHLY MAINTENANCE
MONTHLY MAINTENANCEMONTHLY MAINTENANCE
MONTHLY MAINTENANCE
1. Cleaning Stove Flue Pathways
To access the flue pathways, the bottom baffle should be removed from the stove through the fire door opening and
cleaned thoroughly. For ease of removing the baffle from the firebox, remove the firebars and refractory bricks. Re-
move the bottom baffle by lifting up the front of the baffle and pulling the back edge forward, allowing it to drop into
the firebox area (see Figure 4). Turn the baffle at an angle to remove it through the door opening.
Figure 4
2. Grate Removal & Cleaning
The grate is removed by removing the ashpan and then lifting the grate out of the grate insert from underneath the
grate (see Figure 5). Replace the ashpan and clean all ash from the grate insert underside of the grate. When re-
placing the grate, ensure that the fork on the underside of the grate is located over the grate pull rod (see Figure 6
7) and pull the grate pull rod to check that the grate is riddling.
Figure 5
Figure 7
Figure 6
CARA NB MK I STOVE
PERIODIC MAINTENANCE
PERIODIC MAINTENANCEPERIODIC MAINTENANCE
PERIODIC MAINTENANCE
Adjusting the Door Cat h
Over time, the fire door latch can loosen due to the continual compression and hardening of the rope seal be-
tween the door and the front casting. The position of the latch can be easily adjusted (in order to tighten the
Figure 8
door closure) by removing the nut holding on the door latch and repo-
sitioning the washers between the latch the door casting to allow
the latch to be positioned closer to the back of the door casting — see
Figure 8. The tightness of the door seal should be checked after
each adjustment is made. It is recommended that the rope seals on
the stove are changed at least every two years or sooner if the seal
loses its integrity
Chimney Cleaning
The chimney should be cleaned twice annually or if the stove is not
used for a prolonged period during the summer period, it should be
cleaned prior to commencement of usage. The chimney can be
cleaned through the stove depending on the flue configuration and
the flue liner should be cleaned in accordance with manufacturer’s
instructions. Always use a brush with plastic bristles that is the cor-
rect size to reach all areas of the flue.
GENERAL CLEANING
GENERAL CLEANINGGENERAL CLEANING
GENERAL CLEANING
Glass Cleaning
The stove glass will self-clean when there is sufficient heat generated by the burning fuel i.e. when the unit is operat-
ed at the maximum air settings. If a build-up of creosote occurs on the glass it may be due to low draft conditions,
poor quality fuel or operating the stove at the minimum air settings for long periods of time. The glass should be
cleaned when cool and cleaned with a non-abrasive cloth using warm soapy water. For stubborn deposits, a grade 0
steel wool can be used whilst taking care not to scratch the glass with any coal/ash deposits.
Enamel Cleaning
The enamel finish should only be cleaned when cool and to keep the enamel in the best condition observe the follow-
ing tips:
• Wipe over daily with a soapy damp cloth, followed by a polish with a clean dry duster.
• For stubborn deposits a soap impregnated pad can be carefully used on the vitreous enamel.
• Use only products recommended by the Vitreous Enamel Association, these products carry the Vitramel la-
bel. Astonish CIF branded products are approved by the Vitreous Enamel Association and a detailed list of
the approved cleaners can be found on their website, www.vea.org.uk/enamel-care-list.
DO NOT USE ABRASIVE PADS OR OVEN
DO NOT USE ABRASIVE PADS OR OVENDO NOT USE ABRASIVE PADS OR OVEN
DO NOT USE ABRASIVE PADS OR OVEN CLEANSERS CONTAINING CITRIC ACID ON ENAMELLED SURFACES. ENSURE
CLEANSERS CONTAINING CITRIC ACID ON ENAMELLED SURFACES. ENSURE CLEANSERS CONTAINING CITRIC ACID ON ENAMELLED SURFACES. ENSURE
CLEANSERS CONTAINING CITRIC ACID ON ENAMELLED SURFACES. ENSURE
THAT THE CLEANSER MANUFACTURERS INSTRUCTIONS ARE ADHERED TO.
THAT THE CLEANSER MANUFACTURERS INSTRUCTIONS ARE ADHERED TO.THAT THE CLEANSER MANUFACTURERS INSTRUCTIONS ARE ADHERED TO.
THAT THE CLEANSER MANUFACTURERS INSTRUCTIONS ARE ADHERED TO.
NOTE:
NOTE:NOTE:
NOTE:
Small impact marks on the enamel finish can be repaired using an appropriate enamel touch up (a
touch up bottle is included with the stove packaging) but it should not be used to cover marks greater
than Ø10mm or multiple marks on the same casting/area.
Cleaning a Matt Bla k/Senotherm Stove
Cleaning should be done when the stove is cold by removing any dust or dirt using a dry cloth. Do not use any water
on the matt black/senotherm finish as this will cause it to rust
Changing the Rope Seals
The rope seal between the door the front casting will compress harden over time and whilst small adjustments
can be made to the door catch to ensure the integrity of the rope seal, it will be necessary to replace the rope seals
on the stove periodically depending on stove usage. It is recommended that the rope seals are changed at least every
two years.

Other manuals for Cara

5

This manual suits for next models

3

Other Stanley Stove manuals

Stanley Erin User manual

Stanley

Stanley Erin User manual

Stanley BRANDON User manual

Stanley

Stanley BRANDON User manual

Stanley Erin User manual

Stanley

Stanley Erin User manual

Stanley Lismore User manual

Stanley

Stanley Lismore User manual

Stanley OISIN SF User manual

Stanley

Stanley OISIN SF User manual

Stanley Erin User manual

Stanley

Stanley Erin User manual

Stanley Argon Arranmore User manual

Stanley

Stanley Argon Arranmore User manual

Stanley GRAINNE User manual

Stanley

Stanley GRAINNE User manual

Stanley Oisin Eco User manual

Stanley

Stanley Oisin Eco User manual

Stanley Tara Manual

Stanley

Stanley Tara Manual

Stanley Ashling User manual

Stanley

Stanley Ashling User manual

Stanley Erin User manual

Stanley

Stanley Erin User manual

Stanley K1200 User manual

Stanley

Stanley K1200 User manual

Stanley Tara Mk3 User manual

Stanley

Stanley Tara Mk3 User manual

Stanley OISIN MK II User manual

Stanley

Stanley OISIN MK II User manual

Stanley Lir LIR500 User manual

Stanley

Stanley Lir LIR500 User manual

Stanley IK900 User manual

Stanley

Stanley IK900 User manual

Stanley Solis F650 Style User manual

Stanley

Stanley Solis F650 Style User manual

Stanley Tara Boiler User manual

Stanley

Stanley Tara Boiler User manual

Stanley Argon F500 OVAL User manual

Stanley

Stanley Argon F500 OVAL User manual

Stanley Lismore User manual

Stanley

Stanley Lismore User manual

Stanley Cara User manual

Stanley

Stanley Cara User manual

Stanley K100 User manual

Stanley

Stanley K100 User manual

Stanley Ardmore User manual

Stanley

Stanley Ardmore User manual

Popular Stove manuals by other brands

hergom GLANCE Series Installation, use and maintenance instructions

hergom

hergom GLANCE Series Installation, use and maintenance instructions

Zibro YUUKA DESCRIPTION / CLEANING / TECHNICAL DATA

Zibro

Zibro YUUKA DESCRIPTION / CLEANING / TECHNICAL DATA

Haas+Sohn HSP 6 Pelletto III 419.08 Equipment sheet

Haas+Sohn

Haas+Sohn HSP 6 Pelletto III 419.08 Equipment sheet

HAMPTON BAY EST-540T-40R Use and care guide

HAMPTON BAY

HAMPTON BAY EST-540T-40R Use and care guide

Heat & Glo TIARAP-BK-IPI-B owner's manual

Heat & Glo

Heat & Glo TIARAP-BK-IPI-B owner's manual

Focal Point ND-18D1 Augusta Installation and user instructions

Focal Point

Focal Point ND-18D1 Augusta Installation and user instructions

Austro Flamm GUSSOFEN G1 manual

Austro Flamm

Austro Flamm GUSSOFEN G1 manual

Austro Flamm GLASS manual

Austro Flamm

Austro Flamm GLASS manual

Austro Flamm SOLO manual

Austro Flamm

Austro Flamm SOLO manual

Austro Flamm DIVA manual

Austro Flamm

Austro Flamm DIVA manual

FAR EAST Stockpot user manual

FAR EAST

FAR EAST Stockpot user manual

Fire Power Klover Bi-Fire Mid Operation and maintenance

Fire Power

Fire Power Klover Bi-Fire Mid Operation and maintenance

Haas+Sohn HSP 8 Home 445.08 Equipment sheet

Haas+Sohn

Haas+Sohn HSP 8 Home 445.08 Equipment sheet

Alfa Plam ALFA TERM -27 Installation, setup and operation instructions

Alfa Plam

Alfa Plam ALFA TERM -27 Installation, setup and operation instructions

Glen Dimplex Home Appliances BI 90 Gas user guide

Glen Dimplex Home Appliances

Glen Dimplex Home Appliances BI 90 Gas user guide

Heat & Glo TIARA I Installer's guide

Heat & Glo

Heat & Glo TIARA I Installer's guide

Austro Flamm BINGO manual

Austro Flamm

Austro Flamm BINGO manual

PASIAN Greta user manual

PASIAN

PASIAN Greta user manual

manuals.online logo
manuals.online logoBrands
  • About & Mission
  • Contact us
  • Privacy Policy
  • Terms and Conditions

Copyright 2025 Manuals.Online. All Rights Reserved.