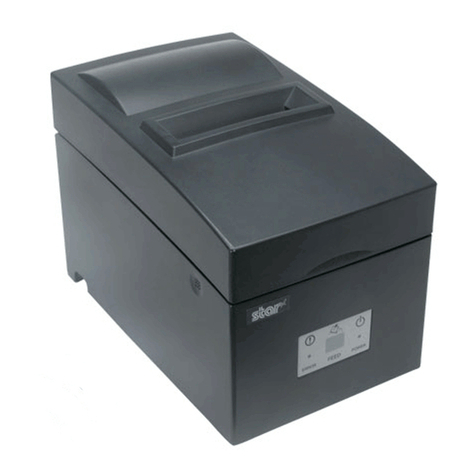
Star Gemini-10X User manual

CP13 08955
STAR®
MODEL GEMINI-1 OX
TECHNICAL SERVICE DATA FOR YOUR PRINTER

SIMS. COMPUTERFACTS' STAR
GEMINI-10X
PRELIMINARY SERVICE CHECKS
This data provides the user with atime-saving service tool
which is designed for quick isolation and repair of printer
malfunctions.
Check all interconnecting cables for good connection and
correct hook-up before making service checks.
Replacement or repair of CPU board or connectors may be
necessary after the malfunction has been isolated.
X
o
ec H
<z
UJ
o
TEST EQUIPMENT AND TOOLS
TEST EQUIPMENT
Digital Volt/Ohm Meter
Scope
Logic Probe
CO
a.
O
TOOLS
Phillips Screwdriver
Small Screwdriver
Low Voltage Soldering Iron
Desoldering Iron
REPLACEMENT PARTS AND DESCRIPTION
ITEM NO. PART NO. DESCRIPTION
DB1 08990202
DB2 08990202
F1 09990020
TR6
thru
TR14 07309861
TRA1 07650003
TRA2 07650003
87041011
87222021
87220320
87041020
09010024
87045041
87223010
89070000
87045010
87049040
08200043
07312771
Bridge Rectifier, KBL02
Fuse, 1.25A @125V Slow-Blow
Transistor, 2SD986
Transistor Array, PU4124
Carriage Motor Assembly
Main Board
Control Panel Board
Linefeed Motor Assembly
On-Line Switch, J-P5029
Paper-Out Detector Switch
Power Supply Unit (Includes
Power Cord, Power Switch, AC
Board and Power Transformer)
Print Head
Print Head Cable Board
Right-End Detector Switch
5.0V Regulator, 7805A
24V Regulator, 2SD1277
SAMS Howard W. Sams &Co., Inc.
tm 4300 West 62nd Street, P.O. Box 7092, Indianapolis, Indiana 46206 U.S.A.
The listing of any available replacement part herein does not
constitute in any case arecommendation, warranty or guaranty by
Howard W. Sams SCo., Inc., as to the quality and suitability of such
replacement part. The numbers of these parts have been compiled
from information furnished to Howard W, Sams &Co., inc., by the
manufacturers of the particular type of replacement part listed.
Reproduction or use, without express permission, of editorial or pictorial
content, in any manner, is prohibited. No patent liability is assumed with
respect to the use of the information contained herein.
©1985 Howard W. Sams &Co., Inc.
4300 West 62nd Street, P.O. Box 7092, Indianapolis, Indiana 46206 U.S.A.
Printed in U.S. of America 85CP14961 DATE 10-85

PRELIMINARY SERVICE CHECKS (Continued)
AC BOARD P0WER
SWITCH
@120VAC
@590roA
CHASSIS-TOP VIEW
5.0V REGULATOR Jr
ft) XJ5rar
.1PAPER-OUT
r^ SWITCH
1J(6B) (6C)
PRINT HEAD
ASSEMBLY
(3C) (5e) N\PRINT HEAD
CABLE BOARD
(3B)
RIGHT-END i
DETECTOR
SWITCH
a
m
3w
l>
O
X
INTERCONNECTING DIAGRAM
II
INTERCONNECTING DIAGRAM
XI

PRELIMINARY SERVICE CHECKS (Continued)
SERVICE CHECKS
SEE INTERCONNECTING DIAGRAM, PLACEMENT CHART, AND PHOTOS TO MATCH
THE NUMBER IN THE CIRCLES WITH THOSE IN THE FOLLOWING DATA FOR SERVICE
CHECKS TO BE PERFORMED.
©
©
©
©
POWER SUPPLY
(A) Check Connectors CN10A, CN10B and CN11 for
good connections.
(B) Check for an open Power Switch (S1) or an open
power cord.
(C) Check the Power Transformer (T1) for an open
winding.
(D) Check AC Fuse F1. If the fuse is open, check the
Power Transformer, Bridge Rectifiers (DB1 and
DB2), the 5.0V Regulator and the 24V Regulator
Transistors for possible shorts.
(E) Check Print Head Driver Transistors TR6 thru
TR14, Linefeed Motor Driver TRA1 and Carriage
Motor Driver TRA2 for shorts.
PRINTER CARRIAGE ASSEMBLY DOES NOT MOVE
(A) Check Connector CN6 for agood connection.
(B) Check the resistance of the Carriage Motor wind-
ings. Unplug Connector CN6 and check for 11.3
ohms between pins 2and 3, pins 2and 4, pins 1
and 5and pins 1and 6. If the resistance of any
winding is abnormal, replace the Carriage Motor.
(C) Check for 24.5V at the emitter of Transistor TR5.
If the voltage is missing, check the power sup-
ply.
(D) Check for ashorted Right-End Detector Switch.
PRINT HEAD WILL NOT PRINT
(A) Check Connector CN7 for good connections.
(B) Check for adefective Head Cable Board. If the
board is defective, replace the Print Head Cable
Board.
(C) Check for adefective Print Head.
MISSING DOTS IN THE PRINT PATTERN
(A) Check Connector CN7 for good connections.
(B) Disconnect Connector CN7 and check the re-
sistances of the Print Head solenoids. Measure
between pin 6and pins 1thru 5and pins 9thru 12
of Connector CN7. If any solenoid is open,
replace the Print Head.
©
©
LINE FEED WILL NOT OPERATE
(A) Check Connector CN5 for good connections.
(B) If the Linefeed Motor turns but the paper does
not feed when the L.F. Button is pressed, check
the operation of the gear assembly on the right
side of the platen. If the gear assembly is not
operating, check for abroken gear.
(C) If tfje Linefeed Motor is inoperative, check the
resistance of the Linefeed Motor windings. Un-
plug Connector CN5 and check for aresistance
of approximately 51 ohms between pins 2and 3,
pins 2and 4, pins 1and 5and pins 1and 6. If the
resistance of any of the windings is abnormal,
replace the Linefeed Motor.
PAPER-OUT NOT DETECTED
(A) Make sure that pin 1of DIP Switch (DSW2) is set
On.
(B) Check the Paper-Out Detector Switch to make
sure that it closes when paper is removed from
the Printer. If the switch does not close, check
for adefective Paper-Out Detector Switch.
(C) Make sure that the Paper-Out detector lever
moves smoothly and the detector spring is not
broken or missing.
PRINTER WILL NOT RECEIVE DATA FROM HOST
COMPUTER
(A) Check the Interface Cable between the host
Computer and the Printer. Also check Connec-
tor CN1 for good connections.
(B) Check the ribbon cable between Connectors
CN2 and CN3.
(C) Check the operation of the On-Line Switch. If
the On-Line status of the Printer does not
change when the switch is pressed, check for a
defective switch. Also check Connector CN8 for
good connections.
Ill
PRELIMINARY SERVICE CHECKS (Continued)
o
m
|S
2>
I"
o
X
MAIN BOARD
IV
MAIN BOARD
IX

PRELIMINARY SERVICE CHECKS (Continued)
MISCELLANEOUS ADJUSTMENTS
PRINT HEAD TO PLATEN ADJUSTMENT
Place the Platen Adjust Lever at the second step positon
(handle straight up). Insert afeeler gauge between the rib-
bon guide and the platen. The gap should measure between
0.25mm and 0.35mm. Check the gap with the print head at
the left, center and right of platen for uniformity.
If the platen gap is out of tolerance, the following adjust-
ment is required.
Move the Platen Adjust Lever all the way forward (lock in
bottom notch). Fasten the left and right adjust bushes with
two (M3 x6) screws into the frame tap holes. Remove nut
and lock washer holding adjust lever. If the gap is too wide
place the adjust lever on point Aor B. See Figure 1. If gap
is too narrow place the adjust lever on point Cor D. See
Figure 1. Retighten nut on adjust lever and remove the two
retaining screws from frame tap holes. Check gap measure-
ment.
Adjust Lever
Adjust Bush
Figure 1
,Adjust Bush
.1 ^2mm Carriage
^Printer Frame (Left)
Figure 2
RIGHT END DETECTOR ADJUSTMENT
It the right end detector switch is not closing when the car-
riage assembly is moved to the far right, adjustment is re-
quired. Remove the ink ribbon spools. Remove two pins
holding ribbon base plate and remove plate. Slide carriage
assembly to far right. Loosen screw in slotted hole of
detector switch. Pivot switch until it just closes and tighten
screw.
TIMING BELT TENSION ADJUSTMENT
Slide carriage assembly to far right. Locate left timing belt
pulley adjusting plate. Loosen screw in slotted hole of ad-
justing plate. Adjust belt tension for 30 grams ±10%. Ad-
justment is made by pushing the pulley to the left until pro-
per tension is obtained. If adjustment cannot be made
within tolerance replacement of timing belt is required.
Tighten screw and apply screw lock.
CARRIAGE POSITION ADJUSTMENT (HOME POSITION)
Turn ON the Printer. The carriage will move to the left and
stop. Measure the gap between the adjust bush and the car-
riage. It should be between 1and 2mm. See Figure 2. To
adjust, loosen the screw on the Home Position Detector
board. Pivot the board either left or right depending if the
gap is too wide or too narrow. To check the adjustment turn
ON the Printer and measure the gap. Repeat procedure
until gap setting is correct.

PRELIMINARY SERVICE CHECKS (Continued)
©
ON-LINE
SWITCH ®
FUSE
m
m
-v
•
^m
i
f
CONTROL PANEL BOARD
VI
FUSE BOARD

PRELIMINARY SERVICE CHECKS (Continued)
@@ @@@ ®®®
3APEB~0UT
SWITCH REGULATOR 24V
REGULATOR
»0WER
TRANSFORMER FUSE
F1
SW POWER
SWITCH
PRINT HEAD
ASSEMBLY
PRINT HEAD
CABLEBOARD GEAR
ASSEMBLY RIGHT-END
DETECTOR
SWITCH
,2D,
Q
m
z>
1=
o
X
LINEFEED
MOTOR
CARRIAGE
MOTOR
CHASSIS-TOP VIEW
VII

DIP SWITCH SETTINGS
DSW1
FUNCTIONS DSW1
ON
1-1 Selection of
Character Set
1-2 Print Mode at
Power ON
1-3 Set of Print Pitch
1-4 Selection of
Character Set
1-5 Line Feed Value 1/6 inch
1-6 Selection of
1-7 International
1-8 Character Set
Form Length
(Refer below)
Normal
10CPI
(Refer below)
(Refer below)
DSW1
OFF
Emphasized
17CPI
1/8 inch
DSW1
Pin No. Pin No.
1-1 1-4
ON ON
ON OFF
OFF ON
OFF OFF
DSW1
INTERNATIONAL CHARACTER SET DESIGNATION
Character Set
Standard ASCII
Character Set
Download
Character Set
Italic ASCII
Character Set
Italic ASCII
Character Set
DSW1-6 DSW1-7 DSW1-8
U.S.A. ON ON ON
England OFF ON ON
Germany ON OFF ON
Denmark OFF
France ON
Sweden OFF
Italy ON
Spain OFF
OFF
ON
ON
OFF
OFF
DSW2
FUNCTIONS
2-1 Paper-Out
2-2 Buffer-Full
Printing
2-3 7/8 Bit Inter-
face Selection
2-4 Automatic
Line Feed
ON
OFF
OFF
OFF
OFF
ON
Disables the
printer when
paper-out. Paper-
,,out signal is
transmitted from
the printer
mechanism to the
computer.
CR code is
ignored, and
print data of one
line is stored in
the buffer until
the memory is full
or by input of a
LF code.
Interface is set to
7bits.
OFF
Allows the printer
to print with no
paper. Paper-out
signal is not
transmitted from
the printer
mechanism to the
computer.
Printing is
performed every
time CR code is
input.
Interface is set to
8bits.
Automatic line Line feed is not
feed is performed performed by
by input of CR input of CR code,
code.
(Note) DIP switch pin No. 2-2 overrides DIP switch pin
No. 2-4.
VIII

DISASSEMBLY INSTRUCTIONS
CABINET TOP REMOVAL
Remove the platen knob on the right side. Remove two
philips screws from cabinet top. Remove the dust cover,
gently pull the front edge of cabinet top to release three
tabs, and lift cabinet top upwards. Unplug the function
board connector and remove cabinet top.
Remove two screws holding function board to cabinet top
and remove the function board.
CHASSIS REMOVAL
Remove four screws holding the chassis to the cabinet bot-
tom. Unplug connectors CN4, CN5, CN6, CN7 and CN8
from the Main board. Remove the chassis assembly from
Printer.
PRINT HEAD REMOVAL
Remove the printer cover. Remove ink ribbon from front of
the print head. Remove two screws and washers holding
print head to carriage assembly. Disconnect the head cable
from the head connector. Print head may not be removed.

PRELIMINARY SERVICE CHECKS (Continued)
PREVENTATIVE MAINTENANCE
ENVIRONMENT
Computers perform best in aclean, cool area that is below 80 degrees Fahrenheit and free of dust and smoke particles. Even
though home Computers are not affected by cigarette smoke as much as commercial Computers are affected, it is better to
maintain asmoke-free area around the Computer. Do not block cabinet vents of any of the Computer system; Computer,
Monitor, Printer, or other power devices.
ELECTRICAL POWER
Variations in the line voltage can affect the Computer. Try to avoid these fluctuations by using an AC receptacle that is on a
power line not used by appliances or other heavy current demand devices. Apower-surge protector, power-line conditioner, or
non-interruptable power supply may be needed to cure the problem. Do not switch power On and Off frequently.
KEYBOARD
Liquids spilled into the Keyboard can ruin it. Immediately after aspill occurs, disconnect the Computer power plug from AC
power outlet. Then, if circuitry or contacts are contaminated, disassemble the Keyboard and carefully rinse the Keyboard
printed circuit board with distilled water and let it dry. Use acotton swab to clean between the keys. Use anon-abrasive con-
tact cleaner and lint-free wipers on accessible connectors and contacts.
DISK DRIVES
Clean the read/write heads of the Disk Drives about once amonth or after 100 hours usage. Use only an approved head clean-
ing kit.
Handle carefully to preserve proper disk head alignment. Asudden bump or jolt to the Disk Drives can knock the disk head out
of alignment. If the disk drive must be transported, place an old disk in slot and close door during transport.
Store disks in their protective covers and never touch the disk surface. Observe the disk handling precautions usually found
on the back of disk protective covers.
PRINTERS
Carefully vacuum the Printer regularly. Wipe surface areas clean using alight all-purpose cleaner. Do not oil the machine.
The oil will collect abrasive grit and dust. The dust will act as ablanket. This can cause components to overheat and fail.
STATIC ELECTRICITY
Static electricity discharge can affect the Computer. In order to minimize the possibility, use anti-static mats, sprays, tools
and materials, and maintain good humidity in the Computer environment.
MONITOR
Use an isolation transformer with any Monitor that does not come as part of the system since some Monitors use aHOT
chassis (chassis connected to one side of the AC line). The face of the Monitor should never be left on for long periods of time
at high brightness level except when pattern is being changed periodically. Use caution when cleaning anti-glare screens, to
preserve the glare-reduction feature.
XI!

gflM$COMPUTERFACTS" STAR
GEMINI-10X
X
o
DC 1
o
CO
o
PRELIMINARY SERVICE CHECKS
ENCLOSED INDEX
SAFETY PRECAUTIONS
See page 10.
o
CO
o
m
z>
o
X
Page
Block Diagram 28
DIP Switch Settings 10
Disassembly Instructions 9
Exploded View Mechanical 27
GridTrace Location Guide 6
IC Pinouts and Terminal Guides 4,29
Line Definitions 9
Logic Chart 23,24
Mechanical Parts List 19
Miscellaneous Adjustments 13
Parts List 14 thru 18
Page
Photos
Chassis Top 22
Control Panel Board 20
Fuse Board 21
Main Board 7,8,25,26
Safety Precautions 10
Schematics
Input Buffer 3,30
Main 2,31,32,33
Serial Interface 5
Schematic Notes 29
Test Equipment 11
Troubleshooting 11,12
Star Micronics Printers are warranted for one year from date of purchase. If any service or modifications
are performed during this time by other than Authorized Star Micronics Service Centers, the manufac-
turers' warranty will be void.
SAMS* Howard W. Sams &Co., Inc.
4300 West 62nd Street, P.O. Box 7092, Indianapolis, Indiana 46206 U.S.A.
The listing of any available replacement part herein does no*
constitute in any case arecommendation, warranty or guaranty by
Howard W. Sams &Co. ,Inc. .as to the quality and suitability of such
replacement part. The numbers of these parts have been compiled
from information furnished to Howard W. Sams &Co., Inc., by the
manufacturers of the particular type of replacement part listed.
Reproduction or use, without express permission, of editorial or pictorial
content, in any manner, is prohibited. No patent liability is assumed with
respect to the use of the information contained herein.
©1985 Howard W, Sams &Co., trie.
4300 West 62nd Street, P.O. Box 7092, Indianapolis, Indiana 46206 U.S.A.
Printed in U.S. of America. 85CP1 4961 DATE 10-85

MAIN BOARD
A PHOTOFACT STANDAUD NOTATION SCHEMATIC
wiTHQmsnsa
©Howard W. Sams &Co., Inc. 1985 MAIN BOARD

sa in-
CN1 28
OuSy-t-
7 CN7
To
"0
c
N
-JL
CO
3a
rn
N|h
M
AO
X
N
B
A
R
D
INPUT BUFFER
30
OPTIONAL INPUT BUFFER SCHEMATIC INPUT BUFFER
3

IC PINOUTS &TERMINAL GUIDES
nlnlDlnlalDlnlnlDlalDldnlDlnlalalDlddalnlalaldDiniDiniD
CN2, CN3
WIRING VIEW 'CI
IC1, IC3.IC6,
IC7, IC8, IC15.
IC18, IC20, IC21,
IC22
TOP VIEW
I I II I
54 3 2 1
IC14
FRONT VIEW
TR1A, TR2, TR3 TR1
BOTTOM VIEW BOTTOM VIEW
B C E
TR4, TR5
FRONT VIEW
E C B
TR6 THRU TR14
FRONT VIEW
123
IC99
FRONT VIEW B C E
TR99
FRONT VIEW
II I IIIII I I
12 345678910
TRA1. TRA2
FRONT VIEW
I I III
12 3 4 5
RA5, RA8, RAH
FRONT VIEW
1 I IIII
234567
RA1, THRU HA4
RA6. RA7
FRONT VIEW
TT
89
17 16 15 14 13 12 11 10 4876S43 2
IIIIIIII
12 3 4 5678
RA9, RAW
FRONT VIEW
36 35 34 33 3? 31 30 29 28 27 26 25 24 23 22 21 20 »
CM
FRONT VIEW
CN10A
WIRING VIEW
2
3
CN10B
WIRING VIEW
1
2
3
CN11A, CN11B
WIRING VIEW
^j
1VPP VCC 28
2AI2 PGM 27
3A7 NC 26
4A6 A8 25
sA5 A9 24
tA4 All 23
7A3 OE 22
8A2 A10 21
9Al CE 20
10 A0 07 19
11 00 06 18
12 01 05 17
13 02 04 16
14 GND 03 15
IC16
ROM
TOP VIEW
M5M2364 169P
A7 VCC 24
A4 A8 23
A5 A9 22
A! A12 21
A3 CE 20
A2 A10 19
Al All 18
AC 07 17
00 06 16
01 05 15
02 04 14
GND 03 13
IC12
ROM
TOP VIEW
n
D1n1fl 1
?D?Q2a2a
3a3n 2 a3l! 3
4a4i3ii 4[1 4D
5n5i] 45[J 5D
66u5D66
7n/a67D7
8SaCN5, CN6 8D8
9uCN4 WIRING VIEW 9
CN1A WIRING VIEW CN8
WIRING VIEW 12 WIRING
2
3
CN9
PIN VIEW
TMM2016P
A7 VCC 24
A6 A8 23
A3 A9 22
A4 WE 21
A3 61 20
A2 A10 19
A
I
CE 18
A0 1/08 17
1/01 1/07 16
1/02 1106 15
1/03 1/05 14
vss 1/04 13
IC13
ROM
TOP VIEW
CN7
WIRING V
1CLR VCC
A
10 DCLR
>cu
PR
Q
CLR
D
CLK<
PR
2CLR
ICK 2D
1PR 2CK
10 2PR
15 2Q
12Q
GND
IC4
DUAL D-TVPE FLIP/FLOP
TOP VIEW
VCC 16
A
1»A
2B
3C
4D
59
678
13
12
10
Y9
PAO VCC
PA1 VDD
PA2 PD7
PA3 PD6
PA4 PD5
PA5 PD4
PA6 PD3
PA7 PD2
PBO PD1
PB1 PDO
PB2 PF7
PB3 PF6
PB4 PF5
PBS PF4
PBS PF3
PB7 PF2
PCO pri
PCI PFO
PC2 ALE
PC3 WR
PCI RD
PC5 AVCC
PC6 VR
PC 7AN7
INTO AN6
INT1 AN5
Ml AN4
RESET AN3
MD AN2
X2 AN1
XI ANO
VSS AVSS
IC11
MICROCOMPUTER
TOP VIEW
IC10. IC19
TRI-STATE FLIP/FLOP
TOP VIEW
INPUTS
OUTPUTS OUTPUT
BCD TO DECIMAL DECODER
TOP VIEW
D7 VCC 24
D6 WR 23
D5 RD 22
D4 CS 21
D3 Al 20
02 AO 19
Dl CLK2 18
DO 0UT2 17
CLKO GATE2 16
OUTO CLK1 15
GATEO GATE1 14
GND 0UT1 13
IC17
PROGRAMMABLE TIMER
TOP VIEW
1±-<>
1R EXT
1CEXT
CLR
Q
IC23
MULTIVIBRATOR
TOP VIEW
SCHEMATIC NOTES
eSee parts list
+Ground
Voltages measured with digital meter.
Waveforms and voltages are taken from ground, unless
noted otherwise.
Voltages, waveforms and logic readings taken with printer
On Line and in self-test mode unless otherwise noted.
Waveforms taken with triggered scope and Sweepn"lme
switch in Calibrate position, scope input set for DC
coupling on "0" reference voltage waveforms. Switch to
AC input to view waveforms after DC reference is mea-
sured when necessary. Each waveform is 7.5cm width
with DC reference voltage given at the bottom line of
each waveform. Time in /is per cm, given with p-p reading
at the end of each waveform.
Supply voltage maintained as shown at input.
Controls adjusted for normal operation.
Terminal identification may not be found on unit.
Resistors are %W or less, 5% unless noted.
Value in ()used in some versions.
Logic probe readings taken with printer On Line and
in self-test mode unless otherwise noted.
(1) Pulse when Head is at Home position.
(2) Do not measure.
(3) Low when Head is at Home position.
(4) High when Head is at Home position.
(5) Pulse during Line Feed.
(6) Low during Form Feed.
(7) Low when Carriage Motor changes direction.
(8) Low when Printer is ON LINE.
(9) High when Printer is OFF LINE.
a
rn
o
X
29

75188
PART OF 1C1
751 83
part of 1C2 <J 74LS04
PARI OF IC3 74LS04
PART OF IC3
f
[> 751 83
PART OF IC2 £> i—
r
-o- 42
T
C
M
P\
U
T
E
R
cio
220pF :
"13 t>
^
T2
C!l
220pF :
751 88
T<Kp
75188
PART OF 1C1
«
20
^
<K
751 as
PART OF 1C1
<K
751 as
PART OF 1C2
IT
?t>
7S189
PART OF IC2 C12
220pF T
1^-q>
zn
C13_
220pFT1
E3- C9
IS1 ggjl 4?jfb".022'
r
tjr
7CS04
PART OF IC3
-3-
T-^L
74LS04
PART OF IC3
r-f-i To <r
Tp 74LS04
PART OF IC3
12
r-f-i <F IT
I—f-^~_-*t+
J4
7CS04
PART OF IC3
rT4>
_PJM_
IF"
SMI
78L12
1CSRE6
TIT
•022ISOURCE LLr
42
10
f
«* TO CN3
ON MAIN BOARD '
WITHOUT "O
INPUT SUFFER T
CO
Rf
f
f
4
CN2 14
15 CN2
CN2 16
17 CN2
CN2 18
f
tf?
TO CN2
ON INPUT
BUFFER BOARD Q
IF USED m
o
X
J
1S15M
C8
:: 4?jf%a .022
791.12
IC4RE6
T
C31 C2l CI ,4
022T.022T 47/jFy
™
f
TO CN9 ON
MAIN BOARD
r
C5_
.022X TO CNS ON
MAIN BOARD
OPTIONAL SERIAL INTERFACE SCHEMATIC

MAIN BOARD GridTrace LOCATION GUIDE
CI H-4 DB1 E-27 RA10 G-21
C2 W-7 D82 J-29 RA11 J-19
C3 N-7 DSW1 C-2 TR1 C-17
C4 0-8 DSW2 A-4 TR2 E-20
C5 I-9 1C1 G-2 TR3 I-20
ce D-13 IC2 C-4 TR4 C-22
C7 B-15 IC3 G-4 TR5 L-21
C8 C-14 iC4 J-4 TR8 D-2!
C9 0-16 IC5 i>5 TR7 E-21
C10 C-I6 1C6 fr-S TR8 E-21
CI? B-18 iC7 J-5 TR9 F-21
C12 L-18 IC8 G-7 TR10 F-21
CI 3M-18 1C9 J-7 TR11 G-21
C14 L-19 IC10 G-10 TR12 H-21
C15 N-21 IC11 K-10 TR13 H-21
C16 D-25 IC12 G-13 TR14 1-21
C17 E-25 IC13 L-13 TRA1 C-20
C!8 E-28 IC14 B-15 TRA2 K-20
C19 G-28 IC15 D-15 X-TAL M-6
C20 f-27 1C16 G-15 ZD1 B-14
C21 J-28 1CI7 L-15 ZD2 D-24
C22 L-27 IC18 D-17 ZD3 E-24
C23 N-28 IC19 G-17 ZD4 E-24
C24 N-28 IC20 J-17 Z05 F-24
C25 I-2 IC21 M-17 Z08 F-24
C26 E-4 1C22 H-19 ZD7 G-24
C2? K-3 1C23 (4-19 ZD8 6-24
C28 C-5 R1 L-7 ZD9 H-24
C29 K-5 R2 L-7 ZD10 H-24
C30 H-7 R3 L-7 ZD11 K-28
C31 1-10 R4 E-13
C32 0-10 R5 A-14
C33 E-13 R6 C-14
C34 J-13 R7 B-16
C35 F-15 R8 B-17
C36 J-15 R9 M-16
C37 F-17 RIO B-17
C38 1-17 R1I B-18
C39 0-17 R12 B-18
C40 N-20 R13 C-17
C45 F-19 R14 B-18
CN1 B-10 R15 C™18
CN2 C-9 R18 B-19
CN3 E-9 R17 B-19
CN4 A-19 R18 P^IQ
CN5 C-20 R19 0-19
CN6 K-21 R20 D-19
CN7 G-24 R21 H-19
CN8 L-2 R22 1-20
CN9 B-22 R23 J-19
CN10A G-29 R24 L-19
CN10B 0-29 R25 N-19
CN11A M-29 R26 C-21
CN11B N-29 R27 C-22
D! B-16 R28 1-21
D2 D-22 R29 1-21
03 E-22 R30 M-21
D4 E-22 R3! -M-21
03 F-22 R32 L-22
D6 F-22 R33 K-23
07 6-22 R34 K-24
08 G-22 R35 G-25
09 H-22 R36 K-25
D10 H-22 R37 M-25
D11 D-27 R38 L-29
D12 0-27 RA1 C-3
D13 D-27 RA2 D-4
D14 D-27 RA3 E-8
015 F-26 RA4 G-8
016 K-25 RA5 J-8
D17 L-28 RA6 G-9
018 M-28 RA7 G-11
D19 M-26 RA8 0-19
020 N-26 RA9 E-21

IC1 !C3 1C6 IC8 IC12 IC16 IC19 IC15 1C22 IC14 IC18 ::u-- 8CETR3
IC17 1C20 1C21 IC23
ARROWS ON IC'S INDICATE PIN 1UNLESS NOTED
MAIN BOARD AHoward W. Sams HIJHUHJWll Photo
26
are i
31,1V 24.5V 9.28V
///
.5V 9.28V D.uV(A)
I.: ':^:
;,..;..
I
i#
'
t
1]
f: 1
s"Till; !•
'^r
\
o
o
m
z>
21 a
f
MAIN BOARD
7

24 25 26 27 I28. 129
L1-,
1
M|
N1
1234
A
B
C
i
G
i
15 16 I17 I18 I19 I20 21 22 23 24 25
SSL H
28 27 28
k
n
29
o
m
|Si
z>
H^
o
x
MAIN BOARD
8
AHoward W. Sams l«i;<WI:fcMMill Phr. MAIN BOARD
25

DISASSEMBLY INSTRUCTIONS
CABINET TOP REMOVAL
Remove the platen knob on the right side. Remove two
philips screws from cabinet top. Remove the dust cover,
gently pull the front edge of cabinet top to release three
tabs, and lift cabinet top upwards. Unplug the function
board connector and remove cabinet top.
Remove two screws holding function board to cabinet top
and remove the function board.
CHASSIS REMOVAL
Remove four screws holding the chassis to the cabinet bot-
tom. Unplug connectors CN4, CN5, CN6, CNT? and CN8
from the Main board. Remove the chassis assembly from
Printer.
PRINT HEAD REMOVAL
Remove the printer cover. Remove ink ribbon from front of
the print head. Remove two screws and washers holding
print head to carriage assembly. Disconnect the head cable
from the head connector. Print head may not be removed.
LINE DEFINITIONS
o
"0
Gs)
Q
m
A0THRUA15 Address Lines 2W
BBUSY Bus Busy J? >
BUFFER Buffer £33
C1.C2 Carriage Motor Driving Pulses O
C3, C4 Line Feed Motor Driving Pulses
CS6, CS7 Chip Select
CTS Clear to Send
DO THRU D7 Data Lines
DCD Data Carrier Detection
DSR/SEL IN Data Set Ready/Select In
DTR/ERR Data Terminal Ready/Error
E2, E5 THRU E8 Enable
INPUT PInput Prime
PEND Paper End
RD Read
RES Reset
RTS/SLCT Request to Send/Select
RXD Received Data
SBUSY/ACK Busy/Acknowledge
SERIAL Serial
STB OUT/P BUSY Strobe Out/Printer Busy
TXD/ON LINE Transmitting Data/On Line
WR Write
Any Bar above any alphabetical or numerical combination
indicates Line active in aLow (0) state.
Other manuals for Gemini-10X
1
Table of contents
Other Star Printer manuals

Star
Star SP298 SERIES User manual

Star
Star TSP650 SERIES User manual

Star
Star SP742 Series User manual

Star
Star TSP700 SERIES User manual

Star
Star LC-8521 User manual

Star
Star Multi-Font XR-1020 User manual

Star
Star FVP-10U User manual

Star
Star SP6000 SERIES User manual

Star
Star TSP847II User manual

Star
Star Star NX-510 User manual

Star
Star LC-7211 User manual

Star
Star mC-Label3 Quick start guide

Star
Star TSP100 futurePRNT Guide

Star
Star TSP400 SERIES User manual

Star
Star NX-2480 User manual

Star
Star TSP800II SERIES User manual

Star
Star TSP564II User manual

Star
Star SP712 Series User manual

Star
Star TSP847IIU-24 User manual

Star
Star Multi-Font ZA-200 User manual