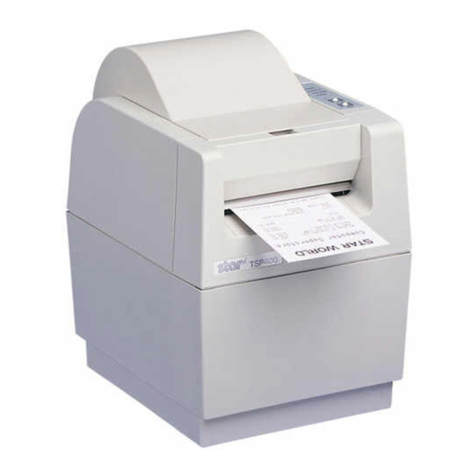
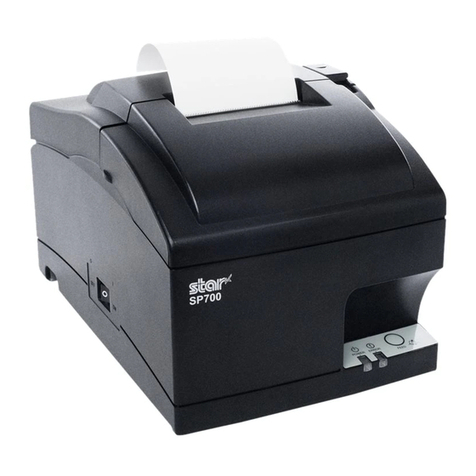
Star SP500 SERIES User manual

DOT MATRIX PRINTER
SP500 SERIES
USER’S MANUAL

– 2 –
Federal Communications Commission
Radio Frequency Interference
Statement
This equipment has been tested and found to comply with the limits for a Class A digital device, pursuant to Part 15 of the
FCC Rules. These limits are designed to provide reasonable protection against harmful interference when the equipment is
operated in a commercial environment. This equipment generates, uses and can radiate radio frequency energy and, if not
installed and used in accordance with the instruction manual, may cause harmful interference to radio communications.
Operation of this equipment in a residential area is likely to cause harmful interference in which case the user will be
required to correct the interference at his own expense.
For compliance with the Federal Noise Interference Standard, this equipment requires a shielded cable.
This statement will be applied only for the printers marketed in U.S.A.
Statement of
The Canadian Department of Communications
Radio Interference Regulations
This digital apparatus does not exceed the Class A limits for radio noise emissions from digital apparatus set out in the
Radio Interference Regulations of the Canadian Department of Communications.
Le présent appareil numérique n’émet pas de bruits radioélectriques dépassant les limites applicables aux appareils numériques de la
classe Aprescrites dans le Règlement sur le brouillage radioélectrique édicté par le ministère des Communications du Canada.
The above statement applies only to printers marketed in Canada.
CE
Manufacturer’s Declaration of Conformity
EC Council Directive 89/336/EEC of 3 May 1989
This product has been designed and manufactured in accordance with the International Standards EN 61000-6-3/10.2001
and EN 55024/09.98 following the provisions of the Electro Magnetic Compatibility Directive of the European Communi-
ties as of May 1989.
EC Council Directive 73/23/EEC and 93/68/EEC of 22 July 1993
This product has been designed and manufactured in accordance with the International Standards EN 60950 following the
provisions of the Low Voltage Directive of the European Communities as of July 1993.
The above statement applies only to printers marketed in EU.
Trademark acknowledgments
SP500: Star Micronics Co., Ltd.
ESC/POS: Seiko Epson Corporation
Notice
•All rights reserved. Reproduction of any part of this manual in any form whatsoever, without STAR’s express permis-
sion is forbidden.
•The contents of this manual are subject to change without notice.
•All efforts have been made to ensure the accuracy of the contents of this manual at the time of going to press. How-
ever, should any errors be detected, STAR would greatly appreciate being informed of them.
•The above notwithstanding, STAR can assume no responsibility for any errors in this manual.
©Copyright 2002 Star Micronics Co., LTD.
–3 –
Safety Information
Important!
Make sure that the printer is turned off and unplugged from the AC outlet and that the
computer is turned off before making connections.
Important!
Do not connect a telephone line into the peripheral drive connector. Failure to observe this
may result in damage to the printer.
Also, for safety purposes, do not connect wiring to the external drive connector if there is a
chance it may carry peripheral voltage.
ON
ON
OFF
OFF

–4 –
Unpacking
Choosing a place for the printer
Before actually unpacking the printer, you should take a few minutes to think about where
you plan to use it. Remember the following points when doing this.
✓Choose a firm, level surface where the printer will not be exposed to vibration.
✓The power outlet you plan to connect to for power should be nearby and unobstructed.
✓Make sure that the printer is close enough to your host computer for you to connect the
two.
✓Make sure that the printer is not exposed to direct sunlight.
✓Make sure that the printer is well away from heaters and other sources of extreme heat.
✓Make sure that the surrounding area is clean, dry, and free of dust.
✓Make sure that the printer is connected to a reliable power outlet. It should not be on the
same electric circuit as copiers, refrigerators, or other appliances that cause power spikes.
✓Make sure that the room where you are using the printer is not too humid.
✓Printer
✓User’s manual
✓Ribbon cartridge
✓Power cord
✓Roll paper guide
✓Rear cover
✓Switch blind
Printer
User’s manual
Ribbon cartridge
Power cord
Roll paper guide
Rear cover
Switch blind

–5 –
Consumable Parts
When consumable parts have run out, use those specified in the table below.
(1) Roll paper specifications
Paper type: Ordinary bond and carbonless copy paper
Paper width: 76±0.5 mm (3.0 inches) /57.5±0.5 mm (2.25 inches)
Roll diameter: ø85 mm (3.35 inches) max.
Core: ø12±1 mm (Inner dia.), ø18±1 mm (Outer dia.)
Note: Paper rolls with the end of the paper glued or taped to the
paper roll core or paper rolls with the end of the paper
folded can cause a paper jam. For these paper rolls, use
the optional near-end sensor.
Thickness: (single) 70 µm to 100 µm
(copies) Original + 2 copies (Max. 200 µm)
(2) Ink ribbon specifications
Ribbon type: Cartridge cassette
Color: Single color (Purple or black)
Ribbon material: Nylon 66 (#40 denier)
Ribbon life: Purple 3,000,000 characters
Black 1,200,000 characters

–6 –
ERROR
H
V
OFF
OFF
ON
ON
OFF
OFF
ON
ON
ERROR
ERROR
POWER
POWER
FEED
FEED
Control Panel
1POWER lamp (Green LED)
Lights when the power is ON
2FEED button
Press the FEED button to feed roll paper.
3ERROR lamp (Red LED)
Indicates various errors in combination with
POWER lamp
Loading the Ribbon Cartridge (Tear Bar Model)
1Turn off power to the printer.
2Open the cover.
Important!
1. Do not touch the print head immediately after
printing as it can be extremely hot.
2. Do not touch the cutter blade.
•There is a cutter inside the paper outlet slot.
Not only should you not put your hand in the
paper outlet slot while printing is in progress,
never put your hand into the outlet even when
printing is not in progress.
3Placetheribbon cartridgeinthe directionshown
in figure and press it down to load it. If loading
of the ribbon cartridge is not satisfactory, press
downthecartridgewhilerotatingtheribbonfeed
knob in the direction of the arrow.
4Turntheribbonfeedknoboftheribboncartridge
in the direction of the arrow to remove slack in
the ribbon.
5Close the cover .
Cover
Power off
1POWER lamp
(Green LED)
2FEED button
3ERROR lamp
(Red LED)
Print head
Ink ribbon
Ribbon feed
knob
Notched part
Ribbon cartridge
Ribbon separator

–7 –
H
V
OFF ONON
ERROR
ERROR
F
Note: When removing the ribbon cartridge, raise
the A section and then remove it by holding
the B section as shown in figure.
Loading the Ribbon Cartridge (Auto Cutter Model)
1Turn off power to the printer.
2Open the cover.
Important!
1. Do not touch the print head immediately after
printing as it can be extremely hot.
2. Do not touch the cutter blade.
•There is a cutter inside the paper outlet slot.
Not only should you not put your hand in the
paper outlet slot while printing is in progress,
never put your hand into the outlet even when
printing is not in progress.
3Lift up the auto cutter and put it in a vertical
position, as shown in figure.
Cover
Power off
A
B
H
V
OFF
OFF
ON
ON
FEED
ERRORPOWER
OFF
OFF
ON
ON
Auto cutter

–8 –
4Placetheribbon cartridgeinthe directionshown
in figure and press it down to load it. If loading
of the ribbon cartridge is not satisfactory, press
downthecartridgewhilerotatingtheribbonfeed
knob in the direction of the arrow.
5Turntheribbonfeedknoboftheribboncartridge
in the direction of the arrow to remove slack in
the ribbon.
6Close the Auto Cutter.
7Close the cover.
Note: When removing the ribbon cartridge, raise
the A section and then remove it by holding
the B section as shown in figure.
Loading the Paper (Tear Bar Model)
1Open the cover.
Important!
1. Do not touch the print head immediately after
printing as it can be extremely hot.
2. Do not touch the cutter blade.
•There is a cutter inside the paper outlet slot.
Not only should you not put your hand in the
paper outlet slot while printing is in progress,
never put your hand into the outlet even when
printing is not in progress.
2Cut off the front edge of the roll paper
perpendicularly.
3Confirm that the power of the printer is turned
on.
Print head
Ink ribbon Auto cutter
Ribbon feed
knob
Notched part
Ribbon cartridge
Cover
Ribbon separator
B
A
H
V
OFF
OFF
ON
ON
ERROR
ERROR
POWER
POWER
FEED
FEED

–9 –
4While observing the direction of the roll, set the
paper roll into the hollow as shown in figure.
Roll paper
Paper exit
Roll paper
Paper feeder
Tear bar
5Insert the edge of the paper into the paper feeder
(blackplasticpart).Ifinsertedcorrectly,theedge
of the paper will pass through the paper exit.
6Insert the top edge of the paper into the tear bar
slot, then mount the cover by reversing the pro-
cedure for opening the cover in step 1above.
Note: When the paper end mark appears on the
paper,replacethe roll paper before itruns
out.
H
V
OFF
OFF
ON
ON
ERROR
ERROR
POWER
POWER
FEED
FEED
H
V
H
V

–10 –
5Insert the edge of the paper into the paper feeder
(blackplasticpart).Ifinsertedcorrectly,theedge
of the paper will pass through the auto cutter
paper slit. Press the FEED button to cut the
paper.
6Remove the cut piece of paper and close the
cover.
Note: When the paper end mark appears on the
paper,replacethe paper roll before itruns
out.
2Cut off the front edge of the roll paper
perpendicularly.
3Confirm that the power of the printer is turned
on.
4While observing the direction of the roll, set the
paper roll into the hollow as shown in figure.
Roll paper
Paper feeder
H
V
H
V
Loading the Paper (Auto Cutter Model)
Cover
1Open the cover.
Important!
1. Do not touch the print head immediately after
printing as it can be extremely hot.
2. Do not touch the cutter blade.
•There is a cutter inside the paper outlet slot.
Not only should you not put your hand in the
paper outlet slot while printing is in progress,
never put your hand into the outlet even when
printing is not in progress.
Roll paper
H
V
OFF
OFF
ON
ON
ERROR
ERROR
POWER
POWER
FEED
FEED

–11 –
H
V
OFF
OFF
ON
ON
ERROR
ERROR
POWER
POWER
FEED
FEED
Clearing Paper Jams
1Turn the printer off and unplug the power cord
from the AC outlet.
2Open the cover.
Note: Do not touch the print head immediately
after printing, as it can be extremely hot.
In addition, do not touch the cutter blade
on models equipped with the auto cutter.
3Forauto cuttermodels,liftupthe autocutter and
put it in a vertical position as shown in figure.
4Cut the paper before the paper feeder as shown
in figure.
5Remove the jammed paper and reload the roll
paper.
Note: 1)Whenpaperisjammedintheautocutter,
use a flat-head screwdriver or similar
tooltoturntheknobandmovethecutter
blade in order to remove the jammed
paper.
2) Do not touch any metal edges. Personal
injury could result.
Cut
Knob
H
V
OFF ONON
ERROR
ERROR
F
Auto cutter

–12 –
41
Dip Switch Settings - Parallel InterfaceType
DIP switch
SW No. Function ON OFF
1 Always ON Should be set on
2
Auto Cutter Invalid Valid
3 Always ON Should be set on
4 Command emulation Star ESC/POS
Factory presetting: All on *1
*1 The factory settings for enabling/disabling the auto cutter are as
follows.
Models without auto cutter: Invalid (Switch 2 = on)
Models with auto cutter: Valid (Switch 2 = off )
Note: Do not enable the auto cutter for models without the auto
cutter (i.e., models with a tear bar). A mechanical error will
occur.
DIP switch
Power off
ON
OFF

–13 –
101
Dip Switch Settings - Serial InterfaceType
DIP switch
SW No. Function ON OFF
1 Always ON Should be set on
2
Auto Cutter Invalid Valid
3 Always ON Should be set on
4 Command emulation Star ESC/POS
5Baud Rate See table below
6
7 Data Length 8 bits 7 bits
8 Parity Check Disabled Enabled
9
Parity Odd Even
10
Handshake DTR/DSR XON/XOFF
Factory presetting: All on *1
*1 The factory settings for enabling/disabling the auto cutter are as
follows.
Models without auto cutter: Invalid (Switch 2 = on)
Models with auto cutter: Valid (Switch 2 = off )
Note: Do not enable the auto cutter for models without the auto
cutter (i.e., models with a tear bar). A mechanical error will
occur.
Baud rate Switch 5 Switch 6
4800BPS OFF ON
9600BPS ON ON
19200BPS ON OFF
38400BPS OFF OFF
DIP switch
Power off
ON
OFF

–14 –
Printing method Serial impact dot matrix printing
Number of columns 42 columns (76mm paper)
32 columns (58mm paper)
Printing direction Bi-directional with friction feed
Printing width Max.63mm(76mm paper) / Max.45mm (58mm paper)
Dot spacing 0.30(H) ×0.353(V) mm
Character size 1.2W ×2.42H mm (7×9, 16.9 cpi)
1.5W ×2.42H mm (5×9, 14.1 cpi)
Character set Alphanumeric characters: 95
International characters: 46
External graphics: 128 ×40 pages
Print speed Approx 7.5 lps(@16col) or 4 lps(@42col, 16.9CPI)
Paper feed speed Approx. 33 lps(@continuous feed)
Line spacing 1/144 inch
Character structure 7(Half dots)×9 or 5×9
Interface RS232C or Bi-Directional Parallel
Received buffer size 2K bytes or 256 bytes
Printer Reliability 22 million lines Calculated Real Time
9 million lines MCBF
Print head life 100 million characters
Cutter life 0.3 million cutting (Full or Partial Cut)
Temperature Operating: 0 to 40 °C
Storage:
-20 to 70 °C
Humidity Operating: 10 to 90% RH (without condensation)
Storage: 5 to 95% RH (without condensation)
Dimension Tear bar model: 140 ×225 ×163 (W×D×H mm)
Auto cutter model: 140 ×225 ×163 (W×D×H mm)
Weight Tear bar model: Approx. 2.0 Kg
Auto cutter model: Approx. 2.2 Kg
Specifications
Please access the following URL
http://www.star-micronics.co.jp/service/frame_sp_spr_e.htm
for the lastest printer drivers and utilities.

IMPRIMANTE MATRICIELLE
SÉRIE SP500
MODE D’EMPLOI

– 2 –
Federal Communications Commission
Interférences radioélectriques
Déclaration
Cet appareil a été testé et déclaré conforme aux normes des appareils numériques de Classe A, conformément à l’article 15
du règlement de la FCC. Ces normes ont été établies en vue de fournir une protection convenable contre les parasites en
usage commercial. Cet appareil génère, utilise et peut émettre des ondes radioélectriques, et s’il n’est pas installé et utilisé
conformément aux instructions, peut produire des parasites en communications radio. L’utilisation de cet appareil dans une
zone résidentielle produira vraisemblablement des parasites, dont l’élimination devra être prise en charge par l’utilisateur
lui-même et à ses frais.
Pour être conforme à la norme antiparasitage fédérale, cet appareil doit être utilisé avec un câble blindé.
Cette déclaration ne concerne que les imprimantes vendues aux États-Unis d’Amérique.
Déclaration du
Ministère des Communications du Canada
Règlement sur le brouillage radioélectrique
Le présent appareil numérique n’émet pas de bruits radioélectriques dépassant les limites applicables aux appareils
numériques de la Classe A prescrites dans le Règlement sur le brouillage radioélectrique édicté par le Ministère des
Communications du Canada.
Cette déclaration ne concerne que les imprimantes vendues au Canada.
Déclaration de conformité CE du fabricant
Directive du conseil de la CE 89/336/EEC du 3 mai 1989
Ce produit a été conçu et fabriqué en accord avec les normes internationales EN 61000-6-3/10.2001 et EN 55024/09.98 selon
les dispositions de la Directive de mai 1989 de la CE, relative à la compatibilité électromagnétique.
Directives du conseil de la CE 73/23/EEC et 93/68/EEC du 22 juillet 1993
Ce produit a été conçu et fabriqué en accord avec les normes internationales EN 60950 selon les dispositions de la Directive
de juillet 1993 de la CE, relative à la basse tension.
Valable pour les imprimantes commercialisées en Europe seulement.
Renseignements sur les marques de fabrique
SP500: Star Micronics Co., Ltd.
ESC/POS: Seiko Epson Corporation
Remarque
•Tous droits réservés. La reproduction d’une partie de ce manuel sous quelque forme que ce soit, sans la permission
expresse de STAR, est strictement interdite.
•Le contenu de ce manuel peut être modifié sans préavis.
•Des précautions ont été prises lors de l’impression de ce manuel pour garantir la précision de son contenu. Cependant,
en cas d’erreur dans ce manuel, STAR apprécierait grandement d’en être informé.
•Cependant, STAR n’assume aucune responsabilité en cas d’erreurs dans ce manuel.
©Copyright 2002 Star Micronics Co., LTD.

–3 –
Informations concernant la sécurité
Attention!
Assurez-vous que l’imprimante est hors tension, qu’elle est débranchée de la prise secteur
et que l’ordinateur est hors tension avant d’effectuer les connexions.
Attention!
Ne connectez pas une ligne de téléphone àla borne du pilote de périphérique, sous peine de
risquer d’endommager l’imprimante.
Pourdesraisonsdesécurité,ilconvientégalementdenepasbrancherd’appareilpériphérique
en cas de risque de survoltage.
ON
ON
OFF
OFF

–4 –
Déballage
✓Imprimante
✓Mode d’emploi
✓Cartouche àruban
✓Câble d’alimentation
✓Guide du rouleau de papier
✓Plaque arrière
✓Cache de I’interrupteur
Imprimante
Mode d’emploi
Cartouche à ruban
Câble d’alimentation
Guide du rouleau
de papier
Plaque arrière
Cache de I’interrupteur
Emplacement de l’imprimante
Avant de déballer l’imprimante, déterminez l’emplacement oùvous souhaitez l’installer.
Veuillez observer les points ci-dessous lors de votre choix.
✓Choisissez une surface stable et de niveau sur laquelle l’imprimante ne sera exposée à
aucune vibration.
✓Assurez-vous que l’emplacement dispose d’une prise secteur proche et d’accès aisé.
✓Assurez-vous que la distance entre l’imprimante et l’ordinateur-hôte vous permet de les
raccorder aisément.
✓Assurez-vous que l’imprimante n’est pas exposée directement aux rayons du soleil.
✓Tenezl’imprimanteàl’écartdessourcesdechaleurimportante,tellesquelesappareilsde
chauffage, etc.
✓Assurez-vous que le lieu oùvous souhaitez installer l'imprimante est propre, sec et n'est
pas poussiéreux.
✓Assurez-vous que la prise secteur àlaquelle vous raccordez l’imprimante délivre une
tension stable. Evitez de raccorder l’imprimante àla prise secteur d’un circuit alimentant
de gros consommateurs de courant, tels qu’un photocopieur, réfrigérateur, etc.
✓Assurez-vousque lelieuoùvous installezl’imprimante n’estpas excessivement humide.

–5 –
Consommables
Lorsque les consommables sont épuisés, utilisez ceux qui sont spécifiés dans le tableau ci-dessous.
(1) Rouleau de papier, caractéristiques
Papier ordinaire: Papier de copie bond et sans carbone ordinaire
Largeur de papier: 76 ±0,5 mm (3,0 pouces)/57,5 ±0,5 mm (2,25 pouces)
Diamètre du rouleau: ø85 mm (3,35 pouces) max.
Noyau: ø12 ±1 mm (dia. int.), ø18 ±1 mm (dia. ext.)
Remarque: Les rouleaux de papier dont l’extrémitédu papier
estcolléeoufixéeaunoyau ou les rouleaux depapier
dont l’extrémitédu papier est pliée peuvent
provoquer un bourrage de papier.Avec ces rouleaux
de papier, utilisez le capteur d’approche de fin de
papier en option.
Epaisseur: (simple) 70 µm à100 µm
(copies) Original + 2 copies (200 µm max.)
(2) Ruban encreur, caractéristiques
Type de ruban: Cassette àcartouche
Couleur Monochrome (violet ou noir)
Matériau du ruban: Nylon 66 (denier #40)
Durée de service du ruban: Violet 3 000 000 caractères
Noir 1 200 000 caractères

–6 –
ERROR
H
V
OFF
OFF
ON
ON
OFF
OFF
ON
ON
ERROR
ERROR
POWER
POWER
FEED
FEED
Panneau de commande
1Témoin POWER (DEL verte)
S’allume quand l’appareil est sous découpage.
2Témoin FEED
AppuyezsurlatoucheFEEDpourfaireavancer
le papier.
3Témoin ERROR (DEL rouge)
Indique des erreurs variées en combinaison
avec le témoin POWER.
Installation d’une cartouche àruban (
Modèle avec barre de découpage
)
1Mettez l’imprimante hors découpage.
2Ouvrez le capot.
Attention!
1. Ne touchez pas la tête d’impression
immédiatement après une impression ; en effet,
celle-ci peut être très chaude.
2. Ne pas toucher la lame du coupe-papier.
·Une lame se trouve dans la fente de sortie de
papier.Ilestfortementdéconseillédemettresa
main dans la fente de sortie de papier non
seulement pendant l’impression mais aussi en
toute autre circonstance, même quand
l’impression n’est pas effectuée.
3Mettezlacartoucheàrubanenplacedanslesens
indiquésurlafigureetappuyezlégèrementsurla
cartouche afin qu’elle se mette en place. Si la
mise en place de la cartouche n’est pas satisfai-
sante, appuyez sur la cartouche tout en faisant
tourner le bouton d’alimentation du ruban de la
cartouche dans le sens de la flèche.
4Pour tendre le ruban, faites tourner le bouton
d’alimentation du ruban de la cartouche dans le
sens de la flèche.
5Refermez le capot.
1Témoin POWER
(alimentation)
2Témoin FEED
(avance de papier)
3Témoin ERROR
(erreur)
Capot
Hors tension
Tête d’impression
Ruban encreur
Bouton
d’alimentation
du ruban
Parties avec
encoches
Cartouchhe à
ruban
Séparateur de ruban
Other manuals for SP500 SERIES
1
Table of contents
Languages:
Other Star Printer manuals

Star
Star NX-2480 User manual

Star
Star Gemini-10X User manual

Star
Star SM-T400I SERIES User manual

Star
Star Star NX-410 User manual

Star
Star TSP847II User manual

Star
Star Dot Impact Printer User manual

Star
Star SM-S220I SERIES User manual

Star
Star TSP100 futurePRNT Guide

Star
Star LC-90 User manual

Star
Star WinType 800C User manual

Star
Star TSP400 SERIES User manual

Star
Star LC-240 User manual

Star
Star SM-S201 User manual

Star
Star SM-S301 User manual

Star
Star SP200F SERIES User manual

Star
Star TSP650 SERIES User manual

Star
Star SM-L200 SERIES User manual

Star
Star SP298 SERIES User manual

Star
Star SM-S230I SERIES User manual

Star
Star mC-Label3 Quick start guide