Star LC-4522 User manual

USER’S MANUAL
LC-4522
DOT MATRIX PRINTERS

Contents
Chapter 1: Printer Setup …1
Choosing a place for the printer … 1
Upacking the printer … 2
General guide … 3
Open the front cover … 4
Removing the protective materials … 4
Installing the platen knob … 6
Installing the ribbon cassette … 6
Removing the ribbon cassette … 8
Installing the paper guide … 9
Standing up the paper guide … 10
Connecting to a power outlet and turning power on and off … 11
Loading fanfold paper … 12
Printing on fanfold paper … 16
Parking fanfold paper … 17
Unpaking fanfold paper … 17
Using the tear-off function … 18
Connecting to your computer … 18
Chapter 2: Control Panel Operations
Switching between on-line and off-line … 20
Selecting a Print Quality … 21
Entering the Print Quality Lock Mode … 21
Entering the Multi-part Mode … 22
Line feed … 23
Setting the top of form position … 24
Tear-off Function (fanfold paper) … 24
Selecting the Quiet Print Mode … 24
Changing the auto load position … 25
Save a macro … 26
Clearing the printer’s buffer … 26
Initializing the printer … 27

Chapter 3: Using the EDS Mode
About EDS Mode settings … 28
Entering the EDS Mode … 28
Selecting a bank … 29
Changing a switch setting … 29
Printing the current switch settings … 30
Exiting the EDS Mode … 30
EDS Mode Settings … 31
Chapter 4: Using the Printer with MS-DOS
Setting up for printing with MS-DOS … 40
Chapter 5: Paper Handling
Selecting paper types … 41
Adjusting for paper thickness … 43
Paper Handling … 44
Automatic fanfold feeding … 44
Manual sheet feeding … 44
Clearing paper jams … 45

1
Chapter 1: Printer Setup
This chapter contains important information on setting up your printer. Be sure
to read this chapter carefully before using the printer for the first time. In this
chapter you will learn about:
o Choosing a place for the printer
o Unpacking and setting up the printer
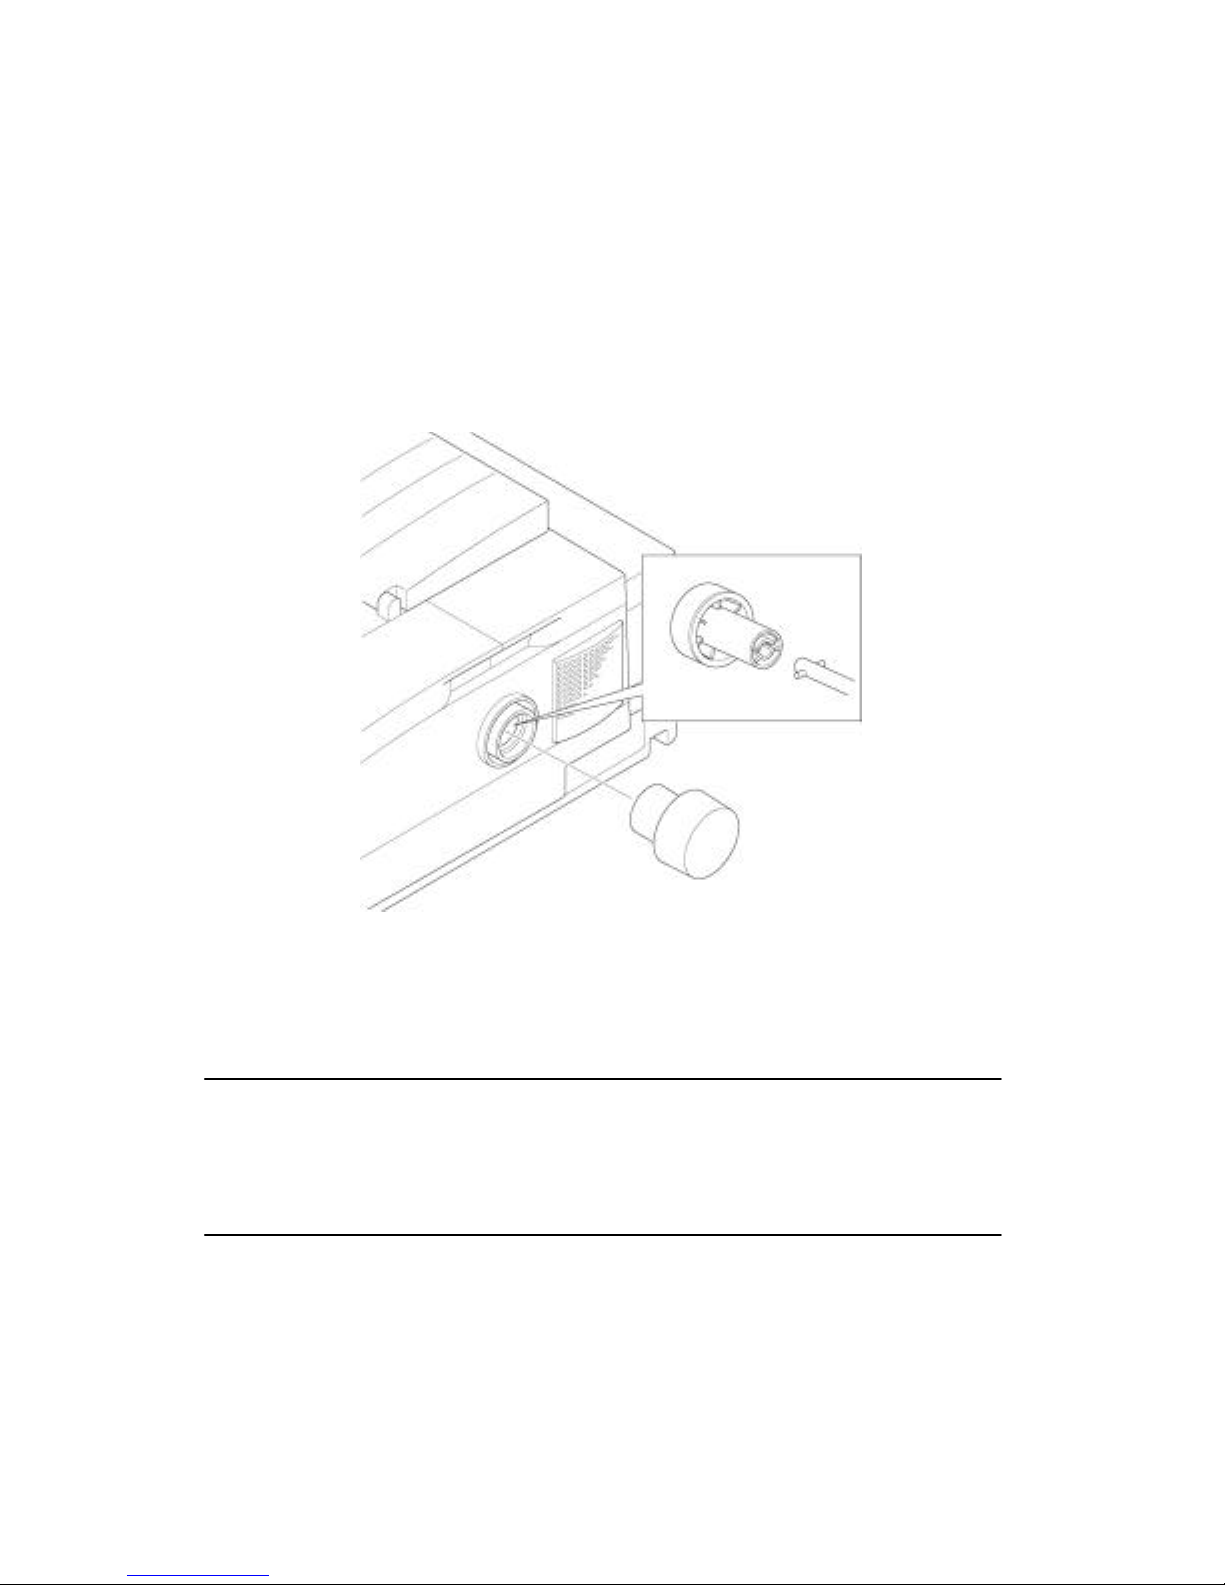
o Installing the platen knob
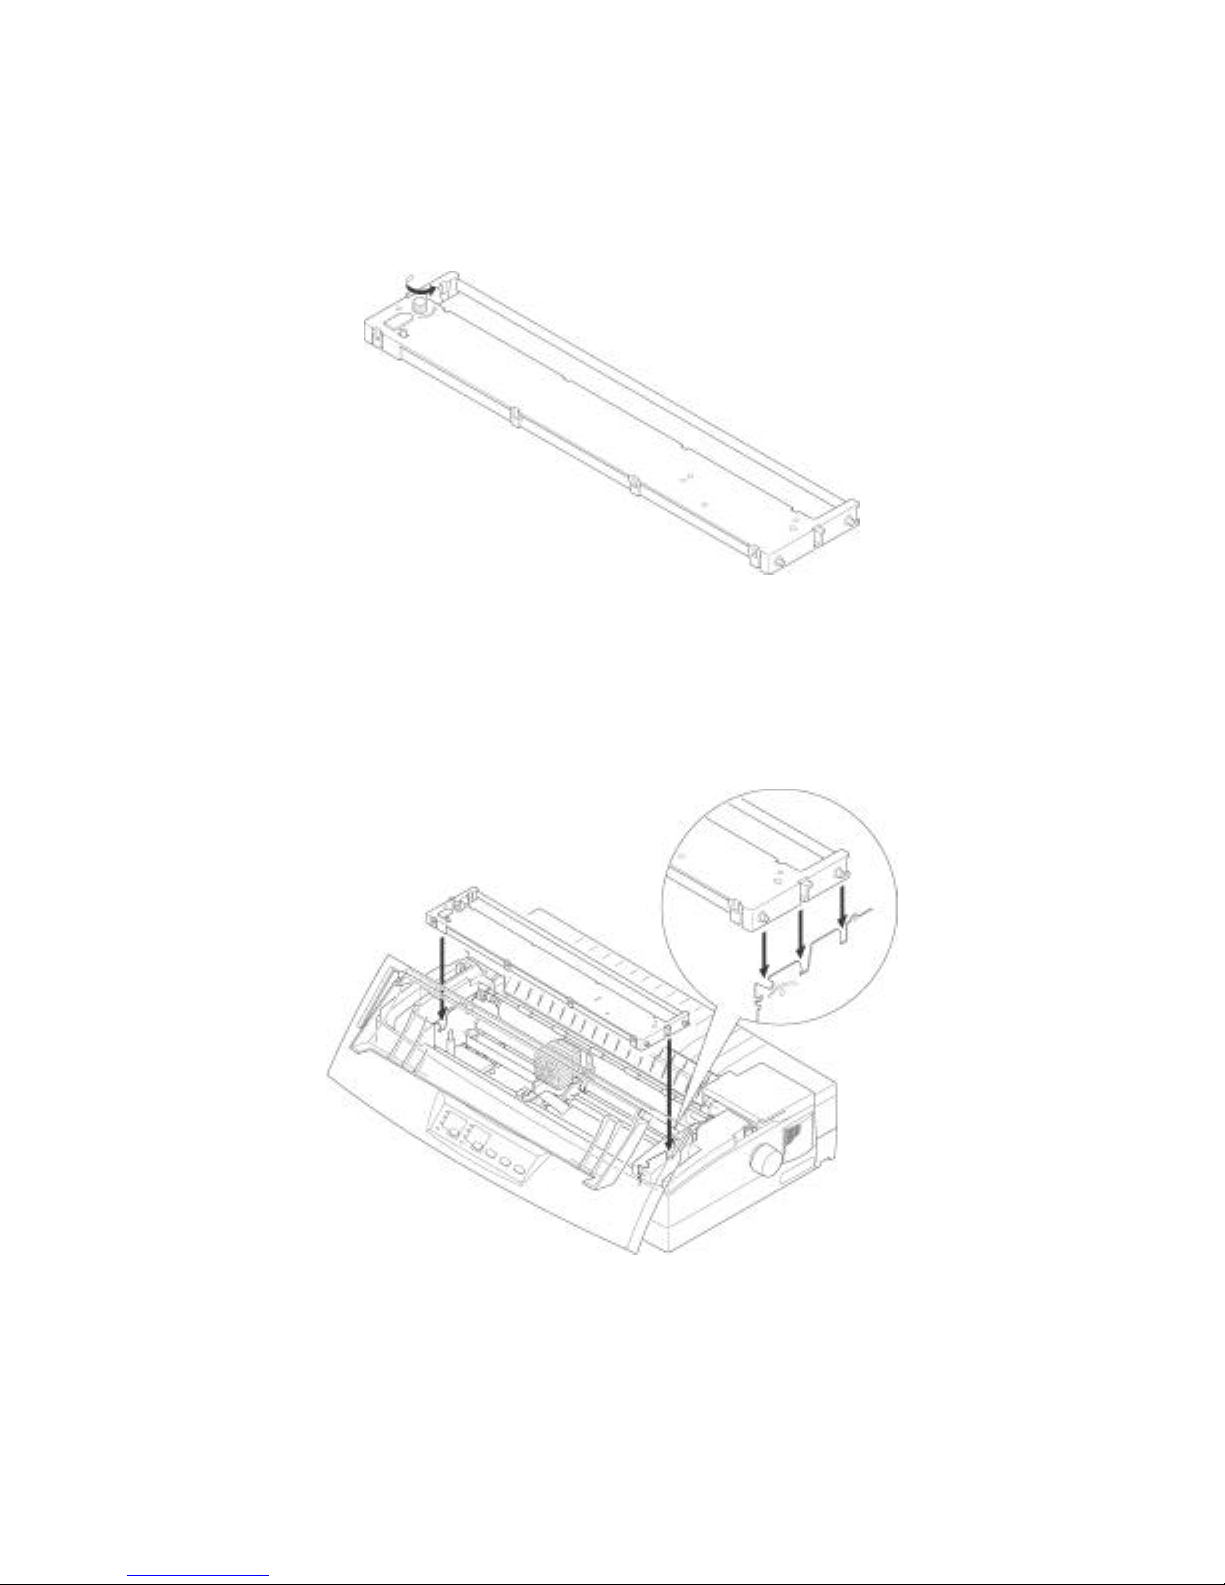
o Installing the ribbon cassette
o Loading paper
o Connecting to your computer
Choosing a place for the printer
Before actually unpacking the printer, you should take a few minutes to think
about where you plan to use it. Remember the following points when doing this.
3 Choose a firm, level surface where the printer will not be exposed to
vibration.
3 The power outlet you planto connect to for power should be nearby and
unobstructed.
3 Make sure that the printer is close enough to your computer for you to
connect the two with your printer cable.
3 Allow six inches (15 centimeters) of free space on either side of the printer.
If you are going to use fanfold paper, make sure that there is adequate space
for paper behind the printer.
3 Make sure that the printer is not exposed to direct sunlight.
3 Make sure that the printer is well away from heaters.
3 Make sure that the surrounding area is clean, dry, and free of dust.
3 Make sure that the printer is connected to a reliable power outlet. It should
not be on the same electric circuit as copiers, refrigerators, or other
appliances that cause power spikes.
3 Use a power outlet that matches the power rating noted on the label affixed
to the bottom of your printer.
3 Make sure that the room where you are using the printer is not too humid.

2 Printer Setup
Unpacking the printer
Check to make sure that the carton contains each of the items shown in the
following illustration.
If anything is missing, contact the store where you bought the printer and ask
them to supply the missing part. Note that it is a good idea to keep the original
box and all the packing materials just in case you need to pack the printer up
again and send it somewhere at a later date.
Important!
There are several versions of this printer designed for different voltages. It is
not possible to change the voltage of a printer. If the voltage shown on the label
on the bottom of your printer does not match the voltage for your area, contact
your dealer immediately.

General guide 3
General guide
The following illustrations show the major components of your printer.

4 Printer Setup
Opening the front cover
o Lift up on the front cover and swing it open until it stops.
o To close the front cover, simply lower it back into place.
Caution!
The tear assist edge is rather sharp. Take care to avoid injuring your hands.
Note:
You can completely remove the front cover from the printer or you can stand it
up. You should normally leave the front cover closed, because it protects
against objects getting into the printer, and it cuts down on printer noise.
Removing the protective materials
Two small pieces of packing material are inserted into the printer to protect
components during shipping. Be sure to remove them before using the printer.
o Open the rear cover by pushing it back so that the cover swings back and
down.

Removing the protective materials 5
o Open the front cover.
o Remove apieces of packingmaterial from inside the printer as shown in
the illustration.
A piece of cardboard is inserted into the printer to protect components during
shipping. Be sure to remove it before using the printer.
o Open the rear cover.
o Remove the cardboard from the inside of the rear cover as shown in the
illustration.

6 Printer Setup
Installing the platen knob
The platen knob is packed into a recess in the packaging material.
o Install the knob on the shaft located inside the large hole on the left side of
the printer. Make sure that the two splines of the platen shaft inside the
printer fit into the slots inside the knob’s spindle. Press the knob carefully
but firmly into place as far as it will go.
Installing the ribbon cassette
o Make sure the printer is unplugged from its power outlet.
Caution!
Never move the print head while the printer is turned on. Doing so can damage
the printer. If you have just finished printing, let the print head cool for a few
minutes before you touch it.
o Remove the front cover of the printer.
o Remove the ribbon cassette from its package.

Installing the ribbon cassette 7
o Rotate the knob on the ribbon cassette clockwise to take up any slack in the
ribbon.
o Carefully place the cassette onto the mechanism making sure that the
spindle fits into the socket on the bottom of the cassette. Also
make sure that the side tabs fit into the grooves on the sides of the flame.

8 Printer Setup
o While guiding the ribbon between the print head and print head shield,
press downthe ribbon fabric by pen.
o By hand, move the printer head left and right making sure that the ribbon
fabric comes into correct position.
o Replace the front cover of the printer.
Important!
Printing that is poor quality or too light is almost always due to a ribbon that is
simply worn out or “used up.” If you experience problems with print quality,
check the condition of the ribbon. If the black part looks gray and well-worn,
replace the ribbon with a new one.
Removing the ribbon cassette
Use the following procedure to remove the ribbon cassette from the printer
when you want to replace it with a new one.
o Make sure that the printer is unplugged from its power outlet.
Caution!
Never move the print head while the printer is turned on. Doing so can damage
the printer. If you have just finished printing, let the print head cool for a few
minutes before you touch it.

Installing the paper guide 9
o Open the front cover of the printer.
o By hand, move the cartridge holder to the left side where there is a cutout in
the top guide to allow easy installation and removal of the ribbon cassette.
o Using your thumb and forefinger to squeeze the two tabs on the ribbon
cassette towards the center, carefully remove the cassette from the holder.
o Use the procedure under “Installing the ribbon cassette” on page 6 to install
a new cassette.
Installing the paper guide
o Insert the two tabs on the rear cover of the printer into the holes in the
bottom of the paper guide.
o To remove the paper guide from the printer, simply pull the tabs out of the
holes.

10 Printer Setup
Standing up the paper guide
o You can move the paper guide so that it is at angle as shown inthe illustrations
below.

Connecting to a power outlet and turning power on and off 11
Connecting to a power outlet and turning power on and off
o Plug the power cord of the printer into a standard power outlet whose
voltage matchesthe power rating noted on the label affixed to the bottom of
your printer.
Caution!
If the voltage marked on the bottom of your printer does not match the voltage
from the outlet you are using, do not plug in the power cord. Contact your
dealer for assistance.
o Set the switch on the left of the printer to 1 (ON) to turn power on, and to 0
(OFF) to turn power off.
Caution!
Whenever you turn off the power, wait for at least five seconds before turning it
back on. Otherwise you may damage the printer. We also recommend that you
unplug the printer from the power outlet whenever you do not plan to use it for
long periods. Because of this, you should locate the printer so that the power
outlet it is plugged into is nearby and easy to access.

12 Printer Setup
Loading fanfold paper
This section tells you how to load fanfold paper. Note that you can also use cut-sheet
paper. For details on using other types of paper, see “Paper Handling” on
page 41 of this manual.
o Remove the paper guide from the printer.
o Make sure printer power is turned off.
o Set the release lever to the fanfold position.
o Grasping the two back corners of the printer with the palms of your hands,
press back on the two raised areas on the top of the rear cover until it opens.
o Swing the rear cover back and down until it stops.

Loading fanfold paper 13
Note:
You can also completely remove the rear cover by simply pulling it away from
the back of the printer after you open it.
Caution!
The metal edge of the cover is rather sharp. Take care to avoid injuring your
hands when handling it.
o Pass the fanfold paper through the space between the printer case and the
rear cover.
o Unlock the two tractor covers by pulling their gray levers up, and slide
them so they are aligned approximately with the holes on the sides of the
paper. Also move the center paper support so that it is approximately
halfway between the two tractors.
o Open the covers of both tractors and insert the paper so the tractor pins fit.
o Close the tractor covers. At this point you can make final adjustments to the
paper position by releasing the gray levers and moving the tractors. The
paper should lie flat with no buckling or bulging (tractors too close) or no
stretching or elongation of the holes (tractors too far apart). After making
these adjustments, be sure that you re-lock the tractors by pushing the gray
levers back into their original positions.

14 Printer Setup
o Close the rear cover and press down gently on it until it locks into place
with a click.
Caution!
Since printing with an open rear cover may cause paper feeding problems, be
sure to close the rear cover before printing.

Loading fanfold paper 15
o Install the paper guide so that it islay down as the illustration.
In this position, the paper guide keeps the printed paper separate from the
unprinted paper.
Then slide the right and left paper guides apart so they do not interfere with
the fanfold paper feeding.
o Turn on the printer.
The printer will beepa number of times to indicate that paper is not loaded
properly. Also, the control panel’sPOWER indicator flashes whenever
paper is not loaded.
o Press the SET/EJECT/PARK button to feed the paper to the starting
position.

16 Printer Setup
Printing on fanfold paper
When printing on fanfold paper, take care not to print too close to the
perforations that separate each sheet. The following shows the recommended
print area for fanfold paper, cut-sheet paper and label paper.

Parking fanfold paper 17
Parking fanfold paper
It is not necessary to remove fanfold paper currently loaded in the printer in
order to print on cut-sheet paper. Instead, simply use the following procedure to
park the fanfold paper.
o Tear off the paper at a perforation so there is no more than half a page
sticking out of the front cover of the printer.
If necessary, you can press the control panel’sON LINEbutton to put the
printer off-line. and then use the LINE FEEDbutton to feed the paper until
a perforation isjust past the front cover.
o Press the control panel’sON LINEbutton to put the printer off-line.
o Press the control panel’sSET/EJECT/PARKbutton. The printer
automatically reverse feeds the fanfold paper until it is no longer in contact
with the platen, which is indicated by the printer beeping a number of
times. Also, the control panel’sPOWER indicator starts to flash because
paper is not loaded.
o Move the release lever to the cut-sheet position.
o Change the paper guide to its upright position.
You can now load cut-sheet paper into the printer using the procedures
under “Manual sheet feeding” on page 44.
Unparking fanfold paper
After you are finished printing on cut-sheet paper, use the following procedure
to unpark fanfold paper and make it available for printing.
o Remove all cut-sheet paper from the printer.
o Move the paper guide so that it is at a lay down position: (Refer to page 10.)
o Move the release lever to the fanfold position.
o Press the SET/EJECT/PARK button to feed the paper to the starting
position.
The printer automatically goes back on-line at this time.
Table of contents
Other Star Printer manuals

Star
Star SM-S220I SERIES User manual

Star
Star TSP100IIIBI Quick start guide

Star
Star futurePRNT TSP100IIU Manual

Star
Star Tsp 100 User instructions

Star
Star DP8340 SERIES User manual

Star
Star futurePRNT ECO TSP100 User manual

Star
Star TSP700 SERIES User manual

Star
Star LaserPrinter 4 Instructions for use

Star
Star SM-T300 User manual

Star
Star LC-1511 User manual

Star
Star TSP654II Series User manual

Star
Star SM-S230I SERIES User manual

Star
Star SM-T300 User manual

Star
Star SM-T400I SERIES User manual

Star
Star SP742R series User manual

Star
Star Gemini-10X User manual

Star
Star TSP200 Series User manual

Star
Star SP742 Series User manual

Star
Star HSP7000 User manual

Star
Star StarPRNT mC-Print3 Series Quick start guide