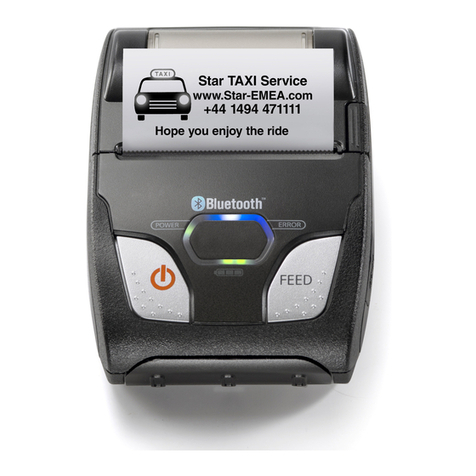
Star SM-T300I Series User manual

Mobile Printer
SM-T300ISERIES
Hardware Manual

- 2 -
Radio Equipment Information:
Informations relatives à l’équipement radioélectrique :
Radiogeräteinformationen:
Informatie over de radioapparatuur:
Informazioni sulle apparecchiature radio:
Información sobre equipos de radio:
Informações de equipamento de rádio:
Radyo Ekipmanı Bilgileri:
Πληροφορίες περί ραδιοεξοπλισμού:
Informacije o radijski opremi:
Informacije o radijskoj opremi:
Information vedr. radioudstyr:
Radioaaltoja lähettävän laitteen tiedot:
Informasjon om radioutstyr:
Information om radioutrustning:
Informacja o urządzeniach radiowych:
Informace o rádiovém vyzařování přístroje:
Rádióhullám-kibocsátási adatok:
Informácie o rádiovom zariadení:
Informații privind echipamentele radio:
Informācija par radio iekārtu:
Radijo ryšio įrangos informacija:
Raadioseadme teave:
Informazzjoni tat-Tagħmir tar-Radju:
Eolas faoi realamh Raidió:
2402 - 2480 MHz max. 20 dBm (E.I.R.P.)

- 3 -
Mexico Statement
LA OPERACIÓN DE ESTE DISPOSITIVO ESTA SUJETA A LAS SIGUIENTES CONDICIONES:
a) Es posible que este equipo o dispositivo no cause interferencia perjudicial.
b) Este equipo o dispositivo debe aceptar cualquier tipo de interferencia, incluyendo la que pueda causar su operación no
deseada.
FCC/IC Statement
https://download.starmicronics.com/manual/FCC/FCC_IC_Statement_Type6.pdf
EU Declaration of Conformity
Konformitätserklärung
Déclaration de conformité
Declaración de conformidad
Dichiarazione di conformità
Verklaring van conformiteit
Izjava o sukladnosti
Izjava o skladnosti
Prohlášení o shodě
Uyumluluk Beyanı
Megfelelőségi nyilatkozat
Overensstemmelseserklæring
Försäkran om överensstämmelse
Vaatimuksenmukaisuusvakuutus
Konformitetserklæring
Declaração de Conformidade
Δήλωση συμμόρφωσης
Deklaracja zgodności
Vyhlásenie o zhode
Vastavusdeklaratsioon
Atbilstības deklarācija
Atitikties deklaracija
Dikjarazzjoni ta' Konformità
Declaraţie de conformitate
Декларация за съответствие
https://download.starmicronics.com/manual/CE_DoC/WSP-i350_CE_DoC_Newest.pdf
Italia: l’uso pubblico e soggetto ad autorizzazione generale da parte del rispettivo provider di servizi.
Noorwegen: Gebruik van radioapparatuur is niet toegestaan in het geograsche gebied binnen een straal van 20 km
vanaf het centrum van Ny-Ålesund, Svalbard.
is statement will be applied only for the printers marketed in Europe.
UK Declaration of Conformity
https://download.starmicronics.com/manual/CE_DoC/WSP-i350_UK_DoC_Newest.pdf

- 4 -
Trademark acknowledgments
SM-T300I : Star Micronics Co., Ltd.
Notice
•All rights reserved. Reproduction of any part of this manual in any form whatsoever, without STAR’s express permission
is forbidden.
•The contents of this manual are subject to change without notice.
•All eorts have been made to ensure the accuracy of the contents of this manual at the time of going to press. However,
should any errors be detected, STAR would greatly appreciate being informed of them.
•The above notwithstanding, STAR can assume no responsibility for any errors in this manual.
•All company and product names are trademarks or registered trademarks of their respective owners.
(https://www.star-m.jp/eng/trademarks.html)
Copyright
2013-2023 Star Micronics Co., Ltd.

- 5 -
Safety Precautions Please be sure to read
To use this product in safety, please follow the precautions given below.
WARNING
PPIf you notice smoke, a strange smell, or a strange sound, turn o the power immediately, and remove the
battery pack and battery charger. en contact a Star Micronics dealer.
PPIf any foreign material (metal scraps, water, or other uid) enters the printer, immediately turn o the
printer and remove the battery charger and/or battery pack. en, contact your dealer for advice. Con-
tinued use of the printer could result in a re.
PPNever attempt to repair the printer yourself. Also do not disassemble or modify the product.
Doing so could lead to injury, re, or electric shock.
PPDo not touch the tear bar.
- ere is a tear bar inside the paper outlet slot. Not only should you not put your hand in the paper out-
let slot while printing is in progress, never put your hand into the outlet even when printing is not in
progress.
- e printer cover can be opened when replacing the paper. However, since the tear bar is on the inside
of the printer cover, be careful not to place your face or hands too close to the tear bar.
PPDuring and immediately aer printing, the area around the thermal head is very hot.
Do not touch it, as you could be burned.
PPIf any battery pack uid gets on your skin or clothing, immediately wash the aected area with fresh
water. Otherwise, skin damage may result.
PPe battery pack may be hot immediately aer the product has been used.
Caution Symbol
Caution for burns: The print head may be hot.
Do not touch the print head. There is a risk of burns.
Caution for static electricity: Do not touch the print head as it may be damaged by static
electricity accumulated in the human body.

- 6 -
nUsing the Printer
PP
Do not use any battery charger other than the provided charger.
If a battery charger other than the specied charger is used, there is the risk of electric shock or re.
PP
Do not wire the cables in a way other than designated.
Doing so could result in a re. It may also damage other connected devices.
PP
Some semiconductors can be damaged by static electricity.
Be sure to turn o the printer when inserting or removing the battery pack.
PPDo not drop the printer or hit it against a hard object.
PPDo not open the printer cover while the printer is printing.
PPBefore you open the printer cover, make sure that printing data is not being sent to the printer.
PPDo not unplug or plug in a communication cable while the printer is printing or during communication.
PPDo not touch a communication connector while the printer is printing.
PPTurn o the printer when you are not using it.
PPWhen the printer is used in a low temperature environment or when a PIN pad or other device that needs
electricity is connected to the printer, the battery’s performance will be diminished, and the amount of time
that you can use the printer for may be reduced.
PPDo not pull out paper while the printer cover is closed.
PPThe heating element and the driver IC of the thermal head are easily damaged. Do not touch them with
metal objects, sandpaper, etc.
PPPrinting quality may suer if the thermal head heating element becomes soiled by being touched with your
hands. Do not touch the thermal head heating element.
PPere is a risk of damage to the driver IC of the thermal head from static electricity.
Never directly touch the IC.
PPDo not operate the printer if there is moisture on the front surface of the head from condensation, etc.
nermal Paper Handling
PPOnly use thermal paper with the designated specications.
e printing quality and working life of the thermal head cannot be guaranteed if any paper other than that
recommended is used. In particular, paper containing [Na+, K+, C1-] may drastically reduce the working
life of the thermal head. Please exercise caution.
PPStore the thermal paper in a cool, dry, dark location.
PPDo not rub the thermal paper with a hard object.
PPDo not leave the thermal paper in contact with plastic lm, an eraser, or adhesive tape for a long period of
time.
PPDo not stack the thermal paper on fresh diazo copies or wet-type copies.
PPDo not use chemical glue on the thermal paper.
PPDo not use thermal paper that has been stored for a long period of time.

- 7 -
nOperating Environment for the Printer
Before actually unpacking the printer, you should take a few minutes to think about where you plan
to use it. Remember the following points when doing this.
PPDo not use the printer in an environment in which it will be subject to strong shaking while it is printing.
PPBe careful to ensure that the printer is not exposed to direct sunlight.
e appropriate environment for using the printer is described below.
Temperature: -10°C to 50°C
Humidity: 30 % RH to 80 % RH (No condensation)
PPDo not place the printer near a copying machine or other device that produces a strong electromagnetic eld.
PPKeep the printer suciently removed from heaters and other sources of heat.
PPUse the printer in a clean, low-humidity environment that is free from dust.
PPAvoid using the printer in high-humidity rooms.
PPWe recommend that you unplug the printer from the power outlet whenever you do not plan to use it for
long periods. Because of this, you should locate the printer so that the power outlet it is plugged into is near-
by and easy to access.
nPrinter Maintenance
Please perform the following maintenance every 6 months.
PPermal head
Dip a cotton swab in an alcohol solvent (ethanol, methanol, or isopropyl alcohol), and clean the heating area
of the head.
PPPlaten
While turning the platen, use a so, dry cloth to lightly rub the entire surface of the platen and remove any
foreign objects.
PPPaper storage unit and the surrounding area
Remove any dirt, dust, pieces of paper, etc., from the paper storage unit.
PPCard reader
Regularly blow air onto the card reader to remove any dust from the card slot.
nUsing a Magnetic Card
PPDo not bring magnets near the card, and do not store the card near a device that produces a magnetic eld
(such as a mobile phone, speaker, or TV).
If you do so, the data on the card may be deleted.
PPDo not leave the card in a high-temperature environment (such as the dashboard of a car).
If you do so, the card may bend.
PPDo not touch the card with dirty or wet hands. Also, do not attach adhesive tape or glue to the card.
Failing to follow the above precautions could cause the card to stop working properly.

- 8 -
Table of Contents
1. Product Overview.......................................................................................................10
1.1 Printer & Accessories .............................................................................................................................. 11
1.2 External Appearance and Part Names ...............................................................................................12
2. Setup ..............................................................................................................................13
2.1 Battery Pack .............................................................................................................................................. 13
2.1.1 Inserting into the Printer or the Battery Holder .......................................................................................13
2.1.2 Charging the Battery.......................................................................................................................................14
2.2 Bluetooth...................................................................................................................................................17
2.2.1 Pairing .................................................................................................................................................................17
2.2.2 Auto Connection Function (only for iOS*1)................................................................................................18
2.3 Loading Paper...........................................................................................................................................19
2.4 Belt Clip ......................................................................................................................................................21
2.4.1 Attaching to the Printer..................................................................................................................................21
2.4.2 Using the Belt Clip............................................................................................................................................21
3. Printer Features.......................................................................................................... 22
3.1 Control Panel ............................................................................................................................................22
3.1.1 Button .................................................................................................................................................................22
3.1.2 Panel Lamp ........................................................................................................................................................22
3.1.3 LCD ......................................................................................................................................................................22
3.2 Self Test ......................................................................................................................................................23
3.2.1 Self Test Procedure ..........................................................................................................................................23
3.2.2 Printing the Bluetooth Device Name and the Bluetooth Device Address ........................................23
3.3 Memory Switch Setting (By the buttons on the printer.)..............................................................24
3.4 HEX Dump Mode..................................................................................................................................... 31
3.5 Instruction for Auto Power Down(Sleep) Mode..............................................................................32
3.6 Card Reading (Only for Model with Card Reader)...................................................... 33
4. Paper ........................................................................................................................... 34
4.1 Paper Specications................................................................................................................................34
4.2 Recommended Paper (Common thermal roll paper) ....................................................................34
4.3 Printing Range..........................................................................................................................................34

- 9 -
5. General Specications................................................................................................35
6. Version History...........................................................................................................37
This manual supports the following rmware version.
Firmware Version: Ver 4.2 or later
Refer to the appropriate hardware manual which supports the rmware version of your printer.
The rmware version can be conrmed by the self-test. (“3.2 Self Test” of Page 23)

- 10 -
1. Product Overview
This printer is perfect for mobile banking systems, retail, POS (point of sale) terminals and other
forms of mobile computing.
uThe characteristics of this printer are listed below:
•Pocket size (120 ×130.5 × 58.4 mm) <Model without Card Reader>
•Extremely light and mobile (424 g)
•Up to 31 hours of battery-powered operation (12 receipts per hour / Sleep setting after 1 minute)
•International Splash/Dust Proof “IP54” Certied
•1.5m Drop Resistance (Tough Rubber Type Case Design)
*Our test procedure, Not guarantee
•Support High Quality Print Mode (Double-Stroke Mode)
•Very silent printing thru direct thermal printing method
•High speed (80 mm/sec, max.)
•Standard-equipped dual interface (RS-232C serial interface and Bluetooth Ver. 3.0)
•Support for secure Bluetooth communications
Support for Bluetooth Security Mode 3 (PINs of up to 16 digits in length)
Non-discoverable mode can be oered (Factory option)
• Support Magnetic Stripe Reader <Model with Card Reader>
• Support Graphic LCD(128×32 dots) with Blue LED Backlight
• Belt Clip as a standard accessory
• Support text and graphic printing
• Bit-Image(Logo) Store Function “Use Logo Store Tool to store a logo.”
• Drop-in design that makes it easy to load paper
• A printer cover that can be opened with the touch of a button
• Printer cover open sensor & Paper-out sensor
• Flow control : Software (XON/XOFF)
Note: Hardware ow control not supported in printer
•Apple Certied to print directly from iOS devices over Bluetooth
Easy set-up to switch from printing directly from iOS to Android devices

- 11 -
Shoulder Strap
1.1 Printer & Accessories
The printer is packaged with the following accessories.
If any of these accessories is broken or missing, please contact the dealer that you bought the product.
uThe optional items for this printer are listed below.
Battery Pack
Serial Communication Cable
Printer paper samplePrinter
Battery ChargerSafety Instruction Sheet
Extra Battery Pack
Battery Holder
Belt Clip
Car Charger
4 Unit Battery Charger (Special AC Adapter + 4 Unit Holder)

- 12 -
1.2 External Appearance and Part Names
*1) Remove the lms if you do not need them.
Platen Gear
Platen
Printer Cover
Cover Open Switch
Thermal Head
Mechanism
Feed Button
LCD
Magnetic Stripe Reader
Error Lamp
Power Lamp
Power Button
Battery Pack
Belt Clip
Charge Connector
Serial Connector
Don’t connect USB mini B cable here.
Protection Film
*1)

- 13 -
2. Setup
2.1 Battery Pack
2.1.1 Inserting into the Printer or the Battery Holder
1. Make sure that the printer has been turned o before you insert or remove the battery pack.
2. Insert the battery pack into the back of the printer as in the gure shown below, following the di-
rection of the arrow.
3. To remove the battery back, pull back the hook, and use the opposite procedure from the one you
used to insert the battery pack.
4. The battery pack install into External Battery Cradle.
Insert the battery pack in the direction of the arrow.
Hook
Push the battery pack until
the hock clicks into place.

Lamp(Red) Lamp(Green)
Charging Fully charged / No load
- 14 -
2.1.2 Charging the Battery
Insert the battery pack into the printer to charge it.
Insert the designated battery charger into the inlet of the printer or battery holder.
Notes about the Battery Pack
uGeneral Battery Characteristics
•The battery is a consumable and its performance over time will gradually decrease.
•While not in use, the battery will slowly discharge itself.
Prepare a battery pack that has been charged relatively recently (1 to 2 days earlier).
•To ensure that the battery lasts for a long time, we recommend that you turn off the printer
whenever possible.
• When used at low temperatures, battery performance will temporarily decline. Be sure to have a
fully-charged spare battery standing by if the printer will operate in a cold environment.
uCharging the Battery Pack
• The battery pack can be charged at ambient temperatures between 0 and 40°C.
• The time required to charge the battery pack varies depending on the voltage and the ambient
temperature.
Normally, it takes 4 to 5 hours to charge the battery pack.
• Turn off the printer power while the printer is charging.
• Printing while the printer is charging will shorten the battery lifetime.
• Do not remove the battery pack while it is being charged.
• Fully charge the battery prior to using the printer. Otherwise, the performance of the battery
may be affected.
• There is no need to completely discharge or use up a rechargeable lithium ion battery before re-
charging it.
• It is normal for the battery pack to be hot after it has finished charging or been used.
• Do not frequently repeat charging when there is still sufficient remaining battery charge.
Note: When the battery charger is connected to the printer without the battery pack, the
printer turns on but cannot print.

- 15 -
uBattery Pack Life
• The battery can be charged approximately 300 times in the normal temperature range without
losing performance. If an extreme decline in the running time of the battery is noticed, the bat-
tery is reaching the end of its usable life. It is recommended to replace the old battery with a
new one.
uNotes about Using the Battery Pack
• Only use a designated battery pack. There is a risk of explosion or fire.
• Only use the designated battery charging method. There is a risk of explosion or fire.
(You cannot use a battery charger other than the designated battery charger.)
• Do not throw the battery pack into a fire, place it near a flame or heating device, or use, charge
or leave it in a hot environment (under direct sunlight, in a car, etc.). There is a risk of heat gener-
ation, smoke emission, explosion, fire, or battery acid leakage.
• Do not use a battery pack that has been dropped or subjected to a shock in some other way.
There is a risk of heat generation, smoke emission, explosion, fire, or battery acid leakage.
• Do not disassemble or modify the battery pack.
Doing so could lead to injury, fire, or electric shock.
• Do not short the terminals of the battery pack or get it wet.
Do not put the battery pack in a bag with a metal object such as a key. There is a risk of heat
generation, smoke emission, explosion, fire, or battery acid leakage.
• If the battery acid gets into contact with the eyes, wash eyes immediately with water and consult
a doctor. Leaving your eyes untreated could result in blindness.
• If there is an abnormality such as heat generation, smoke emission, explosion, fire, or battery
acid leakage while the battery pack is being used or stored, remove the battery pack from the
printer immediately. Consult your dealer.
uNotes about Storing the Battery Pack
• The characteristics of the battery pack may degrade if you store it in a charged state for a long
period of time. If you do not intend to use the battery pack for a while, charge it to approximate-
ly 50 %, and then remove it from the printer.
• If you do not intend to use the battery pack for a long time, be sure to remove it from the printer,
and do not leave it connected to a battery pack holder for external charging.
• Keep the battery pack out of the reach of children. In addition, be careful that children do not
remove the battery pack.
• Store the battery pack in a cool place.
* We recommend that you store the battery pack in a dry area with an ambient temperature of
15 to 25 oC.
* Avoid storing the battery in locations with high or extremely low temperatures.

- 16 -
< For U.S.A. and Canada >
Lithium-Ion batteries are recyclable. You can help preserve our environment by re-
turning your used rechargeable batteries to the collection and recycling location
nearest you. For more information regarding recycling of rechargeable batteries,
call toll free 1-800-822-8837, or visit http://www.rbrc.org/
uBattery Disposal and Recycling
A lithium-ion battery is used to power this device. Since the disposal process of batteries varies
from country to country, refer to the appropriate measures mandating the disposal method of
the country in which this device is used.
Make sure to follow the instructions below to prevent the battery from
permanent damage.
lIf you do not intend to use the battery pack for a long period of time, charge it to approximately
50 %, and then remove it from the printer.
lDuring storage, charge the battery pack to approximately 50 % every 3 months.
lWhen the remaining battery level is low, charge the battery as soon as possible.
lIf the printer turns o due to insucient battery remaining, make sure to recharge the battery
within 15 days.

- 17 -
2.2 Bluetooth
2.2.1 Pairing
1. Press and hold POWER button for approx. 5 seconds, and printer is turned on.
Then, it is ready to pair with another Bluetooth device.
3. If necessary, enter the following information into the terminal that you are using.
PIN: 1234 (default)
Device name: Star Micronics (default)
2. On the host device, tap [Settings]. Set [Bluetooth] to ON.
Select "Star Micronics".
CAUTION
1) For security purposes, we recommend that you change the PIN.
The following utility is required to change the PIN.
Please download and use the utility soft from the following URL.
iOS https://www.star-m.jp/prjump/000003.html
Android https://www.star-m.jp/prjump/000004.html
Windows https://www.starmicronics.com/support/
Or, please contact the seller.
For instructions on how to use this utility, please refer to the Bluetooth Setting Utility Software
Manual.
2) If the quantity of data which is printed at once is more than 1M byte on Bluetooth communication,
it would cause the buer to overow and the data to get damaged.
3) For instructions on how to connect with a host device, please refer to your host device user
manual.
<iOS ><Android >
You can test the connectivity with a host device by using StarIO SDK Application which is
available on Apple Store and Google play.

- 18 -
2.2.2 Auto Connection Function (only for iOS*1)
When the Bluetooth connection with your iOS device*2 is disconnected, it is required to establish a
connection by tapping the printer you want to use on the Bluetooth setting screen. This Re Connection
Specication is exactly based on the iOS specications, and this specication is dierent from other OS
such as Android.
The auto connection eliminates this conguration process and automatically sends a request for
connection to the iOS terminal (Host) that the printer previously connected.
See the table below for details of Auto Connection setting.
Auto Connection OFF Auto Connection ON
(Defalt)
How to re-connect
Turn the printer on and tap the
printer name on the Bluetooth
setting screen of the iOS device.
Af ter powered on, the printer
automatically connects to the
Host that it previously connected.
How to change
the Host
Turn the printer on and tap the
printer name on the Bluetooth
setting screen of the iOS device
you want to use.
Turn the "Bluetooth" function o
on the Bluetooth setting screen
of the host that the printer is
currently connected, and then tap
the printer name on the Bluetooth
setting screen of the iOS device
you want to use.
Use case A printer is shared with the multiple
host devices.
A printer is always used with one
host device only.
The ON/OFF switching of the auto connection can be performed by operating the printer panel or using
the Star Bluetooth utility in "StarPRNT Intelligence".
For more details on the switching method, refer to "3-3. Memory Switch Setting".
*1) This function is only valid when the printer is set to [Bluetooth(Auto)]. This function will be
invalid regardless of the settings when the printer is set to [Bluetooth(Mac)].
*2) For example, iPhone, iPad and iPod

- 19 -
2.3 Loading Paper
Refer to “4.2 Recommended Paper (Common thermal roll paper)” of Page 34, to select roll paper
that conforms to the specications.
1. Turn on the printer.
2. Put your nger on the switch for opening the cover, and then open and raise the printer cover.
3. Load the roll paper in the orientation shown in the gure below, and then pull the end of the roll
straight toward you.
4. Press down on both sides of the printer cover to close it rmly.
When you close the printer cover, make sure that it is closed on both sides.
5. Use the tear bar to cut the extra paper.
CAUTION
When the paper is jammed, be sure to open the printer cover before removing the jammed
paper.
Do not under any circumstances try to pull out the jammed paper forcefully while the printer
cover is closed. Doing so may damage parts of the printer.
Printer Cover
Cover Open Switch

- 20 -
WARNING
1) Do not touch the tear bar.
• There is a tear bar inside the paper outlet slot. Not only should you not put your hand in the
paper outlet slot while printing is in progress, never put your hand into the outlet even when
printing is not in progress.
• The paper cover can be opened when replacing the paper. However, since the tear bar is on the
inside of the paper cover, be careful not to place your face or hands too close to the tear bar.
2) During and immediately after printing, the area around the thermal head is very hot. Do not
touch it, as you could be burned.
Table of contents
Other Star Printer manuals

Star
Star TSP700 SERIES User manual

Star
Star FVP-10U User manual

Star
Star SM-S401 User manual

Star
Star mC-Print3 MCP31LB Safety guide

Star
Star HSP7000 User manual

Star
Star SP200F SERIES User manual

Star
Star StarPRNT mC-Print3 Series Quick start guide

Star
Star SM-S201 User manual

Star
Star TUP500 Quick setup guide

Star
Star WinType 4000 User manual

Star
Star SM-L200 SERIES User manual

Star
Star XB24-250 II User manual

Star
Star Line Thermal/Dot Printer User manual

Star
Star NX-2480 User manual

Star
Star TSP847IIU-24 User manual

Star
Star Multi-Font ZA-200 User manual

Star
Star SP742R series User manual

Star
Star Star NX-510 User manual

Star
Star TSP650II series User manual

Star
Star LaserPrinter 4 Instructions for use