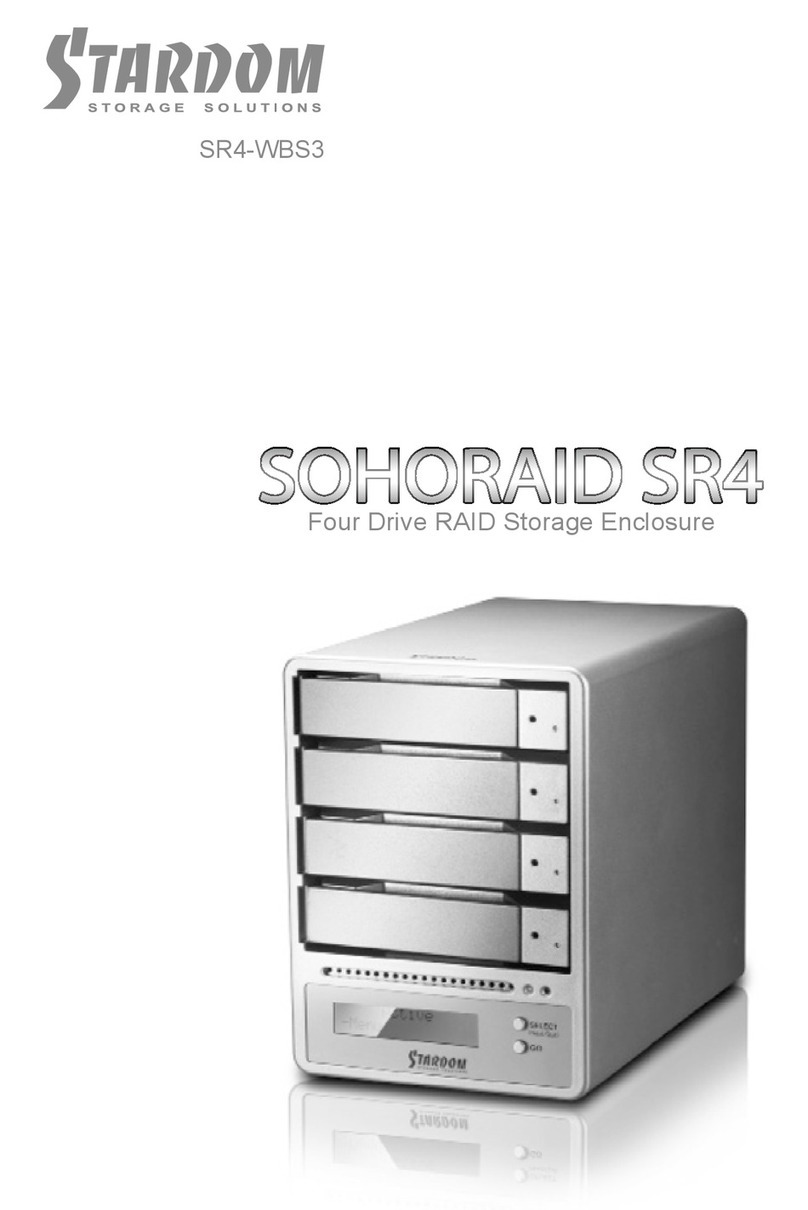
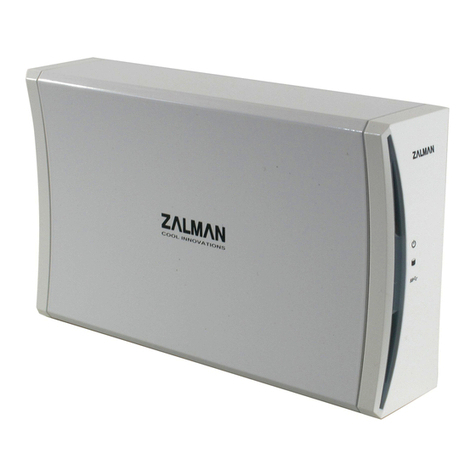
Stardom SOHORAID SR2 User manual

SR2-WBS3
SR2-SB3
Two Bay RAID Storage Enclosure


4
14
26
38
50
60
70
»
SOHORAID SR2 Series User Manual
.......................................
»
SOHORAID SR2 Serie Bedienungsanleitung
.............................
»
Série SOHORAID SR2 Manuel de l’utilisateur
............................
»
Manual de usuario de SOHORAID SR2 Series
...........................
»
SOHORAID SR2 系列產品使用說明
.........................................
»
SOHORAID SR2 シリーズユーザーマニュアル
................................
»
SOHORAID SR2 시리즈 사용 설명서
........................................

SOHORAID SR2 Series User Manual
English
Deutsch
Français
Español
中文
日本語
한국어
Forewords
Thank you for purchasing STARDOM products. Before using your SOHORAID, please read this
manual thoroughly.
At time of publish, all information contained in this user manual has been veried. Before
Product specication will be based on the time of delivery from STARDOM. Any revision
updates or important technical information may be found on www.stardom.com.tw. Products
specications are subject to change without notice.
If you have any questions regarding the products of STARDOM, or you would like to know the
latest product information, user manual update, or rmware update, please contact your local
supplier or visit www.stardom.com.tw for further information.
Copyright © RAIDON TECHNOLOGY, INC. All rights reserved.
Table of Contents
1. Package Contents and Product Views
2. Operating Information
3. Hardware Requirements and Precautions
4. Hardware Installation
5. How to Switch the RAID Mode
6. How to Change the Password
7. Hard Drive Replacement Instructions
8. Data Rebuild and Verification Functions
9. System Temperature Overheat and Fan Failure Management
10. Additional Display Messages of System and Operation Procedures
11. LED Visual Status Indicator Definitions
12. Frequently Asked Questions
4

SOHORAID SR2 Series User Manual
English
Deutsch
Français
Español
中文
日本語
한국어
1. Package Contents and Product Views
Open the package and you should nd the following :
SR2-WBS3 SR2-SB3
SR2-WBS3 x 1
( with removable drive tray enclosed x 2 )
SR2-SB3 x 1
( with removable drive tray enclosed x 2 )
AC Power Cable x 1 AC Power Cable x 1
eSATA Cable x 1 eSATA Cable x 1
Firewire 800 (1394b) Cable x 1 USB 3.0 Cable x 1
USB 3.0 Cable x 1 Accessory Kit x 2
Accessory Kit x 2 SR2 User Manualx 1
SR2 User Manual x 1
Please make sure that the contents listed above are not damaged or missing. If there are
damages or missing items, please contact your supplier immediately.
Front View
1 2 3
4
8
6
7
5
9
A
B
1. LCD display panel
2. Scroll buttons
3. ESC button
4. Power/Alarm indicator
5. Mute button
6. ENT button
7. Removable tray handle
8. Key access opening
9. Hard drive status indicator
A“PRI” Primary drive position
B“SEC” Secondary drive position
Rear View
SR2-WBS3 SR2-SB3
USB 3.0
1 2
5
6
7
31 2
4
5
7
3
4
USB 3.0
1. Power socket 2. Power switch 3. Cooling fan 4. USB 3.0 interface connection
5. eSATA interface connection 6. FireWire 800 (1394b) interface connection
7. Anti-theft cord slot
5

SOHORAID SR2 Series User Manual
English
Deutsch
Français
Español
中文
日本語
한국어
Storage Mode Denitions
Safe mode (RAID 1) : Mirrored storage capacity allowing data protection.
Speed mode (RAID 0) : Striped into a single large volume allowing higher speed transfers
but without data protection.
The secondary FireWire 800 (1394b) connection can be used to connect to other Firewire
800(1394b) devices.
2. Operating Information
Operating Temperature : 0 ~ 40℃ (32 ~ 104°F)
Storage Temperature : -10 ~ 70℃ (14 ~ 158°F)
Line Voltage : 100 ~ 240V AC
3. Hardware Requirements and Precautions
1. Both hard drives must be installed into the system for the device to work properly.
2. Only one interface connection may be used at once per computer system.
3. For the best performance of the system, it’s strongly recommended that you install hard
drives of the same model and if need be, replace faulty hard drives also with the same
model. If the same model of HDD is unobtainable, please replace with a model that is at
least 20GB larger in capacity.
4. All data on replacement hard drive will be erased once inserted into the system.
5. The actual usable storage capacity may differ from the stated capacity once the drives in
the system have been formatted.
6. Always safely dismount the volume from the Operating System before removing
SOHORAID SR2 from host computer.
7. Do not remove the hard drive(s) while the system is powered on or switch the position of
the drives. Always remember to power off the unit prior to removing the hard drives (unless
hot-swapping for the purpose of a rebuild in a RAID 1 conguration).
8. In RAID 1 mode, only 1 hard disk failure is permitted. Please seek help from data recovery
services should there be further data-loss due to failures in a RAID 0 mode.
9. It is highly recommended for users to back up important data. Stardom will not be
responsible for any lost of data caused during the use of the unit or the recovery of the
data lost.
10. The default setting of SOHORAID SR2 is RAID 1. To set it in a data protection mode,
please set it to RAID 1. Please set SR2 to RAID 0 mode when speed and large storage
capacity is required.
11. Users can set the RAID level and the basic functions of SOHORAID SR2 using the buttons
on the right side of LCD screen in front of the product.
6

SOHORAID SR2 Series User Manual
English
Deutsch
Français
Español
中文
日本語
한국어
4. Hardware Installation
Please follow the instructions below to complete the hardware installation:
Step 1 Open the package and take out the product making sure that all contents are not
damaged or missing. Should you nd any damage or missing contents, please contact
your supplier immediately.
Step 2 Place the system on a stable surface. Ensure that it is installed in a well ventilated area
with acceptable airow for the vent and keep product away from moisture.
Step 3 Use the provided key in the accessory kit to eject the removable tray, pull tray handle to
remove from SR2.
Step 4 Install your hard drives onto the removable drive tray and secure it with the screws
included in the accessory kit. Once completed, insert the hard drive tray into the system.
Step 5 Use the provided cables to connect your computer to the preferred interface connection.
7

SOHORAID SR2 Series User Manual
English
Deutsch
Français
Español
中文
日本語
한국어
Step 6 Power on the unit and wait for the system to initialize. When the LCD display panel
indicates “OK”, the system has completed initialization and is ready for hard drive
formatting.
System initializing Normal operational state
When the SR2 has completed initializing, your computer’s operating system should
recognize the device automatically. Please follow the formatting instructions given by the
operating system to format the drives. Once the formatting has been completed, the system
is ready for use.
5. How to Switch the RAID Mode
The default setting of SOHORAID SR2 is RAID 1. To change the setting, please follow the
steps below:
Step 1 After turning on the power, press “ENT” when the screen below is displayed on the LCD.
STARDOM SR2
Booting...
Step 2 When the “Enter Password” screen appears, please enter “0000” (press ▼ or ▲ to
choose numbers, and then press “ENT”).
PASSWORD
0000
Step 3 If you are sure to switch the RAID mode, press “ENT” to accept. If not, press “ESC”.
CHANGE RAIDMODE
YES NO
Step 4 When the “RAID-0 MODE” appears on the LCD screen, press “ENT”.
RAID-0 MODE
YES NO
Step 5 When you switch the RAID mode, all data in the hard disk will be deleted. Press “ENT”
to accept, or press “ESC”.
DATA WILL LOSE
YES NO
8

SOHORAID SR2 Series User Manual
English
Deutsch
Français
Español
中文
日本語
한국어
Step 6 This display indicates that the switch has been done successfully. Please reboot the
SOHORAID SR2.
RaidMode Changed
Pls Reboot Sys
6. How to Change the Password
The default password setting of SOHORAID SR2 is “0000”. If you want to change the
password, please follow the steps below:
Step 1 After turning on the power, press “ENT” when the screen below is displayed on the LCD.
STARDOM SR2
Booting...
Step 2 When the “Enter Password” screen appears, please enter “0000” (press ▼ or ▲ to
choose numbers, and then press “ENT”).
PASSWORD
0000
Step 3 Press ▼ or ▲ to switch the screen from “CHANGE RAIDMODE” to “SETUP
PASSWORD”.
SETUP PASSWORD
YES NO
Step 4 Press ▼ or ▲ to change the password, and then press “ENT” to conrm.
PASSWORD
XXXX
Step 5 When the following screen appears, press “ENT” if the password is correct. If not, press
“ESC”.
PASSWORD : XXXX
YES NO
Step 6 This display indicates that the switch has been done successfully.
SETUP PASSWORD
OK
9

SOHORAID SR2 Series User Manual
English
Deutsch
Français
Español
中文
日本語
한국어
7. Hard Drive Replacement Instructions
In normal operational state, if the LCD displays “PRI HDD FAIL” or “SEC HDD FAIL” and the
audio alarm activates, this would indicate that the hard drive may be malfunctioning. When
this happens, you may choose to disable the audio alarm by pressing the MUTE button
located at the front of the system and continue to operate the system normally. When nished,
you may restart the SR2 to double check and see if the drive is in fact malfunctioning. If you
are certain that the drive is in fact malfunctioning, follow the instructions below to complete
the replacement of the malfunctioning drive.
Primary drive malfunctioning Secondary drive malfunctioning
Step 1 Shut off the SR2 power. Extract the drive displaying “FAIL” on the LCD display from
the corresponding drive position and replace it with the new replacement drive. Do not
switch the positions of the drives.
Step 2 Once the replacement is complete, turn on the power of the SR2. When the system
completes initialization, the LCD display will ask you if you wish to initiate the rebuilding
procedure (to understand more about the data rebuilding function, refer to chapter 6
“Data Rebuild and Verication Functions”). If you wish to perform data rebuild, press the
ENT button. If you do not wish to, press the ESC button.
8. Data Rebuild and Verication Functions
During the use of SR2, if you are required to replace a malfunctioning drive refer to chapter 5
“Hard Drive Replacement Instructions”. Once drive replacement is complete and you power
on the SR2, the LCD display will ask you whether you would like to perform the data rebuild
procedure by writing data from non-malfunctioning (source) drive to the newly replaced
(target) drive (refer to below diagrams). When conrmed, press the ENT button to initiate. If
you do not wish to perform data rebuild, press ESC to escape. After data rebuild is complete,
the system will ask whether you would like to perform data rebuild verication procedure.
This procedure allows the system to verify and check if there are any incomplete rebuilding
errors.
Both the data rebuild and verication processing time is based on the capacity of the drive.
During both procedures, we suggest to not use the system until the procedure(s) is complete
as use of the system during both procedures may cause delays to the processing time.
Please wait until the procedure(s) has been completed to continue use.
Rebuild from PRI position (source) Rebuild from SEC position (source)
drive to SEC position (target) drive drive to PRI position (target) drive
conrmation screen. conrmation screen.
10

SOHORAID SR2 Series User Manual
English
Deutsch
Français
Español
中文
日本語
한국어
During the data rebuilding process, the LCD panel will display the percentage progression
rate of the rebuild. Below are sample diagrams.
Data being rebuilt from Primary Data being rebuilt from Secondary to
to Secondary position at 10% Primary position at 90% completion
completion
Verication completed. Back to normal operational state
If during the rebuilding process, a drive malfunctions and is unable to continue the rebuilding
process, restart the SR2 to check and see that the drive is in fact malfunctioning. If it is, please
refer to chapter 5 “Hard Drive Replacement Instructions” to replace the malfunctioning drive.
Below are sample diagrams of drive malfunctioning.
Primary drive error during rebuild Secondary drive error during rebuild
Once data rebuild is complete, the LCD will display the following message to conrm
whether you wish to perform rebuild verication procedure.
Rebuild verication procedure conrmation screen
If you wish to perform the rebuild verication procedure, press the ENT button.
If you do not wish to do so, press the ESC button.
During the verication process, the LCD panel will display the percentage progression rate
of the verication. Below are sample diagrams.
Verifying Primary drive at Verifying Secondary drive at
20% completion 80% completion
Normal operation state if do not
wish to perform verication or once
verication has completed.
11

SOHORAID SR2 Series User Manual
English
Deutsch
Français
Español
中文
日本語
한국어
Once the verication process is complete, and the result shows there is an rebuilding error on
a drive, restart the SR2 to check and see that the drive is in fact malfunctioning. If it is, please
refer to chapter 5 “Hard Drive Replacement Instructions” to replace the malfunctioning drive.
Below are sample diagrams of drive malfunctioning.
Rebuilding error on Primary drive Rebuilding error on Secondary drive
Note :
The SR2 allows shut down of power during the data rebuild and verication process, therefore,
if you turn off the power during both processes, the next time you turn on the power of the unit,
the system will automatically continue to process the remains. Please do not switch position of
the drive at any time.
9. System Temperature Overheat and Fan Failure Management
If the LCD panel displays “T” on the bottom right hand corner meaning the system
temperature has exceeded its allowance of 60℃or “F” at the top right hand corner meaning
the system fan has malfunctioned and the audio alarm alerts, you may rst press the MUTE
button to disable the audio alarm. At the allowed operational state, re-start the system to
double check and see if the problem is still present. If the problem persists, please turn off
the system and contact your supplier or the STARDOM tech support for further assistance.
System temperature exceeded System fan malfunctioning
limitation
10. Additional Display Messages of System and Operation Procedures
The SR2 frontal LCD panel is able to display additional messages such as rmware version,
system temperature and fan status by pressing the ▼ or ▲ buttons to make your selection.
Continuously pressing the selection buttons allows you to scroll through the menu. If not
pressed within 3 seconds, the display will revert back to its normal operational state.
Firmware version message
System temperature message
System fan healthy message
System fan malfunctioning message
12

SOHORAID SR2 Series User Manual
English
Deutsch
Français
Español
中文
日本語
한국어
11. LED Visual Status Indicator Denitions
Power/Alarm indicator :
When the Power/Alarm indicator lights green, this means the system power is on.
When the Power Alarm indicator lights amber, this means the system temperature has
exceeded its limitation or the system fan has malfunctioned.
Hard drive status indicator :
When the hard drive status indicator is off, this means the drives are idling.
When the hard drive status indicator lights or blinks blue, this means the drives are
being accessed for operation.
12. Frequently Asked Questions
Q1. Which drive format should I choose to format the hard drives in the SR2 ?
A : It depends on the computer system you most often use. See the below suggestions:
1. Use NTFS for Windows 2000/XP/Vista/Windows 7 system.
2. Use HFS+ (Mac OS Extended) format for a Mac OS X system.
3. Choose FAT32 format if you’ll use the SR2 in both Windows and Mac environments
(the maximum size of one single le may not exceed 4 GB).
Q2. Why can’t my SR2 reach the high transfer performance speed beyond 200 MB /sec.
via e-SATA interface as stated on your website?
A : 1. Please rst check if your PCI-E SATA host adapter would only support PCI-E (1X).
This type of host adapters cannot reach the transfer performance speed beyond
140MB/s.
2. It is recommended to purchase STARDOM SJ20-8x (PCI-E 8X) host adapter to
enhance the transfer speed performance via e-SATA.
13

SOHORAID SR2 Serie Bedienungsanleitung
English
Deutsch
Français
Español
中文
日本語
한국어
Über diese Anleitung
Vielen Dank für den Kauf eines STARDOM Produkts.
Dieses Bedienungsanleitung beschreibt das STARDOM SOHORAID SR2 Produkt. Bevor Sie
dieses Produkt benutzen, lesen Sie diese Anleitung bitte sorgfältig durch.
Obwohl alle Informationen in dieser Anleitung vor der Veröffentlichung sorgfältig überprüft
wurden, beziehen sich die tatsächlichen Produktspezikationen auf die Zeit der Auslieferung
durch STARDOM. Aktualisierungen der Produktspezikationen können auf der Webseite www.
stardom.com.tw gefunden werden. Änderungen der Produkte ohne vorherige Nachricht
vorbehalten. Wenn Sie Fragen zu den Produkten von STARDOM haben, oder mehr über die
aktuellsten Produktinformationen, Aktualisierungen der Bedienungsanleitung oder Firmwareupdates
erfahren möchten,
kontaktieren Sie bitte Ihren Händler vor Ort oder besuchen Sie www.stardom.
com.tw für weitere Informationen.
Copyright © RAIDON TECHNOLOGY, INC. All Rechte vorbehalten.
Inhaltsverzeichnis
1. Packungsinhalt und Produktansichten
2. Betriebsinformationen
3. Festplattenanforderungen und Vorsichtsmaßnahmen
4. Hardwareinstallation
5. Wechsel des RAID Modus
6. Änderung des Kennwortes
7. Anweisungen für den Festplattenaustausch
8. Datenwiederherstellung und Verizierungsfunktionen
9. Verhalten bei Systemüberhitzung und Lüfterausfall
10. Zusätzliche Anzeigen von System- und Bedienungsvorgängen
11. Beschreibung der visuellen LED Statusanzeige
12. Oft gestellte Fragen
14

SOHORAID SR2 Serie Bedienungsanleitung
English
Deutsch
Français
Español
中文
日本語
한국어
1. Packungsinhalt und Produktansichten
Öffnen Sie das Paket und Sie sollten die folgenden Dinge vornden:
SR2-WBS3 SR2-SB3
SR2-WBS3 x 1
( mit integriertem Wechselrahmen x 2 )
SR2-SB3 x 1
( mit integriertem Wechselrahmen x 2 )
Stromkabel x 1 Stromkabel x 1
eSATA Kabel x 1 eSATA Kabel x 1
Firewire 800 (1394b) Kabel x 1 USB 3.0 Kabel x 1
USB 3.0 Kabel x 1 Zubehörset x 2
Zubehörset x 2 SR2 Bedienungsanleitung x 1
SR2 Bedienungsanleitung x 1
Bitte stellen Sie sicher, dass die oben aufgelisteten Inhalte nicht beschädigt sind oder
fehlen. Falls Schäden oder fehlende Inhalte festgestellt werden, kontaktieren Sie bitte
umgehend Ihren Händler.
Vorderansicht
1 2 3
4
8
6
7
5
9
A
B
1. LCD Anzeige
2. Navigationstasten
3. ESC Taste
4. Netz/Alarmanzeige
5. Stummtaste
6. ENT Taste
7. Wechselrahmenklappe
8. Schlüsselzugangsöffnung
9. Festplatten-Statusanzeige
A"PRI" Position Primäres Laufwerk
B"SEC" Position Sekundäres Laufwerk
Rückansicht
SR2-WBS3 SR2-SB3
USB 3.0
1 2
5
6
7
31 2
4
5
7
3
4
USB 3.0
1. Netzbuchse 2. Netzschalter 3. Kühllüfter 4. USB 3.0 Anschluss
5. eSATA Anschluss 6 .FireWire 800 (1394b) Anschlüsse 7.
Steckplatz für Kensingtonschloss
15

SOHORAID SR2 Serie Bedienungsanleitung
English
Deutsch
Français
Español
中文
日本語
한국어
Speichermodus Beschreibung
Sicherer Modus (Raid 1): für individuelle Speicherkapazität und Datenschutz.
Geschwindigkeitsmodus (RAID 0) : Großer Laufwerksspeicher mit hohem Durchsatz,
aber ohne Datenschutz.
Der sekundäre FireWire 800 (1394b) Anschluss wird zum Anschluss anderer Firewire 800
(1394b) Geräte verwendet.
2. Betriebsinformationen
Betriebstemperatur : 0 ~ 40°C (32 ~ 104°F)
Lagertemperatur : -10 ~ 70°C (14 ~ 158°F)
Spannung : 100 ~ 240V AC
3. Festplattenanforderungen und Vorsichtsmaßnahmen
1. Damit das Gerät richtig funktioniert, müssen beide Festplatten in das System integriert
werden.
2. Pro Computersystem kann immer nur ein Anschluss genutzt werden.
3. Zur Sicherstellung der bestmöglichen Leistung wird dringend empfohlen, Festplatten
derselben Marke zu verwenden. Falls Sie ein defektes Laufwerk austauschen müssen,
wird ein mit dem nicht defekten Laufwerk identisches Laufwerk empfohlen. Falls kein
identisches Laufwerk verfügbar ist, stellen Sie bitte sicher, dass das Ersatzlaufwerk
mindestens 20GB größer ist.
4. Installieren Sie kein(e) Laufwerk(e), auf dem/denen bereits Daten gespeichert wurden, da
alle Daten bei der Formatierung des Laufwerks gelöscht werden.
5. Die tatsächliche Speicherkapazität kann von der auf den Festplatten angegeben Kapazität
abweichen, nachdem sie im System formatiert wurden.
6. Wann immer einAusschalten oder Abtrennen des Systems von Ihrem Computer notwendig
wird, vergessen Sie nicht es vorher immer aus Ihrem Betriebssystem zu entfernen.
7. Entfernen Sie das/die Laufwerk(e) nicht, wenn das System eingeschaltet ist und tauschen
Sie nicht zufällig die Laufwerkspositionen aus. Schalten Sie das Gerät vor dem Entfernen
des/der Laufwerks(e) immer aus.
8. SOHORAID SR2 toleriert nur einen Festplattendefekt. Die gespeicherten Daten können
daher beschädigt oder verloren sein, wenn Defekte auf mehr als einer Festplatte auftreten.
Wir empfehlen die Hilfe eines Datenrettungsdienstes in Anspruch zu nehmen, um die
beschädigten oder verlorenen Daten wiederherzustellen. Die gespeicherten Daten können
beschädigt oder verloren sein, wenn Defekte auf mehr als einer Festplatte im RAID 0
Modus auftreten. Wir empfehlen die Hilfe eines Datenrettungsdienstes in Anspruch zu
nehmen, um die beschädigten oder verlorenen Daten wiederherzustellen.
16

SOHORAID SR2 Serie Bedienungsanleitung
English
Deutsch
Français
Español
中文
日本語
한국어
9. Es wird dringend empfohlen, alle auf den Laufwerken des SOHORAID SR2 bendlichen
Daten regelmäßig oder wenn immer es der Benutzer für nötig hält auf einem fern
gewarteten oder externem Speicherlaufwerk zu sichern. Stardom ist weder verantwortlich
für Datenverluste, die während der Benutzung des Geräts entstehen, noch für die
Wiederherstellung verlorener Daten.
10. Die Standardeinstellung dieses Produktes ist RAID 1. Wir empfehlen, den Einsatzzweck
vor der Verwendung festzulegen. Um die Daten sicher aufzubewahren, stellen Sie es bitte
in den RAID 1 Modus, oder in den RAID 0 Modus, wenn eine erweiterte Speicherkapazität
benötigt wird. Bei einer Zurücksetzung nach der Verwendung könnten die Daten auf der
Festplatte beschädigt sein.
11. Sie können das RAID Level und die Grundfunktionen des SOHORAID SR2 mit den Tasten
an der rechten Seite des LCD-Bildschirms an der Vorderseite des Produktes einstellen.
4. Hardwareinstallation
Bitte folgen Sie den unten stehenden Anweisungen, um die Hardwareinstallation durchzuführen:
Schritt 1 Öffnen Sie die Verpackung und nehmen Sie das Produkt heraus. Stellen Sie sicher,
dass sämtliche Inhalte unbeschädigt sind und nicht fehlen. Falls Sie Schäden
oder fehlende Inhalte feststellen sollten, kontaktieren Sie bitte umgehend Ihren
Händler.
Schritt 2 Stellen Sie das System auf eine stabile Unterlage. Stellen Sie sicher, dass es gut
belüftet ist, die Öffnungen nicht blockiert werden und von Orten in der Nähe von
Wasser oder an denen das Produkt beschädigt werden könnte ferngehalten wird.
Schritt 3 Benutzen Sie den mitgelieferten Schlüssel im Zubehörset und stecken Sie ihn in
die Schlüsselzugangsöffnung, um die Wechselrahmenklappe auszuwerfen und
den Wechselrahmen zu entnehmen.
17

SOHORAID SR2 Serie Bedienungsanleitung
English
Deutsch
Français
Español
中文
日本語
한국어
Schritt 4 Befestigen Sie die Festplatten am Wechselrahmen und sichern Sie sie mit den
im Zubehörset enthaltenen Schrauben. Fügen Sie den Wechselrahmen nach
Abschluss ins System ein und drücken Sie die Klappe zu.
Schritt 5 Benutzen Sie die mitgelieferten Kabel, um Ihren Computer mit den entsprechenden
Anschlüssen des Systemgeräts zu verbinden.
Schritt 6 Schalten Sie das Gerät ein und warten Sie auf die Systeminitialisierung. Wenn
die LCD Anzeige „OK“ anzeigt, bedeutet dies, dass das System die Initialisierung
abgeschlossen hat und bereit zum Formatieren der Festplatte ist.
Systeminitialisierung Normaler Betriebszustand
Nachdem das SR2 System initialisiert wurde, sollte das Betriebssystem Ihres Computers
das Gerät automatisch erkennen. Bitte folgen Sie den Anweisungen des Betriebssystems
hinsichtlich der Formatierung der Laufwerke. Sobald die Formatierung abgeschlossen
wurde, steht das System zur Nutzung zur Verfügung.
5. Wechsel des RAID Modus
Die Standardeinstellung des SOHORAID SR2 ist RAID 1. Um die Einstellung zu ändern,
folgen Sie bitte den unten stehenden Schritten:
Schritt 1 Drücken Sie nach dem Einschalten auf „ENT“, wenn der unten abgebildete
Bildschirm auf dem LCD-Bildschirm angezeigt wird.
STARDOM SR2
Booting...
Schritt 2 Wenn der „Enter Password“ Bildschirm erscheint, geben Sie bitte „0000“ ein
(drücken Sie ▼ oder ▲ zur Auswahl von Ziffern und drücken Sie anschließend
auf „ENT“).
PASSWORD
0000
18

SOHORAID SR2 Serie Bedienungsanleitung
English
Deutsch
Français
Español
中文
日本語
한국어
Schritt 3 Wenn Sie sich sicher sind, dass Sie den RAID Modus wechseln möchten, drücken
Sie zur Bestätigung auf „ENT“. Wenn nicht, drücken Sie auf „ESC“.
CHANGE RAIDMODE
YES NO
Schritt 4 Wenn „RAID-0 MODE“ auf dem LCD-Bildschirm erscheint, drücken Sie auf „ENT“.
RAID-0 MODE
YES NO
Schritt 5 Wenn Sie den RAID Modus wechseln, werden sämtliche Daten auf der Festplatte
gelöscht. Drücken Sie zur Bestätigung auf „ENT“, anderenfalls auf „ESC“.
DATA WILL LOSE
YES NO
Schritt 6 Diese Meldung bedeutet, dass der Wechsel erfolgreich vorgenommen wurde.
Bitte starten Sie den SOHORAID SR2 neu.
RaidMode Changed
Pls Reboot Sys
6. Änderung des Kennwortes
Die Standardkennworteinstellung des SOHORAID SR2 ist „0000“. Wenn Sie das Kennwort
ändern möchten, folgen Sie bitte den unten stehenden Schritten:
Schritt 1 Drücken Sie nach dem Einschalten auf „ENT“, wenn der unten abgebildete
Bildschirm auf dem LCD-Bildschirm angezeigt wird.
STARDOM SR2
Booting...
Schritt 2 Wenn der „Enter Password“ Bildschirm erscheint, geben Sie bitte „0000“ ein
(drücken Sie ▼ oder ▲ zur Auswahl von Ziffern und drücken Sie anschließend
auf „ENT“).
PASSWORD
0000
Schritt 3 Drücken Sie auf ▼ oder ▲, um den Bildschirm von „CHANGE RAIDMODE“ auf
„SETUP PASSWORD“ zu ändern.
SETUP PASSWORD
YES NO
19

SOHORAID SR2 Serie Bedienungsanleitung
English
Deutsch
Français
Español
中文
日本語
한국어
Schritt 4 Drücken Sie auf ▼ oder ▲, um das Kennwort zu ändern und anschließend zur
Bestätigung auf „ENT“.
PASSWORD
XXXX
Schritt 5 Wenn der folgende Bildschirm erscheint, drücken Sie auf „ENT“, wenn das
Kennwort korrekt ist. Falls nicht, drücken Sie auf „ESC“.
PASSWORD : XXXX
YES NO
Schritt 6 Diese Meldung bedeutet, dass der Wechsel erfolgreich vorgenommen wurde.
SETUP PASSWORD
OK
7. Anweisungen für den Festplattenaustausch
Falls die LCD Anzeige im normalen Betriebszustand entweder „PRI HDD FAIL“ oder „SEK
HDD FAIL“ anzeigt und der akustische Alarm ausgelöst wird, bedeutet dies, dass die
Festplatte möglicherweise defekt ist. Sie können sich zu diesem Zeitpunkt entscheiden,
den akustischen Alarm durch Drücken der MUTE Taste an der Vorderseite des Systems
zu deaktivieren und mit dem System normal weiterzuarbeiten. Nach Abschluss können Sie
das System neu starten, um doppelt sicher zu gehen, dass das Laufwerk tatsächlich defekt
ist. Wenn Sie sicher sind, dass das Laufwerk tatsächlich defekt ist, folgen Sie den unten
stehenden Anweisungen, um den Austausch des fehlerhaften Laufwerks vorzunehmen.
Primäres Laufwerk defekt Sekundäres Laufwerk defekt
Schritt 1 Fahren Sie das SR2 System herunter. Entfernen Sie das auf dem LCD Display
"FAIL" anzeigende Laufwerk aus der entsprechenden Laufwerksposition und
ersetzen Sie es durch ein neues Laufwerk. Tauschen Sie nicht die Positionen der
Laufwerke.
Schritt 2
Starten Sie das SR2 System nachdem der Austausch abgeschlossen wurde.
Nach der
Systeminitialisierungfragt dieLCDAnzeige,obSie denWiederherstellungsvorgang
ausführen möchten. (für weitere Informationen über die Datenwiederherstellungsfu
nktion, lesen Sie Kapitel 6 "Datenwiederherstellung und Verizierungsfunktionen").
Wenn Sie eine Datenwiederherstellung ausführen möchten, drücken Sie die ENT
Taste. Wenn Sie keine Wiederherstellung ausführen möchten, drücken Sie die
ESC Taste.
20
Other manuals for SOHORAID SR2
1
This manual suits for next models
2
Table of contents
Languages:
Other Stardom Enclosure manuals

Stardom
Stardom U2F-B32 User manual
Stardom
Stardom iTank i302-1S User manual
Stardom
Stardom SOHORAID ST8-TB3 User manual
Stardom
Stardom SOHOTANK ST2-WABC User manual
Stardom
Stardom DeckTank DT4-SB2 User manual

Stardom
Stardom iTANK ZT1-B31BP User manual
Stardom
Stardom SOHOTANK ST4 Series User manual
Stardom
Stardom Sohoraid SR5-WBS2 User manual
Stardom
Stardom DR8-TB User manual

Stardom
Stardom SOHOTANK ST5610 User manual

