Stardom DeckTank DT4-SB2 User manual

1
DT4-SB2
DECKTANK
4 Bay External Storage Enclosure


3
Forewords
About this manual
Thank you for purchasing STARDOM products.
This manual will introduce the STARDOM DECKTANK Series of products. Before using your
DECKTANK, please read this manual thoroughly.
Although all information contained in this user manual has been carefully verified before
publishing, however, the actual product specication will be based on the time of delivery from
STARDOM. Any updates to the product specications or relevant information may be found on
www.stardom.com.tw. Products are subject to change without prior notications.
If you have any questions regarding the products of STARDOM, or you would like to know the
latest product information, user manual update, or rmware update, please contact your local
supplier or visit www.stardom.com.tw for further information.
Copyright © RAIDON TECHNOLOGY, INC. All rights reserved.
Table of Contents
1 Package Contents and Product View
2 Hard Drive Requirements and Precautions
3 Hardware Installation
4 System Temperature Overheat and Fan Failure Management
5 Visual Status Indicator Denitions
6 SATA Port Multiplication Overview
1. Package Contents and Product View
Open the package and you should nd the following :
Please make sure that the contents listed above are not damaged or missing. If you should
nd damages or missing contents, please contact your supplier immediately.
DECKTANK DT4-SB2 x1 with Removable drive tray enclosed x 4
DECKTANK DT4-SB2
Accessories kit x 4
User Manual x 1
e-SATA Cable x 1
USB2.0 Cable x 1
AC Power Cable x 1
120W DC Adapter x 1

4
Front View
Rear View
1. Hard drive status indicator 2. Removable drive tray 3. Key access opening
Drive Position
A. Drive position A B. Drive position B C. Drive position C D. Drive position D
123
ABC D
4, Power switch 5, Power socket 6, Power indicator 7, Alarm indicator
8, Mute button 9, USB2.0 interface connection
10, e-SATA interface connection 11,cooling fan
456789
10
11 11
11
NOTE :
1.Only one interface connection may be used at once per one computer system.
2.The USB2.0 interface connection is capable of detecting up to four drives at once.
3.The eSATA interface connection requires to be connected to an eSATA port with port
multiplication functionality in order for all 4 drives to be seen by your computer system.

5
2. Hard Drive Requirements and Precautions
1. The DT4-SB2 allows you to install up to four hard drives of different models and capacities.
It is not required to simultaneously have all four hard drives installed in order for the
system unit to operate. You may use one rst and add more drives later accordingly to your
preference.
2. Make sure the brand new hard drives to be used are free from bad blocks or defects prior to
installation to avoid system crashes or data loss.
3. When connected to the computer using the USB2.0 interface connection, the Drive position
A must have a drive installed for the drive volumes in the other drive positions to be seen
in your computer. It is also prohibited to remove, insert or swap hard drive(s) while the
system is powered on. Always remember to power off the unit prior to removing, inserting
or swapping hard drive(s).
4. The eSATA interface connection requires to be connected to an eSATA port with port
multiplication functionality in order for all 4 drives to be seen by your computer system.
If you require the hot swap functionality, it is important to know whether the host adapter
you’ll be using supports the hot swap functionality. See Section 6 “SATA Port Multiplication
Overview” for more info.
5. When connected to the computer using the eSATA interface connection, it’s prohibited to
remove, insert or swap hard drives(s) while data transfer is being performed as the action
taken may affect the performance of the data transfer taking place.
6. Whenever removing a drive becomes necessary, always remember to safely remove the
designated drive from your operating system rst prior to physically removing it from the
system unit.
7. If you will be incorporating either software or hardware RAID functionality to operate with
the DT4-SB2 system, it is important to understand the RAID level and its component that
will be incorporated and the precautions to take as each RAID level and component may
function differently and contains various limitations.
8. It is highly recommended for users to back up important data contained within the drives
of the DT4-SB2 on a regular basis or whenever the user feels necessary at a remote or a
separate storage device. Stardom is not responsible for any lost of data caused during the
use of the DT4-SB2 unit nor the recovery of the data lost.

6
3. Hardware installation
Please follow the instructions below to complete the hardware installation.
Step 1 Open the package and take out the product making sure that all the enclosed contents are not
damaged or missing. Should you nd damages or missing contents, please contact your supplier
immediately.
Step 2 Place the system on a stable surface. Ensure that it is well ventilated without blockage to the vent
and kept away from locations near water or where the product may become vulnerable resulting in
damages.
Step 3 Use the provided key in the accessory kit and inserted into the key access opening to eject the
removable drive tray latch and extract the removable drive tray.
Step 4 Remove the drive stabilizer from the removable tray then mount the hard drive onto the removable
drive tray and secure it with the screws enclosed in the accessory kit. Once completed, insert each
drive back to the drive position starting with Drive position A.
Step 5 Use the provided cables to connect your computer to the relative interface connection of your
preference on the system unit.
Step 6 Attach the AC power cable to the DC power adapter then connect one end to the system unit and the
other end to the power socket. Once completed, you may power on the unit.
Once your computer has also booted, your operating system should recognize each drives automatically. If
the hard drives installed require formatting, follow the formatting instructions given by the operating system
to format each drive volume to your preference. Once the formatting has been completed, the device is
ready for use. Once your computer has also booted, your operating system should recognize each
drives automatically. If the hard drives installed require formatting, follow the formatting instructions
given by the operating system to format each drive volume to your preference. Once the formatting
has been completed, the device is ready for use.

7
4. System Temperature Overheat and Fan Failure Management
If the rear alarm indicator has light up red and the audio alarm sounds, this could mean that
either a system fan has stopped operating entirely or the system temperature has exceeded
over the default temperature of 60℃.When this happens, you may press the mute button
at the rear of the system to shut off the audio alarm and power off the system immediately if
in the allowed operational state then re-power on the system to double check and see if the
problem is still present. If the problem persists, please turn off the system and contact your
supplier or the STARDOM support for further assistance.
5. Visual Status Indicator Denitions
Front hard drive indicator
1. When the hard drive status indicator lights red, this means drive is not present.
2. When the hard drive status indicator is off, this means the drive is present and is on idling.
3. When the hard drive status indicator blinks blue, this means the drive is present and being
accessed for operation.
Rear power indicator
1.When the power indicator light blue, this means the power of the system is on.
2.When the power indicator is off, this means the power of the system is off.
Rear alarm indicator
1.When the alarm indicator lights red, this means either a system fan has malfunctioned or
the system temperature has exceeded the normal operational temperature allowed.
2.When the alarm indicator is off, no malfunctioning of fan and no system overheat are
present.
6. SATA Port Multiplication Overview
The DT4-SB2 utilizes the SATA port multiplication function where storage read/write of data to
multiple hard drives can be performed through one single eSATA interface connection rather
than multiple. In other words, once you’ve connected the DT4-SB2 using the eSATA interface
connection to the computer system, all hard drives installed would appear on the operating
system for storage purposes. However, this would mean the eSATA host connectivity in the
computer system will also require to being equipped with the port multiplication function.
Normally, if your computer system is not equipped with such, you are required to purchase
a PCI eSATA expansion adapter card with the port multiplier function available. You may
check with your supplier of the DT4-SB2 or various computer storage component resellers to
purchase an adapter card. If you have any questions about purchasing, please log on to
www.stardom.com.tw for more information or contact STARDOM support.
NOTE :
1. When connected to the computer using the USB2.0 interface connection, the Drive
position A must have a drive installed for the drive volumes in the other drive positions
to be seen in your computer.
2. The eSATA interface connection requires to be connected to an eSATA port with port
multiplication functionality in order for all 4 drives to be seen by your computer system.
See Section 6 “SATA Port Multiplication Overview” for more info.
3. The DT4-SB2 functions as a JBOD type of storage system. Therefore, each drive
installed will be seen as separate volumes by your computer. Also note that the actual
storage capacities may differ from the stated capacities on the hard drives once the
drives have been formatted.


9
Vorwort
Vielen Dank für den Kauf eines Stardom Produkts.
Bevor Sie STARDOM DECKTANK benutzen, raten wir Ihnen zuerst diese Anleitung zu lesen.
Sämtlic he Aktualisierungen der Produktmerkmale oder relevante Informationen können
au www.stardom.com.tw gefunden werden. Die Änderung von Produkten ohne vorherige
Nachricht bleibt vorbehalten.Falls Sie irgendwelche Fragen über Produkte von STARDOM
haben oder etwas über die neuesten Produktinformationen, Bedienungsanleitungen oder
Firmware wissen möchten, nehmen Sie bitte Kontakt zu Ihrem örtlichen Händler auf oder
besuchen Sie www.stardom.com.tw
Copyright © RAIDON TECHNOLOGY, INC. All rights reserved.
Inhaltsverzeichnis
1 Packungsinhalt und Produktansichten
2 Festplattenanforderungen und Vorsichtsmaßnahmen
3 Hardwareinstallation
4 Verhalten bei Systemüberhitzung und Lüfterausfall
5 Beschreibung der Statusanzeigen
6 SATA Portreplikator Übersicht
1. Package Contents and Product Views
Nach dem Öffnen der Verpackung sollten Sie die folgenden Artikel vornden:
Bitte stellen Sie sicher, dass die oben aufgelisteten Inhalte nicht beschädigt sind oder fehlen.
Falls Sie Schäden oder fehlende Inhalte feststellen sollten, kontaktieren Sie bitte umgehend
Ihren Händler.
DECKTANK DT4-SB2 x 1 mit integriertem Wechselrahmen x 4
DECKTANK DT4-SB2
Zubehörset x 4
Bedienungsanleitung x 1
eSATA Kabel x 1
USB2.0 Kabel x 1
AC Stromkabel x 1
120W DC Adapter x 1

10
Vorderansicht
Rückansicht
1. Festplatten-Statusanzeige 2. Griff 3. Schlüsselzugangsöffnung
Laufwerkposition
A. Laufwerk position A B. Laufwerk position B
C. Laufwerk position C D. Laufwerk position D
123
ABC D
4. Netzschalter 5. Netzanschluss 6. Power indicator, 7. Alarmanzeige 8. Stummtaste
9. USB 2.0 Anschlüsse 10. eSATA Anschlüsse 11. Kühllüfter
456789
10
11 11
11
HINWEIS:
1.Pro Computersystem kann immer nur ein Anschluss genutzt werden.
2.Die USB 2.0 Schnittstelle kann bis zu vier Laufwerke gleichzeitig erkennen.
3.Die eSATA Schnittstelle muss an einen eSATA Port mit Portreplikatorfunktion
angeschlossen werden, damit alle 4 Laufwerke von Ihrem Computersystem erkannt
werden können.

11
2. Festplattenanforderungen und Vorsichtsmaßnahmen
1. DT4-SB2 ermöglicht Ihnen den Einbau von vier Laufwerken unterschiedlicher Modelle
und Kapazitäten. Es ist nicht notwendig alle vier Laufwerke einzubauen, damit das Gerät
funktioniert. Sie können zunächst ein Laufwerk nutzen und später weitere nach Bedarf
hinzufügen.
2. Bitte stellen Sie sicher, dass die komplett neuen Festplatten vor der Installation keine
fehlerhaften oder defekten Sektoren aufweisen, um Systemabstürze oder Datenverluste zu
vermeiden.
3. Bei der Verbindung mit dem Computer über die USB 2.0 Schnittstelle muss ein Laufwerk
in Laufwerkposition A eingebaut sein, damit Ihr Computer die Laufwerke in den anderen
Laufwerkpositionen erkennen kann. Es ist ebenfalls nicht erlaubt, Festplatten zu entfernen,
hinzuzufügen oder auszutauschen, während das System eingeschaltet ist. Schalten Sie
das Gerät immer vor dem Entfernen, Hinzufügen oder Austauschen von Festplatten aus.
4. Die eSATA Schnittstelle muss an einen eSATA Port mit Portreplikatorfunktion angeschlossen
werden, damit alle 4 Laufwerke von Ihrem Computersystem erkannt werden können. Falls
Sie die Hot Swap Funktionalität benötigen, ist es wichtig zu wissen, ob der von Ihnen
verwendete Hostadapter die Hot Swap Funktionalität unterstützt. Siehe Abschnitt 6 „SATA
Portreplikator Übersicht“ für weitere Informationen.
5. Bei der Verbindung mit dem Computer über die eSATA Schnittstelle ist es nicht erlaubt
Festplatten zu entfernen, hinzuzufügen oder auszutauschen, während Daten übertragen
werden, da dies die Leistung des Datentransfers beeinträchtigen könnte.
6. Immer wenn das Entfernen eines Laufwerks notwendig wird, vergessen Sie nicht,
das betreffende Laufwerk zuerst in Ihrem Betriebssystem zu entfernen, bevor Sie es
physikalisch vom Systemgerät trennen.
7. Wenn Sie eine Software oder Hardware mit RAID Funktionalität für den Betrieb mit dem
DT4-SB2 System einsetzen, ist es wichtig die verschiedenen RAID Level und die zum
Einsatz kommenden Komponenten sowie die zu ergreifenden Vorsichtsmaßnahmen zu
kennen, da jedes RAID Level und jede Komponente anders funktioniert und verschiedene
Limitierungen enthalten kann.
8. Eine regelmäßige oder benutzerbestimmte Sicherung wichtiger Daten der im DT4-SB2
eingebauten Laufwerke auf ein Remote- oder einem separaten Speichergerät wird dringend
empfohlen. Stardom kann für den Verlust oder die Wiederherstellung von verlorenen Daten
in Verbindung mit der Nutzung von DT4-SB2 nicht verantwortlich gemacht werden.

12
3. Hardwareinstallation
Bitte folgen Sie den unten stehenden Anweisungen, um die Hardwareinstallation durchzuführen.
Schritt 1 Öffnen Sie die Verpackung und nehmen Sie das Produkt heraus. Stellen Sie sicher, dass sämtliche
Inhalte unbeschädigt sind und nicht fehlen. Falls Sie Schäden oder fehlende Inhalte feststellen
sollten, kontaktieren Sie bitte umgehend Ihren Händler.
Schritt 2 Stellen Sie das System auf eine stabile Unterlage. Stellen Sie sicher, dass es gut belüftet ist,
die Öffnungen nicht blockiert werden und von Orten in der Nähe von Wasser oder an denen das
Produkt beschädigt werden könnte ferngehalten wird.
Schritt3Benutzen Sie den mitgelieferten Schlüssel im Zubehörset und stecken Sie ihn in die
Schlüsselzugangsöffnung, um die Wechselrahmenklappe auszuwerfen und den Wechselrahmen
zu entnehmen.
Schritt 4 Entfernen Sie die Laufwerksstabilisierung vom Wechselrahmen. Legen Sie dann Ihre Festplatten in
den Wechselrahmen und sichern Sie sie mit den im Zubehörset enthaltenen Schrauben. Fügen Sie
jedes Laufwerk nach Abschluss in die Laufwerkposition zurück. Beginnen Sie mit Laufwerkposition
A.
Schritt 5 Benutzen Sie die mitgelieferten Kabel, um Ihren Computer mit den entsprechenden Anschlüssen
des Systemgeräts zu verbinden.
Schritt 6 Verbinden Sie das Stromkabel mit dem Netzteil und dann ein Ende mit dem Systemgerät und das
andere Ende mit einer Steckdose. Danach können Sie das Gerät einschalten.
Beim Starten Ihres Computers sollte Ihr Betriebssystem das Gerät automatisch erkennen. Falls die
eingebauten Festplatten formatiert werden müssen, folgen Sie bitte den Anweisungen des Betriebssystems,
um jedes Laufwerk nach Ihren Wünschen zu formatieren. Sobald die Formatierung abgeschlossen wurde,
ist das Gerät zur Nutzung bereit.

13
4. Verhalten bei Systemüberhitzung und Lüfterausfall
Falls die hintere Alarmanzeige rot aufleuchtet und der Audioalarm ertönt, könnte dies
bedeuten, dass entweder ein Systemlüfter komplett ausgefallen ist oder die Systemtemperatur
die Standardtemperatur von 60°C überschritten hat. Wenn dies passiert, können Sie die
Stummtaste an der Rückseite des Systems drücken, um den Audioalarm auszuschalten und
das System, falls es der Betriebszustand zulässt, sofort herunterzufahren. Starten Sie das
System dann neu und prüfen Sie, ob das Problem noch immer besteht. Falls das Problem
noch weiter besteht, schalten Sie das System bitte aus und kontaktieren Sie Ihren Händler
oder den STARDOM Kundendienst, um weitere Hilfe zu erhalten.
5. Beschreibung der Statusanzeigen
Vordere Festplattenanzeige
1.Wenn die Festplattenstatusanzeige rot aufleuchtet, bedeutet dies, dass kein Laufwerk
vorhanden ist.
2.Wenn die Festplattenstatusanzeige nicht leuchtet, bedeutet dies, dass ein Laufwerk
vorhanden ist und sich im Leerlauf bendet.
3.Wenn die Festplattenstatusanzeige blau aufleuchtet, bedeutet dies, dass ein Laufwerk
vorhanden ist und darauf zugegriffen wird.
Hintere Netzanzeige
1.Wenn die Netzanzeige blau aueuchtet, bedeutet dies, dass das System eingeschaltet ist.
2.Wenn die Netzanzeige nicht leuchtet, bedeutet dies, dass das System ausgeschaltet ist.
Hintere Alarmanzeige
1.Wenn die Alarmanzeige rot aufleuchtet, bedeutet dies, dass entweder ein Systemlüfter
ausgefallen ist oder die Systemtemperatur die normale Betriebstemperatur überschritten
hat.
2.Wenn die Alarmanzeige nicht leuchtet, bedeutet dies, dass kein Lüfter ausgefallen und das
System nicht überhitzt ist.
6. SATA Port Multiplication Overview
DT4-SB2 verwendet die SATA Portreplikatorfunktion, mit der das Lesen/Schreiben von
Daten auf mehrere Festplatten über eine einzige eSATA Schnittstelle anstatt mit mehreren
möglich ist. Mit anderen Worten, sobald Sie DT4-SB2 über die eSATA Schnittstelle an
das Computersystem angeschlossen haben, erscheinen alle eingebauten Laufwerke
im Betriebssystem. Allerdings muss der eSATA Host Ihres Computersystems ebenfalls
die Portreplikatorfunktion beherrschen. Falls Ihr Computersystem nicht mit dieser
Funktion ausgestattet ist, müssen Sie eine PCI eSATA Erweiterungsadapterkarte mit
Portreplikatorfunktion erwerben. Informieren Sie sich bei Ihrem DT4-SB2 Händler oder
verschiedenen Verkäufern von Speicherkomponenten über den Erwerb einer Adapterkarte.
Falls Sie Fragen hinsichtlich des Kaufs haben, melden Sie sich für weitere Informationen bitte
auf www.stardoem.com.tw an oder kontaktieren den STARDOM Kundendienst.
HINWEIS:
1. Bei der Verbindung mit dem Computer über die USB 2.0 Schnittstelle muss ein Laufwerk
in Laufwerkposition A eingebaut sein, damit Ihr Computer die Laufwerke in den anderen
Laufwerkpositionen erkennen kann.
2. Die eSATA Schnittstelle muss an einen eSATA Port mit Portreplikatorfunktion
angeschlossen werden, damit alle 4 Laufwerke von Ihrem Computersystem erkannt
werden können. Siehe Abschnitt 6 „SATA Portreplikator Übersicht“ für weitere
Informationen.
3. DT4-SB2 funktioniert als Speichersystem des JBOD Typs. Jedes eingebaute Laufwerk
wird daher als einzelnes Laufwerk vom Computer erkannt. Beachten Sie ebenfalls, dass
sich die tatsächlichen Speicherkapazitäten von den auf den Festplatten angegebenen
Kapazitäten unterscheiden können, nachdem die Laufwerke formatiert wurden.


15
はじめに
この使用説明書について
この度は STARDOM 社製商品をお買い上げいただき、誠にありがとうございま
す。この説明書では STARDOM DECKTANK シリーズの商品を紹介いたします。
STARDOM DECKTANK のご使用前に、このマニュアルをお読みいただくことをお勧
めします。この説明書に記載されている内容は、出版前に慎重な確認作業を致し
ましたが、製品は現時点の状況を基準に引き渡されます。製品仕様または関連情報
の更新につきましては、全て www.stardom.com.tw にてご確認ください。また商
品は予告なく変更されることがあります。STARDOM の製品に関して何かご質問が
あるか、または最新の製品情報、使用説明書、ファームウェアについてお知りに
なりたいようでしたら、お客様のお近くにあるご購入店に相談されるか、または
www.stardom.com.tw
にアクセスしてください。© RAIDON TECHNOLOGY, INC. 全権保留
目次
1 パッケージ内容と製品図
2 ハード ドライブの要件と注意
3 ハードウェアの取り付け
4 システム過熱とファン故障の管理
5 状態インジケーターの説明
6 SATA Port Multiplicationの概要
1. パッケージ内容と製品図
箱を開くと、次のアイテムが見つかります:
上記一覧の内容が損傷または欠品していないことを確認してください。内容の損傷や欠品が
見つかった場合、販売店に直ちにご連絡ください。
DECKTANK DT4 x 1 (リムーバル ディスク トレイx 4内蔵)
DECKTANK DT4-SB2
アクセサリー キット x 4
ユーザーマニュアル x 1
eSATAケーブル x 1
USB20ケーブル x 1
AC電源ケーブル x 1
120W DCアダプタ x 1

16
前面図
後部図
1 ハードディスク状態インジケータ 2トレイ 3鍵挿入口
ドライブ位置
A ドライブ位置 A B ドライブ位置 B C ドライブ位置 C D ドライブ位置 D
123
ABC D
4 電源スイッチ 5 電源ソケット 6 電源インジケーター 7 アラーム インジケーター
8 ミュート ボタン 9 USB20インタフェース接続 10 eSATAインタフェース接続
11 冷却ファン
456789
10
11 11
11
注意:
1一台のコンピュータ システムに対して、一本のインタフェース接続のみを同時に使用する
ことができます。
2USB20インタフェース接続では一度に最大4台のドライブを検出できます。
3ご使用のコンピュータシステム上で全4台のドライブを表示するためには、eSATAインタ
フェース接続は、マルチポート機能を有するeSATAポートに接続されている必要がありま
す。

17
2. ハード ドライブの要件と注意
1 DT4-SB2は、最大4台の様々なモデル・容量のハードディスクドライブが搭載可能です。シ
ステム本体での動作には、同時に4台すべてのハードディスクドライブを搭載する必要はあ
りません。最初に1台のみを使用し、後から必要に応じてより多くのドライブを追加するこ
とができます。
2 システム クラッシュやデータ損失を防ぐため、使用する新品ハード ドライブに不良ブロッ
クが存在しないことを確認するか、または取り付け前に診断を実施してください。
3 USB20インタフェースを使用して接続する場合、コンピュータでドライブボリュームにお
ける他のドライブの位置を表示させるには、ドライブ位置A(正面から見て一番左のドライ
ブ)にドライブがインストールされている必要があります。又、システムの電源がONにな
っている時に、ハードディスクドライブの取り外し、交換は行わないでください。ハード
ディスクドライブの取り外し、交換をする場合は、必ず電源をOFFにした常態で行って下
さい。
4 ご使用のコンピューターシステムで全4台のドライブを表示するためには、eSATAインタ
フェース接続は、マルチポート機能を有するeSATAポートに接続されている必要があり
ます。ホットスワップ機能を使用する場合は、ご使用のホストアダプタがホットスワッ
プ機能をサポートするかどうかを事前に必ず確認してください。詳しくは、セクション6
「SATAマルチポート概要」をご参照ください。
5 eSATAインタフェースを使用して接続をする際に、データ転送実行中のハードディスクド
ライブの取り外し、交換等は行わないで下さい。データ転送が正常に転送が行えなくなり
ます。
6 ドライブを取り外す時は、システム本体から物理的に取り外す前に、必ず指定されたドラ
イブをオペレーティングシステム上で安全に取り外す操作を行ってから取り外してくださ
い。
7 DT4-SB2システムと複合させてソフトウェア、又はハードウェアRAID機能を組み込む場
合、各RAIDレベルと構成コンポーネント、および各RAIDレベルでのコンポーネント構成や
その他様々の制限事項を理解するのが大切です。
8 万が一の場合に備え、定期的にDT4-SB2に含まれる重要なデータをリモートまたは別のスト
レージ装置にバックアップする事を強くお勧めします。 StardomはDT4-SB2ユニットの使
用の際に生じたいかなるデータの損失および損失データの復旧に対して責任を負いません
のでご注意下さい。

18
3. ハードウェアの取り付け
以下の手順に従って、ハードウェアの取り付けを完了してください。
ステップ1 パッケージを開き、内容物の損傷や欠品がないことを確認しながら製品を取り出
します。内容の損傷や欠品が見つかった場合、販売店に直ちにご連絡ください。
ステップ2 システムを安定した平面に配置します。通気口を塞がずに良好な通気を確保し、
水のそばや製品の損傷を引き起こす可能性のある場所から離れていることを確か
めます。
ステップ3 アクセサリー キット付属のキーを鍵挿入口に差し込んで、リムーバブルドライブ
トレイ ラッチを取り出し、リムーバブルドライブ トレイを引き出します。
ステップ4 アクセサリー キット付属のキーを鍵挿入口に差し込んで、リムーバブルドライブ
トレイ ラッチを取り出し、リムーバブルドライブ トレイを引き出します。
ステップ5 付属のケーブルを使用して、お使いのコンピュータをシステム ユニットの使用す
るインタフェースに接続します。
ステップ6 AC電源ケーブルをDC電源アダプターに取り付けて、一端をシステム本体に、他
端をコンセントに接続します。完成したら、本体の電源を入れてください。
コンピュータを起動後、OSは各ドライブを自動的に認識します。インストールしたハードデ
ィスクドライブのフォーマットが必要であれば、OS上のディスク管理機能を使用して、各ボ
リュームをフォーマットしてください。フォーマットが終了したら、デバイスを使用する準
備は完了です。

19
4. システムの温度とファン故障の管理
後部アラーム表示が赤く点灯し、アラーム音が鳴った場合、何らかの原因で本体のファンが
停止したか、又はシステム温度がデフォルトの60℃を超えた事を示します。 この場合、本体
後部のミュートボタンを押してアラームを切り、一度本体の電源を切ってください。本体が
動作可能の状態であれば、再度電源を入れ直して、問題が再び発生するかどうか確認してく
ださい。問題が続く場合、システムをオフにし、販売店又はSTARDOMサポートにお問い合わ
せてください。
5. 状態インジケーターの説明
前部ハードドライブインジケーター
1 ハードドライブ状態インジケーターが赤く点灯する時、これはドライブを搭載していないこ
とを示します。
2 ハードドライブ状態インジケーターがオフであるとき、これはドライブが搭載されており、
アイドリング状態であることを示します。
3 ハードドライブ状態インジケーターが青く点滅するとき、これはドライブが搭載されてお
り、尚且つ操作のためにアクセスしていることを示します。
後部電源インジケーター
1 電源インジケーターが青色に点灯するとき、これは本体の電源がオンであることを示しま
す。
2 電源インジケーターがオフになるときに、これは本体の電源がオフであることを意味しま
す。
後部アラームインジケーター
1 アラームインジケーターが赤色に点灯するとき、これはシステムファンの動作エラーか、ま
たはシステム温度が許容された通常の操作温度を超えていることを示します。
2 アラームインジケーターがオフであるとき、ファンのエラーやシステム過熱等はありませ
ん。
SATA Port Multiplicationの概要
DT4-SB2は複数ではなく、単体のeSATAインタフェース接続経由で、複数のハードドライブへ
のデータ転送を実行できるSATAマルチポート機能を使用します。言い換えると、eSATAイン
タフェース接続を使用するDT4-SB2をコンピュータシステムに一度接続すると、ストレージ
目的でインストールされたハードドライブすべてがオペレーティングシステムに表示されま
す。しかしながら、これはコンピュータ・システムのeSATAホストの接続性に、マルチポー
ト機能が備わっている必要があることを意味します。通常、コンピュータシステムがこの機
能を備えていないなら、マルチポート機能を備えたPCI eSATA拡張アダプタカードを購入する
必要があります。アダプタカード購入に関しては、DT4-SB2の販売店又は様々なコンピュー
ターストレージ装置の販売業者にお問い合わせください。購入に関するご質問がありました
ら、www.stardom.com.tw にアクセスするか、またはSTARDOMサポートに連絡して詳しい
情報を入手してください。
注意:
1 USB20インタフェースを使用して接続をする場合、コンピュータでドライブボリューム
における他のドライブの位置を表示させるには、ドライブ位置Aにドライブがインスト
ールされている必要があります。
2 ご使用のコンピュータ・システムで全4台のドライブを表示するためには、eSATAイン
タフェース接続は、マルチポート機能を有するeSATAポートに接続されている必要があ
ります。詳しくは、セクション6「SATAマルチポート概要」をご参照ください。
3 DT4-SB2はJBODタイプのストレージシステムとして機能します。従って、インストー
ルされた各ドライブは、コンピュータからは個別のボリュームとして認識されます。ま
た、ドライブを一度フォーマットした後の実際の記憶容量は、ハードディスクドライブ
に表示されたものと異なる場合がございますのでご注意ください。

Table of contents
Languages:
Other Stardom Enclosure manuals

Stardom
Stardom iTANK ZT1-B31BP User manual
Stardom
Stardom SOHORAID SR2 User manual

Stardom
Stardom U2F-B32 User manual

Stardom
Stardom MR2-BA31 User manual

Stardom
Stardom SOHOTANK ST4-SB3 User manual

Stardom
Stardom SOHOTANK ST5610 User manual
Stardom
Stardom SOHOTANK ST4 Series User manual
Stardom
Stardom SOHOTANK ST2-WABC User manual
Stardom
Stardom Sohoraid SR5-WBS2 User manual
Stardom
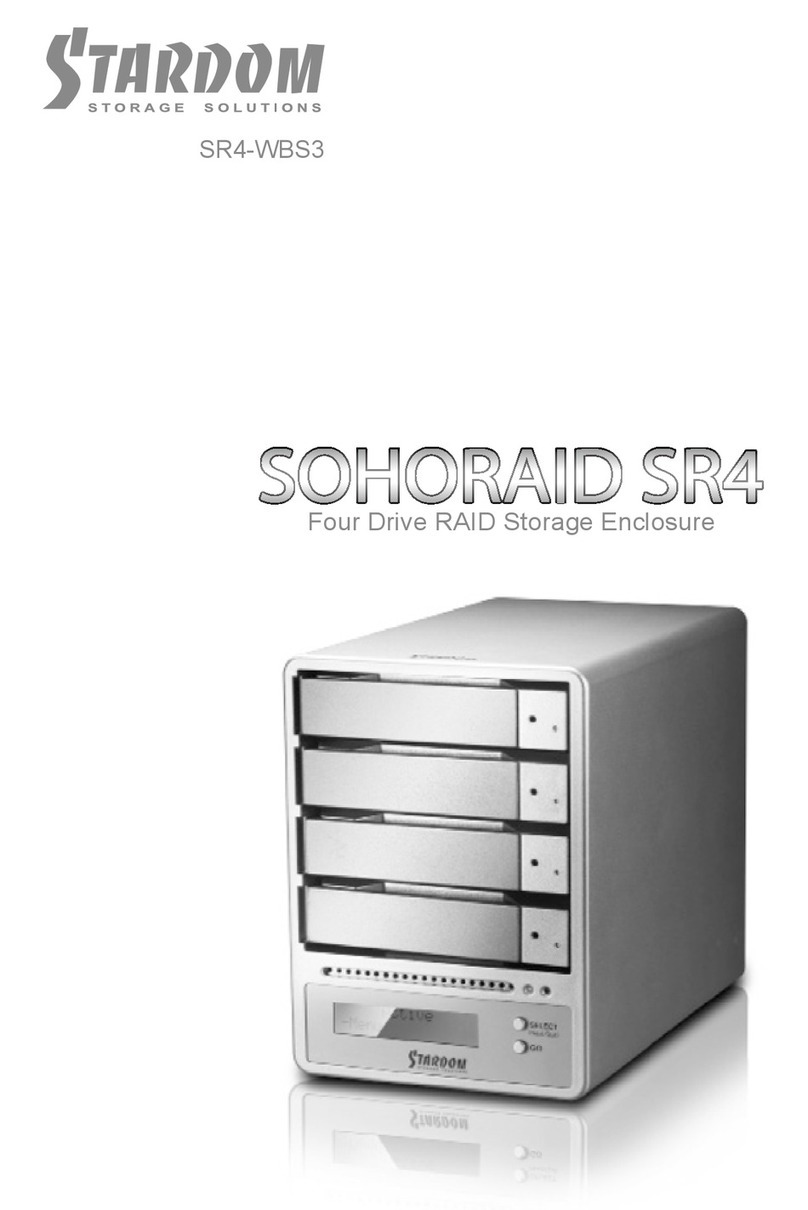
Stardom SR4-WBS3 User manual
