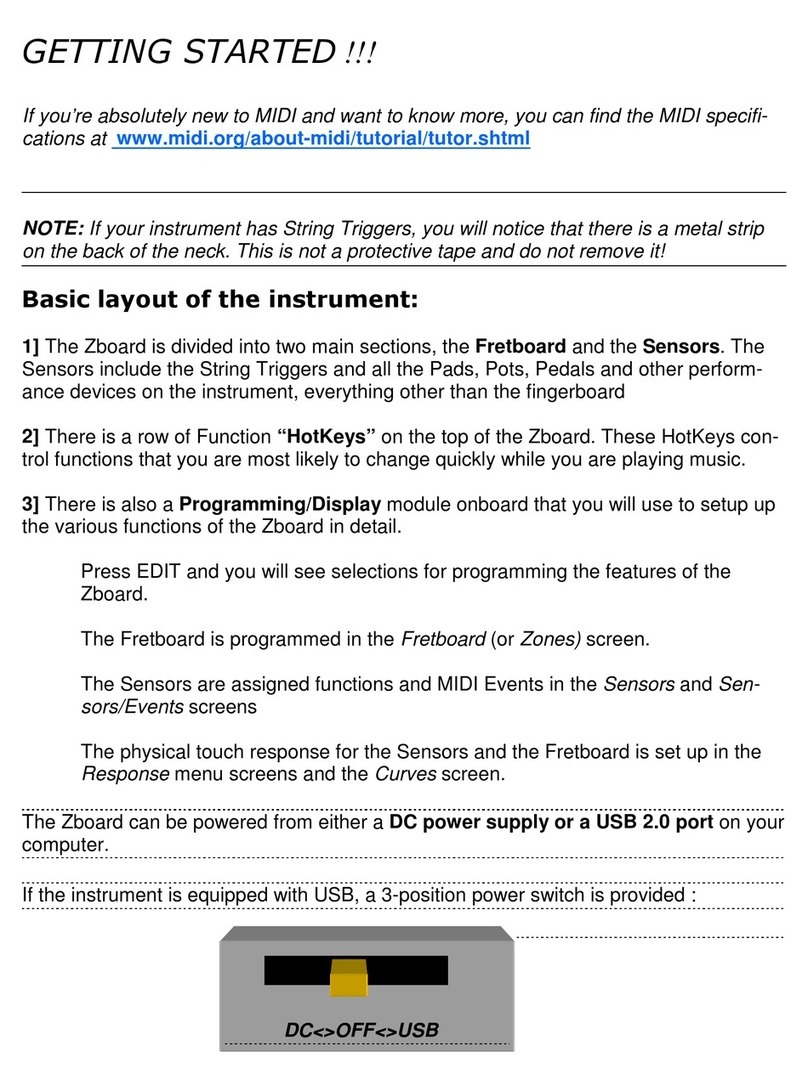
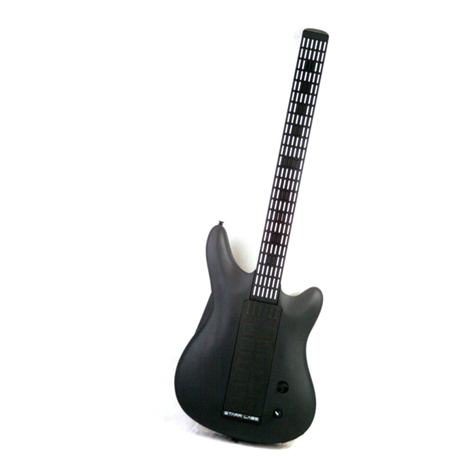
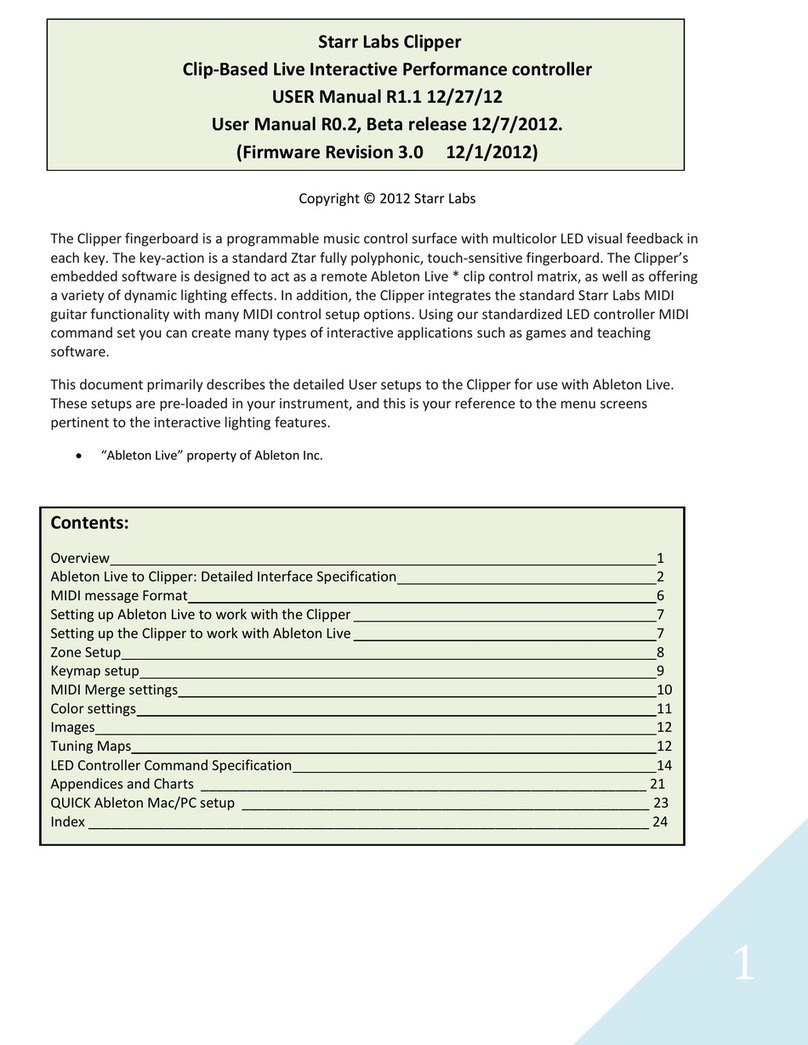
Starr Labs MT48DD User manual

MT48DD 4 x 12 FloorPad Array
In this manual the individual Pads are referred to both as “Pads” and generically
as “Sensors”. “Sensors” also includes the Joystick, Pedals and other hardware
that may be mentioned but may not be installed on your instrument.
The SENSOR controllers on-board the ZTAR encompass all of the performance
devices other than the fingerboard. Included are six Triggers for strumming and
picking and which have special setup software to tailor their operation. The
Triggers may be installed either as String Triggers, real strings that capture a
guitarist’s picking techniques, or KeyTriggers, pressure- and velocity-sensing
bars that may be used to create new, expression techniques for controlling
synthesizers and other MIDI controlled devices. There is a wealth of controllable
features in modern synths that lies untapped and the various new touch-surfaces
of the Ztar attempt to open that door for you. There may also be installed on
your Ztar a bank of Expression Pads, usually 6 or 12 on most instruments. Two
pedal inputs, Sustain and Volume, are fully programmable. Any of the SENSOR
controllers may be assigned to control any two MIDI effects or Continuous
Controller assignments to four channels each. They may also be used to capture
and play back up to eight MIDI notes across one or more channels, control
external sequences and looped-samples, and other special functions.
The term “NOTE” is often used to refer to any MIDI event.
User Interface
We hope you enjoy this new user-interface and that you find the menu system
easy to navigate, considering the size of the display and the amount of
information that is available to be viewed and programmed.
The ZTAR is supported by a Programming/Display system with a 2 line by 40-
character backlit LCD and a ’softkey’ based User Interface. What this means is
that the eight keys that surround the display are used in varying ways to select
different items depending on the particular menu screen showing. Where
necessary numeric values are scrolled up and down using the Up and Down
arrow (^ v) keys or the joystick. Most menus are entered with the softkeys.
The menu-system is a tree-like structure. The Ztar has quite a few programmable
parameters but every effort has been made to keep the nesting of menus to a
minimum and the navigation of the system as simple as possible.
The EDIT key is used both to enter an edit-screen in some menus and more often
to exit from a menu-screen when you’re finished programming. In general, pressing

EDIT several times will back you out of a series of menus and bring you back to the
top-level LIVE-mode screen.
The Ztar Operating System has a LIVE mode and an EDIT mode. Pressing the
EDIT key from the LIVE-MENU enters the top-level SONG-EDIT screen to alter the
various setup parameters of the fingerboard, pads, triggers, joystick and pedals.
The ZTAR will continue to play while in the EDIT mode. Make sure to exit back to
the LIVE mode after completing an edit, however, as you may accidentally change
one of your setups by hitting the joystick or another programming key. Also, the
instrument will play a bit faster in the LIVE mode, as there it isn’t the necessity to
update any Edit screens
Programming, Mode Selection and Data Entry:
Many of the programming features on the ZTAR have been implemented in the
screen/menu system and also in shorthand fashion on the front-panel “hot-keys”. In
the screen/menu system the eight “soft” keys surrounding the display will be
physically near their selections on the screen. Use of the hot-keys will save a
number of keystrokes. Also, the joystick is used both as a performance tool and a
data entry device in conjunction with the data Up/Down buttons when programming
the system.
“Chase” features:
In several of the menus a String, or a Key, or other Sensor may be selected by
simply touching it, in addition to using the Display keys
A little more Terminology
In an effort to make the ZTAR as fully user-programmable as possible some
existing MIDI concepts have been expanded and are slightly re-defined:
Patches for the ZTAR are called SONGS. A Song stores the complete configuration
for the instrument. This includes all of the fingerboard splits/zones, transpositions,
patches, tunings, and all of the MIDI control assignments for the SENSORS,
including any recorded Notes, Chords or Drums, Continuous Control EFX, and a
list of other parameters. SONGS may be thought of as ‘Kits’ in the sense used in an
electronic percussion device, a set of assignments of hardware Triggers to MIDI
output functions and the player’s response setups for all of the hardware. There is
no analogous term in guitar playing so we chose ‘SONGS’ as you might use a
different configuration for each song in a set, different voices, etc.
HOTKEYS/ FUNCTION KEYS
Most of the function keys are intended to serve the Ztar Fingerboard which is not
installed in this instrument. However, due to the low-volume nature of the
FloorPads we re-used our existing hardware in the Y-10 controller rather than

design new hardware. The WRITE and PANIC keys are still useful and the PAT+
and PAT- keys can be used to change patches for the selected channel.
OCT Up/Down: These buttons allow you to change the Octave for any Zone on
the fingerboard giving you access to the full MIDI note range.
PAT Up/ Down: These buttons allow you to access up to 128 MIDI patches
within any Zone
TRIG: Turn the Triggers ‘On’ to strum like a guitar or ‘Off’ to tap the fingerboard
like a keyboard. When the LED is lit the Triggers are ‘On’.
G/POLY: When the LED is lit the fingerboard plays one note per string, like a
guitar. When it is off, the POLY-mode allows you to hear whatever you press.
SOLO: SOLO allows you to select one or more small zones on the fingerboard
and expand them to fill the entire fingerboard. This is used to quickly change
sounds and try out new combinations of sounds over the full range of notes.
Pressing SOLO again will revert the fingerboard to its prior multi-zoned state. If
multiple zones are selected when SOLO is pressed those sounds will be stacked
and spread over the fingerboard. Use this as a quick layering tool.
WRITE: WRITE lets you save your current edited setup “on the fly” to its battery-
backed RAM location. There are many adjustable parameters in the Ztar and
Write will copy all of them so that the full setup may be recalled with a single
keystroke. The WRITE hotkey is a shortcut version of the WRITE function found
in the top-level EDIT screen.
REC: This button activates the CHORD RECORD feature. Press the button, hold
down some notes on the fingerboard, strum them if necessary to hear them, and
tap one of the Pads (or a Trigger, or any other Sensor) to assign the notes to that
Pad for playback. This is a quick way to capture notes to a Pad, in addition to the
CHORD-NOTES screen.
PANIC!: Sends a note-off to every note on and resets all controllers for every
channel
Currently we use the brute force approach that takes a little extra time but should
definitely clear any stuck messages for any synth,
The PAT, OCT, and SOLO keys are ‘Zone-based’ controls that allow you to select
a zone by playing and holding a note within it and adjust the parameter for just that
Zone. So, if you have say two zones on the fingerboard, you can touch a key in one
(or both) and then press the hotkey to change the Patch, etc for that zone. This
shortcut lets you make changes while you’re performing rather than having to wade
through menus to re-program the system.

MENU TREE
TOP LEVEL LIVE-SCREEN
SONG-MENU
NAME-EDIT
WRITE
UTILITIES
LIBRARIAN
SONGNAME
SAVE
COPY
DELETE
SWAP
COPY-PAD (s/b SENSOR)
INITIALIZE
MIDI
TUNING
BULK-DUMPS
CLOCKS
METRONOME ENABLE
METRONOME CHANNEL
NOTE#
TempoPad Enable
CLOCK: INTERNAL/EXTERNAL
MIDI CLOCK OUTPUT ENABLE
BPM SETTING
TIME SIGNATURE
CURVES
(8) FORCE:VELOCITY POINTS
SEQUENCES
INSERT-EVENT
DELETE-EVENT
PROGRAMMING-LOCK
FRETBOARD
NOTES ON/OFF
BOUNDARIES
KEY/TRANSPOSITION
AFTERPRESSURE
UNISON
TRANSPOSITION
SOLO
VELOCITY: TOUCH/FIXED
VELOCITY INVERSION ON/OFF

CURVE#
MIDI
Patch/Velocity Send ON/OFF
Channel#: RIGHT/LEFT
SEND PROGRAM CHANGE
PATCH#
BANK#
VOLUME
SCAN-MODE
TRIGGERS: ON/OFF
TRIGGER CAPTURE ON/OFF
ZONE-SOLO (Audition)
Scan-Mode: GUITAR/POLYPHONIC
HAMMER-MENU
HAMMER-ON/PULLOFF ENABLE
HAMMER-THRESHOLD LEVEL
OPEN STRING PULLOFF ENABLE
HAMMER-PICK-DELAY
FINGERBOARD AUTO-SUSTAIN: ON/OFF
SENSORS
SENSOR-MODE
FINGERBOARD STRING LINK
6-TRIGGER, GUITAR SETUP MACRO
TIMING MENU
EVENTS MENU
PLAY FUNCTION
VELOCITY-WINDOW
(8) EVENT-SETTINGS
EVENT-TYPE
MIDI CHANNEL/NOTE, OTHER DATA
FIXED VELOCITY-VALUE or SENSOR-TRACKING
NOTE-DURATION
MACROS
CHORD-GENERATOR
OUTPUT SETTINGS
CURVE ASSIGNMENT
MODULATING SENSOR (PEDAL#)
MIDI OUT 1, 2 ROUTING
LINK ASSIGNMENTS
TRIGGER-FUNCTIONS
FINGERBOARD TRIGGER LINK
DUAL MODE
Aftertouch Threshold
Aftertouch CURVE
RESPONSE
GAIN

RESPONSE BARGRAPH
SCAN-TIME
MASK-TIME
THRESHOLD
CHASE ON/OFF
TRAIN SENSOR LOW POINT/ HIGH POINT
SHOWALL
SONGS
PADS (s/b SENSORS)
EVENTS
GATES
LINKS
CHAINS
PATCHES

MENU SYSTEM – DATA ENTRY
The menu system uses eight “soft” keys around the perimeter of the display to
select various functions as indicated by the messages on the screen. Press the
button nearest to your desired selection in order to activate it. An UP and a Down
key are provided for data entry. The joystick, when installed, may also be used for
data entry. Use the EDIT key to enter and exit the programming menus. The soft-
keys are numbered here for reference in this manual.
Up Softkey#1 Softkey#2 Softkey#3 Softkey#4
Down
EDIT Softkey#5 Softkey#6 Softkey#7 Softkey#8
LIVE-MODE MENU
Up Softkey#1 Softkey#2 Softkey#3 Softkey#4
Down ZTAR CHORDS DRUMS ORCHESTRA
LEFTY JAZZ_COMBO ROCK_COMBO STICK TUNING
EDIT Softkey#5 Softkey#6 Softkey#7 Softkey#8
This is the top-level menu, which appears when the ZTAR is in LIVE-mode. The
Ztar is in LIVE-MODE when you first power-up.
It displays the names of the various system configurations that have been saved as
“SONGS”. A drummer would refer to these as “KITS”; A SONG is a collection of
hardware with all of our computer-assigned options and setups. The first eight
songs are provided from the factory as templates for your use. These are saved in
ROM and may not be overwritten. The following twenty-four song locations are
provided to store your own setups. These are saved in a battery-backed RAM so
that your changes will remain after you remove power from the ZTAR. The Song
banks may also be stored off-line via the MIDI Bulk-Dump utility.

Use the EDIT key to leave the LIVE mode and enter the EDIT mode. After editing,
use the EDIT key again the return to the LIVE mode.
SONG MENU, the Top-Level SONG-EDIT screen
Up Softkey#1 Softkey#2 Softkey#3 Softkey#4
Down SONG: #01 ZTAR WRITE UTILITIES
FRETBOARD SENSORS RESPONSE
EDIT Softkey#5 Softkey#6 Softkey#7 Softkey#8
This is the top-level edit screen, which displays sub-menus for the various
programmable features for each Song.
A Song consists of:
1) One or more Zones with all of their programmed settings.
2) Assignments for the Sensors.
2) Physical response settings for the Sensors.
3) A Tuning for the fingerboard keys and Open-Strings, and settings for Triggering
modes.
4) A setup for the metronome.
SONG-MENU sub-menus:
Name-Edit: Press the name of the SONG to enter the Name-Edit screen.
Write: Takes you to the Write screen so that you may save your current setup.
Utility: enters the Utility menu to edit a variety of objects.
Zone: enters the Zone menu to set up the fingerboard. All of your settings can be
made into 32 independent fingerboard Zones.

Sensor: enters the Sensor menu to set up the Pads/Triggers/Joystick
configuration.
Scan-Mode: enters the Scan-Mode menu.
Tuning: enters the Tuning menu.
The top-left of the screen shows the Song number followed by its name. By placing
the cursor over the song number and using the joystick or Up/Down buttons you
may scroll through the Song Banks without going back to the LIVE menu to make
your selection.
SONG-MENU\ NAME-EDIT screen
To enter a new Song name: Place the cursor over the name field using the
softkey#2 button above the name. Use the Joystick or Up/Down buttons to enter a
character, then use the soft keys to the left and right of the “CURSOR” message to
move the cursor over to the next character position.
Up Softkey#1 Softkey#2 Softkey#3 Softkey#4
SONG:#01 ZTAR
CURSOR
Down
EDIT Softkey#5 Softkey#6 Softkey#7 Softkey#8

WRITE MENU [ available at the Top-level Edit menu]
This shows the temporary SCRATCH buffer on the left that is now holding all of your
current changes to the configuration you’re playing right now. To the right side of the arrow
you are prompted for the location number of the song you wish to save your changes into.
The ZPC version of the Ztar OS allows you to overwrite all of your Song-locations including
those programmed from the factory. To re-initialize the first four SONGS back to their
factory-settings go to the UTILITIES\ LIBRARIAN\ INITIALIZE menu.
Use Softkey# 8 to select a destination location for the SCRATCH buffer, and press the
EXECUTE soft-key to complete the WRITE operation. You may also make changes to the
Song setup at any time from the LIVE mode and save your changes via the WRITE hot-key
on the front panel.
Up Softkey#1 Softkey#2 Softkey#3 Softkey#4
<WRITE SCRATCH KIT> EXECUTE
Scratch #01 ZTAR #01 ZTAR
Down
EDIT Softkey#5 Softkey#6 Softkey#7 Softkey#8

SENSORS MENU
The word PAD is often used interchangeably with the word SENSOR. The word Note is
often used interchangeably with the word EVENT.
Sensors screen #1
Up Softkey#1 Softkey#2 Softkey#3 Softkey#4
TRIG 1 Mode: Strum String# 0 6-TRIGS
TIMING EVENTS OUTPUT
Down
EDIT Softkey#5 Softkey#6 Softkey#7 Softkey#8
The Sensor-name is shown in the upper-left corner of the screen. Use softkey#1
and the Up/Dn keys to select a Sensor to edit.
(PLAY) MODE: There are three Play-modes for a Sensor; Events, Strum, and
Dual.
In the Events-mode, the Sensor will play its own programmed set of events.
In the Strum-mode the Sensor will trigger notes from the fingerboard according
to the fingerboard’s Scan-Mode. The Ztar’s Triggers are normally set to Strum-
mode. When the TRIG front-panel hotkey is used to turn off the Triggers and put
the fingerboard into Tapping Mode, the Triggers will revert to playing their
assigned MIDI events.
In the DUAL-mode the Sensor will both trigger fingerboard-notes and its own
programmed set of events. The Dual-Mode will apply to and Sensor. This can
have some interesting effects and allow the simulation of various acoustic
instruments. Consider setting up the Breath with the Dual-mode to initiate a note
and apply volume-changes, as does a real wind instrument. Or a Pad in Dual-
Mode with pitchbend applied to act like a conga-head or tympani.
STRING#: Use softkey#3 to select a Fingerboard-String for the Sensor to trigger
when in Strum-Mode.

6-TRIGS: Press softkey#4 to automatically set the Ztar’s six triggers to Strum-
mode, assign them to their corresponding fingerboard-strings, and set the Hit-
Mode to “TOUCH”. (See the TIMING menu for this.) You’ll still need to set the
fingerboard’s active zones’ Trigger-mode to TRIGGERS-ON to set up the Ztar as
a guitar. Who would’ve thought a guitar could be so complicated!
TIMING: selects the TIMING menu, which sets up several options to determine
how a Sensor’s events will be played.
EVENTS: enters the Events menu to assign MIDI functions to a Sensor.
OUTPUT: sets up several parameters that route the Sensor’s MIDI output.

[SENSORS, cont.]
EVENTS menu
Up Softkey#1 Softkey#2 Softkey#3 Softkey#4
TRIG 1 PlayFunc: All Velocity:: 0 / 127 MACRO
Evt1: Note Channel 3: 48 / C3 PAD Gate: 250
Down
EDIT Softkey#5 Softkey#6 Softkey#7 Softkey#8
The Events menu programs the various notes and other events that the Sensor will perform.
Some fields in the EVENTS menu will change depending on the SensorMode or the
EventType selected.
The Sensor-Name appears in the upper-left corner of the screen. Use softkey#1
and the Up/Dn keys to select a Sensor to edit.
PlayFunction: use the softkey and the UP/Dn keys to set the type of function
the Sensor will play out. See the Play-Function List for descriptions of the various
choices.
Vel: [0-127/ 0-127]
Each Event has a velocity-range or “window” within which it will respond. The
upper and lower limits for this range may be set in this field. By careful setting of
these limits a variety of musical effects may be achieved, such as velocity-
switching, velocity-shifting, velocity-adding, etc.
All of the velocity-response settings of the Ztar still effect the note that appears
within a narrow response window; that is,
To set a velocity-window:
Press softkey#3 to toggle between the Lower and Upper Velocity fields.
Use the Up/Dn keys to set the value.
See the section, “VELOCITY CURVES” for more details.
For clarity’s sake we will refer to these two settings as “Input Velocity-Low” and
“Input Velocity-High”
InputVel_L: The lowest velocity value that will trigger this event. This value has
already been processed by the velocity curve. (See the Velocity processing
Flowchart)

InputVel_H: The highest velocity that will trigger this event.
Event-number: Event-Type Softkey #5 will toggle between the Event-number
and its assigned Event-type. Use the UP and DOWN arrow-keys to change the
Event-number and Event-Type. Use the Up/Down keys to adjust the type.

Event Type List:
Off
Note
Control Change
Program Change
Channel Pressure
PitchBend
Song Select
Start Sequence
Continue Sequence
Stop Sequence
System Reset
When the PlayFunction is set to Control Change these are the available
Event-types:
Off
BendUp
Bend Down
Volume Up
Volume Down
Velocity Up
Velocity Down
Mod Wheel
Sustain
Expression
Channel Pressure
Polyphonic Key Pressure
User-entered ControlChange number
UserUp Control-number for center-detented effects
UserDown Control-number for center-detented effect
MIDI Channel number:
Use softkey#6 and the UP/Dn keys to select and set the MIDI Channel for this
Note.
Event-Data/ Note-number/ Velocity-source:
Use softkey#7 to toggle between the Note-number and the Velocity-source fields.
The Note-number reads both as a decimal number and in standard musical
notation.
Use the Up/Dn keys to set the values.

The velocity-source may be set to follow the touch, position, or pressure of the
Sensor by setting the screen-value to “PAD” or you may assign a Fixed velocity-
or data-value for this Note by assigning a number.

Gate: This sets the programmed note-duration.
Press softkey#8 to toggle time between “absolute” (milliseconds) and “scaled”
(MIDI clocks).
MIDI clocks are displayed as nnn#, range 0-999. These events will play out
according to the Tsig and BPM (if INT clock is selected), or the external MIDI
clock (if A or B is selected).
Note for internal clock: there are 96 MIDI clocks per whole note, so if the Tsig
is x/4, each beat is 24 clocks, but if Tsig is x/8, each beat is 12 clocks –
remember that BPM is beats, but events are programmed in clocks. If you’re
using external MIDI clock, the Ztar’s Tsig doesn’t affect the event timing.
To see the Metronome change the timing for a sequence, program a pad in
Sequential mode with the “Loop” turned ‘On’. Program each event with a Gate
time of 24# (i.e., 24 MIDI clocks). Hit the pad, then go into UTILITIES/CLOCKS
menu and change the BPM.
To change the sequence timing from the MIDI Input ports, switch the MIDI clock
to an external source, and then change the BPM in your external unit. .

Sensor Play-Function List:
Off
Basic
All
Seqntl
NtShft
AltUp
AltDn
AltUpDown
AltRandom
Slice
ContinuousControl
SequencePlay
Sequence RePlay
Sequence StopPlay
Sequence Record
Sequence RecordNext
Sequence Undo
SongIncrement
SongDecrement
ChainIncrement
MuteAll
ReferencePad
HiHatPedal1
HiHatPedal2
HatPad
Detailed descriptions of the Play Functions are given at the end of this section.

[EVENTS, cont.]
MACRO screen
Up Softkey#1 Softkey#2 Softkey#3 Softkey#4
S01/Trigger1 NotesAll VelocityShift Velocity Add
Velocity = Pad CHORDS
Down
EDIT Softkey#5 Softkey#6 Softkey#7 Softkey#8
Each event has a pair of numbers that define a velocity-range where the event
will respond. By setting the velocity-ranges for the various events assigned to a
pad, several unique effects or pad-modes can be created. Rather than defining
set modes in the PlayFunction List, we chose to provide macro settings that
initialize the events’ velocity-ranges to default values. These values may then be
modified in the SENSOR/EVENTS menu to more accurately create the desired
result
The Velocity-related MACROS here are just conveniences that set the velocity
windows for all 8 events in a Sensor’s buffer to default values. You’ll want to
adjust these values in the EVENTS screen to dial in your touch.
NotesAll
All of the Sensor’s events will play simultaneously as a chord. This holds true for
ControlChange events as well.
VelSw Velocity Switch
The complete MIDI velocity range is split equally between the 8 events so that
none of the ranges overlap. Each event then responds within its own unique
range. (This may not be present in your version of software and you’ll have to set
it up manually in the EVENTS menu.) In this way it’s possible to play up to eight
different sounds from a single Pad just by varying the force of your hit.
VelShf (Velocity Shift)
Velocity ranges are set for each event so that the ranges of adjacent events
overlap, playing both events together. This allows note-events to blend together,
usually in pairs, with varying velocity of a pad-hit. This is useful for controlling
multiple samples of real acoustic sounds, which tend to vary subtly in timbre
according to the input velocity to the patch. Or you can blend samples from
completely different instruments for an endless variety of effects.
VelAdd (Velocity Add)
Each event has its velocity-range set with a lower-limit of zero and an upper limit at
successively higher points in the MIDI velocity range of 0-127. This way the softest

hit will play event #1, a slightly harder hit will add Event#2, a somewhat harder hit
event#3, and so on. This is an interesting way to build up chords with velocity.
Vel=PAD
This is a handy shortcut that sets all of a Pad’s events to track the Pad’s hit-
velocity rather than output a fixed value. You can otherwise set each event one-
by-one in the SENSORS/EVENTS screen
Chords:
This selects the CHORDS screen that allows automatic generation of chord-notes
into the 8-event buffer for the selected pad. This is a handy shortcut for many chord
types. To generate inversions of these chords, go into the SENSORS/ EVENTS
screen, shuffle the notes into a different order, change octaves for individual notes,
and add notes to un-assigned events for chordal extensions, or remove notes if
there are too many. When a Sensor’s Chords are used with velocity-
switching/adding/etc, the notes may be changed by varying the force of your touch.
Curve#: The applied afterpressure will follow this assigned curve. You can
therefore setup separate curves for the Trigger-velocity and the Trigger-
Aftertouch
SENSOR PLAY FUNCTIONS
Basic
Only the first event is played from the Pad’s 8-event block. Also, only the first
event is displayed in the EVENTS screen. This mode is normally used in the
common situations where only one note or event is required.
All [All-Notes]
When the Pad is struck, all of the events programmed into the Pad’s 8-Event
buffer will play together as a group according to the response settings for the Pad
and the individual event velocity-settings. The various events’ durations will time
out according their programmed gate-times. Chords or note-“stacks” may be
played in this mode.
Seqntl [Sequential-Notes]. The 8-note pattern sequencer.
When the pad is struck once, each of the events programmed into the Pad’s 8-
Event buffer will play automatically in sequence, according to the programmed
gate-times for each event. The sequence may be looped by setting the loop
Table of contents
Other Starr Labs Recording Equipment manuals
Popular Recording Equipment manuals by other brands
Sound Performance Lab
Sound Performance Lab TransientDesigner 9842 user manual
Nat
Nat AA12 Installation and operation guide
Lexicon
Lexicon I-ONIX U42S owner's manual
Nat
Nat AA12S Series Compact Audio Controller SM69 Installation and operation manual
socomec
socomec DIRIS D-30 instruction manual

Ecler
Ecler ALMA24 Service manual
