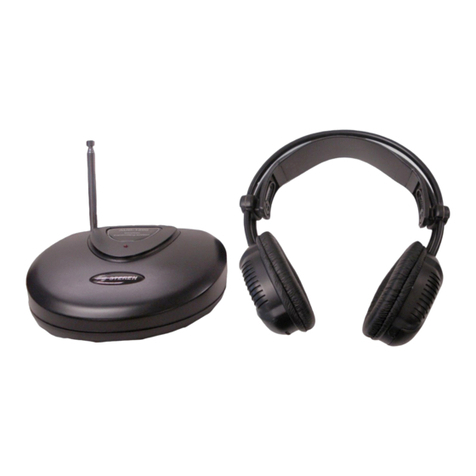
Steren AUD-780 User manual


Before using your new Headset please read this instruction
manual to prevent any damage. Put it away in a safe place for
future references.
IMPORTANT
Do not expose the equipment to extreme weather.
Do not use or store the equipment near wet places. May cause
malfunction or shock hazard.
Clean only with a soft, dry cloth.
Used wisely, your new sound equipment will provide a lifetime of fun
and enjoyment. Since hearing damage from loud noise is often
undetectable until it is too late.
Steren recommend you avoid prolonged exposure to excessive noise.
This list of sound levels is included for your protection.
ENGLISH
ENGLISH-02
Before usin
g
y
our new Headset please read this instruction
m
anual to prevent an
y
dama
g
e. Put it awa
y
in a safe place fo
r
f
uture references
.
Level
(
Decibels
)
Exam
p
le
30 Quiet library, soft whispers
40 Living room, refrigerator, bedroom
50 Light traffic, normal conversation, quiet office
60 Air conditioner at 20ft, sewing machine
70 Vacuum cleaner, hair dryer, noisy restaurant
80 Average city traffic, alarm clock at two feet
The following noises can be dangerous under constant exposure:
DRIVER INSTALLATION ON XP
Make sure to plug the headphones into an available USB port
before installing drivers.
1.- The computer automatically detects the headset when you plug it
into the USB port.
2.- The Found New Hardware Wizard starts. Click Cancel.
3.- Place the CD installation and run Setup.exe.
4.- A Welcome message appears on screen. Choose Next to continue.
5.- Click Next button thrice to begin the installation process.
6.- Press OK to restart the computer.
7.- Once the system restarted, an icon appears on taskbar. The icon
means that your new headset is ready to use.
ENGLISH
ENGLISH-03
90 Subway, motorcycle, lawn mower
100 Pneumatic drill, garbage truck
120 Rock band concert in front of speakers, thunderclap
140 Gunshot blast, jet plane
180 Rocket launching pad
M
ake sure to plu
g
the headphones into an available USB port
b
efore installin
g
drivers
.

ENGLISH
USB 3D SOUND
Your headset includes a software to listen to your favorite movies, music
or games in true 7.1 channel sound. Just click on the USB icon on
taskbar to open the software.
1.- Analog output channel mode
Headphones, 2 speakers
ENGLISH-04
1
2
3
4
5
6
7
8
9

ENGLISH
ENGLISH-05
2.- Configuration
Allows you to activate or deactivate the right / left earphone switching
(This option it’s available only if you activate the analog channel mode).
3.- Digital output
Press this button to select the SPDIF Out data format
4.- Virtual speaker
Press this button to activate the 7.1 channel virtual speaker
5.-Digital volume control
Displays the volume control for both channels
6.- Restart
Returns to default parameters
7.- Current mode
Displays the selected mode: digital, 2 channels, virtual speaker, etc.
8.- Auto sound test
Starts the auto testing
9.- Stop auto sound test
Stops the auto testing.

ENGLISH
ENGLISH-06
If activates the Virtual Speaker:
When you enable the virtual speaker, a Setup button can be used and it
will display in the next window:
A. Distance: Allows you to bring near or to move further away the virtual
speakers
B. Use it to rotate the speakers clockwise
C. Use it to rotate the speakers counterclockwise
D. Use to manually rotate the speakers
E. Press to distribute the speakers, randomly
F. Drag zone. Press on the speakers to place them in the desired
position
G. dB indicators
H. Returns to default parameters
a
bcde
f
g
h

ENGLISH
ENGLISH-07
Mixer
1.- Master balance control
2.- Master volume control
3.- Master volume control on / off
4.- Graphic output meter
5.- Wave balance control
6.- SW Synth balance control
7.- CD player balance control
8.- Microphone balance control
9.- Individual volume control
1
2
3
4 5 6 7 8
9
10
11
12
13 14
151617
18

10.- Functions On / Off
11.- Recording balance for Stereo Mix or Microphone
12.- Microphone volume control
13.- Stereo Mix volume control
14.- Stereo Mix volume control on / off
15.- Microphone volume control on / off
16.- Recording control on / off
17.- Activación o desactivación del control de grabación de la música
reproducida
This menu allows you to set the recording parameters, however,
voice recording can be performed only using an external software.
Effect
Through this menu you can configure the different preset EQ options.
ENGLISH
ENGLISH-08
T
his menu allows
y
ou to set the recordin
g
parameters, however,
v
oice recordin
g
can be performed onl
y
usin
g
an external software
.

ENGLISH
ENGLISH-09
Karaoke
Allow one to activate or deactivate the microphone and other options for
Karaoke function.
Info
Displays information about audio codecs.

ENGLISH
ENGLISH-10
VOLUME CONTROL
1.- Increase the volume level
2.- Decrease the volume level
3.- Headset on / off
4.- Microphone on / off
5.- Headset working indicating LED
6.- Microphone mute indicating LED
+-
1
23
4
5
6

ENGLISH
ENGLISH-11
HOW TO USE THE 7.1 CHANNEL USB PC HEADSET
1.- Plug the headset into an available USB port in the computer. On
taskbar appears the USB icon.
2.- Click on the icon with mouse’s right button and choose Multimedia
Properties.
3.- Click on Audio eyelash.
4.- On the options Sound Reproduction and Sound recording select
C-Media USB Sound Device. Click OK to save changes.
5.- Run your favorite multimedia software and start the reproduction.
6.- If is necessary open the Headset Main Menu once again to configure
the sound in accord to your necessities.
7.- Now you can listen the music in true 7.1 channel sound through the
headset.
The Headset working indicating LED blinks when the headset
receives audio signal.
When you use the headset, it is possible that the sound of the
speakers mute. Once you have finished to use the headset, the
sound returns to normality.
RECORDING
1.- Plug the headset into an available USB port. The USB icon appears
in Windows taskbar.
2.- Click with right button of the mouse over the USB icon, then select
Sound Recorder option.
3.- Automatically, the Sound Recorder software runs.
4.- Please refers to Windows Instruction Manual in order to know more
details about recording voice.
T
he Headset workin
g
indicatin
g
LED blinks when the headset
r
eceives audio si
g
nal
.
When
y
ou use the headset, it is possible that the sound of the
speakers mute. Once
y
ou have finished to use the headset, the
sound returns to normalit
y.

ENGLISH
ENGLISH-12
Remember, it is necessary to set the recording parameters before
to record a file.
SPECIFICATIONS
Input: 5V
Dimensions: 4,13” (diameter)
Weight: 0,61lb
Product design and specifications are subject to change, without
notice.
Remember, it is necessar
y
to set the recordin
g
parameters before
t
o record a file
.
P
roduct desi
g
n and specifications are sub
j
ect to chan
g
e, without
not
i
ce
.

WARRANTY
This Steren product is warranted under normal usage against defects in workmanship and
materials to the original purchaser for one year from the date of purchase.
CONDITIONS
1.- This warranty card with all the required information, invoice or purchase ticket, product
box or package, and product, must be presented when warranty service is required.
2.- If the product stills on the warranty time, the company will repair it free of charge.
3.- The repairing time will not exceed 30 natural days, from the day the claim was received.
4.- Steren sell parts, components, consumables and accesories to costumer, as well as
warranty service, at any of the addresses mentioned later.
THIS WARRANTY IS VOID IN THE NEXT CASES:
If the product has been damaged by an accident, acts of God, mishandling, leaky batteries,
failure to follow enclosed instructions, improper repair by unauthorized personnel, improper
safe keeping, among others.
a) The consumer can also claim the warranty service in the purchase establishment.
b) If you lose the warranty card, we can reissue it, if you show the invoice or purchase ticket.
Product: 7.1 Channel USB PC Headset
Part number: AUD-780
Brand: Steren

RETAILER INFORMATION
Name of the retailer
Address
Product
Brand
Part number
Serial number
Date of delivery
In case your product fails or have any doubt, please contact your nearest retailer. If
you are in Mexico, please give a call to our Call Center.
Call Center
01 800 500 9000


Antes de utilizar sus nuevos Audífonos para computadora lea este
instructivo para evitar cualquier mal funcionamiento. Guárdelo
para futuras referencias.
IMPORTANTE
No exponga el equipo a temperaturas extremas.
No use ni almacene este equipo en lugares donde existan goteras o
salpicaduras de agua. Puede causar un mal funcionamiento o un
choque eléctrico.
Siempre utilice un paño suave, limpio y seco para limpiar el equipo.
Utilizado de manera adecuada, su nuevo equipo de sonido le provee
de una vida entera de diversión y placer. Escuchar equipos de audio a
un nivel muy alto puede ocasionar daños irreparables, los cuales son
detectados demasiado tarde. Es por eso, que Steren le recomienda no
estar expuesto a sonidos muy altos por un tiempo prolongado.
Esta lista de nivel de sonidos es para su protección.
ESPAÑOL-02
ESPAÑOL
A
ntes de utilizar sus nuevos Audífonos para computadora lea este
i
nstructivo para evitar cualquier mal funcionamiento. Guárdelo
p
ara futuras referencias
.
Nivel
(
en Decibeles
)
E
j
em
p
lo
30 Biblioteca tranquila, susurros
40 Cuarto de estar, refrigerador, recámara
50 Tráfico ligero, conversación normal, oficina tranquila
60 Aire acondicionado a 6 metros, máquina de coser
70 Aspiradora, secadora de cabello, restaurante ruidoso
80 Tráfico pesado, alarma de reloj a 60cm

Los siguientes niveles de ruido pueden ser peligrosos bajo una
exposición constante:
INSTALACIÓN DE DRIVERS EN XP
Asegúrese de conectar los audífonos en un puerto USB disponible
antes de instalar los drivers.
1.- Cuando conecte los audífonos a la computadora, automáticamente
detectará el nuevo equipo.
2.- El Asistente para Nuevo Hardware Encontrado se inicia. Seleccione
Cancelar.
3.- Inserte el disco de instalación y ejecute el programa Setup.exe.
4.- Aparece un mensaje de bienvenida. Seleccione Next para continuar.
5.- Presione Next tres veces más para comenzar con la instalación de
drivers.
6.- Presione OK para reiniciar la computadora.
7.- Una vez que el equipo haya reiniciado, un icono aparecerá en la
barra de tareas, indicando que sus nuevos audífonos están listos para
utilizarse.
ESPAÑOL-03
ESPAÑOL
90 Metro, motocicletas, cortacéspedes
100 Perforación de llantas, camiones de basura
120 Concierto de rock enfrente de las bocinas, rayos
140 Detonación de arma de fuego, aviones
180 Lanzamientos de cohetes espaciales
A
se
g
úrese de conectar los audífonos en un puerto USB disponible
a
ntes de instalar los drivers
.

USB 3D SOUND
Sus audífonos cuentan con un software para escuchar sus películas,
música o juegos favoritos en 7.1 canales. Simplemente presione dos
veces con el botón izquierdo del ratón sobre el icono USB de la barra
de tareas para abrir el programa.
1.- Modo de canales de salida análoga
Audífonos, 2 Bocinas
ESPAÑOL-04
ESPAÑOL
1
2
3
4
5
6
7
8
9

2.- Configuración
Permite activar o desactivar el intercambio de auriculares derecha /
izquierda (Esta opción sólo aparecer cuando se selecciona el modo de
canal análogo de audífonos)
3.- Salida digital
Active este botón si desea seleccionar el formato de salida de datos
SPDIF
4.- Bocina virtual
Activa el sistema de bocina virtual de 7.1 canales
5.- Control de volumen digital
Muestra el control de volumen para ambos canales
6.- Reinicio
Borra los cambios de configuración previamente realizados
7.- Modo actual
Muestra el tipo de modo seleccionado: Digital, 2 canales, bocina virtual,
etc.
8.- Prueba automática de sonido
Comienza la prueba de sonido automática
9.- Prueba automática de sonido
Detiene la prueba de sonido automática
ESPAÑOL-05
ESPAÑOL

Si activa la Bocina Virtual:
Cuando activa la bocina virtual, el botón de Configuración podrá ser
utilizado y aparecerá la siguiente ventana:
A. Distancia: Permite alejar o acercar las bocinas
B. Rotar las bocinas en sentido a las manecillas del reloj
C. Rotar las bocinas en sentido contrario a las manecillas del reloj
D. Rotar las bocinas manualmente
E. Distribuir las bocinas aleatoriamente
F. Zona de arrastre. Presione sobre las bocinas para colocar en la
posición deseada
G. Indicadores de decibeles
H. Este botón permite regresar a los parámetros iniciales
ESPAÑOL-06
ESPAÑOL
a
bcde
f
g
h
Other manuals for AUD-780
1
Table of contents
Languages:
Other Steren Headset manuals

Steren
Steren TEL-210 User manual

Steren
Steren AUD-784 User manual

Steren
Steren AUD-781 User manual

Steren
Steren AUD-560 User manual

Steren
Steren AUD-027 User manual

Steren
Steren AUD-780 User manual

Steren
Steren 300-595 User manual

Steren
Steren TEL-110 User manual

Steren
Steren AUD-770 User manual

Steren
Steren AUD-771 User manual