Stevens Tot mate TM8350R User manual
1
#0964-3146
3594.TM8350/TM8352.9/25/18
©2018 Stevens Industries, Inc.
Due to continuing product development, Stevens reserves the right to change specifications without notice.
CAUTION – CHOKING HAZARD
Adult assembly required due to presence
of small parts and sharp edges.
ATTENTION
Please unpack and assemble in an area away from children's activities. Remove all tools
and excess materials from work area after assembly of unit is complete. Dispose of pallet
and packaging materials in an environmentally friendly manner. If any parts are missing
or damaged, please call Stevens for immediate parts replacement (1-800-350-3270).
When ordering parts, give the Model Number and Color of the unit.
NOTE: ASSEMBLY INSTRUCTIONS REFERENCE
ILLUSTRATIONS AND PART NUMBERS FOR THE TM8352R.
by Stevens Industries, Inc.
704 West Main St.
Teutopolis, IL 62467
P: 800.350.3270
P: 217-857-7100 • F: 217-857-7101
www.totmate.com
TM8350R
TM8352R
IMPORTANT!
Assembly must be securely attached to
building structure with anchoring devices
of appropriate type, size and quantity in
accordance with applicable codes and
accepted installation practices.
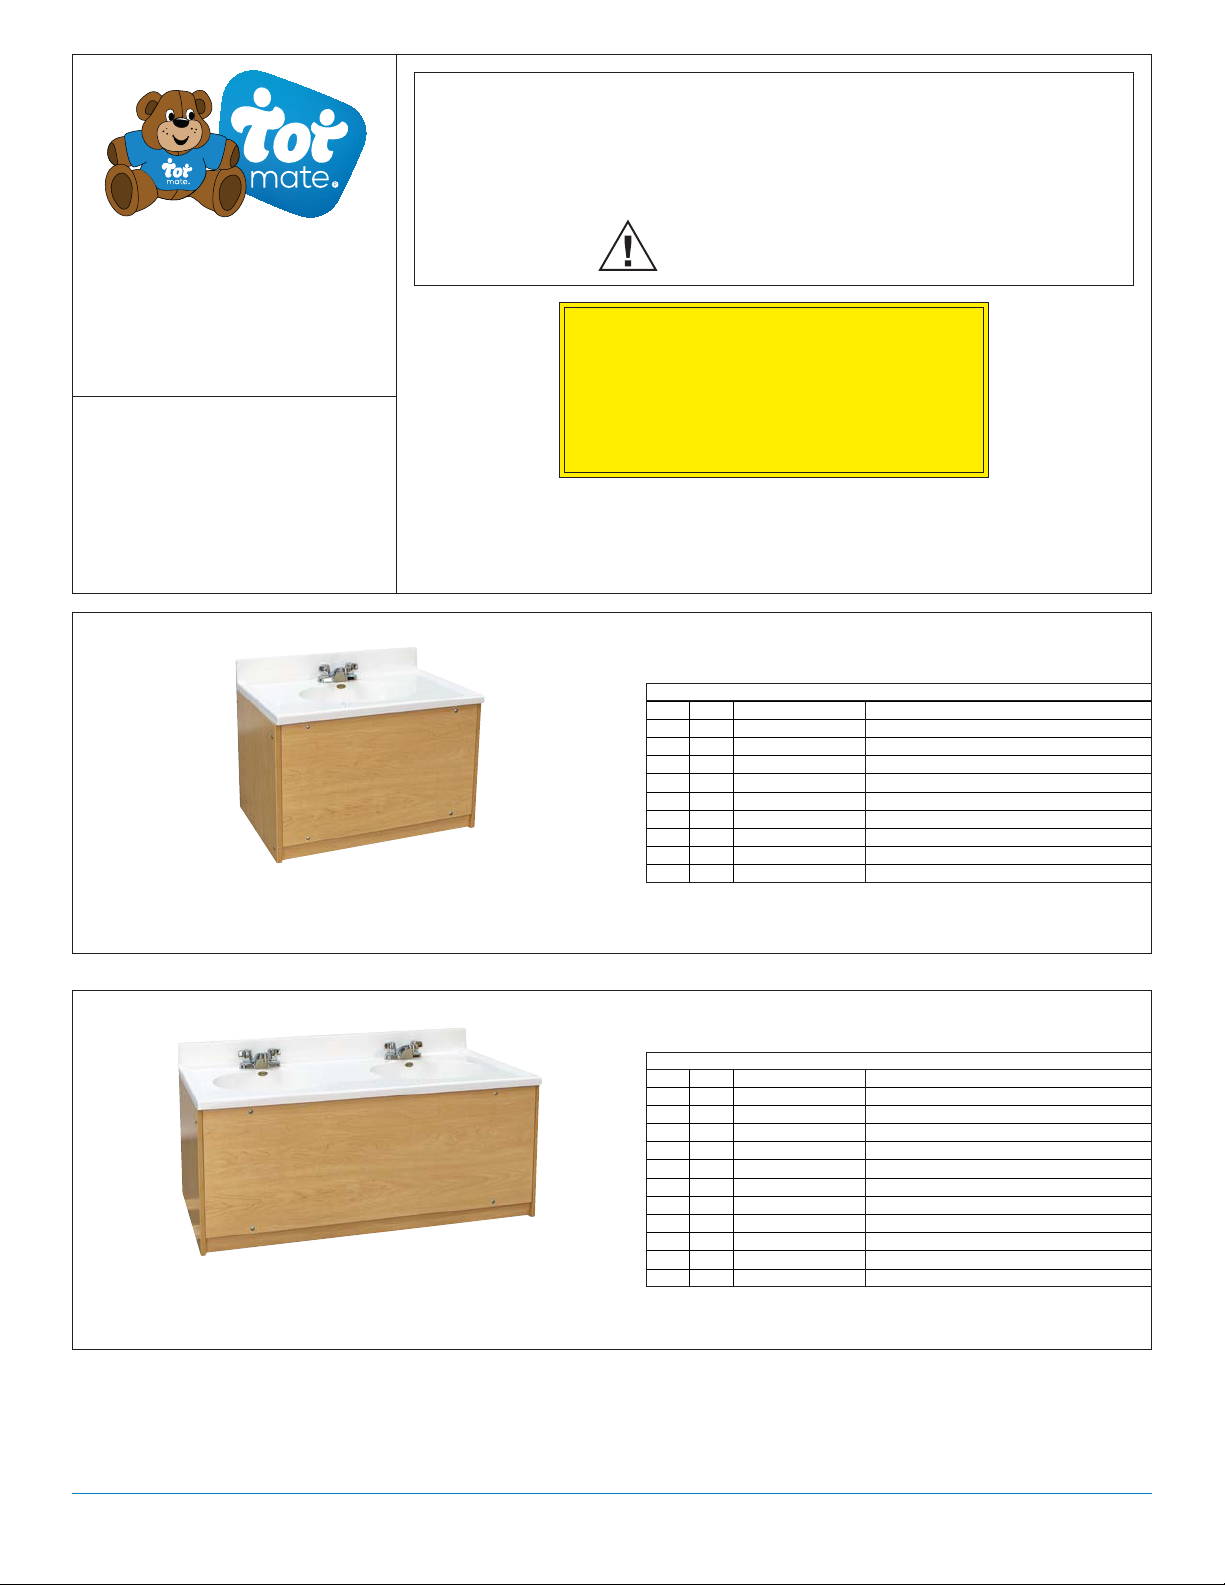
TM8350R
Single Floor Vanity
TM8352R
Double Floor Vanity
076,QYHQWRU
\
3DUWV/LVW
3DUWV/LVW
3$5747<,7(0
;;
;;
;;
'(6&5,37,21
(QG8
$FFHVV3DQHO
5DLO7.6XSW
1XW3URSHOO[)ODQJ
6FUHZ0DFK3K7U=Q[
6FUHZ&RQQ+['F1LPP[PP
)DXF3((53/)/DY
6LQN6QJ&'(63:[:KW
3OE
J
6WUDLQHU)ODW'
076,QYHQWRU
\
3DUWV/LVW
3DUWV/LVW
3$5747<,7(0
;;
;;
;;
;;
'(6&5,37,21
(QG8
$FFHVV3DQHO
5DLO7.6XSW
5DLO;VXSW
1XW3URSHOO[)ODQJ
6FUHZ0DFK3K7U=Q[
6LQN'EO''(63:[:KW
)DXF3((53/)/DY
3OEJ6WUDLQHU)ODW'
6FUHZ&RQQ+['F1LPP[PP
6FUHZ&RQQ+[)O=1PP[PP

TM8350R – TM8352R
STEP-BY-STEP ASSEMBLY
2#0964-3146
©2018 Stevens Industries, Inc.
Due to continuing product development, Stevens reserves the right to change specifications without notice. 3594.TM8350/TM8352.9/25/18
ILLUSTRATIONS AND PART NUMBERS ARE FOR TM8352R.
BASIC ASSEMBLY INSTRUCTIONS ARE THE SAME FOR BOTH MODELS.
2-PERSON ASSEMBLY RECOMMENDED.
IMPORTANT!
Be sure to keep all parts supported during assembly to avoid damage.
Do not over-tighten screws or it will damage the pre-drilled holes;
snug fit is adequate.
076,QYHQWRU
\
3DUWV/LVW
3DUWV/LVW
TM8352R
3$5747<,7(0
;;
;;
;;
;;
'(6&5,37,21
(QG8
$FFHVV3DQHO
5DLO7.6XSW
5DLO;VXSW
1XW3URSHOO[)ODQJ
6FUHZ0DFK3K7U=Q[
6LQN'EO''(63:[:KW
)DXF3((53/)/DY
3OEJ6WUDLQHU)ODW'
6FUHZ&RQQ+['F1LPP[PP
6FUHZ&RQQ+[)O=1PP[PP
HARDWARE / TOOLS INCLUDED
Hex Wrench
Access Panel Nut (5)
(Nut Propell 1/4 20x.5 5/8Flang)
Access Panel Screw (6)
(Screw Mach PhTr Zn 1/4-20x1.50)
Confirmat Bolt (10)
(Screw Conn HxDc Ni 7mmx50mm)
Flat Head Confirmat Bolt (11)
(Screw Conn HxFl ZN 7mmx50mm)
(Phillips screwdriver and soft mallet required but not included.)

TM8350R – TM8352R
STEP-BY-STEP ASSEMBLY
3
#0964-3146
©2018 Stevens Industries, Inc.
Due to continuing product development, Stevens reserves the right to change specifications without notice.3594.TM8350/TM8352.9/25/18
Construct two Rail Supports as follows:
a. Insert dowels on ends of one X Rail (4) into
holes in center of two TK Rails (3). Make sure
holes in ends of X Rail (4) align with thru-holes
in TK Rails (3). Press firmly into place.
b. Secure Rails (3 & 4) from (a.) together with
two Flat Head Confirmat Bolts (11), using the
included Hex Wrench.
c. Repeat (a.) and (b.) to construct other Rail
Support.
STEP
1
FOR TM8352R ONLY (STEP 1):
thru-hole
Lay one End (1) flat on floor, with side having the
most holes facing up. NOTE: Holes are closer to
back edge and further from front edge.
STEP
2
FOR BOTH MODELS (STEPS 2-13):
back edge
front edge
Insert dowels on TK Rails (3) into holes on End
(1).(For TM8352R, TK Rails (3) are part of the
Rail Supports from Step 1.) Top edges of all TK
Rails (3) must be facing same direction. Press
firmly into place.
STEP
3
top edges of
TK Rails (3)
(to identify, note
location of holes
on faces)
Position other End (1) on top of assembly, so
dowels on TK Rails (3) align with holes on End (1)
and back edges of both Ends (1) are facing same
direction. Press firmly into place.
STEP
4
back edge
back edge

TM8350R – TM8352R
STEP-BY-STEP ASSEMBLY
4#0964-3146
©2018 Stevens Industries, Inc.
Due to continuing product development, Stevens reserves the right to change specifications without notice. 3594.TM8350/TM8352.9/25/18
Carefully turn assembly over, so other End (1) is
facing up.
STEP
6
Carefully position assembly with front facing up.
STEP
8
Insert Access Panel Nuts (5) into both holes on
each front TK Rail (3), with flange exposed to
interior of cabinet. Tap Access Panel Nuts (5) into
place with soft mallet.
STEP
9
Repeat Step 5 to secure End (1) to TK Rails (3).
STEP
7
Secure End (1) to TK Rails (3) with four
Confirmat Bolts (10).
STEP
5
flange

TM8350R – TM8352R
STEP-BY-STEP ASSEMBLY
5
#0964-3146
©2018 Stevens Industries, Inc.
Due to continuing product development, Stevens reserves the right to change specifications without notice.3594.TM8350/TM8352.9/25/18
Position Access Panel (2) over assembly, so
holes on Access Panel (2) align with Access
Panel Nuts (5). Press firmly into place.
STEP
10
Secure Access Panel (2) to front TK Rails (3)
with four Access Panel Screws (6). (Phillips
screwdriver not included.) NOTE: The Access
Panel can be removed as needed for plumbing
access.
STEP
11
Carefully stand unit upright.
STEP
12
Ensure that all joints, bolts and screws are tight.
STEP
13
This completes the assembly of the cabinet.
Installation of Sinks (7), Faucets (8) and Strainers (9)
to be performed by licensed plumber.
This manual suits for next models
1
Other Stevens Indoor Furnishing manuals

Stevens
Stevens Tot mate TMS501R User manual

Stevens
Stevens Tot mate TM2134R User manual

Stevens
Stevens Tot mate TM2137R User manual

Stevens
Stevens Toy mate TM9372R User manual

Stevens
Stevens Toy mate TM9418R User manual

Stevens
Stevens ToT mate TM2336R User manual

Stevens
Stevens 84152 User manual

Stevens
Stevens tot mate TM2084R User manual

Stevens
Stevens ToT mate TML403R User manual

Stevens
Stevens ToT mate TM2185R User manual


