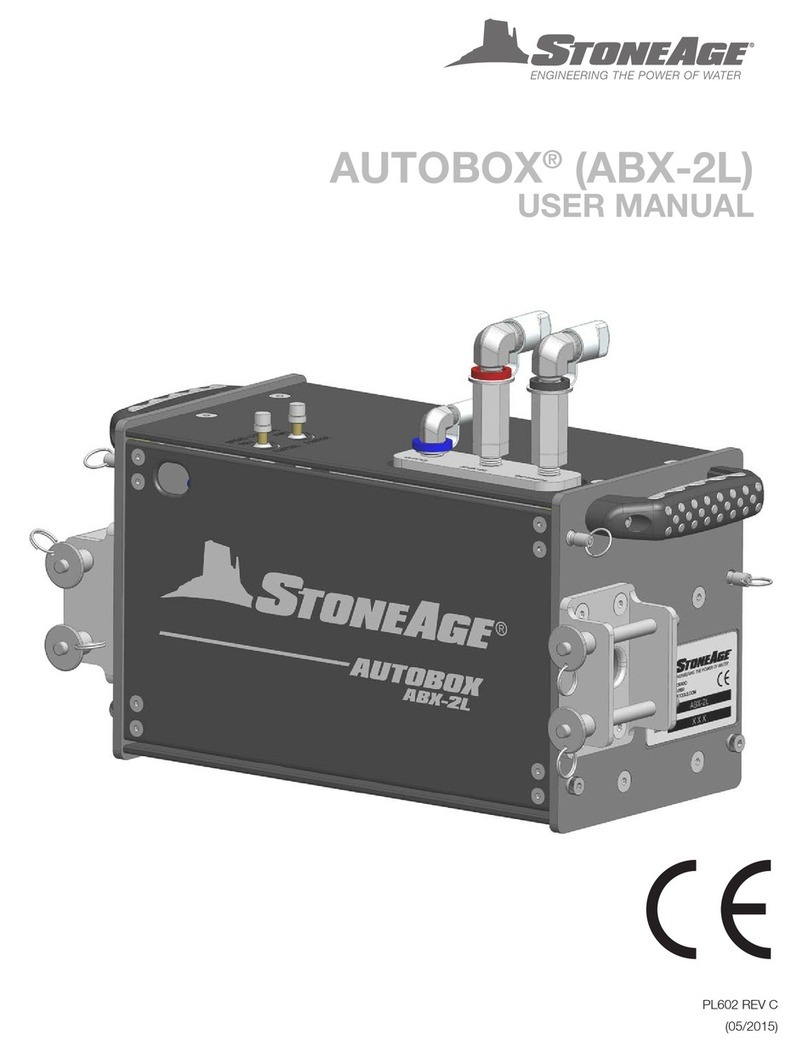
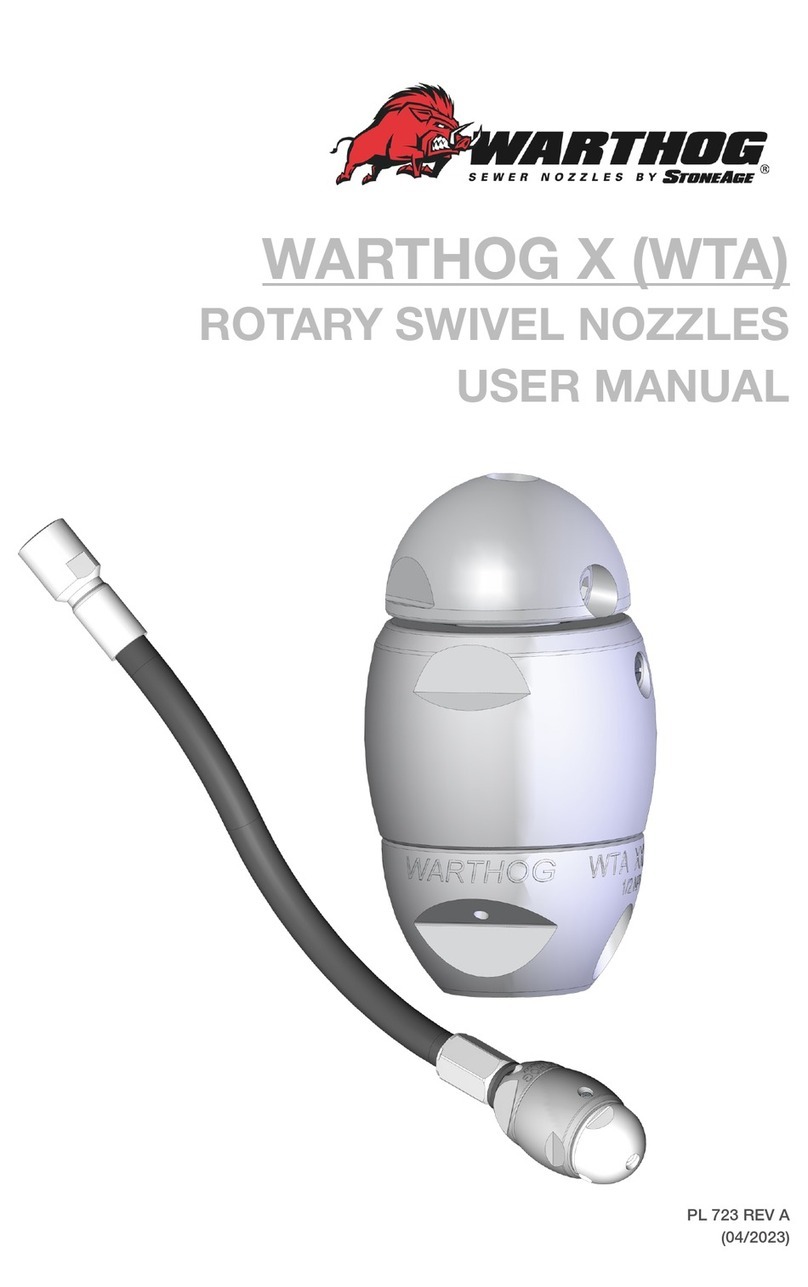
StoneAge WARTHOG CLASSIC (WS) User manual

PL 530 REV B
(04/2023)
CLASSIC (WS)
ROTARY SWIVEL NOZZLES
USER MANUAL

2866-795-1586 • WWW.SEWERNOZZLES.COM
TABLE OF CONTENTS
MANUFACTURER’S INFORMATION ...........................................................3
SPECIFICATIONS..........................................................................3
DESCRIPTION AND INTENDED USE ......................................................3
KEY FEATURES ...........................................................................3
EC DECLARATION OF CONFORMITY .....................................................4
UK DECLARATION OF CONFORMITY.....................................................5
WARNING AND SAFETY INSTRUCTIONS .....................................................6
BACKOUT PREVENTION ..................................................................6
OPERATOR TRAINING RISK ASSESSMENT ..............................................7
PPE........................................................................................8
PRE-RUN SAFETY CHECK ................................................................9
WARTHOG®CLASSIC (WS-X-1/2)OVERVIEW..................................................10
WARTHOG®CLASSIC (WS-X-1/2)MODEL INFORMATION ................................11
OPERATION ....................................................................................12
TROUBLESHOOTING ..........................................................................13
TOOL SERVICE INFORMATION ................................................................14
VISCOUS FLUID FILL INFORMATION..........................................................14
DISASSEMBLY .................................................................................15
ASSEMBLY .....................................................................................17
PART NAMES AND SERVICE KITS.............................................................19
TERMS AND CONDITIONS AND WARRANTY .................................................20

3
866-795-1586 • WWW.SEWERNOZZLES.COM
WARTHOG®CLASSIC (WS) SPECIFICATIONS
Tool Family: Warthog® CLASSIC
Tool Model: WS-X-1/2
Pipe Size: 4-8 in. (100-200 mm)
Pressure Range: 1200-5000 psi (83-350 bar)
Flow Range: 9-21 gpm (34-79 Lpm)
Flow Coefcient: 1.3 Cv
Visc Service Life: 40-50 Hours
Rotation Speed: 300-500 rpm
Inlet Connection: 1/2” NPT or BSPP
Jet Port Size: 3 x 1/8” NPT
Jet Type & Plug Type: AP2 & AP 002
Outside Diameter: 2.0 in. (51 mm)
Overall Length: 5.5 in. (140 mm)
Weight: 2.2 lbs (1 kg)
Max Water Temperature: 160 °F (70 °C)
DESCRIPTION AND
INTENDED USE
The Warthog® WS-X-1/2 is
designed to handle 4”-8”
(102-203 mm) lines and is
most commonly used with
trailer jetters. It is used to
clean lines in restaurants,
hospitals, multi-story apartment
buildings, residential, and other
applications. Easily removes
grease, cuts roots, and clears
ice and soil blockages.
RIGID AND JOINTED INLETS
The WS-J-1/2 model allows the
inlet hose to bend to the side,
shortening the rigid length of the
tool and allowing limited access
applications to be cleaned much
easier.
The WS-X-1/2 is an excellent
tools for straight pipes. The whip
hose is removed, allowing the
hose to connect directly to the
tool
KEY FEATURES:
• Navigates sweeping bends.
• Cuts roots, clears ice and
blockages
•Whip hose, jointed inlet and
direct connection available
• Replaceable AP2 jets.
MANUFACTURER’S INFORMATION
StoneAge Inc.
466 S. Skylane Drive
Durango, CO 81303, USA
Phone: 970-259-2869
Toll Free: 866-795-1586
www.stoneagetools.com
StoneAge NL
Reedijk 7Q
3274 KE Heinenoord
Netherlands
(+31) (0) 85 902 73 70
StoneAge UK
Unit 3
Crucible Business Park
Woodbury Lane
Norton
Worcester
Worcestershire, WR5 2DQ
United Kingdom
+44 (0) 1684 892065
This manual must be used in accordance with all applicable national
laws. The manual shall be regarded as a part of the machine and
shall be kept for reference until the nal dismantling of the machine,
as dened by applicable national law(s). Updated manuals can be
downloaded at: https://www.stoneagetools.com/manuals

866-795-1586 • WWW.STONEAGETOOLS.COM
4
EC DECLARATION OF CONFORMITY
Manufacturer: StoneAge Incorporated
466 South Skylane Drive Durango, CO 81303 USA
Authorized Representative: StoneAge Netherlands BV
Reedijk 7Q
3274 KE Heinenoord Netherlands
Sander de Korte, Customer Service Manager
Declare that: Warthog® Classic (WS-X-1/2)
are rotary swivel tools designed for cleaning pipes with
bends.
Are compliant with the following Directives and Standards:
Directive 2006/42/EC (Machinery Directive)
EN ISO 12100:2010 (E) Safety of machinery – General principles for design – Risk assessment and risk
reduction
The Technical Files for the Warthog® Classic (WS-X-1/2) are maintained at:
StoneAge Incorporated, 466 South Skylane Drive, Durango, CO 81303, USA and were compiled by
the Engineering Manager. The Technical File is available through the Authorized Representative. This
Declaration of Conformity is issued under the exclusive responsibility of StoneAge Incorporated.
________________________________________ 02/15/23
StoneAge Incorporated, Durango, CO, USA Date
Liz Mancuso, Director of Engineering

866-795-1586 • WWW.STONEAGETOOLS.COM 5
UK DECLARATION OF CONFORMITY
Manufacturer: StoneAge Incorporated
466 South Skylane Drive Durango, CO 81303 USA
Authorized Representative: StoneAge UK
Unit 3
Crucible Business Park
Woodbury Lane
Norton
Worcester
Worcestershire, WR5 2DQ
United Kingdom
Steve Ellis, Managing Director StoneAge UK
Declare that: Warthog® Classic (WS-X-1/2)
are rotary swivel tools designed for cleaning pipes with
bends.
Are compliant with the following Statutory Requirements and Designated Standards:
S.I. 2008 No. 1597 (E) Safety of machinery – General principles for design – Risk assessment and risk reduction
EN ISO 12100:2010 (E) Safety of machinery – General principles for design – Risk assessment and risk
reduction
The Technical Files for the Warthog® Classic (WS-X-1/2) are maintained at:
StoneAge Incorporated, 466 South Skylane Drive, Durango, CO 81303, USA and were compiled by
the Engineering Manager. The Technical File is available through the Authorized Representative. This
Declaration of Conformity is issued under the exclusive responsibility of StoneAge Incorporated.
________________________________________ 02/15/23
StoneAge Incorporated, Durango, CO, USA Date
Liz Mancuso, Director of Engineering

6866-795-1586 • WWW.SEWERNOZZLES.COM
WARNING AND SAFETY INSTRUCTIONS
WARNING
Because of the short length of the Warthog® Classic (WS-X-1/2), the tool can turn around in pipes and
come back at the operator at a high rate of speed. A rigid “stinger” should be used between the hose and
the tool. The rigid length of the tool including hose end must be 1-1/2 times the inside diameter of the pipe
being cleaned (see below).
Make sure there is an operator controlled dump in the system, operated by the person closest to the
cleaning job. It is recommended that the hose be marked a few feet from the end with a piece of tape so
the operator knows when to stop when retracting the tool.
DANGER
Operations with this equipment can be potentially hazardous. Caution must be exercised prior to and
during machine and water jet tool use. Please read and follow all of these instructions, in addition to the
guidelines in the WJTA Recommended Practices handbook, available online at www.wjta.org.Deviating
from safety instructions and recommended practices can lead to severe injury and/or death.
IMPROPER USE:
Classic (WS) will turn around in
large diameter pipe
VERY DANGEROUS!
PROPER USE:
Classic (WS) with rigid “stinger”
to prevent turnaround, still
able to pass through elbows.
Rigid
Stinger
1-1/2 times
pipe ID

7
866-795-1586 • WWW.SEWERNOZZLES.COM
StoneAge has designed and manufactured this
equipment considering all hazards associated
with its operation. StoneAge assessed these risks
and incorporated safety features in the design.
StoneAge WILL NOT accept responsibility for the
results of misuse.
IT IS THE RESPONSIBILITY OF THE INSTALLER/
OPERATOR to conduct a job specic risk
assessment prior to use. Job specic risk
assessment MUST be repeated for each different
set up, material, and location.
The risk assessment MUST conform to the Health
and Safety at Work Act 1974 and other relevant
Health and Safety legislation.
The risk assessment MUST consider potential
material or substance hazards including:
• Aerosols
• Biological and microbiological (viral or
bacterial) agents
• Combustible materials
• Dusts
• Explosion
• Fibers
• Flammable substances
• Fluids
• Fumes
• Gases
• Mists
• Oxidizing Agents
WARNING AND SAFETY INSTRUCTIONS
OPERATOR TRAINING
Managers, Supervisors, and Operators MUST be
trained in Health and Safety Awareness of High-
pressure Water Jetting and hold a copy the Water
Jetting Association (WJA) Code of Practice, or
equivalent (see www.waterjetting.org.uk).
Operators MUST be trained to identify and
understand all applicable standards for the
equipment supplied. Operators should be trained
in manual handling techniques to prevent bodily
injury.
Operators MUST read, understand, and follow the
Operational and Training Requirements (Section
7.0) of WJTA-IMCA’s Industry Best Practices For
The Use Of High-pressure Waterjetting Equipment,
or equivalent.
Operators MUST read, understand and follow
the Warnings, Safety Information, Assembly,
Installation, Connection, Operation, Transport,
Handling, Storage, and Maintenance Instructions
detailed in this manual.

8866-795-1586 • WWW.SEWERNOZZLES.COM
WARNING AND SAFETY INSTRUCTIONS
PERSONAL PROTECTIVE EQUIPMENT
REQUIREMENTS
Use of Personal Protective Equipment (PPE) is
dependent on the working pressure of water and
the cleaning application. Managers, Supervisors,
and Operators MUST carry out a job specic risk
assessment to dene the exact requirements for
PPE. See Protective Equipment for Personnel
(Section 6) of WJTA-IMCA’s Recommended
Practices For The Use Of High-pressure
Waterjetting Equipment for additional information.
Hygiene - Operators are advised to wash
thoroughly after all waterjetting operations to
remove any waterblast residue which may contain
traces of harmful substances.
First aid provision - users MUST be provided with
suitable rst aid facilities at the operation site.
PPE may include:
• Eye protection: Full face visor
• Foot protection: Kevlar® brand or steel toe
capped, waterproof, non-slip safety boots
• Hand protection: Waterproof gloves
• Ear protection: Ear protection for a minimum
of 85 dBA
• Head protection: Hard hat that accepts a full
face visor and ear protection
• Body protection: Multi-layer waterproof
clothing approved for waterjetting
• Hose protection: Hose shroud
• Respiratory protection: May be required;
refer to job specic risk assessment

9
866-795-1586 • WWW.SEWERNOZZLES.COM
WARNING
Operations with this equipment can be potentially
hazardous. Caution MUST be exercised prior
to and during equipment and water jet tool use.
Please read and follow all of these instructions,
in addition to the guidelines in the
WJTA-IMCA’s
Industry Best Practices
handbook, available
online at www.wjta.org. Deviating from safety
instructions and recommended practices can lead
to severe injury and/or death.
• Do not exceed the maximum operating
pressure specied for any component in a
system.
• The immediate work area MUST be marked
off to keep out untrained persons.
• Inspect the equipment for visible signs
of deterioration, damage, and improper
assembly. Do not operate if damaged, until
repaired.
• Make sure all threaded connections are tight
and free of leaks.
• Users of the
Warthog® Classic (WS-X-1/2)
MUST be trained and/or experienced in
the use and application of high-pressure
technology and cleaning, as well as all
associated safety measures, according
to the WJTA Recommended Practices
for the use of High-pressure Waterjetting
Equipment.
• Install mechanical stops, stingers and back
out preventers as appropriate when doing any
tube, pipe or vessel cleaning.
• Always de-energize the system before
servicing or replacing any parts. Failure to do
so can result in severe injury and/or death.
PRE-RUN SAFETY CHECK
Refer to
WJTA-IMCA’s Industry Best Practices
For
The Use Of High-pressure Waterjetting Equipment
and/or The Water Jetting Association’s, WJA Code
of Practice for additional safety information.
• Complete a job specic risk assessment and
act on the resulting actions.
• Adhere to all site specic safety procedures.
• Ensure the waterblasting zone is properly
barricaded and that warning signs are posted.
• Ensure the workplace is free of unnecessary
objects (e.g. loose parts, hoses, tools).
• Ensure all Operators are using the correct
Personal Protective Equipment (PPE).
• Check that the air hoses are properly
connected and tight.
• Check all hoses and accessories for damage
prior to use. Do not use damaged items. Only
high quality hoses intended for waterblast
applications should be used as high-pressure
hoses.
• Check all high-pressure threaded connections
for tightness.
• Operate the high-pressure water at full
pressure and use the Pneumatic Foot Pedal
Dump Control to verify that the dump valve is
working properly.
• Ensure that Operators never connect,
disconnect, or tighten hoses, adapters, or
accessories with the high-pressure water
pump unit running.
• Ensure no personnel are in the hydroblasting
zone.
WARNING AND SAFETY INSTRUCTIONS

10 866-795-1586 • WWW.SEWERNOZZLES.COM
WARTHOG®CLASSIC (WS-X-1/2)
PIPE SIZE: 4"-8” LINES (100-200 MM)
INLET: 1/2" NPT OR BSPP
FLOW RATE: 9-21 gpm | 34-79 lpm
SERVICE INTERVAL: 40-50 hours
The Classic (WS-X-1/2) is precongured to deliver top performance in the most common 4-8”
(102-203 mm) pipe applications so you can get right to work and deliver great results removing
grease, cutting roots, and clearing ice and soil blockages.
Warthog® CLASSIC (WS-X-1/2) OVERVIEW
UNIVERSAL
• Jetting is precongured for an equal
balance of pulling, ushing, cleaning, and
cutting DESCALING
PULLING/
FLUSHING
CL ASSIC (WS-X-1/2)
3 Ports:
1 @ 15º
2 @ 150º
150º 150º
15º
Front Jet
Rear Jets

11
866-795-1586 • WWW.SEWERNOZZLES.COM
Warthog® CLASSIC (WS-X-1/2) MODEL INFORMATION
RECOMMENDED HOSES
WS-X-1/2: StoneAge recommends a 1/2” ID hose be used, especially when using longer hose lengths.
JETTING
Pumps are commonly sold based on their theoretical maximum ow output; in reality, none are 100%
efcient. We try to take this into account when supplying you the jets. If you are not getting to the
operating pressure desired, the sizes of the jets may need to be changed.
The table below is provided as an overview of common jetting parameters. For more precise jetting
information, please use the StoneAge Jetting App to determine jet sizes:
jetting.stoneagetools.com
For more information regarding the Warthog®Classic (WS) or other Warthog®Sewer Tools, contact your
factory authorized Warthog®Distributor or go to;
www.sewernozzles.com
Warthog® Classic (WS-X-1/2) HEAD OFFSET CHART
WS WITH 500' OF
Ø1/2" HOSE
PRESSURE
2500 PSI 3000 PSI 3500 PSI 4000 PSI 4500 PSI
FLOW
GPM L/MIN 170 BAR 210 BAR 240 BAR 280 BAR 310 BAR
9 34 R25 R25 R25 R25 R25
12 45 R25 R19 R19 R19 R19
15 57 R19 R19 R19 R14 R14
18 68 R14 R14 R14 R14 R14
21 79 R14 R14 R14 R14 R10

12 866-795-1586 • WWW.SEWERNOZZLES.COM
NOTICE
The two most important items in maintaining the WS tools;
- Keep debris from entering the tool and preventing it from rotating by ushing hoses before use.
- Keep the WS full of viscous uid to maintain control and rotation speed. When the viscous uid is lost
or contaminated, the rotation speed of the tool will increase, which reduce the life of the high pressure
seal and bearing. We recommend that this is done after every 40 to 50 hours of operation. If the tool is
spinning much faster than when new, this is an indication that it needs uid.
OPERATION:
• Make sure the operator has a controlled dump in the system and it is operated by the person closest
to the job. Test the dump prior to beginning the job.
• Flush out the high pressure hoses before connecting the WS to eliminate debris.
• Attach the tool to the end of the hose; prepare the threads per the “TECH TIP” below. There is a large
O-Ring (WS 030) around the inlet, covering up the wrench ats. This O-Ring helps prevent the tool
from getting caught on the rear edge when pulling the tool back out of the line. When attaching the
tool to the hose end, slide the O-Ring up the hose out of the way until the connection is tightened,
and then roll the O-Ring back into its original place.
TECH TIP: NPT threads -StoneAge recommends the use of Teon tape and yellow Threadmate™
on NPT thread connections.
Fine and high pressure threads- StoneAge recommends the use of Blue Goop®Anti-seize on
Fine and high pressure thread connections.
• It is recommended that the hose be marked a few feet from the end with a piece of tape so the
operator knows when to stop on the way back out.
• Position the tool within the pipe to be cleaned; bring the pump up to pressure, making certain that
the WS begins to pull it’s way in the proper direction into the pipe. If roots are present, feeding at a
slower rate will improve the cleaning results. Depending on the amount of debris in the pipe, it may
be necessary to occasionally pull the WS back toward the pipe entrance to prevent large buildups
behind the tool.
• Close the dump and slowly bring the pump up to pressure the rst time to make sure jets are not
plugged and the jet thrust is correct. The WS should begin to slowly rotate.
• Once the pump is up to pressure, feed the WS at a reasonable rate to allow the jets time to clean the
pipe. Once operating pressure is reached, feed the tool into the pipe to begin the cleaning job.
• Depending on the amount of debris in the pipe, it may be necessary to occasionally pull the WS back
toward the pipe entrance to prevent large buildups behind the tool. Allow the jets time to do their
work by feeding the hose out at a controlled rate.
• When nished cleaning, shut down and secure pump before removing WS from line. If the WS will be
removed from the line and stored for more than several days, blow out water with compressed air to
prolong the life of the internal components.
Blue Goop®is a registered trademark of the Swagelock®Corporation.
Parker Threadmate™ is a registered trademark of the Parker Hannin Corporation.
OPERATION

13
866-795-1586 • WWW.SEWERNOZZLES.COM
HEAD WILL NOT ROTATE:
• First try rotating head by hand and see if it feels rough or gritty to turn. If it does, the tool must be
disassembled and repaired; it likely has bad bearings, seals and uid. If the tool feels okay, check
to see if any nozzles are plugged; even if a nozzle is only partially blocked it can keep the head from
rotating. Nozzles must be removed from the head to properly clean them; it does not do any good to
poke the material plugging the nozzle back into the head, as it will just replug a nozzle.
HEAD SPINS TOO FAST:
• It is likely that the swivel is low on viscous uid, or the viscous uid has water in it. The best thing to
do is drain all the uid, wipe the parts clean and rell with the proper uid. Check that the shaft seals
are still good and will keep the uid from leaking out. If it spins too fast as a new tool or after proper
repair, check with StoneAge or your distributor to make sure that the tool has the correct head and
nozzle combination.
SEAL LEAK:
• The seal may leak initially at low pressure, but should pop closed as pressure is increased. If
operating pressure is reached and the seal is leaking continuously, the high pressure seal may need
to be replaced. Refer to the maintenance below.
SEALS WEAR OUT QUICKLY:
• The tool must be disassembled and inspected. The brass seat should be checked for being installed
in the right direction, and it should be replaced any time the high pressure seal is replaced. The bore
of the shaft where the high pressure seal is located should be checked for grooving. If it is worn
larger than .383”, the shaft will need to be replaced.
NOT GETTING THE DESIRED OPERATING PRESSURE:
• The sizes of the jets may need to be changed. Verify jetting at jetting.stoneagetools.com
• For more information contact your factory authorized StoneAge® Inc. distributor or go to
www.sewernozzles.com for help.
TROUBLESHOOTING

14 866-795-1586 • WWW.SEWERNOZZLES.COM
TOOL SERVICE INFORMATION
TOOL SERVICE
The Warthog® WS also has a high pressure seal that will last between 150 and 300 hours. The seal
may leak at low pressure, but will seal at high pressures unless it has worn out. Refer to this manual for
assembly instructions.
Product training and proper tools are required to service this tool. If you are uncomfortable performing
the service, bring the WS to your authorized dealer.
The use of a bench vice and an arbor press is highly helpful. Take care throughout the entire procedure
to keep the internals clean and free from grit, lint, and contamination. Failure to do so could result in
premature failure after service.
TO FILL WITH VISCOUS FLUID
1. Fill the syringe with viscous uid. This
is best done by unscrewing the handle
from the tube and pulling out the plunger.
Pour uid into the tube; reassemble the
syringe.
2. Hold the WS with the hose end up as
shown. Remove the Port Plug (BJ 026)
from the WS. Thread the syringe tting
into the port, and slowly squeeze uid
into swivel until excess uid comes
out around the inlet end. If the uid
coming out appears dirty or watery, keep
squeezing in new uid until it comes out
clean.
3. Remove syringe from WS-X-1/2 head,
install Port Plug.
VISCOUS FLUID FILL INSTRUCTIONS
REMOVE TO FILL
BJ 026
Port Plug
BC 410
Syringe
LIST OF TOOLS:
• Bench Vice (recommended)
• Arbor Press (recommended)
• Medium size at-head screw driver
• Pick
• Small needle nose pliers
• WS 612 Tool Kit
TJ 064 Fill Tube
WS 105 Installation Tool
• VS 604-S Visc\Syringe Kit
6oz Slow Visc
BC 410 Syringe
LIST OF MATERIALS:
• Clean lint free rags or blue shop towels
• Lithium Soap Grease – StoneAge PN (GP 048
Grease)
• Isopropyl Alcohol or Denatured Alcohol
• Anti-Seize - Swagelok®Blue Goop® StoneAge
PN (GP 043)
• Parker® Yellow ThreadMate and Teon Tape
or an equivalent combination on the threads of
the WS 001 Shaft.
DISASSEMBLY
Blue Goop®is a registered trademark of Swagelok® Company.
Parker®Yellow ThreadMate™ is a registered trademark of
Parker-Hannin Corporation.

15
866-795-1586 • WWW.SEWERNOZZLES.COM
TOOL SERVICE INFORMATION
VISCOUS FLUID FILL INSTRUCTIONS
DISASSEMBLY
1. Clamp the ats of the WS 140 Head in a vise
as shown.
2. Clamp the ats on the Shaft with a 9/16” or
an Adjustable Wrench and rotate the WS
Assembly Counterclockwise.
Figure 1: For Steps 1-2
Figure 2: For Steps 3-4
TECH TIPS: Use a pick to gently remove
the Brass Seat and High Pressure Seal. If using
an Arbor Press to push the Shaft out of the
Bearings, be sure to set the bearing down on the
inner race and make sure everything is straight
before pressing.
Figure 3: For Steps 5-7
Adjustable
Wrench
WS 003
Body
WS 002
Inlet Nut
TJ 007
Bearings (3)
WS 001
Shaft
DISASSEMBLY
RJ 011
Seat
WS 080
Centralizer
WS 003
Body
RJ 012-TO
H.P. Seal
3. Clamp the ats on the Body in the Vise.
4. Unscrew the Inlet Nut (WS 002) and Hose
from the Body. Use the ats on the Inlet Nut,
not the hex on the hose end.
5. Remove the Centralizer (WS 080).
6. Remove the Seat (RJ 011) and H.P. Seal (RJ
012-TO) from the Shaft bore.
7. Push the Shaft (WS 001) with bearings out
of Body.
9/16” or
Adjustable
Wrench
WS 003
Body
WS 140-XXX
Head

16 866-795-1586 • WWW.SEWERNOZZLES.COM
DISASSEMBLY
Figure 4: For Step 8
Figure 5: For Step 9
Figure 6: For Step 10
TECH TIPS: Use a pick to gently remove
the Seals and O-Ring.
WS 010
Shaft Seal
RJ 008
O-Ring
WS 002
Inlet Nut
NOTICE
Before reassembly of the tool
Wash all parts in solvent and blow dry
and
Inspect wear items, (High Pressure Seal
Assembly, Shaft Seals, O-Rings, Bearings, and
Port Plug.)
See the “Maintenance Kits” section of this
manual for a complete list of Service, Overhaul,
and, Tool kits.
8. Remove the three Bearings (TJ 007) from
the Shaft (WS 001). Inspect bearings binding
rotation.
9. Remove the O-Ring (RJ 008) and Shaft Seal
(WS 010) from Inlet Nut. Inspect both the
O-Ring and Shaft Seal for damage.
10. Remove the Port Plug ( BJ 026) and Shaft
Seal (WS 010) from Inlet Nut. Inspect both
the O-Ring and Shaft Seal for damage.
TJ 007
Bearings (3)
WS 001
Shaft
WS 003
Body
WS 029
Shaft Seal
BJ 026
Port Plug

17
866-795-1586 • WWW.SEWERNOZZLES.COM
DISASSEMBLY
WS 010
Shaft Seal
LIP FACING
DOWN RJ 008
O-Ring
WS 105
Tool
WS 002
Inlet Nut
ASSEMBLY
Figure 7: For Steps 1-2
Figure 9: For Step 4
Figure 10: For Step 5Figure 8: For Steps 3-4
ASSEMBLY
1. Install the Shaft Seal (WS 010) with the LIP
FACING DOWN into the Inlet Nut (WS 002).
2. Using the (WS 105) Tool, install the O-Ring
(RJ 008) into the groove below the threads of
the Inlet Nut (WS 002).
3. Using the (WS 105) Tool, install Shaft Seal
(WS 029) into Body with the LIP FACING UP.
4. Press the Bearings (TJ 007) one at a time
onto the Shaft. It is best to push only on the
inner race of the bearing.
TJ 007
Bearings (3)
TJ 007
Bearings (3)
/ WS 001
Shaft
WS 001
Shaft
WS 003
Body
GREASE
5. Grease Shaft. Push Shaft/bearing stack-
up into Body. It is easiest to turn the shaft
clockwise to thread the pipe threads through
the shaft seal in the Body.
LIP FACING
UP
WS 003
Body
WS 029 Shaft
Seal
GREASE INSIDE
DIAMETER
WS 105
Tool

18 866-795-1586 • WWW.SEWERNOZZLES.COM
ASSEMBLY
TECH TIPS: Greasing the O-Ring on the
H.P. Seal prevents it from tearing in the tight
bore of the Shaft.
6. Clamp the ats of the Body/Shaft Assembly
in a vise as shown.
7. Insert H.P. Seal (RJ 012-TO) into Shaft bore,
until ush with end of shaft. Apply grease to
the H.P. Seal.
8. Push Brass Seat (RJ 011) into shaft with
large diameter down until top of step aligns
with top end of shaft. Apply grease to the
top of Brass Seat.
9. Slide Centralizer (WS 080) over the Body.
Figure 11: For Steps 6-9
WS 080
Centralizer
RJ 011
Seat
Flat face
down
toward Seal
RJ 012-TO
H.P. Seal
Flats on the
WS 003 Body
Figure 12: For Step 10
Adjustable
Wrench
WS 003
Body
WS 002
Inlet Nut
Blue Goop®
Figure 13: For Step 12
WS SERVICE KITS
9/16” or
Adjustable
Wrench
WS 003
Body
WS 001
Shaft
WS 140-XXX
Head
11. Clamp the ats of the WS 140 Head in a vise
as shown.
12. Apply Parker® Yellow ThreadMate and
Teon Tape or an equivalent combination on
the threads of the WS 001 Shaft.
13. Thread the Shaft into the Head and rotate
the WS Assembly Clockwise. Finish
tightening with a 9/16”or Adjustable End
Wrench.
14. Fill tool with syringe as shown on Page 14,
then install Port Plug (BJ 026).
10. Apply Blue Goop®to threads and thread
Inlet Nut into Body, tighten to 30 ft-lb.

19
866-795-1586 • WWW.SEWERNOZZLES.COM
RJ 011
BrassSeat RJ 012-TO
H.P. Seal
WS 003
Body WS 140 -RXX
Head
AP2 XXX
Nozzles
BJ 026
Port Plug
WS 002
Inlet Nut
WS 020-2
Hose
WS 023
Socket
WS 029
Seal
WS 080
Centralizer
WS 022-S
Weep Seal
WS 010
Seal
RJ 008
O-Ring
WS 001
Shaft
WS SERVICE KITS
TJ 007
Bearings
KITS AND KIT CONTENTS
WS 600-ST1 SERVICE KIT WS 610-RT1 OVERHAUL KIT
1 BJ 062-S Copper Antiseize 1.3, 2g pouch
1 RJ 011 Brass Seat
1 RJ 012-TO H.P. Seal & O-Ring
1 BJ 026 Port Plug
1 BJ 062-S Copper Antiseize 1.3, 2g pouch
1 PL 530 Warthog Classic (WS) User Manual
1 RJ 008 O-Ring
1 RJ 011 Brass Seat
1 RJ 012-TO H.P. Seal & O-Ring
3 TJ 007 Bearing, Ball
1 WS 010 Seal
1 WS 022-S Weap Seal
1 WS 029 29mm OD Double Lip Seal
WS 610-J-RT1 OVERHAUL KIT WS 612 TOOL KIT
1 BJ 026 Port Plug
1 BJ 062-S Copper Antiseize 1.3, 2g pouch
1 PL 530 Warthog Classic (WS) User Manual
1 RJ 008 O-Ring
1 RJ 011-K Brass Seat
1 RJ 012-KTO H.P. Seal & O-Ring
3 TJ 007 Bearing, Ball
1 WS 010 Seal
1 WS 202 Nut, Face
1 WS 029 29mm OD Double Lip Seal
1 WS 208 O-Ring, 1-1/8 OD, 70A
2 WS 210 O-Ring, 3/4 OD, 90A
1 TJ 064 Fill Tube
1 WS 105 Installation Tool
VS 604-S VISC/SYRINGE KIT
1 6oz Slow Visc
1 BC 410 Syringe

20 866-795-1586 • WWW.SEWERNOZZLES.COM
TERMS AND CONDITIONS AND WARRANTY INFORMATION
1. Acceptance of Terms and Conditions. Receipt of these
Terms and Conditions of Sale (“Terms and Conditions”) shall
operate as the acceptance by StoneAge, Inc. (“Seller”) of the
order submitted by the purchaser (“Buyer”). Such acceptance
is made expressly conditional on assent by Buyer to these
Terms and Conditions. Such assent shall be deemed to have
been given unless written notice of objection to any of these
Terms and Conditions (including inconsistencies between
Buyer’s purchase order and this acceptance) is given by Buyer
to Seller promptly on receipt hereof.
Seller desires to provide Buyer with prompt and efcient
service. However, to individually negotiate the terms of each
sales contract would substantially impair Seller’s ability to
provide such service. Accordingly, the product(s) furnished
by Seller are sold only according to the terms and conditions
stated herein and with the terms and conditions stated in any
effective StoneAge Dealer Agreement or StoneAge Reseller
Agreement, if applicable. Notwithstanding any terms and
conditions on Buyer’s order, Seller’s performance of any
contract is expressly made conditional on Buyer’s agreement
to these Terms and Conditions unless otherwise specically
agreed to in writing by Seller. In the absence of such
agreement, commencement of performance, shipment and/
or delivery shall be for Buyer’s convenience only and shall not
be deemed or construed to be an acceptance of Buyer’s terms
and conditions.
2. Payment/Prices. Unless other arrangements have been
made in writing between Seller and Buyer, payment for the
product(s) shall be made upon receipt of invoice. The prices
shown on the face hereof are those currently in effect. Prices
invoiced shall be per pricelist in effect at the time of shipment.
Prices are subject to increase for inclusion of any and all taxes
which are applicable and which arise from the sale, delivery or
use of the product(s), and the collection of which Seller is or
may be responsible to provide to any governmental authority,
unless acceptable exemption certicates are provided by Buyer
in accordance with applicable law. Buyer shall pay all charges
for transportation and delivery and all excise, order, occupation,
use or similar taxes, duties, levies, charges or surcharges
applicable to the product(s) being purchased, whether now
in effect or hereafter imposed by any governmental authority,
foreign or domestic.
3. Warranty. SELLER MAKES NO WARRANTIES OR
REPRESENTATIONS AS TO THE PERFORMANCE OF ANY
PRODUCT EXCEPT AS SET FORTH IN THE STONEAGE
LIMITED WARRANTY PROVIDED WITH THE PRODUCT.
4. Delivery. Seller is not obligated to make delivery by a
specied date, but will always use its best efforts to make
delivery within the time requested. The proposed shipment
date is an estimate. Seller will notify Buyer promptly of any
material delay and will specify the revised delivery date as
soon as practicable. UNDER NO CIRCUMSTANCES SHALL
SELLER HAVE ANY LIABILITY WHATSOEVER FOR LOSS OF
USE OR FOR ANY DIRECT OR CONSEQUENTIAL DAMAGES
RESULTING FROM DELAY REGARDLESS OF THE REASON(S).
All product(s) will be shipped F.O.B. point of origin, unless
specically agreed otherwise, and Buyer shall pay all shipping
costs and insurance costs from that point. Seller, in its sole
discretion, will determine and arrange the means and manner of
transportation of the product(s). Buyer shall bear all risk of loss
commencing with the shipment or distribution of the product(s)
from Seller’s warehouse. Order shortages or errors must
be reported within fteen (15) business days from receipt of
shipment to secure adjustment. No product(s) may be returned
without securing written approval from Seller.
5. Modication. These Terms and Conditions are intended by
Seller and Buyer to constitute a nal, complete and exclusive
expression of agreement relating to the subject matter hereof
and cannot be supplemented or amended without Seller’s prior
written approval.
6. Omission. Seller’s waiver of any breach or Seller’s failure
to enforce any of these Terms and Conditions at any time, shall
not in any way affect, limit or waive Seller’s right thereafter to
enforce and compel strict compliance with every term and
condition hereof.
7. Severability. If any provision of these Terms and Conditions
is held to be invalid or unenforceable, such invalidity or
unenforceability shall not affect the validity or enforceability of
the other portions hereof.
8. Disputes. Seller and Buyer shall attempt in good faith to
promptly resolve any dispute arising under these Terms and
Conditions by negotiations between representatives who have
authority to settle the controversy. If unsuccessful, Seller and
Buyer shall further attempt in good faith to settle the dispute by
nonbinding third-party mediation, with fees and expenses of
such mediation apportioned equally to each side. Any dispute
not so resolved by negotiation or mediation may then be
submitted to a court of competent jurisdiction in accordance
with the terms hereof. These procedures are the exclusive
procedures for the resolution of all such disputes between the
Seller and Buyer.
Table of contents
Other StoneAge Industrial Equipment manuals
Popular Industrial Equipment manuals by other brands
Siemens
Siemens SIMATIC HMI ITC1200 V3 PRO Quick install guide
DRIESCHER-WEGBERG
DRIESCHER-WEGBERG MINEX Operation – and Assembly Instruction
Eaton
Eaton DX-SIN3 Series Instruction leaflet
ITOH DENKI
ITOH DENKI MABS manual
GDS
GDS ALLIGATOR Assembly Instructions Instruction Manual
GARANT
GARANT VG BASIC Instruction handbook
CMT
CMT C 50 Technical handbook
Huawei
Huawei FusionModule1000A40 ICT Solution Initial Configuration Parameter Manual
Pepperl+Fuchs
Pepperl+Fuchs VisuNet TCU1100 Series manual
Elsys AG
Elsys AG EL-BU-14/TRIG_R quick start guide
Lincoln
Lincoln D Series Owner's/operator's manual
AIR-O-LATOR
AIR-O-LATOR ICE-AWAY IA-5 Installation, operation and maintenance instructions
