manuals.online logo
Brands
  1. Home
  2. •
  3. Brands
  4. •
  5. SUHNER
  6. •
  7. Grinder
  8. •
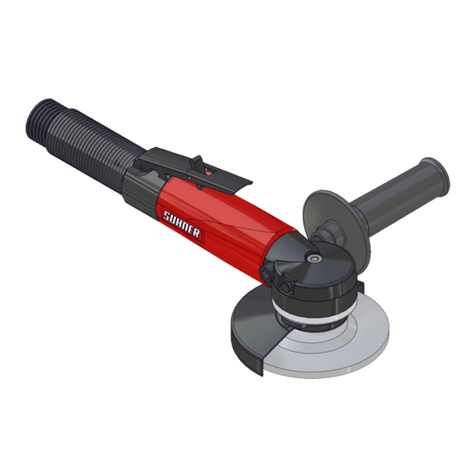
  9. SUHNER USK 6-R User manual

SUHNER USK 6-R User manual

DE FRGB
Betriebsanleitung
Bandschleifgeräte
Technische Daten
BSG 10/35-2
Schleifband 35 x 450 mm
Wellenanschluss G 28
Drehzahl max. 7'000 min-1
Gewicht 1.500 kg
BSG 10/50-2
Schleifband 50 x 450 mm
Wellenanschluss G 28
Drehzahl max. 7'000 min-1
Gewicht 1.585 kg
BSGV
Schleifband BSGV 35 35 x 450 mm
Schleifband BSGV 50 50 x 450 mm
Drehzahl max. 7'000 min-1
Gewicht der
kompl. Maschine LLH 4.500 kg
Inbetriebnahme
1. Verstellbare Kontaktrolle in Arbeitsla-
ge bringen.
2. Schleifband entsprechend der Dreh-
richtung aufspannen.
Zum Aufspannen und Wechseln des
Schleifbandes nur auf die metallische
Stirnfläche des Kopfstücks (Pos. 2),
niemals aber auf die kleine Kon-
taktrolle (Pos. 35/36) drücken.
3. Auf kleiner Drehzahl Bandlauf justie-
ren.
4. Auf Arbeitsdrehzahl einstellen.
5. 5-10 min. einlaufen lassen.
6. Nach einigen Schleifvorgängen
Bandlauf nachkorrigieren.
Operating instructions
Belt grinders
Technical data
BSG 10/35-2
Abrasive belt 35 x 450 mm
Shaft connection G 28
Maximum speed 7'000 RPM
Weight 1.500 kgs
BSG 10/50-2
Abrasive belt 50 x 450 mm
Shaft connection G 28
Maximum speed 7'000 RPM
Weight 1.585 kgs
BSGV
Abrasive belt BSGV 35 35 x 450 mm
Abrasive belt BSGV 50 50 x 450 mm
Maximum speed 7'000 RPM
Weight of complete
machine LLH 4.500 kgs
Putting into service
1. Put adjust roller (Item 2) in working
position.
2. Install abrasive belt according to
direction of rotation.
For installing or change of belt,
always apply force against metal
surface of head end (Item 2), never
press against contact roller Item
35/36).
3. Adjust and align belt at low speed.
4. Set the speed to working RPM.
5. Allow to run the tool freely for 5-10
minutes.
6. Readjust the belt after completion of
a few operations.
BSG 10/35-2
BSG 10/50-2
BSGV 35 + LLH 7-H = LBH 7-H35
BSGV 35 + USK 6-R = UBK 6-R
BSGV 50 + LLH 7-H = LBH 7-H50
Instructions de service
Ponceuses à ruban
Caractéristiques techniques
BSG 10/35-2
Ruban abrasif 35 x 450 mm
Accouplement d'arbre G 28
Vitesse max. 7'000 min-1
Poids 1.500 kg
BSG 10/50-2
Ruban abrasif 50 x 450 mm
Accouplement d'arbre G 28
Vitesse max. 7'000 min-1
Poids 1.585 kg
BSGV
Ruban abrasif BSGV 35 35 x 450 mm
Ruban abrasif BSGV 50 50 x 450 mm
Vitesse max. 7'000 min-1
Poids de la machine
complète LLH 4.500 kg
Préparation
1. Amener le alet de contact régable en
position de travail.
2. Monter le ruban abrasif en fonction
du sens de rotation. Pour tendre ou
changer de ruban n'appuyer que sur
la face métallique frontale de la tête
(Pos. 2), jamais sur le petit galet de
contact (Pos. 35/36).
3. Ajuster la marche du ruban à faible
vitesse.
4. Passer à la vitesse de travail.
5. Laisser tourner la ponçeuse pendant
5 - 10 minutes.
6. Corriger la position du ruban après
quelques opérations de ponçage.
DE FRGB
-2-
DE FRGB
-3-
- - - 1 1 1 Gehäuse Housing Carter 52 631 01
1 1 1 1 1 2 Kopfstück kompl. Head end compl. Pièce de tête compl. 52 632 01
- - - 1 1 3 Reduktionshülse Reducing sleeve Bouille de réduction 52 633 01
- - - 1 1 5 Spindel Spindle Broche 52 635 01
- - - 1 1 6 Distanzhülse Spacer sleeve Douille d‘écortement 33 677 01
1 1 1 1 1 7 Säule Support pillar Colonne-support 52 636 01
1 1 1 1 1 8 Rändelschraube Knurled screw Vis moletée 52 637 01
11111 10 Deckscheibe Washer Rondelle 52 638 01
- - - 2 2 11 Stützring Supporting ring Rondelle d‘appui 52 639 01
- - - 1 1 13 Zentrierung Center Centre 52 653 01
11111 17 U-Scheibe Washer Rondelle 27 814 38
11111 19 Kegelkerbstift Tapered grooved dowel Goupille conique cannelée 27 778 95
- - - 2 2 20 Dämmring Insulation ring Bague elastique 52 521 01
22222 21 Flache 6-kt.-Mutter Flat hex. nut Ecrou 6-pans plat 27 558 42
22222 23 Zylinder-Schraube I-6kt. Allen screw Vis à tête cylindrique à 6pans creux 27 561 12
- - - 2 2 24 Lagernadel Kl. II Bearing needle cl. II Aiguille cl. II 27 776 07
- - - 1 1 25 Überzugschlauch Rubber sleeve Gaine de recouvrir 25 431 01
- - - 1 1 26 Gummischeibe Rubber disc Disque caoutchouc 45 409 01
11111 27 Faltenbalg Anti-dust bellows Soufflet anti-pouss. 28 026 01
- - - 2 2 28 Kugellager Ball bearing Roulement à billes 27 696 81
11111 30 Zylinder-Stift Cyl. pin Goupille cyl. 27 831 97
11111 31 Scheibenfeder Woodruff key Clavette encastrée 27 835 06
- - - 1 1 32 Si-ring Circlip Circlip 27 663 08
- - - 2 2 33 Tellerfeder Dished spring Rondelle 27 993 05
11111 34 Druckfeder Pressure spring Ressort de pression 21 219 01
- - 1 - 1 35 Kontaktrolle Contact pulley Rouleau 52 643 01
1 1 - 1 - 36 Kontaktrolle Contact pulley Rouleau 52 643 02
- - 1 - 1 37 Kontaktrolle Contact pulley Rouleau 52 644 01
1 1 - 1 - 38 Kontaktrolle Contact pulley Rouleau 52 644 02
11111 40 Bandschutz Protecting bracket Etrier de protection 52 645 01
11111 42 Firmenschild Marks plate Plaquette marquée 52 765 01
1 1 1 - - 50 Support Support Support 52 614 03
- 1 1 - - 51 Aufspanndorn Work arbor Broche 52 615 01
1 1 1 - - 52 Zylinder-Schraube I-6kt. Allen screw Vis à tête cylindrique à 6pans creux 27 602 69
1 - - - - 53 Aufspanndorn Work arbor Broche 59 194 01
- - - 2 2 54 Zylinder-Schraube I-6kt. Allen screw Vis à tête cylindrique à 6pans creux 27 561 10
- - - 1 1 55 Schutzblech Protecting bracket Etrier de protection 57 607 01
- - - 2 2 56 Flache 6-kt.-Mutter Flat hex. nut Ecrou 6-pans plat 27 558 05
1 1 1 1 1 - Steckschlüssel Box spanner Clef à douille 12 436 01
1 1 1 - - - Sechskant-Stiftschlüssel Hexagonal key Clef mâles six pans 27 855 04
BSGV 35 - USK 6-R
BSGV 35 - LLH 7-H
BSGV 50 - LLH-7-H
BSG 10/35
BSG 10/50
Menge / Quantité /
Quantity / Pos. Benennung Description Désignation Art. No.
DE FRGB
-4-
39 063 01 G - 08/07
Local Distributor
SCHWEIZ / Export:
Suhner Abrasive Expert AG
Postfach 199
CH-5201 Brugg
Tel. +4156 4642880
Fax +4156 4642831
http://www.suhner.com
Zusammenbau des BSGV
1. Aufspanndorn (Pos. 51, 53) in die
Spindel der Antriebsmaschine
einschrauben/einspannen und mit
Schlüssel gut festziehen.
2. Kompl. Bandschleifgerät auf den
Hals der Antriebsmaschine schieben.
3. Grosse Kontaktrolle (Pos. 37/38)
auf den Aufnahmedorn schieben. Da-
nach U-Scheibe (Pos. 17) anbringen
und mit Mutter (Pos. 21) festziehen
(Steckschlüssel SW 17).
4. Bandschleifgerät auf dem Hals der
Maschine nach vorn schieben bis die
Stirnseiten der beiden Kontaktrollen
fluchten (an Werkbank ausrichten).
5. Klemmverbindung mit I-6 kt.-Schrau-
be (Pos. 52) mit 6 kt.-Schlüssel SW 6
fest anziehen).
Demontage
erfolgt in umgekehrter Reihenfolge.
Wartung
1. Abgenutzte Gummirollen verur-
sachen einen unruhigen Lauf des
Schleifbandes. Die Rollen sind zu
ersetzen.
2. Die Bandschleifgeräte brauchen
weiter keine Wartung. Die Kugellager
sind dauergeschmiert.
Gewährleistung
Entsprechend den allgemeinen Liefer-
bedingungen. Bei Ersatzteilbestellungen
bitte Maschinentyp, Fabrikations- und
Teil-Nr. angeben.
Assembly of BSGV
1. Insert work arbor (Item 51, 53) into
drive spindle and tighten firmly using
wenches.
2. Slide complete belt grinder assembly
over work arbor (Item 51) and body of
power tool.
3. Install washer (Item 17) and lock nut
(Item 21) and tighten firmly using
socket nut wrench size 17 mm.
4. For ease of aligment of contact rollers
(Item 35 & 37 or 36 & 38), powertool
and belt grinder assembly, should
be installed in a vise. Contact rollers
have to be parallel.
5. Tighten socket head cap screw (Item
52) with 6 mm allen wrench.
Disassembly
In reserve sequence.
Maintenance
1. Worn rubber pulleys cause running of
belt. Replace pulleys.
2. No other maintenance of belt grinder
is needed. Ball bearings are geased
fol life.
Warranty
Please observe our general delivery
terms. When ordering spare parts., please
state machine typ, serial number and part
numbers.
Assemblage de la BSGV
1. Introduire l'arbre de fixation (pos. 51,
53) dans la broche de la machine
d'entraînement et le bloquer à l'aide
de clefs.
2. Introduire la ponçeuse complète sur
le col de la machine d'entraînement.
3. Introduire le gros galet de contact
(pos. 37/38) sur l'axe puis mettreen
place la rondelle (pos. 17). Bloquer le
tout à l'aide de l'ecrou (pos. 21). (Clef
à douille de 17).
4. Sur le col de la machine, délacer
la ponçeuse vers l'avant jusqu'à
l'lignement parfait la face frontale
des galets. (Operation à effectuer à
l'établi).
5. Bloquer la pièce de serrage au mo-
yen de la vis à 6 pans creux (pos. 52)
avec clef hexagonal de 6.
Démontage
S'effectue dans l'ordre inverse.
Entretien
1. Lorsque les rouleaux sont usés, la
marche du ruban devient instable.
Remplacer les rouleaux.
2. Les ponceuses n'exigent pas
d'entretien spécial. Les roulements à
billes sont graissés à vie.
Garantie
Se référer aux conditions générales de
vente. Lors de la commande de pièces
de rechange, indiquer toujours le type de
la machine, le numéro de fabrication et le
numéro d'article.

Other manuals for USK 6-R

1

This manual suits for next models

8

Other SUHNER Grinder manuals

SUHNER LSG 16 Technical manual

SUHNER

SUHNER LSG 16 Technical manual

SUHNER UXD 4 User manual

SUHNER

SUHNER UXD 4 User manual

SUHNER UWK 10R-125 Technical manual

SUHNER

SUHNER UWK 10R-125 Technical manual

SUHNER UXF 4-R Series Technical manual

SUHNER

SUHNER UXF 4-R Series Technical manual

SUHNER UWG 10-R125 Technical manual

SUHNER

SUHNER UWG 10-R125 Technical manual

SUHNER LSC 23-TOP Technical manual

SUHNER

SUHNER LSC 23-TOP Technical manual

SUHNER LSA 79 User manual

SUHNER

SUHNER LSA 79 User manual

SUHNER MINIfix 9-R User manual

SUHNER

SUHNER MINIfix 9-R User manual

SUHNER ABRASIVE LSA 81 Technical manual

SUHNER

SUHNER ABRASIVE LSA 81 Technical manual

SUHNER LSB 14 Technical manual

SUHNER

SUHNER LSB 14 Technical manual

SUHNER LLG 4 Technical manual

SUHNER

SUHNER LLG 4 Technical manual

SUHNER USK 6-R Technical manual

SUHNER

SUHNER USK 6-R Technical manual

SUHNER USG 33-R Technical manual

SUHNER

SUHNER USG 33-R Technical manual

SUHNER LWB 4 Technical manual

SUHNER

SUHNER LWB 4 Technical manual

SUHNER LWB 21-DH Technical manual

SUHNER

SUHNER LWB 21-DH Technical manual

SUHNER UKC 3-R Technical manual

SUHNER

SUHNER UKC 3-R Technical manual

SUHNER USG 33-R Technical manual

SUHNER

SUHNER USG 33-R Technical manual

SUHNER LWE 10-TOP Technical manual

SUHNER

SUHNER LWE 10-TOP Technical manual

SUHNER USG 9-R User manual

SUHNER

SUHNER USG 9-R User manual

SUHNER LSA 77 Technical manual

SUHNER

SUHNER LSA 77 Technical manual

SUHNER USC 25-R Technical manual

SUHNER

SUHNER USC 25-R Technical manual

SUHNER Abrasive expert UXK 4-R Technical manual

SUHNER

SUHNER Abrasive expert UXK 4-R Technical manual

SUHNER LSB 20 Technical manual

SUHNER

SUHNER LSB 20 Technical manual

SUHNER URG 9-R Technical manual

SUHNER

SUHNER URG 9-R Technical manual

Popular Grinder manuals by other brands

Parkside PWS 230 C3 Translation of the original instructions

Parkside

Parkside PWS 230 C3 Translation of the original instructions

joke AirMAX 20 instruction manual

joke

joke AirMAX 20 instruction manual

Parkside PDS 200A Operation and safety notes

Parkside

Parkside PDS 200A Operation and safety notes

FujiFilm FA-67-8F Operator's manual

FujiFilm

FujiFilm FA-67-8F Operator's manual

Milwaukee 2783-20 Operator's manual

Milwaukee

Milwaukee 2783-20 Operator's manual

Makita DGD800 instruction manual

Makita

Makita DGD800 instruction manual

HERKULES H-NT 150/200 Original operating instructions

HERKULES

HERKULES H-NT 150/200 Original operating instructions

Makita M9000 instruction manual

Makita

Makita M9000 instruction manual

Workzone Titanium BGS700 user manual

Workzone

Workzone Titanium BGS700 user manual

Craftsman 900.116500 instruction manual

Craftsman

Craftsman 900.116500 instruction manual

KRAUSMANN 8740 Operation manual

KRAUSMANN

KRAUSMANN 8740 Operation manual

Makita GA7064 instruction manual

Makita

Makita GA7064 instruction manual

Ryobi P4221 Operator's manual

Ryobi

Ryobi P4221 Operator's manual

Au Tour du Béton SH270M manual

Au Tour du Béton

Au Tour du Béton SH270M manual

Stanley PG10 user manual

Stanley

Stanley PG10 user manual

DeWalt DCG414 Original instructions

DeWalt

DeWalt DCG414 Original instructions

Timber Tuff Tools TMG-243PT owner's manual

Timber Tuff Tools

Timber Tuff Tools TMG-243PT owner's manual

Hitachi Koki G 18MRU Handling instructions

Hitachi Koki

Hitachi Koki G 18MRU Handling instructions

manuals.online logo
manuals.online logoBrands
  • About & Mission
  • Contact us
  • Privacy Policy
  • Terms and Conditions

Copyright 2025 Manuals.Online. All Rights Reserved.