manuals.online logo
Brands
  1. Home
  2. •
  3. Brands
  4. •
  5. Sumitomo
  6. •
  7. Industrial Equipment
  8. •
  9. Sumitomo FC-6S+ User manual

Sumitomo FC-6S+ User manual

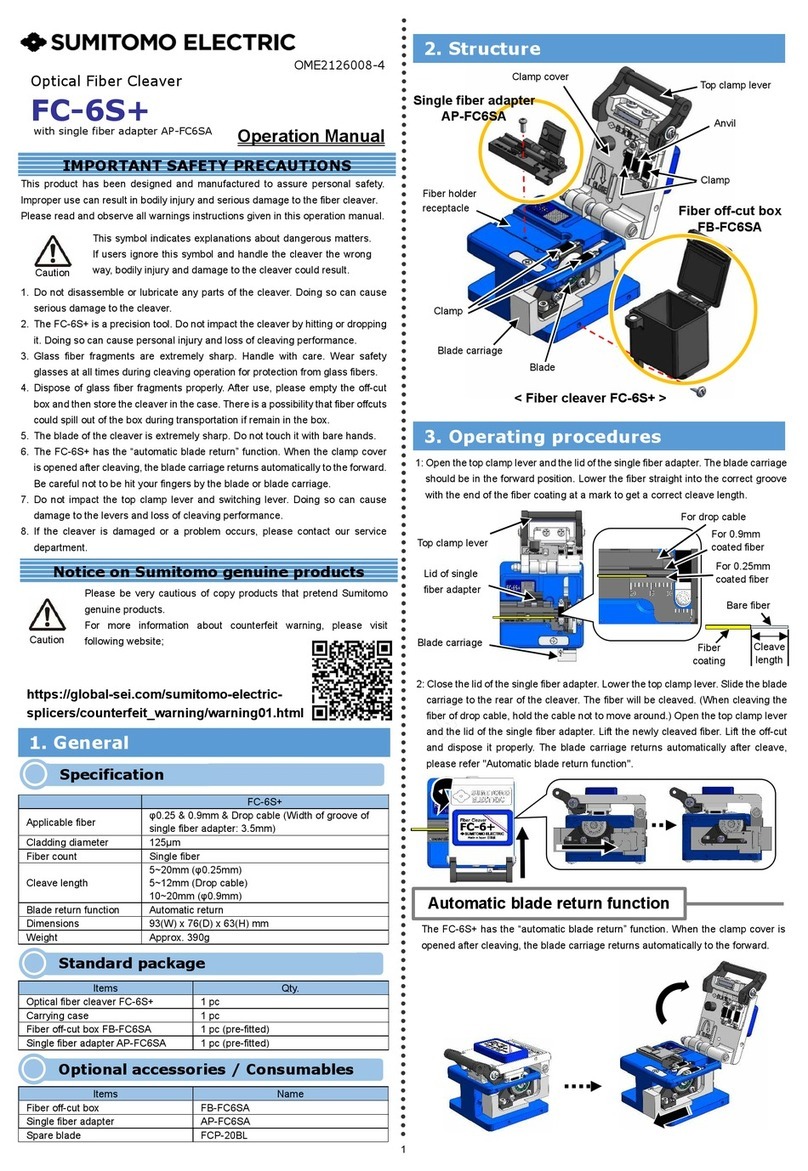
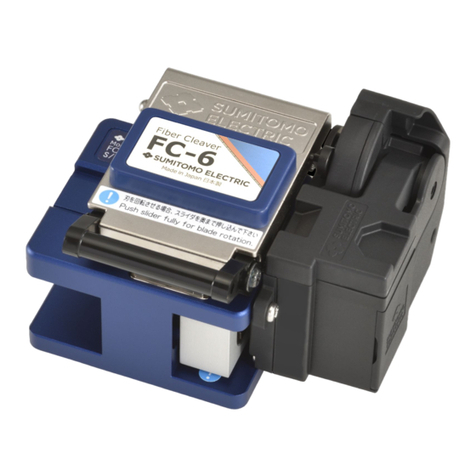
FC-6S+
Cladding Diameter
125μm
Fiber Count
Coating Diameter
Single fiber
(φ0.25 & φ0.9mm)
Cleave length 5~20mm (single φ0.25mm)
10~20mm (single φ0.9mm)
Blade return function Automatic return
Dimensions
100(W) x 86(D) x 63(H) mm
Weight
Approx. 430g
Items Qty.
Optical fiber cleaver FC-6S+ 1 pc
Carrying case 1 pc
Fiber off-cut collector CU-FC6+ 1 pc (pre-fitted)
Single fiber adapter AP-FC6M 1 pc (pre-fitted or attached)
Items Name
Fiber off-cut collector CU-FC6+
Single fiber adapter AP-FC6M
Spare blade FCP-20BL
OME2126008-1
Optical Fiber Cleaver
FC-6S+
Operation Manual
IMPORTANT SAFETY PRECAUTIONS
This symbol indicates explanations about dangerous matters.
If users ignore this symbol and handle the cleaver the wrong
way, bodily injury and damage to the cleaver could result.
Caution
1. General
2. Structure
This product has been designed and manufactured to assure personal safety.
Improper use can result in bodily injury and serious damage to the fiber cleaver.
Please read and observe all warnings instructions given in this operation manual.
1
1. Do not disassemble or lubricate any parts of the cleaver. Doing so can cause
serious damage to the cleaver.
2. The FC-6S+ is a precision tool. Do not impact the cleaver by hitting or dropping
it. Doing so can cause personal injury and loss of cleaving performance.
3. Glass fiber fragments are extremely sharp. Handle with care. Wear safety
glasses at all times during cleaving operation for protection from glass fibers.
4. Dispose of glass fiber fragments properly. After use, please empty the off-cut
bin and then store the cleaver in the case. There is a possibility that fiber offcuts
could spill out of the bin during transportation if remain in the bin.
5. The blade of the cleaver is extremely sharp. Do not touch it with bare hands.
6. The FC-6S+ has the “automatic blade return” function. When the clamp cover
is opened after cleaving, the blade carriage returns automatically to the forward.
Be careful not to be hit your fingers by the blade or blade carriage.
7. Do not impact the top clamp lever and switching lever. Doing so can cause
damage to the levers and loss of cleaving performance.
8. If the cleaver is damaged or a problem occurs, please contact our service
department.
Specification
Standard package
Optional accessories / Consumables
3. Operating procedures
< Single fiber adapter AP-FC6M >
Groove for φ0.9mm fiber
Groove for φ0.25mm fiber
With single fiber adapter
Single fiber adapter
AP-FC6M
Off-cut collector
CU-FC6+
Blade carriage
Blade
Clamp
Fiber holder
receptacle
Clamp cover
Top clamp lever
Anvil
Clamp
Off-cut bin
< Fiber cleaver FC-6S+ >
1: Open the top clamp lever and the
lid of the single fiber adapter. The
blade carriage sho
uld be in the
forward position.
Lid of single fiber adapter
Top clamp lever
Blade carriage
2: Lower the
fiber straight into the
correct V-
groove with the end of the
fiber coating (e.g. if the cleave
length is 16mm) at the 16mm mark
on the ruler.
3:
Close the lid of the single fiber
adapter.
4: Lower the
top clamp lever. Slide the blade carriage to the rear of the cleaver.
The fiber will be cleaved.
5:
Open the top clamp lever. Then open the lid of the single
fiber adapter and lift the newly cleaved fiber. Lift the off-
cut
and dispose it properly. (The FC-6S+
automatically
collects an off-cut in the off-cut collector.)
The blade
carriage returns
automatically after cleave, please refer
"Automatic blade return function".
Cleave
length
Fiber
coating
Bare fiber
With fiber holder
1: Open the top clamp lever.
The blade carriage sho
uld be
in the forward position.
Top clamp lever
Blade carriage
2:
Place the fiber holder in the
cleaver. Place the edge of the
fiber holder against the edge of
the fiber holder receptacle.
Fiber holder receptacle
3:
Lower the top clamp lever. Slide the blade carriage to the rear of the cleaver.
The fiber will be cleaved.
4: Open the top clamp lever. Remove the fiber holder from the cleaver. Lift the off-
cut and dispose it properly. (The FC-6S+ automatically collects an off-
cut in the
off-cut collector.) T
he blade carriage returns automatically after cleave, please
refer "Automatic blade return function".
Blade position change
As the number of the cleave
’s
increases, a symptom that fiber cannot be cleaved
or cracks will occur. If such symptom continues to appear, the blade position is
worn out. Rotate
the
blade according to the following procedures and use a new
blade position.
[Reference] 2,250 fibers per position (*)
(*) The number above is not guaranteed. It may vary depending on the operating environment.
2
4. Maintenance
Cleaning
To keep excellent cleaving quality, cleaning must be performed after use.
Clean the blade edge, the rubber pad of the clamp and the anvil with a cotton
swab moistened with isopropyl alcohol.
Cotton swab
Clean the fiber holder receptacle and
the grooves of
the single fiber
adapter, too.
Caution
▪
Dust on the blade edge or the clamp might cause loss of cleaving
performance or poor quality of fiber end face.
▪ Do not clean them with any other kind of chemicals.
▪ If the top clamp lever is closed leaving an off-
cut fiber on the clamp,
the rubber pad of the clamp will have a trace of the fiber, causing
loss of cleaving performance or poor quality of fiber end face.
Remove the off-cut collector first.
1:
Loosen the blade setscrew with a
slotted screwdriver.
2: Rotate the blade to the next
position by pressing its side or edge with a cotton
swab. Cotton swab
Rotate the blade in the direction
indicated by the arrow.
▪ Do not rotate the blade with hands.
▪ Do not rotate the blade with metallic tweezers. Doing so may
damage the blade.
Caution
3: Tighten the blade setscrew.
[Reference] Optimum torque:
Approx. 0.98N∙m (10kgf∙cm)
▪ Do not over-tighten the blade setscrew. The screw will get
worn out.
Caution
4: Try and cleave the fiber. Make visual check of the fiber end face with the splicer.
If the fiber end face is poor, adjust the blade height. (Refer to “
Blade height
adjustment”.)
Automatic blade return function
The FC-6S+ has the “automatic blade return” function. When the clamp cover is
opened after cleaving, the blade carriage returns automatically to the forward.
3
Blade height adjustment
Remove the off-cut collector first.
1: Loosen the 2 cross head screws.
2: Slide the blade carriage to the rear of the cleaver
,
then loosen the blade height locking screw.
Put a Hex driver (US) or
Allen key (UK) here.
Blade height locking screw
Blade height adjustment screw
3: Place a mechanical pencil lead or a light stick on the
clamps. Slide the blade
carriage back and forth and turn the blade height adjustment screw.
The point
where the lead barely touches the edge of the blade is a reference point (0μm).
Tips
▪ To make the blade higher, turn the blade height adjustment screw clockwise.
▪ To make the blade lower, turn the blade height adjustment screw anti-
clockwise.
(Turn the screw while pushing the blade down with a cotton swab.)
Mechanical pencil lead
Slide the blade carriage.
Blade height
adjustment
screw
(with scale)
[Reference]
1 mark on scale = Approx. 10μm
To make the blade lower, turn the
blade height adjustment screw anti-
clockwise,
while pushing the blade
down with a cotton swab.
Cotton swab
4: Turn the blade height adjustment screw clockwise by more 4 to 6
marks from the
reference point.
Caution
▪
Do not make the blade too high. Doing so will damage the anvil
and increases the chipped fiber ends.
5: Tighten the blade height locking screw.
[Reference] Optimum torque: Approx. 0.59N∙m (6kgf∙cm)
6: Tighten the 2 cross head screws.
[Reference] Optimum torque: Approx. 0.98N∙m (10kgf∙cm)
Blade replacement
Remove the off-cut collector first.
1: Unscrew the blade setscrew.
2: Remove the blade with tweezers.
Tweezers
Caution
▪
The edge of a blade is manufactured precisely. If the edge is hit
against metallic objects, it will crack, resulting in poor cleaving
performance. Handle with care.
▪ When using metallic tweezers, be careful not to damage the blade.
▪ Do not touch the blade with hands. Use gloves.
▪ Dispose of the old blade properly.
3: Insert a new blade in the cleaver so that “(1)” of the number sticker
is in the top
position. (Refer to the enlarged view below.)
The hole of the blade should be aligned with the hole of the blade receptacle.
Enlarged view
“(1)” should be in the top position.
(24) (1) (2)
4: Tighten the blade setscrew completely, while pressing the side of the blade.
[Reference] Optimum torque: Approx. 0.98N∙m (10kgf∙cm)
Press the side of the blade.
5: Adjust the blade height, referring to “Blade height adjustment”.
Troubleshooting
5. Fiber off-cut collector
Installing off
-
cut collector
Notice on Sumitomo genuine products
Caution
Please be very cautious of copy products that pretend Sumitomo
genuine products.
For more information about counterfeit warning, please visit
following website;
https://global-sei.com/sumitomo-electric-
splicers/counterfeit_warning/warning01.html
Tokyo (JAPAN)
Sumitomo Electric Industries, Ltd.
(Global Business Dept.)
Akasaka Center Building, 1-3-13,
Motoakasaka, Minato-ku, Tokyo
107-8468, JAPAN
Tel: +81 (0)3 6406 2666
http://global-sei.com/sumitomo-electric-splicers
North Carolina (U.S.A)
Sumitomo Electric Lightwave Corp.
201 South Rogers Lane, Suite 100
Raleigh, NC27610 U.S.A
Toll Free No. 800 358 7378
Tel: +1 919 541 8100
http://www.sumitomoelectric.com
London (U.K)
Sumitomo Electric Europe Ltd.
220 Centennial Park, Centennial Avenue,
Elstree, Herts, WD6 3SL, U.K.
Tel: +44 (0)20 8953 8118
http://www.sumielectric.com
Hong Kong (China)
Sumitomo Electric Asia, Ltd.
Tel: +852 2576 0080
http://www.seac-cn.com/
Bangkok (Thailand)
Sumitomo Electric (Thailand) Limited
Tel: +66 (0)2 260 7231 to 5
http://www.set-th.com/
Singapore
Sumitomo Electric Asia Pacific Pte. Ltd.
Tel: +65 6261 3388
http://www.seps.com.sg/
Dubai (U.A.E.)
Middle East office
Tel: +971 4 701 7338
Gurgaon (India)
SEI Trading India Pvt. Ltd. (SETI)
Tel: +91 124 4577 470
Manila (Philippines)
SEI (PHILIPPINES) INCORPORATED
Tel: +63 2 811 2755/2756
4
Poor cleave angle
Lip
Good
Crack
If the cleaving problem occurs, the followings are possible causes.
(A) The fiber is placed obliquely in the cleaver.
 Make sure that the fiber is placed straight in the cleaver.
(B) The blade height is too high.
 Adjust the blade height.
(C) Dust or dirt remains on the clamp.
 Clean the clamp.
(D) Dust or dirt remains on the blade
 Clean the blade.
(E) Dust or dirt remains on the fiber.
 Remove the fiber coating and clean the bare fiber again.
If the problem still persists, please contact our service department.
1: Open the top clamp lever fully.
2: Put the lever pin into the pin hole of the cleaver
Lever pin
Front
< Fiber off-cut collector CU-FC6+ >
Put the
lever pin into the pin hole
of the cleaver.
3: Ensure that the lever pin and hook fit the cleaver properly.
<Top view>
5: Tighten the 3 setscrews. Optimum torque: Approx. 40cNm.
6: Completed.
4: Align the screw holes on the cleaver with the screw holes on the off-cut collector.
Emptying off
-
cut collector
1: Remove the off-cut bin from the off-cut collector and dispose of the off-
cuts in
a proper way.
Off-cut bin
(c) 20
2
1 SUMITOMO ELECTRIC INDUSTRIES, LTD.

Other Sumitomo Industrial Equipment manuals

Sumitomo FC-6S+ User manual

Sumitomo

Sumitomo FC-6S+ User manual

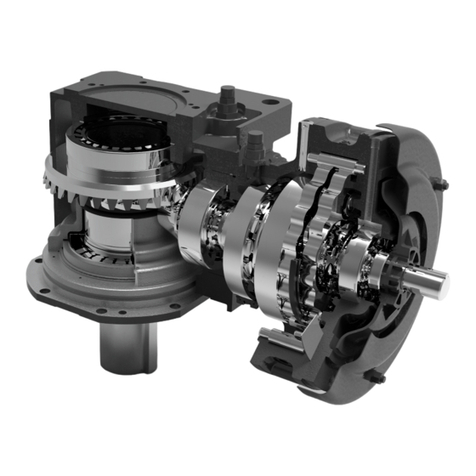
Sumitomo SRDK Series User manual

Sumitomo

Sumitomo SRDK Series User manual

Sumitomo Z2C User manual

Sumitomo

Sumitomo Z2C User manual

Sumitomo Y-OP4-U User manual

Sumitomo

Sumitomo Y-OP4-U User manual

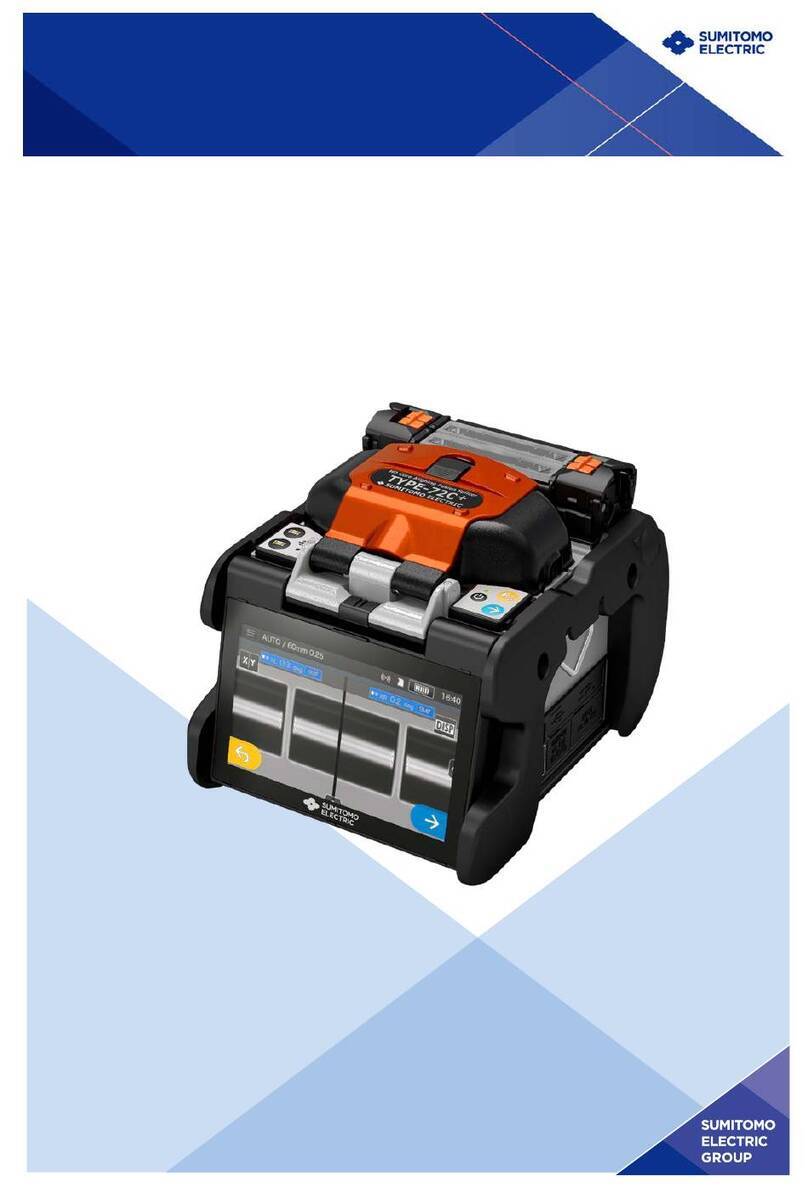
Sumitomo TYPE-72C+ User manual

Sumitomo

Sumitomo TYPE-72C+ User manual

Sumitomo TYPE-201e-VS/M4 User manual

Sumitomo

Sumitomo TYPE-201e-VS/M4 User manual

Sumitomo FC-6 User manual

Sumitomo

Sumitomo FC-6 User manual

Sumitomo CC-17 User manual

Sumitomo

Sumitomo CC-17 User manual

Sumitomo T-57C+ User manual

Sumitomo

Sumitomo T-57C+ User manual

Sumitomo TYPE-Q102-M12 User manual

Sumitomo

Sumitomo TYPE-Q102-M12 User manual

Sumitomo Bevel BUDDYBOX 4 Series User manual

Sumitomo

Sumitomo Bevel BUDDYBOX 4 Series User manual

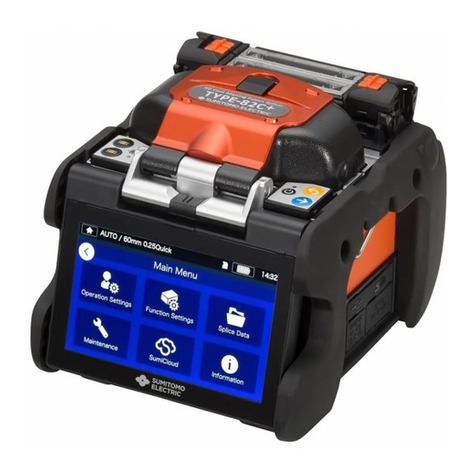
Sumitomo 82C+ User manual

Sumitomo

Sumitomo 82C+ User manual

Sumitomo Cyclo BBB5 User manual

Sumitomo

Sumitomo Cyclo BBB5 User manual

Sumitomo TYPE-72M12 User manual

Sumitomo

Sumitomo TYPE-72M12 User manual

Sumitomo Taper Grip User manual

Sumitomo

Sumitomo Taper Grip User manual

Sumitomo Hansen P4 User manual

Sumitomo

Sumitomo Hansen P4 User manual

Sumitomo ASTERO BASA User manual

Sumitomo

Sumitomo ASTERO BASA User manual

Sumitomo Cyclo BBB4 User manual

Sumitomo

Sumitomo Cyclo BBB4 User manual

Sumitomo BUDDYBOX User manual

Sumitomo

Sumitomo BUDDYBOX User manual

Sumitomo Hansen P4 User manual

Sumitomo

Sumitomo Hansen P4 User manual

Sumitomo PARAMAX 9000 Series User manual

Sumitomo

Sumitomo PARAMAX 9000 Series User manual

Popular Industrial Equipment manuals by other brands

ABB HT564962 Operation manual

ABB

ABB HT564962 Operation manual

LSLIDAR LS30MVA user manual

LSLIDAR

LSLIDAR LS30MVA user manual

ABB HT567639 Operation manual

ABB

ABB HT567639 Operation manual

Rodix FC-42-DC Plus quick start guide

Rodix

Rodix FC-42-DC Plus quick start guide

Trinity Highway QuadGuard Elite M10 Assembly manual

Trinity Highway

Trinity Highway QuadGuard Elite M10 Assembly manual

Phoenix Contact AXC 1050 PN STARTERKIT quick start guide

Phoenix Contact

Phoenix Contact AXC 1050 PN STARTERKIT quick start guide

ABB HT609755 Operation manual

ABB

ABB HT609755 Operation manual

enVerid HLR 100M installation manual

enVerid

enVerid HLR 100M installation manual

Stark 5030 Operating and maintenance manual

Stark

Stark 5030 Operating and maintenance manual

Otec ECO mini dry operating instructions

Otec

Otec ECO mini dry operating instructions

Retsch RS 300 manual

Retsch

Retsch RS 300 manual

Pepperl+Fuchs PGV100RS-F200-B16-1,5M manual

Pepperl+Fuchs

Pepperl+Fuchs PGV100RS-F200-B16-1,5M manual

Planeta SA 250 Installation and operation manual

Planeta

Planeta SA 250 Installation and operation manual

Yamaha SIGMA-G5SII Service information

Yamaha

Yamaha SIGMA-G5SII Service information

Schmalz SPZ operating manual

Schmalz

Schmalz SPZ operating manual

Dover DESTACO RFE Series Service manual

Dover

Dover DESTACO RFE Series Service manual

ABB HT611125 Operation manual

ABB

ABB HT611125 Operation manual

Super SJC Operation manual

Super

Super SJC Operation manual

manuals.online logo
manuals.online logoBrands
  • About & Mission
  • Contact us
  • Privacy Policy
  • Terms and Conditions

Copyright 2025 Manuals.Online. All Rights Reserved.