SET
UP & USE
(continued):
To
Use the Video Monitor in Portable Mode:
For
use
in portable mode, the Monitor requires 1
3.7V
LITHIUM-ION
rechargeable battery (included).
Tips:
• Before using Monitor in portable mode (battery),
be
sure to
charge battery
12-16
hours.
•
To
charge battery, plug the larger AC Adapter into the
Monitor's AC Adapter
Port.
Plug
the other end into a standard
electrical outlet.
• After initial
12-16
hour charge, to achieve optimal battery life,
charge battery overnight and unplug all
day
during
use
until low
batteryindicator light comes on.
• When battery
is
low, the Power On
LED
will illuminate amber,
indicating that the battery needs to be recharged.
• Note: Only charge batterywhen lowindicator light comes on.
Constant recharging of your batterybefore low battery indicator
light comes on will decrease the life of your batteries.
• Remove batteryduring long periods of non-use.
•
If
battery
is
exhausted, remove immediatelyfrom the Monitor.
• Properly dispose of exhausted battery.
Battery Installation:
Note:
This
step
is
only needed
if
replacing battery.
1.
Remove belt clip
by
pulling clip out of the hole on one side
of the monitor and then on the other side (Figure
E).
2.
Locate the batterycompartment
door
on
back of monitor.
3.
Slide open batterydoorand insert
battery.
Ensure
correct connection
(Figure
F).
Slide batterydoor back
in
place.
4.
Insert belt clip back into holes
on
each side of monitor.
Belt Clip:
For
convenience and portability, you can
clip the Monitorto your belt or waistband
after a batteryhas been installed.
Kickstand:
The
Monitor has a built-in footrest for tabletop
convenience. Simply flip out footrest and place
the Monitor on a stable, level surface (Figure G).
6
SET
UP & USE
(continued):
Synching Monitor and
CAMERAS
[I
Using Menu Button:
The
Monitor and Cameras are synched
at
the factory
for privacy reasons. If the Monitor and Cameras are
not synching with each other for any reason, please
sync them as described below.
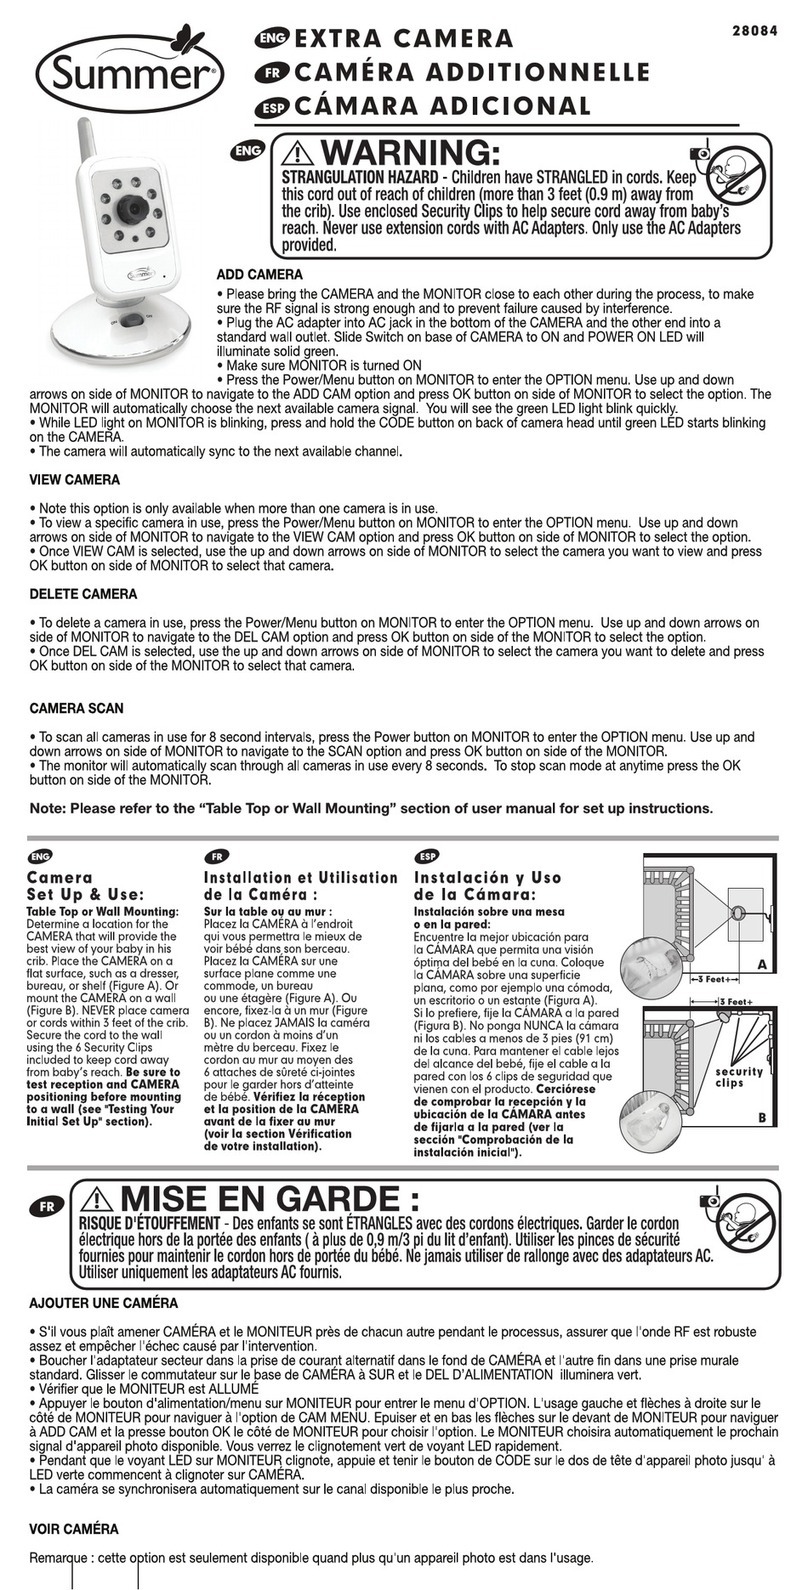
Step 1: Move the Monitorto the same area as the
Camera. Making sure Camera
is
off and Monitor
is
on, press the
"MENU
[J
" button once to call up the
SYNC
icon.
Step 2:
Press
"POWER
O" button once and "CONFIRM" will appear.
Press
"POWER
O " button again to show syncing icon and then turn
Camera
on.
Step 3:
You
should then see a picture from the Camera
on
the
Monitor.
Step 4: If this
is
unsuccessful, you should repeat steps above making
sure
the Camera and Monitorare
close
enough to each other for
synching
and make
sure
the camera
is
off
until
the end of
Step
2.
ADDING
ADDITIONAL
CAMERA:
Note:
This
product can accept up to four cameras.
To
order an
additional camera (#28310), please contact our Customer
Service Department
by
phone
at
1-800-268-6237
or via e-mail
at
+44 (0)208
420
4429
TIPS FOR
IMPROVING
RECEPTION:
• Position
the
Monitor
closer
to
the
CAMERA
if
necessary.
•
Move
Monitor
away
from
other
monitors,
cordless
phones,
walkie-talkies,
etc.;
moving
even
slightly
could
greatly
improve
reception.
• If
you
hear
a
feedback
or
squealing
noise,
move
the
CAMERA
and
the
Monitor
further
away
from
each
other.
7

