GSM Activate ECO-BEAM User manual

Page 1
2G & 3G
GSM Wireless Beam Alarm
www.gsm-activate.co.uk
MODEL ECO - BEAM

Page 2
Product Information
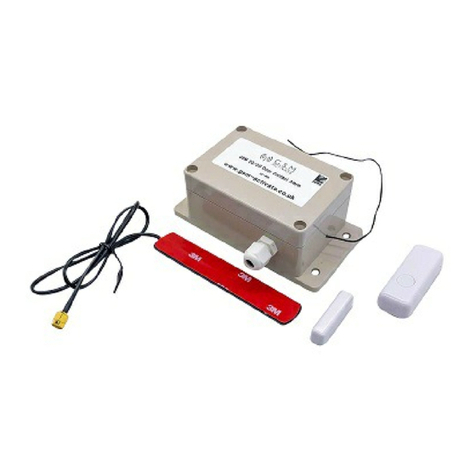
Our 2G/3G GSM Wireless Beam Alarm is a standalone alarm system suitable for indoor
and outside use.
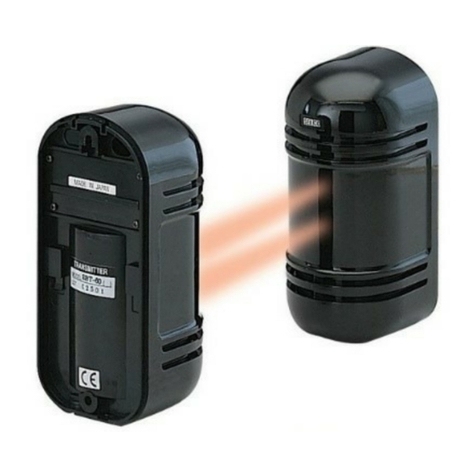
It will alert you using GSM technology by sending a text message and/or a phone call to
your mobile phone or landline when the invisible infrared beams have been broken.
The unit is also enclosed in an IP65 rated box which means it is perfectly weathered for
outside installation and has also passed testing in high heats and below freezing
temperatures.
GSM Module Specification
● GSM Frequency: Quadband freq 850/900/1800/1900/ 3G Model 2100 Mhz
● Power Supply Voltage: 9 - 24 volts DC - 1 Amp Min
● Current used in standby mode: 60mA Max
● IP65 Enclosure rating for outside installation
● 2 Amp Relay Output
● Micro 2G or 3G Simcard
● No land line required
● Dimensions - L100 x W68 x H50mm
● Dimensions PCB Only - L95 x W67mm
● Sim Active Function
● Operating Temperature: -10….+40°C
● Programmed by Text / SMS message
● Text to test signal strength
● Wireless Range - 20 Metres
Beam Specification
● Alert Distance: 100 metre outdoors, 300 metre inside
● Power Consumption: 65mA Max
● Detection Mode: 2 beams blocked simultaneously
● Optical Source: Infrared Digital Pulse Beam

Page 3
Instructions
IMPORTANT - PLEASE READ
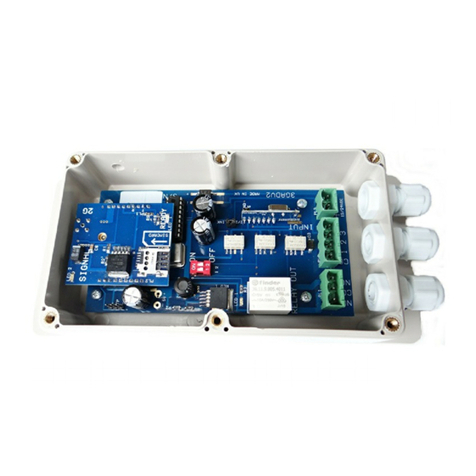
Please make sure you disconnect the power when you fit the simcard the place the
simcard with the clipped corner facing inwards.
Please see picture above.
Signal Strength
To help make sure you place the unit in a suitable position you can text the unit to see
how much signal strength the detector is receiving by sending the text command
#SIGNAL#
The detector will perform a test on the signal strength.
You will receive a text telling you a signal strength score of between 0 up to 30. We
strongly recommend that you place the unit where you can receive a signal strength of at
least 10. Anything with a score of less than 10 will make the unit will be unreliable

Page 4
How to programme contact numbers
After inserting your simcard in to the GSM module turn the unit on and wait until you see
the GREEN LED is on. This will indicate that you have a mobile signal and the unit is
ready for use.
You will now need to send a text message wit the contact numbers, (maximum 3 contact
numbers).
NOTE - To avoid confusion we have colour coded the (HASH) and the (EQUALS)
Symbols. Additionally, where we have put a ‘phone number’ in the manual this
will need to be your own contact number.
Example: (HASH) (1,2 or 3) (EQUALS) (phone number) (HASH)
#1=07123456789# Then send this as a text message for contact no: 1
#2=07123456789# Then send this as a text message for contact no: 2
#3=07123456789# Then send this as a text message for contact no: 3
If you wish to cancel a number please follow this example
Example: (HASH) (1,2 or 3) (EQUALS) (DELETE) (HASH)
#1=DELETE# Send this as a text to the simcard number in your unit.
PLEASE NOTE
Please only send one text message at a time and wait for the GSM detector to send back
the text acknowledgement ‘number stored’ before you try to add another number.
Below is a note pad to help you remember the numbers that you have saved to your unit in
the event you need to modify or delete them in the future.
#1=_ _ _ _ _ _ _ _ _ _ _ _ _ _ _ _ _ _ _ _ _ _ _ _#
#2=_ _ _ _ _ _ _ _ _ _ _ _ _ _ _ _ _ _ _ _ _ _ _ _#
#3=_ _ _ _ _ _ _ _ _ _ _ _ _ _ _ _ _ _ _ _ _ _ _ _#

Page 5
How to program the SMS text message
You can now change the alarm message from “input detected” to one of your choice.
To change the message send the text command as follows
#MESS=YOUR MESSAGE#
The detector will reply with the text message - “MESSAGE STORED”
PLEASE NOTE
You can only use a maximum of 19 characters including spaces for your customised
Message.
Telephone Call Alerts
The Wireless Beam Alarm can be programmed to send you a call after each text alarm has
been sent.
You will receive approximately three ring tones. The unit will then hang up. This is to avoid
any call charges being incurred. To set the alerts to ON please send the text message
#CALL=ON#
The unit will reply back with “CALL ON”
To disarm the alerts please send the text message
#CALL=OFF#
If the call function has been set to ON you will receive a text message and shortly after a
phone call.

Installation of the Infrared Beams
PLEASE NOTE
The transmitter and receiver will work from a distance of 100 metres outside and 300
metres inside. Additionally, the receiver beam should be within 20 metres of the GSM
detector.
1. Find a suitable location for the transmitter and receiver and ensure the sensors are
mounted on a stable structure.
2. When installing the receiver take care to position the receiver out of direct sunlight as
this will reduce the sensitivity.
3. Ensure the sensors line of sight is free form false alarm sources such as bushes, trees
etc. Pay attention to these as they may change seasonally.
4. It is important to have the correct Power Supply to operate this device successfully.
You will need a 12 volt 2 Amp supply or 12 volt battery. You can purchase both of
these from our website www.gsm-activate.co.uk
5. Now you have the transmitter and receiver fitted to the location you can carry out
alignment. You will now need to turn ON the power.
6. There are two adjustments, left and right, and up and down. The photo below should
give you the indication of how to do this.
7. The voltage adjustment is only available on the receiver unit.
8. Correct alignment is indicated by a GREEN LED turning on. Once this has been seen
you can carry out a walk test.
By interrupting the infrared beam the RED alarm light on the receiver should come on for
approximately 4 seconds.
If this is the case then the unit is now working properly.
Page 6

How to use the 2G/3G Beam Alarm
Once you have positioned the beams, installed the simcard and programmed the
numbers the system is ready to use.
The GSM Beam Alarm is armed in two ways, you can arm it by text message command or
you can arm it using the key fob provided. In both scenarios, you need to arm the alarm
before the system can detect movement and send out an alarm alert to your phone.
Arm the alarm by text message
To set the alarm to ON you will need to send the text message
#ALARM=ON# This will activate the alarm
#ALARM=OFF# This will deactivate the alarm
It is important to remember that once the alarm has been triggered you will need to reset
the alarm by sending the text command #ALARM=ON# to reactivate the alarm or activate it
using the key fob.
Arm the alarm using the key fob
The key fob works best when used with the siren provided as you will get the audible alert
whenever you arm or disarm the alarm.
Press button A on the key ob Arms the alarm and siren will beep twice
Press button B on the key fob Disarms the alarm and the siren will beep twice
Again it is important to remember that when the alarm has been triggered you will need to
reset the alarm using either the text command (above) or by using the fey fob.
How to use the Relay Output
The relay has been programmed to trigger the siren for 60 seconds in the event of an
alarm activation. Once the text message and call has been received you can stop the siren
sounding by pressing B on the key fob.
If you do not require the siren to sound in the event of an alarm activation but require it so
that you hear the key fob activation you can turn the siren off by Dipswitch 1.
Dipswitch 1 ON = Siren is turned ON
Dipswitch 2 OFF = Siren turned OFF
If you require the ability for the relay to be independently activated like older versions of
this alarm, please contact us on 01798861346
Page 7

Page 8
Pairing the Wireless Sensors
To connect the wireless sensors you will need to go through a process so that the devices
are matched to the receiver on the GSM module.
1. Switch ON the GSM module
2. Switch ON the beams and allow them to warm up for 15 seconds.
3. Hold down the pairing button on the RF module for 3 seconds (refer to figure 1)
4. Trigger the beams by placing your hand between the beams.
5. The RF module has a RED LED which will flash when pairing is complete.
6. Dipswitch 1 controls siren ON or OFF
7. Dipswitch 2 controls 2G and 3G
PLEASE NOTE
The transmitter and receiver will work from a distance of 100 metres outside and 300
metres inside. Additionally, the receiver beam should be within 20 metres of the GSM
detector.

Page 9
Quick Reference
Factory Reset
To reset the unit back to factory settings you will need to send a text message
#RESET# The GREEN ready LED will flash eight times.
WARNING - This will reset all your parameters. Please only send a reset command when
Necessary as it will clear all of your programmed numbers.
Typical Application of this Product
● Security alarm system applications ● Supervision and monitoring alarm systems
● Automatic monitoring system ● Vending machines security protection
● Pumping stations; tanks, oil or water levels ● Buildings and real estate
● Weather stations ● River monitoring and flood control ● Fridges/Fish Tanks
● Farming equipment and security
Dipswitch Settings
Dipswitch 1 - ON = Siren ON
OFF = Siren OFF
Dipswitch 2 - ON = 3G
OFF = 2G
For more technical support please browse the FAQ’s on our website www.gsm-
activate.co.uk
Alternatively email our technical support team at [email protected] and we will
aim to get back to you within 24 hours Monday- Friday.
23/10/19 - AD
Table of contents
Other GSM Activate Security System manuals
GSM Activate
GSM Activate 2G RF PIR User manual

GSM Activate
GSM Activate GSM PT100 User manual

GSM Activate
GSM Activate GSM 4G AUTO DIALLER PLUS User manual

GSM Activate
GSM Activate ECO-BEAM User manual

GSM Activate
GSM Activate 2G RF BEAM User manual

GSM Activate
GSM Activate Alarm Pro 20 User manual

GSM Activate
GSM Activate ADRV11 User manual

GSM Activate
GSM Activate ECO Series User manual

GSM Activate
GSM Activate e-CO Series User manual

GSM Activate
GSM Activate 3G RF DOOR User manual