Taiwan Main Orthopaedic
Biotechnology Co., Ltd.
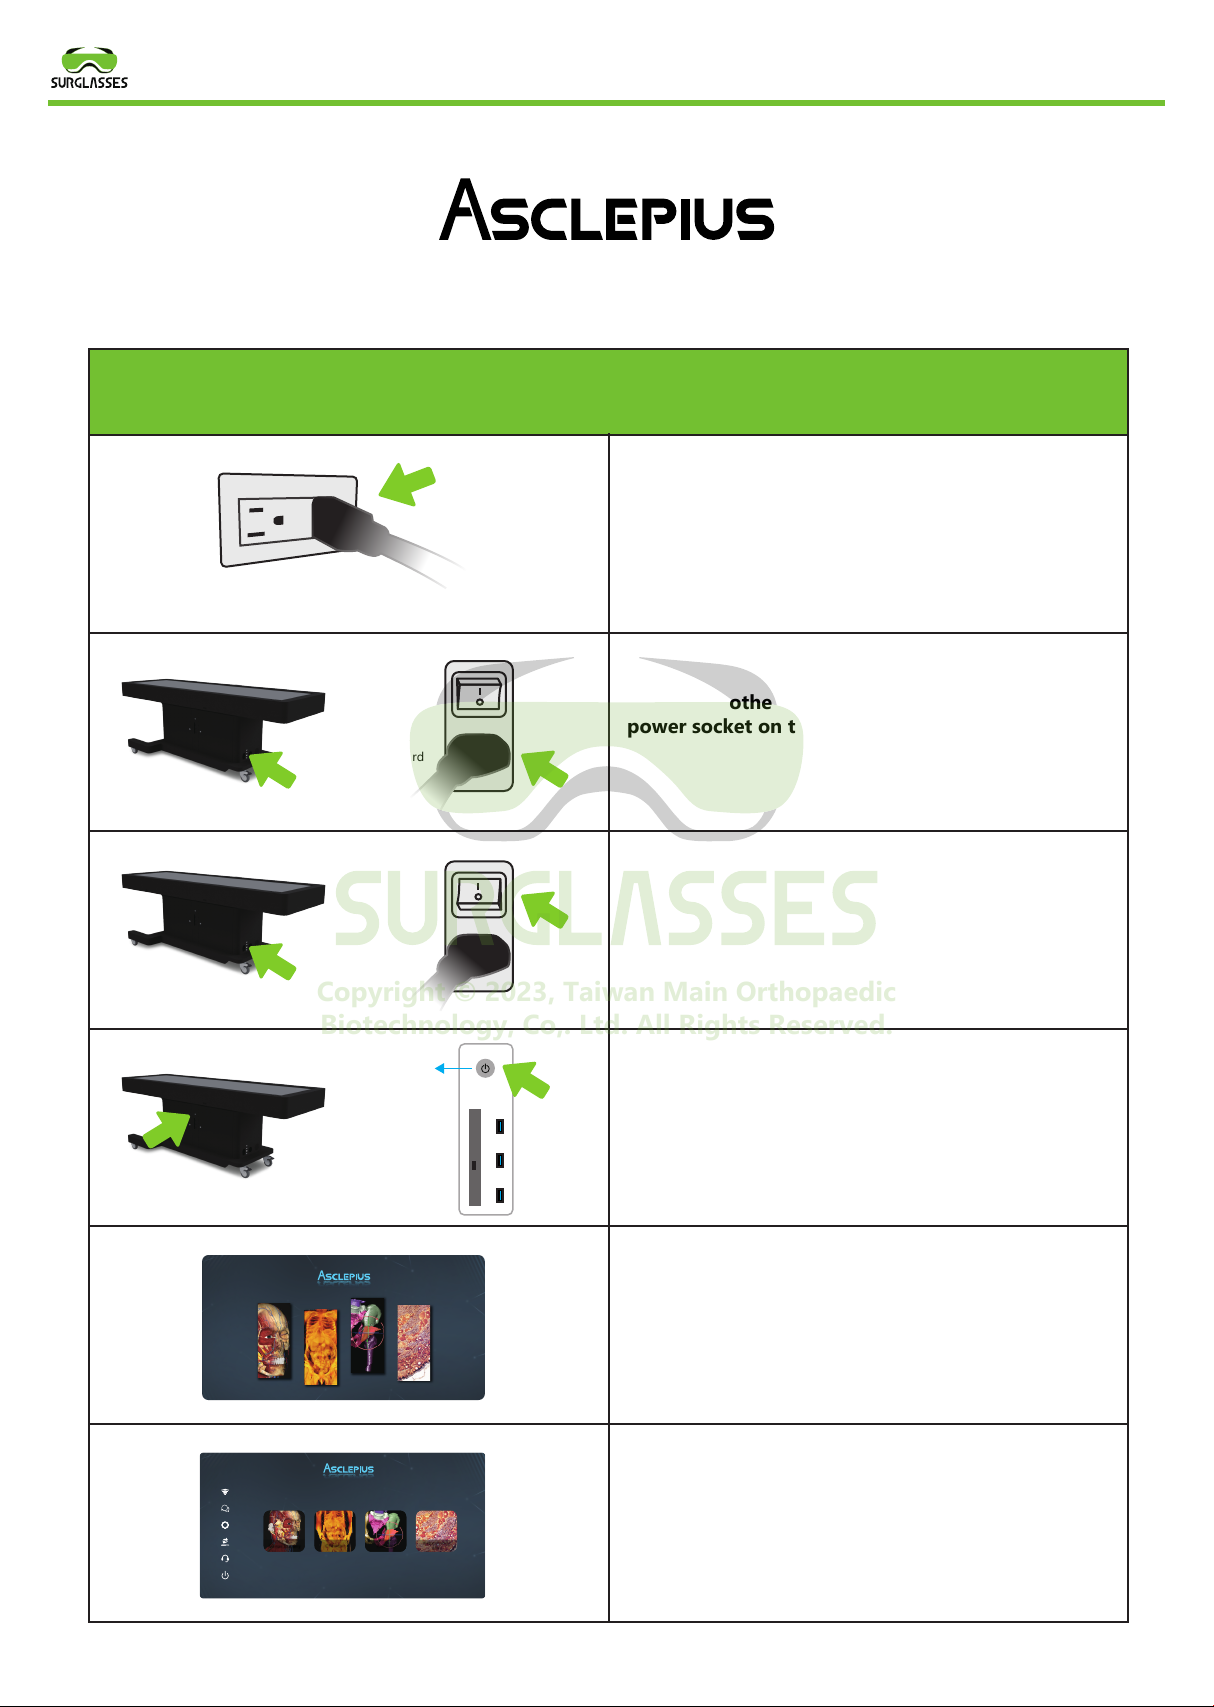
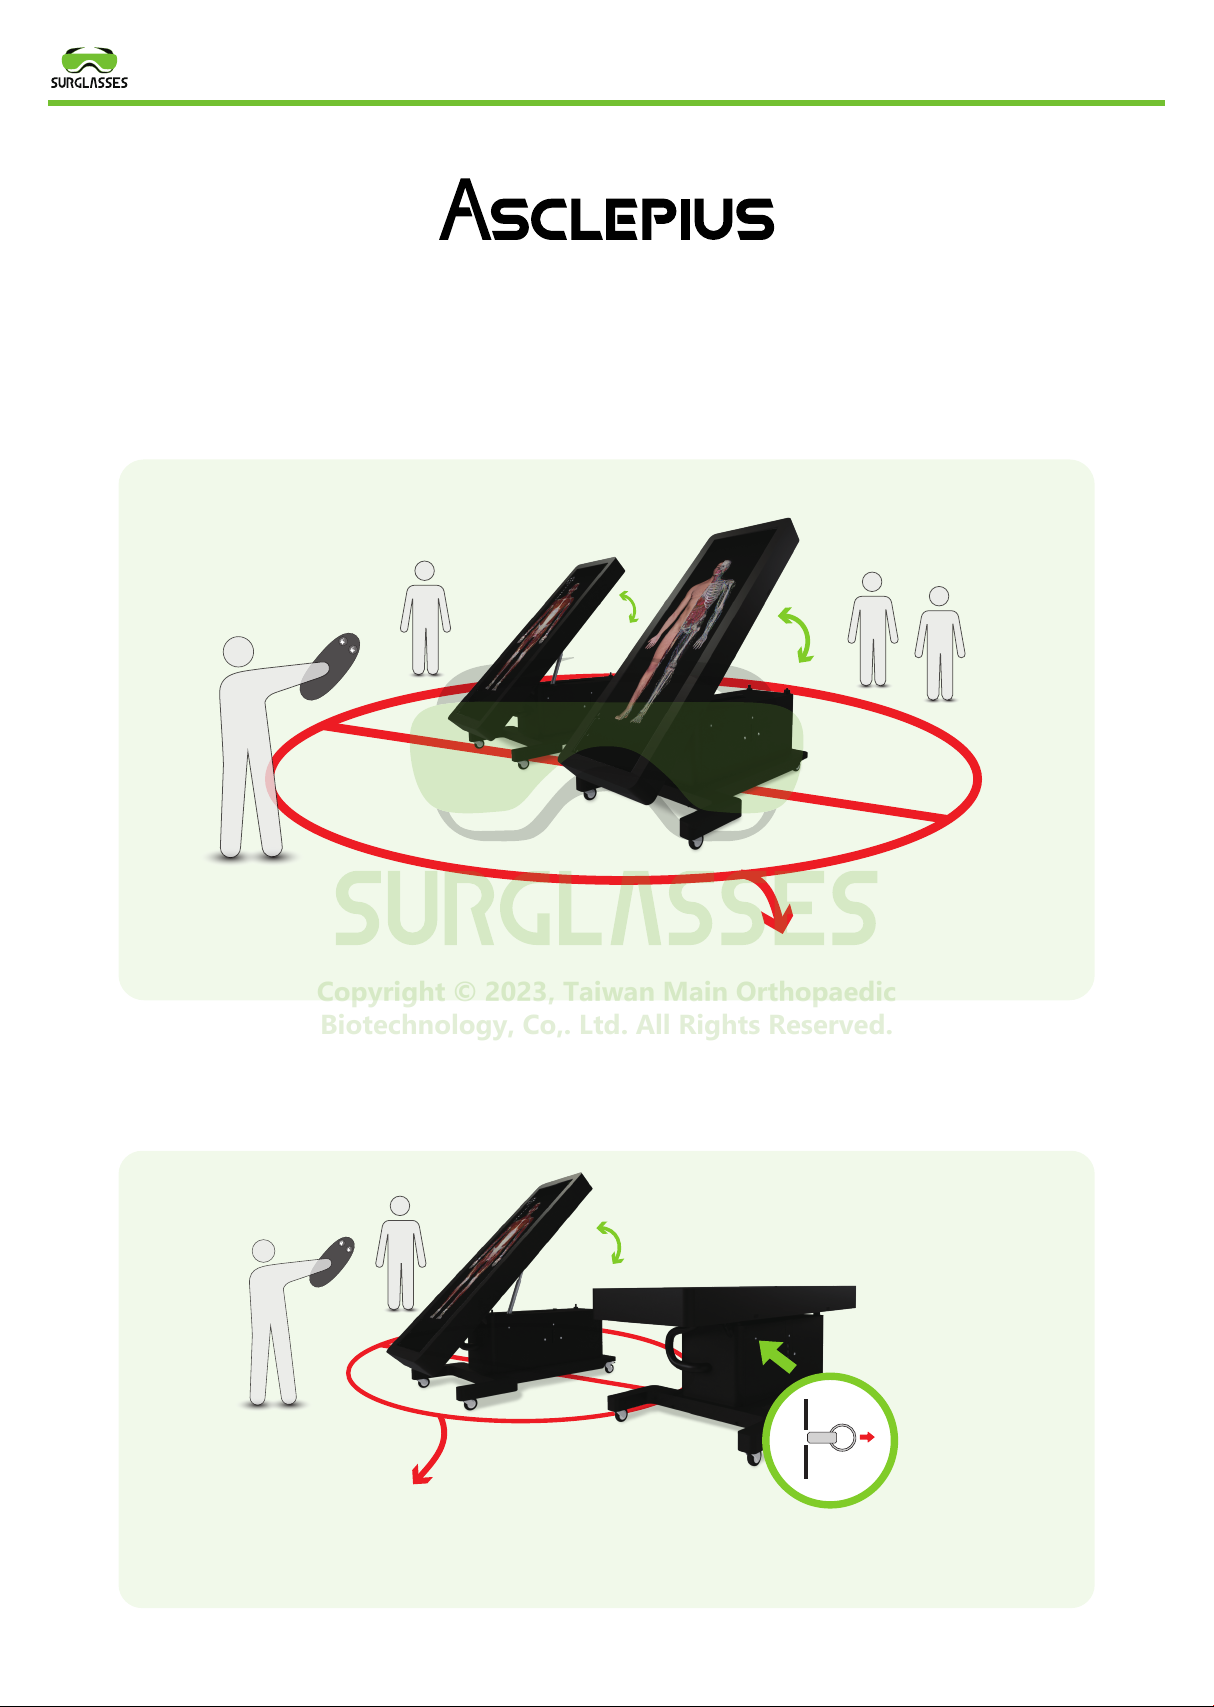
The first step
First complete the boot process and wait for the
dissection table screen to appear before proceed-
ing to the first step (Figure 1). After completing
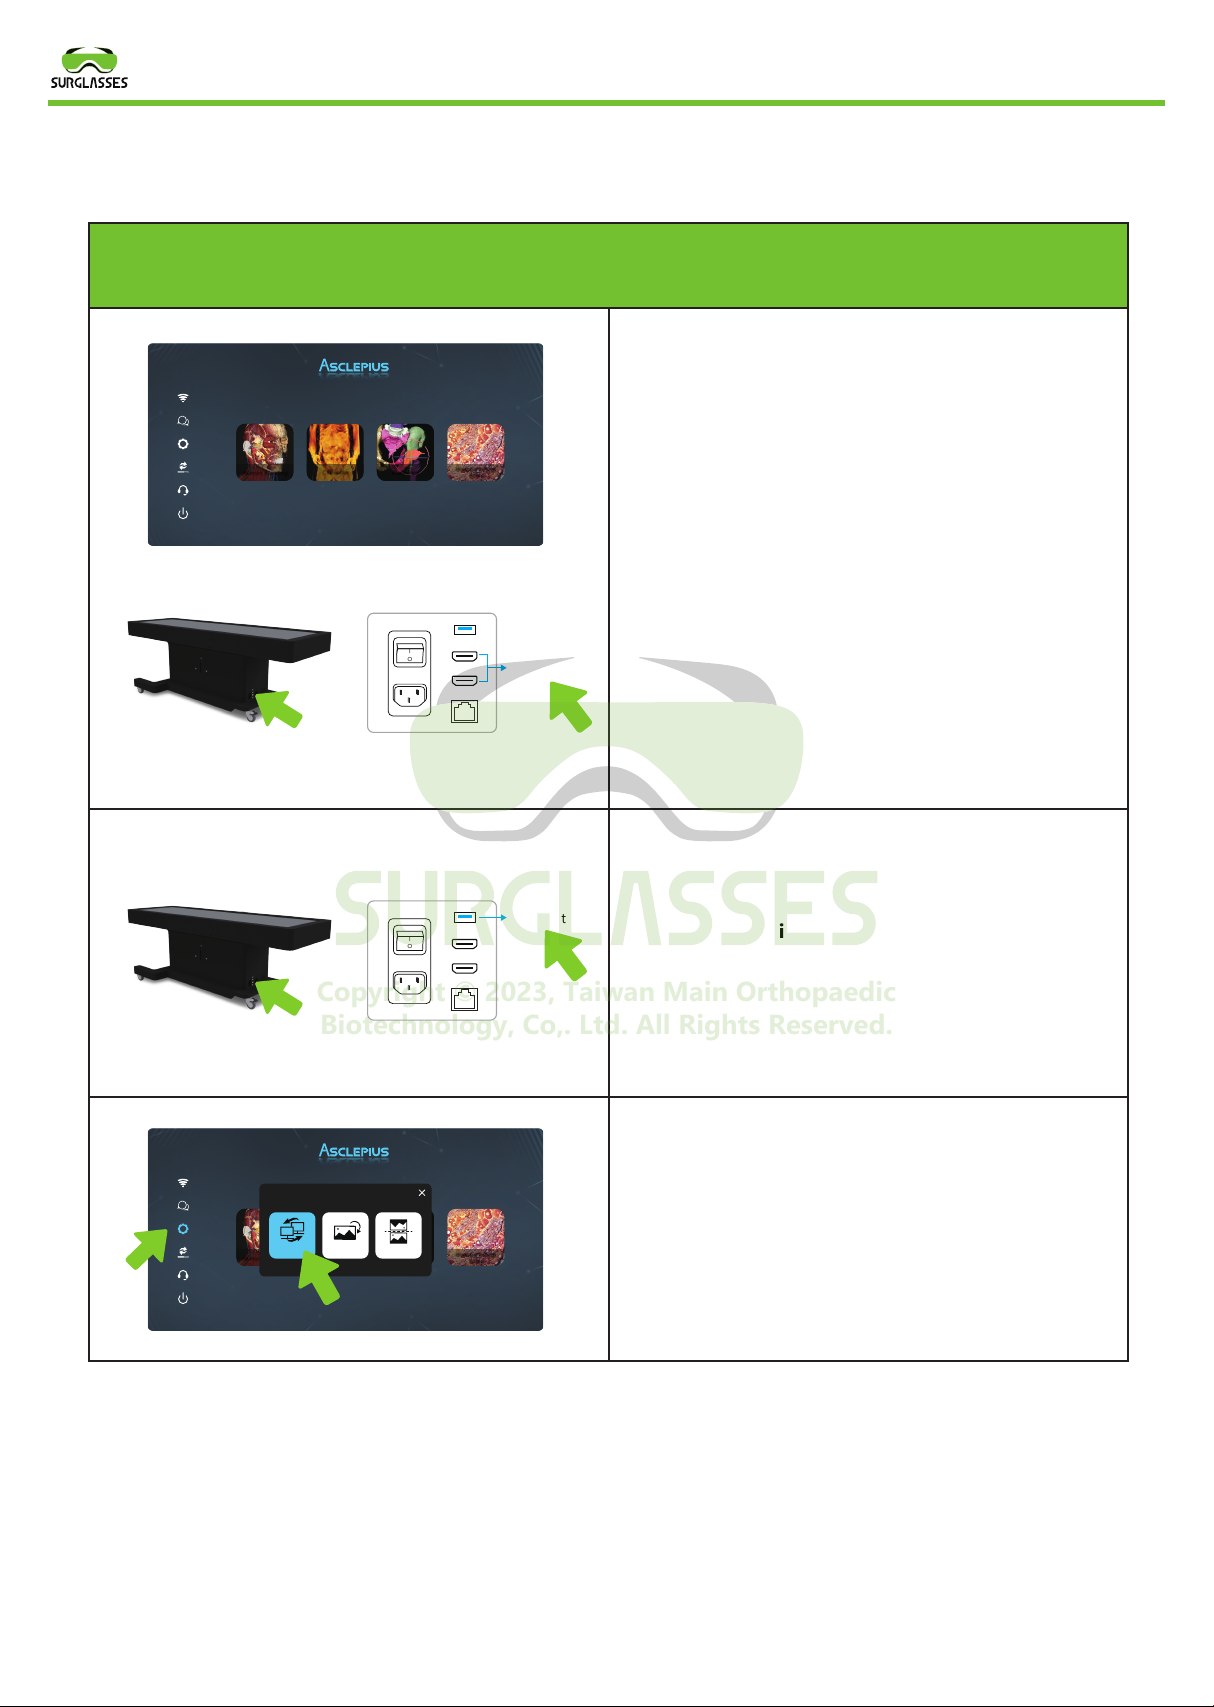
the above steps, there is an HDMI jack on the side
of the dissection table (Figure 2), and then the
HDMI cable Plug one end into the HDMI jack of
the dissection table, and finally plug the other
end of the HDMI cable into the screen signal hole
you want to share.
The second step(If the sharing screen is not a
touch screen, you can skip this step)
There is a USB input on the side of the dissection
table. First plug one end of the USB cable into the
USB socket of the dissection table, and then plug
the other end of the USB cable into the USB socket
of the sharing screen.
The third step
Click the SCREEN SYNCHRONIZATION screen
synchronization button on the dissection table
screen, wait a few seconds to share the screen to
the big screen, and complete the synchronization
screen.
Connect screen synchronization process teaching
O
1
HDMI Port
O
1
USB Port
Copyright © 2018, Taiwan Main Orthopaedic Biotechnology, Co,. Ltd. All Rights Reserved.
Figure 1
Figure 2
Abc
RadiologyCTRender
Human Anatomy
Histopathology
Atlas
Abc
RadiologyCTRender
Human Anatomy
Histopathology
Atlas
Screen
Synchronization
Vertical / Horizontal Reverse
Copyright © 2023, Taiwan Main Orthopaedic
Biotechnology, Co,. Ltd. All Rights Reserved.