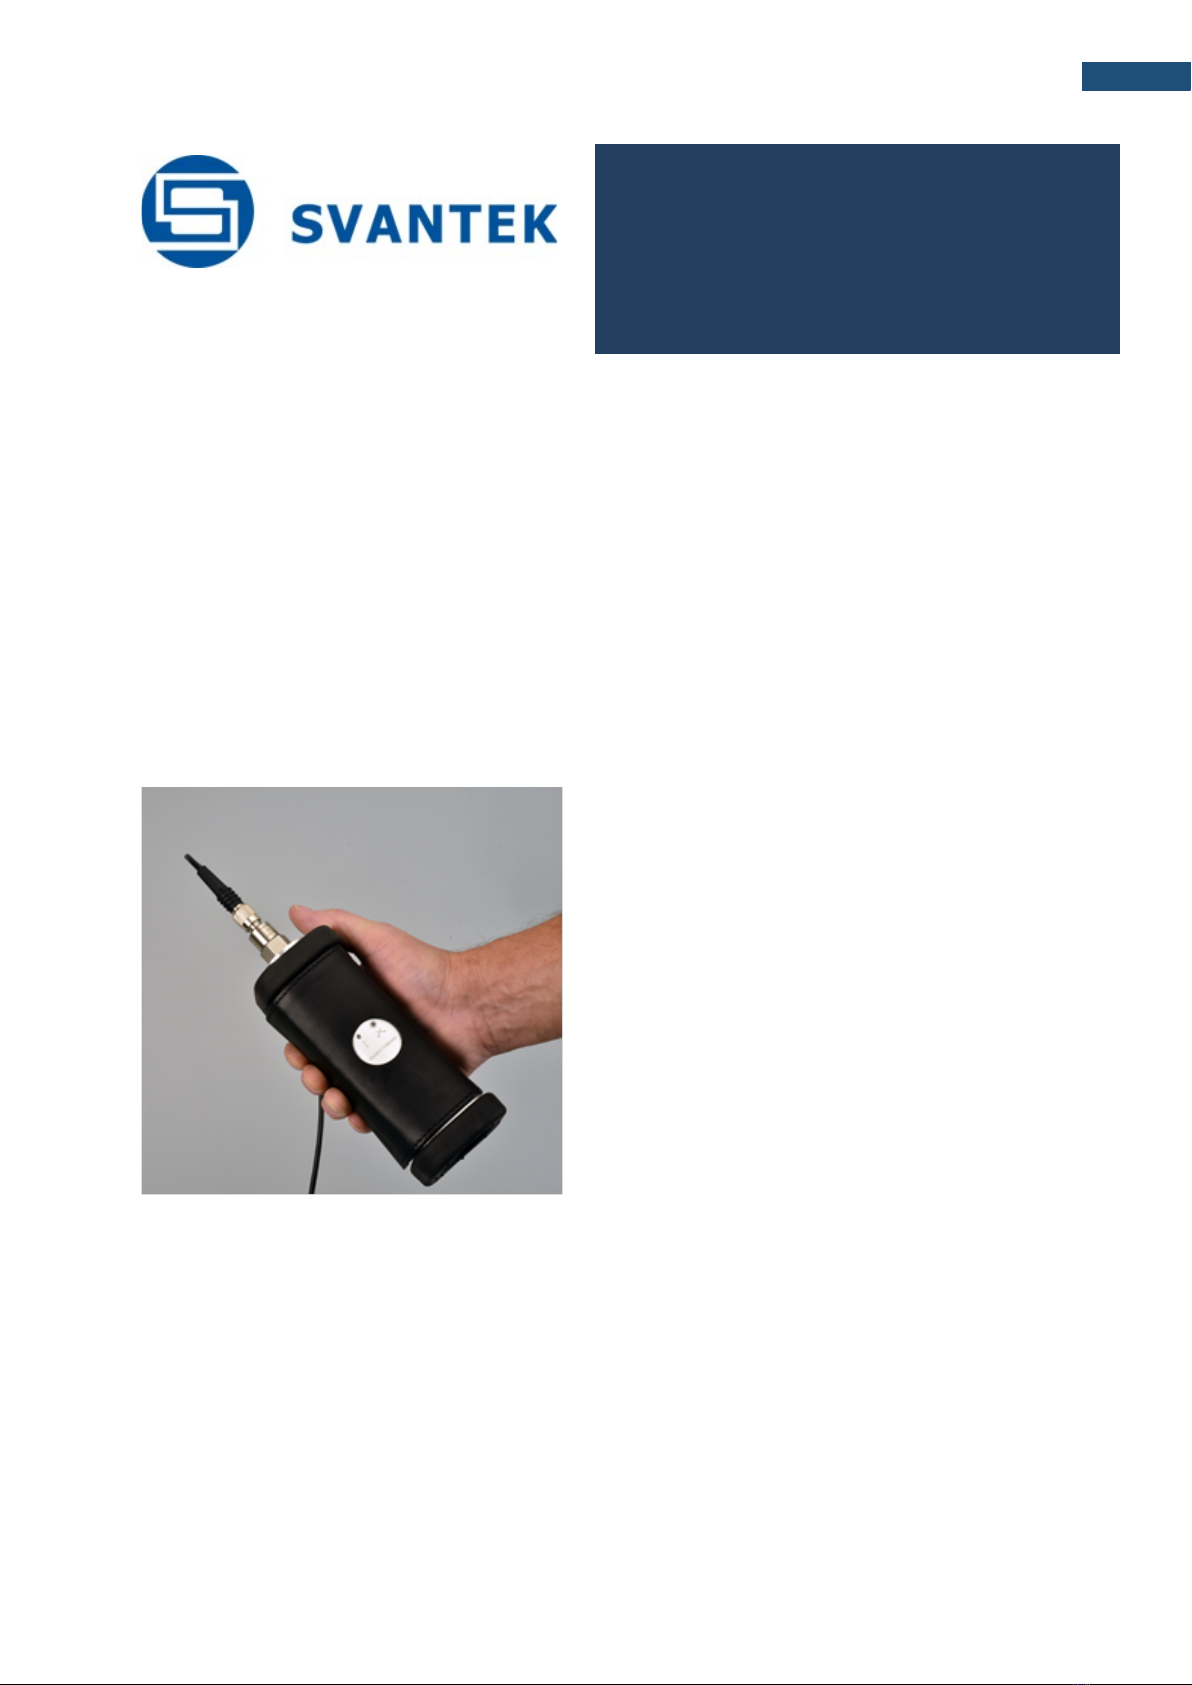
Svantek SV 110 User manual

SV110 user's manual
1
USER MANUAL
SV 110
PORTABLE VIBRATION
CALIBRATOR
Warsaw, August 2016
Copyright © 2015 SVANTEK. All rights reserved.

SV110 user's manual
2
Notice: Battery power indicator - To improve accuracy of remaining battery life
indicator, run the instrument until it is fully discharged; then proceed with a full charge via the mini
USB port. The procedure is recommended before first use. Repeat this procedure every few months
of use to maintain more accurate current battery condition indication.
Notice: On account of continuous product improvement SVANTEK reserves the right
to make changes to product specifications without notice. To download the most up to date user's
manual please visit our web site at www.svantek.com.
This user’s manual presents the firmware revision named 1.02.1 (see the Unit Label review to check
version details).
The succeeding software revisions (marked with the higher numbers) can change the view of some
displays presented in the text of the manual.
WEEE Notice: Do not throw the device away with the unsorted municipal waste at the end
of its life. Instead, hand it in at an official collection point for recycling. By doing this you will help to
preserve the environment.
Trademarks
Microsoft and Windows are registered trademarks of Microsoft Corporation
Copyright © 2015, SVANTEK sp. z o.o.
All rights reserved. No part of this publication may be reproduced or distributed in any form,
or by any means, without prior written consent from SVANTEK, Warsaw, Poland

SV110 user's manual
3
CONTENTS
1. General safety summary ..................................................................................................................... 4
2. Calibration .......................................................................................................................................... 4
3. Accuracy of calibration ........................................................................................................................ 5
4. SV110 model information ................................................................................................................... 5
5. Unpacking and Inspecting the package contents ................................................................................ 6
6. Getting started .................................................................................................................................... 7
7. Manual control of the calibrator ......................................................................................................... 8
7.1. Turning on/off .................................................................................................................................. 8
7.2. Menu content ................................................................................................................................... 9
8. Calibration ......................................................................................................................................... 11
9. General Care and Cleaning ................................................................................................................ 13
10. Charging ........................................................................................................................................... 14
11. Technical data .................................................................................................................................. 16
12. Recalibration of SV110 .................................................................................................................... 14
Document history .................................................................................................................................. 17

SV110 user's manual
4
1. General safety summary
Review the following safety precautions to avoid injury and prevent from damaging
this product or other products connected with it. To avoid potential hazards, use this
product only as specified. Qualified personnel should only perform the service
procedures.
Warnings, precautions and maintenance:
Use a proper AC/DC adapter, specified for this product and certified for the country
of its use.
Keep the product’s surfaces clean and dry.
Even when the device is not in use it is recommended to charge the battery once a
month to keep it in good state
It is recommended to carry out a technical inspection and recalibration of the device
every 12 months to ensure accurate calibration level
Recalibration can be made by the calibration laboratory. If there is no possibility to
recalibrate the device by calibration laboratory the device should be send to the
manufacturer.
All maintenance work and repairs can only be done by the personnel trained by the
manufacturer.
Handle with care
Safety terms and symbols:
Symbol Symbol meaning
Do not throw into standard municipal waste containers. The user is obliged to
deliver used equipment to the manufacturer or to the recycling collection
point.
This product can be recycled
This product has met EU consumer safety, health or environmental
requirements
2. Calibration
One of the fundamental questions, that are most frequently asked while taking a
measurement, is whether its result is accurate. Proceeding, with a measurement
without having a positive answer to this question, may result in obtaining data of no
practical use and wasting our time. However, we may easily obtain the answer by
performing a calibration of the vibration level meter using vibration calibrator. This
device should be used before every set of measurements.
The vibration calibrator is a device, which produces the vibration of the defined levels
and frequency. It allows to calibrate the vibration meter in comparative way.

SV110 user's manual
5
Calibration procedure is also the best way for the complete measuring system
(Meter, Cable and Transducer connected together) check. This is an essential action
for the reliable measurements performed in the field!
3. Accuracy of calibration
Each measurement performed by any measurement device is burdened with an
error. Result obtained from such measurement is only an estimate of the real value
of the measured quantity. Hence, the purpose of calibration is to limit this inevitable
error to a certain acceptable level. Maximum absolute value of the error of the
generated vibration signals is called the tolerance and is strictly defined by the
standard ISO8041:2005.
4. SV110 model information
The SV 110 is a hand-held vibration calibrator designed for
verification of machine sensors as well as on-site checks of
human vibration accelerometers in accordance to ISO
8041:2005.
The two standard frequencies 79.58 and 159.2 Hz brings
opportunity to calibrate wide range of an existing
transducers with maximum load of 0.3 kg.
Depending on the selected frequency, the user can select
the level of the calibration from 1 m/s2 to 10 m/s2.
Because of its own internal rechargeable battery, it is a
truly mobile and flexible device designed to use either in a
laboratory or during fieldwork.
The light weight of the calibrator allows to perform
transducers calibration in the field conditions keeping it in
hands.
Two diodes indicate the external vertical and horizontal
vibration that can affect the tolerances specified by the
ISO8041:2005.
Accelerometers are conveniently attached using either a
mounting stud, a mounting disc or a dedicated adapters.
The calibrator has built-in rechargeable batteries that
power it for 12 hours of continuous operation*.
The calibrator has a robust casing with the leather cover for
hand-arm in field use.
*) In case of 79.58 Hz frequency and accelerometer weight less than 200g. For other frequency and/or
accelerometer weight continuous operation time will be shorter.

SV110 user's manual
6
5. Unpacking and Inspecting the package contents
If the device has been kept or transported in low temperature (below 0 °C), it is
recommended to leave it for a few hours in room temperature before connecting it
to the power supply. If any steam condensation appears, it is recommended not to
connect the device to the mains electricity for 4 to 8 hours until the exterior surface
is dry.
Despite careful packing, the risk of the device damage cannot be entirely eliminated.
Upon delivery, please make sure that the device is not damaged and verify that you
received the ordered equipment and optional accessories (if ordered). In case of any
problems, please contact an authorized Svantek representative, the service staff or
the manufacturer directly.
Before the first use of the device, in order to charge the battery completely, connect
SA 54 AC/DC adapter plug to SV110 USB socket and then connect it to electrical
mains.
The complete set includes the following items:
SV 110 – Portable Vibration Calibrator
SA 54 – Charger/power supply for SV 110
SC 56 - mini USB 2.0 cable
SA 81 – leather cover
CD with user manual
Built-in rechargeable batteries
Optional adapters:
SA 105A - adapter for SV 105A (option)
SA 155 - adapter for SV150 and SV151 (option)
SA 40 - adapter for SV 207A, Dytran 3233A, SV 39A, Dytran 3143M1 (option)
SA 44 - adapter for SV 50, Dytran 3023M2 (option)

SV110 user's manual
7
6. Getting started
The following figures show the SV 110 controls and ports:
SV110 vibration calibrator
1.Shaker; 2.Rubber covers; 3.Keyboard; 4.Aluminum casing; 5.Display; 6.USB port;
7.External vibration diodes.
1
2
3
4
5
6
1
7

SV110 user's manual
8
Following the requirements of ISO 8041, the calibrator’s built-in reference
accelerometer measures the cross-axis (transverse) vibrations to detect any
interference to the calibration signal. Faults caused by transverse vibrations are
indicated by two LEDS on the calibrator’s housing. This unique solution ensures
stability of both the calibration level & frequency, independent from the mass of the
test object.
7. Manual control of the calibrator
The Instrument’s keypad is designed to be minimal, but still highly ergonomic
and easy to use providing effective operational capabilities. Thanks to that, the
number of the control push-buttons of the instrument is reduced to only three.
SV110 keyboard
1.Vibrations level button; 2.Start/Stop button; 3. Charge diode; 4.Display box;
5.Vibration frequency button; 6. Battery diode; 7. USB port.
General keys functions:
Start/stop the calibrator and the shaker with the <Start/Stop> key
Enter/escape the Menu mode with simultaneously pressing <Level> and <Freq.> keys
Scroll the Menu lists with the <Level> and <Freq.>
Open the sub-menu with the <Start/Stop> key pressed at the selected position
Increase/decrease the value of signal level, frequency and the calibration factor.
7.1. Turning on/off
TURNING ON: To switch the power on the operator should hold the <Start/Stop> key
for a couple of seconds. The instrument switches on and goes the self-test routine
1
2
4
5
6
3
7

SV110 user's manual
9
(during this time the manufacturer's logo, the name of the instrument and firmware
version is displayed).
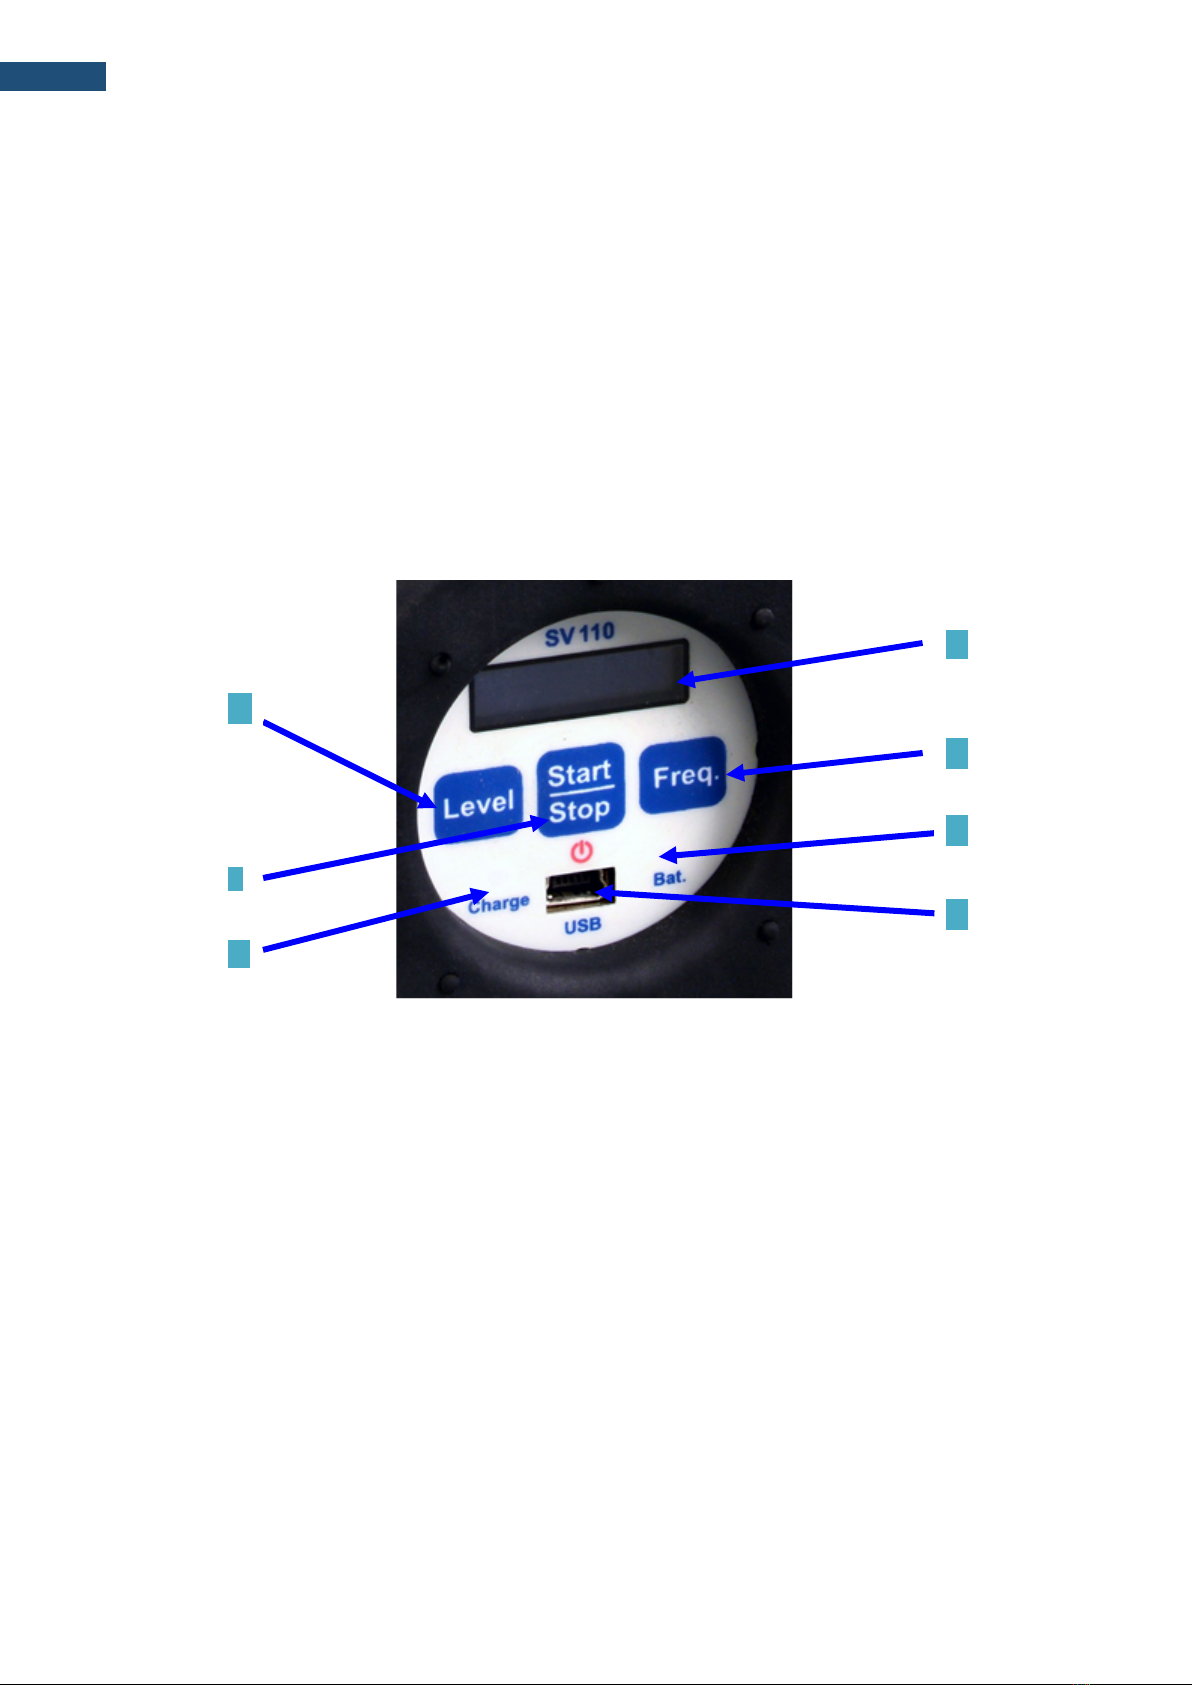
In the ready to operate mode the SV 110 displays the
amplitude and frequency of the shaker:
TURNING OFF: To shut down the unit the operator should hold the <Start/Stop> key
for a couple of seconds during which a countdown (“Shutting down” 3… 2… 1… ) is
displayed. Thus, the SV 110 gives you time to decide if you really want to turn off the
instrument. If you release the key too early, the SV 110 returns to the last presented
VIEW mode.
Notice: If the battery capacity is low SV 110 will show a
warning screen and signal it with red or yellow diode lights.
“Low Battery!” or “Warning! Low Battery!” messages appear
when the shaker is stopped or is working accordingly.
7.2. Menu content
The menu is simply operated by three push-buttons and small OLED display. The
Menu list consists of six positions: Sensor Type, Units, Frequency Units, Calibration,
Battery, USB charging and Unit Label.
To enter the Menu mode the user should press <Level>
and <Freq.> keys simultaneously. The <Level> and <Freq.>
keys enable the user To scroll the Menu list down and up.
To open the sub-menu the user should press
<Start/Stop> key at the selected position.
Sensor type selection
The Sensor Type position enables the user to select the
type of used sensor: Accelerometer or Velocity and
Displacement transducer.
For each sensor type and frequency there is dedicated set
of charger amplitudes (see chapter “Technical data”):
<Start/Stop>
<Level>
For 79.58Hz:
- 1; 2; 3; 4; 5; 6; 7; 8; 9; 10 m/s2;
- 2, 4, 6, 8 10, 12, 14, 16, 18 20 mm/s;
- 4, 8, 12, 16, 20, 24, 28, 32, 36, 40 µm.

SV110 user's manual
10
For 159.2Hz:
- 1; 2; 3; 4; 5; 6; 7; 8; 9; 10 m/s2;
- 1; 2; 3; 4; 5; 6; 7; 8; 9; 10 mm/s;
- 1; 2; 3; 4; 5; 6; 7; 8; 9; 10 µm.
Measurement units selection
The Units position enables the user to select the
measurement unit: Linear Metric or Not Metric.
<Start/Stop>
Frequency units selection
The Frequency Units position enables the user to select
the frequency units: Hz or CPM (Cycles per minute).
<Start/Stop>
<Freq.>
The screen on the right presents the ready to operate
mode with Non Metric units and CPM frequency.
Calibration factor setting
The Calibration position enables the user to set the
calibration factor for different calibration frequencies:
79.58Hz and 159.2Hz.
<Start/Stop>
If the user decided to change the calibration factor he
must press the <Freq.> key. After this to set the
calibration Factor with the <Level> (“-“) or <Freq.> (“+”)
keys.
<Freq.>
<Freq.>
Battery control
The Battery position enables the user to check the battery
condition.
<Start/Stop>
USB charging
The USB charging position enables the user to switch on
<Start/Stop>

SV110 user's manual
11
or off the charging via USB port. If USB charging is
switched off the unit will not charge the internal batteries
via USB also when connected to USB source.
Unit specific information
The Unit Label position enables the user to read the unit
specific information:
Copyrighted manufacturer name: SVANTEK (C)
Instrument name: SV 110
Unit serial number: SN 3500
Firmware version: 1.02.1
CRC(OK): 8BD4
Standards that instrument conforms: ISO 8041:2005
<Start/Stop>
<Level>
<Level>
<Level>
8. Calibration
Install the calibrated sensor on the shaker.
The SV 105 Hand-Arm sensor is
calibrated with the use of dedicated
adapter.
The Adapter should be
installed on the shaker
with the special stud.

SV110 user's manual
12
Notice: The SV 105 Hand-Arm sensor should be calibrated at 79,58 Hz only!
The general purpose accelerometer is connected to the
shaker with the use of magnet adapter or with the special
stud.
Switch on calibrator by pressing <Start/Stop> key for a
while. In ready to operate mode the SV 110 displays the
amplitude and frequency of the shaker
By pressing the <Freq.> key select the shaker frequency: 79.58Hz or 159.2Hz.
By pressing the <Level> key select the shaker amplitude, as example for an
acceleration sensor: 1m/s2, 2m/s2, 3m/s2, 4m/s2, 5m/s2, 6m/s2, 7m/s2, 8m/s2, 9
m/s2 or 10m/s2.
When the frequency and amplitude are set, run the shaker
by pressing <Start/Stop> key.
Hold the calibrator in a hand. Wait until both
diodes emit a green light. This means that the
calibration process is not disturbed by an external
vibration.
Placing calibrator on a surface may cause
appearance of transverse vibrations which is
signalized by the right-hand side LED diode
emitting a red light.
X and Y LEDs flashing yellow when the device is stabilising
in Z axis direction. When the required level is achieved the
LEDs stop flashing.
If X and Y LEDs light red steadily it means that external
vibrations’ level in X or Y directions are higher than 10% (-
20dB) of vibration level generated by shaker in Z direction.
After external vibration is stabilized the LEDs are changed
to green. Stable condition is indicated also by message
“Level OK”.

SV110 user's manual
13
If the calibration level is achieved by the unit, the X, Y
vibration level is indicated as a % of vibration level
generated by shaker in Z direction, but only if this level
exceeds 10% value.
THD compensation
THD (Total harmonic distortion) – means that the harmonics on Z axis exceed threshold
3% (-30,5 dB) of reference vibration level. In this case Z-diode stats to flash with red
light.
For example: When the vibrations are set with ≈80 Hz, 1 m/s2 (120 dB), then the
total vibrations amount with frequencies n*16 HZ (160, 240, 320, 400,...) cannot be
higher than 0,03 m/s2 (89,5 dB).
If the unit detects the high THD level at 79.58Hz it will try
to compensate it. If compensation is possible the
“THD Compensation” message appears.
If compensation fails or in case the high THD level is
detected at 159.2Hz, but the unit can achieve the
calibration level, the “Level OK, High THD!” message
appears.
If the unit cannot achieve the calibration level at the
required frequency, the “Level unreachable” message
appears and calibration is stopped. The user will be
proposed to exit this screen.
The inner temperature of the calibrator is constantly
controlled and if it is exceeds the certain dangerous level,
the device is automatically stopped the shaker. Such
situation may be caused by too heavy accelerometer. If
this happened the “High temperature” message appears
and the user should wait until the device temperature is
normalised and continue the calibration.
To stop the shaker press <Start/Stop> key.
Switch of the calibrator by pressing <Start/Stop> key for a couple of seconds during
which a countdown (“Shutting down” 3… 2… 1… ) is displayed.
9. General Care and Cleaning
Remove the sensor and switch the device off.
Disconnect the device from the power supply.
Wipe the device’s surface with the cloth damped with the mixture of warm
water and detergent.

SV110 user's manual
14
After cleaning, wipe the device with dry cloth and wait until the surface is
completely dry.
Do not immerse the device in any fluids as this may damage the device and
cause electrical shock. Only the external parts of the device should be cleaned
10. Charging
SV 110 instrument is equipped with an internal charger, so that the fixed internal
batteries can be charged directly from USB port or charger (SA 54).
Notice: It is recommended to charge the unit with charger SA 54! Charging via
USB port is optional and by default is switched off. To charge via USB it is
necessary to have USB port with 500mA.
Ensure the SV 110 is fully charged prior to use by connecting it to a USB port or to
USB charger. The SV 110 will automatically switch on during charging and display
how much the internal instrument battery is loaded. The SV 110 will display ‘Fully
charged’ once charging is complete. Full charging from SA 54 should take
approximately 5 hours from a fully discharged state. Charging from PC via USB port is
much slower and takes approximately 10 hours for fully discharged battery. A fully
charged instrument holds enough charge to run maximum 12 hours of work with
attached accelerometer.
Notice: Use only high quality USB cables. Many poor quality cables do not ensure
low resistance of the cable, thus disabling proper charging of the internal cells.
11. Recalibration of SV110
Recalibrations have to be done for all frequencies with vibrations’ level set as shown in the
table below:
Frequency Vibrations level
79.58 Hz 10m/s
2
159.2 Hz 10m/s
2
Recalibration for frequency 159.2Hz:

SV110 user's manual
15
Install the reference sensor and start the shaker with
159.2Hz and 10m/s2 vibrations parameters.
Wait until the vibrations are steady (diodes are lighting
with green continuous light and information “Level OK”
is displayed).
Read the vibrations level value from the reference sensor. When it is the same as
the set one skip to the next frequency. When it differs it is necessary to
enter/modify the calibration coefficient.
Stop the shaker by pressing <Start/Stop> button
When the device is idle press buttons <Level> and
<Freq.> at the same time to enter the menu.
Select the sensor type in the Sensor Type position:
Accelerometer, Velocity or Displacement.
With the <Level> button select the Calibration position.
With the <Level> button select the required frequency
of the shaker.
With the <Start/Stop> button enter the Calibration
menu.
Press the <Freq.> button (“Change”) and select the new
calibration Factor with the <Level> (“-“) or <Freq.> (“+”)
buttons.
Press the <Start/Stop> button to confirm new
calibration Factor and exit the Calibration menu.
Notice: As the calibration coefficient is set, it is recommended to repeat the
measurement with reference sensor.
Definition of the calibration factor
Use one of formulas bellow:
[dB]
C = Ar – Ac

SV110 user's manual
16
Where:
A – standard sensor vibration level
–set vibration level of calibrated device
Where:
Ac- set vibrations level of calibrated
device [dB]
Ar – standard sensor vibration level [dB].
12. Technical data
Generated reference (calibration) signals
Frequency
79,58
159,2 Hz
Vibration
accelerations (RMS) 1; 2; 3; 4; 5; 6; 7; 8; 9; 10 1; 2; 3; 4; 5; 6; 7; 8; 9; 10
Vibration velocities
(rms)
2; 4,; 6; 8; 10; 12;
14; 16; 18;
20 1; 2; 3; 4; 5; 6; 7; 8; 9; 10
Vibration
displacement (rms)
4,; 8; 12; 16; 20; 24; 28; 32;
36; 40 1; 2; 3; 4; 5; 6; 7; 8; 9; 10 µm
Amplitude error
Less than ± 3%
Frequency error
Less than ± 0,5%
Transverse vibration
Less than 10% of main direction
Harmonic distortion
<3
%
Warm up time
< 10
s
General
Maximum loading
mass 300 200 g
Sensor mounting
Threaded hole M5 x 6 mm;
Mounting disc for attaching with Beeswax or SA 38 adapter
Levelling time
Typically 5 ÷ 20 seconds,
Working conditions
Temperature range
-
10°C ÷ 50°C
Humidity range
25% ÷ 85%
Power supply
Battery type
NIMH Rechargeable 7.2V/2.2 Ah
Battery operating
time
Loading mass and operating frequency depended.
Up to 12 hours (110g@79,6Hz)
Automatic switch off
From 5 to 60 minutes adjustable
Charging time
5 hours (with SA 54) or 10 hours (with USB)
Charger
SA 54 (5V / 1A) or mini USB 500 mA HUB
Overall weight and dimensions
Weight
1,25
kg (incl. battery)
Dimensions
65 x 65 x 168 mm

SV110 user's manual
17
Document history
Version Issue Date Remarks Software Version
Table of contents
Other Svantek Test Equipment manuals
Popular Test Equipment manuals by other brands

Agilent Technologies
Agilent Technologies 11644A Series User's and service guide

Keysight Technologies
Keysight Technologies E6640A Getting started guide

Jinhan
Jinhan ADO102 manual

Millipore
Millipore Integritest Exacta Operating and maintenance manual

MSA
MSA ALTAIR Pump Probe operating manual

Anritsu
Anritsu 3656B W1 user guide