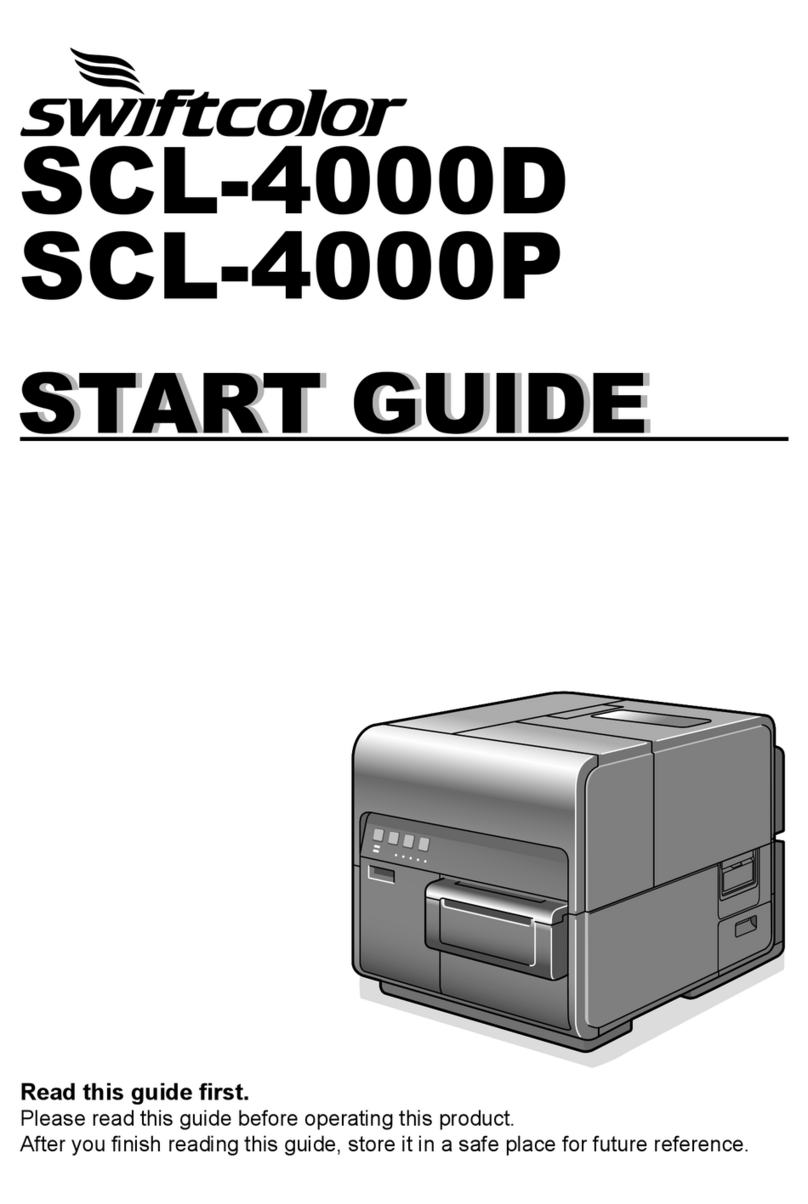
SwiftColor SCL-4000D User manual

PUB No. 4Y1-8570-030 / 2014
USER’S GUIDE
USER’S GUIDE
SCL-4000D
SCL-4000P

i
How to Use This Guide & CD-ROM
Start Guide
You should read this start guide rst if this is the rst time you are using this printer.
The Start Guide describes precautions for using the printer safely and shows you how to prepare
the printer (software installation, etc.) before you use it.
Printer Software (Provided on the CD-ROM)
The CD-ROM contains a printer driver, User’s Guide.
■ Printer Driver
The printer driver is the software for using this product under Windows 7/Windows Vista/Windows
XP.
■ User’s Guide
This electronic manual describes the basic procedures for using the printer. Specically, the
User’s Guide explains the basic print procedures, how to maintain the printer, how to troubleshoot
problems, and describes all the features of the printer and printer driver.
You can nd and display desired information in accordance with the Contents and Index.
To view the User’s Guide, Adobe Reader/Adobe Acrobat Reader is required.
If Adobe Reader/Adobe Acrobat Reader is not installed in your computer, download it from the
website of Adobe Systems Inc. And install it in your computer.
Help Functions
In addition to the Start Guide and the User’s Guide, the printer driver provides online Help to nd
answers to questions about printer features and operations and how to troubleshoot problems
while you are using the printer driver.
Click the Help button on the printer driver screens or in the menu bar to open online Help.

i
Table of Contents
How to Use This Guide & CD-ROM ................... i
Start Guide ...................................................................................... i
Printer Software (Provided on the CD-ROM) ................................ i
Help Functions ................................................................................ i
Before You Begin .............................................. 1
Conventions ................................................................................... 1
Illustrations and Sample Screens ................................................ 1
Trademarks ..................................................................................... 2
Abbreviations ................................................................................. 2
Request to the Customer .............................................................. 2
Legal Notice ................................................................................... 3
Legal Limitations on the Usage of Your Product and the Use of Images ........3
Product Name ..................................................................................................3
CE ...................................................................................................................3
FCC (Federal Communications Commission) .................................................4
1. Before Using the Printer .............................. 5
1-1 Printer Part Names and Functions ......................................... 5
1-1-1. Front View .............................................................................................5
1-1-2. Rear View ..............................................................................................7
1-1-3. Inside the Printer ...................................................................................8
1-1-4. Roll Holder ............................................................................................9
1-1-5. Operation Panel ..................................................................................10
1-1-6. Online and Sleep Modes ..................................................................... 11
1-2 Connecting the Printer and Computer ................................ 12
1-2-1. Connecting with USB Cable ................................................................13
1-2-2. Connecting with LAN Cable ................................................................14
1-3 Switching the Printer On and Off ......................................... 15
1-3-1. Switching the Printer On .....................................................................15

Table of Contents
ii
1-3-2. Switching the Printer Off......................................................................16
1-4 Paper Loading Procedure ..................................................... 17
1-4-1. Loading Paper on the Roll Holder .......................................................17
1-4-2. Setting Paper in the Printer .................................................................19
1-5 Using Fanfold Paper .............................................................. 25
1-6 Changing Paper ..................................................................... 27
1-7 Treating the Trailing Edge of Paper ..................................... 30
1-8 Using the Manual Cutter ....................................................... 33
2. How to Print................................................ 36
2-1 How to Make of Print Data .................................................... 36
2-2 Canceling Print Jobs ............................................................. 38
2-2-1. Canceling Print Jobs from the Status Monitor .....................................38
2-3 Pausing Printing .................................................................... 39
2-3-1. Pause from the Operation Panel .........................................................39
2-3-2. Cleaning During Temporary Stop ........................................................40
3. How to Use the Printer Driver .................... 42
3-1 Opening the Printing Preferences Dialog Box .................... 42
3-1-1. Opening the Printer Driver from the Application Software ...................42
3-1-2. Opening the Printer Driver from the Start Menu ..................................44
3-2 Using the Page Setup Dialog Box ........................................ 46
3-2-1. Registration of Favorites .....................................................................48
3-2-2. Deletion of Favorites ...........................................................................52
3-2-3. Using Print Setting Registered in Favorite ..........................................54
3-2-4. Paper Size ...........................................................................................56
3-2-5. Custom Paper Size Settings ...............................................................60
3-2-6. Paper Type ..........................................................................................65
3-2-7. Orientation ...........................................................................................66
3-2-8. Check Settings ....................................................................................68
3-2-9. Version Information .............................................................................69
Table of Contents
iii
3-3 Using the Color Dialog Box .................................................. 70
3-3-1. Color Adjustment .................................................................................71
3-3-2. Set Print Quality ..................................................................................72
3-3-3. Single Color Settings ...........................................................................73
3-4 Using the Detailed Settings Dialog Box .............................. 74
3-4-1. Color Balance ......................................................................................74
3-4-2. Brightness ...........................................................................................75
3-4-3. Density ................................................................................................77
3-4-4. Contrast ...............................................................................................78
3-4-5. Halftone Process .................................................................................79
3-4-6. Level Correction ..................................................................................80
3-4-7. Sharpness ...........................................................................................81
3-5 Using the Auto Cutter Dialog Box ........................................ 82
3-6 Using the Overlay Settings Dialog Box ............................... 84
3-6-1. Create Form ........................................................................................85
3-6-2. Overlay Printing ...................................................................................88
3-7 Using the Advanced Settings Dialog Box ........................... 91
3-7-1. Print Order ...........................................................................................92
3-7-2. Print Speed .........................................................................................93
3-8 Using the Utility Dialog Box ................................................. 96
3-8-1. Sleep .................................................................................................100
3-8-2. Sleep Timer Settings .........................................................................101
3-8-3. Adjust Paper Stop Position ................................................................104
3-8-4. Pinpoint Color Matches .....................................................................106
3-8-5. Special Settings ................................................................................ 115
3-8-6. Add Custom Paper Type ................................................................... 119
3-8-7 Register TOF Level ............................................................................124

Table of Contents
iv
4. How to Use the Status Monitor ................ 127
4-1 Displaying the Status Monitor ............................................ 127
4-1-1. Starting the Status Monitor ................................................................127
4-1-2. How to Start and Display the Status Monitor ....................................128
4-2 Using the Status Monitor .................................................... 131
4-2-1. Viewing the Print Status ....................................................................132
4-2-2. Viewing the Printer Status .................................................................133
4-2-3. Viewing Ink Information .....................................................................136
4-2-4. Viewing Maintenance Cartridge Information .....................................138
5. Printer Maintenance ................................. 140
5-1 Cleaning the Printhead ....................................................... 140
5-1-1. Cleaning ............................................................................................140
5-2 Adjusting the Printhead Position ....................................... 142
5-3 Fine-tuning the Printhead Position .................................... 160
5-4 Check the Output Setting Value ......................................... 170
5-5 Replacing Ink Tanks ............................................................ 172
5-6 Replacing the Maintenance Cartridge ............................... 179
5-7 Used Ink Tanks .................................................................... 184
5-8 Used Maintenance Cartridge .............................................. 184
5-9 Cleaning the Printer ............................................................ 185
5-10 Perform the Ink Refresh (water-based pigment ink model
only) .................................................................................... 188
5-10-1. Ink Refresh Part 1 ...........................................................................189
5-10-2. Ink Refresh Part 2 ...........................................................................199
5-10-3. Ink Refresh Part 3 ...........................................................................203
6. Troubleshooting ....................................... 207
6-1 Error or Warning Messages ................................................ 207

Table of Contents
v
6-2 When Paper is Jammed ...................................................... 211
6-3 Printer Not Operating Correctly ......................................... 216
6-4 Print Results Are Unsatisfactory ........................................ 220
7. Auto Cutter ............................................... 226
7-1 Part Names and Functions ................................................. 226
7-1-1. Front View .........................................................................................226
7-2 Settings for Using Auto Cutter ........................................... 227
7-2-1.Setting How to Cut Paper in the Before and After of a Job ................228
7-2-2. Setting How to Cut During the Job ....................................................229
7-3 Adjusting Cut Position ........................................................ 233
7-4 When Paper is Jammed ...................................................... 237
8. Appendix ................................................... 243
8-1 Moving the Printer ............................................................... 243
8-2 Shipping the Printer (SecondaryTransportation) ............. 246
8-3 How to Use Printheads Efciently ..................................... 249
8-4 Software Uninstallation ....................................................... 251
8-5 Import / Export Settings ...................................................... 254
8-5-1. Export ................................................................................................255
8-5-2. Import ................................................................................................269
8-6 Network Utility ..................................................................... 285
Specications ............................................... 298
Index ............................................................. 300

1
Before You Begin
Thank you for purchasing the Swiftcolor SCL-4000D(Dye model) / SCL-4000P(Pigment model).
Please read this guide before you use the printer so you can fully understand the printer features and learn
how to use the printer most efciently. This guide provides all the information you need to use this printer.
Conventions
The following marks are used in this guide.
Warning Indicates a warning concerning operations that may lead to death or injury
to persons if not performed correctly. To use the machine safely, always pay
attention to these warnings.
Caution
Indicates a caution concerning operations that may lead to injury to persons if
not performed correctly. To use the machine safely, always pay attention to these
cautions.
Important Indicates operational requirements and restrictions. Be sure to read these items
carefully to operate the machine correctly, and avoid damage to the machine or
property.
Note
Indicates a clarication of an operation, or contains additional explanations for a
procedure. Reading these notes is highly recommended.
Indicates an operation that must not be performed. Read these items carefully,
and make sure not to perform the described operations.
Illustrations and Sample Screens
The illustrations and the sample screens of the printer driver settings in this guide are created with
Swiftcolor SCL-4000D in Windows 7.
The contents of these printer driver screens and instructions are essentially the same as those for
Swiftcolor SCL-4000P, Windows Vista and Windows XP; however,explanations are provided when
there are minor differences in screen content or procedures.

Before You Begin
2
Trademarks
● Microsoft and Windows are trademarks of Microsoft Corporation in the United States and/or other
countries.
● Adobe and the Adobe logo are trademarks of Adobe Systems, Inc.
● Other brand and product names may be trademarks or registered trademarks of their respective
companies.
Abbreviations
Throughout this document the following abbreviations are used in text.
● Microsoft Windows 8 is abbreviated as “Windows 8”
● Microsoft Windows 7 is abbreviated as “Windows 7”
● Microsoft Windows Vista is abbreviated as “Windows Vista”
● Microsoft Windows XP is abbreviated as “Windows XP”
● Microsoft Windows is abbreviated as “Windows”
Request to the Customer
● Copying this guide or any part of this guide without permission is strictly forbidden.
● The specications for this printer as well as the software provided with the printer are subject to
change without prior notice.
● We have done our best to make this guide as complete and accurate as possible, and we ask you
to contact the dealer where you purchased the printer if you nd any omissions or mistakes in this
document.
● We can accept no responsibility for loss or damages resulting from the use of this printer or its
software; please accept this before you use the printer.

Before You Begin
3
Legal Notice
Legal Limitations on the Usage of Your Product and the
Use of Images
● It is illegal to reproduce currency, bills, negotiable securities and other documents prohibited by law.
Reproduction of such items may be subject to criminal prosecution.
● It is illegal to reproduce legal certicates, licenses, and certain public and private documents
prohibited from reproduction by law. Reproduction of such items may be subject to criminal
prosecution.
● Please note that intellectual property protected by copyright may not be reproduced without the
express permission of the copyright holder except for personal or household use under limited
circumstances.
Product Name
SCL-4000D (Dye model)
SCL-4000P (Pigment model)
CE
This equipment conforms with the essential EMC requrements of EC Directive. We declare that
this product conforms with the EMC requirements of EC Directive at nominal mains input 230V,
50 Hz although the rated input of the product is 100 to 240 V, 50/60 Hz. Use of shielded cable is
necessary to comply with the technical EMC requirements of EC Directive.

Before You Begin
4
FCC (Federal Communications Commission)
FCC Part 15 Compliance
NOTE: This equipment has been tested and found to comply with the limits for a Class B
digital device, pursuant to part 15 of the FCC rules. These limits are designed to provide
reasonable protection against interference in a residential installation. This equipment
generates, uses, and can radiate radio frequency energy and, if not installed and used in
accordance with the instruction manual, may cause interference to radio communications.
However, there is no guarantee that interference will not occur in a particular installation. If this
equipment does cause interference to radio or television reception, which can be determined
by turning the equipment off and on, the user is encouraged to try to correct the interference
by one or more of the following measures:
• Reorient or relocate the receiving antenna.
• Increase the separation between the equipment and receiver.
• Connect the equipment into an outlet on a circuit different from that to which the receiver is
connected.
• Consult the dealer or an experienced radio/TV technician for help.
CAUTION: Changes or modifications to this equipment not expressly approved by the party
responsible for compliance could void the user’s authority to operate the equipment.

5
1. Before Using the Printer
This section describes how to prepare the printer and procedures you should know before
you use the printer.
1-1 Printer Part Names and Functions
The name and function of each part is described below.
1-1-1. Front View
[1]
[2]
[3]
[5]
[6]
[4]
[8]
[7]
[9]
[1] Upper Unit
Open this unit when setting paper or removing the paper jammed in the paper feed
path or cleaning inside of the machine. Holds the printhead.
[2] Operation panel
Keys necessary for operation and lamps to indicate the state of printer are
provided on this panel.
[3] Ink tank door
Open this door when replacing ink tanks.
[4] Paper delivery slot
Paper is ejected through this slot.

1. Before Using the Printer
6
[5] Roll cover
This cover protects the roll paper feeder.
[6] Roll cover handle
Use this handle to open the roll cover.
[7] Cutter cover
Open this cover when using the manual cutter.
[8] Maintenance cartridge door
Open this door when replacing the maintenance cartridge.
[9] Manual cutter
Use this cutter to cut the ejected paper manually

1. Before Using the Printer
7
1-1-2. Rear View
[1]
[7]
[3]
[4]
[5]
[6]
[2]
[1] Rear feeder slot
This slot is used to feed fanfold paper.
[2] Rating plate
A serial number for identifying the printer is shown on this plate. (The serial
number is required when you ask for repair of the printer or register yourself as a
user.)
[3] RS232C port
Connect a barcode reader to this port.
[4] RS232C port
This is an extended interface for connecting an external unit.
[5] USB port
Connect a USB cable here to connect to the computer.
[6] LAN port
Connect a LAN cable here to connect to the computer.
[7] Power Socket
Connect the power cord here.

1. Before Using the Printer
8
1-1-3. Inside the Printer
[2]
[3]
[5]
[4] [8]
[6]
[1]
[7]
[1] Transport Guide (Left)
This is a xed guide for transporting paper straight.
[2] Upper unit open lever
Push this lever up to open the upper unit.
[3] Jam release lever
Pull down this lever when paper is jammed.
[4] Transport Guide (Right)
This guide is used to transport paper straight and detect the width of paper.
[5] Paper Guide
This guide prevents paper from oating.
[6] Maintenance cartridge
Ink used to clean the printhead is collected here.
[7] Cleaning stick
Use this cleaning stick when cleaning the transport section.
[8] Roll holder
This holder is used to set paper.

1. Before Using the Printer
9
1-1-4. Roll Holder
[1]
[2]
[1] Holder Stopper
This stopper prevents paper from being removed.
[2] Holder stopper lock/release lever
This lever is used to release the holder stopper. Push this lever when attaching or
detaching the holder stopper.

1. Before Using the Printer
10
1-1-5. Operation Panel
PAUSE FEED
BACK
FEED
STATUS
ERROR
BK C M Y
MC
[1] [2] [3] [4]
[5][6]
[7]
[8]
[1] Power key/lamp
On Power-on.
Blinking Sleep mode.
Off Power-off.
[2] PAUSE key
Printing Pressing this key suspends printing.
in pause Pressing this key restarts printing.
[3] FEED key
Pressing this key in the ofine mode feeds paper.
[4] BACK FEED key
Pressing this key feeds paper one page backward. Pressing and holding this key
feeds paper backward continuously. (The possible Back Feed length is 300mm or
less (accumulated total))
[5] Ink Warning lamp
On No ink or tank.
Blinking Low ink.
Off Sufcient ink.

1. Before Using the Printer
11
[6] Maintenance Cartridge Warning lamp
On Full.
Blinking Nearly full.
Off Sufcient room to collect ink.
[7] ERROR lamp
On Operator-call error. (Check the status monitor on the computer.)
Blinking Fatal error.(Check the status monitor on the computer.)
Off Normal.(Check the status monitor on the computer.)
[8] STATUS lamp
On Online mode.
Blinking Data being received. (Check the status monitor on the computer.)
Off Ofine mode. (Check the status monitor on the computer.)
Important
● Opening the ink tank door or maintenance cartridge door during printing causes
an error and suspends printing. This could result in a failure. Do not open the ink
tank door or maintenance cartridge door except when replacing an ink tank or
maintenance cartridge or opening/closing the upper unit.
● Never attempt to open the upper unit by force or hit the door. This could damage
the printer or result in poor print quality. Always open and close the upper unit
slowly.
1-1-6. Online and Sleep Modes
Online mode: That mode can print data from the computer. The STATUS lamp stays lit.
Sleep mode : Power lamp is blinking and the STATUS lamp stays unlit but the printer
receives instructions and print data from the computer.

1. Before Using the Printer
12
1-2 Connecting the Printer and Computer
The printer is compatible with Hi-Speed USB and LAN.
Important
● You can disconnect the USB cable even while the printer and computer are on, but do
not disconnect the USB cable in the cases described below. This could prevent the
printer from operating normally.
• While the computer is starting up (until the desktop display appears).
• While the printer is printing.
• While you install the printer driver.
To disconnect the USB cable while the computer and the printer are on, disconnect it
at the computer or the USB hub. To reconnect the USB cable, wait at least 5 seconds
before you connect it again. If you reconnect it immediately, the printer may not operate
correctly.
Note
● A USB cable is not provided with the printer. Please prepare a cable that matches the
port on your computer.

1. Before Using the Printer
13
1-2-1. Connecting with USB Cable
1 Connect the USB cable to the printer and the computer.
First, connect the cable to the printer, then connect it to the computer.
Note
● If a printer driver has not been installed in the computer to which you want to connect
your printer, install it before connecting the USB cable.
● For how to install the printer driver, refer to the Start Guide.
Other manuals for SCL-4000D
2
This manual suits for next models
1
Table of contents
Other SwiftColor Printer manuals

SwiftColor
SwiftColor SCC-4000D Guide

SwiftColor
SwiftColor SCC-4000D Reference guide

SwiftColor
SwiftColor SCC-2000D User manual

SwiftColor
SwiftColor SCC-2000D Assembly instructions

SwiftColor
SwiftColor SCL-8000P User manual

SwiftColor
SwiftColor SCL-4000D Guide

SwiftColor
SwiftColor SCC-2000D User manual

SwiftColor
SwiftColor SCL-2000P User manual