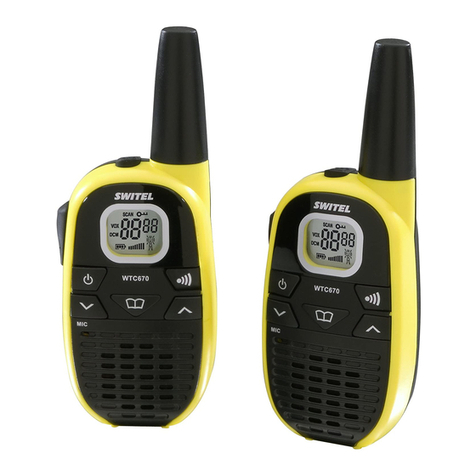
switel WTF 770 User manual

Walkie Talkie WTF 770/777CC
1
2
3
4
5
6
9
11
12
8
10
13
18
202122
14 15
23
24
16 17
19
7
DEUTSCH
Bedienungsanleitung
Bitte lesen und beachten Sie die nach
folgenden Informationen und bewahren
Sie diese Bedienungsanleitung zum Nach
schlagen auf!
Sicherheitshinweise
WARNUNG!
• Explosionsgefahr!
ÆVerwenden Sie nur mitgelieferte Steckernetzteile!
ÆVerwenden Sie nur mitgelieferte oder typgleiche Akkus!
VORSICHT!
• Stolpergefahr durch unsachgemäß verlegte Kabel!
ÆVerlegen Sie Kabel so, dass niemand darüber stolpern
kann!
• Gefährdung von Gesundheit und Umwelt durch Akkus und
Batterien!
ÆAkkus und Batterien nie öffnen, beschädigen, verschlucken
oder in die Umwelt gelangen lassen. Sie können giftige und
umweltschädliche Schwermetalle enthalten.
Bestimmungsgemäß verwenden
Diese Funkgeräte sind geeignet für die Kommunikation mit anderen
Funkgeräten gleichen Standards. Jede andere Verwendung gilt als
nicht bestimmungsgemäß. Eigenmächtige Veränderungen oder Um
bauten sind nicht zulässig. Öffnen Sie die Geräte in keinem Fall selbst
und führen Sie keine eigenen Reparaturversuche durch.
Nur in geeigneter Umgebung verwenden
Beachten Sie örtliche Vorschriften und Bestimmungen.
Vermeiden Sie Belastungen durch Rauch, Staub, Erschütterungen,
Chemikalien, Feuchtigkeit, Hitze oder direkte Sonneneinstrahlung.
Verpackungsinhalt
- 2 Funkgeräte mit Gürtelclip - Ladestation
- 8 Akkus (AAA) - Steckernetzteil
- Bedienungsanleitung - Transportkoffer (777CC)
- 2 KFZ-Ladekabel (777CC) - 2 Headsets (777CC)
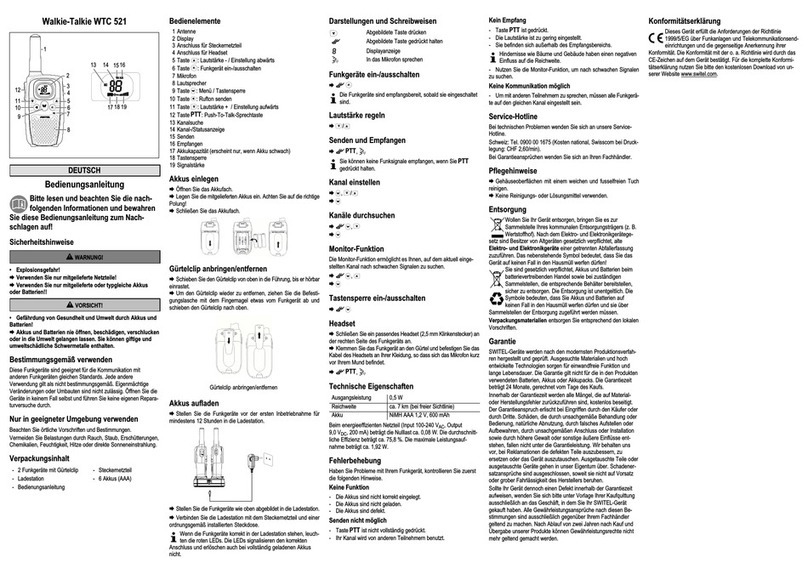
Bedienelemente (siehe Abbildung)
1 Antenne
2 Display
3 Taste : Rufton senden / Stoppuhr
4 Taste : Menü / Tastensperre
5 Taste : Lautstärke - / Einstellung abwärts
6 Mikrofon
7 Anschluss für Steckernetzteil
8 Lautsprecher
9 Taste : Lautstärke + / Einstellung aufwärts
10 Taste : PTT-Sprechtaste
11 Taste : Funkgerät ein-/ausschalten
12 Headset-Anschluss
13 Kanalsuche
14 Senden
15 Empfangen
16 CTCSS-Code
17 DCS-Code
18 CTCSS-/DCS-Code / Status-/Hundertstelanzeige
19 Lautstärke
20 Tastensperre
21 Kanal-/Status-/Sekundenanzeige
22 Akkukapazität
23 Zweikanalüberwachung
24 VOX-Modus
Akkus einlegen
ÆÖffnen Sie das Akkufach.
ÆLegen Sie die mitgelieferten Akkus ein. Achten Sie auf die richtige
Polung!
ÆSchließen Sie das Akkufach.
Gürtelclip anbringen/entfernen
ÆSchieben Sie den Gürtelclip von oben in die Führung, bis er hörbar
einrastet.
ÆUm den Gürtelclip wieder zu entfernen, ziehen Sie die Befesti
gungslasche mit dem Fingernagel etwas vom Funkgerät ab und
schieben den Gürtelclip nach oben.
Gürtelclip anbringen/entfernen Ladestation anschließen
Ladestation anschließen
ÆSchließen Sie die Ladestation wie auf der Skizze abgebildet an.
Akkus aufladen
ÆStellen Sie die Funkgeräte vor der ersten Inbetriebnahme für
mindestens 14 Stunden in die Ladestation.
Wenn die Funkgeräte korrekt in der Ladestation stehen, leuch
ten die roten LEDs.
Die LEDs signalisieren den korrekten Anschluss und erlö
schen auch bei vollständig geladenen Akkus nicht.
Akkukapazität voll bis leer
Darstellungen und Schreibweisen
Abgebildete Taste drücken
2 x Abgebildete Taste 2-mal drücken
Abgebildete Taste gedrückt halten
oN Displayanzeige
In das Mikrofon sprechen
Funkgeräte ein-/ausschalten
Æ
Die Funkgeräte sind empfangsbereit, sobald sie eingeschaltet
sind.
Lautstärke regeln
Æ/
Senden und Empfangen
Æ
Sie können keine Funksignale empfangen, wenn Sie
gedrückt halten.
Bestätigungston ein-/ausschalten
Der Bestätigungston (Roger Beep) erklingt, wenn Sie loslas
sen. Dadurch wird Ihrem Gesprächspartner signalisiert, dass Ihre
Übertragung beendet ist.
Æ9 x , /oN /oF ,
Kanal einstellen
Æ, /,
Rufcodierung einstellen
Es stehen 38 analoge (CTCSS 1-38) und 83 digitale (DCS 1-83) Ruf
codierungen je Kanal zur Verfügung. Funkteilnehmer können nur mit
einander kommunizieren, wenn Kanal und Rufcodierung an den
Funkgeräten übereinstimmen.
Æ2 x , /, ÊCTCSS-Code ausgewählt
Æ3 x , /, ÊDCS-Code ausgewählt
Kanäle durchsuchen
In einer Endlosschleife wird auf allen 8 Kanälen nach Signalen ge
sucht. Wird Funkverkehr gefunden, stoppt die Kanalsuche.
• Drücken Sie , um auf diesem Kanal am Funkverkehr teil
zunehmen. Das Funkgerät wird auf den Kanal eingestellt und die Ka
nalsuche wird beendet.
• Drücken Sie nicht, wird die Kanalsuche nach 5 Sekunden
fortgesetzt, wenn kein Signal auf diesem Kanal gesendet wurde.
Æ5 x , /ÊKanäle werden durchsucht
Æ6 x , /ÊCTCSS-Codes werden durchsucht
Æ7 x , /ÊDCS-Codes werden durchsucht
ÆÊKanäle durchsuchen beendet
Zweikanalüberwachung
Bei aktivierter Zweikanalüberwachung wechselt das Funkgerät
automatisch zwischen zwei Kanälen, bis ein Funksignal gefunden
wird. So können Sie mit zwei Gesprächspartnern auf verschiedenen
Kanälen sprechen.
Æ11 x ÊEinstellungsmodus aktiviert
Æ/, ÊZusätzlicher Kanal ausgewählt
Æ/, ÊCTCSS-Code geändert
Æ/, ÊDCS-Code geändert
Æ11 x , /oF , ÊZweikanalüberwachung
beendet
Ruftonmelodie einstellen
Æ8 x , /,
Monitor-Funktion
Die Monitor-Funktion ermöglicht es Ihnen, auf dem aktuell eingestell
ten Kanal nach schwachen Signalen zu suchen.
Æ,
Æ
Tastensperre ein-/ausschalten
Æ
Tastenton ein-/ausschalten
Æ10 x , /oN /oF ,
Stoppuhr-Funktion
ÆÊStoppuhr-Funktion gestartet
ÆÊStart / Stopp / Weiter
ÆÊZurücksetzen
ÆÊStoppuhr-Funktion verlassen
VOX-Modus
Bei dieser Funktion beginnt das Funkgerät automatisch zu senden,
wenn eine Stimme oder ein Geräusch erkannt wird.
Wenn Sie anfangen zu sprechen, tritt eine kurze Verzögerung
auf, bevor das Funkgerät sendet.
Beim Freisprechen im VOX-Modus muss am Funkgerät
nicht gedrückt werden, um zu senden.
Für den Betrieb im VOX-Modus können 3 Empfindlichkeitsstufen ent
sprechend der Umgebungsgeräusche gewählt werden.
Stufe 1 Stufe 2 Stufe 3
laute Umgebungs
geräusche
normale Umge
bungsgeräusche
leise Umgebungs
geräusche
Æ4 x , /01 /02 /03 , ÊEmpfindlich
keitsstufe ausgewählt und VOX aktiviert
Æ4 x , oF , ÊVOX deaktiviert
Headset
ÆSchließen Sie ein passendes Headset an der oberen Seite des
Funkgeräts an.
ÆAktivieren Sie den VOX-Modus (siehe oben).
ÆKlemmen Sie das Funkgerät an den Gürtel und befestigen das
Kabel des Headsets an Ihrer Kleidung, so dass sich das Mikrofon kurz
vor Ihrem Mund befindet. Jetzt können Sie freihändig empfangen und
senden.
Technische Eigenschaften
Ausgangsleistung 0,5 W
Reichweite ca. 10 km (bei freier Sichtlinie)
Akku NiMH AAA 1,2 V, 600 mAh
Ihr Funkgerät ist mit einem energieeffizienten Steckernetzteil (Input
100-240 VAC, Output 9 VDC, 300 mA) ausgestattet. Die Nulllast be
trägt ca. 0,08 W. Die durchschnittliche Effizienz beträgt ca. 77 %. Die
Leistungsaufnahme beträgt maximal 1,7 W.
Fehlerbehebung
Haben Sie Probleme mit Ihrem Funkgerät, kontrollieren Sie zuerst die
folgenden Hinweise.
Keine Funktion
- Die Akkus sind nicht korrekt eingelegt.
- Die Akkus sind nicht geladen.
- Die Akkus sind defekt.
Senden nicht möglich
-ist nicht vollständig gedrückt.
- Ihr Kanal wird von anderen Teilnehmern benutzt.
Kein Empfang
-ist gedrückt.
- Die Lautstärke ist zu gering eingestellt.
- Sie befinden sich außerhalb des Empfangsbereichs.
Hindernisse wie Bäume und Gebäude haben einen negativen
Einfluss auf die Reichweite.
- Nutzen Sie die Monitor-Funktion, um nach schwachen Signalen
zu suchen.
Keine Kommunikation möglich
- Um mit anderen Teilnehmern zu sprechen, müssen alle Funkgerä
te auf den gleichen Kanal und die gleiche Rufcodierung eingestellt
sein.
Service-Hotline
Bei technischen Problemen wenden Sie sich an unsere Service-Hot
line.
Schweiz: Tel. 0900 00 1675 (Kosten national, Swisscom, bei Druck
legung CHF 2,60/min).
Bei Garantieansprüchen wenden Sie sich an Ihren Fachhändler. Die
Garantiezeit beträgt 2 Jahre.
Pflegehinweise
ÆGehäuseoberflächen mit einem weichen und fusselfreien Tuch
reinigen.
ÆKeine Reinigungs- oder Lösungsmittel verwenden.
Entsorgung
Wollen Sie Ihr Gerät entsorgen, bringen Sie es zur Sammel
stelle Ihres kommunalen Entsorgungsträgers (z. B. Wertstoff
hof). Nach dem Elektro- und Elektronikgerätegesetz sind
Besitzer von Altgeräten gesetzlich verpflichtet, alte Elektro- und
Elektronikgeräte einer getrennten Abfallerfassung zuzuführen. Das
nebenstehende Symbol bedeutet, dass Sie das Gerät auf keinen Fall
in den Hausmüll werfen dürfen!
Sie sind gesetzlich verpflichtet, Akkus und Batterien beim
batterievertreibenden Handel sowie bei zuständigen
Sammelstellen, die entsprechende Behälter bereitstellen, si
cher zu entsorgen. Die Entsorgung ist unentgeltlich. Die Sym
bole bedeuten, dass Sie Akkus und Batterien auf keinen Fall
in den Hausmüll werfen dürfen und sie über Sammelstellen
der Entsorgung zugeführt werden müssen.
Verpackungsmaterialien entsorgen Sie entsprechend den lokalen
Vorschriften.
Garantie
SWITEL-Geräte werden nach den modernsten Produktionsverfahren
hergestellt und geprüft. Ausgesuchte Materialien und hoch entwi
ckelte Technologien sorgen für einwandfreie Funktion und lange
Lebensdauer. Die Garantie gilt nicht für die in den Produkten
verwendeten Batterien, Akkus oder Akkupacks. Die Garantiezeit be
trägt 24 Monate, gerechnet vom Tage des Kaufs.
Innerhalb der Garantiezeit werden alle Mängel, die auf Material- oder
Herstellungsfehler zurückzuführen sind, kostenlos beseitigt. Der Ga
rantieanspruch erlischt bei Eingriffen durch den Käufer oder durch
Dritte. Schäden, die durch unsachgemäße Behandlung oder Be
dienung, natürliche Abnutzung, durch falsches Aufstellen oder Auf
bewahren, durch unsachgemäßen Anschluss oder Installation sowie
durch höhere Gewalt oder sonstige äußere Einflüsse entstehen,
fallen nicht unter die Garantieleistung. Wir behalten uns vor, bei Re
klamationen die defekten Teile auszubessern, zu ersetzen oder das
Gerät auszutauschen. Ausgetauschte Teile oder ausgetauschte Ge
räte gehen in unser Eigentum über. Schadenersatzansprüche sind
ausgeschlossen, soweit sie nicht auf Vorsatz oder grober Fahrlässig
keit des Herstellers beruhen.
Sollte Ihr Gerät dennoch einen Defekt innerhalb der Garantiezeit auf
weisen, wenden Sie sich bitte unter Vorlage Ihrer Kaufquittung aus
schließlich an das Geschäft, in dem Sie Ihr SWITEL-Gerät gekauft
haben. Alle Gewährleistungsansprüche nach diesen Bestimmungen
sind ausschließlich gegenüber Ihrem Fachhändler geltend zu ma
chen. Nach Ablauf von zwei Jahren nach Kauf und Übergabe unserer
Produkte können Gewährleistungsrechte nicht mehr geltend ge
macht werden.
Konformitätserklärung
Dieses Gerät erfüllt die Anforderungen der Richtlinie
1999/5/EG über Funkanlagen und Telekommunikationsen
deinrichtungen und die gegenseitige Anerkennung ihrer Kon
formität. Die Konformität mit der o. a. Richtlinie wird durch das CE-Zei
chen auf dem Gerät bestätigt. Für die komplette
Konformitätserklärung nutzen Sie bitte den kostenlosen Download
von unserer Website www.switel.com.

Walkie Talkie WTF 770/777CC
1
2
3
4
5
6
9
11
12
8
10
13
18
202122
14 15
23
24
16 17
19
7
FRANÇAIS
Mode d'emploi
Veuillez lire et observer les informations
suivantes et conserver ce mode d'emploi
afin de pouvoir le consulter en cas de besoin !
Remarques concernant la sécurité
AVERTISSEMENT !
• Risque d'explosion !
ÆN'utilisez que les blocs secteur enfichables vendus avec
les appareils !
ÆN'utilisez que les piles vendues avec les appareils ou de
type semblable !
PRUDENCE !
• Risque de trébucher suite à des câbles posés de manière
non professionnelle !
ÆPosez les câbles de sorte que personne ne puisse trébu
cher !
• Mise en danger de l'homme et l'environnement causée par
les piles et les piles rechargeables !
ÆNe jamais ouvrir, endommager, avaler les piles et piles
rechargeables ou ne jamais faire pénétrer leur contenu dans
l'environnement. Elles peuvent contenir des métaux lourds
toxiques et nuisibles pour celui-ci.
Utilisation conforme aux prescriptions
Ces émetteurs-récepteurs conviennent pour la communication avec
d'autres émetteurs-récepteurs de même standard. Toute autre utili
sation est considérée comme non conforme aux prescriptions. Des
modifications ou changements effectués d'un propre gré ne sont pas
autorisés. N'ouvrez en aucun cas les appareils et ne tentez pas de les
réparer vous-même.
Utilisez-les appareils uniquement dans un
environnement approprié
Tenez compte des règlements et dispositions locaux.
Évitez toute nuisance causée par la fumée, la poussière, les chocs,
les produits chimiques, l'humidité, la grande chaleur ou l'ensoleil
lement direct.
Contenu du coffret
- 2 Émetteurs-récepteurs
avec clip de ceinture
- Station d'accueil
- 8 Piles rechargeables (AAA) - Bloc secteur
- 2 Câbles chargeurs auto
(777CC)
- Malette de transport
(777CC)
- Mode d'emploi - 2 Kits oreillettes (777CC)
Votre Walkie Talkie (voir figure)
1 Antenne
2 Afficheur
3 Touche : Émettre un signal d'appel / chronomètre
4 Touche : Menu / verrouillage des touches
5 Touche : Réglage du volume sonore / diminuer
6 Microphone
7 Prise pour bloc secteur
8 Haut-parleur
9 Touche : Réglage du volume sonore / augmenter
10 Touche : Touche de conversation PTT (press to talk)
11 Touche : Allumer / Éteindre les émetteurs-récepteurs
12 Prise du kit oreillettes
13 Recherche du canal
14 Émission
15 Réception
16 Code CTCSS
17 Code DCS
18 Code CTCSS / DCS / Affichage état/centièmes
19 Volume sonore
20 Verrouillage des touches
21 Affichage canal/état/secondes
22 Capacité des piles
23 Surveillance de deux canaux
24 Mode VOX
Insérer les piles
ÆOuvrez le compartiment à piles.
ÆPlacez les piles fournies avec les appareils. Observez une polari
sation correcte !
ÆFermez le compartiment.
Poser/retirer le clip de ceinture
ÆIntroduisez le clip de ceinture par le haut dans le guidage jusqu'à
ce qu'il s'enclenche.
ÆPour le retirer, soulevez légèrement la languette de fixation avec
l'ongle et poussez le clip vers le haut.
Poser/retirer le clip de ceinture Raccorder la station d'accueil
Raccorder la station d'accueil
ÆRaccordez la station d'accueil tel que représenté sur le croquis.
Charger les piles
ÆPosez les émetteurs-récepteurs sur la station d'accueil pendant
au moins 14 heures avant la première mise en service.
S'ils sont placés correctement sur celle-ci, les LEDs s'allument
en rouge.
Celles-ci signalisent uniquement un raccordement correct et
restent allumées, même lorsque les piles sont complètement
chargées.
Capacité des piles pleines à vides
Représentations et notations
Appuyez sur la touche représentée
2 x Appuyer 2 fois sur la touche représentée
Maintenir appuyée la touche représentée
oN Affichage
Parler dans le microphone
Allumer / Éteindre les émetteurs-récepteurs
Æ
Les émetteurs-récepteurs sont prêts à recevoir dès qu'ils sont
allumés.
Régler le volume sonore
Æ/
Émettre et recevoir
Æ
Vous ne pouvez pas recevoir de signaux radio si vous mainte
nez appuyé .
Activer/ Désactiver le signal de confirmation
Le signal de confirmation (Roger Beep) se fait entendre si vous relâc
hez . Cela signale à votre correspondant que votre transmission
est terminée.
Æ9 x , /oN /oF ,
Régler le canal
Æ, /,
Régler la codification
Vous disposez de 38 codifications analogiques (CTCSS 1 - 38) et de
83 codifications numériques (DCS 1 - 83) par canal. Les utilisateurs
radio ne peuvent communiquer les uns avec les autres que si le canal
et la codification des appareils concordent.
Æ2 x , /, ÊCode CTCSS sélectionné
Æ3 x , /, ÊCode DCS sélectionné
Rechercher les canaux
Dans une boucle infinie, l'appareil cherche des signaux sur tous les
huit canaux. Si le contact radio est trouvé, la recherche du canal
s'arrête.
• Appuyez sur pour participer à la radiocommunication sur ce
canal. L'émetteur-récepteur est réglé sur le canal et la recherche est
terminée.
• Si vous n'appuyez pas sur , la recherche de canal se poursuit
cinq secondes après que plus aucun signal n'ait été émis sur ce canal.
Æ5 x , /ÊRecherche des canaux
Æ6 x , /ÊRecherche des codes CTCSS
Æ7 x , /ÊRecherche des codes DCS
ÆÊRecherche des canaux terminée
Surveillance de deux canaux
Quand la surveillance à deux canaux est activée, l'émetteur-récep
teur passe automatiquement d'un canal à l'autre jusqu'à ce qu'il ait
trouvé un signal radio. Vous pouvez ainsi parler à deux correspon
dants sur différents canaux.
Æ11 x ÊMode de programmation activé
Æ/, ÊCanal supplémentaire sélectionné
Æ/, ÊCode CTCSS modifié
Æ/, ÊCode DCS modifié
Æ11 x , /oF , ÊSurveillance de deux ca
naux terminée
Régler la mélodie du signal d'appel
Æ8 x , /,
Fonction de balayage
La fonction de balayage vous permet de chercher des signaux faibles
sur le canal actuellement programmé.
Æ,
Æ
Activer/Désactiver le verrouillage des touches
Æ
Activer/Désactiver le son des touches
Æ10 x , /oN /oF ,
Fonction chronomètre
ÆÊFonction chronomètre démarrée
ÆÊDépart / Arrêt / Continuer
ÆÊRemettre à zéro
ÆÊFonction chronomètre
Mode VOX
Avec cette fonction, l'émetteur-récepteur commence à émettre auto
matiquement quand une voix ou un bruit est détecté(e).
Quand vous commencez à parler, l'émetteur-récepteur émet
quelques instants après.
En mode mains-libres en mode VOX, il ne faut pas maintenir
appuyée sur l'émetteur-récepteur pour émettre.
Pour le fonctionnement en mode VOX, vous pouvez sélectionner 3 ni
veaux de sensibilité en fonction des bruits ambiants.
Niveau 1 Niveau 2 Niveau 3
Bruits ambiants
forts
Bruits ambiants nor
maux
Bruits ambiants
faibles
Æ4 x , /01 /02 /03 , ÊNiveau de sen
sibilité sélectionné et VOX activé
Æ4 x , oF , ÊVOX désactivé
Kit oreillette
ÆBranchez le kit oreillettes adéquat sur le côté supérieur de votre
émetteur-récepteur.
ÆActivez le mode VOX (voir ci-dessus).
ÆAcccrochez l'émetteur-récepteur à la ceinture et fixez le câble du
kit oreillettes à vos vêtements de sorte que le microphone se trouve
juste devant votre bouche. Vous pouvez maintenant émettre et
recevoir les mains-libres.
Caractéristiques techniques
Puissance de sortie 0,5 W
Portée Env. 10 km (si ligne visuelle libre)
Pile NiMH AAA 1,2 V, 600 mAh
Votre appareil est équipé d'un bloc secteur à haute efficacité éner
gétique (entrée 100-240 VCA, sortie 9 VCC, 300 mA). La puissance
nulle est d'env. 0,08 W. L'efficacité moyenne est d'env. 77 %. La
puissance absorbée est de 1,7 W maximum.
Elimination d'erreurs
Si vous avez des problèmes avec votre émetteur-récepteur, contrôlez
d'abord les points suivants.
Pas de fonction
- Les piles ne sont pas insérées correctement.
- Les piles ne sont pas chargées.
- Les piles sont défectueuses.
Émission pas possible
-n'est pas complètement appuyée.
- Votre canal est utilisé par d'autres correspondants.
Pas de réception
-est appuyée.
- Le volume est trop faible.
- Vous vous trouvez en dehors de la zone de réception.
Des obstacles, comme des arbres ou des bâtiments, exercent
une influence négative sur la portée.
- Servez-vous de la fonction de balayage pour chercher des signaux
faibles.
Pas de communication possible
- Pour parler avec d'autres correspondants, tous les appareils
doivent être réglés sur le même canal et sur le même code d'appel.
Ligne directe d'assistance
En cas de problèmes techniques, adressez-vous à notre ligne directe
d'assistance.
Suisse : Tél. 0900 00 1675 (frais Swisscom à l'impression de ce
mode d'emploi : CHF 2,60/min).
Si vous jouissez de droits de garantie, adressez-vous à votre
revendeur. La durée de la garantie est de 2 ans.
Remarques concernant l'entretien
ÆNettoyez les surfaces des boîtiers avec un chiffon doux et non
pelucheux.
ÆN'utilisez pas de produits d'entretien ni de solvants.
Traitement de l'appareil hors d'usage
Si vous ne voulez plus servir de votre appareil, veuillez l'ap
porter au centre de collecte de l'organisme de traitement des
déchets de votre commune (par ex. centre de recyclage).
D'après la loi relative aux appareils électriques et électroniques, les
propriétaires d'appareils usagés sont tenus de mettre tous les
appareils électriques et électroniques usagés dans un collecteur
séparé. L'icône ci-contre signifie que vous ne devez en aucun cas
jeter votre appareil dans les ordures ménagères !
Vous êtes tenus par la loi d'éliminer vos piles et piles re
chargeables auprès d'un revendeur de piles ainsi qu'auprès
de centres de collecte responsables de leur élimination qui
mettent des conteneurs adéquats à disposition. Ce geste éco
responsable est gratuit. L'icône ci-contre signifie que vous ne
devez en aucun cas jeter les piles et piles rechargeables dans
les ordures ménagères, mais que vous devez les apporter à un centre
de collecte.
Éliminez les fournitures d'emballage conformément au règlement
local.
Garantie
Les appareils SWITEL sont fabriqués et contrôlés selon des procédés
de haut niveau. Des matériaux sélectionnés et des technologies de
pointe ont pour effet un fonctionnement irréprochable et une longue
durée de vie. La garantie n'est pas valable pour les piles, les piles re
chargeables ou les packs de piles rechargeables utilisés dans les pro
duits. La durée de la garantie est de 24 mois à partir de la date d'achat.
Pendant la durée de la garantie, tous les défauts dus à des vices de
matériel ou de fabrication seront éliminés gratuitement. Le droit à la
garantie expire en cas d'intervention de l'acheteur ou de tiers. Les
dommages provenant d'un maniement ou d'une manipulation in
corrects, d'une usure naturelle, d'une mauvaise mise en place ou
d'une mauvaise conservation, d'un raccordement ou d'une instal
lation incorrects ainsi que d'un cas de force majeure ou autres in
fluences extérieures sont exclus de la garantie. En cas de ré
clamations, nous nous réservons le droit de réparer, de remplacer les
pièces défectueuses ou d’échanger l’appareil. Les composants rem
placés ou les appareils échangés deviennent notre propriété. Les
demandes de dommages et intérêts sont exclues tant qu'elles ne re
posent pas sur l'intention ou une négligence grossière du fabricant.
Si votre appareil présentait malgré tout une défectuosité pendant la
période de garantie, veuillez vous adressez, muni de la quittance
d'achat, exclusivement au magasin où vous avez acheté votre
appareil SWITEL. Tous les droits de garantie basés sur ces dispo
sitions ne peuvent être revendiqués qu’auprès de votre revendeur.
Deux ans après l'achat et la remise de nos produits, il n'est plus
possible de faire valoir les droits à la garantie.
Déclaration de conformité
Cet appareil est en conformité avec la directive 1999/5/CE sur
les installations de radio et de télécommunication et la recon
naissance réciproque de leur conformité. La conformité avec
la directive mentionnée ci-dessus est confirmée par la marque CE
placée sur l’appareil. Vous pouvez télécharger gratuitement la décla
ration de conformité intégrale depuis notre site Internet
www.switel.com.

Walkie Talkie WTF 770/777CC
1
2
3
4
5
6
9
11
12
8
10
13
18
202122
14 15
23
24
16 17
19
7
ITALIANO
Istruzioni per l'uso
Leggere e osservare le seguenti informa
zioni e conservare il manuale d’uso per
consultazione futura!
Indicazioni di sicurezza
AVVERTENZA!
• Pericolo di esplosione!
ÆUtilizzare unicamente gli alimentatori di rete forniti in dota
zione!
ÆUtilizzare unicamente le batterie ricaricabili fornite in dota
zione o batterie dello stesso tipo!
PRUDENZA!
• Pericolo di inciampare dovuto a cavi non posati corretta
mente!
ÆProcedere alla posa dei cavi in modo da escludere il rischio
di inciampare!
• Batterie ricaricabili e pile possono provocare danni alla
salute e all'ambiente!
ÆNon aprire, danneggiare, ingerire o disperdere nell'ambien
te batterie ricaricabili e pile. Queste possono contenere metalli
pesanti nocivi e dannosi per l'ambiente.
Destinazione d’uso
I radiotrasmettitori si prestano alla comunicazione con altri apparec
chi radiotrasmettitori aventi lo stesso standard. Qualsiasi altro im
piego è considerato improprio. Non sono consentite modifiche o tras
formazioni non autorizzate. Non aprire per nessuna ragione gli
apparecchi autonomamente ed evitare di compiere riparazioni di pro
pria iniziativa.
Utilizzare solo in ambiente idoneo
Osservare le norme e disposizioni in vigore a livello locale.
Evitare un'esposizione a fumo, polvere, vibrazioni, sostanze chimi
che, umidità, calore e raggi solari diretti.
Oggetto di fornitura
- 2 radiotrasmettitori con
gancio cintura
- Stazione di carica
- 8 batterie ricaricabili (AAA) - Alimentatore di rete
- Istruzioni per l'uso - Valigetta di trasporto (777CC)
- 2 cavi di ricarica per auto
(777CC)
- 2 auricolari (777CC)
Elementi di comando (vedi figura)
1 Antenna
2 Display
3 Tasto : Invio segnale di chiamata / Cronometro
4 Tasto : Menu / Blocco tastiera
5 Tasto : Volume - / Navigare in basso
6 Microfono
7 Presa per alimentatore
8 Altoparlante
9 Tasto : Volume + / Navigare in alto
10 Tasto : Tasto conversazione PTT
11 Tasto : Inserire/Spegnere radiotrasmettitori
12 Collegamento auricolare
13 Funzione ricerca di canale
14 Trasmettere
15 Ricevere
16 Codice CTCSS
17 Codice DCS
18 Codice CTCSS/DCS / Indicazione di stato/centesimi di secondo
19 Volume
20 Blocco tastiera
21 Indicazione di canale/stato/secondi
22 Capacità di carica delle batterie
23 Monitoraggio dual watch
24 Modalità VOX
Inserire le batterie
ÆAprire il vano batterie.
ÆInserire le batterie ricaricabili accluse nell'apposito vano batterie.
Osservare la corretta polarità!
ÆRichiudere il vano batterie.
Applicare/Rimuovere il gancio cintura
ÆIntrodurre il gancio per cintura nella guida dall'alto facendolo scat
tare in posizione.
ÆPer rimuovere nuovamente il gancio per cintura, afferrare la lin
guetta di fissaggio con l'unghia del dito allontanandola leggermente
dal radiotrasmettitore e sollevare il gancio per cintura verso sopra.
Applicare/Rimuovere
il gancio cintura Collegare la stazione di carica
Collegare la stazione di carica
ÆProcedere al collegamento della stazione di carica seguendo
quanto raffigurato sul disegno.
Caricare le batterie ricaricabili
ÆPosizionare i radiotrasmettitori prima di metterli in funzione per la
prima volta per almeno 14 ore nella stazione di carica.
Non appena i radiotrasmettitori sono stati posizionati corretta
mente nella stazione di carica, i LED rossi si accendono.
I LED segnalano il corretto collegamento e non si spengono
neanche con batterie completamente cariche.
Capacità di carica della batterie - Carico /
Scarico
Rappresentazioni e modi di scrittura
Premere il tasto raffigurato
2 x Premere 2x il tasto raffigurato
Tenere premuto il tasto raffigurato
oN Visualizzazioni di display
Parlare rivolti verso il microfono
Inserire/Spegnere i radiotrasmettitori
Æ
Appena inseriti, i radiotrasmettitori sono pronti alla ricezione.
Regolare il volume
Æ/
Trasmettere e ricevere
Æ
Se si tiene premuto non è possibile ricevere alcun se
gnale radio.
Attivare/Disattivare il segnale acustico di con
ferma
Non appena si rilascia il dispositivo emette un segnale acustico
di conferma (roger beep). In questo modo si segnala al proprio partner
di chiamata la conclusione della trasmissione.
Æ9 x , /oN /oF ,
Impostare il canale
Æ, /,
Impostare la codifica di chiamata
Per ciascun canale è possibile scegliere tra 38 codifiche di chiamata
analogiche (CTCSS 1-38) e 83 codifiche di chiamata digitali
(DCS 1-83). Gli utenti di radiotrasmettitori sono in grado di comunica
re tra di loro solo con canale e codifica di chiamata uguali.
Æ2 x , /, ÊSelezionato codice CTCSS
Æ3 x , /, ÊSelezionato codice DCS
Scorrere i canali
In un ciclo continuo l'apparecchio scorre gli 8 canali alla presenza di
segnali. Non appena l'apparecchio individua comunicazioni via radio,
la ricerca di canale è interrotta.
• Premere per partecipare alla comunicazione via radio su
questo canale. Il radiotrasmettitore passa al canale interessato men
tre la ricerca di canale è conclusa.
• Non premendo e in caso di mancato rilevamento di segnali
sul canale, la ricerca di canale è proseguita dopo 5 secondi.
Æ5 x , /ÊAvviare lo scorrimento canali
Æ6 x , /ÊAvviare lo scorrimento codici CTCSS
Æ7 x , /ÊAvviare lo scorrimento codici DCS
ÆÊConcludere lo scorrimento canali
Monitoraggio dual watch
Con monitoraggio dual watch attivato il radiotrasmettitore passa
automaticamente da un canale impostato all'altro, fino a individuare
un segnale radio. In questo modo è possibile parlare con due partner
di chiamata su canali distinti.
Æ11 x ÊAttivare la modalità di impostazione
Æ/, ÊSelezionato un ulteriore canale
Æ/, ÊModificato il codice CTCSS
Æ/, ÊModificato il codice DCS
Æ11 x , /oF , ÊConcludere il monitorag
gio dual watch
Impostare la suoneria
Æ8 x , /,
Funzione schermo
La funzione schermo consente di individuare sul canale attualmente
impostato la presenza di segnali deboli.
Æ,
Æ
Attivare/Disattivare il blocco tastiera
Æ
Attivare/Disattivare il suono tasti
Æ10 x , /oN /oF ,
Funzione cronometro
ÆÊAvviata la funzione cronometro
ÆÊStart / Stop / Continua
ÆÊReset
ÆÊUscire dalla funzione cronometro
Modalità VOX
La funzione consente al radiotrasmettitore di trasmettere in automati
co, non appena è rilevata una voce o un rumore.
Appena si inizia la conversazione subentra un breve ritardo,
prima che il radiotrasmettitore proceda alla trasmissione.
Con funzione vivavoce in modalità VOX non è necessario
premere sul radiotrasmettitore per trasmettere.
Per l'esercizio in modalità VOX sono disponibili 3 livelli di sensibilità
relativi alla riproduzione di rumori dell'ambiente circostante.
Livello 1 Livello 2 Livello 3
Rumori circostanti
forti
Rumori circostanti
normali
Rumori circostanti
lievi
Æ4 x , /01 /02 /03 , ÊSelezionato il
livello di sensibilità e attivata la modalità VOX
Æ4 x , oF , ÊDisattivata la modalità VOX
Auricolare
ÆCollegare un auricolare idoneo sul lato superiore del radiotrasmet
titore.
ÆAttivare la modalità VOX (vedi sopra).
ÆAgganciare il radiotrasmettitore alla cintura e fissare il cavo
dell’auricolare agli indumenti in modo che il microfono si trovi all’altez
za della propria bocca. A questo punto è possibile ricevere e trasmet
tere a mani libere.
Specifiche tecniche
Potenza di uscita 0,5 W
Portata ca. 10 km (con linea di mira libera)
Batteria ricaricabile NiMH AAA 1,2 V, 600 mAh
Il radiotrasmettitore è equipaggiato con un alimentatore efficiente in
termini di consumo energetico (input 100-240 VAC, output 9 VDC,
300 mA). Il carico zero corrisponde a ca. 0,08 W. L’efficienza media
è di ca. 77%. La potenza assorbita è uguale a 1,7 W.
Eliminare i guasti
In presenza di problemi con il radiotrasmettitore, seguire le indicazioni
riportate qui di seguito.
Nessuna funzione
- Le batterie ricaricabili non sono state inserite correttamente.
- Le batterie ricaricabili non sono cariche.
- Le batterie ricaricabili sono difettose.
Trasmissione non è possibile
-non risulta interamente premuto.
- Il canale è utilizzato da un altro interlocutore.
Nessuna ricezione
-è premuto.
- Il volume è troppo basso.
- Si è fuori del campo di ricezione.
Eventuali ostacoli come alberi o edifici hanno un influsso ne
gativo sulla portata.
- Servirsi della funzione schermo per individuare segnali deboli.
Non è possibile comunicare
- Per comunicare con altri interlocutori, tutti i radiotrasmettitori devo
no risultare impostati sullo stesso canale e sulla stessa codifica di
chiamata.
Linea diretta di assistenza
In caso di problemi tecnici, rivolgersi alla nostra linea diretta di assi
stenza.
Svizzera: Tel. 0900 00 1675 (spese da rete nazionale Swisscom alla
data di stampa CHF 2,60/min).
In caso di reclami entro il periodo di garanzia, rivolgersi al rivenditore
autorizzato. Il periodo di garanzia ricopre 2 anni.
Consigli per la cura
ÆPulire le superfici degli apparecchi con un panno morbido e anti
pelucchi.
ÆNon utilizzare mai detergenti o solventi.
Smaltimento
Smaltire l'apparecchio consegnandolo in uno dei punti di rac
colta istituiti dalla propria società di smaltimento rifiuti comu
nale (ad es. centro di riciclo materiali). Secondo quanto previ
sto dalla legge sugli apparecchi elettrici ed elettronici, i proprietari di
apparecchi esauriti sono per legge tenuti alla consegna di tutti gli ap
parecchi elettrici ed elettronici presso un centro di rilievo rifiuti in
raccolta differenziata. Il simbolo riportato qui a lato indica che non è
assolutamente consentito smaltire l'apparecchio assieme ai normali
rifiuti domestici!
Per legge sussiste l’obbligo di consegnare accumulatori e bat
terie presso i rivenditori di batterie utilizzando gli appositi con
tenitori di raccolta e provvedendo in tal modo al corretto smal
timento. Lo smaltimento è gratuito. I simboli indicano che non
è assolutamente consentito gettare batterie ricaricabili e pile
nei rifiuti domestici, consegnandoli ai fini dello smaltimento nei
rispettivi punti di raccolta.
Smaltire confezioni ed imballaggi secondo quanto indicato dalle
norme in vigore a livello locale.
Garanzia
Gli apparecchi SWITEL sono costruiti e collaudati in osservanza dei
processi di produzione più moderni. L'impiego di materiali selezionati
e tecnologie altamente sviluppate sono garanti di una perfetta fun
zionalità e lunga durata in vita. La garanzia non si estende a pile, bat
terie ricaricabili o pacchi batteria utilizzati all'interno degli apparecchi.
Il periodo di garanzia ricopre 24 mesi a partire dalla data di acquisto.
Entro il periodo di garanzia si procederà all'eliminazione gratuita di
tutti i guasti dovuti a difetti di materiale o produzione. Il diritto di garan
zia cessa in caso di interventi da parte dell'acquirente o di terzi. Danni
dovuti a impiego o esercizio improprio, naturale usura, errato montag
gio o conservazione, collegamento o installazione impropri, forza
maggiore o altri influssi esterni non sono coperti da garanzia. In quali
tà di produttore ci riserviamo il diritto, in caso di reclami, di riparare o
sostituire le parti difettose o di rimpiazzare l'apparecchio. Parti o ap
parecchi sostituiti passano di nostra proprietà. Sono esclusi diritti di
risarcimento per danni se non dovuti a intenzione o colpa grave del
costruttore.
In presenza, ciononostante, di un difetto durante il periodo di garan
zia, si prega di rivolgersi esclusivamente al negozio di rivendita del
l'apparecchio SWITEL assieme al relativo scontrino di acquisto. In ba
se alle presenti disposizioni, tutti i diritti di garanzia dovranno essere
fatti valere esclusivamente nei confronti del rivenditore autorizzato.
Decorso il termine di due anni dalla data di acquisto e consegna dei
nostri prodotti non sarà più possibile fare valere alcun diritto di garan
zia.
Dichiarazione di conformità
Il presente apparecchio è conforme alla direttiva 1999/5/CE
concernente le apparecchiature radio, le apparecchiature ter
minali di telecomunicazioni e il reciproco riconoscimento della
loro conformità. La conformità con la direttiva sopra indicata è confer
mata dal marchio CE applicato sull'apparecchio. Per la dichiarazione
di conformità completa si prega di voler usufruire del servizio di down
load gratuito dal nostro sito web www.switel.com.
Walkie-Talkie WTF 770/777CC
1
2
3
4
5
6
9
11
12
8
10
13
18
202122
14 15
23
24
16 17
19
7
ENGLISH
Operating Manual
Please read and observe the following in
formation and keep the operating manual
nearby for future reference!
Safety information
WARNING!
• Risk of explosion!
ÆOnly use the power adapter plug supplied!
ÆOnly use the batteries supplied or ones of the same type!
CAUTION!
• Risk of tripping due to improperly laid cable!
ÆLay the cables so that nobody can trip over them!
• Batteries represent a hazard to health and the environment!
ÆNever open, damage or swallow batteries or allow them to
pollute the environment. They may contain toxic, ecologically
hazardous heavy metals.
Intended use
These walkie-talkies have been conceived for communication with
other walkie-talkies complying to the same standards. Any other use
is considered unintended use. Unauthorised modification or recon
struction is not permitted. Under no circumstances open the devices
or complete any repair work yourself.
Use only in suitable environments
Observe all local directives and regulations.
Prevent excessive exposure to smoke, dust, vibration, chemicals,
moisture, heat and direct sunlight.
Package contents
- 2 walkie-talkies with belt clips - charging station
- 8 batteries (AAA) - power adapter plug
- operating manual - carrying case (777CC)
- 2 vehicle charger cables (777CC) - 2 headsets (777CC)
Operating elements (see diagram)
1 Antenna
2 Display
3button: Send ringing tone / Stopwatch
4button: Menu / Key lock
5button: Volume - / Reduce setting
6 Microphone
7 Power adapter plug socket
8 Loudspeaker
9button: Volume + / Increase setting
10 button: Press To Talk button
11 button: Switch walkie-talkie on/off
12 Headset connection
13 Channel scanning
14 Transmitting
15 Receiving
16 CTCSS code
17 DCS code
18 CTCSS/DCS code / Status / Hundredths display
19 Volume control
20 Key lock
21 Channel / Status / Seconds display
22 Battery capacity
23 Dual channel monitoring
24 VOX mode
Inserting the batteries
ÆOpen the battery compartment.
ÆInsert the batteries supplied. Pay attention to correct polarity.
ÆClose the battery compartment.
Attaching/Detaching the belt clip
ÆSlide the belt clip in the guide from the top until it audibly snaps into
place.
ÆTo detach the belt clip, prize the fastening tab away from the
walkie-talkie a little with your fingernail and slide the belt clip upwards.
Attaching/Detaching the belt clip Connecting the charging station
Connecting the charging station
ÆConnect the charging station as illustrated in the diagram.
Charging the batteries
ÆBefore using the walkie-talkies for the first time, place them in the
charging station for at least 14 hours.
When the walkie-talkies are inserted correctly in the charging
station, the red LEDs light up.
The LEDs signal that the connection is correct and continue to
light up even when the batteries are fully charged.
Battery capacity: full to empty
Display and explanation of operations
Press the button depicted
2 x Press the button depicted twice
Press and hold the button depicted
oN Text in the display
Speak into the microphone
Switching the walkie-talkies on/off
Æ
The walkie-talkies are ready for reception immediately they
are switched on.
Adjusting the volume
Æ/
Transmitting and receiving
Æ
Radio signals cannot be received when the is being
pressed.
Activating/Deactivating the confirmation signal
The confirmation signal (Roger beep) sounds when you release the
button. This signals to the caller that you have ended transmis
sion.
Æ9 x , /oN /oF ,
Setting the channel
Æ, /,
Setting the CTCSS/DCS code
There are 38 analogue (CTCSS 1-38) and 83 digital (DCS 1-83)
codes available per channel. It is only possible to communicate using
the walkie-talkies when they are each set to the same channel and
CTCSS/DCS code.
Æ2 x , /, ÊSelect the CTCSS code
Æ3 x , /, ÊSelect the DCS code
Scanning the channels
Signals are searched for on all 8 channels in a continuous cycle. The
channel search is stopped if radio communication is found.
• Press the button to enable radio communication on this
channel. The walkie-talkie is set to the channel and channel scanning
is ended.
•Ifis not pressed, channel scanning resumes after 5 seconds
if no signal is transmitted on this channel.
Æ5 x , /ÊThe channels are scanned
Æ6 x , /ÊCTCSS codes are scanned
Æ7 x , /ÊDCS codes are scanned
ÆÊEnd channel scanning
Dual channel monitoring
When dual-channel monitoring is activated, the walkie-talkie auto
matically switches between two channels until a communication sig
nal is detected. This means you can talk to two callers on different
channels.
Æ11 x ÊActivate programming mode
Æ/, ÊSelect additional channel
Æ/, ÊChange CTCSS code
Æ/, ÊChange DCS code
Æ11 x , /oF , ÊEnd dual channel monitor
ing
Setting the ringing melody
Æ8 x , /,
Monitor function
The Monitor function enables the search for weak signals on the chan
nel currently set.
Æ,
Æ
Switching the key lock on/off
Æ
Switching the key tone on/off
Æ10 x , /oN /oF ,
Stopwatch function
ÆÊActivate the stopwatch function
ÆÊStart / Stop / Resume
ÆÊReset
ÆÊEnd the stopwatch function
VOX mode
When this function is active, the walkie-talkie automatically starts to
transmit when the unit detects a voice or a sound.
When you start to speak, there is a slight delay before the
walkie-talkie starts to transmit.
When communicating with the hands free in VOX mode, there
is no need to press the button on the walkie-talkie to be
able to transmit.
There are three sensitivity levels available for operation in VOX mode
which can be selected according to the ambient noise.
Level 1 Level 2 Level 3
High ambient noise Normal ambient
noise
Low ambient noise
Æ4 x, /01 /02 /03 , ÊSelect the sens
itivity level and activate VOX
Æ4 x , oF , ÊDeactivate VOX
Headset
ÆConnect an appropriate headset using the socket at the top of the
walkie-talkie.
ÆActivate VOX mode (see above).
ÆClip the walkie-talkie on your belt and fix the headset cable to a
piece of your clothing so that the microphone is positioned near your
mouth. You can now transmit and receive without needing to use your
hands.
Technical properties
Output power 0.5 W
Range Approx. 10 km (in open space)
Battery NiMH AAA 1.2 V, 600 mAh
The walkie-talkie is equipped with an energy-efficient power adapter
plug (input 100-240 VAC, output 9 VDC, 300 mA). The zero load is ap
prox. 0.08 W. The average efficiency is approx. 77%. The power con
sumption is max. 1.7 W.
Troubleshooting
Should problems arise with the walkie-talkies, please refer to the fol
lowing information first.
Equipment does not function
- The batteries are not inserted correctly
- The batteries are not charged
- The batteries are defective
Transmission not possible
-is not pressed in fully
- The channel is being used by other subscribers
No reception
-is being pressed
- The volume is set too low
- You are outside the reception range.
Obstructions such as trees and buildings impair the range.
- Use the Monitor function to search for weak signals.
No communication possible
- In order to talk to other subscribers, the respective walkie-talkies
must be set to the same channel and CTCSS/DCS code.
Service hotline
In the case of technical problems, contact our Service hotline.
Switzerland: Tel. 0900 00 1675 (national charges, Swisscom, at time
of going to print CHF 2.60/min).
In the case of claims under the terms of guarantee, please contact
your sales outlet. There is a 2 year period of guarantee.
Maintenance
ÆClean the housing surfaces with a soft, fluff-free cloth.
ÆNever use cleaning agents or solvents.
Disposal
In order to dispose of your device, take it to a collection point
provided by your local public waste authorities (e.g. recycling
centre). According to laws on the disposal of electronic and
electrical devices, owners are obliged to dispose of old electronic
and electrical devices in a separate waste container. The adjacent
symbol indicates that the device must not be disposed of in normal do
mestic waste!
You are legally obliged, to dispose of power packs and batter
ies at the point of sale or in the corresponding containers
provided at collection points by local public waste authorities.
Disposal is free of charge. The symbols indicate that the bat
teries must not be disposed of in normal domestic waste and
that they must be brought to collection points provided by local
public waste authorities.
Packaging materials must be disposed of according to local regula
tions.
Guarantee
SWITEL equipment is produced and tested according to the latest
production methods. The implementation of carefully chosen materi
als and highly developed technologies ensure trouble-free function
ing and a long service life. The terms of guarantee do not apply to the
batteries or power packs used in the products. The period of guaran
tee is 24 months from the date of purchase.
All deficiencies related to material or manufacturing errors within the
period of guarantee will be redressed free of charge. Rights to claims
under the terms of guarantee are annulled following intervention by
the purchaser or third parties. Damage caused as the result of improp
er handling or operation, normal wear and tear, incorrect positioning
or storage, improper connection or installation or Acts of God and oth
er external influences are excluded from the terms of guarantee. In
the case of complaints, we reserve the right to repair defect parts, re
place them or replace the entire device. Replaced parts or devices be
come our property. Rights to compensation in the case of damage are
excluded where there is no evidence of intent or gross negligence by
the manufacturer.
If your device does show signs of a defect within the period of guaran
tee, please contact the sales outlet where you purchased the SWITEL
device, producing the purchase receipt as evidence. All claims under
the terms of guarantee in accordance with this agreement can only be
asserted at the sales outlet. No claims under the terms of guarantee
can be asserted after a period of two years from the date of purchase
and hand-over of the product.
Declaration of Conformity
1999/5/EC directive on radio equipment and telecommunica
tions terminal equipment and the mutual recognition of their
conformity. Conformity with the above mentioned directive is
confirmed by the CE mark on the device. To view the complete Declar
ation of Conformity, please refer to the free download available on our
web site at www.switel.com.
This manual suits for next models
1
Table of contents
Languages:
Other switel Two-way Radio manuals

switel
switel WTC600 User manual

switel
switel WTE 2313 Trio User manual

switel
switel WTF 750 User manual

switel
switel WT227 User manual

switel
switel WTC605 CC User manual

switel
switel PMR WTF 8000 User manual

switel
switel WTC 525 User manual

switel
switel WT237 User manual

switel
switel WTE 23x User manual

switel
switel PMR WTC 2700B User manual

switel
switel WTC520 User manual

switel
switel WTC 2800 User manual

switel
switel WT270 User manual

switel
switel WTC 521 User manual

switel
switel WTF718 User manual

switel
switel WTE20x User manual

switel
switel WTC670 User manual

switel
switel WT007 User manual

switel
switel WTF 729 User manual

switel
switel WTC519 User manual