Sylvan SL43E User manual

SL43E
INSTALLATION INSTRUCTIONS
Version 2

2www.sylvan.co.nz
Thank you for choosing Sylvan, this lock is for Residential use only, and its two year warranty
(mechanical and electronic) only applies for locks being used for residential use.
To ensure you get the best out of your purchase we ask that you follow the below:
• Please read these instructions fully before installation of this lock.
• We recommend this lock is installed by a professional installer or a serious DIYer to ensure
correct installation and operation.
• The supplied rubber boots must be installed; however, this smart lock requires a smooth flat
surface to hold its water tightness. This lock is not suitable for use on a tongue and groove
door, where water can penetrate the lock via a groove in the door.
• We recommend that this lock is never fully exposed to direct weather for long periods of
time. For long lasting properties of the product, positioning the lock under a eve or sheltered
position is best.
• This lock is rated IP55, but only on the outward face of the lock. No warranty is given if the
lock gets damaged from water for the inside of the door.
• This lock is not suitable for use on a gate.
• This lock comes with a mechanical key override, this can be used in a situation of complete
battery loss. We recommend an override key is put somewhere safe outside in case complete
power loss.
• Replace batteries when they are showing low voltage on the app.
• All batteries used with this lock must be high quality
Alkaline (4 x AA batteries), to ensure long lasting use.
• Lithium or rechargeable batteries cannot be used with this lock.
Introduction
Installation Video
Scan this code:
App Setup Video
Scan this code:
3www.sylvan.co.nz
SL43E INSTALLATION INSTRUCTIONS
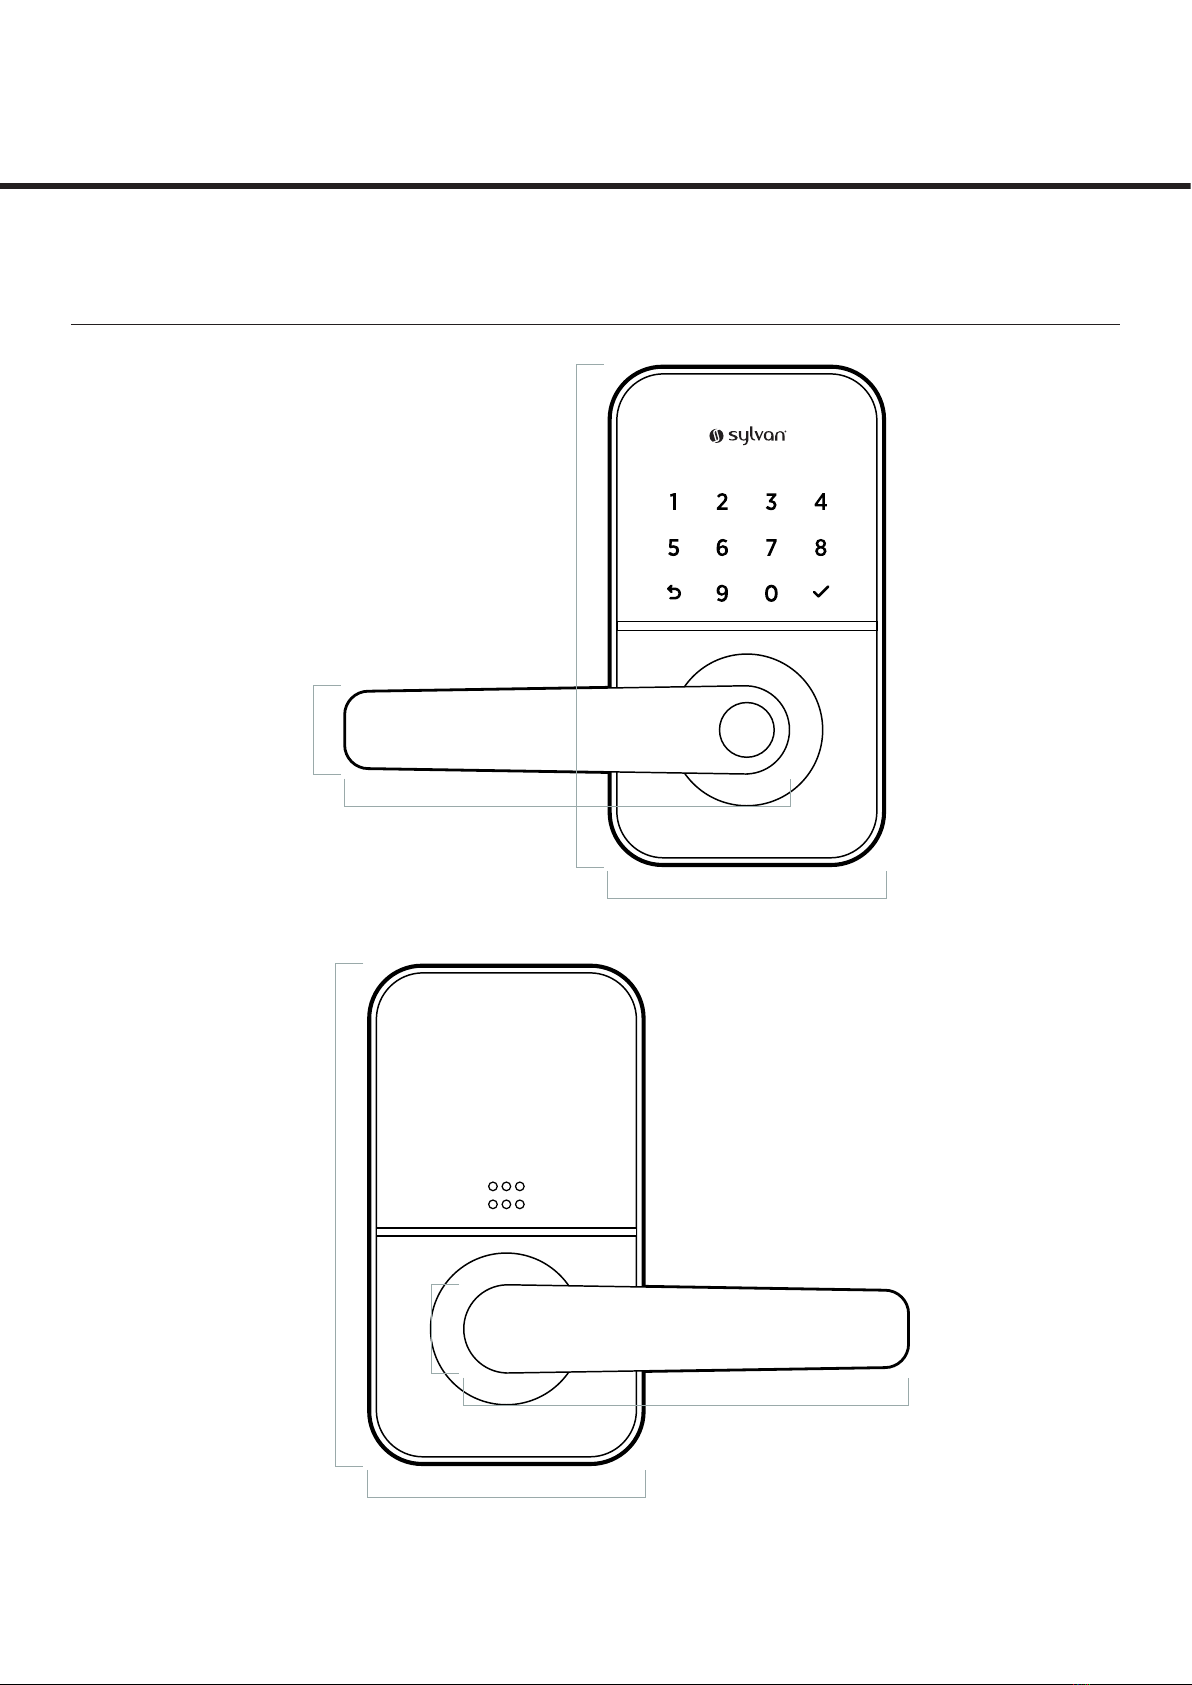
Lock Dimensions
124mm
25mm
124mm
25mm
78mm
140mm
78mm
140mm
124mm
25mm
124mm
25mm
78mm
140mm
78mm
140mm

4www.sylvan.co.nz
SL43E Packing List
• Front panel
Qty x1
• Back panel
Qty x1
• User manual
Qty x1
• Installation template
Qty x1
• Mortice lock / latch
Qty x1
• Striker plate
Qty x1
• RFID Tag
Qty x2
• Self adhesive disc
Qty x2
• Mechanical keys
Qty x 2
• Waterproof rubber boot
Qty x2
• Striker
Plate Box
Qty x1
• Pin x1
• Screw G x2
• Screw B x4
• Allen Key x1
• Sliding Screw Stub A x1
• Sliding Screw Stub B x2
• Screw E x1
• Screw C x3
• Spindle
• Sliding Screw D x1
• Screw F x1
• Screw Stub A x2
• Screw Stub B x2
• Screw H x2
• Smart hub
Qty x1 (optional)

5www.sylvan.co.nz
SL43E INSTALLATION INSTRUCTIONS
Product specifications:
Model number SL43E Door thickness
range
35mm - 65mm
Material of
Manufacture
Aluminum alloy Low voltage
Alarm
Less than 4.8 Volts
Weight 2 kg Type of use Residential use only
Options of
unlocking
Bluetooth
Password
Card
Mechanical key
Gateway(option)
Passcode
capacity
App unlocks
Passcodes: 150 max
RFID Cards: 200 max
Working
temperature
-10 – + 55 degrees C Working
Humidity
0-95%
Normal voltage 6 volts (4 x Alkaline
batteries)
Warranty 2 years mechanical
2 years electronic
Anti Peeping Technology
This lock oers anti-peeping virtual passcode entry by inputting a random
passcode either before or after the proper passcode followed by the # key.

6www.sylvan.co.nz

7www.sylvan.co.nz
SL43E INSTALLATION INSTRUCTIONS
Installation:
Notice: Adjust the handle according to the direction you open the door.
The door opens to the left, with the handle facing left. The door opens to the right, with the handle
facing right.
1. Loosen the screw
1. Loosen the screw
2. Adjust the direction of
the handle
2. Adjust the direction of
the handle
3. Tighten the screw
3. Tighten the screw
For Exterior Assembly:
For Interior Assembly:

8www.sylvan.co.nz
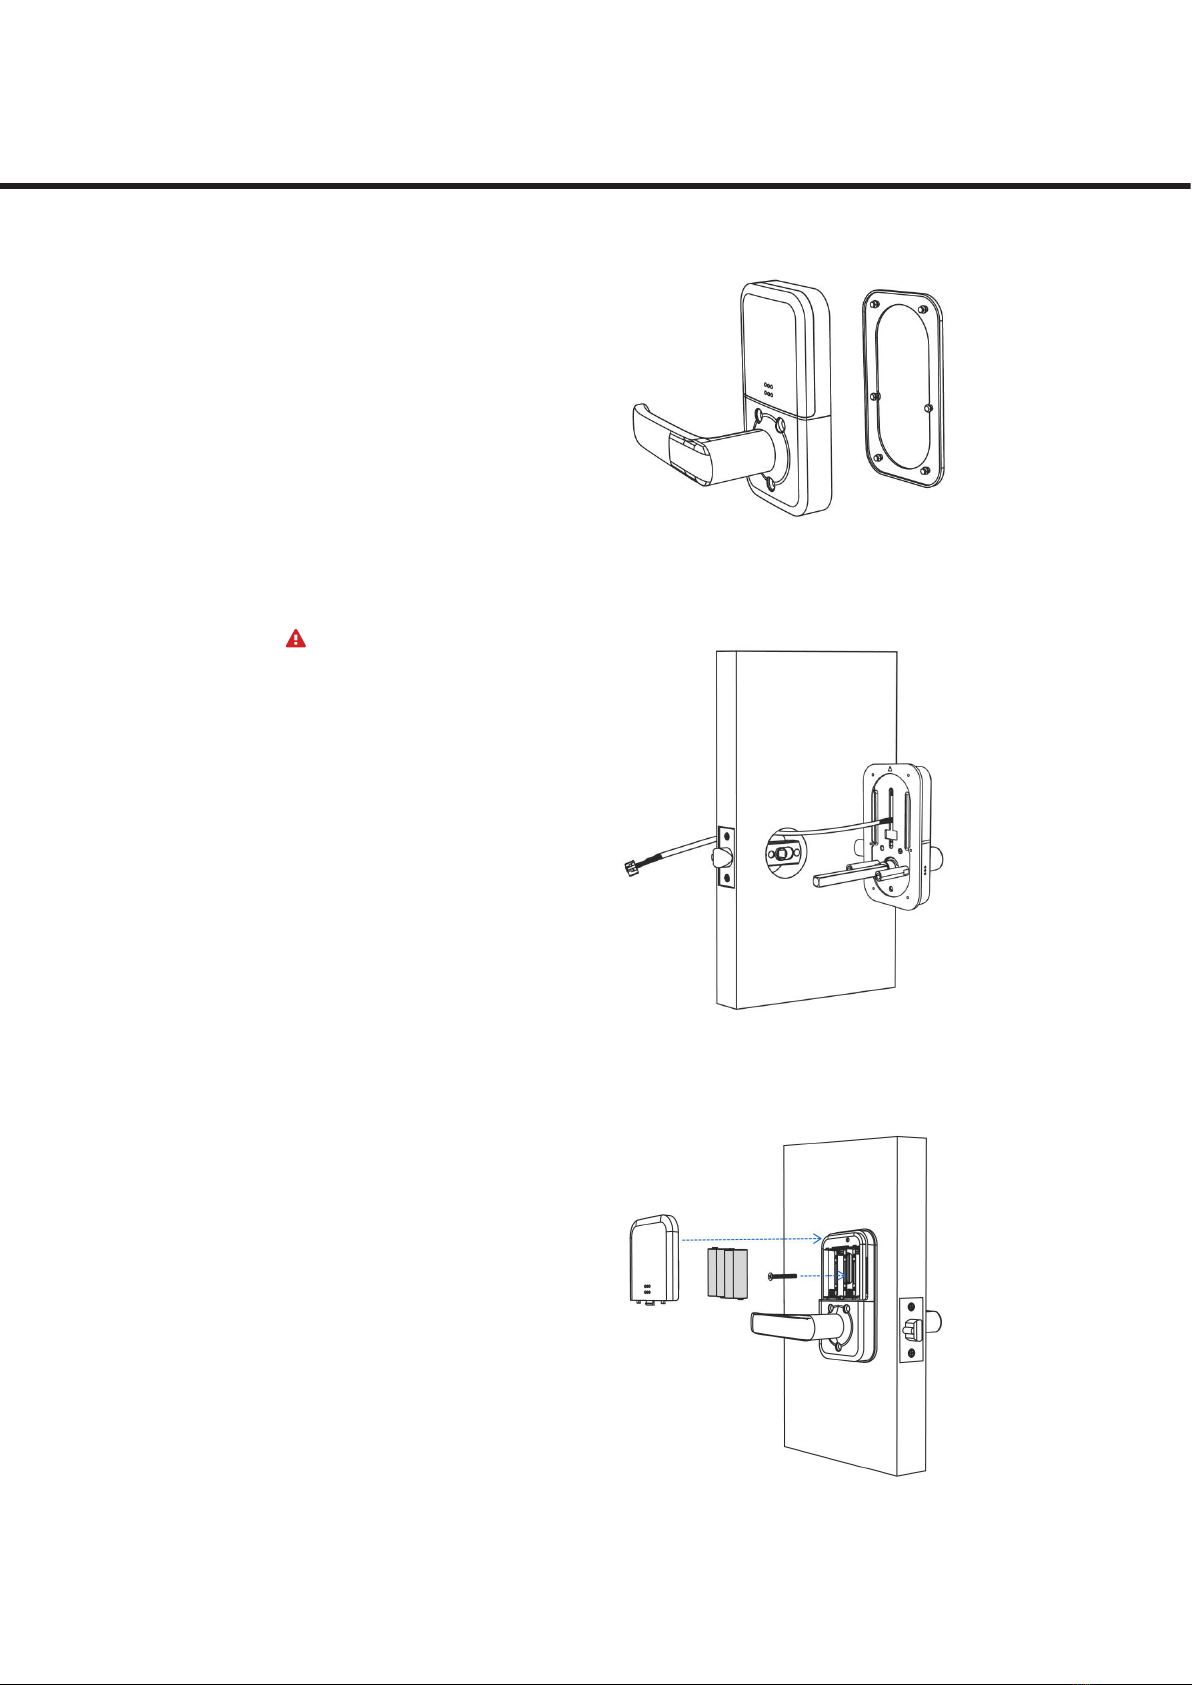
Installation:
Step 1: Install Latch
1. Mark and crop door using installation template provided
2. Ensure holes are clear of any sharp edges and clean of
swarf and wood dust.
3. Install the latch into the door with screws
Step 2: Install Exterior Assembly
1. Install the waterproof rubber plate to exterior assembly.
2. Install square shaft into spindle hub and 2 positioning columns.
3. Install 3 screw stubs.
4. Install exterior assembly.
1. 2.
3. 4.
9www.sylvan.co.nz
SL43E INSTALLATION INSTRUCTIONS
Step 3: Install Interior Assembly
1. Install the waterproof rubber plate.
2. Connect the wire. IMPORTANT Plug in
power cable ensuring
the plug is around the correct way for
the plug to accept its receiver correctly.
3. Secure exterior assembly with screw .
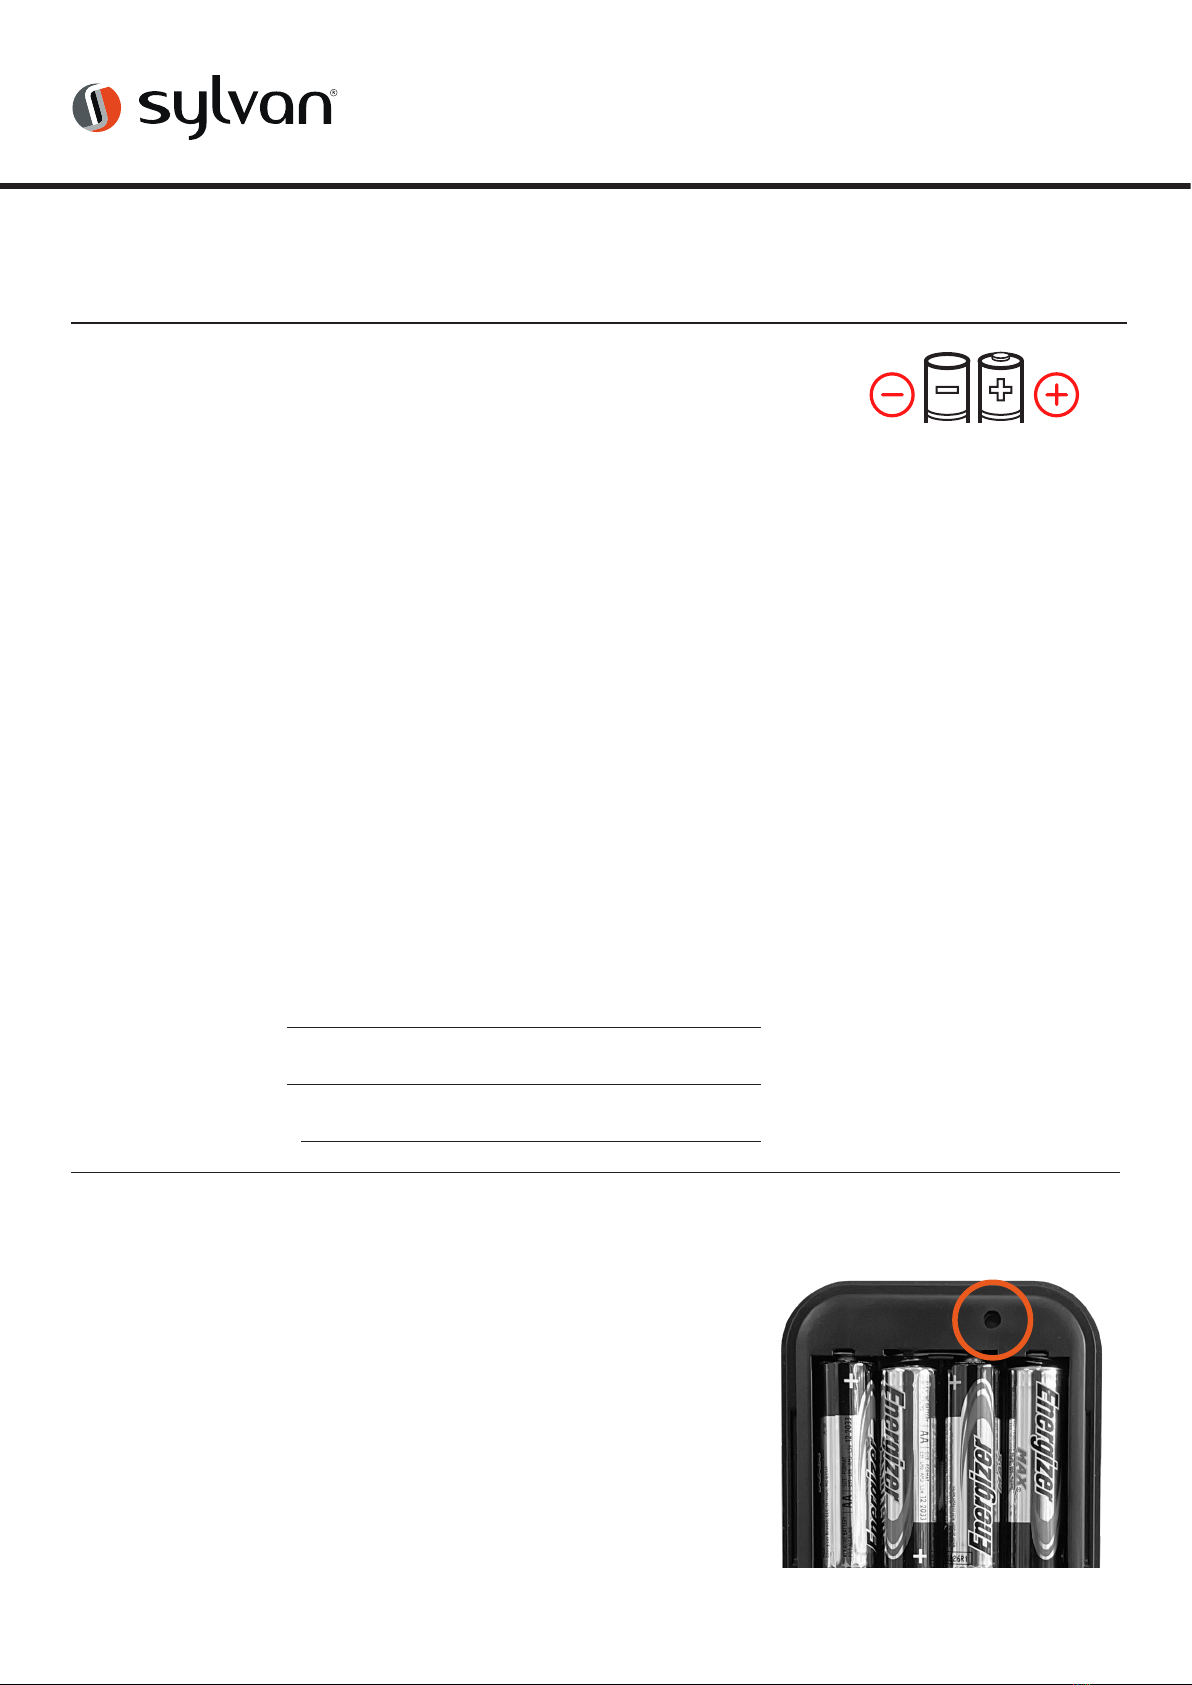
4. Install 4 AA alkaline batterie.
5. Install the battery cover.
6. Complete Installation.
10 www.sylvan.co.nz
Manual reset:
If you are not admin of the Smart Lock, remove battery cover
and complete:
Long press the reset button beneath the battery case for
5 seconds or until you hear: “Please Input Initialisation
Passcode”.
Now input code “000#” on the keypad.
The system reset will be complete. From here you can re-link
the SL43E Smart Lock to your phone via the TT App.
*Note: this will clear all previous users from the locks memory
1. Date Installed: / /
2. Installed By:
3. Pin: #
1. Holes drilled and aligned as per drilling template.
2. Ensure the rubber boot is aligned correctly with a
good seal on the door, also making sure the lugs are
correctly seated in their holes .
3. Ensure all screws and bolts are correctly tightened.
4. Ensure power cable is installed and not bent or
crimped in door.
5. Check batteries are Alkaline and installed correctly.
6. Check to see if the lcok requires a software update via
the TT App
Lock Installation Checklist
Table of contents
Other Sylvan Door Lock manuals


