manuals.online logo
Brands
  1. Home
  2. •
  3. Brands
  4. •
  5. Symmons
  6. •
  7. Plumbing Product
  8. •
  9. Symmons Symmetrix S240 Manual

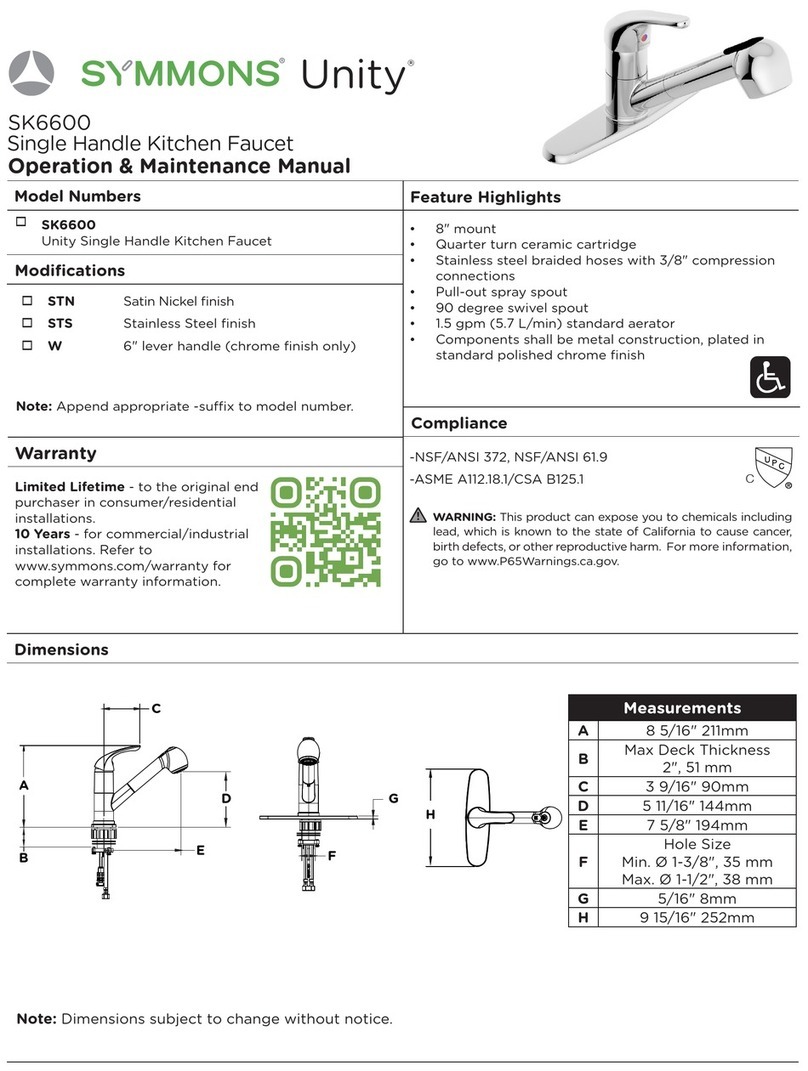
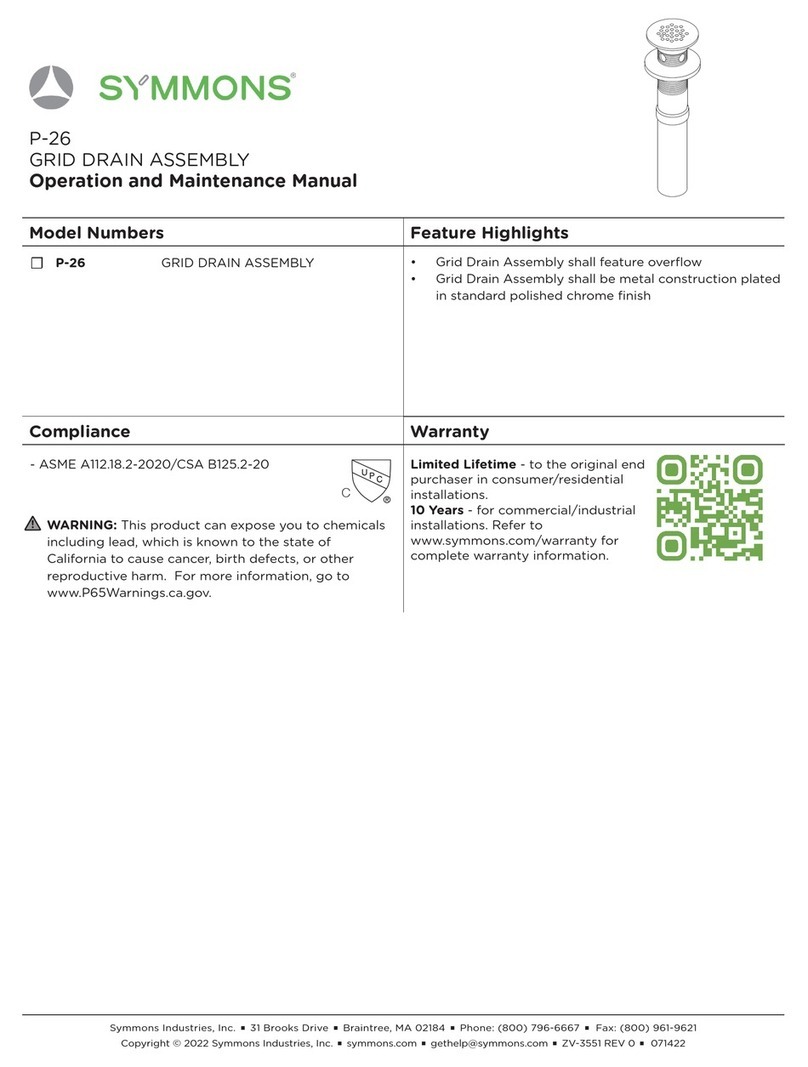
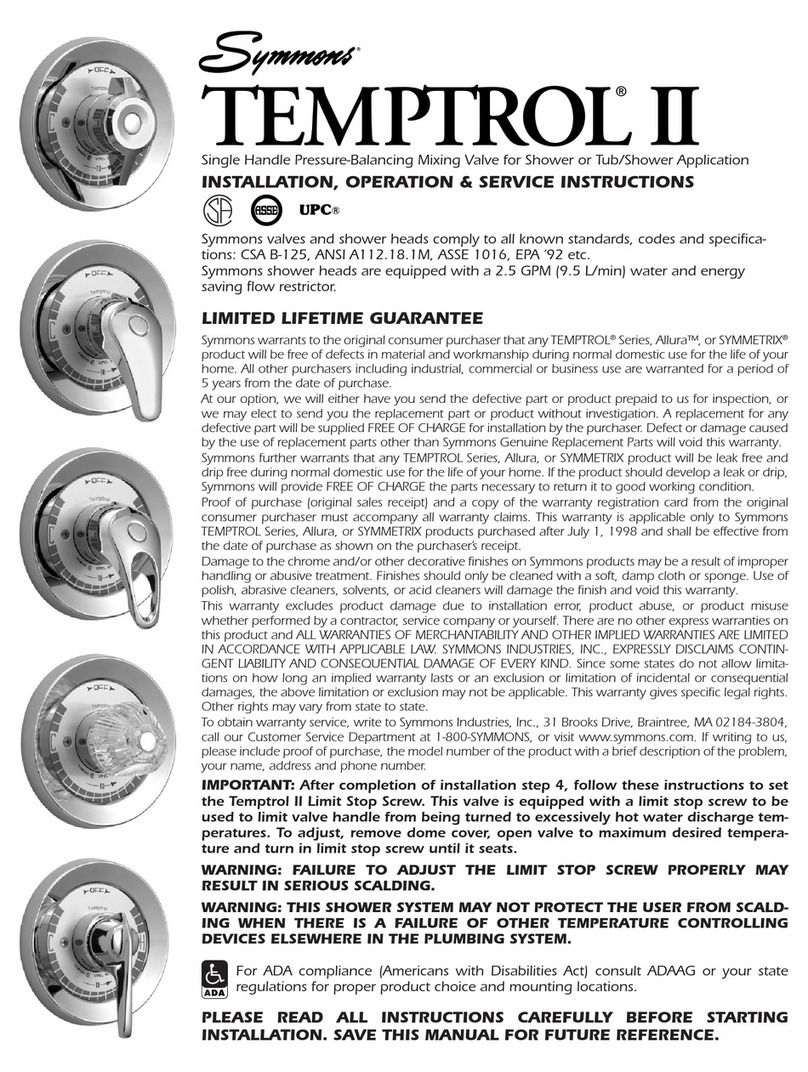
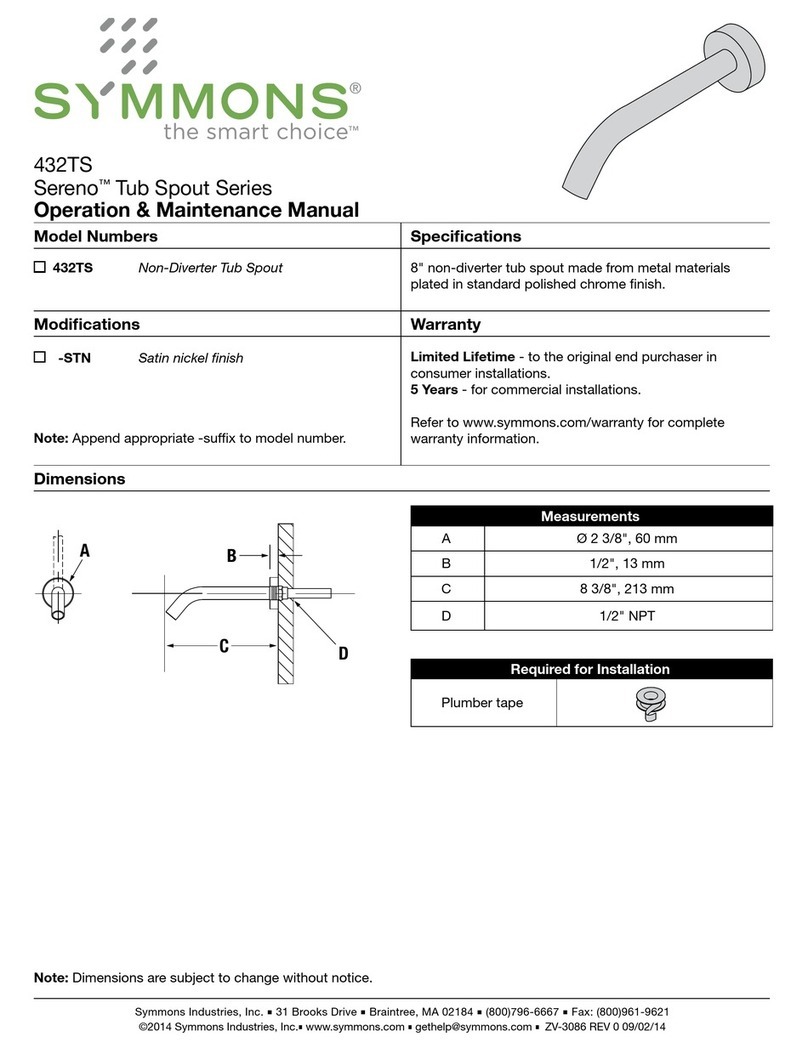
Symmons Symmetrix S240 Manual

Lavatory Faucet
S240, S2401 & S2402 & S2402PP
Operation & Maintenance Manual
Caution: Be sure to turn o hot and cold water supplies
before installing or servicing faucet.
INSTALLATION:
1. Push faucet supplies through holes in sink. Secure faucet
to sink by tightening flange nuts (KN-116) from underside.
(If sink or counter surface is uneven, use putty or sealant
to make proper seal
under base.)
2. Connect hot supply to left tube and cold supply to right
tube using appropriate connectors.
3. Pop-up drain installation:
a) Remove pop-up plug, tail piece and flange from the drain
body. Make sure that locknut is threaded all the way
down onto the body with flat friction washer in middle
and beveled washer on top.
b) Apply plumbers putty or sealant to bottom of flange.
c) Install drain body through drain opening in lavatory and
screw flange onto the drain body making sure that the
threads are completely engaged for proper sealing and
strength of the connection. Apply joint compound to
all threaded parts to insure proper seal. Apply putty or
teflon tape to tail piece before attaching to drain body.
d) Tighten locknut to compress the beveled flange evenly
across the bottom of the drain opening taking care
not to over tighten the locknut, causing damage to the
lavatory.
e) Remove one of two ball washers from inside the
threaded cavity. Insert pop-up plug and pivot rod into
body. Add one ball washer (the second ball washer
should remain inside the body) to the outside of the ball.
Tighten the retaining nut until the ball is seated on the
internal and external ball washers. Note: The pop-up plug
can be installed either in the removable or non-
removable position, depending on the location of the
hole located in the guide at the bottom of the plug.
f) Slide the pivot rod through one side of the spring clip,
then the appropriate adjustment hole and then other
side of the spring clip.
g) Insert lift rod through faucet housing and the top of the
lift strap and secure it in place by tightening the screw.
Note: To insure proper operation of lift rod and pop-up,
some adjustment of the linkage may be required. There
are two possible adjustment points: 1) lift strap to lift rod
and 2) lift strap to pivot rod.
4. It is very important to thoroughly flush the supply lines to
prevent foreign matter, i.e. copper chips, sand, stones, etc.
from damaging the sealing surfaces of cartridge. Remove
aerator and turn cold valve handle on to full cold position,
open cold supply. Without closing, turn hot valve handle to
full hot position and open hot supply. Let water run in hot
only and cold only positions long enough to flush supply
lines thoroughly. Shut o faucet and replace aerator. Check
for leaks.
To replace cartridge (KN-113 or KN-114) in
faucet with standard or LCT handles:
1. Remove plug button (T-33, T-33R or T-33B), loosen philip
head screw (LN-121A) and remove handle (LN-140, LN-131 or
LN-102).
2. Place wrench on cartridge hex nut (KN-113, KN-114). Turn
wrench counter clockwise until cartridge is removed.
3. Install new cartridge. Turn cartridge with wrench until car-
tridge does not turn easily then turn 1/4 or 1/2 turn further.
Reassemble handle in reverse fashion.
To replace cartridge (KN-113 or KN-114) in
faucet with LCF, LPO or LAM handles:
1. Loosen philip oval head screw (LN-134) and remove handle
(LN-114).
2. Remove collar (LN-112) by turning counter clockwise, do not
use wrench as this may damage the surface finish.
3. Place wrench on cartridge hex nut (KN-113, KN-114). Turn
wrenchcounter clockwise until cartridge is removed.
4. Install new cartridge. Turn cartridge with wrench until
cartridge does not turn easily then 1/4 or 1/2 turn further.
Reassemble handle in reverse fashion.
4 "
114mm
1
2
2 "
54mm
1
8
3 "
79mm
1
8
2 "
70mm
3
4
6"
152mm
6"
152mm
4"
102mm
2"
51mm
2 "
57mm
1
4
1 "(29mm)max
1
8
"(22mm)min
7
8
"-14 NPSM
1
2
1 "
35mm
max
3
8
4 "
108mm
1
4
4 "
108mm
1
4
-ASME A112.18.1/CSA B125.1
-NSF/ANSI/CAN 61: Q<1, NSF/ANSI 372
-WaterSense: 1.5 gpm (5.7 L/min)
Symmetrix®
WARNING: This product can expose you to chemicals including
lead, which is known to the state of California to cause cancer,
birth defects, or other reproductive harm. For more information,
go to www.P65Warnings.ca.gov.
Certied by
CSA Group
S2402PPS240, S2401 & S2402
DF-30 Finial, handle
KN-113 Valve cartridge (cold)
KN-114 Valve cartridge (hot)
KN-116 Flange nut (2)
L-42 Nut (2)
LN-15* Aerator
LN-20 Gasket
LN-100 Aerator (vandal resistant
0.5 gpm)
LN-101 Aerator (vandal resistant)
LN-102 Acrylic handle (2)
LN-111* Lock ring (2)
LN-112* Lever handle collar (2)
LN-114* Handle lever
LN-115 Bushing (2)
LN-118 Supply body assembly
LN-120* Shell
LN-121A Phillips pan head screw (2)
LN-131* ADA handle (2)
LN-132A White lever insert (2)
LN-132B Chrome lever insert (2)
LN-133A Temperature indicator (red)
LN-133B Temperature indicator (blue)
LN-134* Oval Phillips head screw (2)
LN-136 Clear lever insert (2)
LN-139* Undercover plate
LN-140 Lever handle (2)
LN-177 Cross handle (2)
RL-154* Pop-up drain assembly
P-26 Grid drain assembly
RL324* Push Pop Drain Assembly
T-33* Plug button (plain)
T-33B Plug button (blue)
T-33R Plug button (red)
*For Decorative Finish Faucets add suffix to
parts marked with an asterisk as follows:
Suffix BRS: Radiance
®
polished brass finish
Suffix STN: Radiance
®
satin finish
P-26
RL-154
RL324
T-33
T-33B
T-33R
LN-121A
LN-140
LN-115
KN-113
LN-111
LN-120
LN-118
LN-20
KN-116
L-42
LN-15
LN-11
LN-139
KN-114
LN-100
LN-101
LN-134
T-33, T-33B, T-33R
LN-121A
LN-131
DF-30
LN-112
LN-114
LN-133A, LN-133B
LN-132A, LN-132B
LN-136
Handle option: LPO, LAM, LCF
Handle option: LWG
Handle option: LCT
T-33, T-33B, T-33R
LN-121A
LN-102
KN-114
Cartridge used for both
hot and cold handles
T-33
T-33B, T-33R
LN-121A
LN-177
Handle option: CR
Limited Lifetime - to the original end purchaser in consumer/residential installations.
10 Years - for commercial/industrial installations. Refer to www.symmons.com/war-
ranty for complete warranty information.
Warranty
Symmons Industries, Inc. ■31 Brooks Drive ■Braintree, MA 02184 ■Phone: (800) 796-6667 ■ Fax: (800) 961-9621
Copyright © 2023 Symmons Industries, Inc. ■symmons.com ■gethelp@symmons.com ■ZV-3828 REV 0 ■ 110223

This manual suits for next models

3

Other Symmons Plumbing Product manuals

Symmons Duro 361TS Series Manual

Symmons

Symmons Duro 361TS Series Manual

Symmons LaundryMate LM600 Manual

Symmons

Symmons LaundryMate LM600 Manual

Symmons Brenna SLW82121.2 Manual

Symmons

Symmons Brenna SLW82121.2 Manual

Symmons Hydapipe 1-901Series User manual

Symmons

Symmons Hydapipe 1-901Series User manual

Symmons Duro 361SH Manual

Symmons

Symmons Duro 361SH Manual

Symmons Origins S-9603-PLR Manual

Symmons

Symmons Origins S-9603-PLR Manual

Symmons 3DIV-BODY Manual

Symmons

Symmons 3DIV-BODY Manual

Symmons SCOT S-60 Series SCOT S-61 Series Installation and maintenance instructions

Symmons

Symmons SCOT S-60 Series SCOT S-61 Series Installation and maintenance instructions

Symmons Unity 66-2DIV Manual

Symmons

Symmons Unity 66-2DIV Manual

Symmons Duro SLS3622PP Manual

Symmons

Symmons Duro SLS3622PP Manual

Symmons Canterbury Trim Series Installation instructions

Symmons

Symmons Canterbury Trim Series Installation instructions

Symmons Carrington Trim Series Manual

Symmons

Symmons Carrington Trim Series Manual

Symmons Duro 361TS Manual

Symmons

Symmons Duro 361TS Manual

Symmons The Smart Choice Water Dance 1-7480-TRM Manual

Symmons

Symmons The Smart Choice Water Dance 1-7480-TRM Manual

Symmons SRT-4172 Quick guide

Symmons

Symmons SRT-4172 Quick guide

Symmons Elm S-5504-TRM Manual

Symmons

Symmons Elm S-5504-TRM Manual

Symmons Dia 353SR-5 Manual

Symmons

Symmons Dia 353SR-5 Manual

Symmons Allura S-7602RP Quick guide

Symmons

Symmons Allura S-7602RP Quick guide

Symmons Origins S9612PP Manual

Symmons

Symmons Origins S9612PP Manual

Symmons Identity SLW6712 Manual

Symmons

Symmons Identity SLW6712 Manual

Symmons SLS-5512 Series User manual

Symmons

Symmons SLS-5512 Series User manual

Symmons Sereno 4300-TRM Manual

Symmons

Symmons Sereno 4300-TRM Manual

Symmons Winslet S-5100-TRM Installation instructions

Symmons

Symmons Winslet S-5100-TRM Installation instructions

Symmons Canterbury Trim Series Installation instructions

Symmons

Symmons Canterbury Trim Series Installation instructions

Popular Plumbing Product manuals by other brands

Toto Washlet SG instruction manual

Toto

Toto Washlet SG instruction manual

Omnires FRESH Installation and Maintenance

Omnires

Omnires FRESH Installation and Maintenance

AFA AFUR3322TE owner's manual

AFA

AFA AFUR3322TE owner's manual

Balmani FACETTA natural stone installation guide

Balmani

Balmani FACETTA natural stone installation guide

Clou mini wash me CL/03.12131 installation instructions

Clou

Clou mini wash me CL/03.12131 installation instructions

Bristan Opac Series Installation instructions and user guide

Bristan

Bristan Opac Series Installation instructions and user guide

Billi Alpine user guide

Billi

Billi Alpine user guide

American Standard SERIN T064.60X installation instructions

American Standard

American Standard SERIN T064.60X installation instructions

newform ERGO 65840 instructions

newform

newform ERGO 65840 instructions

Atmor Platinum Assembly instructions

Atmor

Atmor Platinum Assembly instructions

Watermark Jem 97 Series Important installation information

Watermark

Watermark Jem 97 Series Important installation information

Grohe ESSENCE 29203001 owner's manual

Grohe

Grohe ESSENCE 29203001 owner's manual

Luxier BSH06-S installation guide

Luxier

Luxier BSH06-S installation guide

Elson EPS PEX manual

Elson

Elson EPS PEX manual

Mora MMIX MA 73 01 00 Series Installation and maintenance  instruction

Mora

Mora MMIX MA 73 01 00 Series Installation and maintenance instruction

Mission Air HYDRO FLOW 3,3 KW DARK Operation and installation instructions

Mission Air

Mission Air HYDRO FLOW 3,3 KW DARK Operation and installation instructions

Helios A17 installation guide

Helios

Helios A17 installation guide

Kraus KBU11 installation manual

Kraus

Kraus KBU11 installation manual

manuals.online logo
manuals.online logoBrands
  • About & Mission
  • Contact us
  • Privacy Policy
  • Terms and Conditions

Copyright 2025 Manuals.Online. All Rights Reserved.