manuals.online logo
Brands
  1. Home
  2. •
  3. Brands
  4. •
  5. SYR
  6. •
  7. Control Unit
  8. •
  9. SYR 6243 User manual

SYR 6243 User manual

SYR/112005/HUSTY/INSTRUKCJA
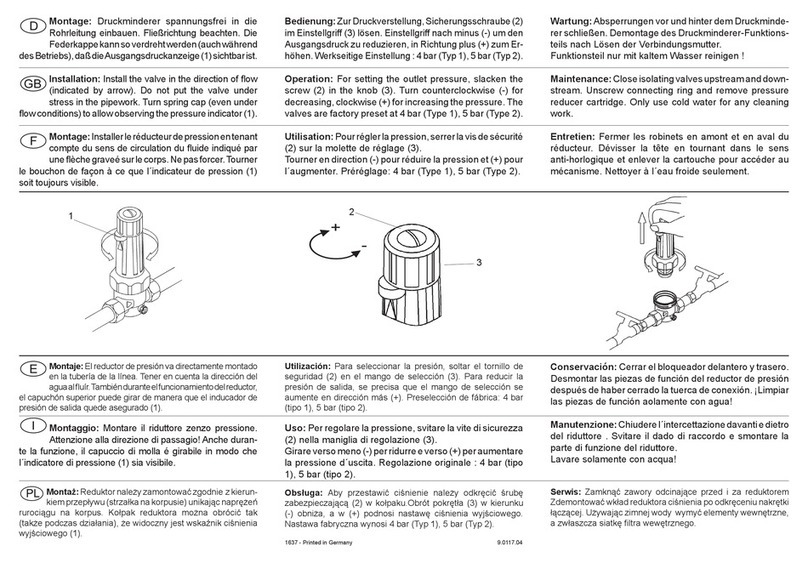
Montage: Druckminderer spannungsfrei in die Rohrleitung
einbauen. Fließrichtung beachten. Die Federkappe kann
so verdreht werden (auch während des Betriebs), daß die
Ausgangsdruckanzeige (1) sichtbar ist.
Installation: Install the valve in the direction of flow (indi-
cated by arrow). Do not put the valve under stress in the
pipework. Turn spring cap (even under flow conditions) to
allow observing the pressure indicator (1).
Montage: Installer le réducteur de pression en tenant
compte du sens de circulation du fluide indiqué par une
flèche graveé sur le corps. Ne pas forcer. Tourner le bou-
chon de façon à ce que l´indicateur de pression (1) soit
toujours visible.
Montaje: El reductor de presión va directamente montado en la
tubería de la línea. Tener en cuenta la dirección del agua al fluír.
También durante el funcionamiento del reductor, el capuchón
superior puede girar de manera que el inducador de presión de
salida quede asegurado (1).
Montaggio: Montare il riduttore zenzo pressione. Attenzi-
one alla direzione di passagio! Anche durante la funzione,
il capuccio di molla é girabile in modo che l´indicatore di
pressione (1) sia visibile.
1
Bedienung: Zur Druckverstellung, Sicherungsschraube
(2) im Einstellgriff (3) lösen. Einstellgriff nach minus (-) um
den Ausgangsdruck zu reduzieren, in Richtung plus (+)
zum Erhöhen. Werkseitige Einstellung : 4 bar.
Operation: For setting the outlet pressure, slacken the
screw (2) in the knob (3). Turn counterclockwise (-) for
decreasing, clockwise (+) for increasing the pressure. The
valves are factory preset at 4 bar.
Utilisation: Pour régler la pression, serrer la vis de sécurité
(2) sur la molette de réglage (3).
Tourner en direction (-) pour réduire la pression et (+)
pour l´augmenter.
Préréglage: 4 bar.
Utilización: Para seleccionar la presión, soltar el tornillo de se-
guridad (2) en el mango de selección (3). Para reducir la presión
de salida, se precisa que el mango de selección se aumente en
dirección más (+). Preselección de fábrica: 4 bar.
Uso: Per regolare la pressione, svitare la vite di sicurezza
(2) nella maniglia di regolazione (3).
Girare verso meno (-) per ridurre e verso (+) per aumentare
la pressione d´uscita. Regolazione originale : 4 bar.
2
3
Wartung: Absperrungen vor und hinter dem Druckminde-
rer schließen. Demontage des Druckminderer-Funktions-
teils nach Lösen der Verbindungsmutter.
Funktionsteil nur mit kaltem Wasser reinigen !
Maintenance: Close isolating valves upstream and down-
stream. Unscrew connecting ring and remove pressure
reducer cartridge. Only use cold water for any cleaning
work.
Entretien: Fermer les robinets en amont et en aval du
réducteur. Dévisser la tête en tournant dans le sens
anti-horlogique et enlever la cartouche pour accéder au
mécanisme. Nettoyer à l´eau froide seulement.
Conservación: Cerrar el bloqueador delantero y trasero.
Desmontar las piezas de función del reductor de presión
después de haber cerrado la tuerca de conexión. ¡Limpiar
las piezas de función aolamente con agua!
Manutenzione: Chiudere l´intercettazione davanti e dietro
del riduttore . Svitare il dado di raccordo e smontare la
parte di funzione del riduttore.
Lavare solamente con acqua!
Obsługa: Aby przestawić ciśnienie należy odkręcić
śrubę zabezpieczającą (2) w kołpaku.Obrót pokrętła (3)
w kierunku (-) obniża, a w (+) podnosi nastawę ciśnienia
wyjściowego. Nastawa fabryczna wynosi 4 bar.
Montaż: Reduktor należy zamontować zgodnie z kierun-
kiem przepływu (strzałka na korpusie) unikając naprężeń
rurociągu na korpus. Kołpak reduktora można obrócić
tak (także podczas działania), że widoczny jest wskaźnik
ciśnienia wyjściowego (1).
Serwis: Zamknąć zawory odcinające przed i za reduktorem
Zdemontować wkład reduktora ciśnienia po odkręceniu
nakrętki łączącej. Używając zimnej wody wymyć elementy
wewnętrzne, a zwłaszcza siatkę filtra wewnętrznego.
SYR/112005/HUSTY/INSTRUKCJA
Betriebstemp.: maks. 80°C; Eingangsdruck: max. 16
bar; Ausgangsdruck: typ 6243.1: 1,5-6 bar, typ 6243.2:
4-8 bar. Medien: Wasser, Pressluft, Heizöl, neutrale
nichtklebende Flüssigkeiten und Gase;
Operating Temp.: max. 80°C ; Inlet Pressure: max.
16 bar ; Outlet Pressure: type 6243.1: 1,5-6 bar, type
6243.2: 4-8 bar; Media : Water, compressed air, heating
oil, neutral non-adhesive liquids and gases
Temperature: max. 80°C ; Pression amont: max. 16
bar ; Pression aval: type 6243.1: 1,5-6 bar, type 6243.2:
4-8 bar; Matières: Eau, air comprimé, fuel domestique,
liquides et gaz neutres et non-adhésifs
Temperatura máxima de trabajo: 80°C ; Presión máxima
de entrada: 16 bar ; Presión de salida: tipo 6243.1: 1,5-6
bar, tipo 6243.2: 4-8 bar; Medios: Agua, Aire a presión,
Aceite de calefacción, Liquidos neutrales no pegadizos
y Gases.
Temperatura d´esercizio: mass. 80°C ; Pressione
d´entrata: mass. 16 bar ; Pressione d´uscita: tipo 6243.1:
1,5-6 bar, tipo 6243.2: 4-8 bar; Mezzi:Acqua, aria compres-
sa, olio combustibile, liquidi neutri non adesivi e gas
ARMATUREN
Made in Germany
Gebrauchsanleitung
Instructions for use
Mode d´emploi
Instrucciones de uso
Istruzioni per l´uso
Instrukcja obsługi
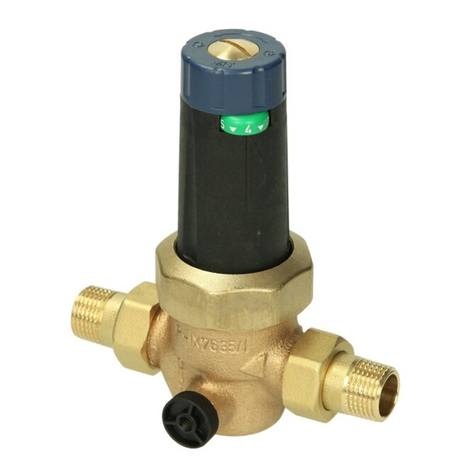
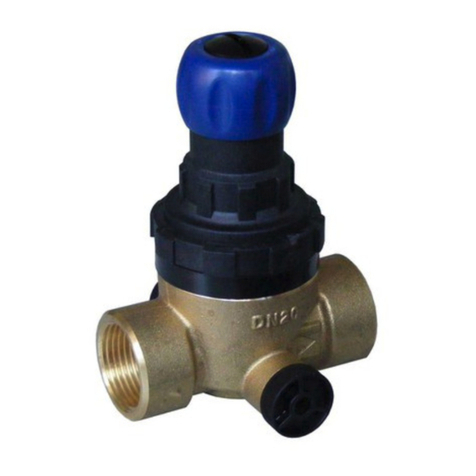
Druckminderer 6243
Pressure reducer 6243
Réducteur de pression 6243
Reductor de presión 6243
Riduttore di pressione 6243
Reduktor ciśnienia 6243
0828.08.000
Wkłady wymienne
dostępne na zapytanie
0828.08.000
Die Installation und Wartung darf nur durch einen autori-
sierten Fachbetrieb vorgenommen werden.
Die Verpackung ist Transportschutz. Bei starker Beschä-
digung der Verpackung, Armatur nicht einbauen.
Installation and maintenance should only be undertaken
by competent personnel.
The packing is provided to protect the valve during transport.
Please do not install the valve if damage is evident.
Seul un personnel qualifié est habilité à installer et contrôler
ce matériel. Le transport de ce matériel est effectué sous
emballage spécial. Ne pas installer le matériel si celui-ci
est défectueux.
La instalación y el mantenimiento pueden ser sólo realiz-
adas por un distribuidor autorizado.
En caso de deterioro considerable en el embalaje, el
reductor de presión no debe de montarse.
L´installazione e la manutenzione é da eseguire unicamen-
te da una ditta specializzata ed autorizzata.
In caso d´imballo considerevolmente danneggiato,
l´articolo non é da montare.
Temperatura pracy: maks.80oC; Ciśnienie wejściowe:
maks.16 bar; Ciśnienie wyjściowe: typ 6243.1: 1,5-6 bar,
typ 6243.2: 4-8 bar; Media: woda, powietrze sprężone,
olej opałowy, neutralne nieklejące płyny i gazy.
Instalacja i obsługa może być wykonywana jedynie przez
autoryzowany zakład instalacyjny. Opakowanie pełni rolę
ochronną podczas transportu.W przypadku znacznego
uszkodzenia opakowania należy odstąpić od instalacji
armatury.
Hans Sasserath & Co KG - HUSTY
ul. Rzepakowa 5e, 31-989 Kraków
tel. 012/645-03-04, faks: 012/645-03-33,
e-mail:info@husty.pl www.syr.pl

Other SYR Control Unit manuals

SYR ESBE VST100 Series User manual

SYR

SYR ESBE VST100 Series User manual

SYR 315 User manual

SYR

SYR 315 User manual

SYR 312 Euro Plus User manual

SYR

SYR 312 Euro Plus User manual

SYR 6243 User manual

SYR

SYR 6243 User manual

SYR 312 User manual

SYR

SYR 312 User manual

SYR 315.2 User manual

SYR

SYR 315.2 User manual

SYR STS 5 User manual

SYR

SYR STS 5 User manual

SYR BA 6600 Operation manual

SYR

SYR BA 6600 Operation manual

SYR 2115 User manual

SYR

SYR 2115 User manual

SYR 7500 User manual

SYR

SYR 7500 User manual

SYR 6247 User manual

SYR

SYR 6247 User manual

Popular Control Unit manuals by other brands

resideo Braukmann D05F-EF installation instructions

resideo

resideo Braukmann D05F-EF installation instructions

Siemens SIRIUS 3SB3 operating instructions

Siemens

Siemens SIRIUS 3SB3 operating instructions

Siemens Flowrite 599 Series Technical instructions

Siemens

Siemens Flowrite 599 Series Technical instructions

EWM Tetrix AC/DC Comfort 2.0 operating instructions

EWM

EWM Tetrix AC/DC Comfort 2.0 operating instructions

Powers IntelliStation Jr User guide and instruction manual

Powers

Powers IntelliStation Jr User guide and instruction manual

Digi XBee3 DigiMesh 2.4 Update instruction manual

Digi

Digi XBee3 DigiMesh 2.4 Update instruction manual

Cameron WHEATLEY 820 Series Installation, operation and maintenance manual

Cameron

Cameron WHEATLEY 820 Series Installation, operation and maintenance manual

USR IOT USR-BLE100 user manual

USR IOT

USR IOT USR-BLE100 user manual

DeZurik S2 instructions

DeZurik

DeZurik S2 instructions

Conti+ Lino WV10 Installation & user manual

Conti+

Conti+ Lino WV10 Installation & user manual

Ansell Alphatec K72 141 100 instruction manual

Ansell

Ansell Alphatec K72 141 100 instruction manual

National Instruments NI ISM-7401 user manual

National Instruments

National Instruments NI ISM-7401 user manual

National Instruments DAQCard-DIO-24 user manual

National Instruments

National Instruments DAQCard-DIO-24 user manual

Phoenix Mecano DewertOkin MC11 installation instructions

Phoenix Mecano

Phoenix Mecano DewertOkin MC11 installation instructions

Vortice NA 100 Instruction booklet

Vortice

Vortice NA 100 Instruction booklet

Afag GMQ 32/RM 16 Assembly and operating instructions

Afag

Afag GMQ 32/RM 16 Assembly and operating instructions

GF 582 instruction manual

GF

GF 582 instruction manual

SEW-Eurodrive BMV operating instructions

SEW-Eurodrive

SEW-Eurodrive BMV operating instructions

manuals.online logo
manuals.online logoBrands
  • About & Mission
  • Contact us
  • Privacy Policy
  • Terms and Conditions

Copyright 2025 Manuals.Online. All Rights Reserved.