T&R KV mk2 Series Operating instructions

1
OPERATING AND MAINTENANCE MANUAL
Product:
High Voltage AC Test Set
Type:
KV30-100 mk2
KV50-100 mk2
KV50-200 mk2
KV100-100 mk2
low discharge (LD) and timer (T) options
DESIGNED AND MANUFACTURED IN THE UK BY:
T & R Test Equipment Limited
15-16 Woodbridge Meadows, Guildford, Surrey, GU1 1BJ, United Kingdom
Fax.: 01483 511229 Web: www.trtest.com

2
GENERAL SAFETY STATEMENT
The following safety precautions should be reviewed to avoid injury to the user and damage to
the product (and other products connected to it). To avoid potential hazards only use this
product as specified.
Only suitably qualified personnel should use this equipment. Servicing of this
product should only be carried out by suitably qualified service personnel.
The high voltage generated by this unit is extremely dangerous and may be fatal.
This unit is designed only for operation in a designated high voltage test area with
suitable interlocks and safety procedures..
To Avoid Fire Hazards and Personal Injury
Use the correct power supply lead. Only use a suitably rated and approved power supply
lead for the country of use.
Ensure that systems that the unit is to be connected to are dead.
Do not connect and disconnect leads whilst outputs are switched on.
Ensure that the product is grounded. To avoid electric shock it is essential that the
grounding conductor is connected to the earth ground. Additional earth terminals are
provided on the control unit and HV transformer that must be connected to a local earth.
Ensure that the unit is properly grounded before making any connections to inputs or
outputs.
Output ratings must be observed to prevent fire hazards and risk of injury to the operator.
Consult the product manual for ratings information before making any connections.
It is ESSENTIAL to consult the product manual for rating information before making any
connection to a terminal or terminal group marked with a warning triangle.
Only use fuses of a type and rating specified for this product.
Do not operate the unit out of its case or with any covers or panels removed.
Do not touch exposed connections and components when power is present.
Do not operate the product if any damage is suspected. Refer the unit to qualified service
personnel to be checked.
Do not operate the unit in wet or damp conditions
Do not operate the unit in an explosive atmosphere
Some test objects may generate X-rays when tested (particularly those containing a
vacuum). Ensure adequate safe distances to the test object are maintained or suitable
screening is used.
This unit is not designed for unattended operation
If any further queries occur regarding the usage and maintenance of
the equipment detailed in this manual, please refer these to the
supplier of the equipment in the first case or to:
T & R Test Equipment Limited

3
HIGH VOLTAGE SAFETY
It is essential to follow safe working procedures when working with high voltage. Information
on accepted codes of practice should be obtained from your local heath and safety regulatory
body.
It is essential that the KV100-100 mk2 series test sets are only used in a suitable test
environment. EN50191:2001 (Erection and Operation of Electrical Test Equipment) provides
information on the installation and use of test installations and is referenced by health and
safety law in the EU. EN50191:2001 is available from T&R Test Equipment.
IEEE standard 510-1983 (IEEE Recommended Practices for Safety in High-Voltage and High-
Power Testing) also provides a working framework for establishing safe procedures, but must
be read in conjunction with local regulations and accepted codes of practice.
The following excerpts are taken from IEEE 510
All ungrounded terminals of the test equipment or apparatus under test should be
considered as energised.
Common ground connections should be solidly connected to both the test set and the test
specimen. As a minimum, the current capacity of the ground leads should exceed that
necessary to carry the maximum possible ground current. The effect of ground potential
rise due to the resistance and reactance of the earth connection should be considered.
Precautions should be taken to prevent accidental contact of live terminals by personnel,
either by shielding the live terminals or by providing barriers around the area.
The circuit should include instrumentation for indicating the test voltages.
Appropriate switching and, where appropriate, an observer should be provided for the
immediate de-energisation of test circuits for safety purposes. In the case of dc tests,
provisions for discharging and grounding charged terminals and supporting insulation
should also be included.
In the use of signal-gathering equipment, each device should be used in such a manner
that it will not present a personnel hazard should it inadvertently become a part of the high-
voltage circuit, or fail to function properly.
High-voltage and high-power tests should be performed and supervised by qualified
personnel.
Consideration should be given to safety regulations which may apply to specific
circumstances; for example, HSE, company, or government regulations.

4
SAFETY TERMS AND SYMBOLS
The following safety symbols appear on the equipment:
CAUTION/WARNING –Refer to manual
DANGER –High voltage
Mains off
Mains on
The following safety symbols appear in this manual:
CAUTION
This action or procedure may be dangerous if not carried
out correctly, and may cause damage to the equipment or
connected equipment.
WARNING
This action or procedure may be cause injury or death to
the operator or other personnel if not carried out correctly
using applicable safety procedures.

5
CONTENTS
1. DESCRIPTION OF EQUIPMENT 7
1.1 Electrical Specification 7
1.1.1 Input and Output 7
1.1.2 Partial Discharge Level 8
1.2 Front Panel Controls 9
1.2.1 Standard Units Without Timer 9
1.2.2 -T units With Test Timer 10
1.3 Rear Panel Connections 11
1.3.1 Alarm Sounder 11
1.3.2 Signal Beacons 11
1.3.3 Earthing Mechanism Control Output 12
1.4 Output Voltage Control 12
1.5 Overload Protection 13
1.5.1 Fixed Overload 13
1.5.2 Variable Overload 13
1.6 Metering 14
1.6.1 Metering Ranges 14
1.6.2 IMPORTANT NOTE - Metering Connections 14
1.7 Test timer (-T suffix units only) 15
1.7.1 Setting the Test Time 15
1.7.2 Starting the Timer 15
1.7.3 Resetting the Timer 15
1.7.4 Cancelling the Alarm 15
1.7.5 Disabling the Timer 15
1.8 Interlock Circuits 16
1.8.1 Zero Voltage Interlock 16
1.8.2 External Interlock/Emergency Stop Circuit 16
1.9 Output Configuration 17
1.9.1 HT Transformer Terminals 17
1.10 Brush Noise Filter (Low Partial Discharge Units Only) 18

6
1.11 Construction 18
1.11.1 Control Unit 18
1.11.2 HV Transformer 18
2. OPERATION 19
2.1 Safety 19
2.1.1 Installation 19
2.1.2 Operation 19
2.2 Connections 22
2.3 Method of Operation 24
3. MAINTENANCE 25
3.1 Output Control Variable transformers 25
3.2 HV Output Transformer 25
4. ACCESSORIES 26
4.1 Standard Accessories 26
4.2 Optional Accessories 26
5. OVERALL PERFORMANCE SPECIFICATION 27
5.1 Insulation resistance at 1000V DC 27
5.2 Applied voltage test 27
5.3. Accuracy of instruments 27
5.4. H V Transformer 27
5.5. Complete Equipment 27
6. REVISION 29

7
1. DESCRIPTION OF EQUIPMENT
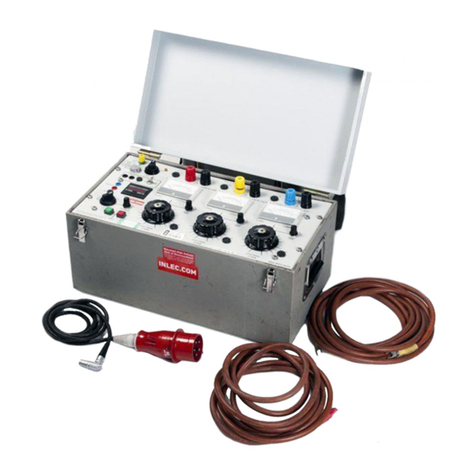
The KV series of high voltage test systems consist of a separate control unit and high voltage
transformer. In addition, low partial discharge systems (-LD suffix on unit name) have a brush
noise filter which is fitted in the power lead between the control unit and HV transformer.
Units with test timer option (-T suffix on unit name) have a test timer fitted that sounds an
alarm at the end of the preset test period.
The mk2 versions of the KV series have safety systems incorporating the following features:
Emergency stop button on control unit
Dual output contactors controlled by safety monitoring relay
Audible alarm on detection of contactor fault
Safety monitored external dual channel emergency stop/interlock circuit
Output for external signal beacons
Output for control of automatic earthing mechanism
All references to the “KV series” in this manual refer to the KV30-100 mk2, KV50-100 mk2,
KV50-200 mk2 and KV100-100 mk2 and low discharge derivatives unless a specific reference
is made to a particular unit.
NOTE –To operate this equipment it will first be necessary to connect to an external
interlock circuit using the 6 pin plug provided. See section 1.7.2 for further information.
1.1 Electrical Specification
1.1.1 Input and Output
Supply requirements 230V 10% 50/60 Hz
Unit
Supply
voltage
Supply
maximum
VA
Output
voltage
Output current
Continuous
5 min on/
15 min off
KV30-100
230V 10%
3.5kVA
0-30kV
50mA
100mA
KV50-100
230V 10%
6kVA
0-50kV
50mA
100mA
KV50-200
230V 10%
11kVA
0-50kV
100mA
200mA
KV100-100
230V 10%
11kVA
0-100kV
50mA
100mA

8
1.1.2 Partial Discharge Level
The partial discharge of the standard units in the KV series range is not specified. Two
models in the range (the KV50-200LD and KV100-100LD) have specified partial discharge
levels and are supplied with a brush noise filter to prevent noise from the supply and control
unit variable transformer being transmitted through to the HV output. The partial discharge
levels specified for the KV series are shown in the table below.
Unit
Maximum Partial Discharge
Brush Noise Filter Supplied
KV30-100
Not specified
No
KV50-100
Not specified
No
KV50-200
Not specified
No
KV100-100
Not specified
No
KV50-200LD
1pC
Yes
KV100-100LD
3pC
Yes

9
1.2 Front Panel Controls
1.2.1 Standard Units Without Timer
CDE
F
G
H
J
K
L
M
N
P
A
B
Figure 1.1 Control panel front panel layout
A kV meter*
H HV output on switch and indicator
B kV meter range switch
J Supply indicator
C Emergency stop button
K Supply on/off switch
D E-stop/interlock reset button
L mA meter range switch
E Output control knob
M Variable overload trip reset switch
F Fixed overload circuit breaker
N Variable overload trip level select
G HV output off switch and indicator
P mA meter*
* The meters shown are for a KV100-100

10
1.2.2 -T units With Test Timer
Figure 1.2 Control panel front panel layout (-T versions)
A kV meter*
H HV output on switch and indicator
B kV meter range switch
J Supply indicator
C Emergency stop button
K Supply on/off switch
D E-stop/interlock reset button
L mA meter range switch
E Output control knob
M Variable overload trip reset switch
F Fixed overload circuit breaker
N Variable overload trip level select
G HV output off switch and indicator
P mA meter*
Q Test timer
R Cancel timer alarm
* The meters shown are for a KV100-100-T

11
1.3 Rear Panel Connections
G
F
E
D
C
B
A
Fig. 1.3 Rear panel connections
Note: KV30-100 has different style connector
A Signal beacons & earthing
mechanism control outputs
E Output to HV transformer
Note: KV30-100 fitted with 3 pin
connector.
B Contactor fault alarm sounder
F Main earth terminal
C Interlock & emergency stop circuit
inputs
G Mains supply lead
D HV transformer voltage & current
metering inputs
1.3.1 Alarm Sounder
The control unit switches its output on using two independent safety contactors, connected in
series. Mechanically linked auxiliary contacts on these devices are used to monitor the status
of the main contacts. If a condition is detected where either of the contactors remains closed
when it is switched off (e.g. due to a welded contact), the other contactor will be disabled and
the alarm will sound. Further operation of the unit will not be possible until the fault is rectified.
1.3.2 Signal Beacons
Connector A in Fig. 1.3 provides for the addition of green and red signal beacons (230V) which
indicate the operational status of the equipment (in accordance with EN50191). Fig. 1.4
shows the general arrangement.

12
Fig. 1.4 Signal lamps and earthing mechanism arrangement
The green signal lamps are illuminated when the mains supply to the unit is on, and the key
switch on the front panel (item K in Fig. 1.1) is off (ready for operation).
The red signal lamps are illuminated when the key switch is on, all interlock switches closed,
all emergency stop buttons released and the interlock circuit reset by pressing the front panel
button (item D in Fig. 1.1) (ready to switch on). The red lamps will remain illuminated when
the output voltage is switched on (in operation). They will not be extinguished until an
emergency stop or interlock switch is opened, or the control unit is switched off with the key
switch. See the section Optional Accessories for information on a suitable connector.
1.3.3 Earthing Mechanism Control Output
Connector A also provides a 230V output which may be used to control an automatic earthing
mechanism. The output will be on whenever the unit is ready to switch on or in operation
(when the red signal lamp is on). This output can be used to trigger the removal of an
automatic earthing mechanism.
1.4 Output Voltage Control
The output is controlled from the output control located on the front panel of the control unit.
To increase the output voltage the knob is turned in a clockwise direction.
Note:- The output cannot be energised unless the output control is at zero, i.e. fully anticlockwise.

13
1.5 Overload Protection
The equipment is fitted with fixed and variable overload protection circuits as standard.
1.5.1 Fixed Overload
The fixed overload protection system senses any rapid increase in the load current which
exceeds approximately 120% of the full load current in the high voltage circuit. The circuit will
respond more quickly to low impedance faults.
1.5.2 Variable Overload
The variable overload protection system senses current changes in the high voltage circuit.
The trip level is adjusted by means of a selector switch on the front panel of the control unit.
The switch allows the level to be adjusted from 10-110% of normal full current in eleven steps.
The circuit will activate when the load current exceeds that set by the trip level selector switch.
The circuit will respond to more slowly changing levels of load current.
IMPORTANT NOTE:
The variable overload trip circuit does not limit the output current on
short circuit.

14
1.6 Metering
The KV mk2 series range use a tap on the secondary of the HV transformer for voltage
metering. This can be more accurate than primary metering, although capacitive loads will still
cause the meter to read low.
If very accurate kV metering is required, it is necessary to use an external HV divider.
All of the units use moving coil analogue meters.
1.6.1 Metering Ranges
Unit
Voltmeter FSD
mA meter FSD
X1
X0.5
X1
X0.1
KV30-100
40kV
20kV
120mA
12mA
KV50-100
60kV
30kV
120mA
12mA
KV50-200
60kV
30kV
240mA
24mA
KV100-100
120kV
60kV
120mA
12mA
1.6.2 IMPORTANT NOTE - Metering Connections
It is essential that the metering lead from the high voltage transformer to the control unit is
connected in circuit. If this lead is not connected, the metering on the control unit will not
function and the variable overload trip will not function.

15
1.7 Test timer (-T suffix units only)
The test timer fitted to –T units may be pre-set with a test time in hours, minutes and seconds.
The timer counts down when the output is switched on and an alarm sounds when the timer
reaches zero.
Fig. 1.5 Test timer
1.7.1 Setting the Test Time
Set the test time using the six central triangular buttons on the front of the timer. Each button
sets one digit of the timer. The timer displays the time in the format hh:mm:ss in hours,
minutes and seconds. When the test time has been set, press the Reset button on the timer
twice to set the current test time to the pre-set time.
1.7.2 Starting the Timer
The timer automatically starts when the HV output is switched on. The timer counts down from
the pre-set value to zero.
1.7.3 Resetting the Timer
The timer is automatically reset to zero when the HV output is switched off.
1.7.4 Cancelling the Alarm
The alarm is cancelled by pressing the CANCEL ALARM button or switching off the output. If
the alarm is cancelled while the output is still switched on the time is reset to the pre-set value
and the timer will start counting down again.
1.7.5 Disabling the Timer
It is not possible to disable the timer, but if you do not wish to use the test timer, set the test
time to a large value (e.g. 10 hours). The timer will still run, but will not affect the test.
Test time
Pre-set time
Reset
Hours
Minutes
Seconds
Timer running
Set
hours
Set
minutes
Set
seconds

16
1.8 Interlock Circuits
1.8.1 Zero Voltage Interlock
The equipment is fitted with a zero volt interlock system on the output voltage control. This
interlock prevents the output being energised unless the output control is in the zero position.
1.8.2 External Interlock/Emergency Stop Circuit
The equipment is fitted with an external, dual channel interlock system with safety monitoring.
The external circuit is implemented as a chain of switches, e.g. door or cage switches and
emergency stop buttons, each having a pair of normally closed contacts (i.e. contacts open
when an emergency stop button is pressed or an interlocked enclosure gate is opened). Fig.
1.6 shows the general arrangement.
Fig. 1.6 External interlock/emergency stop circuit arrangement
To ensure the maximum level of safety, and to enable fault detection in the external wiring, it is
essential to use both channels and dual contact switches as shown.
Upon activation of any of the external switches, the output of the Control Unit will switch off
and the reset button/indicator on the Control Unit (item D in Fig. 1.1) will illuminate. Before the
output can be switched on again, all interlock switches must be closed, emergency stop
buttons released and the interlock reset button pressed.
In case of a fault in the external circuit (short between switch channels etc.) the output will
again be switched off and disabled. It will then not be possible to reset the interlock circuit until
the fault has been rectified.

17
1.9 Output Configuration
Note: The circuits shown below show a simplified arrangement. A full circuit diagram of the unit may
be found at the rear of the manual.
1.9.1 HT Transformer Terminals
Screen 1 Screen between primary winding and core
Screen 2 Screen between primary and secondary windings.
Note: KV30-100 has one screen.
HV Start Earthy end of secondary (HV winding)
HV Earth Transformer earth terminal
100V Tap 100V tap on secondary winding
In normal use, the HV earth, screen 1 and screen 2 terminals must be linked together.
kV
SUPPLY
mA
Control Unit
HV EARTH
HV START
SCREEN 2
SCREEN 1
100V tap
HV Transformer
HV Bushing
Figure 1.7 Secondary tap metering output configuration

18
1.10 Brush Noise Filter (Low Partial Discharge Units Only)
The KV50-200LD and KV100-100LD units are supplied with a brush noise filter to prevent
interference and noise from the control unit variable transformer and supply affecting the
output from the HV transformer. The brush noise filter is connected in the power lead between
the control unit and the HV transformer.
1.11 Construction
1.11.1 Control Unit
The control unit is housed in aluminium case. All controls and metering functions are located
on the front panel. All power and interconnecting outputs are located on the rear panel.
1.11.2 HV Transformer
The high voltage transformer is housed in an indoor type sheet steel tank of all welded
construction. The tank is fitted with an oil drain plug, free air breather, lifting eyes, rating plate,
earthing terminal and an initial filling of insulating oil to BS 148.1972.
The high voltage end the winding is terminated in an indoor type bushing mounted on the
transformer cover.

19
2. OPERATION
2.1 Safety
The outputs from the KV series are extremely dangerous, and if used incorrectly could be
fatal. The unit must only be installed, operated, and maintained by suitably qualified and
trained personnel.
It is essential to follow accepted safety procedures and local health and safety regulations and
guidelines when installing and operating high voltage equipment. A risk assessment should
be undertaken on both the installation and the working procedures to ensure the safety of test
personnel and all other personnel.
2.1.1 Installation
2.1.1.2 Test Area
The unit must be installed in a suitable high voltage test area completely enclosed by walls or
some type of physical barrier. Appropriate controls and safety measures must be applied to
this area including interlocks connected to the supply or HV unit interlock to ensure that the
unit cannot be switched on unless the area is secure. Refer to EN50191:2001 for further
details of suitable test enclosures. The test area must also be identified with suitable signs.
2.1.1.3 Mains supply
The unit must be connected to a suitable supply via an approved and suitably rated mains
connector with earth connection. Please refer to section 1.1 for the supply requirements for
each unit.
2.1.1.4 Earthing
Particular attention must be made in earthing the equipment, and all earth connections must
be made with substantial conductors with secure joints.
The earth connection on the HV transformer must be connected to a suitable low impedance
earth. It is also advisable to connect the control unit earth terminal to the local earth.
The earth return from the test object must also be made with a suitable conductor back to the
earth point on the HV transformer (see figure 2.1).
All earth connections must be able to withstand the largest fault current that may be
encountered in the system.
2.1.2 Operation
It is essential that safe working practices are maintained when conducting high voltage
testing. Safe working procedures must be implemented to accepted standards (e.g.
EN50191:2001 in the EU).

20
2.1.2.1 Interlocks
The unit is provided with a dual channel external interlock circuit that may be used to link to
interlock switches on the high voltage test area. The test area must be interlocked.
An interlock should be considered to be a safety back-up feature. An interlock should not be
regarded as a substitute for adequate safety rules and proper operator vigilance.
2.1.2.2 Grounding of the High Voltage Output
A temporary ground should be applied to the high voltage output when the circuit has been de-
energised using the earth stick provided. When connections are made or disconnected, the
circuit either side of the connection should be grounded first. Extra earth sticks are available
from T&R Test Equipment as an optional accessory. Alternatively an automatic earthing
system can be implemented under the control of the output provided (refer to section 1.3.3).
If the test circuit includes capacitors, each capacitor should be grounded separately before
connections are made or broken. In the case of capacitors connected in series, the
intermediate terminals should also be grounded.
It is good practice for all capacitive devices to remain short-circuited when not in use.
2.1.2.3 High Voltage Connection
The HV connection to the test object must be made securely, and suitable stress relief
components should be used where required to keep electrical stresses within acceptable
limits. The KV series are designed to be used with an air-insulated output conductor. No HV
connection lead is supplied with the KV series units.
2.1.2.4 High Voltage Output Clearances
The high voltage output from the unit is from a bushing, and adequate clearances (distances
between objects through the air) must maintained between the following parts and any other
conducting object (whether earthed or not):
HV bushing
Wiring connected to HV bushing
Non-grounded parts of test object
Any part of the test object not connected to earth should be considered live at the test voltage.
The clearances required when high voltage testing may be split into two groups –functional
clearances and safety clearances.
Functional clearances relate to the clearances entirely within the test enclosure to ensure
that there is no risk of breakdown. These distances will need to be increased when partial
discharge testing.
Safety clearances are the clearances required to ensure the safety of personnel at all
times, and relate to clearances that may affect the test enclosure or personnel outside the
test enclosure. Safety clearances will always be higher than functional clearances. Safety
clearances may be obtained from BSEN50191:2001.
EN50191 defines prohibition zones for high voltage, describing a volume around high
voltage parts that personnel or their tools must not be able to reach. The prohibition zones
This manual suits for next models
6
Table of contents
Other T&R Test Equipment manuals

T&R
T&R TPT9000 Operating instructions
T&R
T&R Z-OVR Operating instructions
T&R
T&R KV5-100 mk3 Operating instructions

T&R
T&R PT30-10 mk2 Operating instructions
T&R
T&R PT30-10 Operating instructions
T&R
T&R KV6-80 Operating instructions
T&R
T&R KV30-40 Operating instructions
T&R
T&R KV30-40D mk3 Operating instructions
T&R
T&R PT15-10s Operating instructions
T&R
T&R CU-Ps Operating instructions
